
'%20x='0'%20y='0'%20height='100%25'%20width='100%25'%20%0A%20%20%20%20%20%20%20%20%20%20xlink%3Ahref='data:image/jpg;base64,/9j/2wBDAAYEBQYFBAYGBQYHBwYIChAKCgkJChQODwwQFxQYGBcUFhYaHSUfGhsjHBYWICwgIyYnKSopGR8tMC0oMCUoKSj/2wBDAQcHBwoIChMKChMoGhYaKCgoKCgoKCgoKCgoKCgoKCgoKCgoKCgoKCgoKCgoKCgoKCgoKCgoKCgoKCgoKCgoKCj/wgARCAAGAAoDASIAAhEBAxEB/8QAFgABAQEAAAAAAAAAAAAAAAAAAAYH/8QAFQEBAQAAAAAAAAAAAAAAAAAAAgP/2gAMAwEAAhADEAAAAMklw1//xAAfEAABAwMFAAAAAAAAAAAAAAABAgMFABETBAYSMqL/2gAIAQEAAT8A2bLiGxPLZypcYUiwVa3IVOSAcmpBePtqHD6Nf//EABcRAAMBAAAAAAAAAAAAAAAAAAABAjH/2gAIAQIBAT8AnWf/xAAWEQEBAQAAAAAAAAAAAAAAAAACADL/2gAIAQMBAT8AeTf/2Q=='%3E%3C/image%3E%3C/svg%3E)
AMD's latest Ryzen 7000 processors are currently available for purchase. These chips come with some of the best single-core and multi-core performance levels available in the market. All things considered, the latest processors are a huge improvement over the last-gen Ryzen 5000 offerings.
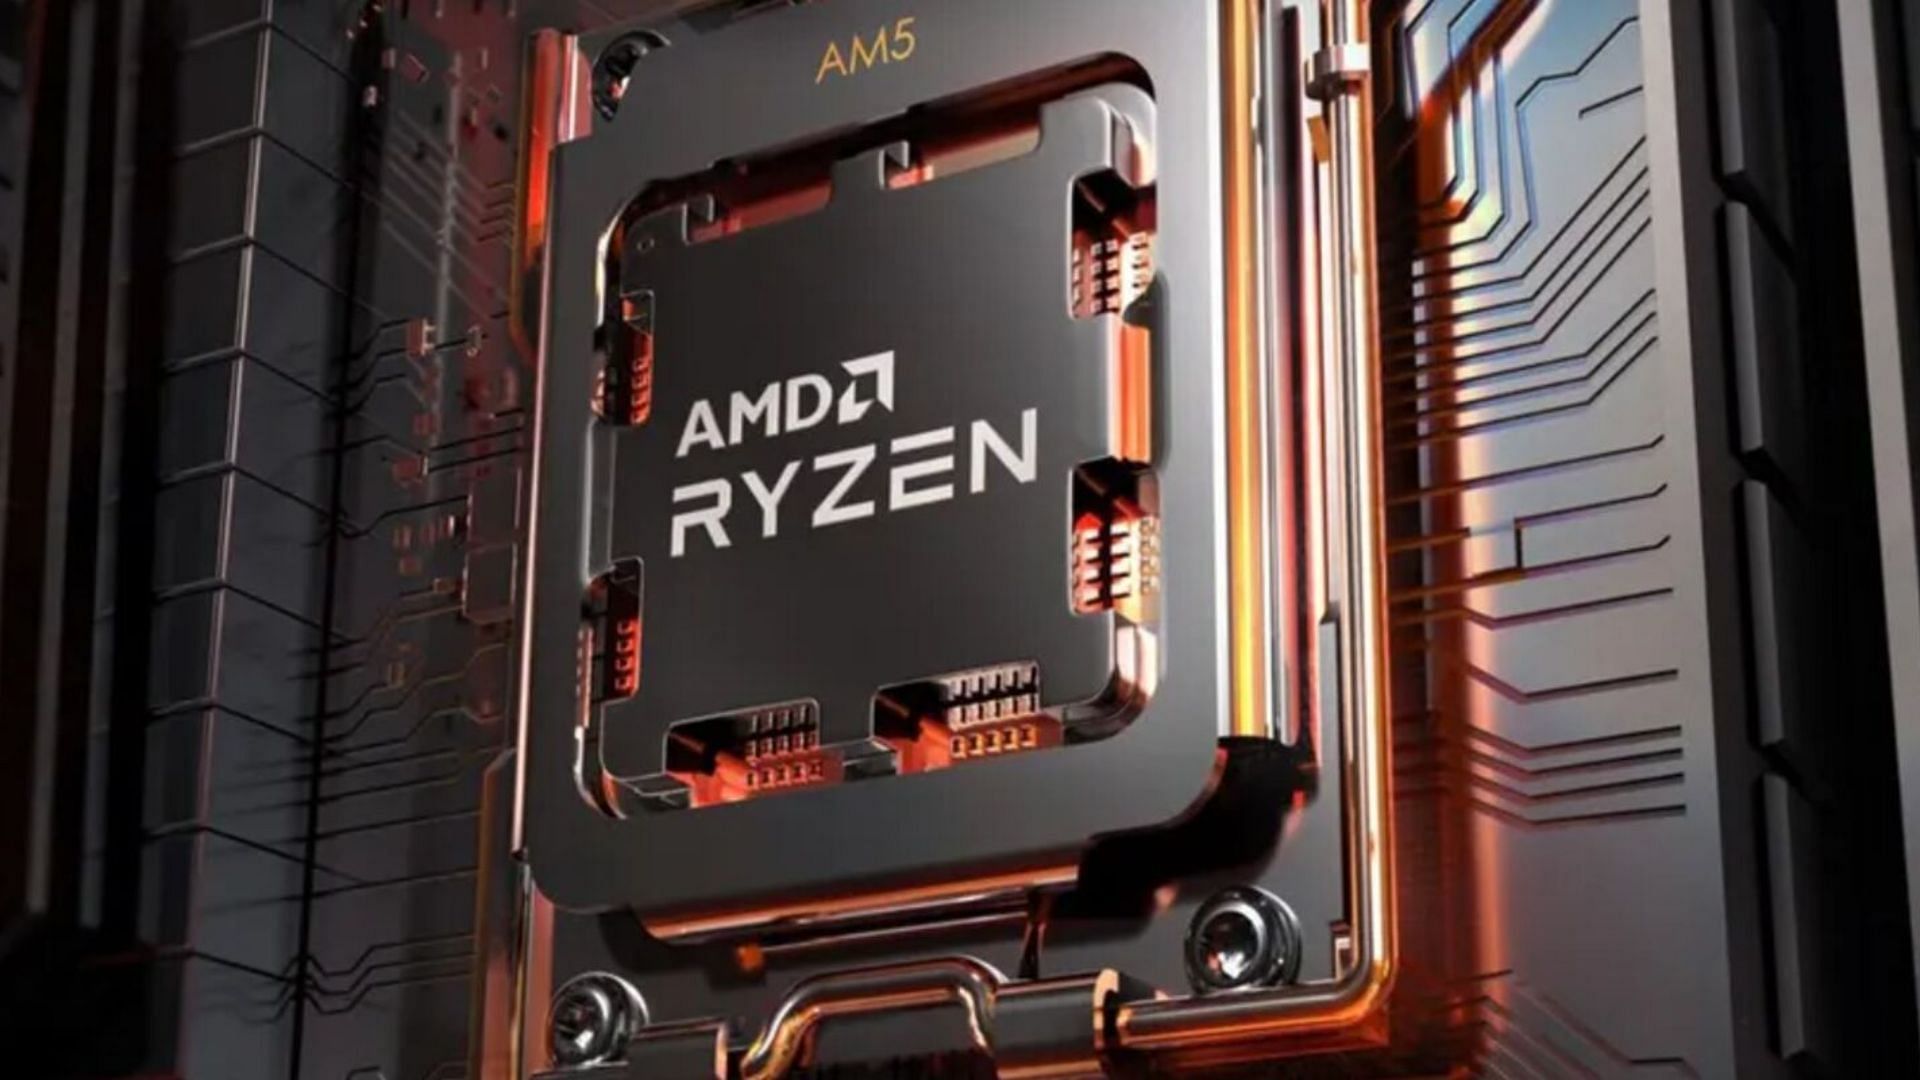
Based on an all-new AM5 socket, the processors look quite different from the AM4-based chips that AMD Ryzen users have used in the last five years. With this chip, the company has shifted to an LGA socket. To date, the company has been using a PGA socket with its AM4 platform.
Thus, installing a Ryzen processor into the new AM5 socket can be slightly challenging for users who are inexperienced with the LGA platform.

A guide to installing a Ryzen 7000 chip on an AM5 motherboard
The new Ryzen processors are based on a PGA socket, meaning the pins are present on the motherboard socket instead of on the processor as seen in older chips. Hence, users should take extra care not to damage the pins on the motherboard.
LGA sockets are easier to handle and the probability of ending up with a bent pin is fairly low in comparison to PGA. Furthermore, the chances of bending a motherboard pin is far lower than that of bending one in the processor. Interested users can follow the steps given below to safely install a Ryzen 7000 chip on their motherboard.
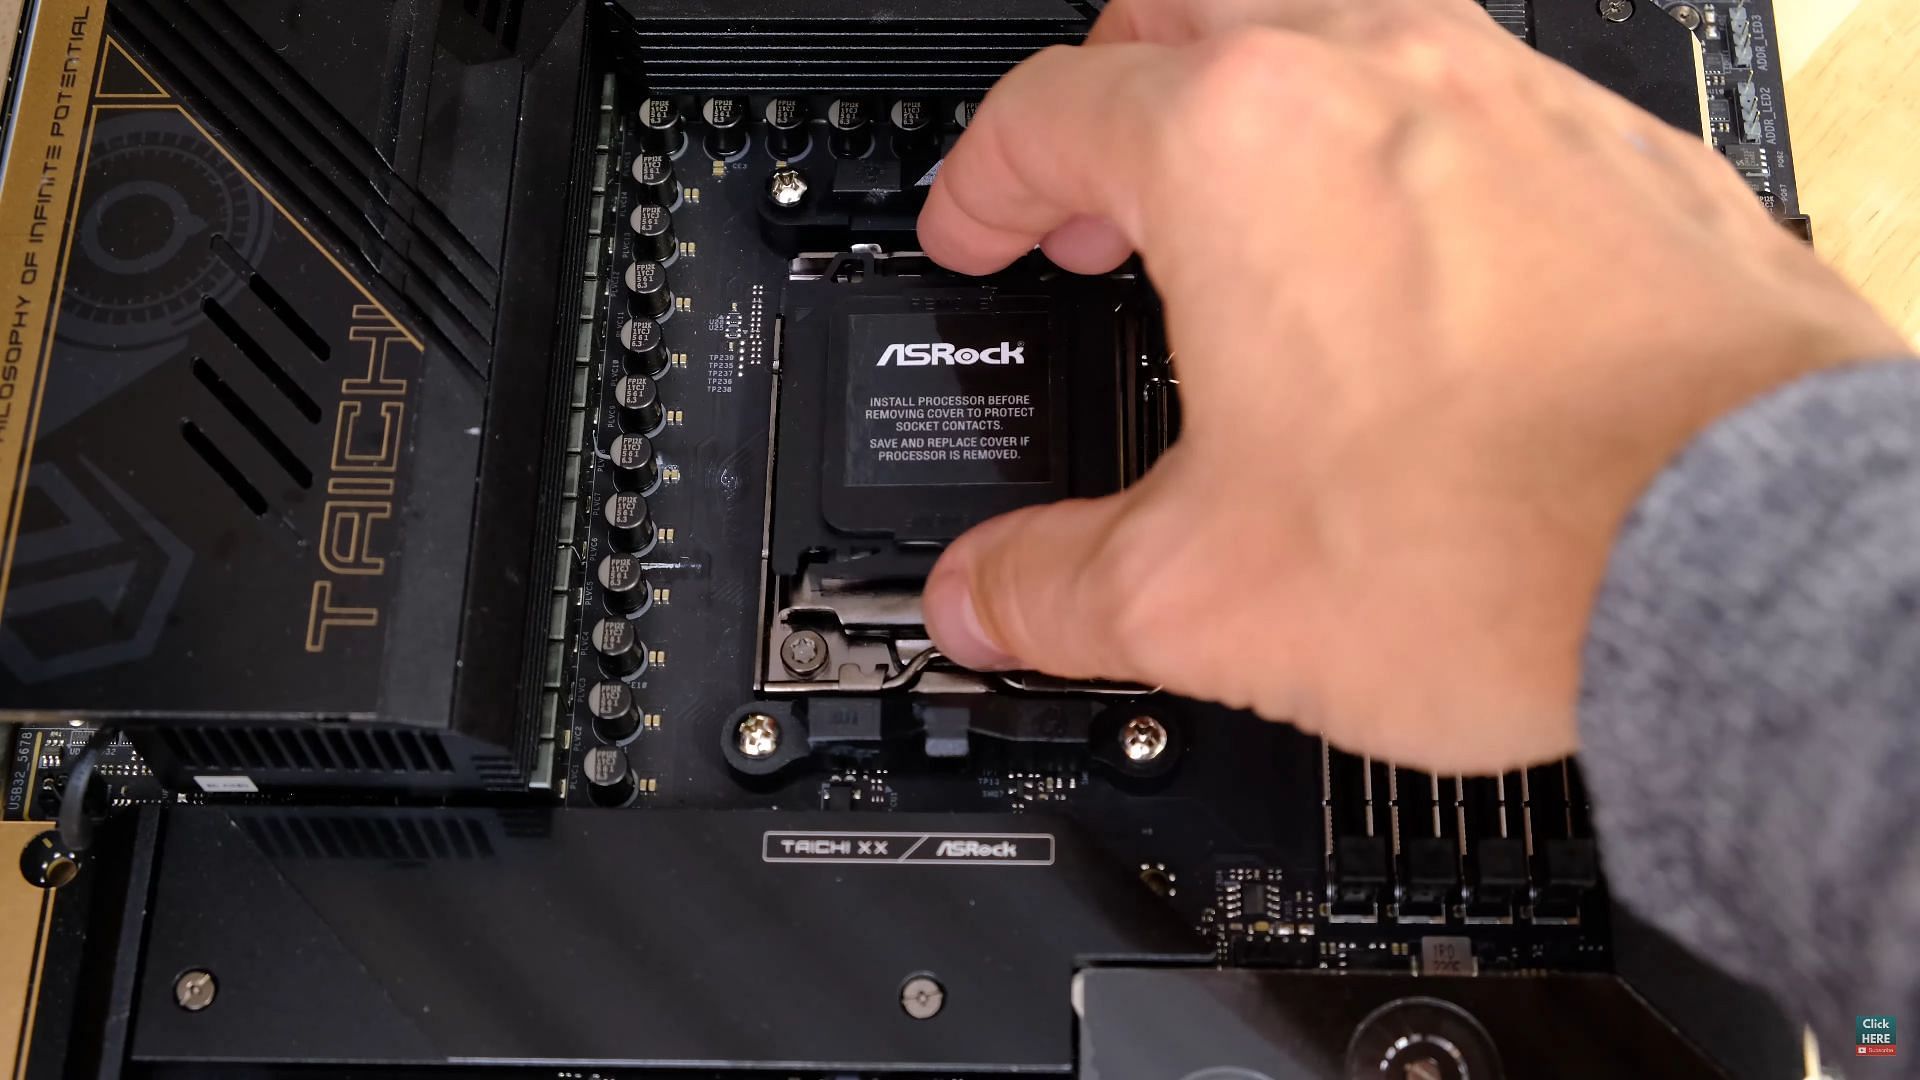
Step 1) Releasing the retention mechanism
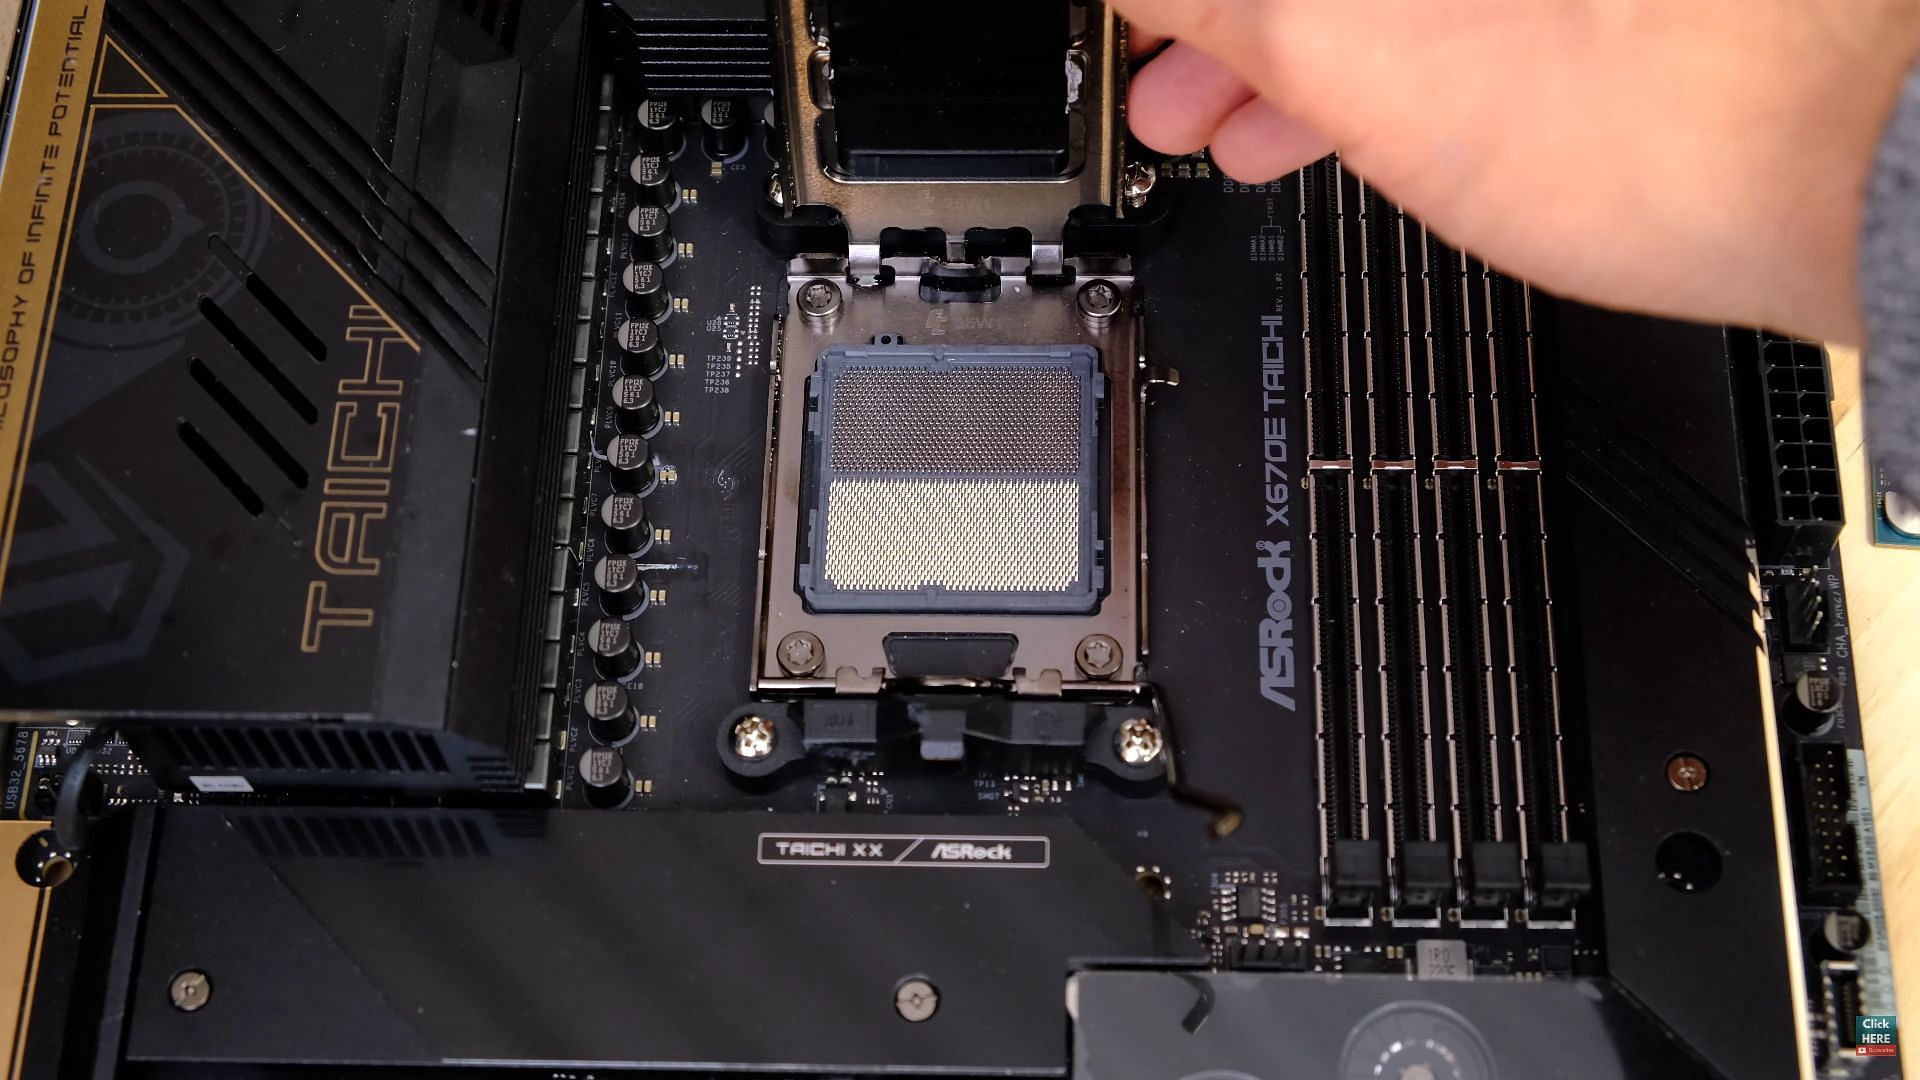
Each AM5 motherboard comes with a protective cover on the CPU socket. Users do not need to touch this cover as it will eject itself once the processor has been successfully installed.
Users will have to release the latch to the left of the processor socket. Once this latch has been released, users can gently lift the retention bracket to reveal the LGA socket inside.
Step 2) Lining the processor up with the socket
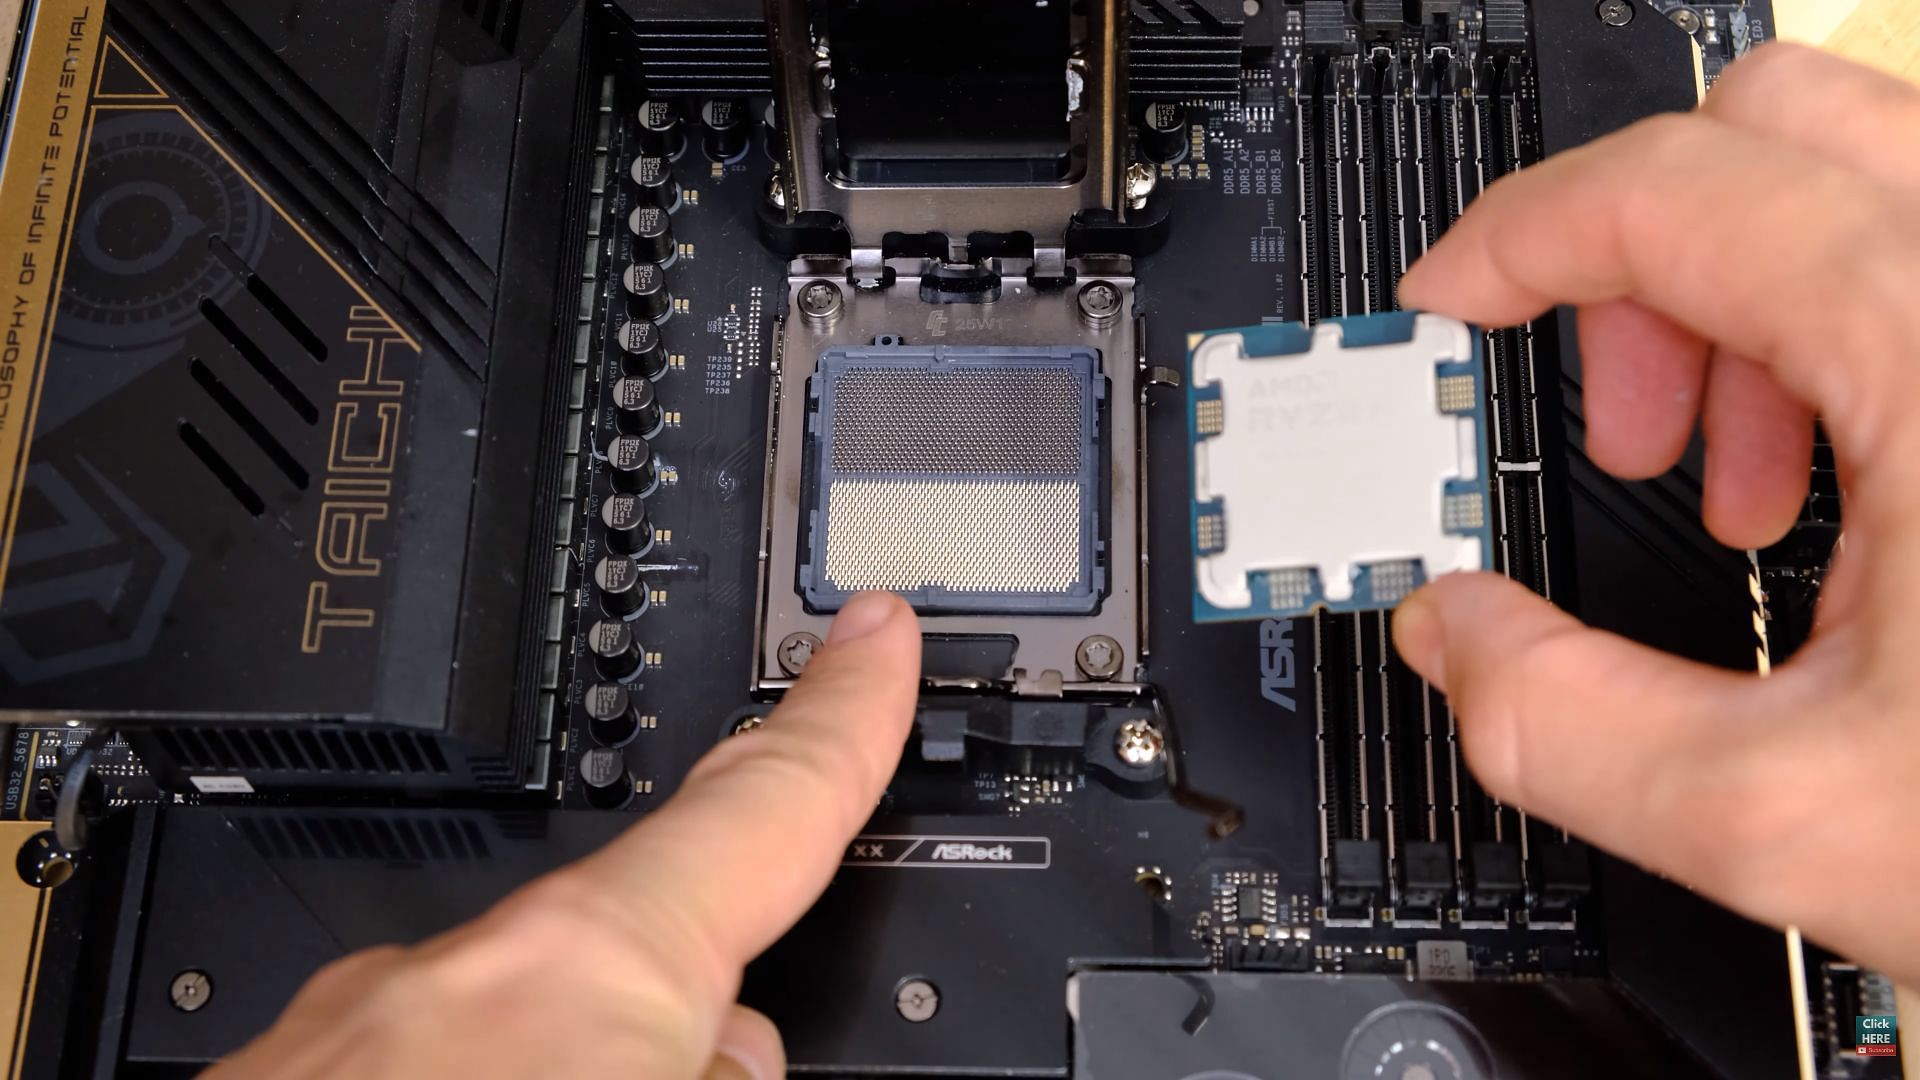
This next step is the most crucial element in the entire process. Users need to locate the two notches on either end of the AM5 socket and should line the processor up accordingly. Take maximum care to ensure that these notches line up with the processor correctly since failing this step could potentially damage the system.
Step 3) Installing the Ryzen 7000 processor in the socket
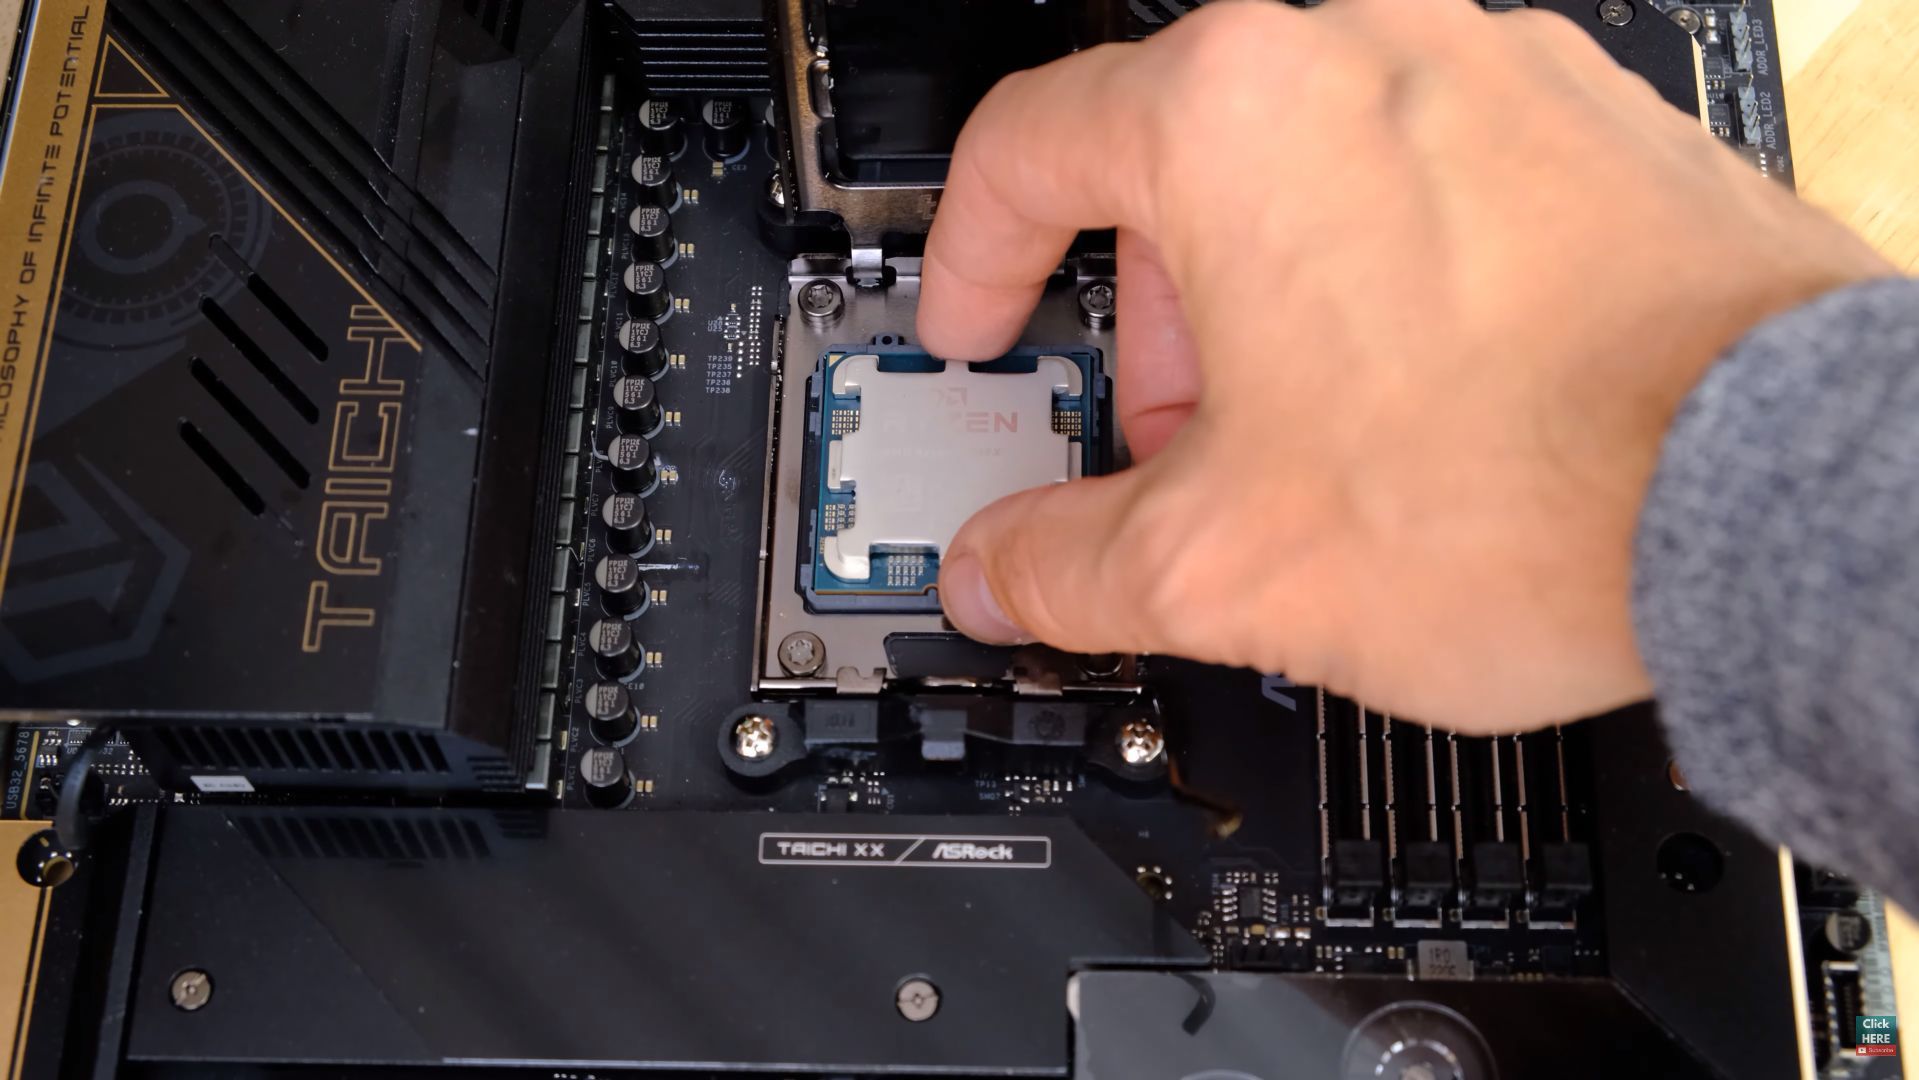
Once the processor is properly lined up, users should lower the chip as much as possible and then gently drop it into the socket. The chip should slide into place automatically and there should be no need for additional manual pressure or wiggling of any kind.
Step 4) Place the retention mechanism back in place
Once the processor is installed, users will have to place the retention mechanism back on to ensure that the processor does not fall off the motherboard. Gently push the retention bracket down and then place the latch back in place. The plastic protection cover will be ejected once the latch locks in.
For future convenience, users should keep the protection cover somewhere safe if they are either selling the motherboard or sending it for an RMA.
