
'%20x='0'%20y='0'%20height='100%25'%20width='100%25'%20%0A%20%20%20%20%20%20%20%20%20%20xlink%3Ahref='data:image/jpg;base64,/9j/4AAQSkZJRgABAQAAAQABAAD/2wCEAAMDAwMDAwQEBAQFBQUFBQcHBgYHBwsICQgJCAsRCwwLCwwLEQ8SDw4PEg8bFRMTFRsfGhkaHyYiIiYwLTA+PlQBAwMDAwMDBAQEBAUFBQUFBwcGBgcHCwgJCAkICxELDAsLDAsRDxIPDg8SDxsVExMVGx8aGRofJiIiJjAtMD4+VP/AABEIAAUACgMBIgACEQEDEQH/xABdAAEBAQAAAAAAAAAAAAAAAAAABggQAAICAgMBAAAAAAAAAAAAAAEDAgQAEQUTUTEBAQAAAAAAAAAAAAAAAAAAAAURAQABBAMAAAAAAAAAAAAAAAECABESIQMTIv/aAAwDAQACEQMRAD8AxHx7nhkrg6dDZ6ysa9+5LX6qbF+06UQCx7JED2UicYwqM5dsksWMdAaKUOOGOdvS7a//2Q=='%3E%3C/image%3E%3C/svg%3E)
Maps in Minecraft are considerably useful items, and can be expanded further with the help of a cartography table. However, it's also possible to place them on walls as decoration and navigation guides, with the possibility of connecting these maps together to create one massive map.
Connecting maps and placing them on a wall can be slightly tricky, as players have to be aware of which maps must be connected. Additionally, completing maps to connect them together will require exploration of a sizable amount of the game's world, depending on how large Minecraft players want to make their connected wall map.

While the process of putting connected maps on walls can be a little confusing at first, it's not as difficult as it appears and once players learn how to do so, they can use it well into the future.
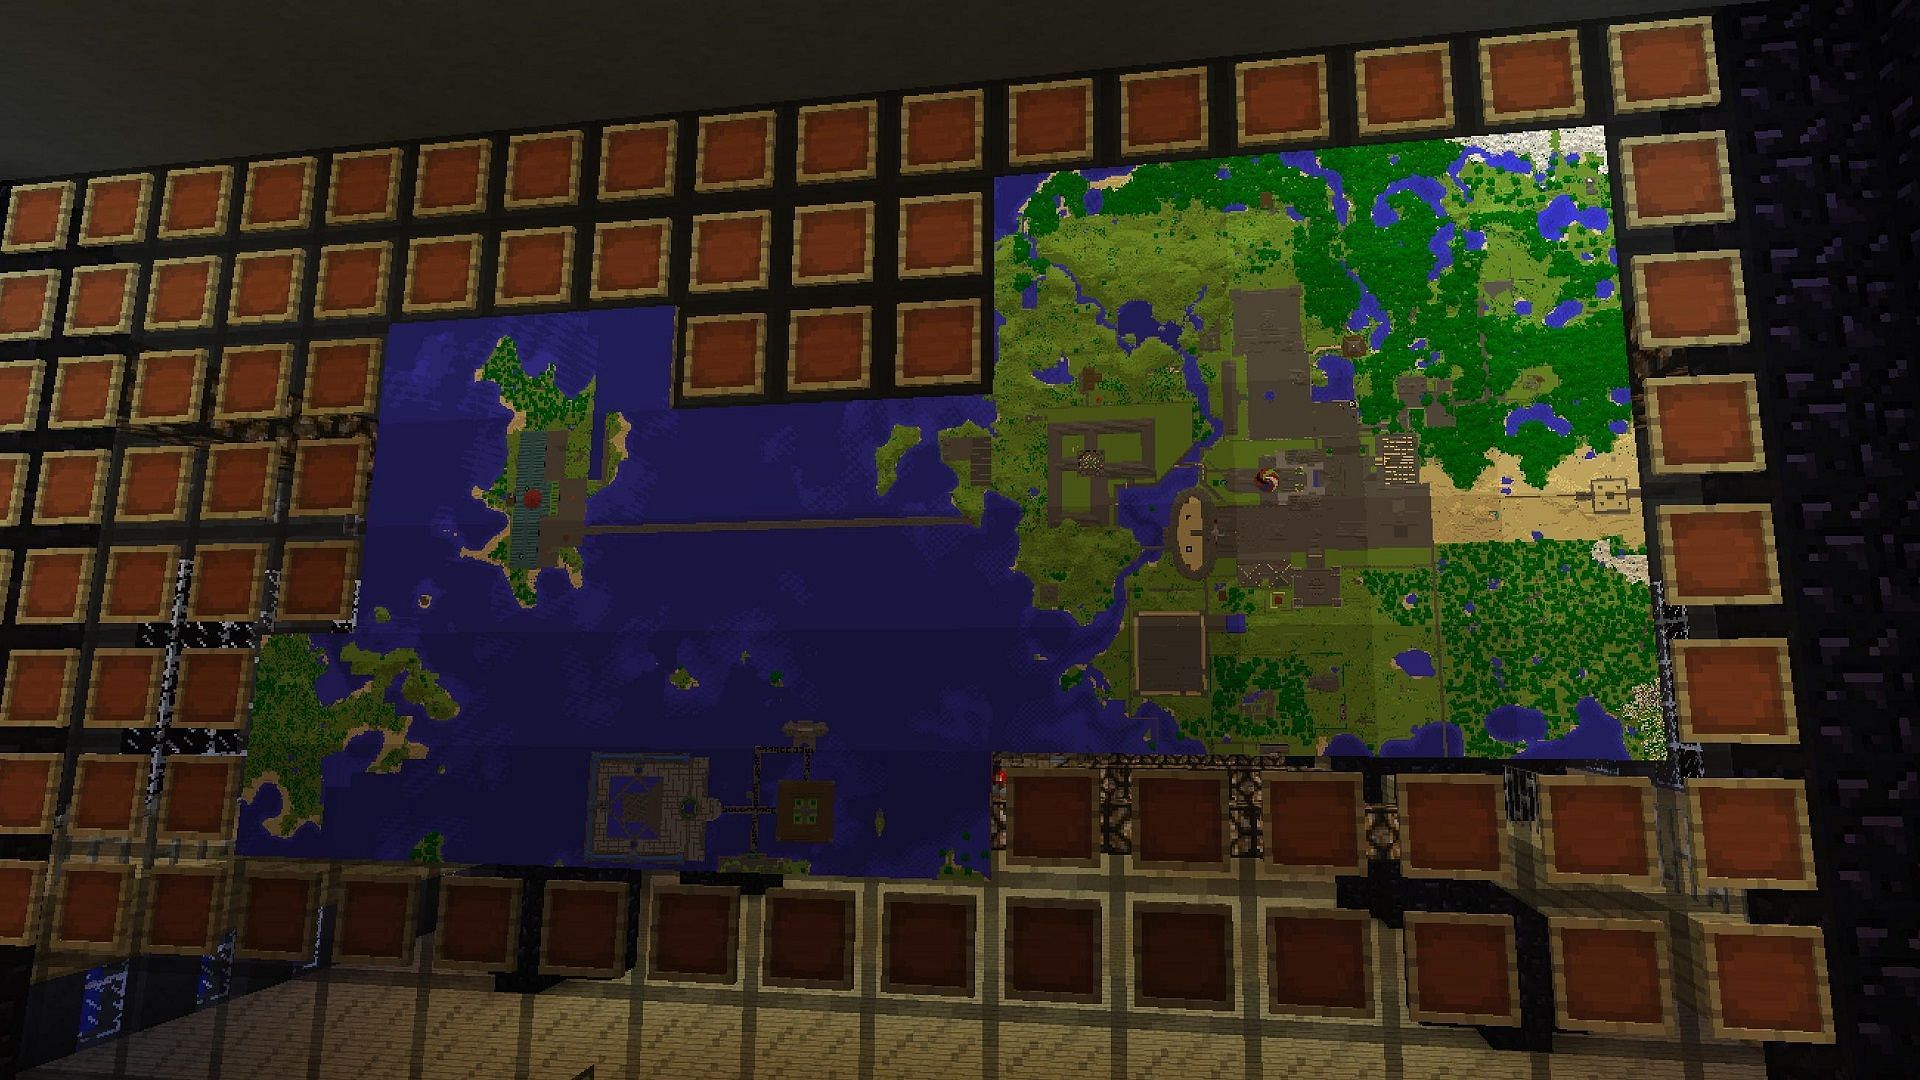
Connecting maps together on a wall in Minecraft
Creating a basic wall map in Minecraft will take some effort and a fair amount of resources, but the final result can be quite pleasing. Players can create a connected map with as few as two item frames, but the possibilities for expansion exist if players create additional maps and item frames. Ensuring that the maps are connected is the hardest part, as being poorly-positioned can lead to a player creating seams in their connected maps, which certainly isn't ideal.
Creating a connected wall map in Minecraft
- Create at least two item frames. These can be constructed by combining eight sticks and one piece of leather in a crafting table.
- Create at least two maps that you want to connect. This can be accomplished by combining eight pieces of paper and a compass. They'll begin as blank maps, so you'll need to use the maps that you've made and then explore the region contained within them so that they don't have blank spots when placed on the item frames. Additionally, you can increase your in-game render distance to reduce the distance that you must explore to fill out the map.
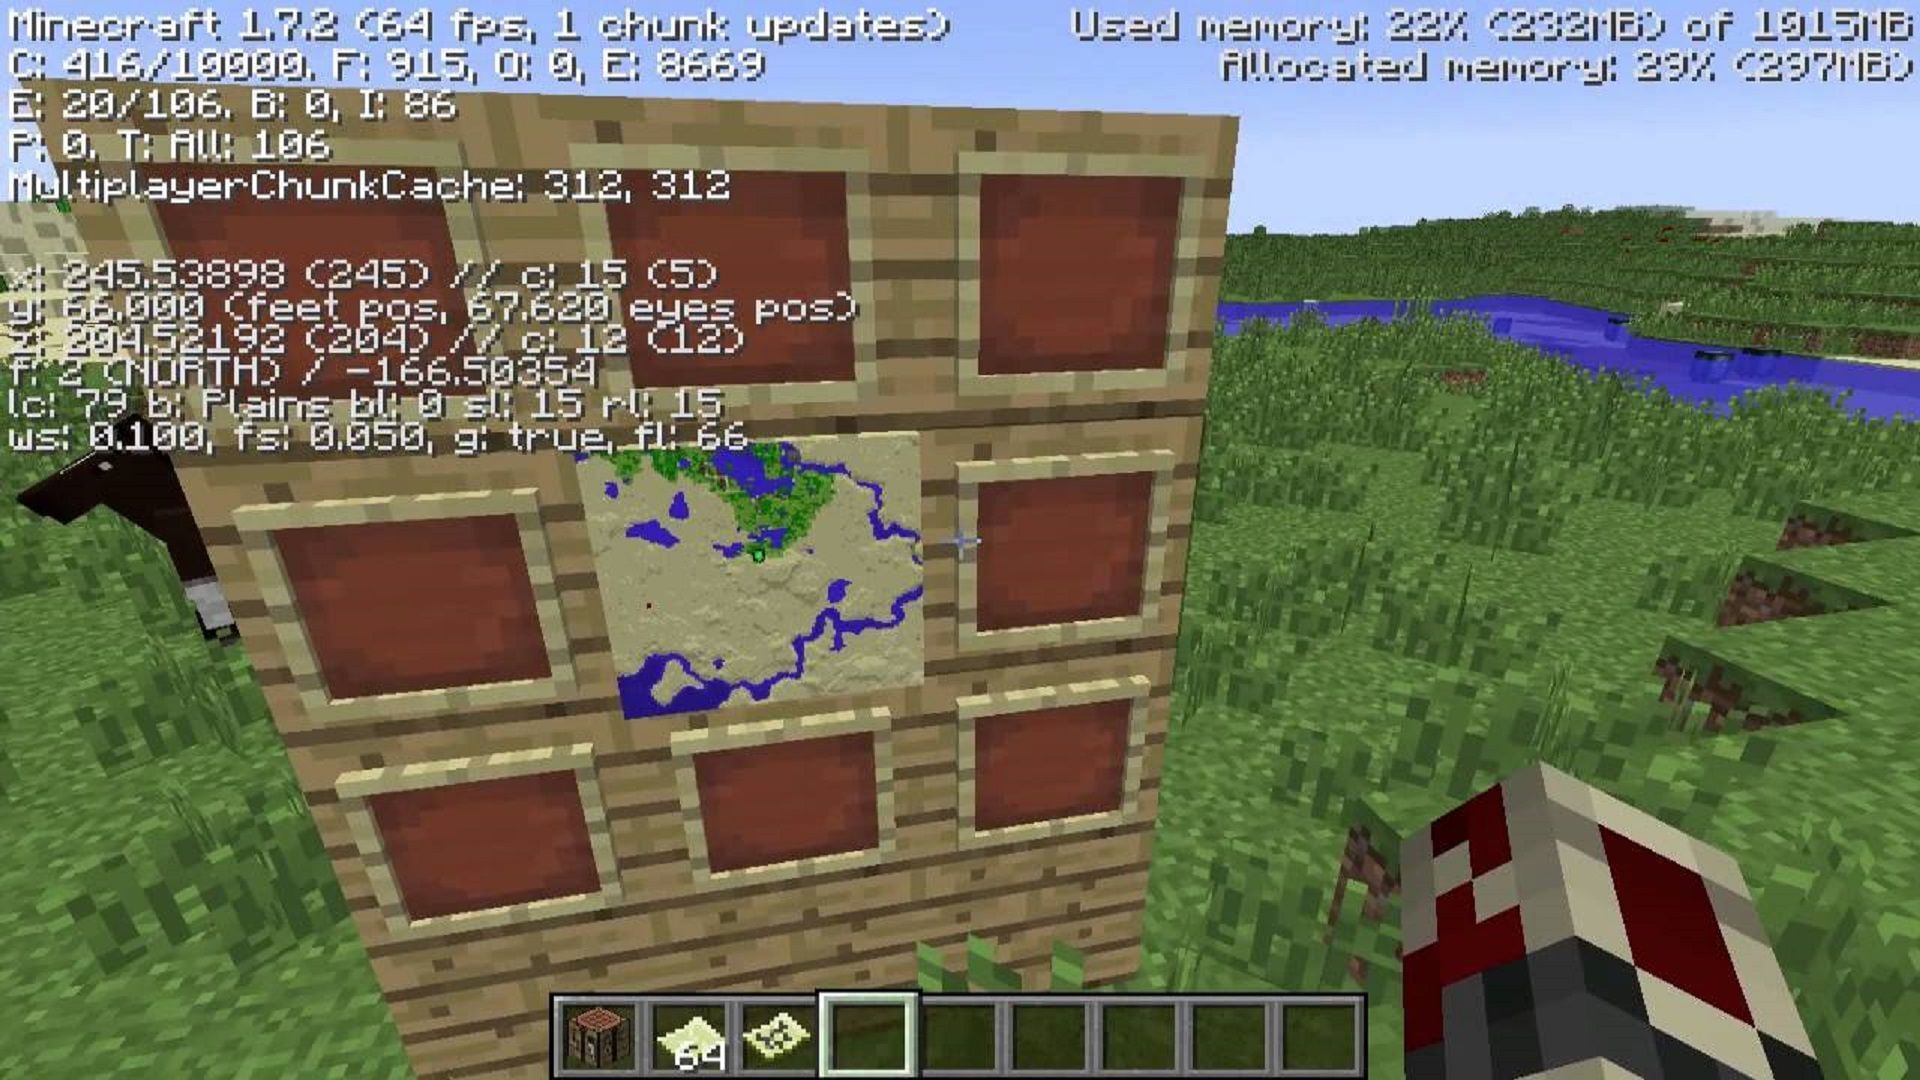
- Once one map has been completed, make your way to the edge of your current map. Then, move one block over until your player marker is no longer located on the map.
- In this new position, take your second map and activate it, which will render an additional area past what your first map was capable of showing. As before, walk around and fill out the second map as required.
- With both of your Minecraft maps completely filled, head back to a desired wall and place your item frames. You must place your maps based on where their borders are. For example, if your second map details the area to the west of your first map, you'll want to place it to the left of your first map to ensure that the two connect correctly. It's a fairly similar process to putting together a puzzle.
With larger map walls that contain multiple item frames, Minecraft players may want to organize their maps in their inventories to avoid any confusion. For example, placing specific maps in certain slots and surrounding them with other maps that players wish to connect ensures that the maps don't get mixed up before they're placed onto the walls.
Obsessed with Crosswords, Wordle, and other word games? Take our quick survey and let us get to know you better!
