
'%20x='0'%20y='0'%20height='100%25'%20width='100%25'%20%0A%20%20%20%20%20%20%20%20%20%20xlink%3Ahref='data:image/jpg;base64,/9j/2wBDAAYEBQYFBAYGBQYHBwYIChAKCgkJChQODwwQFxQYGBcUFhYaHSUfGhsjHBYWICwgIyYnKSopGR8tMC0oMCUoKSj/2wBDAQcHBwoIChMKChMoGhYaKCgoKCgoKCgoKCgoKCgoKCgoKCgoKCgoKCgoKCgoKCgoKCgoKCgoKCgoKCgoKCgoKCj/wgARCAAGAAoDASIAAhEBAxEB/8QAFgABAQEAAAAAAAAAAAAAAAAAAAUH/8QAFQEBAQAAAAAAAAAAAAAAAAAAAAT/2gAMAwEAAhADEAAAAMzjCf8A/8QAHxABAAEEAQUAAAAAAAAAAAAAAgEDBAURABIUISNB/9oACAEBAAE/AMbUpW1tdCq2arMaApBheuNSur7G+K7xiUoYMgT5g99VnUc//8QAFxEAAwEAAAAAAAAAAAAAAAAAAAMRIf/aAAgBAgEBPwBW0//EABgRAAIDAAAAAAAAAAAAAAAAAAACAyEi/9oACAEDAQE/AItLZ//Z'%3E%3C/image%3E%3C/svg%3E)
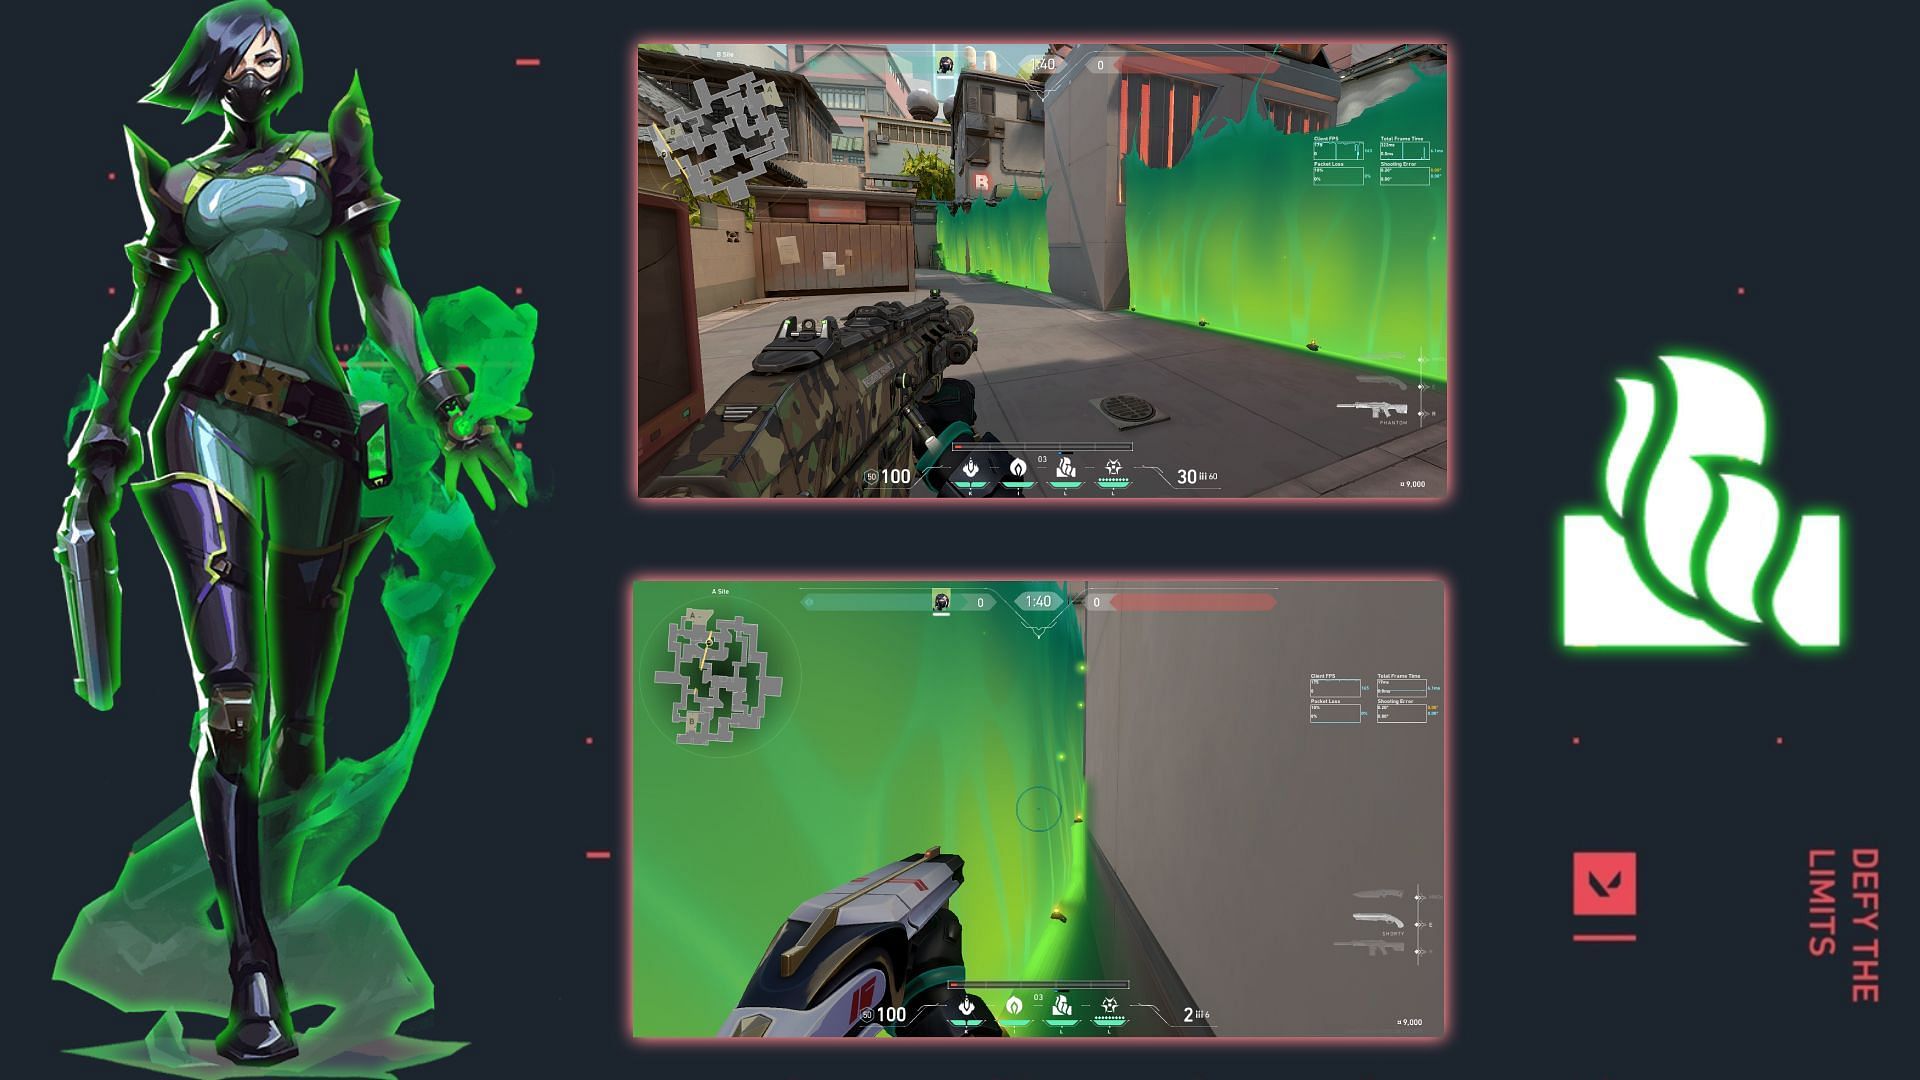
Viper's Toxic Screen ability, known as the Viper Wall in Valorant, allows her to dominate map areas by depriving enemies of vital information and leaving them vulnerable. This ability has proven particularly effective on the Split map, showcasing her as a formidable Controller in this environment. Dealing with Toxic Screens on Split presents a significant challenge for opposing teams, particularly when defending sites.
In the constantly evolving meta of Riot Games' FPS title, certain Toxic Screen setups have remained effective since the game's launch, while others have emerged more recently. This article delves into the best Toxic Screen setups for Split, highlighting their strategic value.
Note: This article is subjective and reflects the writer's opinions.

Best Viper Walls on Split for A site, B site, and more in Valorant
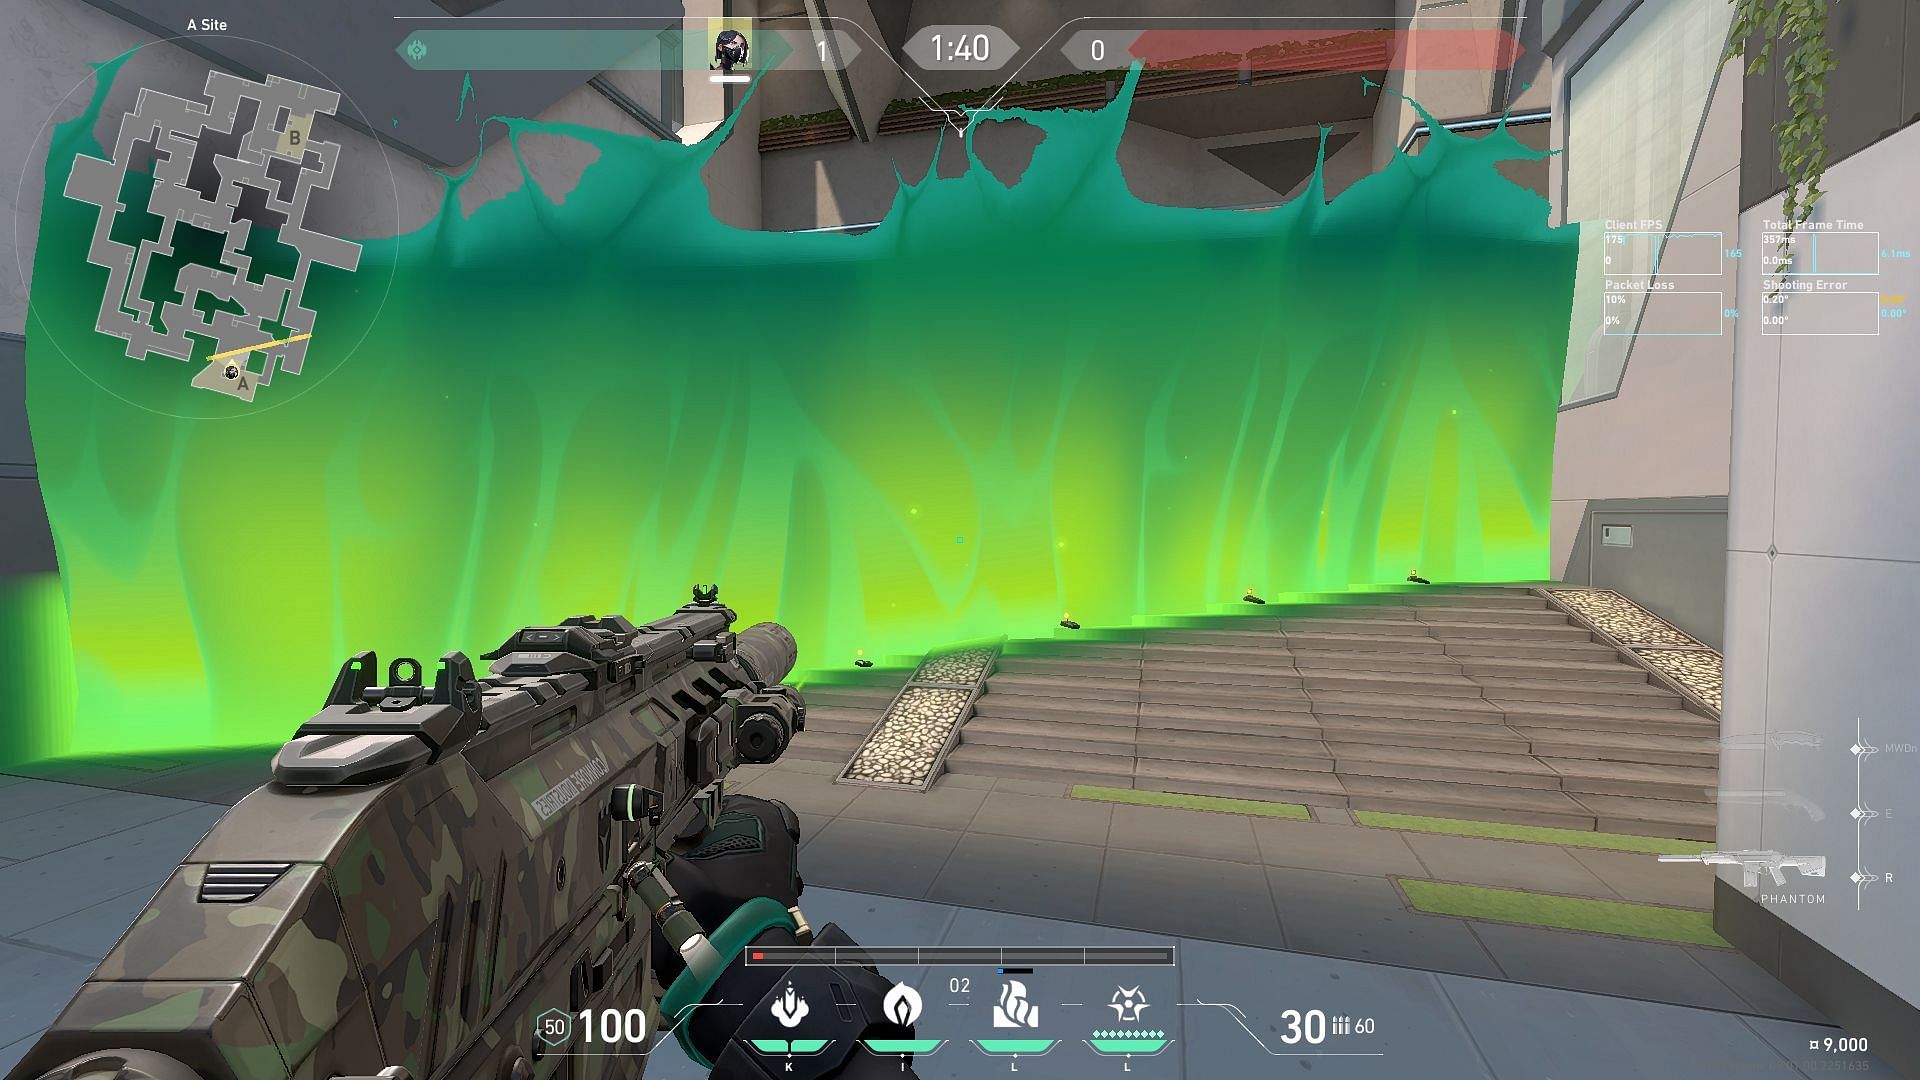
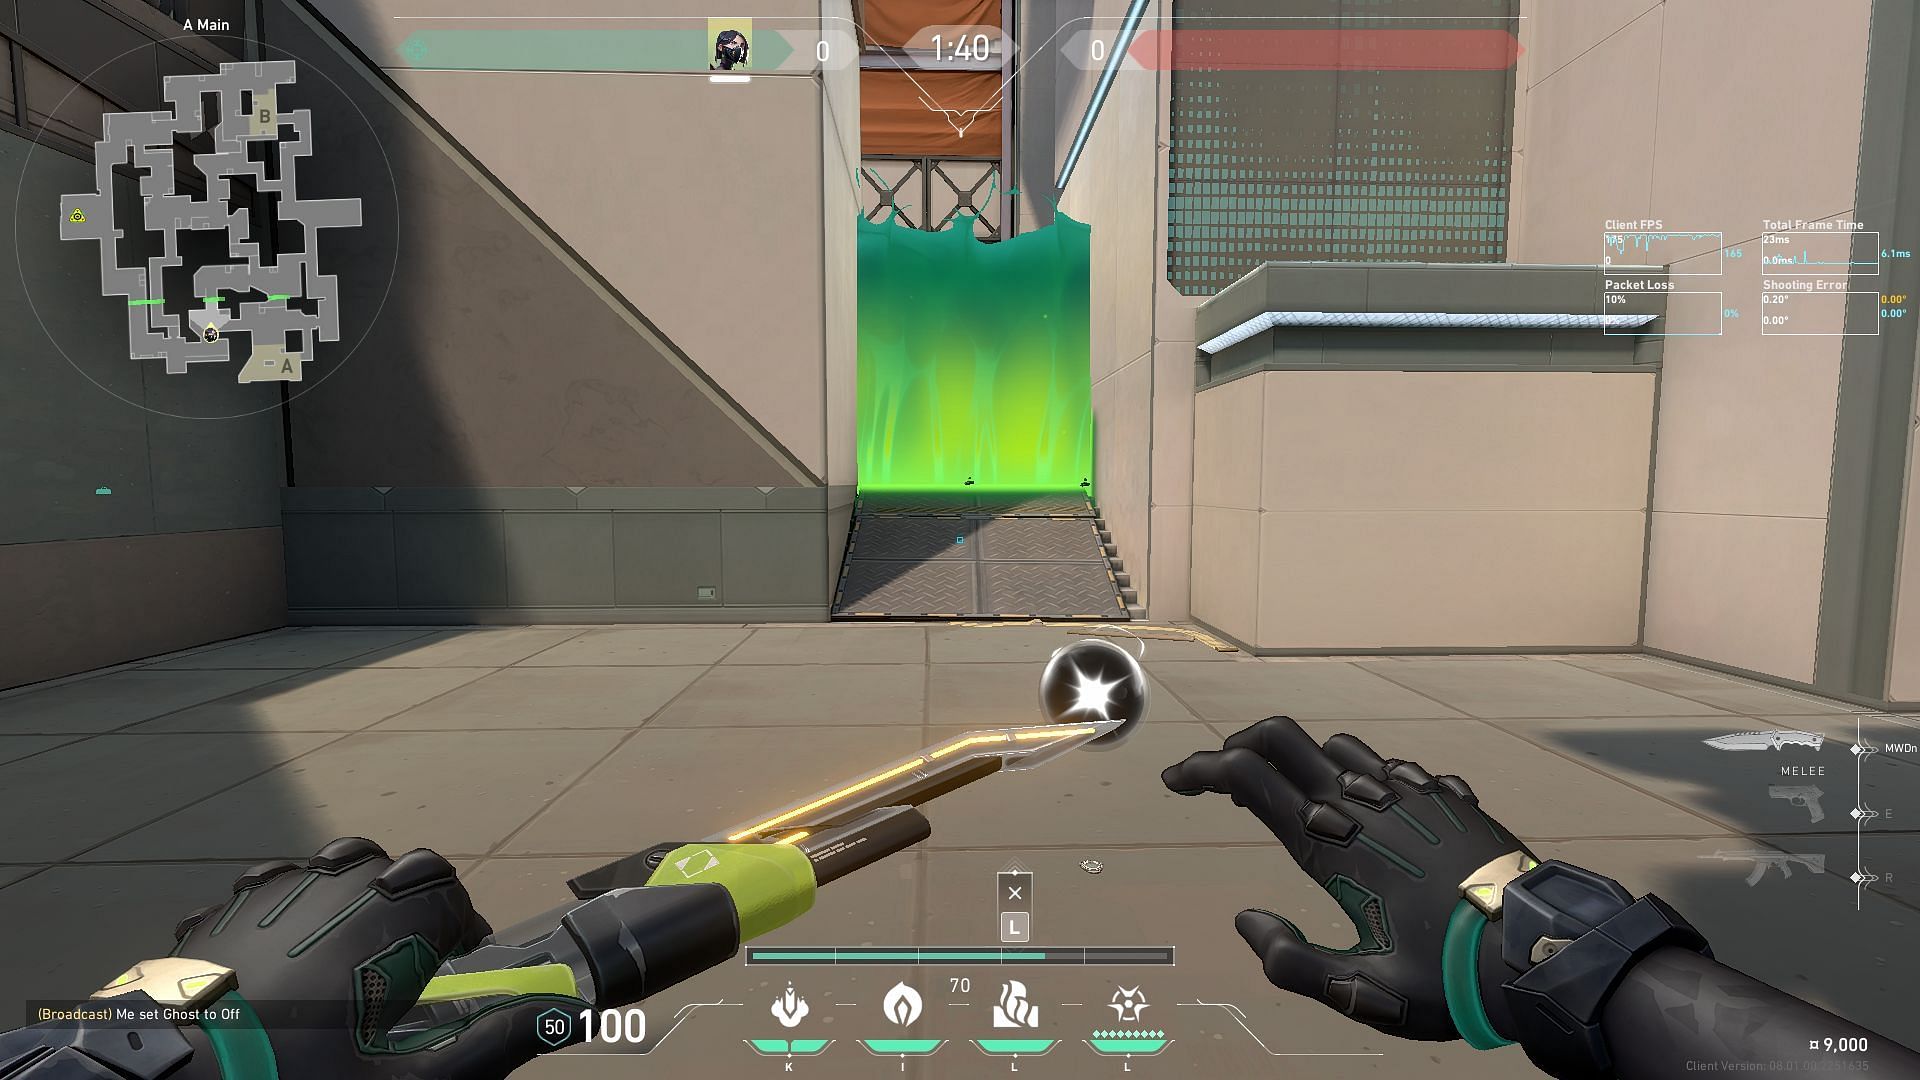
1) A site Toxic Screen for defense
Viper's job on Split is to replace the Sage and stall middle attack initiatives while defending. She can successfully function like this by using her Poison Orb while controlling the chokepoints on the A site with her Toxic Screen ability.
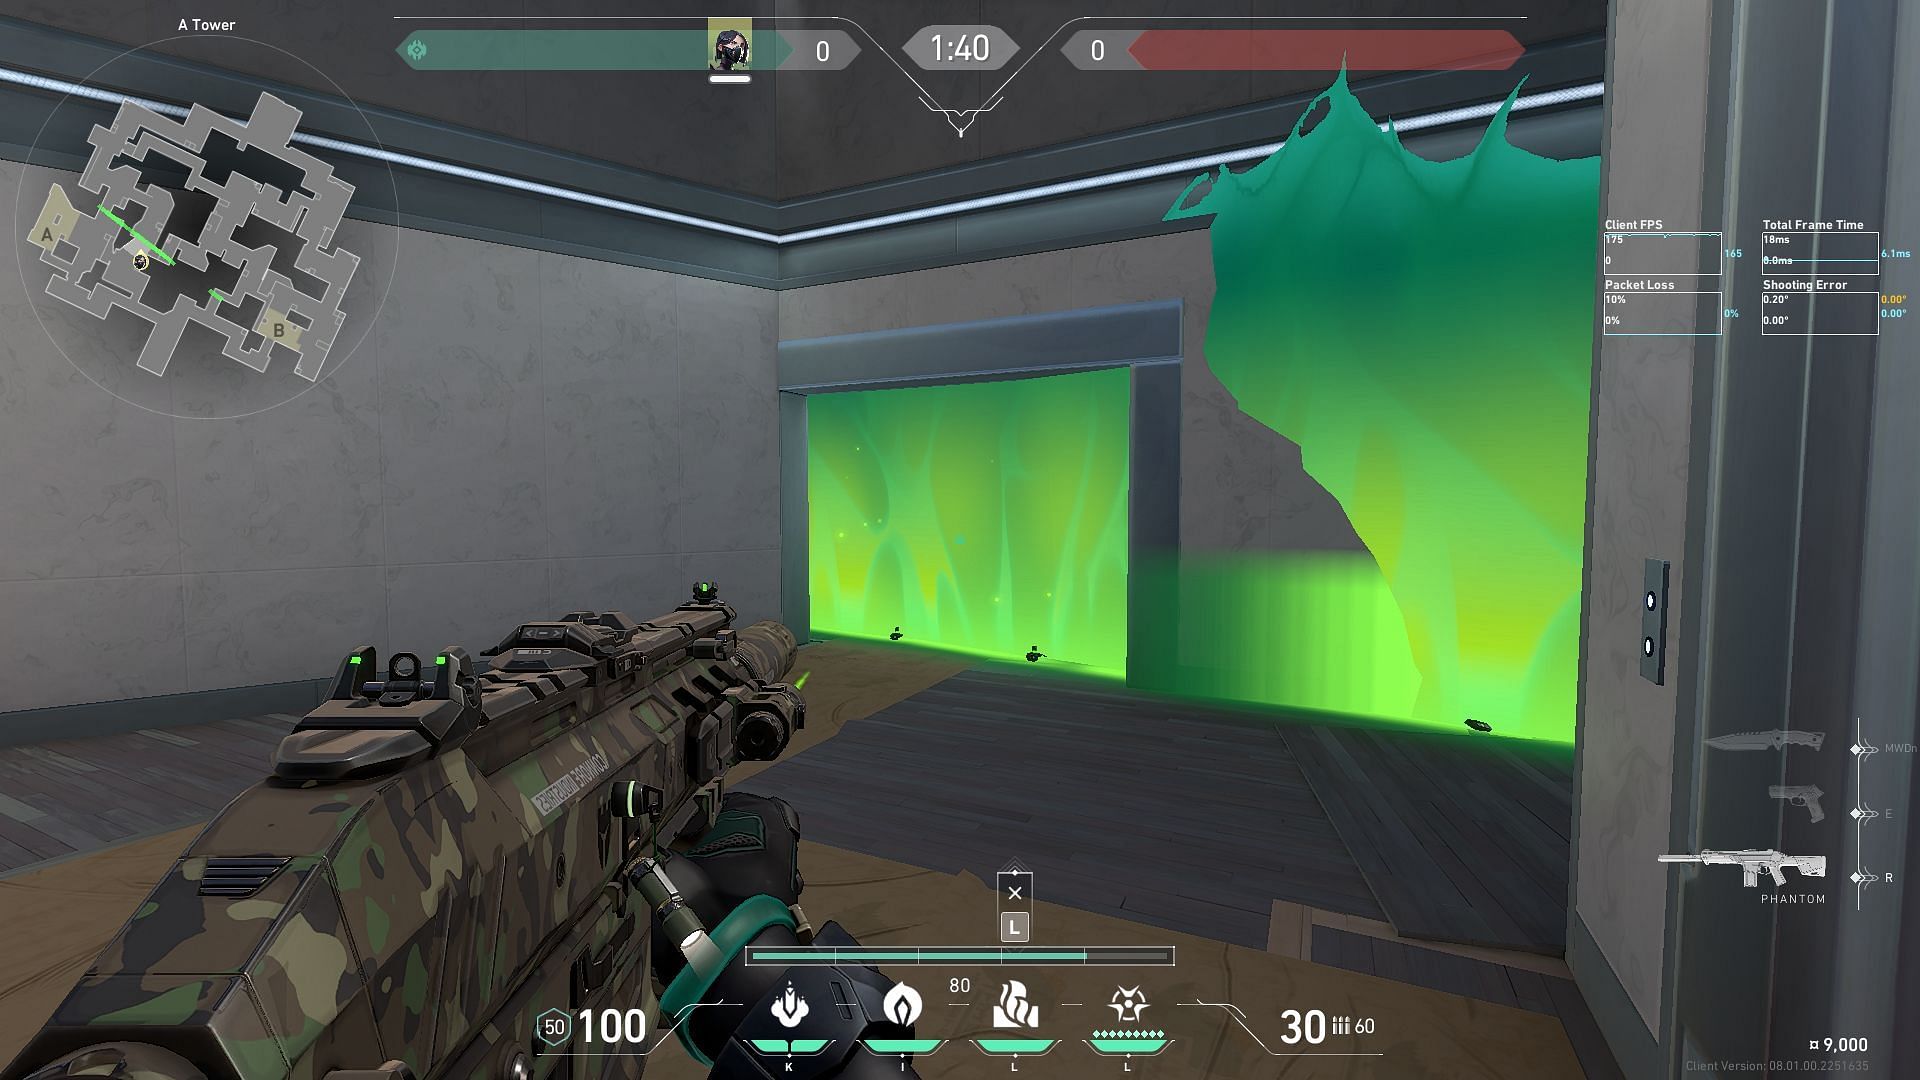
To deploy this Viper Wall on Split, follow the guide below:
Climb the B Stairs and position yourself in front of the edge on the right wall, marked in the image with yellow borders. Next, orient yourself towards the left wall and align your crosshair next to the white speck, highlighted in the image with red borders.
Then, left-click to deploy the wall once it's perfectly aligned in the manner shown above in the minimap, highlighted in the image with green borders.
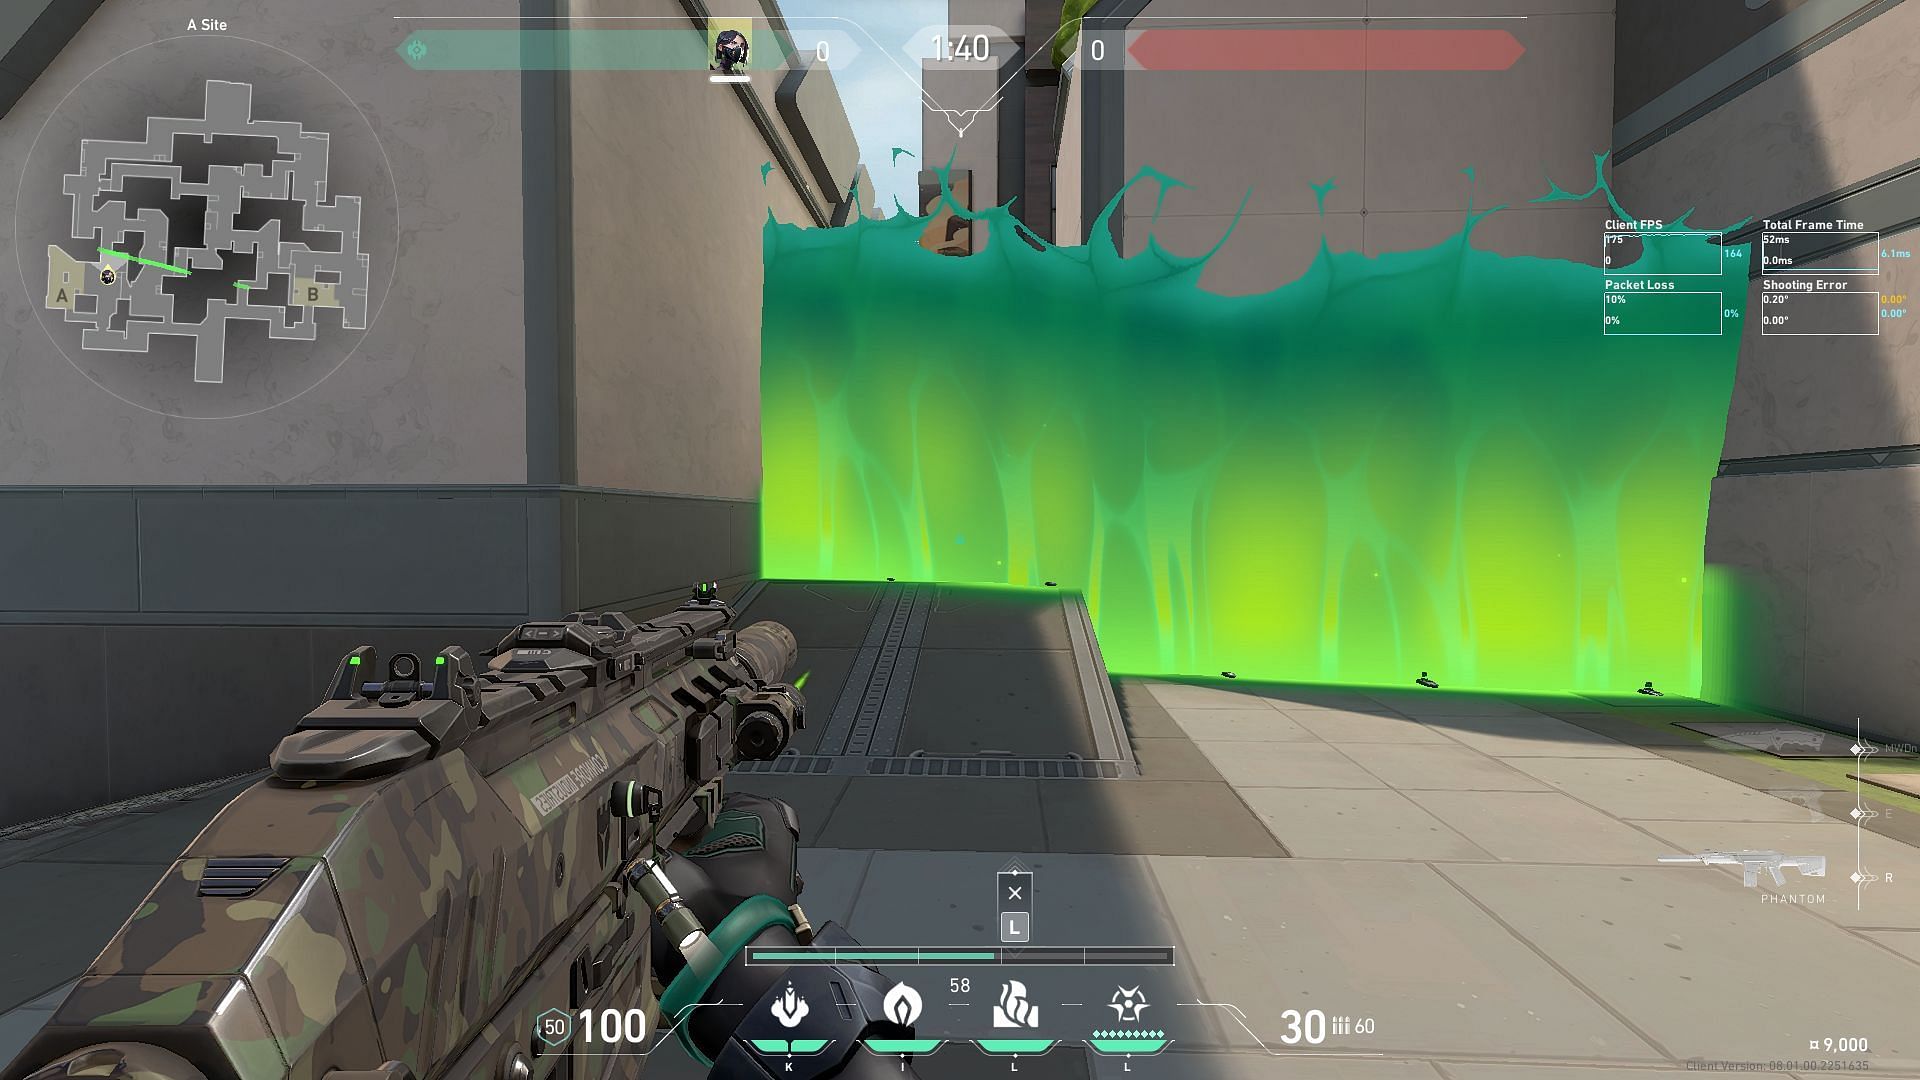
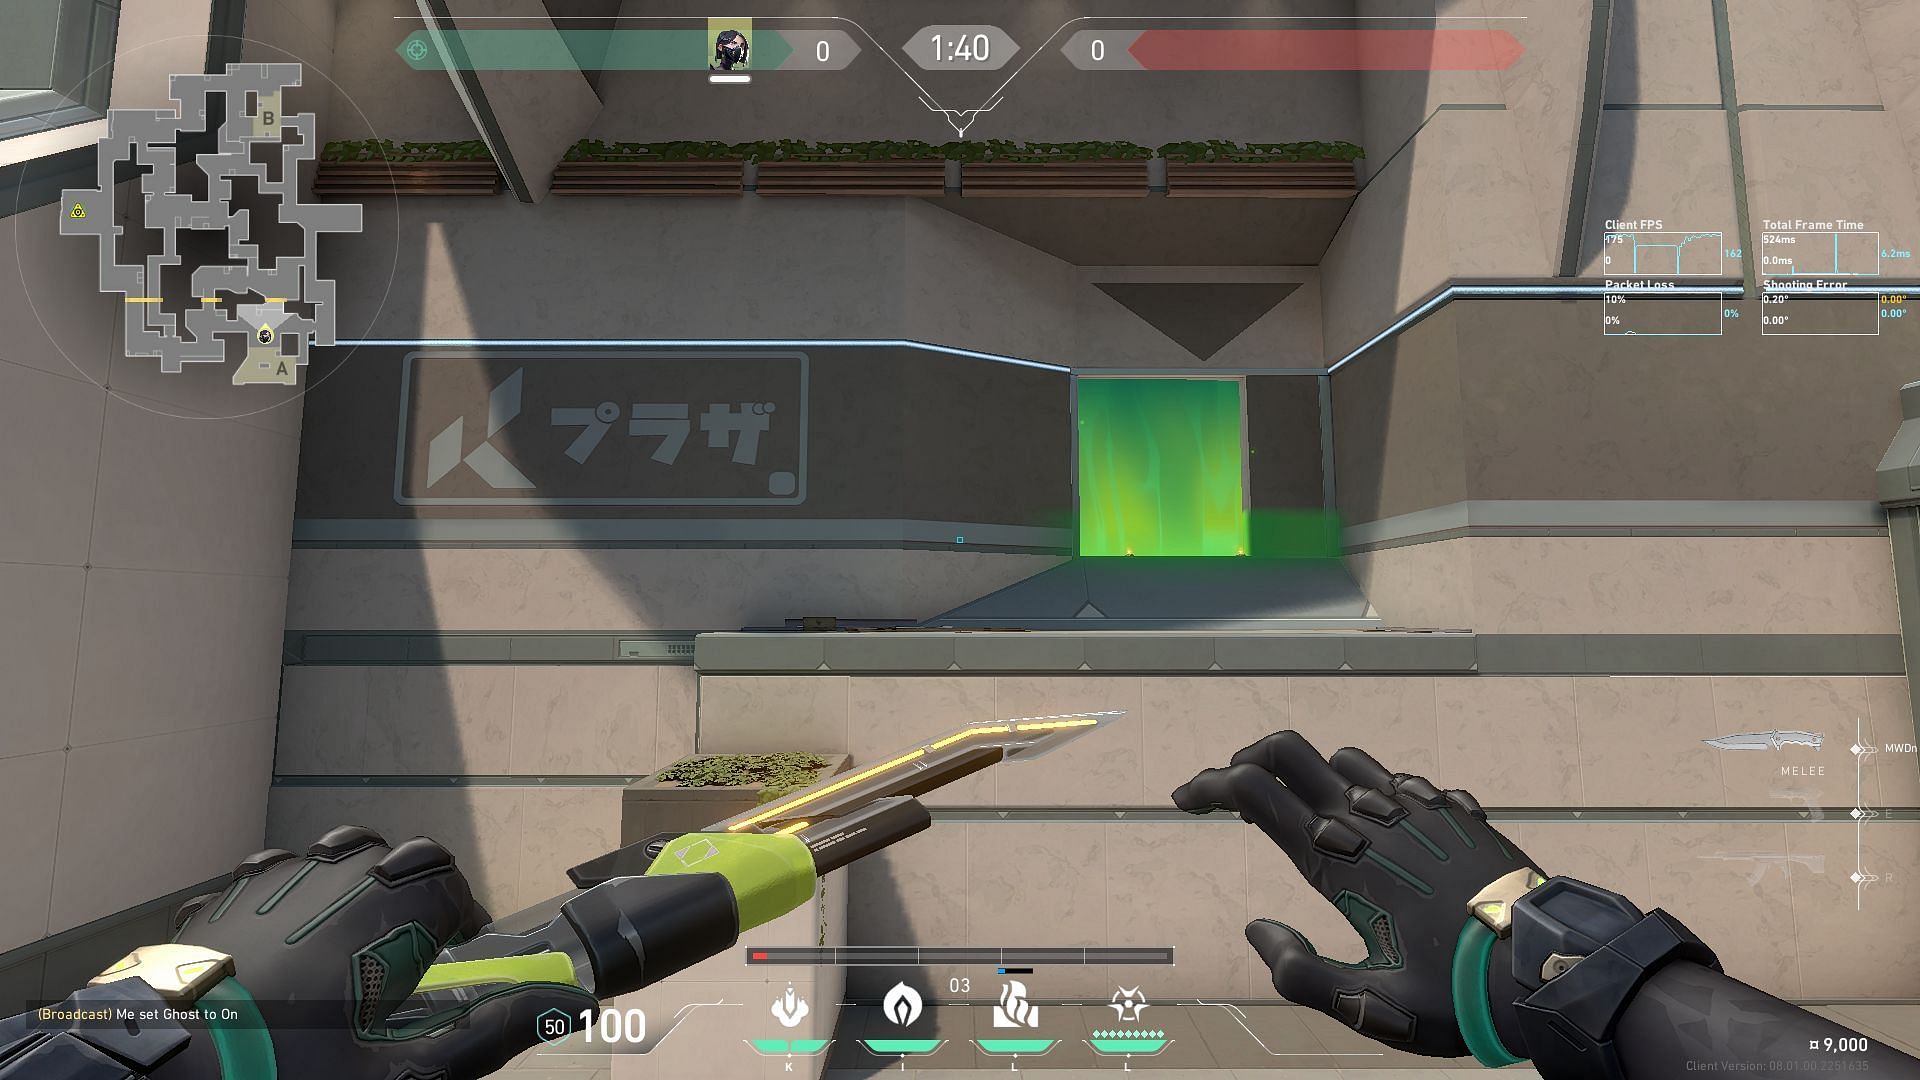
2) Toxic Screen for A Site retake
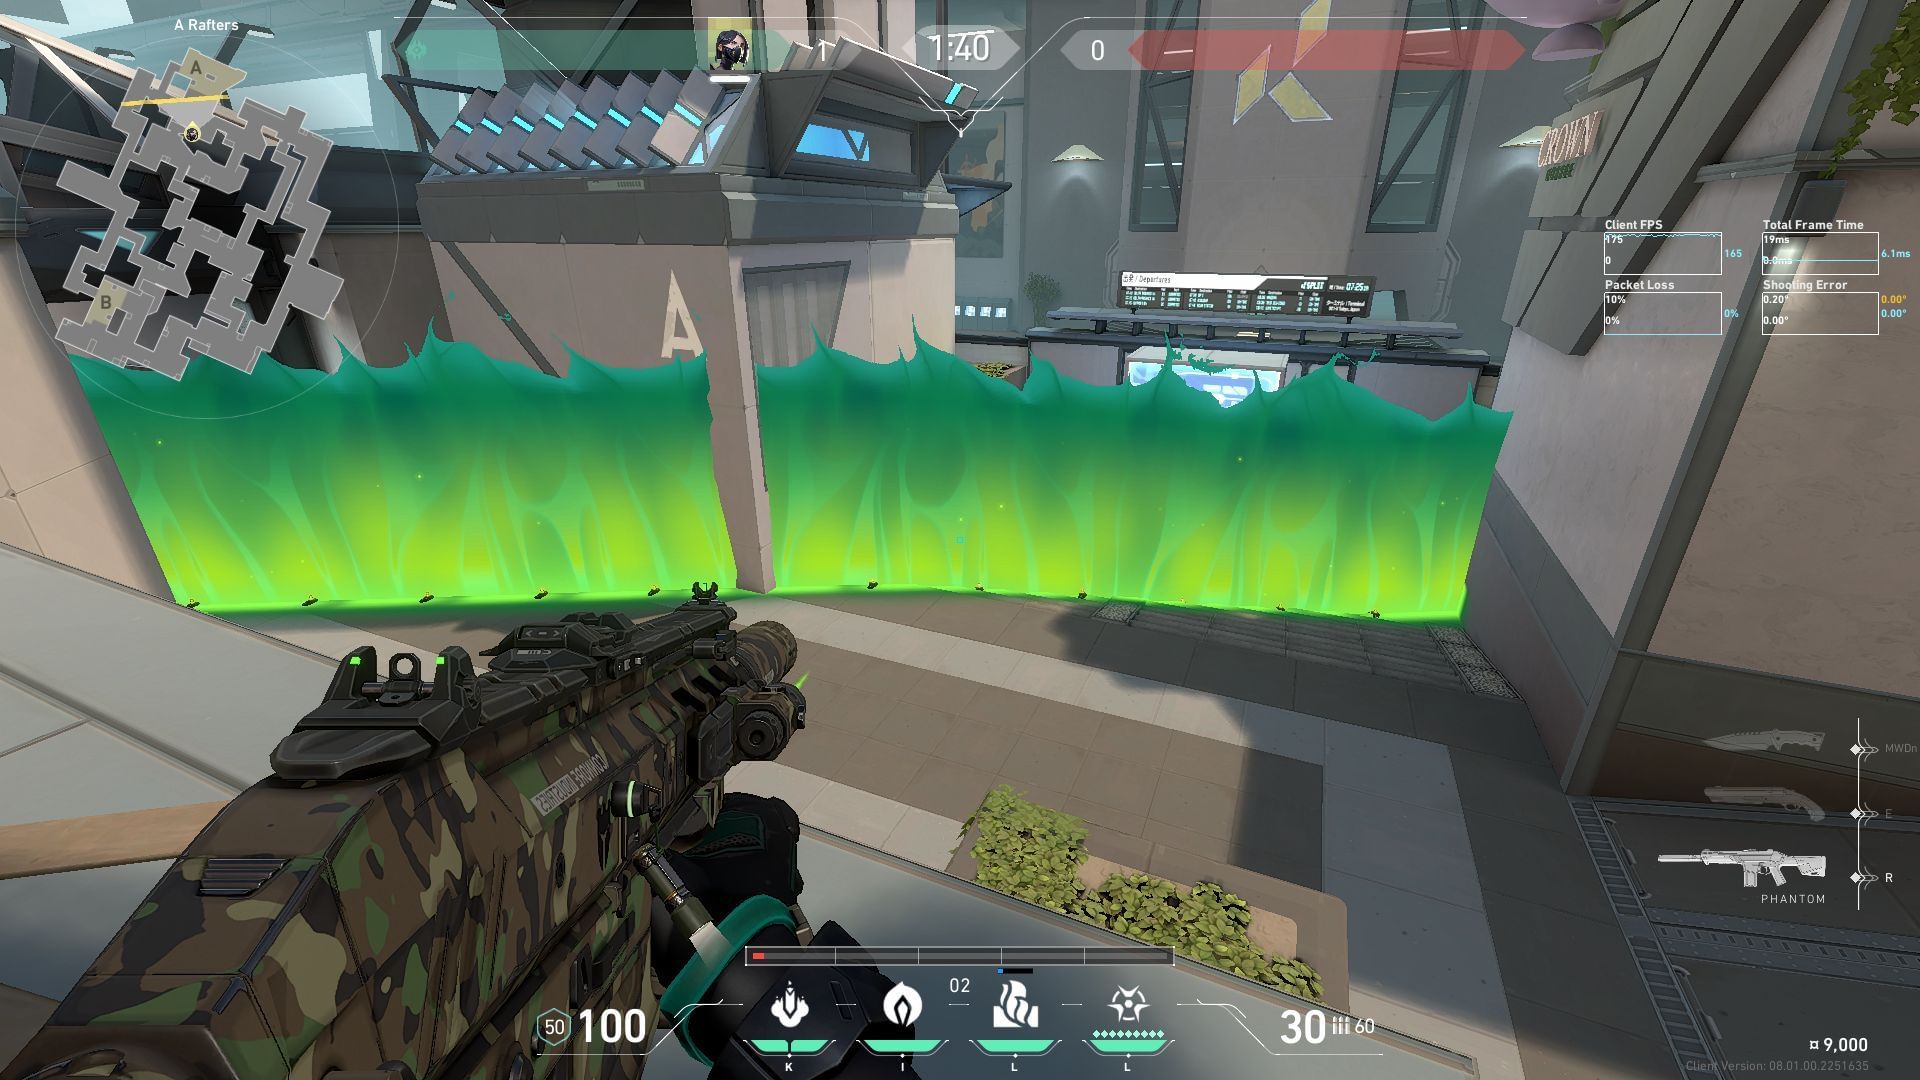
This Viper Wall serves two main purposes for defenders at the A Site. First, it helps stall attackers trying to enter and allows defenders holding the site securely to move to a safer position.
Second, when activated during the defenders' attempt to retake control after the spike has been planted, this Toxic Screen helps isolate common angles. This is because it denies attackers the ability to set up advantageous crossfire during post-plant.
To deploy this Viper Wall on Split, follow the guide below:
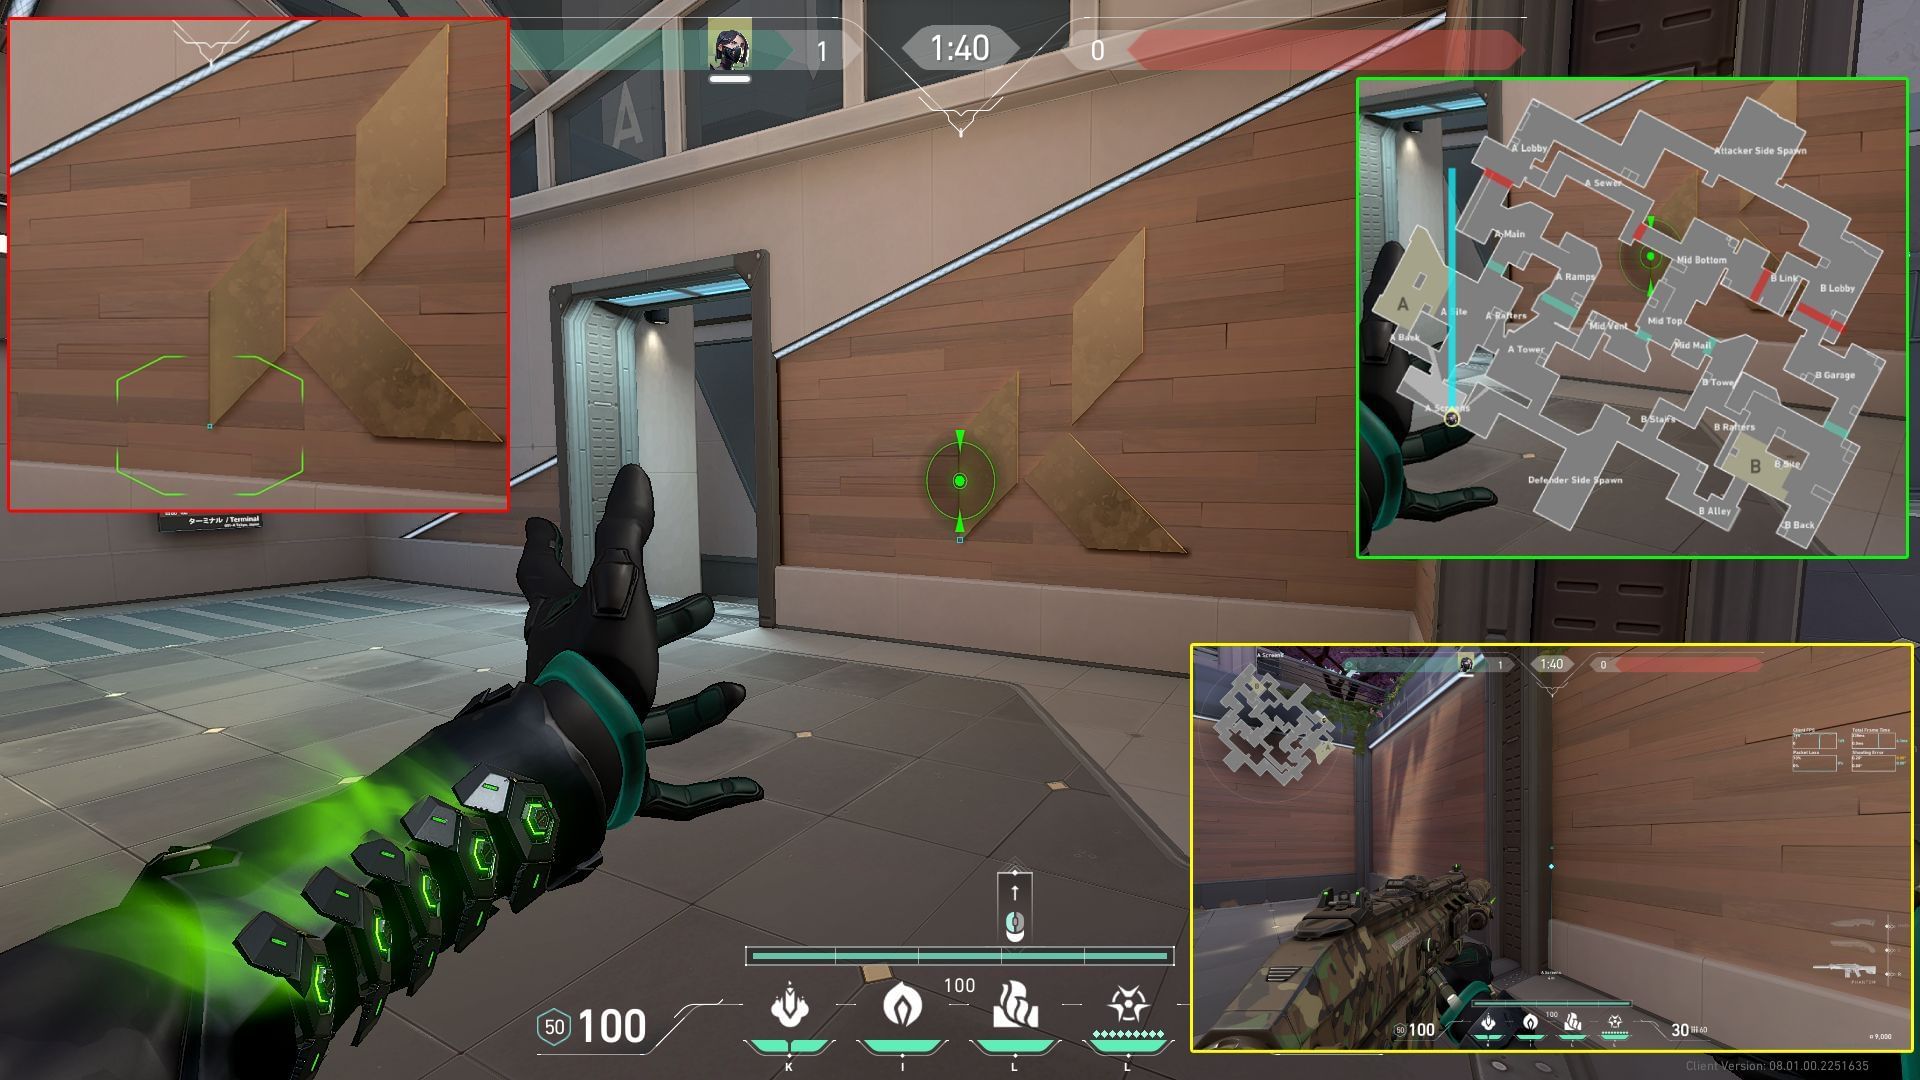
Get beside the grey beam in A Screens, marked in the image above with yellow borders. Next, orient yourself towards the A site and aim your crosshair on the bottom left part of the 'K' logo on the wall as highlighted in the image with red borders.
Then, left-click to deploy the wall once it's perfectly aligned in the manner shown above in the minimap highlighted in the image with green borders.
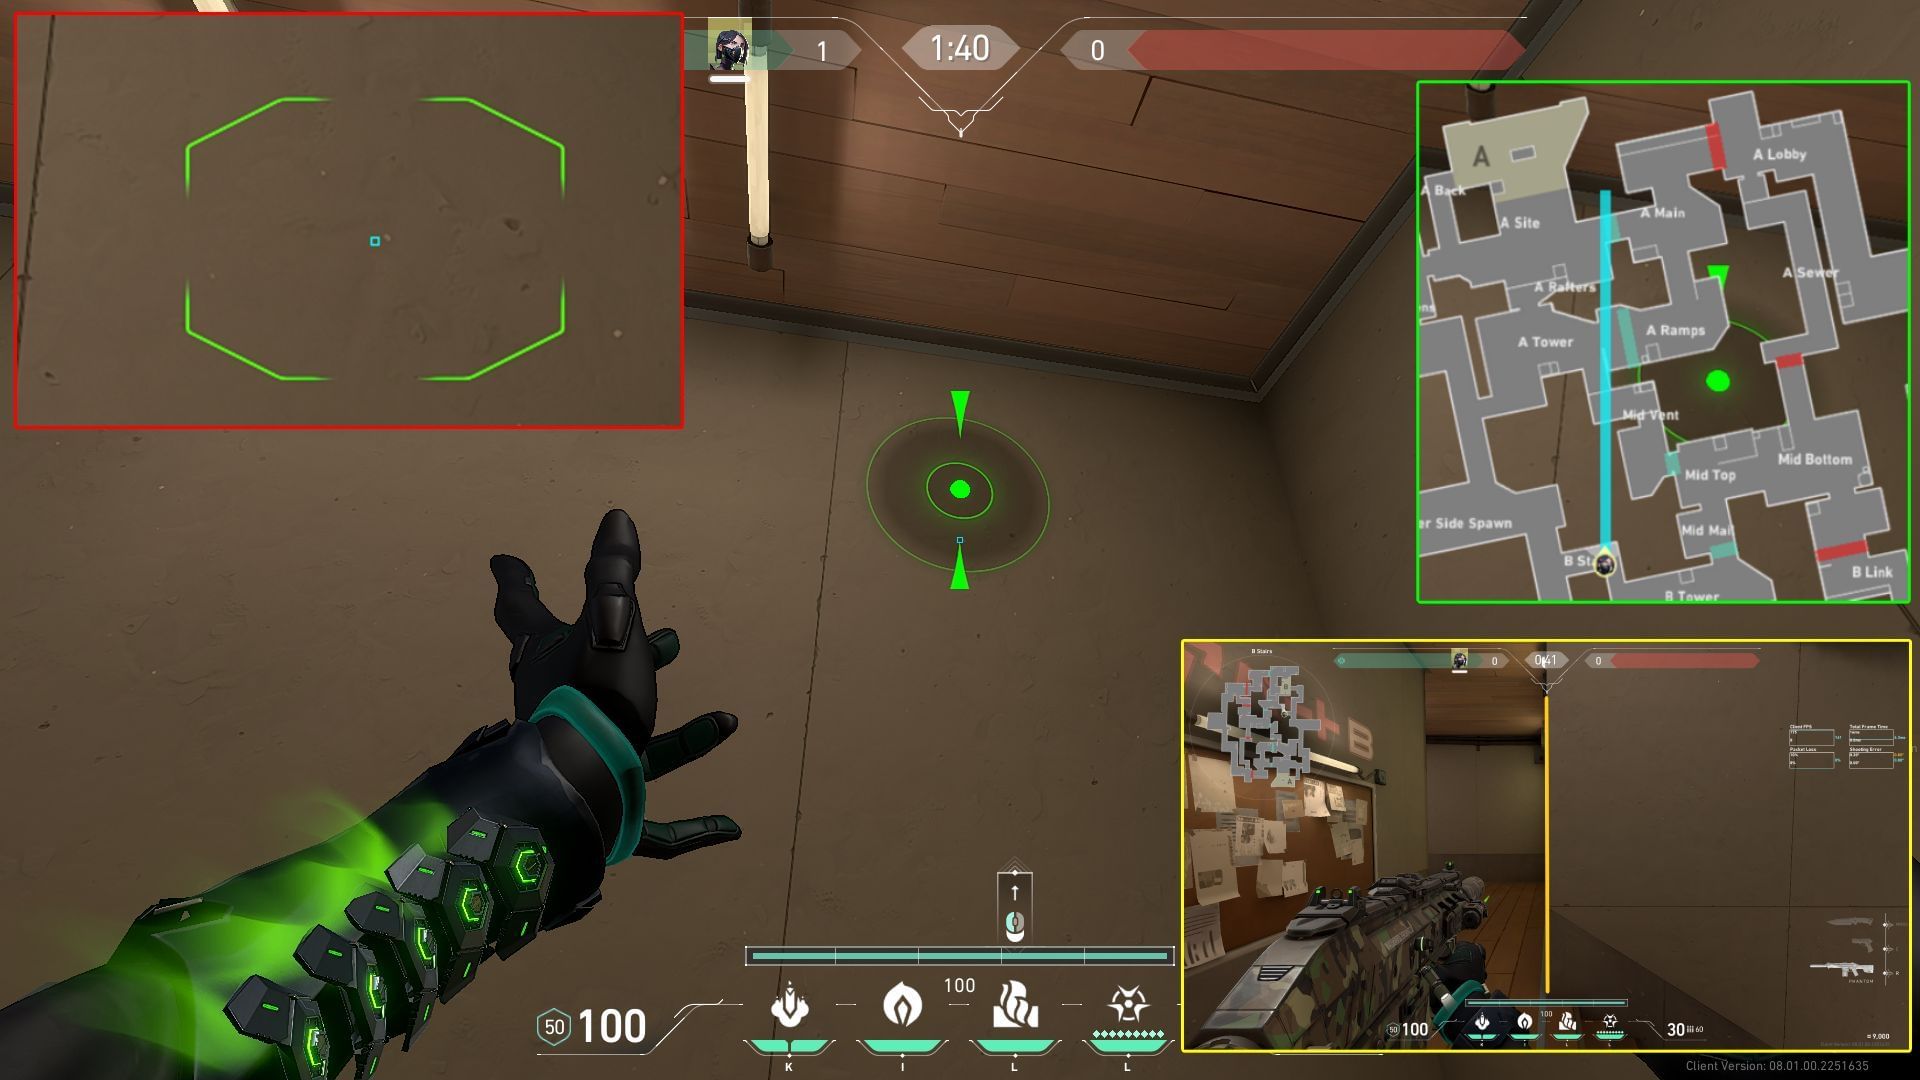
3) Toxic Screen for B Site lurk
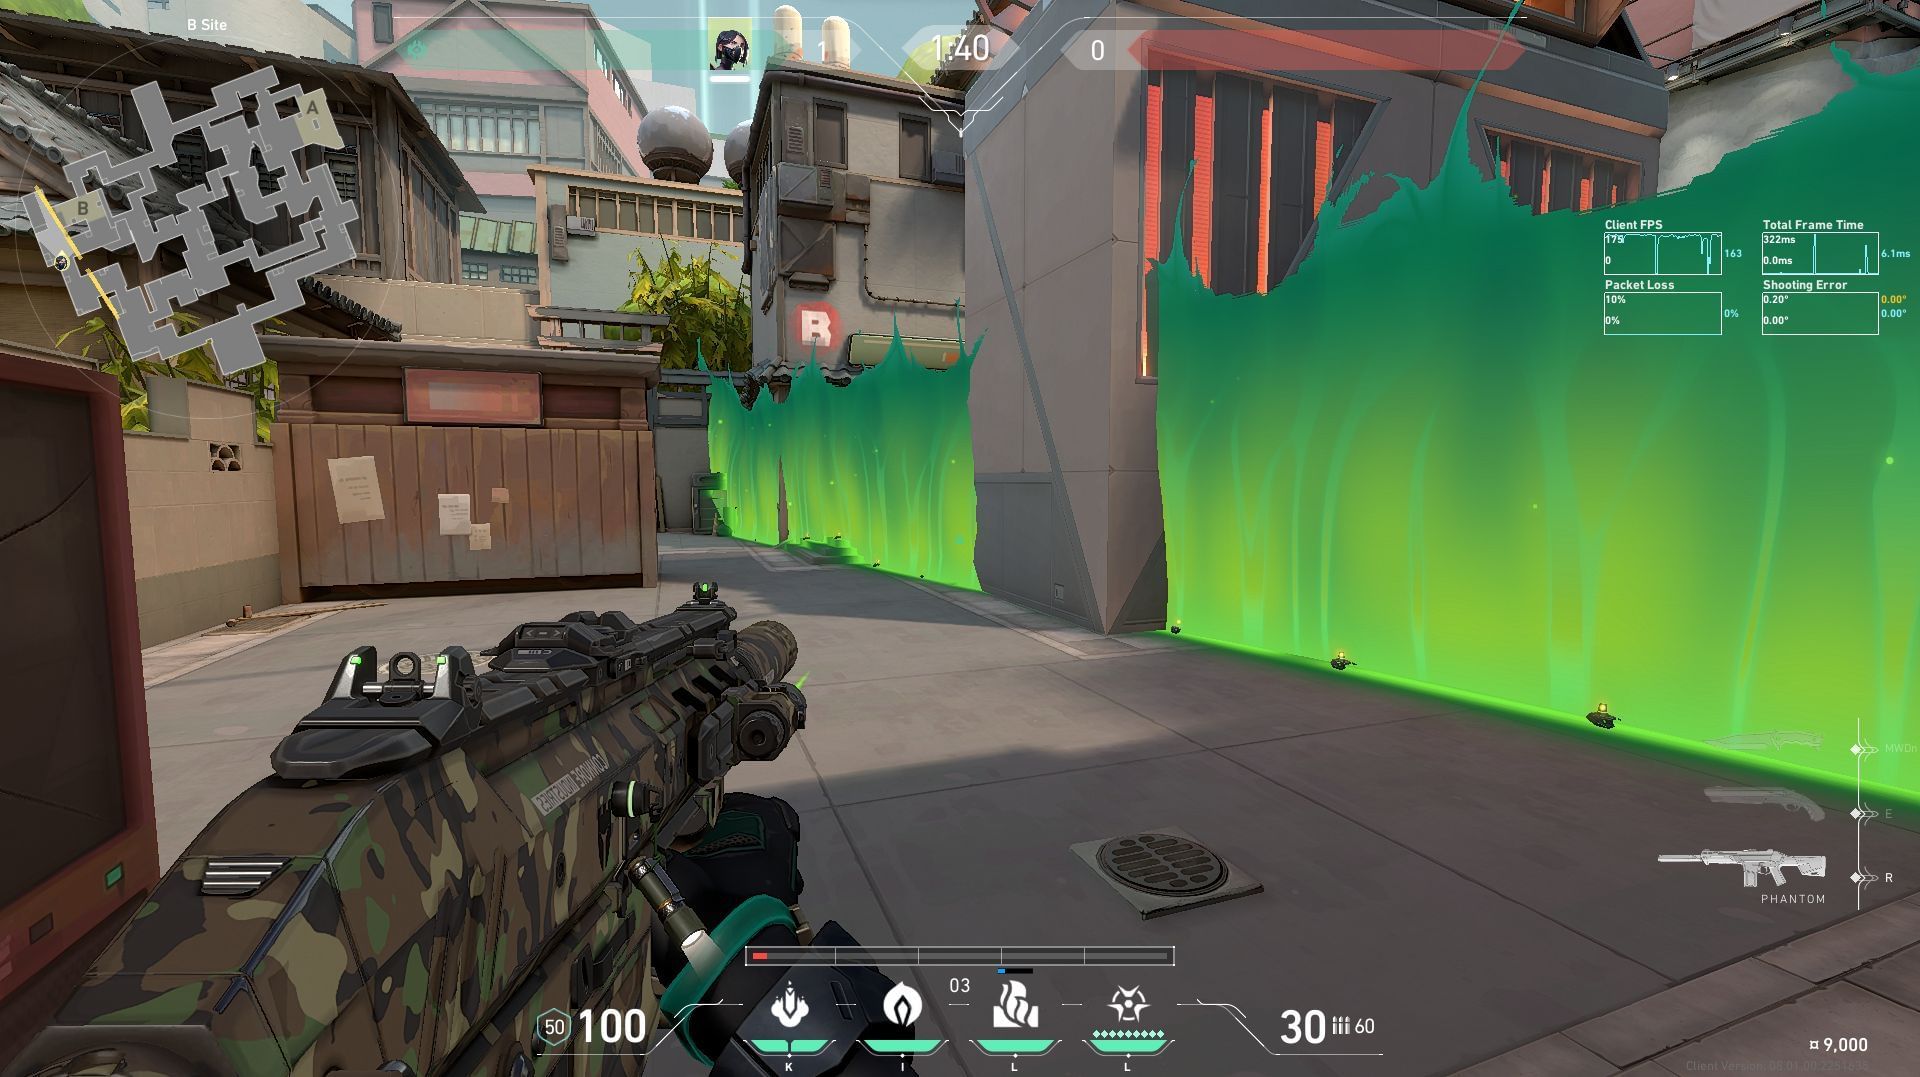
Unlike other Controllers, Viper plays a unique role on the Split map. During attack rounds, she becomes an active lurker, using her Toxic Screen to block defenders from getting crucial information. She deploys this wall strategically to control areas of the map and venture deep into enemy territory.
This wall enables Viper to move across B Main, clear nearby angles while being protected from Heaven, and advance past the defender's position anchoring the B Site. When activated, this Toxic Screen prevents the site defender from safely gathering information by peeking at B Main at intervals, as this B Site lurk wall will damage them each time they come into contact with it.
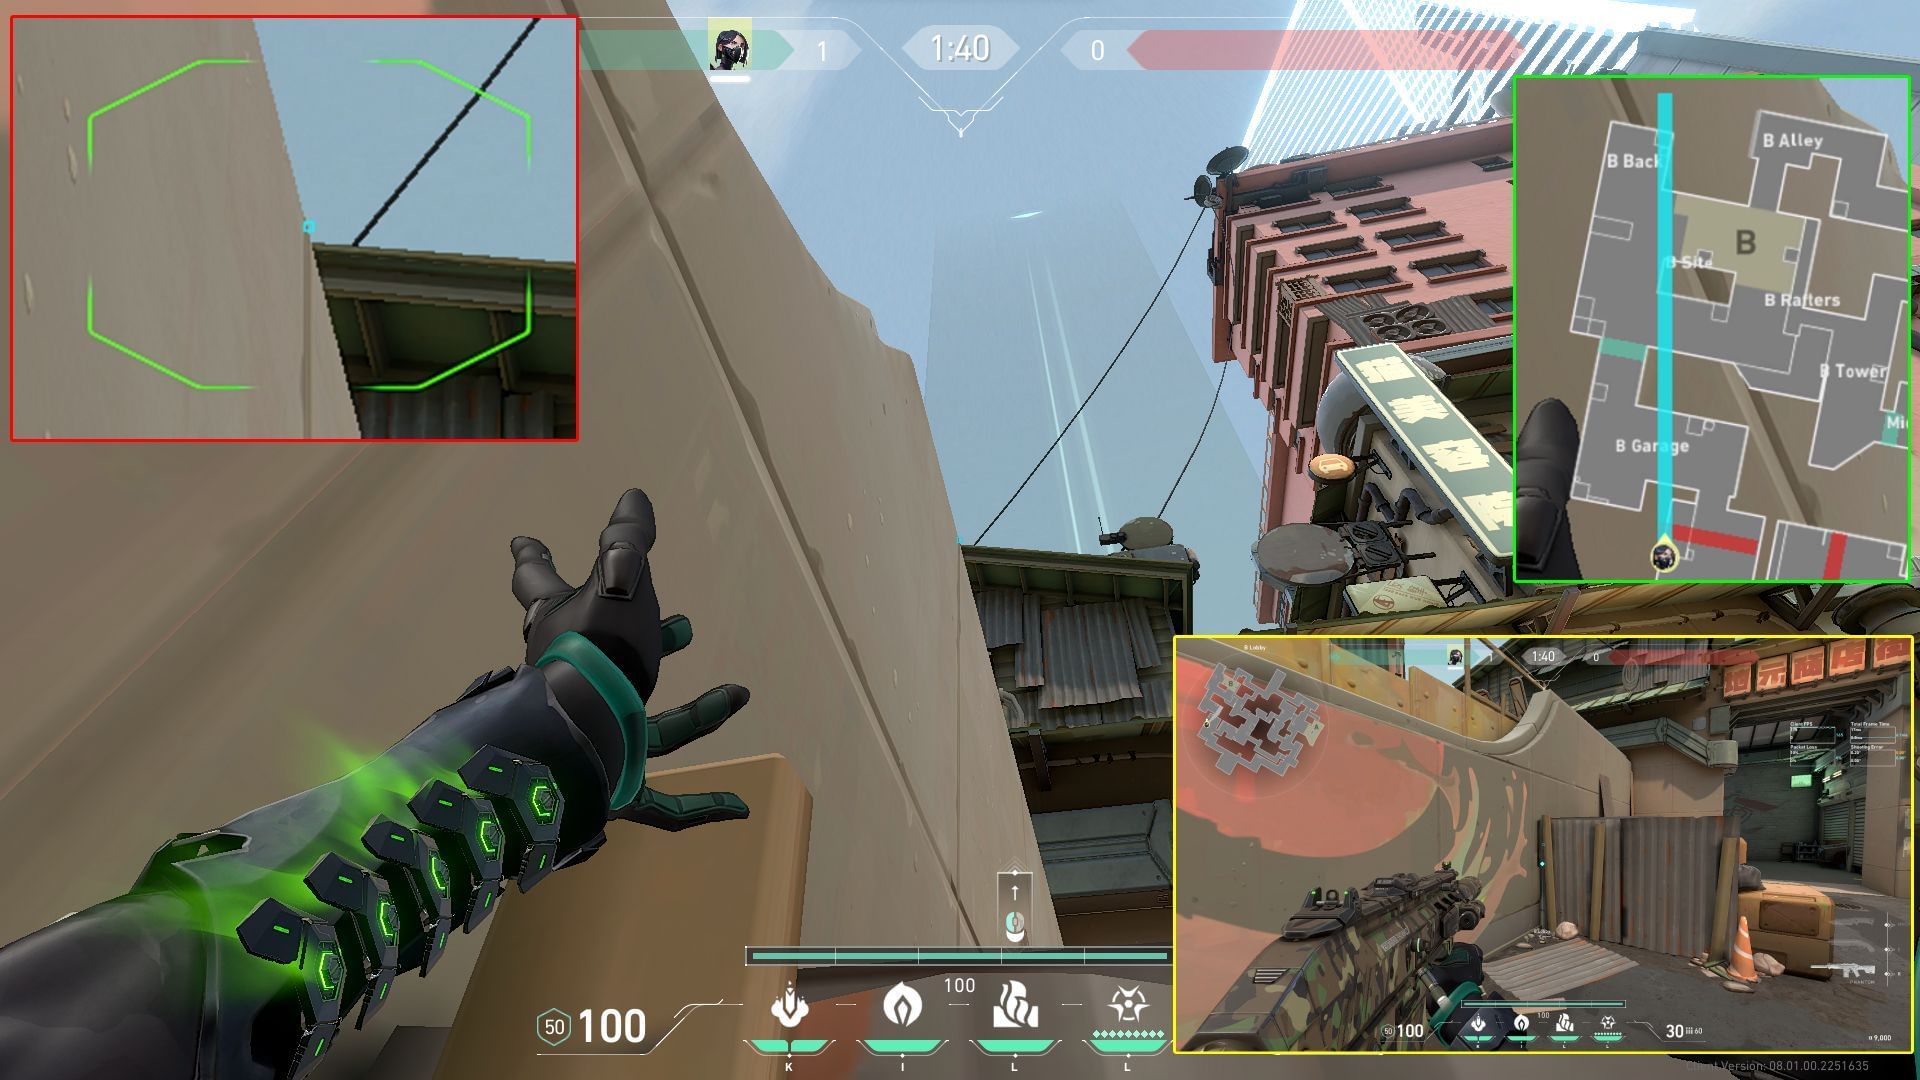
Stand in the corner marked in the above image with yellow borders. Next, orient yourself towards the B Site and aim your crosshair where the left wall and roof appear to meet, highlighted in the image with red borders.
Then, left-click to deploy the wall once it's perfectly aligned in the manner shown above in the minimap, highlighted in the image with green borders.
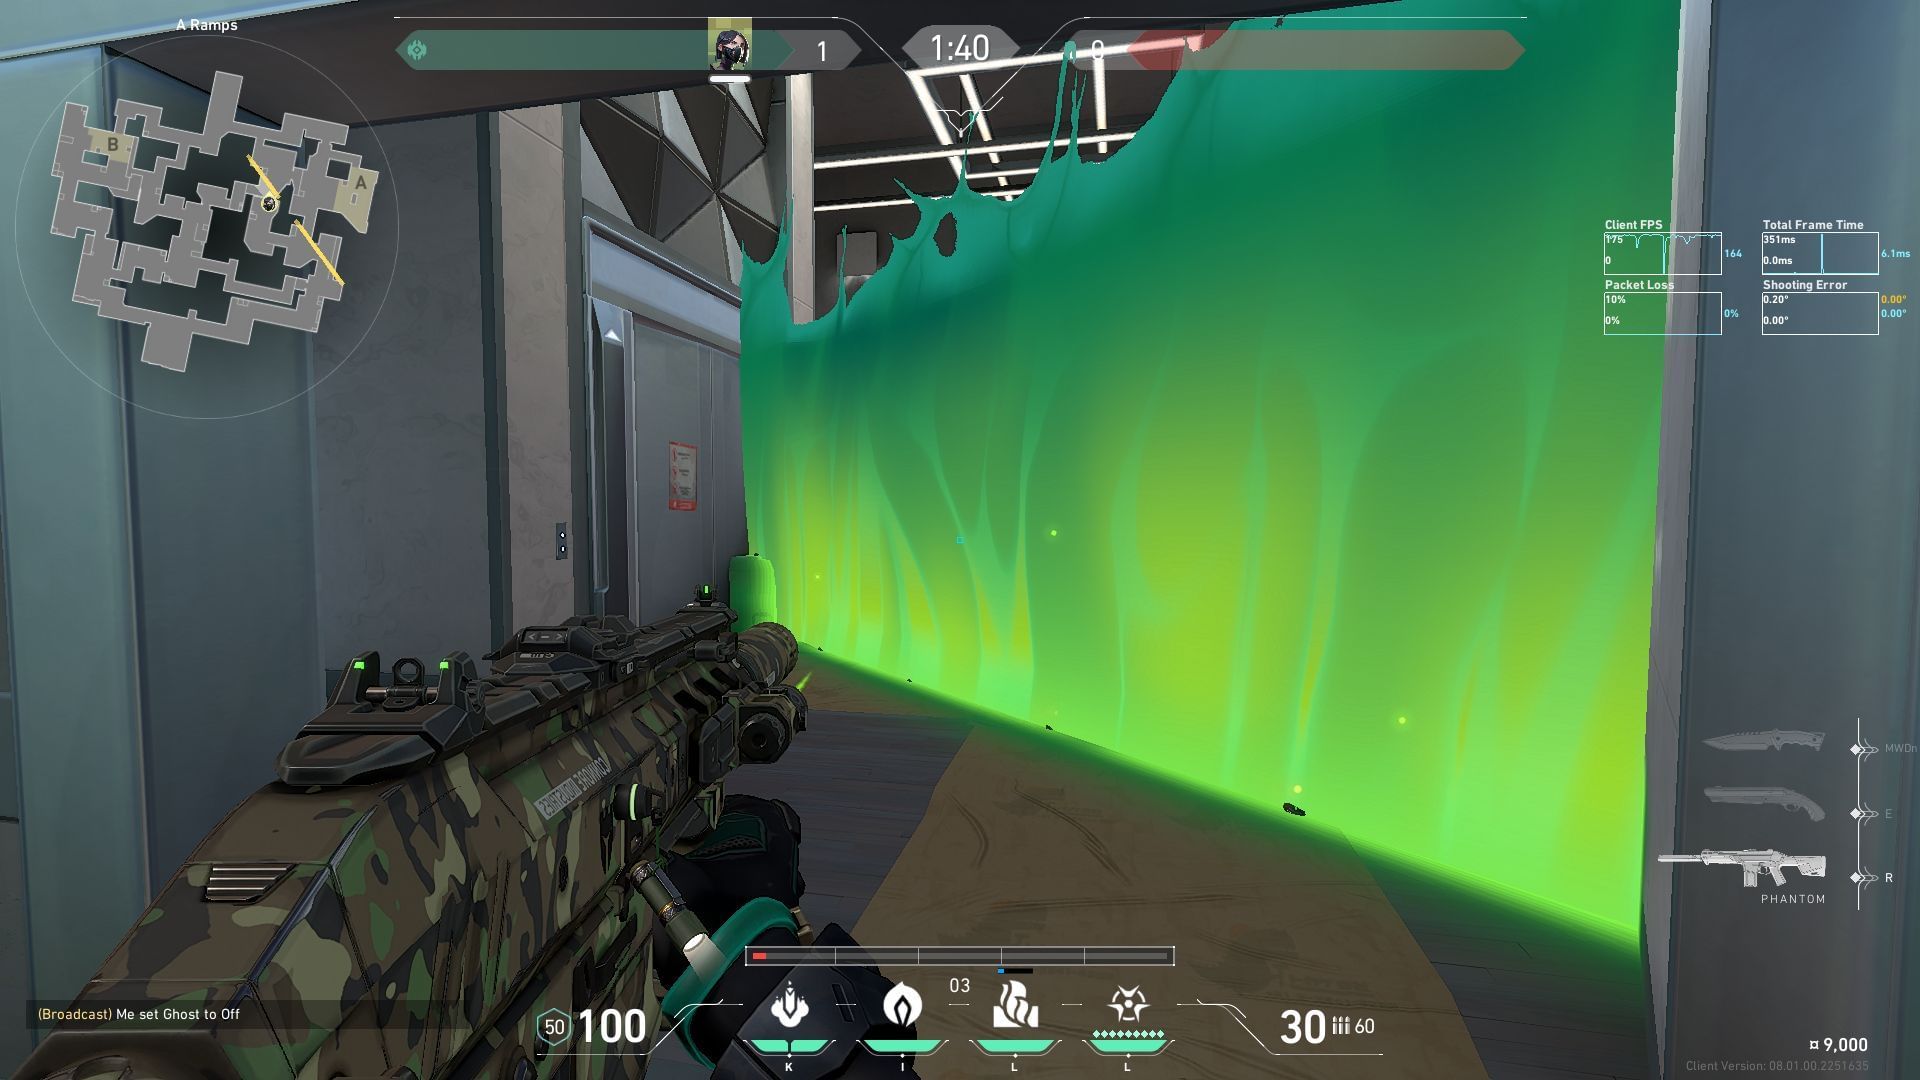
4) Toxic Screen for A Ramps lurk
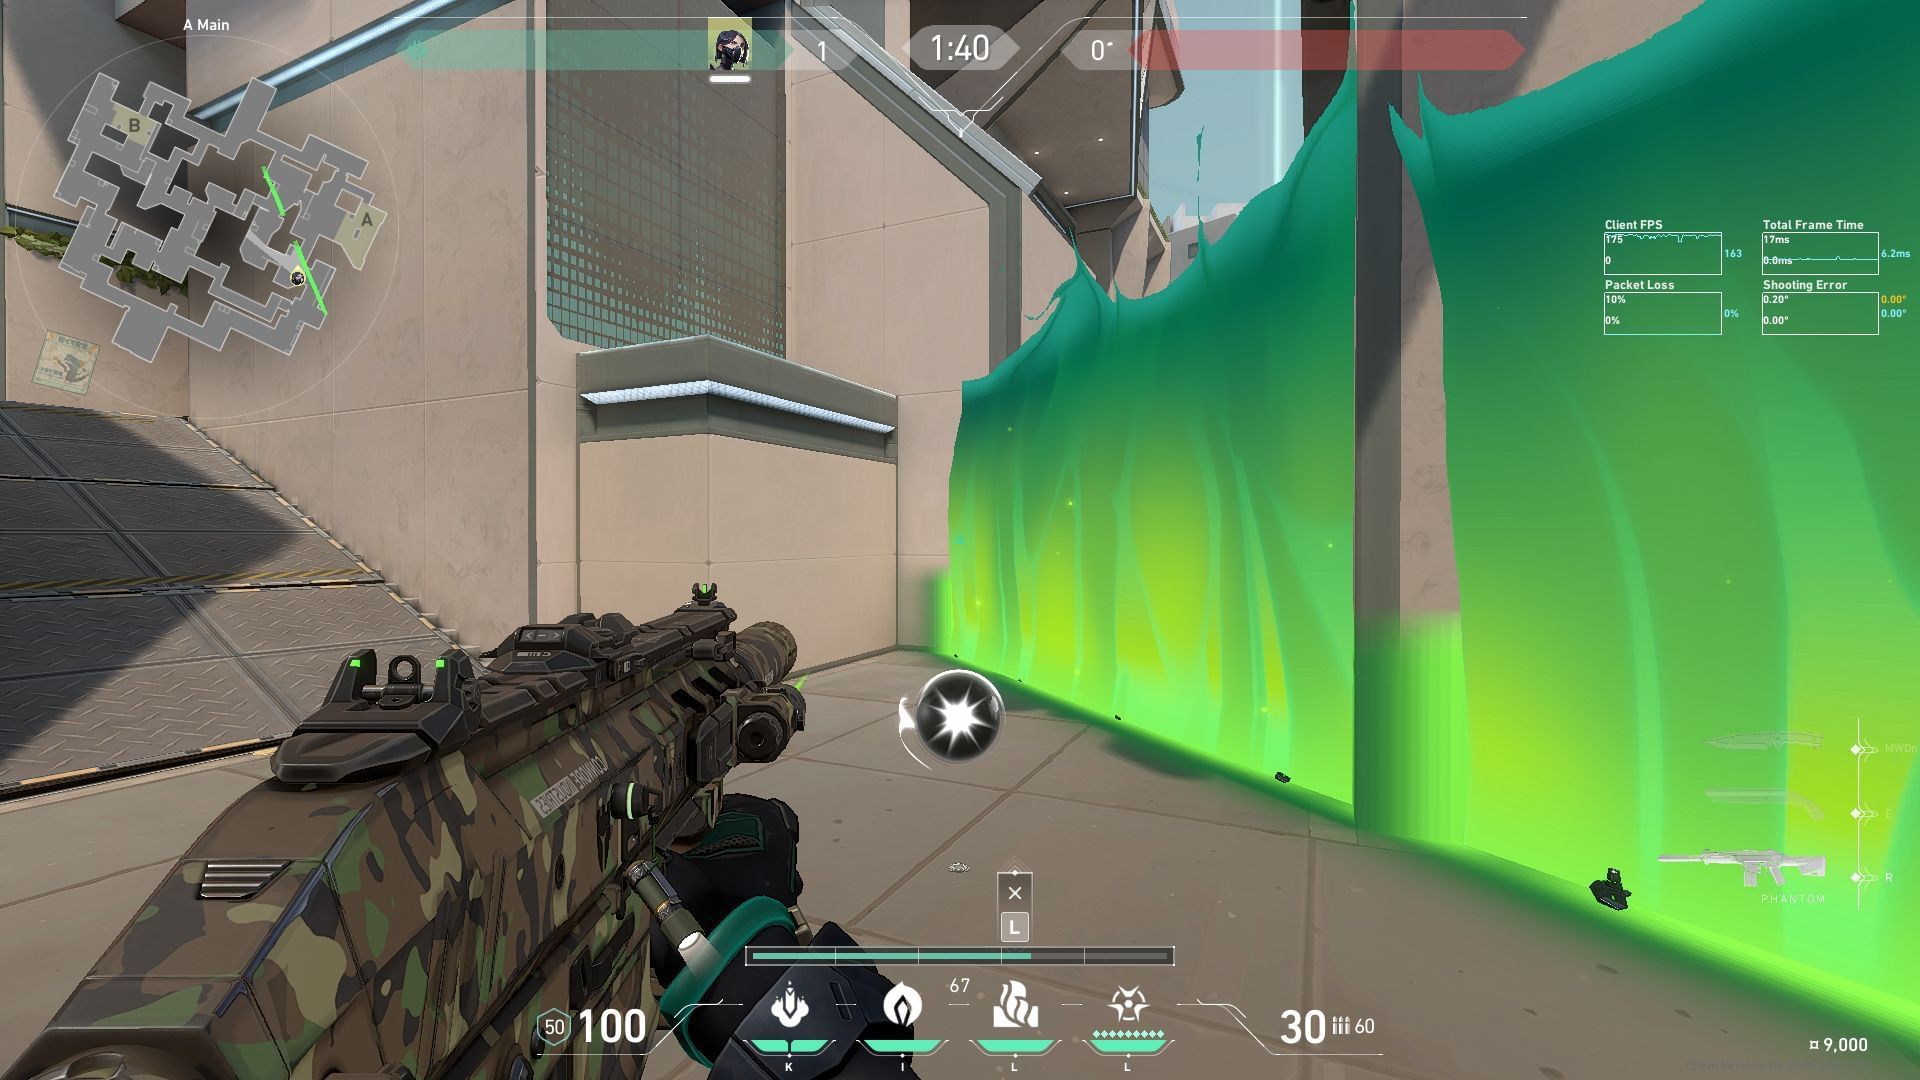
This wall allows Viper to traverse A Main, clear nearby angles while shielded from A Site defenders, and advance toward A Ramps. It enhances its effectiveness by obstructing defenders from obtaining critical information near A Heaven.
This permits the attacking team to apply pressure in the middle area of the Split map, particularly 'Vents', and introduce a fresh offensive approach on the A side of the map. Viper can securely hold A Ramp and assist her team from behind this specific Viper Wall.
To deploy this Viper Wall on Split follow the guide below:
Stand in the corner marked in the above image with the yellow border. Next, orient yourself towards the A site and aim your crosshair at the corner of the plank highlighted in the above image with red borders. Then, left-click to deploy the wall once it's perfectly aligned in the manner shown above in the minimap highlighted in green borders.
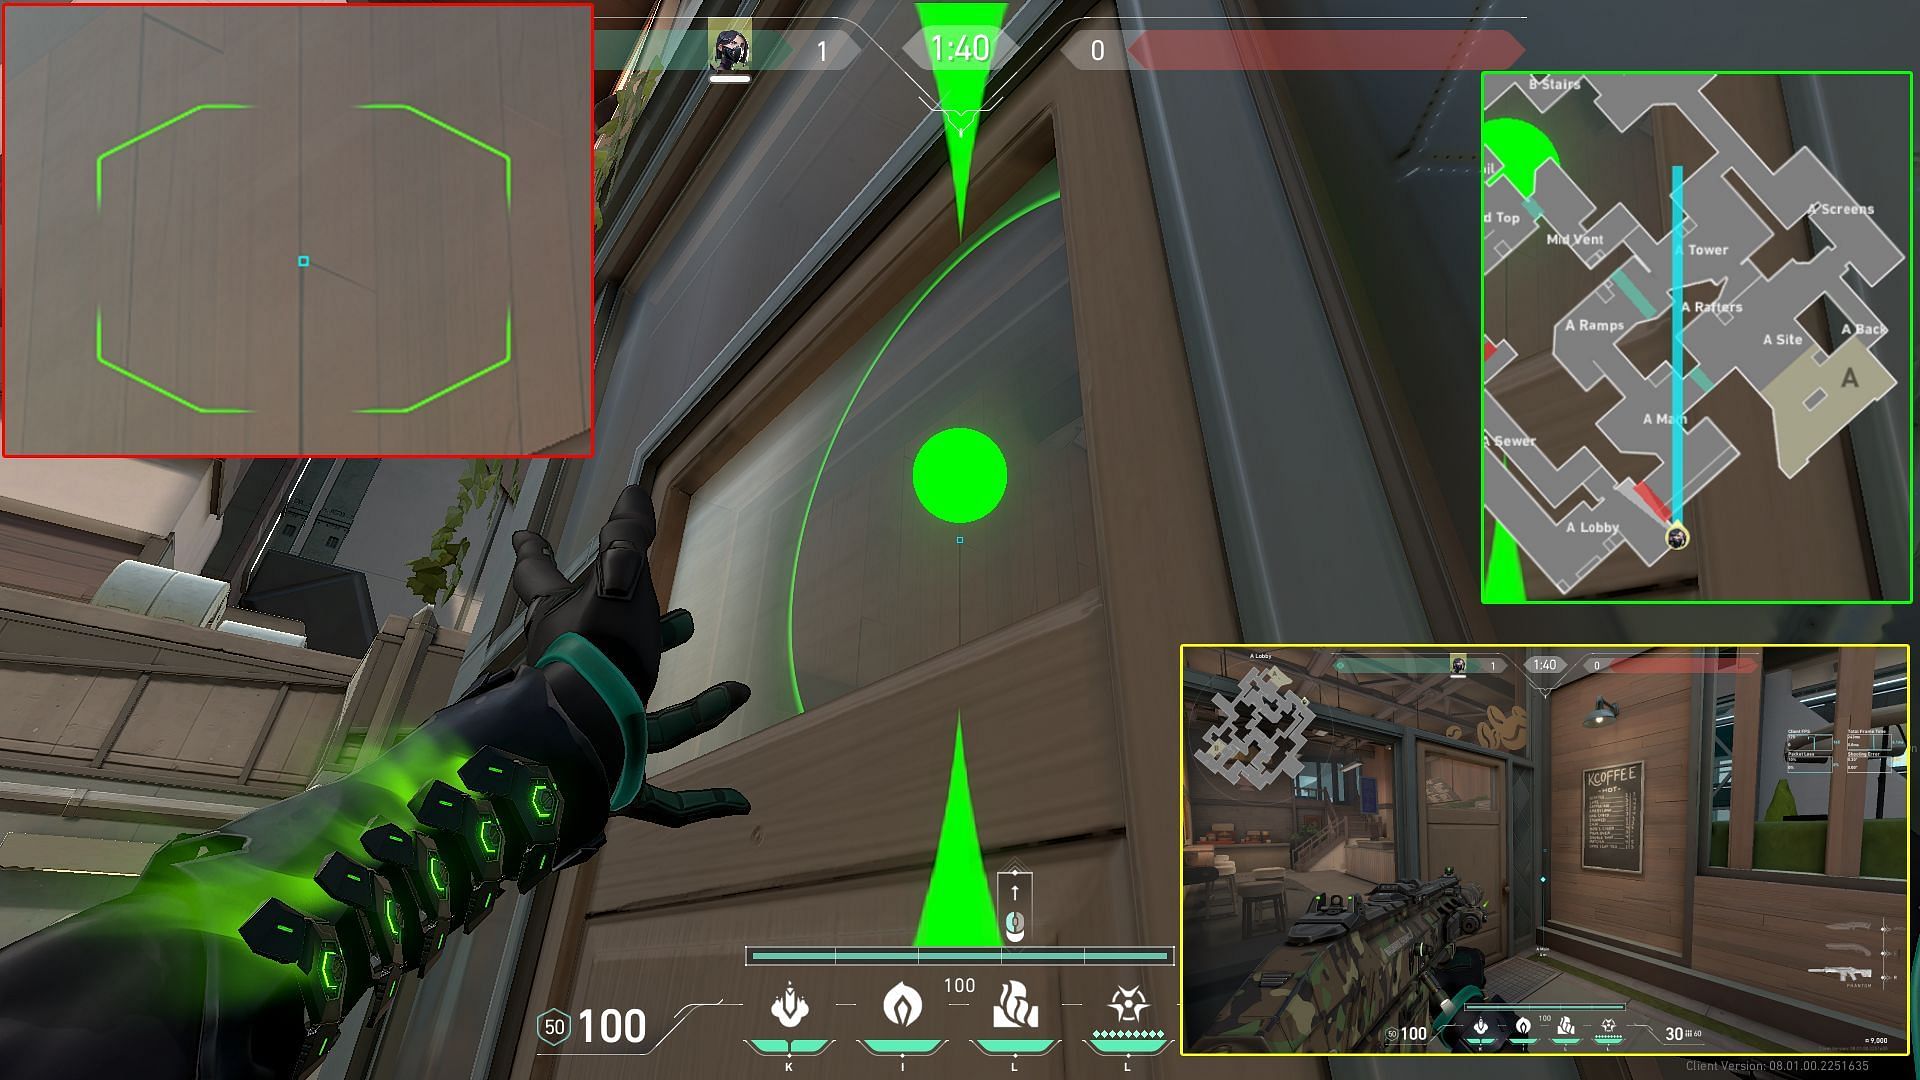
5) Toxic Screen for A Site attack
The A Site attack wall provides Viper with lurking potential as well as great support for her team while pushing into the A Site by covering them from A Ramps and A Heaven.
To deploy this Viper Wall on Split, follow the steps given below:
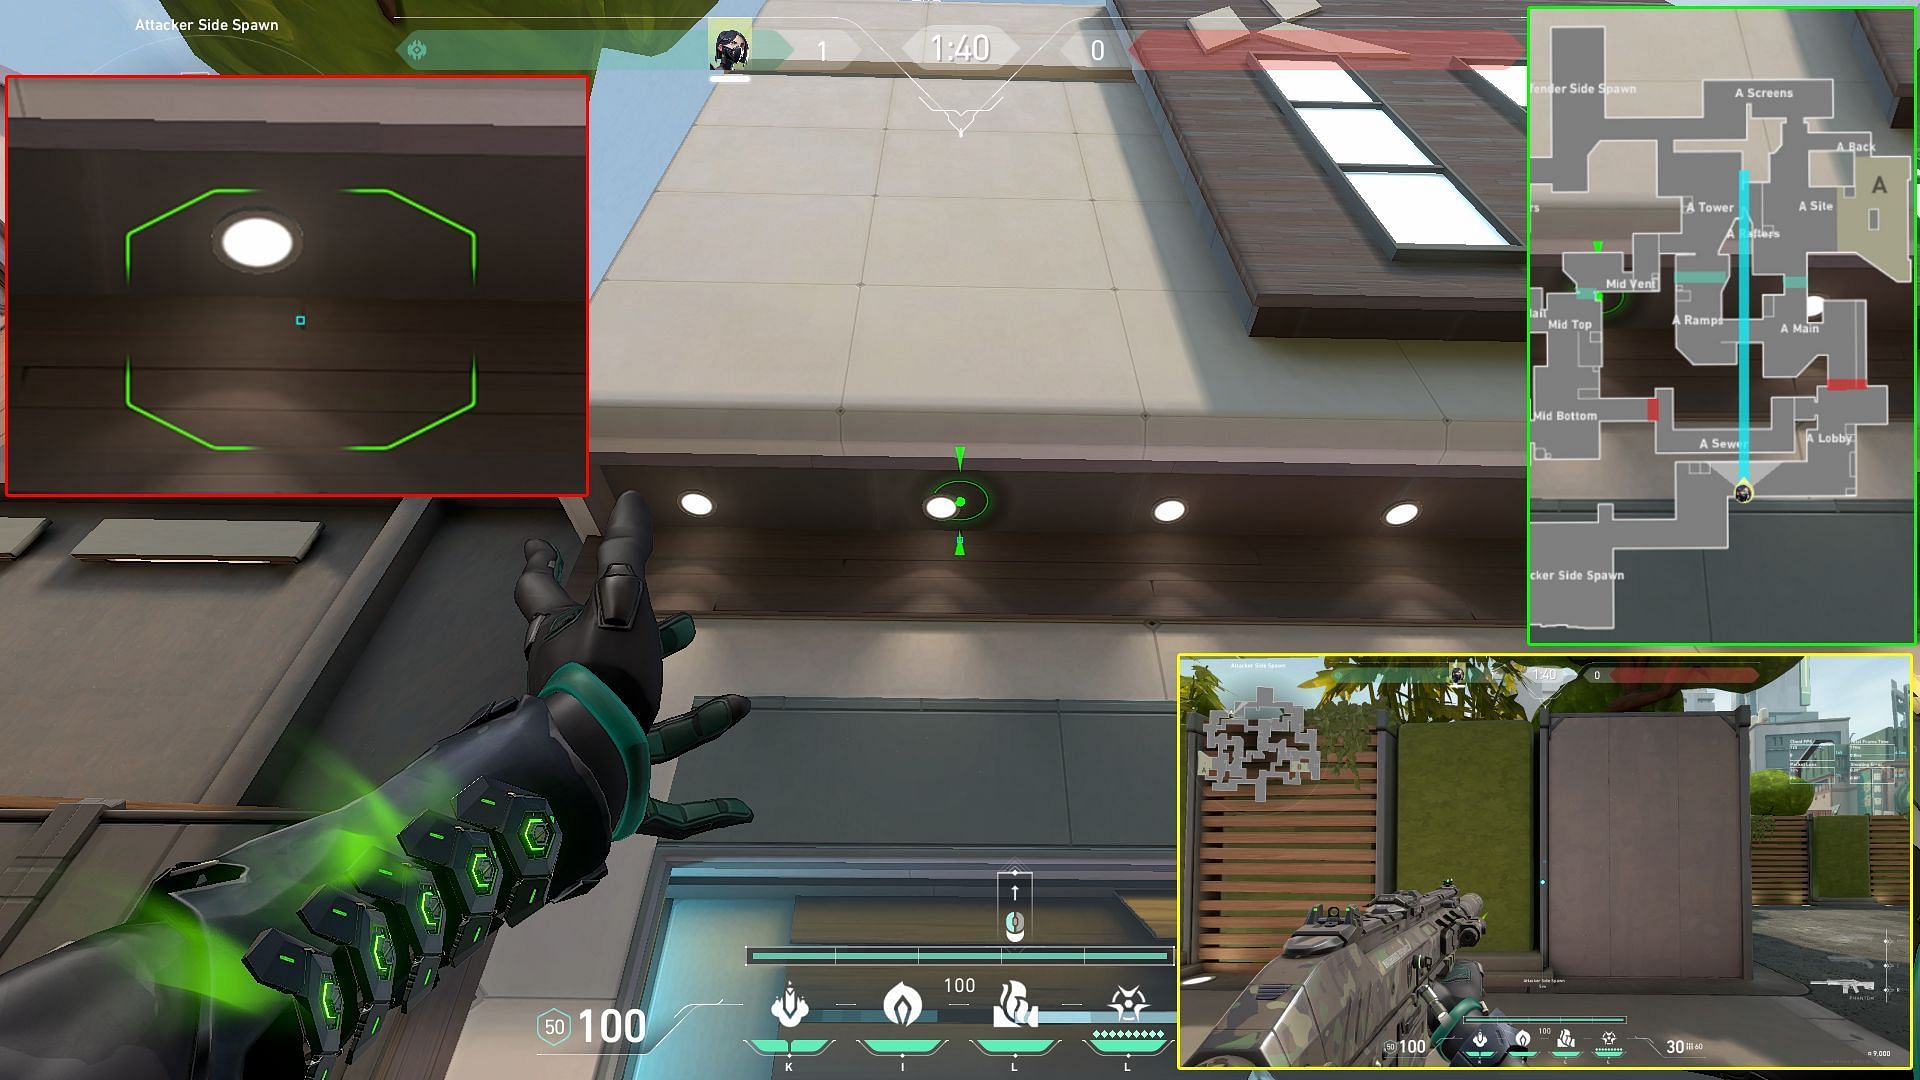
Stand against the right grey border beside the grass wall near the A Side attackers spawn, marked in the above image with yellow borders. Next, orient yourself towards the A Ramps and aim your crosshair at the dark line running beneath the second lamp from the left, highlighted in the above image with red borders.
Then, left-click to deploy the wall once it's perfectly aligned in the manner shown above in the minimap highlighted in green borders.
Check out our other Valorant guides:
Best Viper lineups on Bind map || Best Viper lineups on Valorant Sunset map || Viper Walls for Bind in Valorant || Complete Valorant Viper Sunset guide || Valorant Outlaw weapon guide || 5 best Cypher one-way cages on Sunset in Valorant || Best KAY/O Knife lineups on Sunset map in Valorant
