
'%20x='0'%20y='0'%20height='100%25'%20width='100%25'%20%0A%20%20%20%20%20%20%20%20%20%20xlink%3Ahref='data:image/jpg;base64,/9j/2wBDAAYEBQYFBAYGBQYHBwYIChAKCgkJChQODwwQFxQYGBcUFhYaHSUfGhsjHBYWICwgIyYnKSopGR8tMC0oMCUoKSj/2wBDAQcHBwoIChMKChMoGhYaKCgoKCgoKCgoKCgoKCgoKCgoKCgoKCgoKCgoKCgoKCgoKCgoKCgoKCgoKCgoKCgoKCj/wgARCAAGAAoDASIAAhEBAxEB/8QAFgABAQEAAAAAAAAAAAAAAAAAAAQH/8QAFAEBAAAAAAAAAAAAAAAAAAAAA//aAAwDAQACEAMQAAAAwqgR/wD/xAAgEAACAQQBBQAAAAAAAAAAAAABAgMABRESBBMVITEy/9oACAEBAAE/AHusXYlthi2dZzMrlfkH2M5qDmwdGPZJC2oyfFf/xAAVEQEBAAAAAAAAAAAAAAAAAAAAAv/aAAgBAgEBPwC3/8QAGREAAQUAAAAAAAAAAAAAAAAAAAECBBKB/9oACAEDAQE/AIrlth//2Q=='%3E%3C/image%3E%3C/svg%3E)
Hailing from China, Sage, Agent 7 in Valorant, was one of the first Sentinels in the game since closed beta. She is usually a very safe Agent to play, and the newer players might find her easy to learn. Unlike the other Agents in her class, she does not have a kit that can anchor down bomb sites or watch flank for your team on the attack. However, her unique playstyle brings a different perspective to the game and is often annoying to play against.
She is primarily a healer and support character. Her ultimate is one of the most useful ones in Valorant, as it can revive one of her fallen teammates. However, players find her Barrier Orb (C) ability very versatile and often the most attractive part of her kit.
Players have found several unique ways to use her walls, from reaching challenging places to taking off-angles. Let us take a look at five impressive Sage walls in Valorant.

Note: This article is subjective and reflects the writer's opinions.
5 unique Sage walls in Valorant
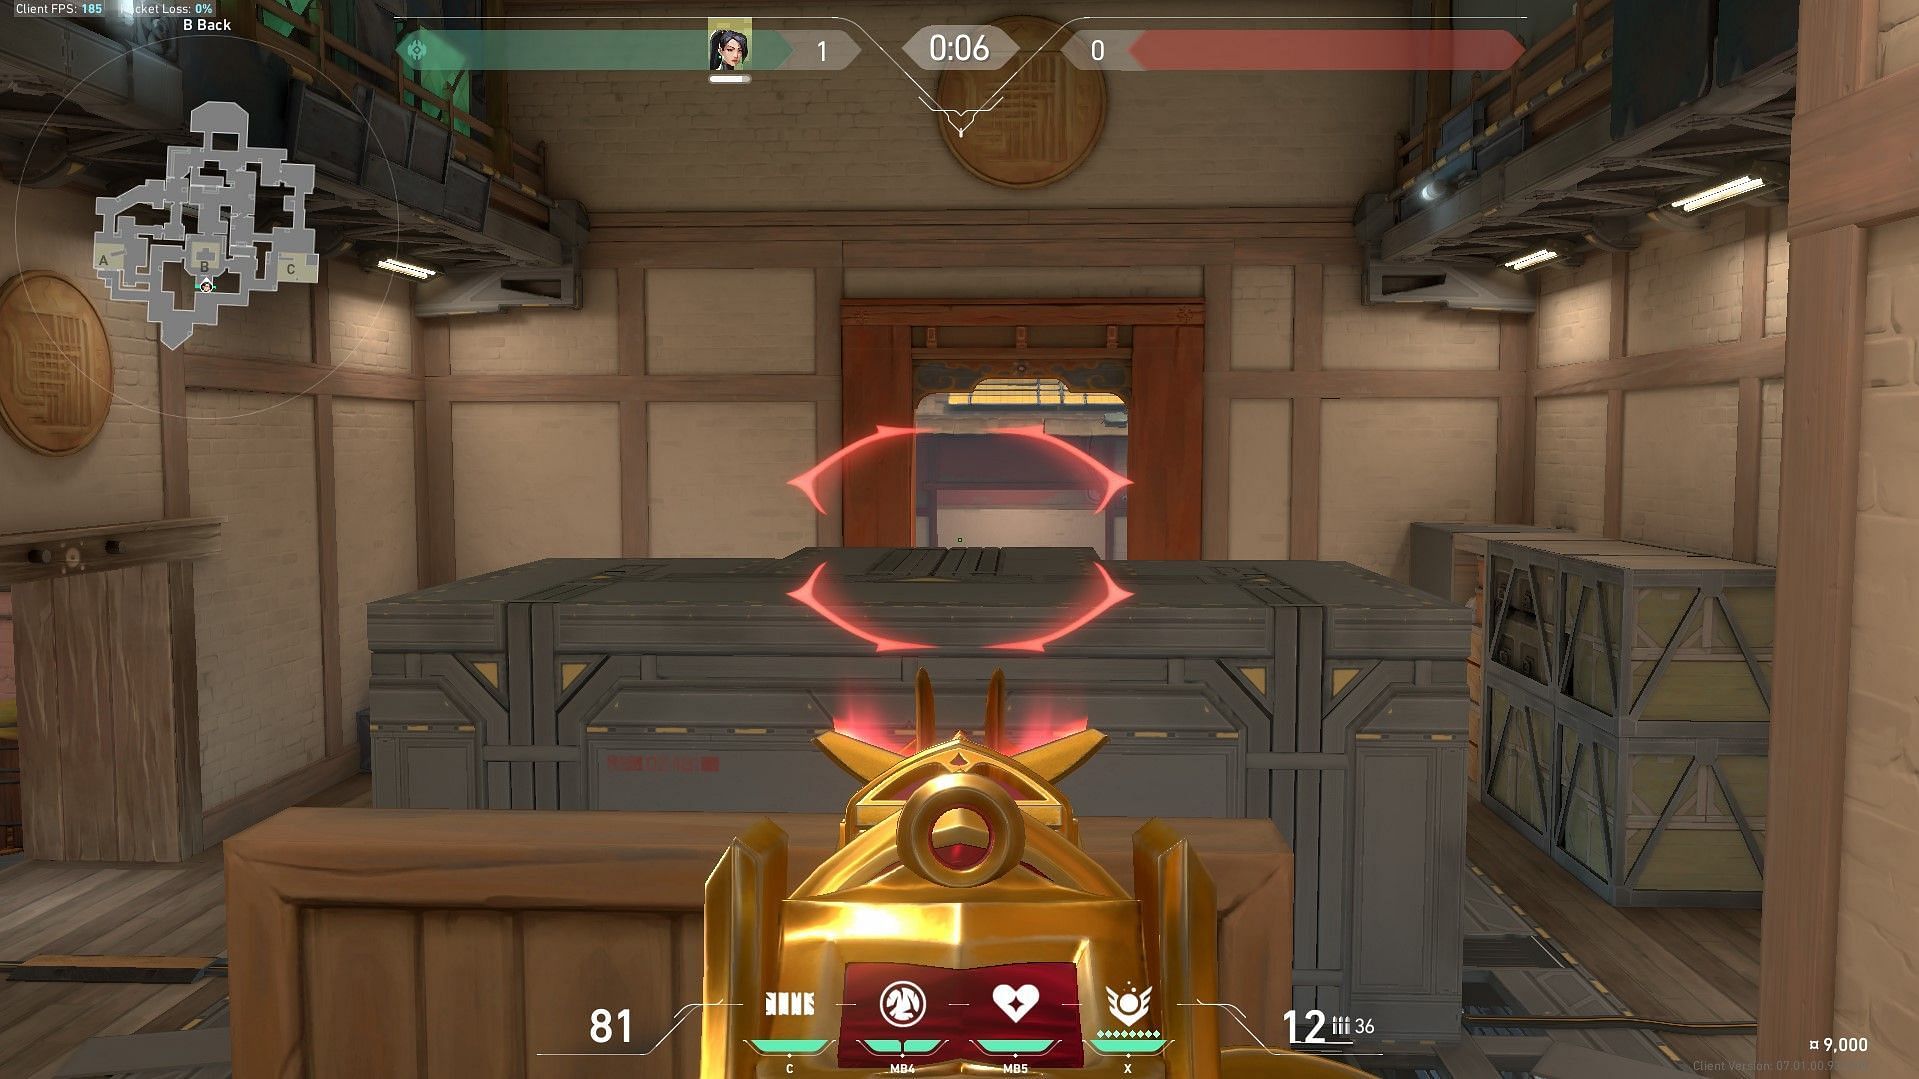
1) Ascent mid-market (Defense)

As shown in the picture, stand on top of the orange crates and aim at the wooden plank. Place your wall, and you will get a very useful off-angle towards the high mid. It would be best to ask your teammates to watch lower mid and B sites for this to be most effective. Remember, teamwork is the most essential in Valorant.
2) Ascent B main (Attack)
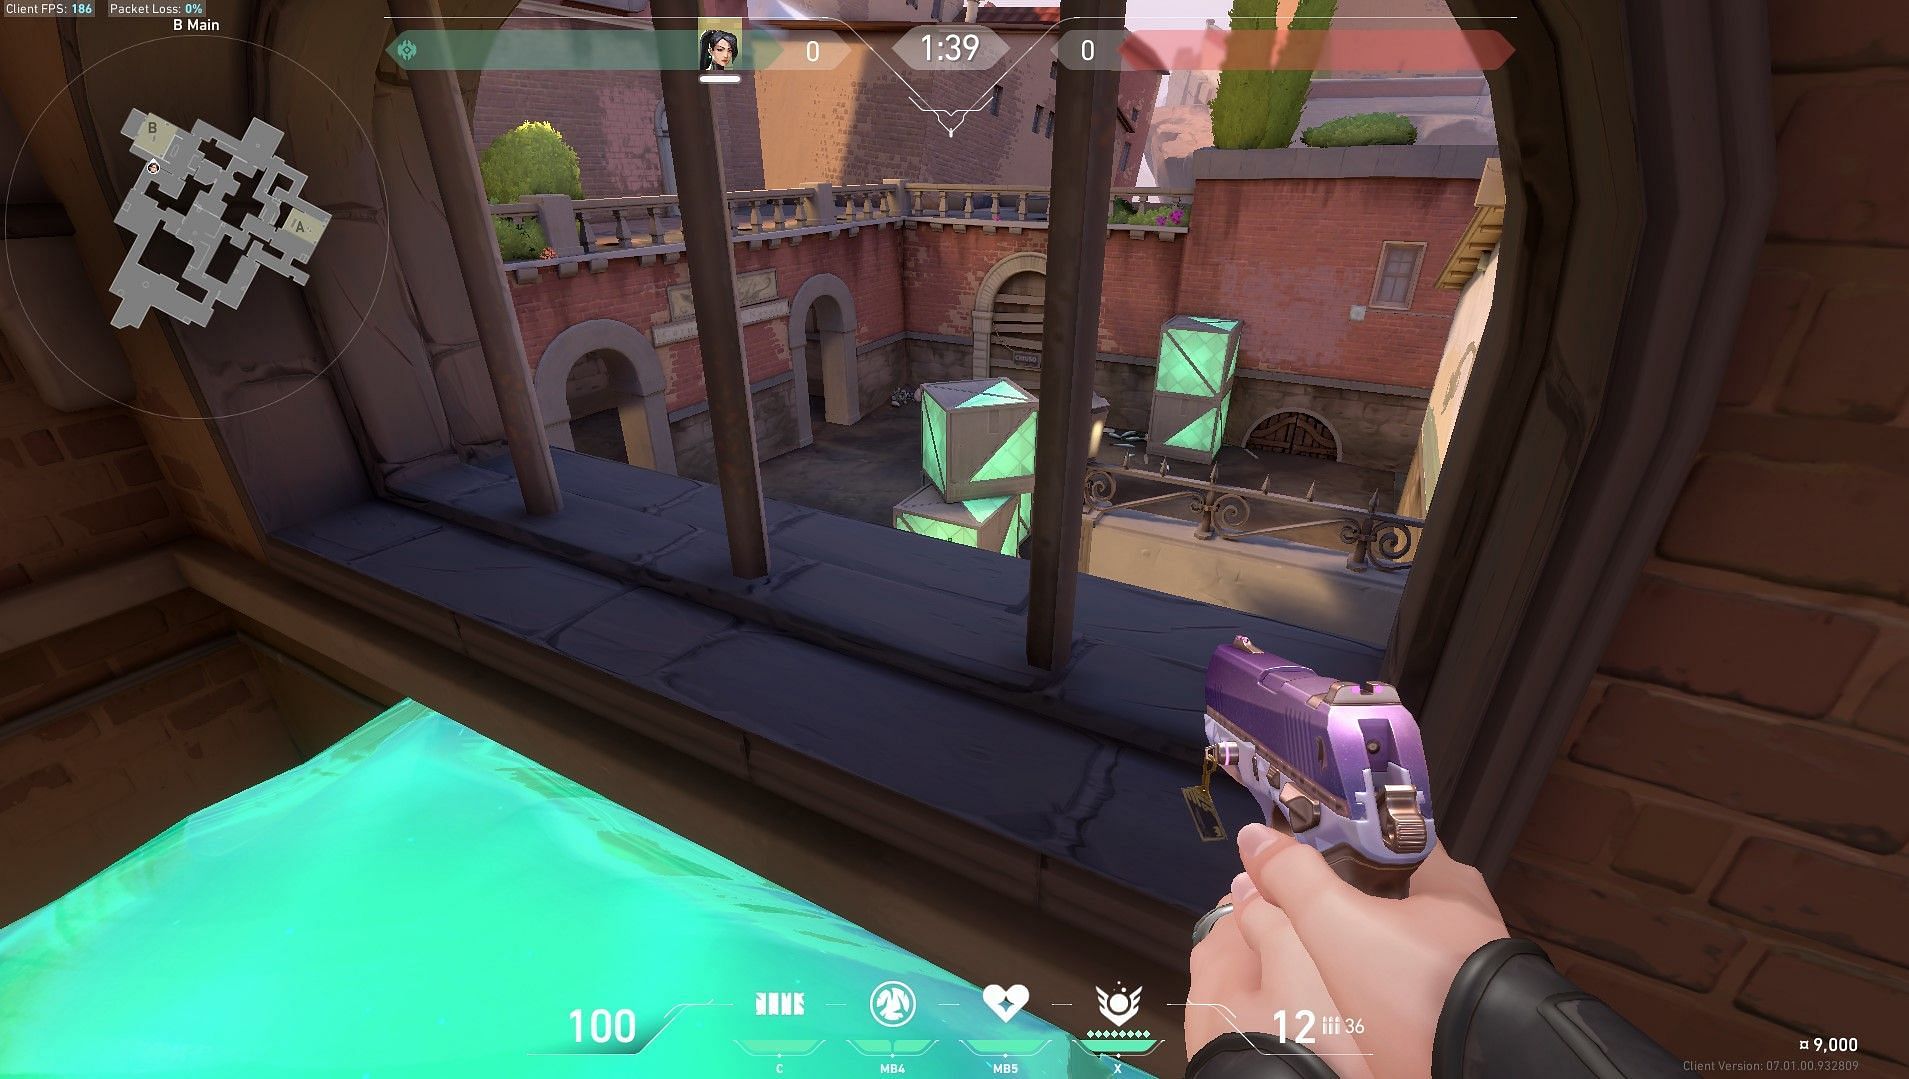
This is a relatively easy-to-place Sage wall and reasonably common in Valorant, so you should be careful of timing with this wall. Stand atop the wooden boxes in B main, where the ultimate orb spawns. Look down and place your wall under you. You should be able to catch enemies on-site or try to come out through the market or defender spawn.
3) Bind B site (Defense)
This wall serves two purposes simultaneously. It blocks off hookah and gives you an elevated angle towards B long. Stand on the ledge at the entrance of the hookah, as shown. Keep your view model towards the hookah and place the wall under you on the ledge such that a part of the wall sticks outside the hookah. This is a mighty wall and has proven very effective in Valorant.
4) Split B heaven (Defense)
This is one of the more challenging to place walls in this list. It is, however, mighty and difficult to counter. Stand on B heaven and aim your wall as shown. Run backward, jump, and place your wall such that a part of it is in the air outside heaven, and you are standing on top of it. You can keep watching heaven through a tiny gap on top of the wall or easily pick off enemies trying to enter through B main.
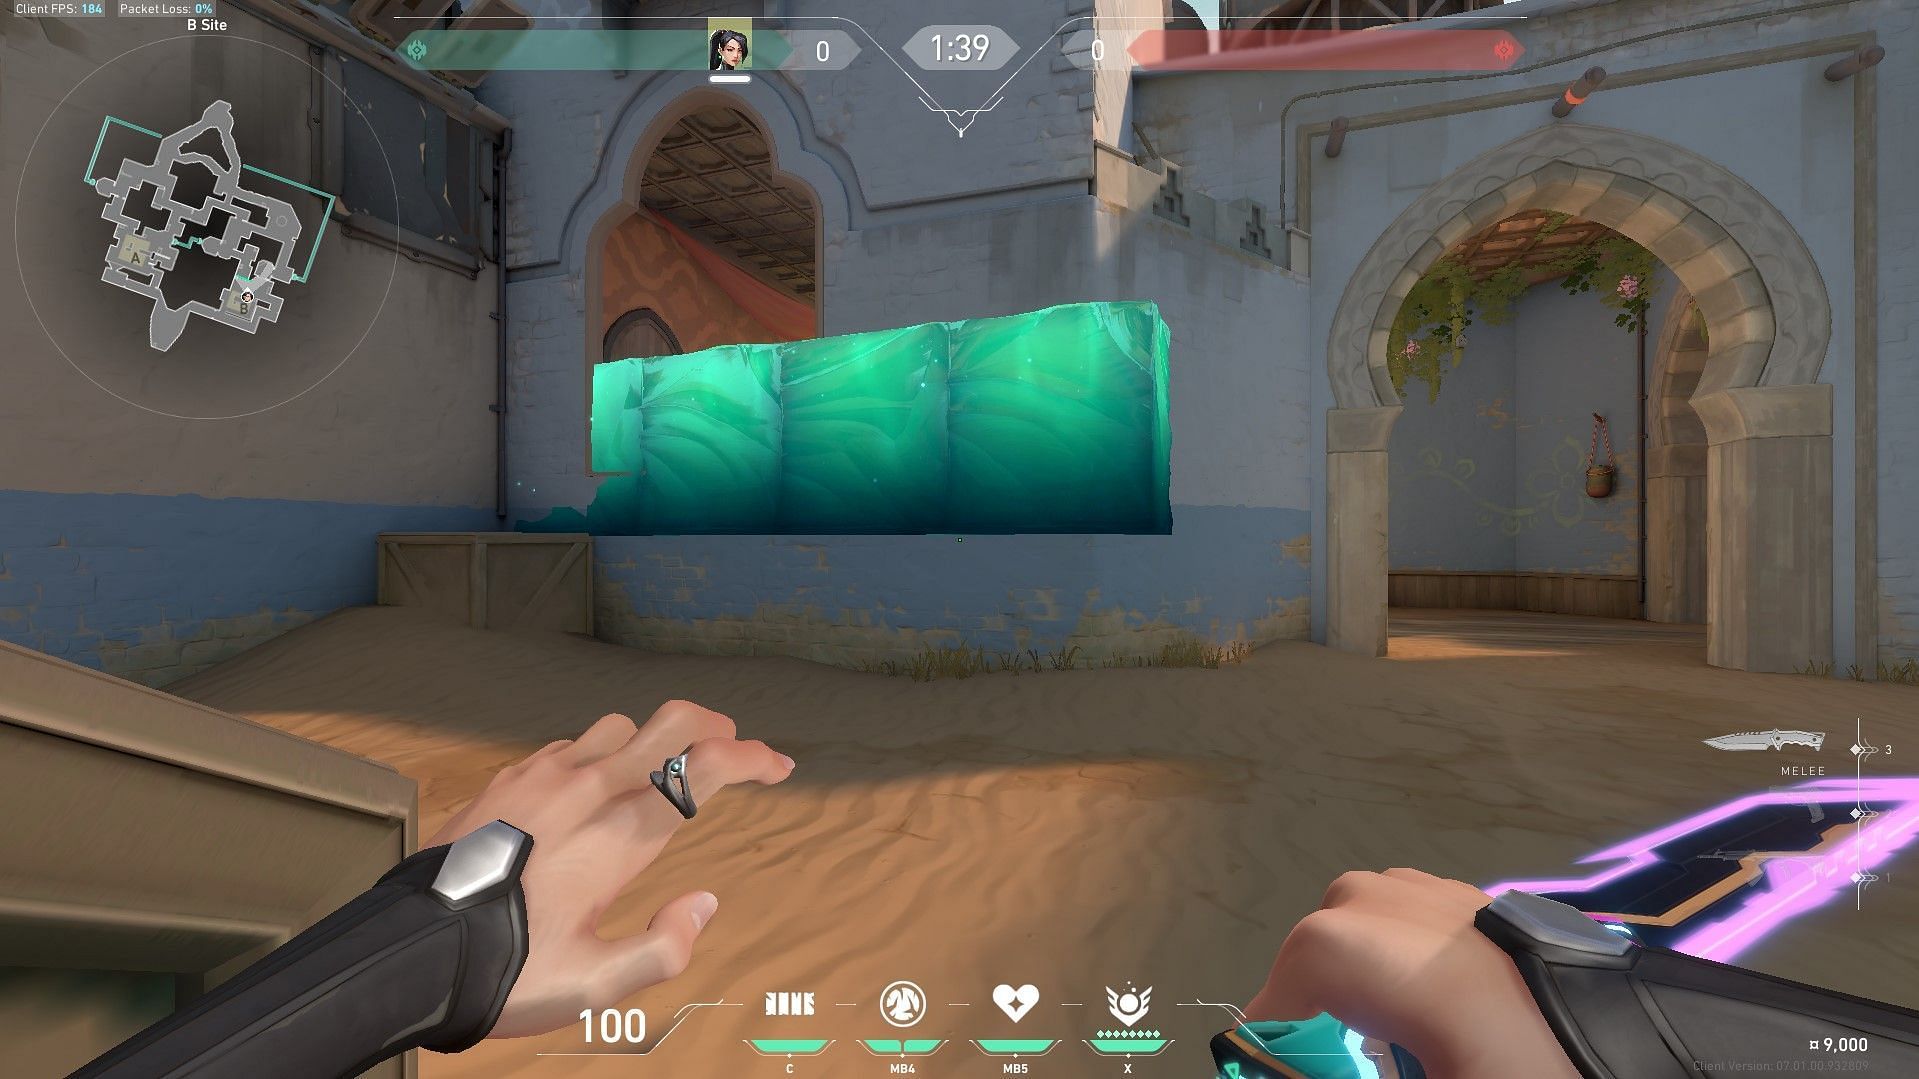
5) Haven B site (Defense)
This is one of the easiest walls to learn, but it is not bad. Position yourself at the back of B site on the ledge behind the gong. Place your wall under you, and you can catch enemies trying to peek mid-window.
How to effectively use aggressive Sage walls in Valorant?
Sage walls can be used in several ways. You can always help your team by blocking off important choke points and denying enemy entry. Once in a while, throw in these types of aggressive walls to surprise your enemies and get the best results. It is advised not to overdo these walls, as the enemy team will eventually catch on to your tricks and counter you. You should also communicate with your teammates when and where you are placing your walls so that they can play around it to their advantage.
