
'%20x='0'%20y='0'%20height='100%25'%20width='100%25'%20%0A%20%20%20%20%20%20%20%20%20%20xlink%3Ahref='data:image/jpg;base64,/9j/2wBDAAYEBQYFBAYGBQYHBwYIChAKCgkJChQODwwQFxQYGBcUFhYaHSUfGhsjHBYWICwgIyYnKSopGR8tMC0oMCUoKSj/2wBDAQcHBwoIChMKChMoGhYaKCgoKCgoKCgoKCgoKCgoKCgoKCgoKCgoKCgoKCgoKCgoKCgoKCgoKCgoKCgoKCgoKCj/wgARCAAGAAoDASIAAhEBAxEB/8QAFgABAQEAAAAAAAAAAAAAAAAAAAUG/8QAFQEBAQAAAAAAAAAAAAAAAAAAAQT/2gAMAwEAAhADEAAAAMJUKX//xAAcEAABBAMBAAAAAAAAAAAAAAABAwQSIQACBRX/2gAIAQEAAT8AcdDqKKNC2eFETOsbMgBKznqdMUFE6z//xAAVEQEBAAAAAAAAAAAAAAAAAAABAP/aAAgBAgEBPwBb/8QAFREBAQAAAAAAAAAAAAAAAAAAAQD/2gAIAQMBAT8AAv/Z'%3E%3C/image%3E%3C/svg%3E)
Valorant introduced a brand new map called Sunset with the Episode 7 Act 2 update. It has several openings and a lot of room for lineups, making Agents like Sova perfect for post-plant scenarios. The recon character packs two shock darts in his ability kit and can be used to disorient and eliminate unsuspecting players with its high damage output.
Sova is one of the classic characters that the community can play around with and find new lineups to secure rounds. Aside from providing crucial positional information, the Agent can also delay the enemy team’s strategies by chipping away some health with the shock darts.
The new Valorant map features a classic double bomb site layout and has various low-rise walls for Sova players to utilize for lineups. Despite the recent nerf to the recon dart ability in the latest patch, Sova remains a viable pick for Valorant’s Sunset.

Best Sova shock dart lineups for Valorant’s Sunset
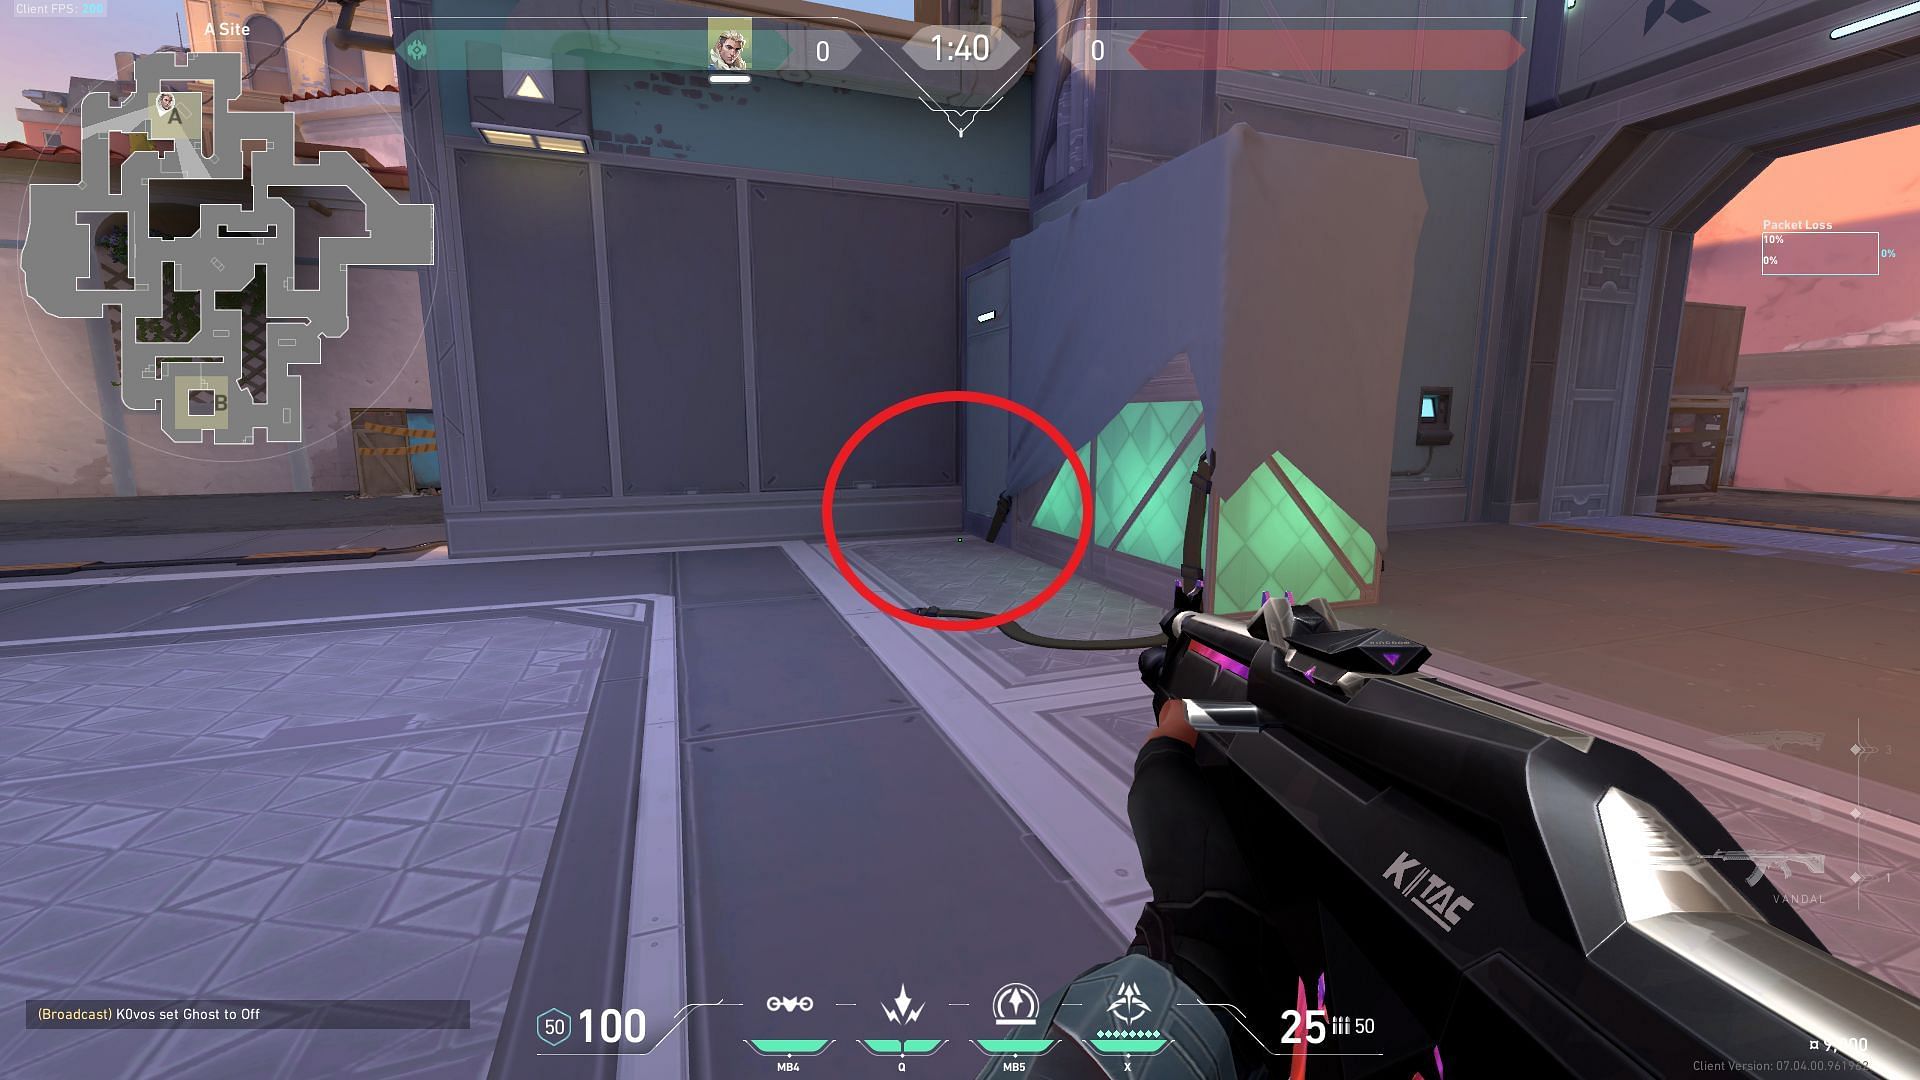
1) A-Lobby to A-Site
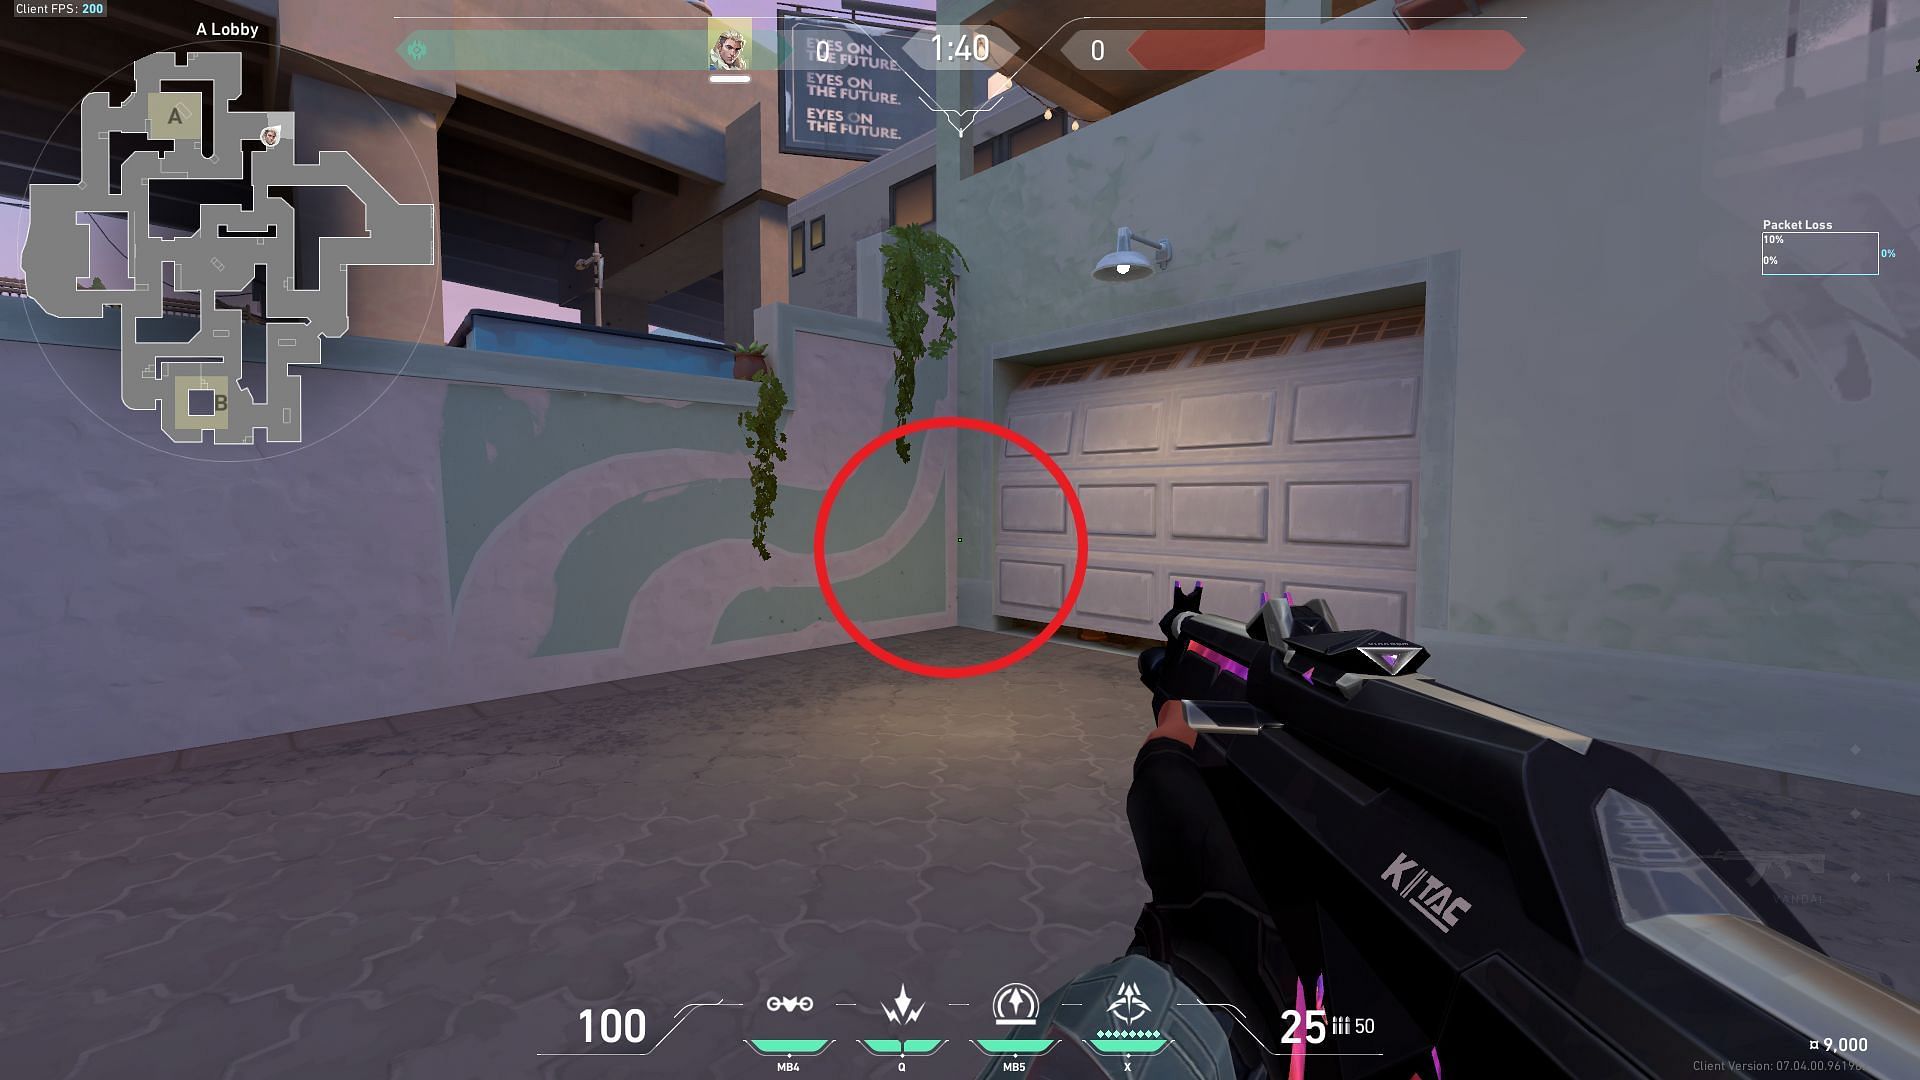
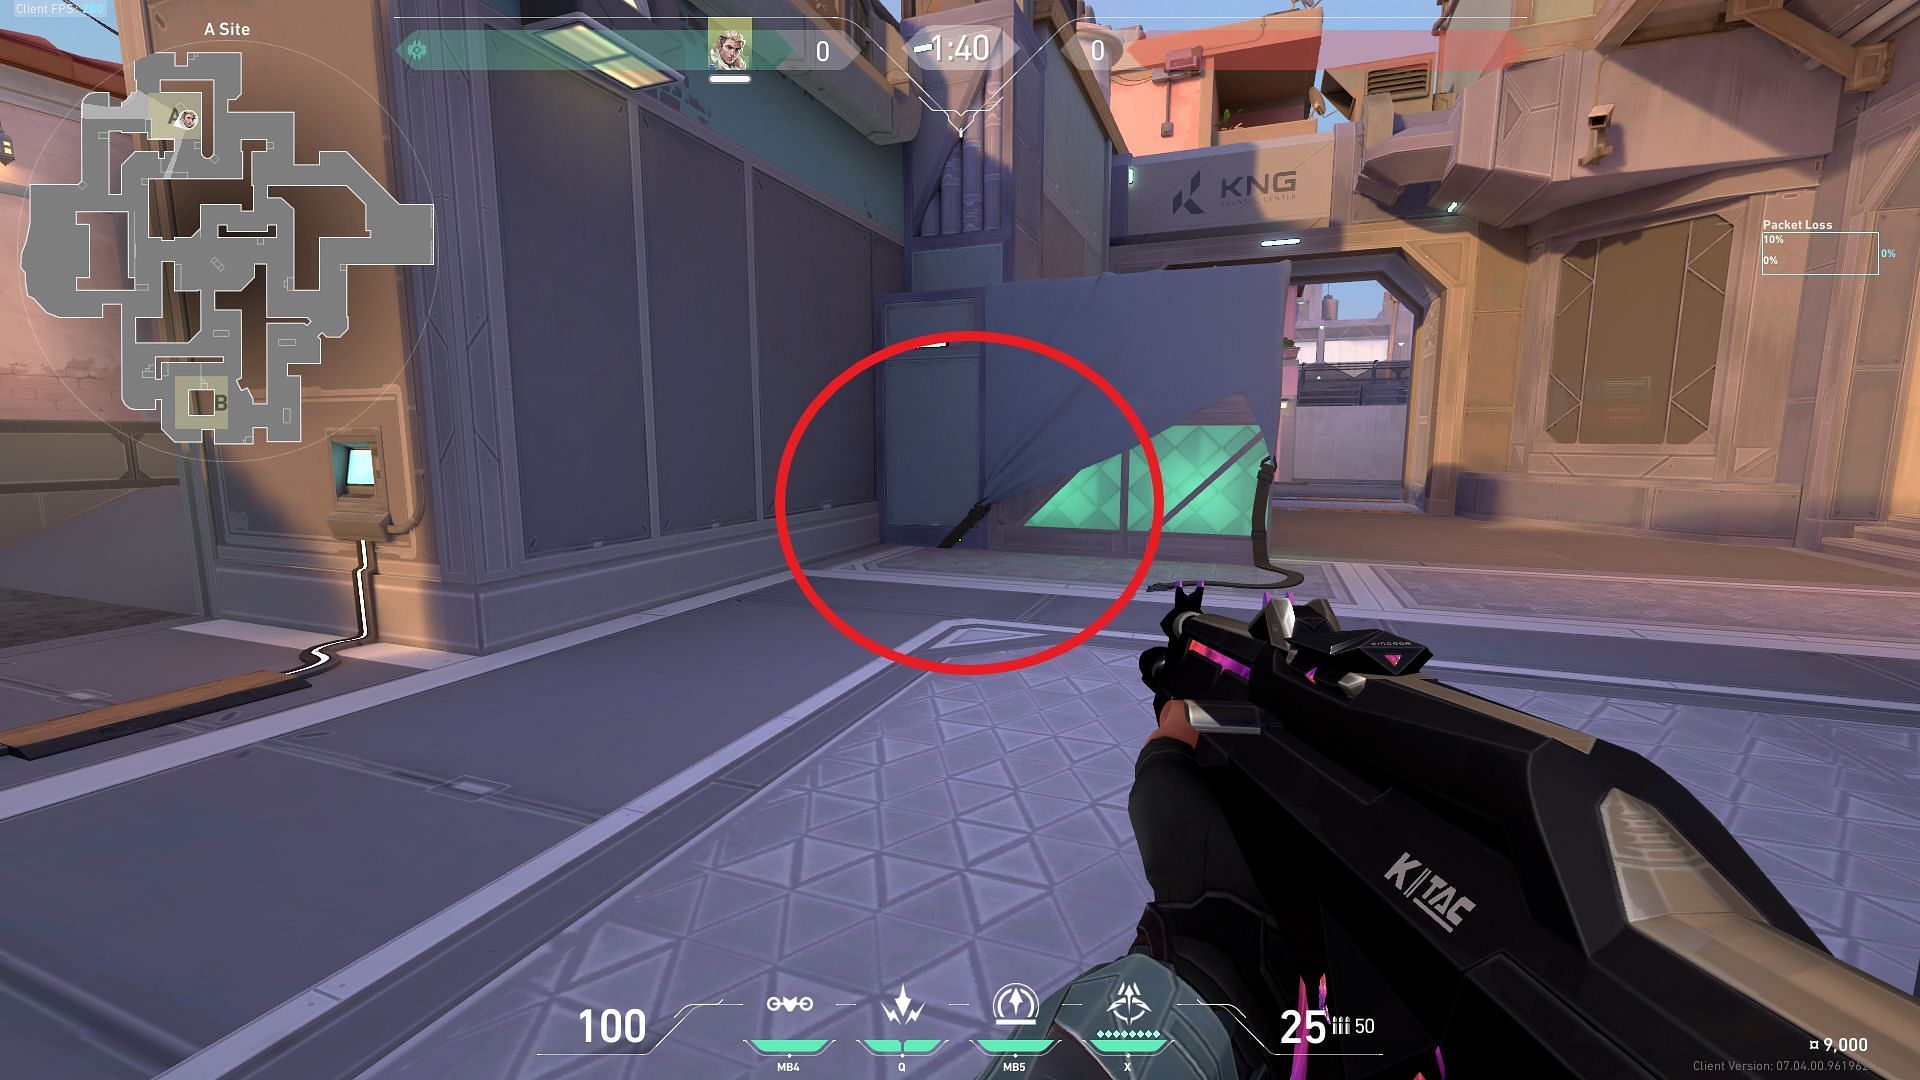
Position yourself in the corner of the A-Lobby area as shown in the image and aim towards the A-Site. It is generally better to have a teammate around to look for flanks and defend you during the lineups.
Place your right Heads-Up Display (HUD) edge on the leaf hanging off of the wall (shown with a circle) and deploy the first shock dart with two charges.
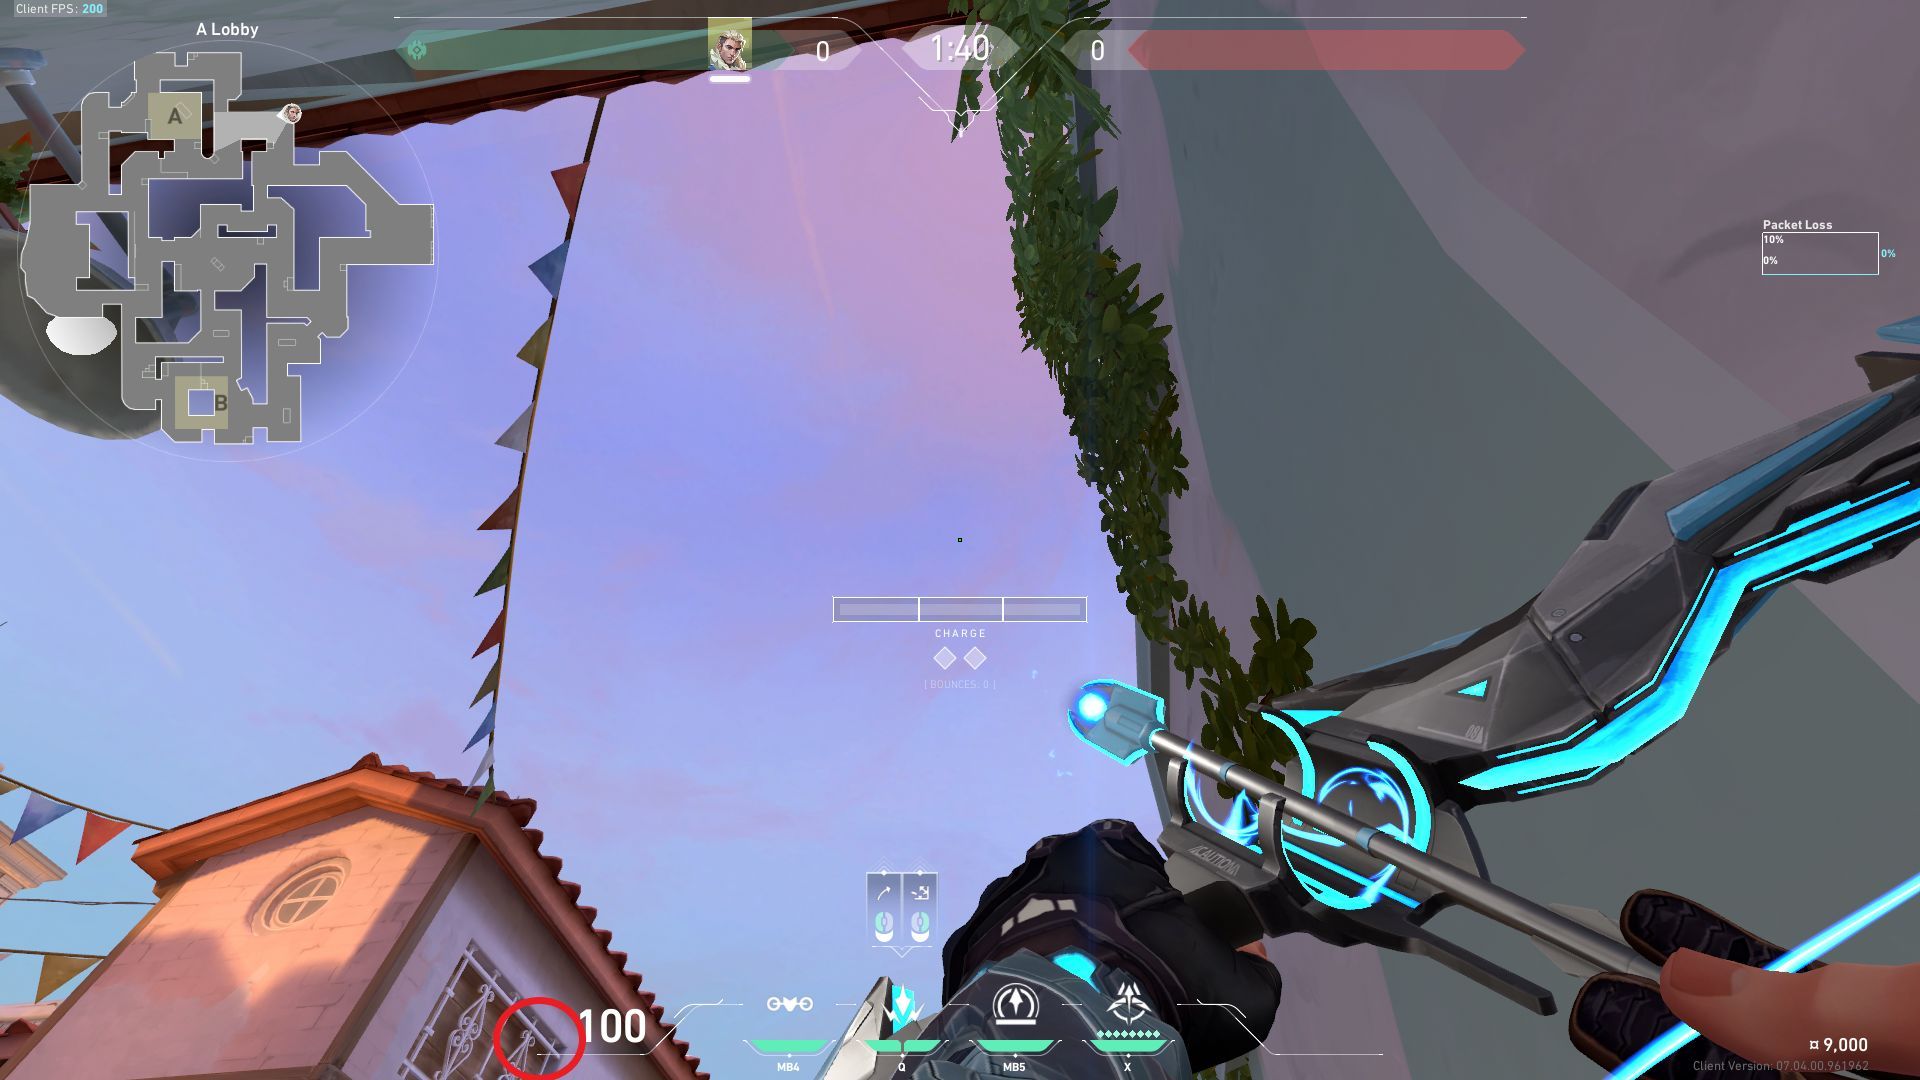
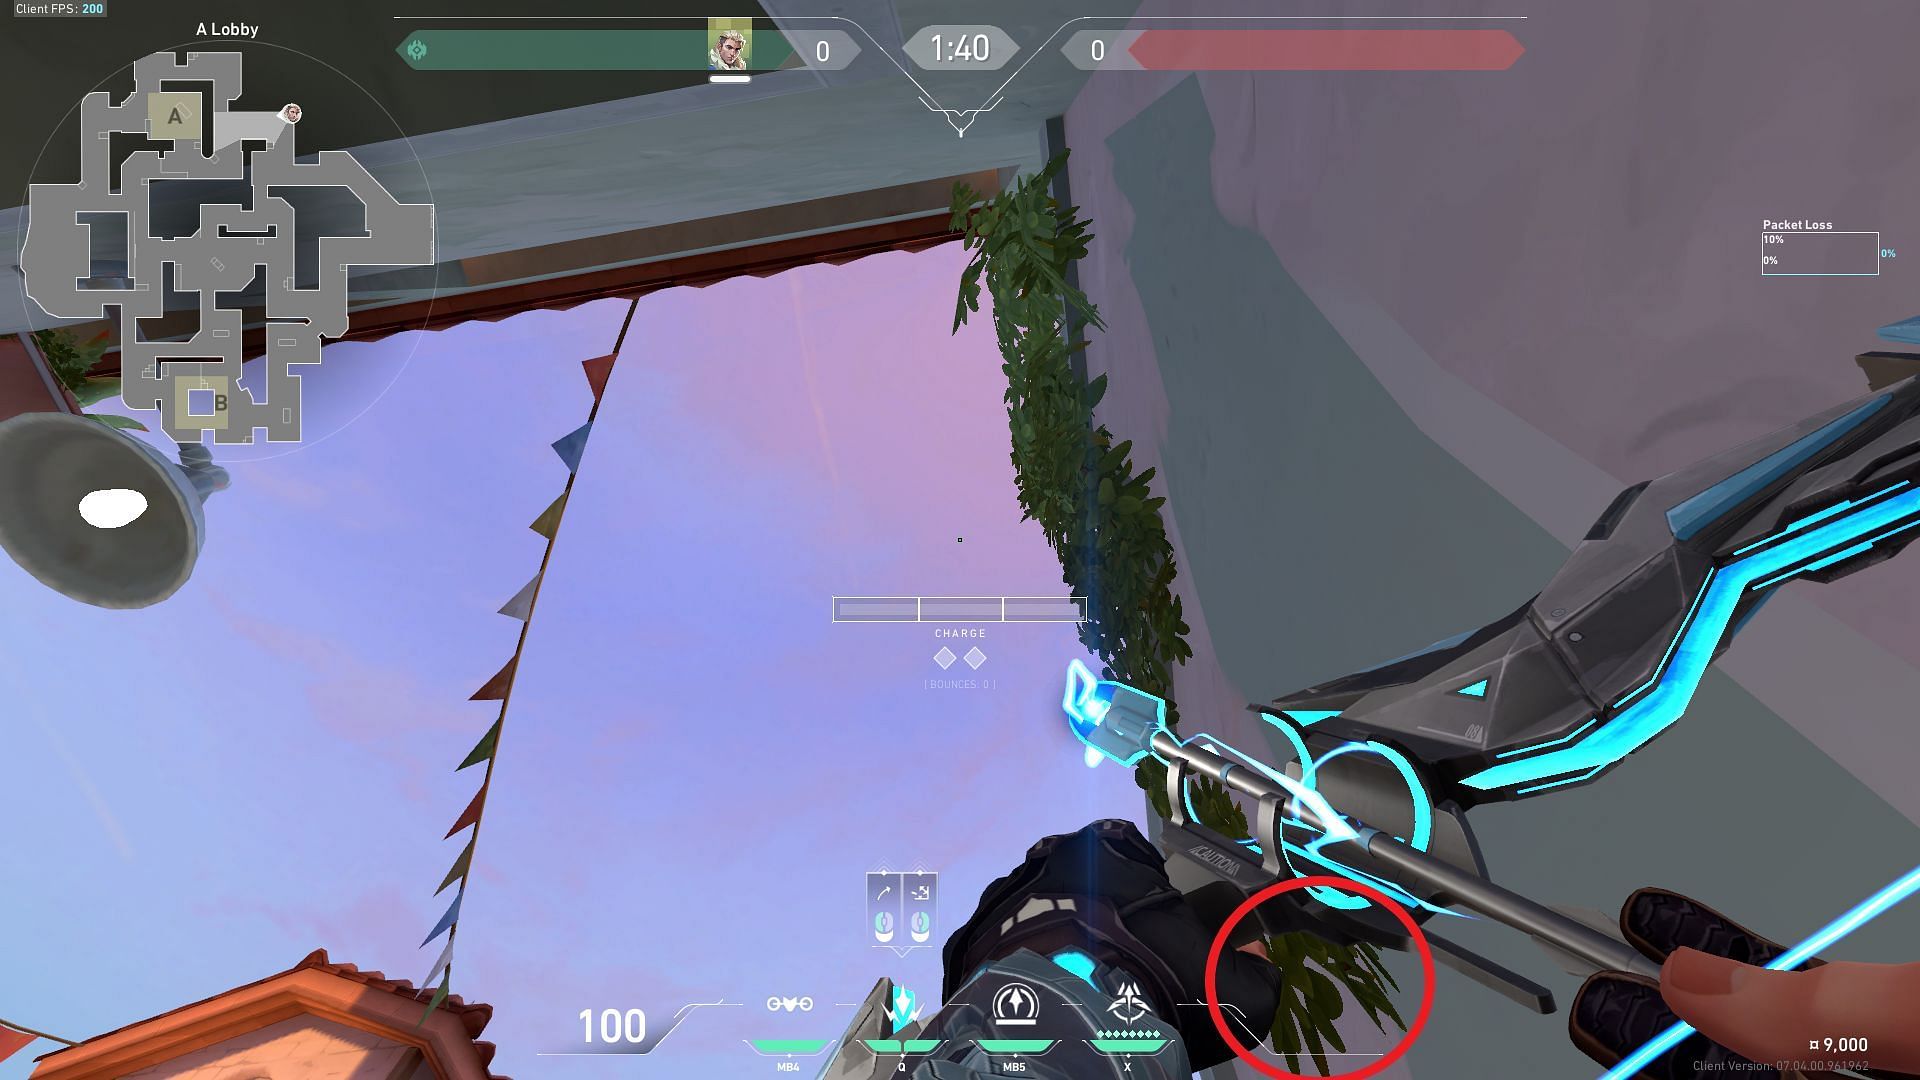
Place your left HUD edge on the left window near the tip of the grill (shown with a circle) and launch the second shock dart with a single charge.
If you time both darts correctly, they will land inside A-Site near the Radianite boxes and take down anyone in the area.
2) A-Elbow to A-Site
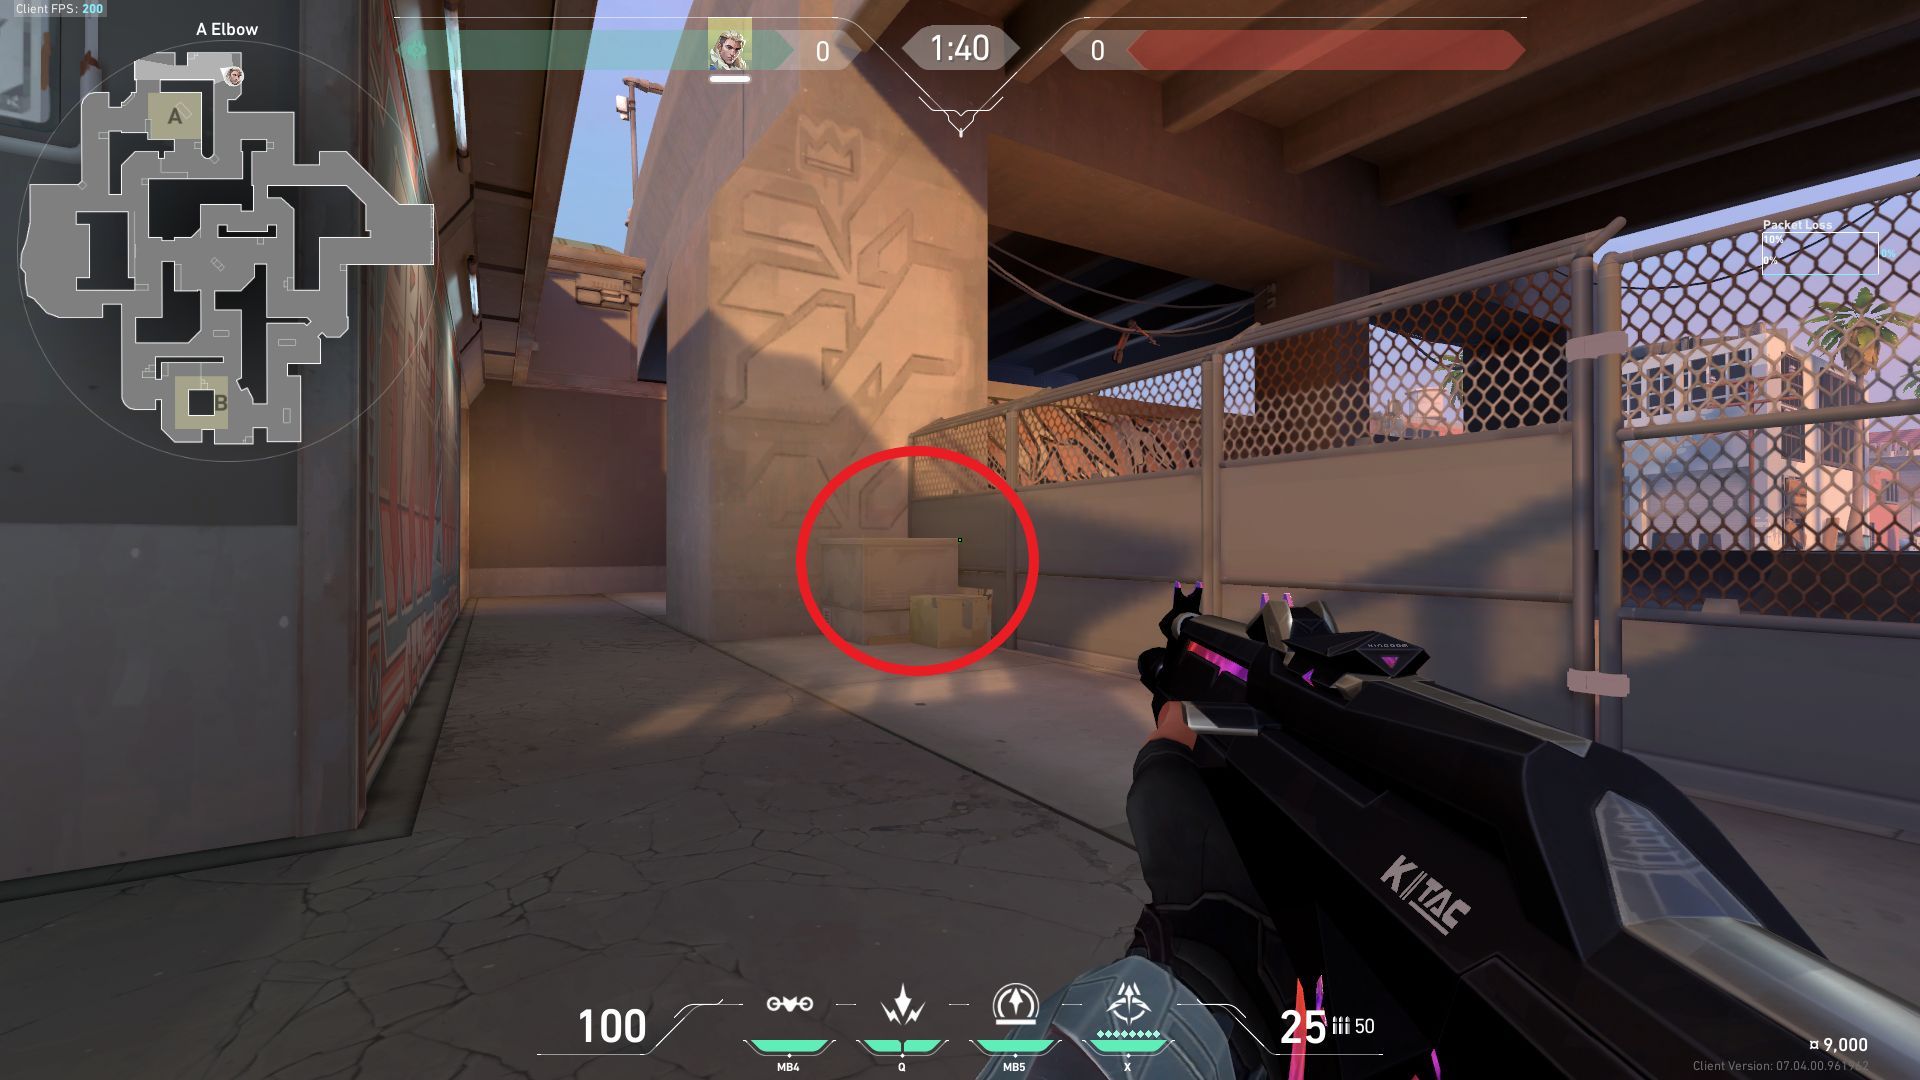
This lineup requires your team to have complete control of the A-Elbow area. Position yourself on the edge of the box present inside the A-Elbow as shown in the image, and aim towards the roof of the A-Site wall.
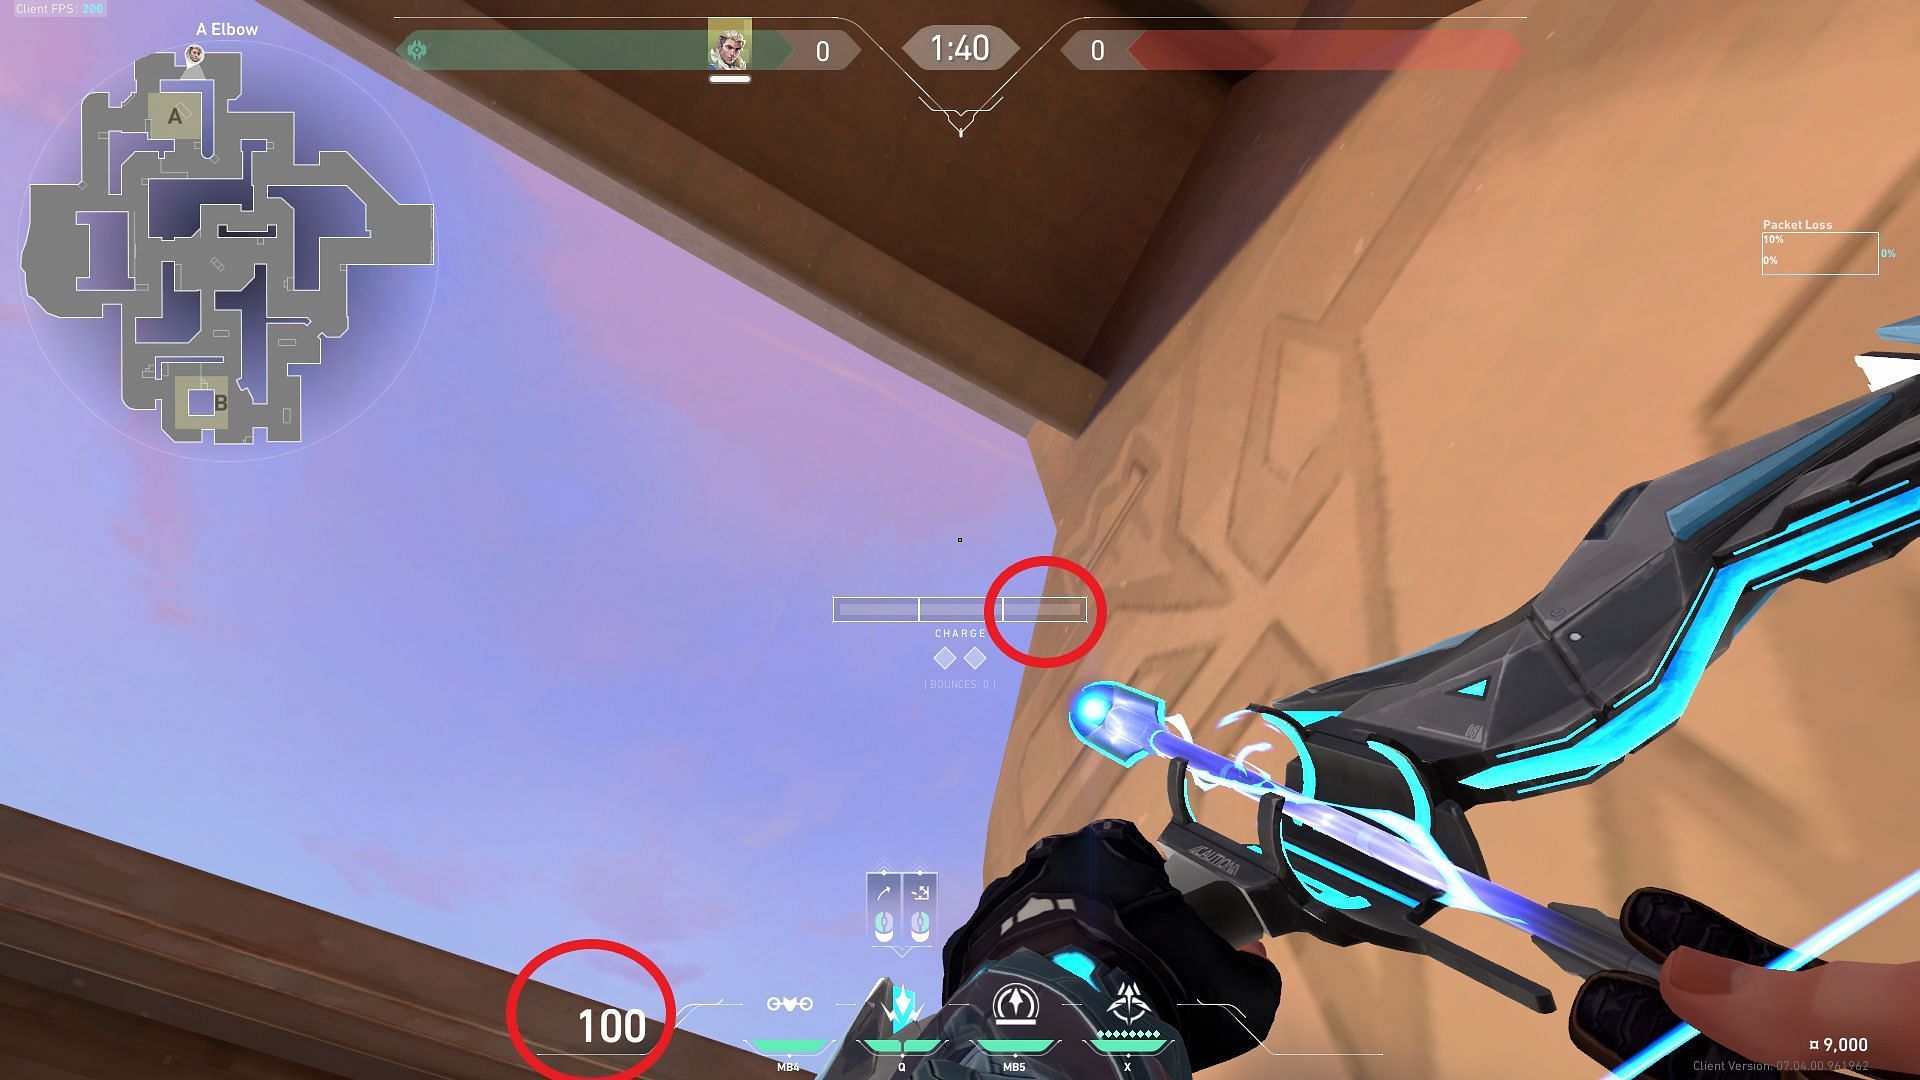
Place your left HUD on the ledge of the wall such that the charge bar intersects with the right wall in A-Elbow (shown with circles). Fire your first dart with a single charge.
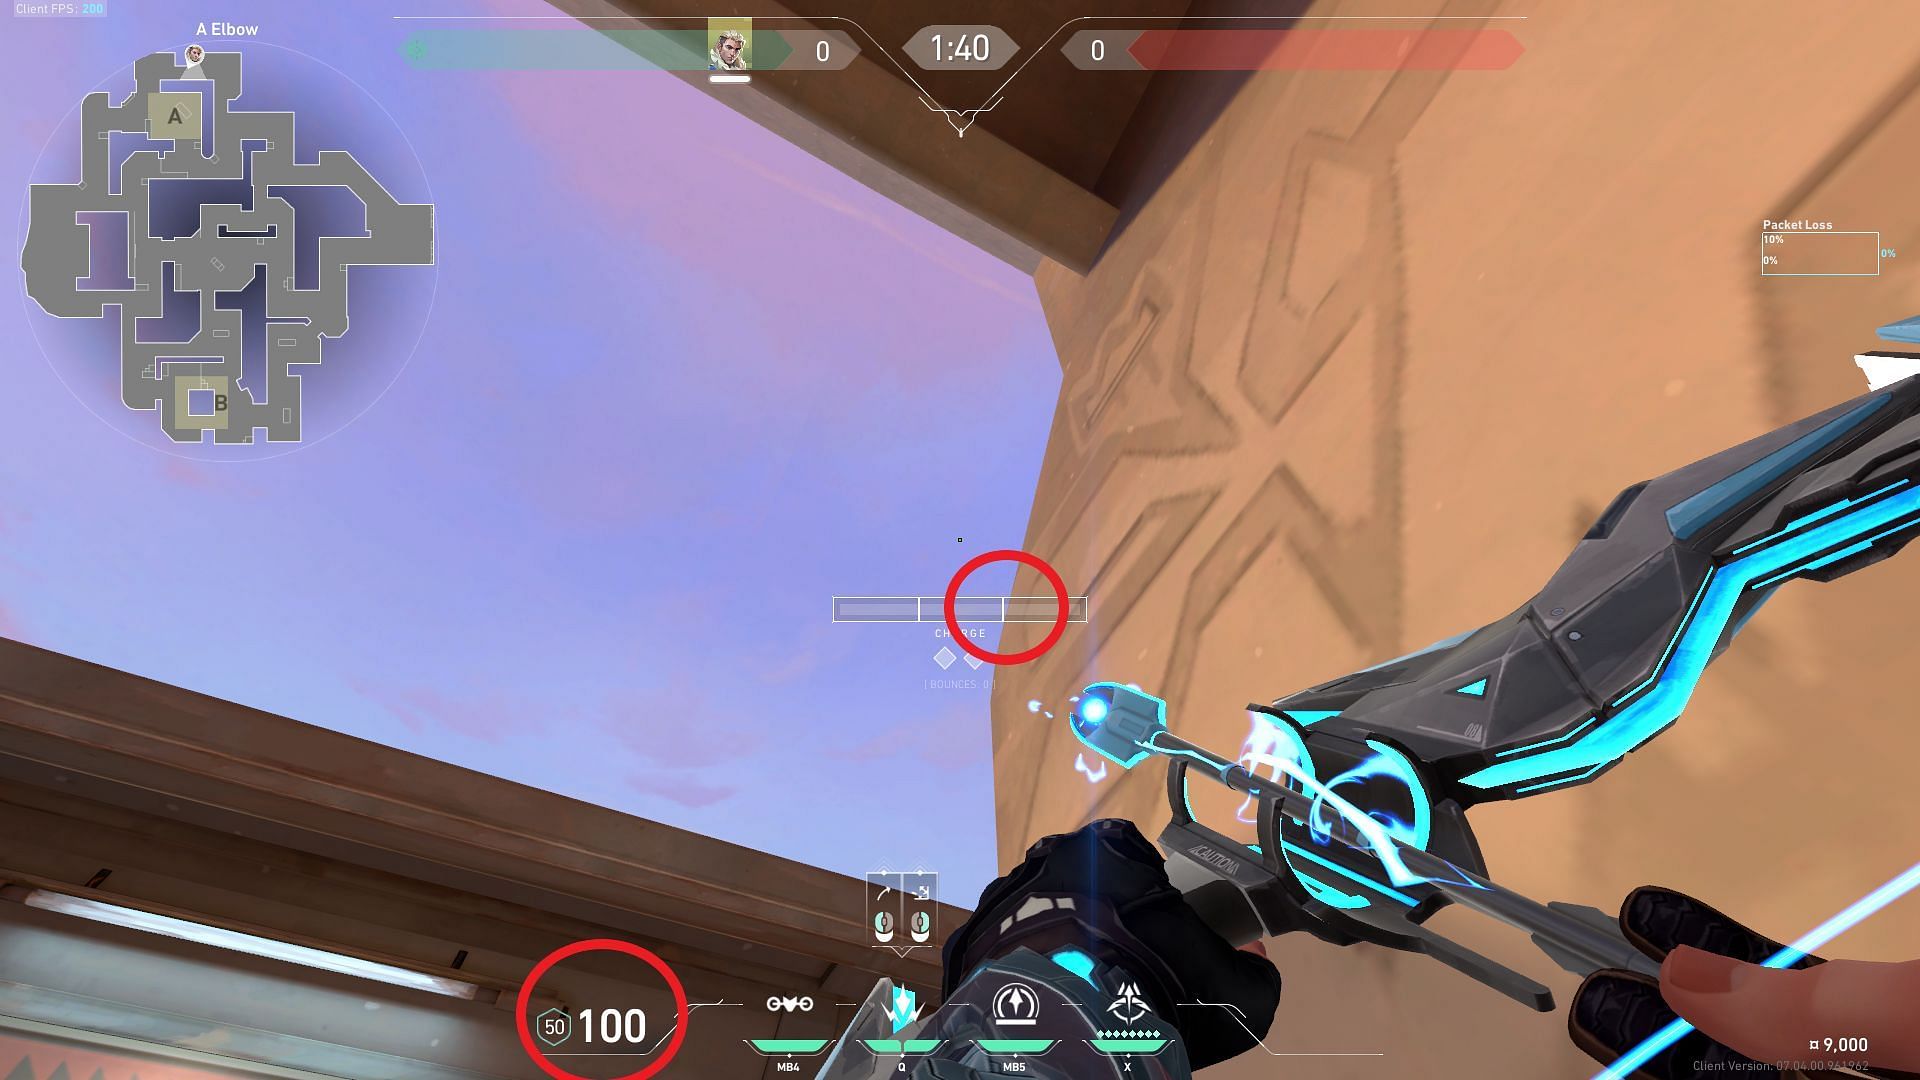
Place your left HUD below near the light such that the charge bar touches the right wall (shown with circles) and deploy the second dart with a simple left click without charge.
Both your shock darts will land in A-Site near the Radianite boxes present near A-Alley. This can be a great deterrent in post-plant scenarios.
3) B-Lobby to B-Site
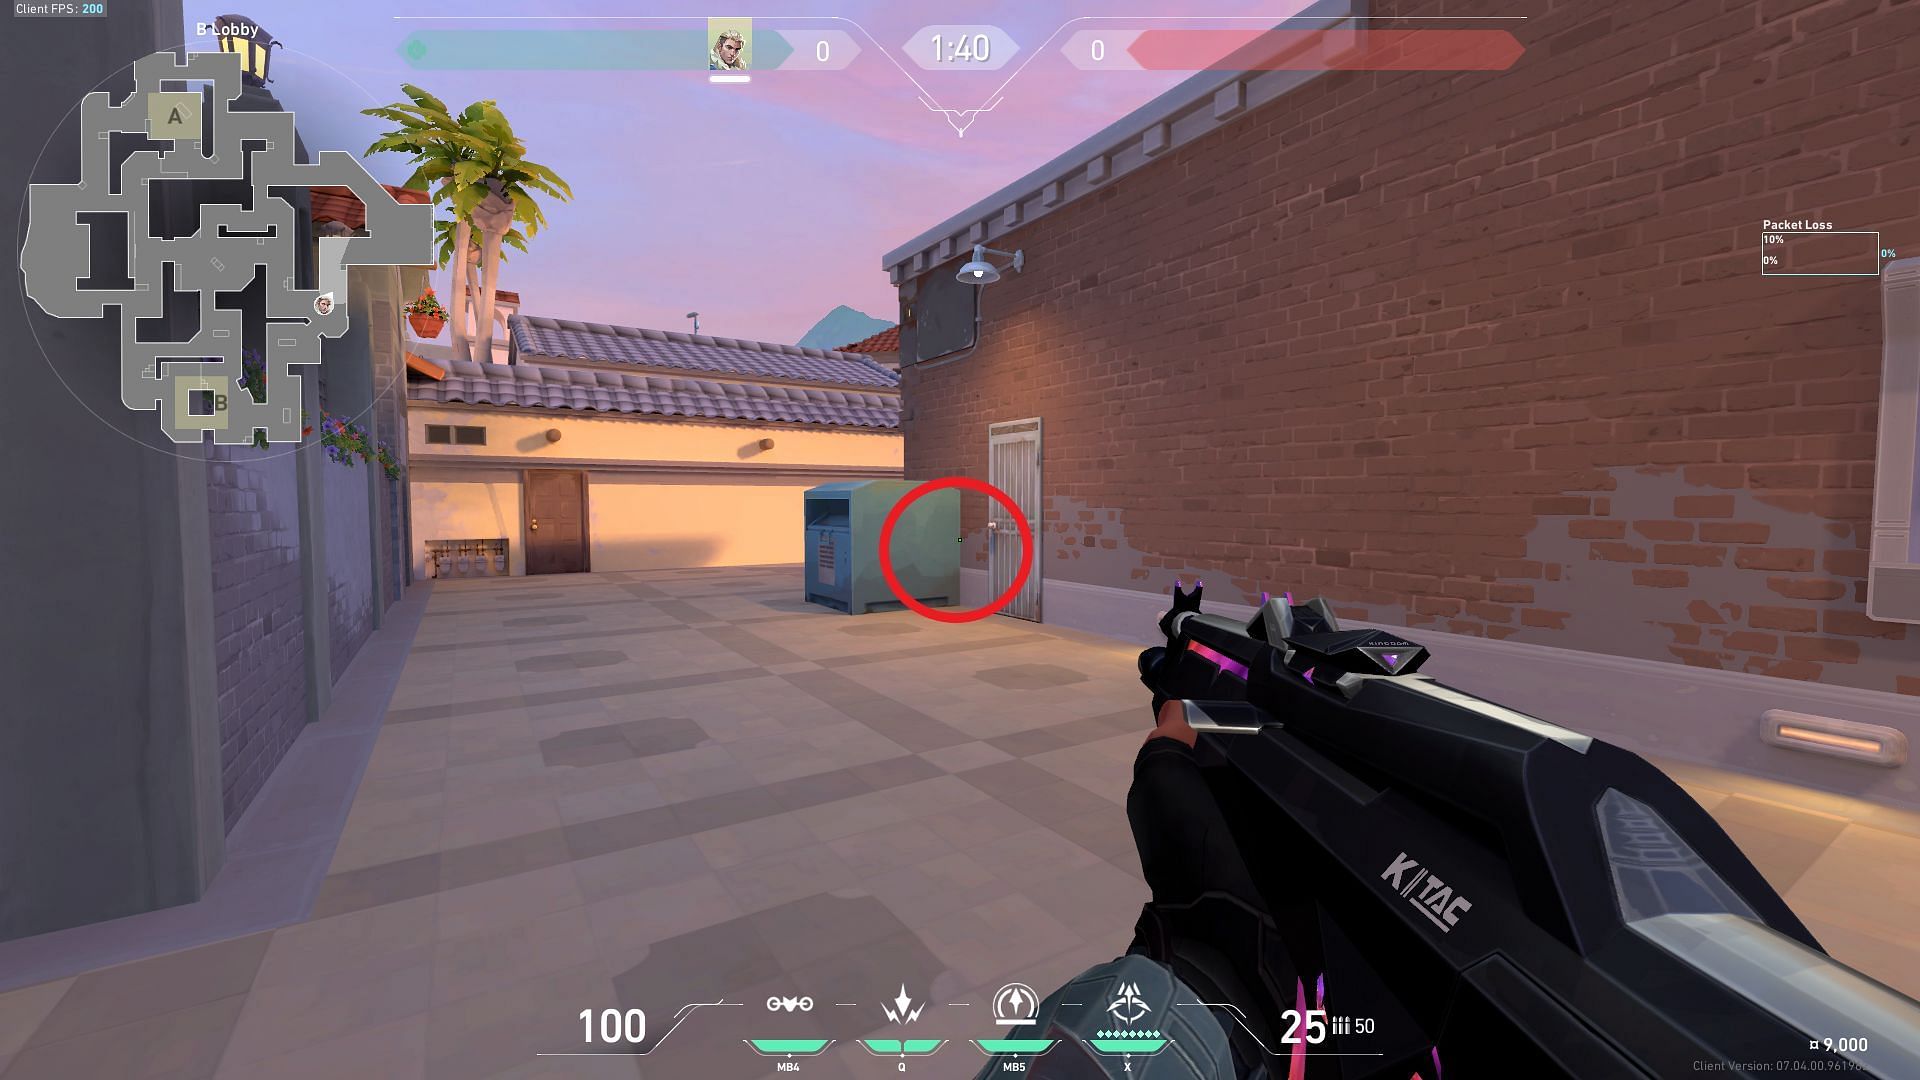
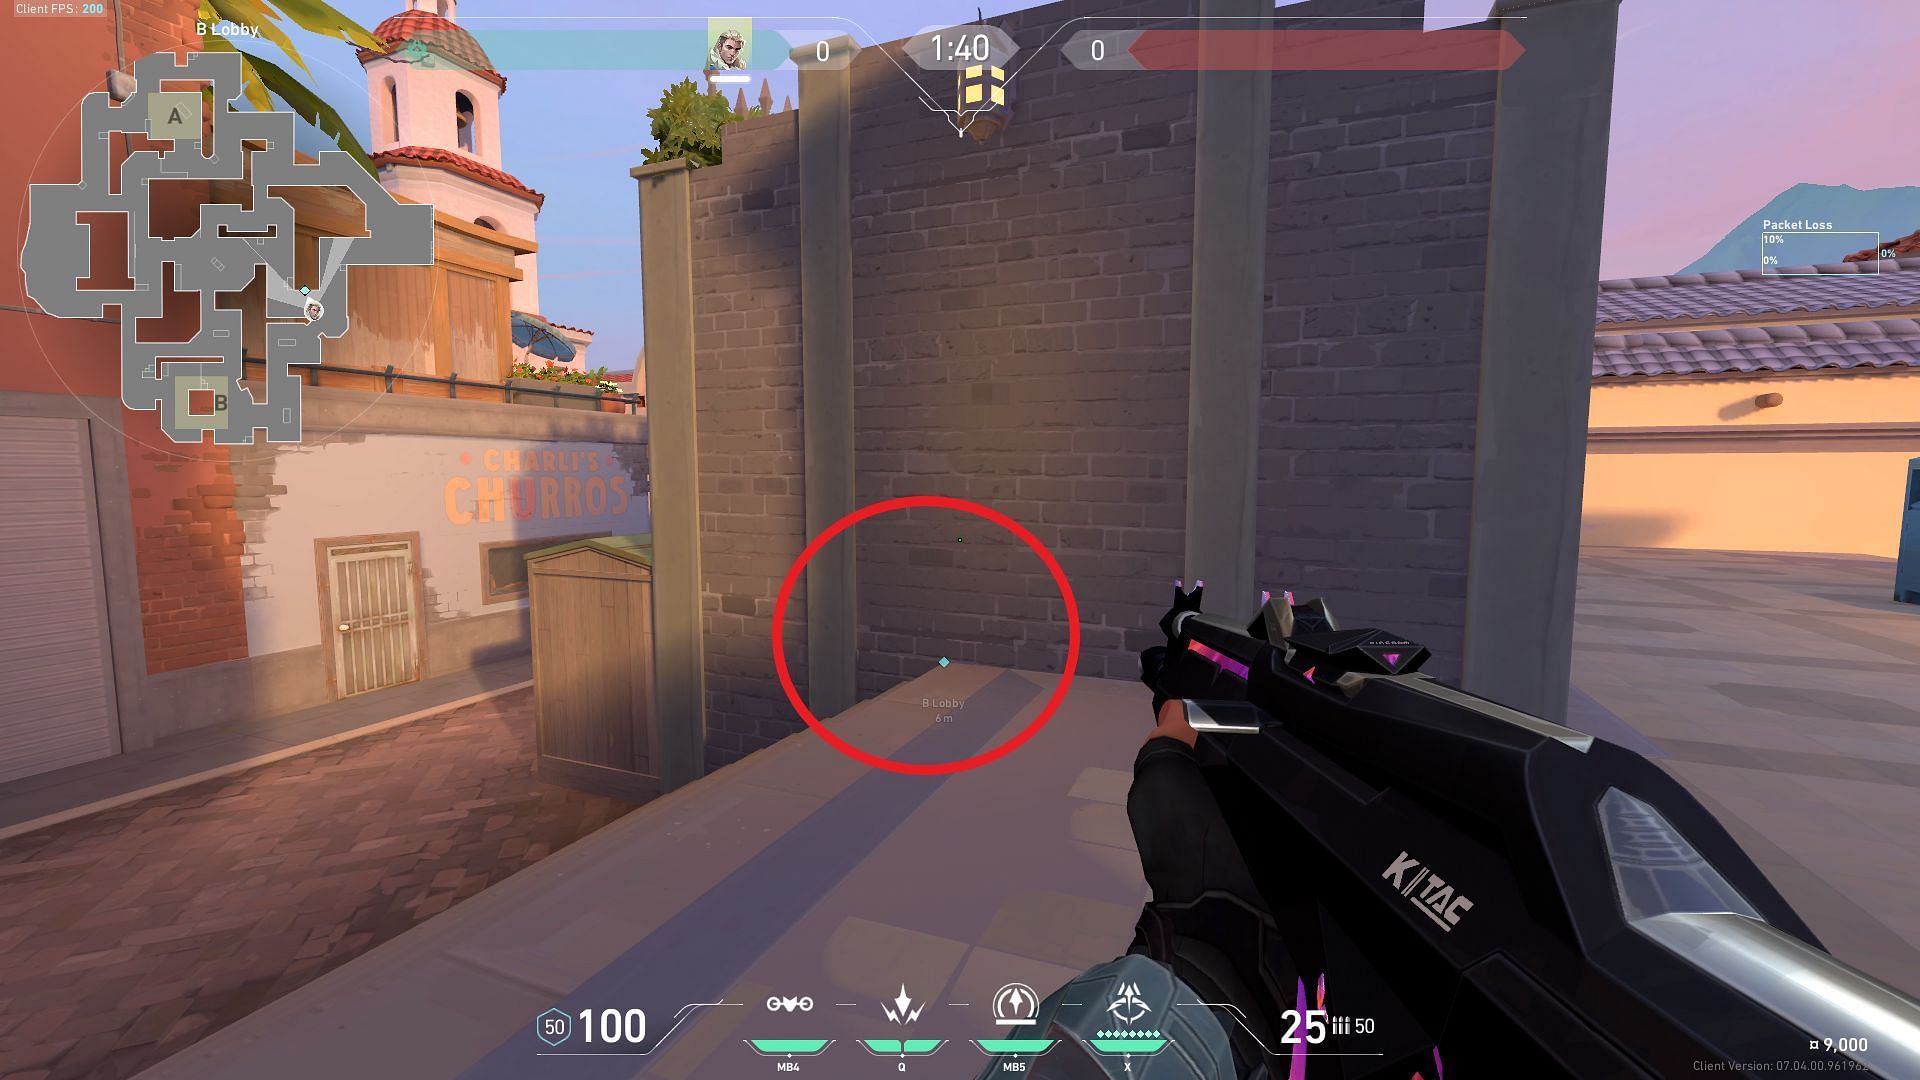
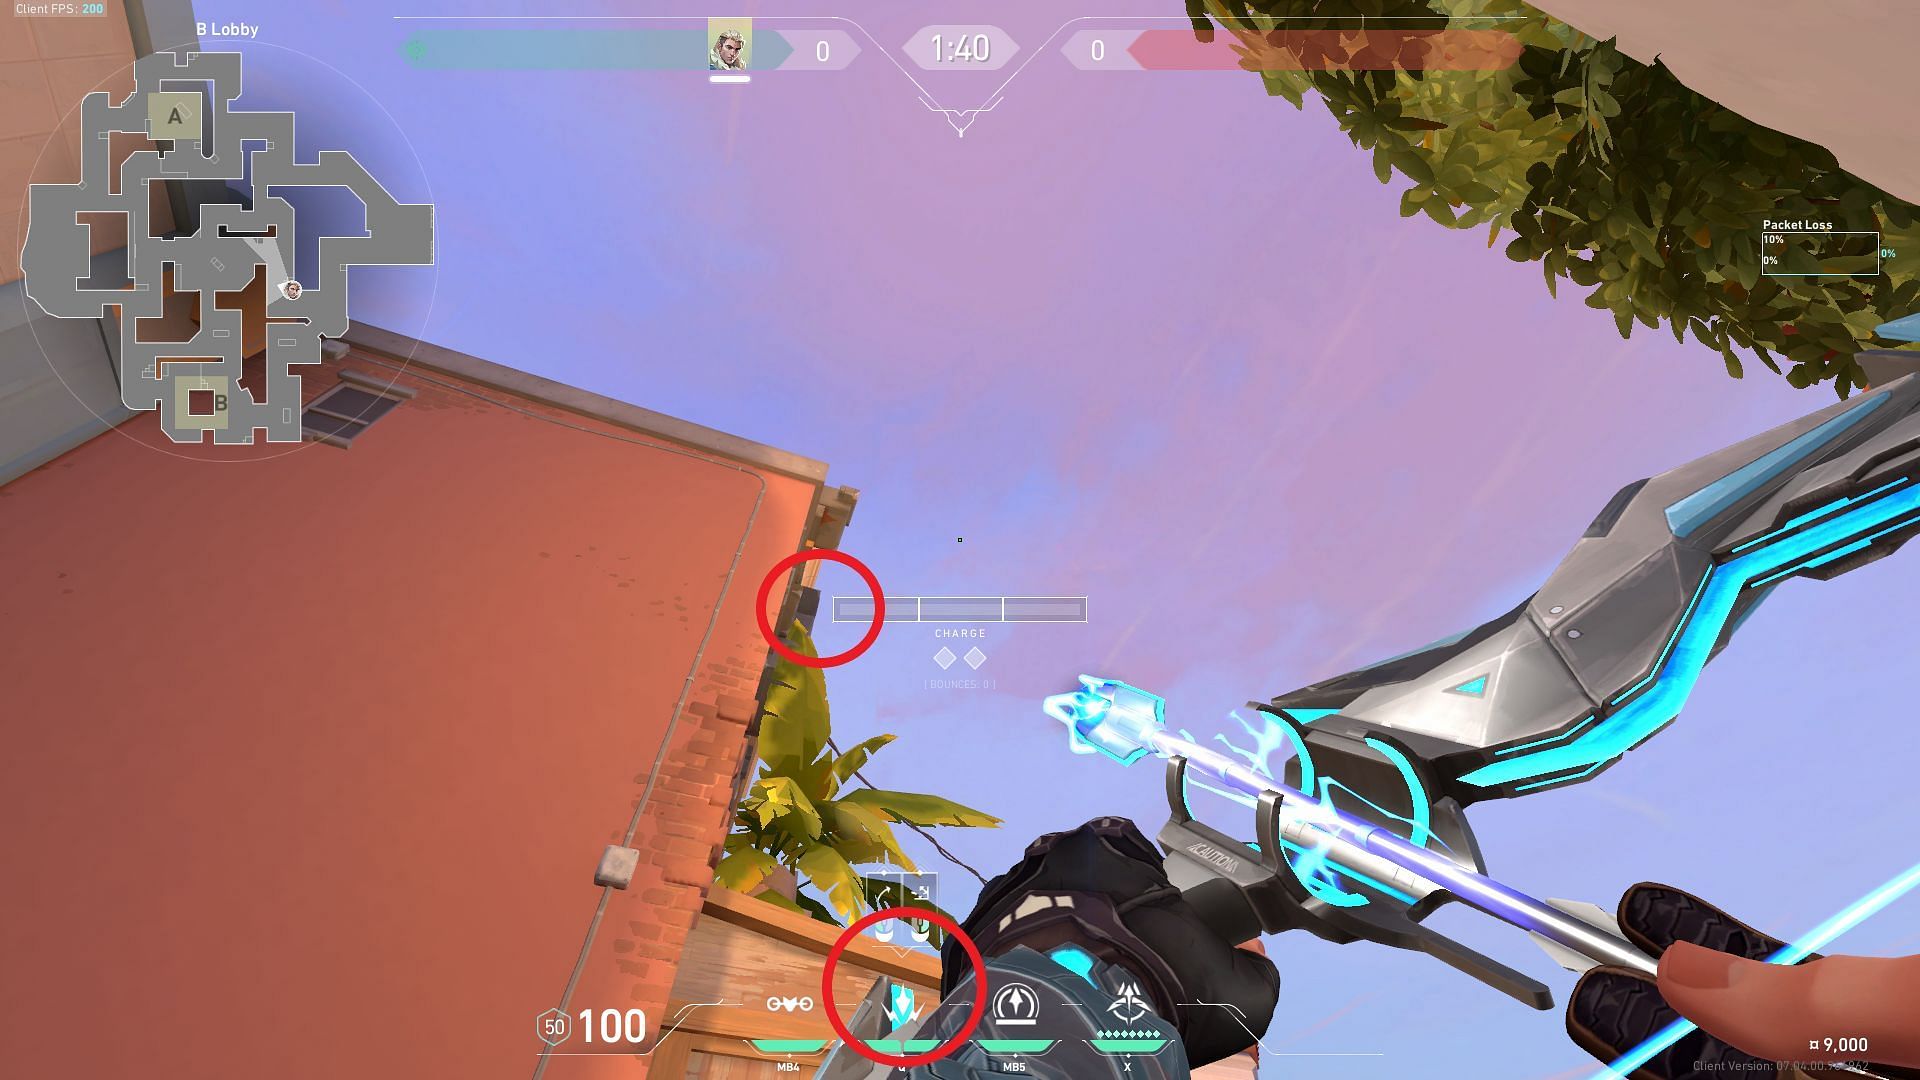
Position yourself near the blue box present in the B-Lobby as shown in the image, and tuck yourself inside the corner. Aim towards the B-Main area and place your crosshair towards the sky.
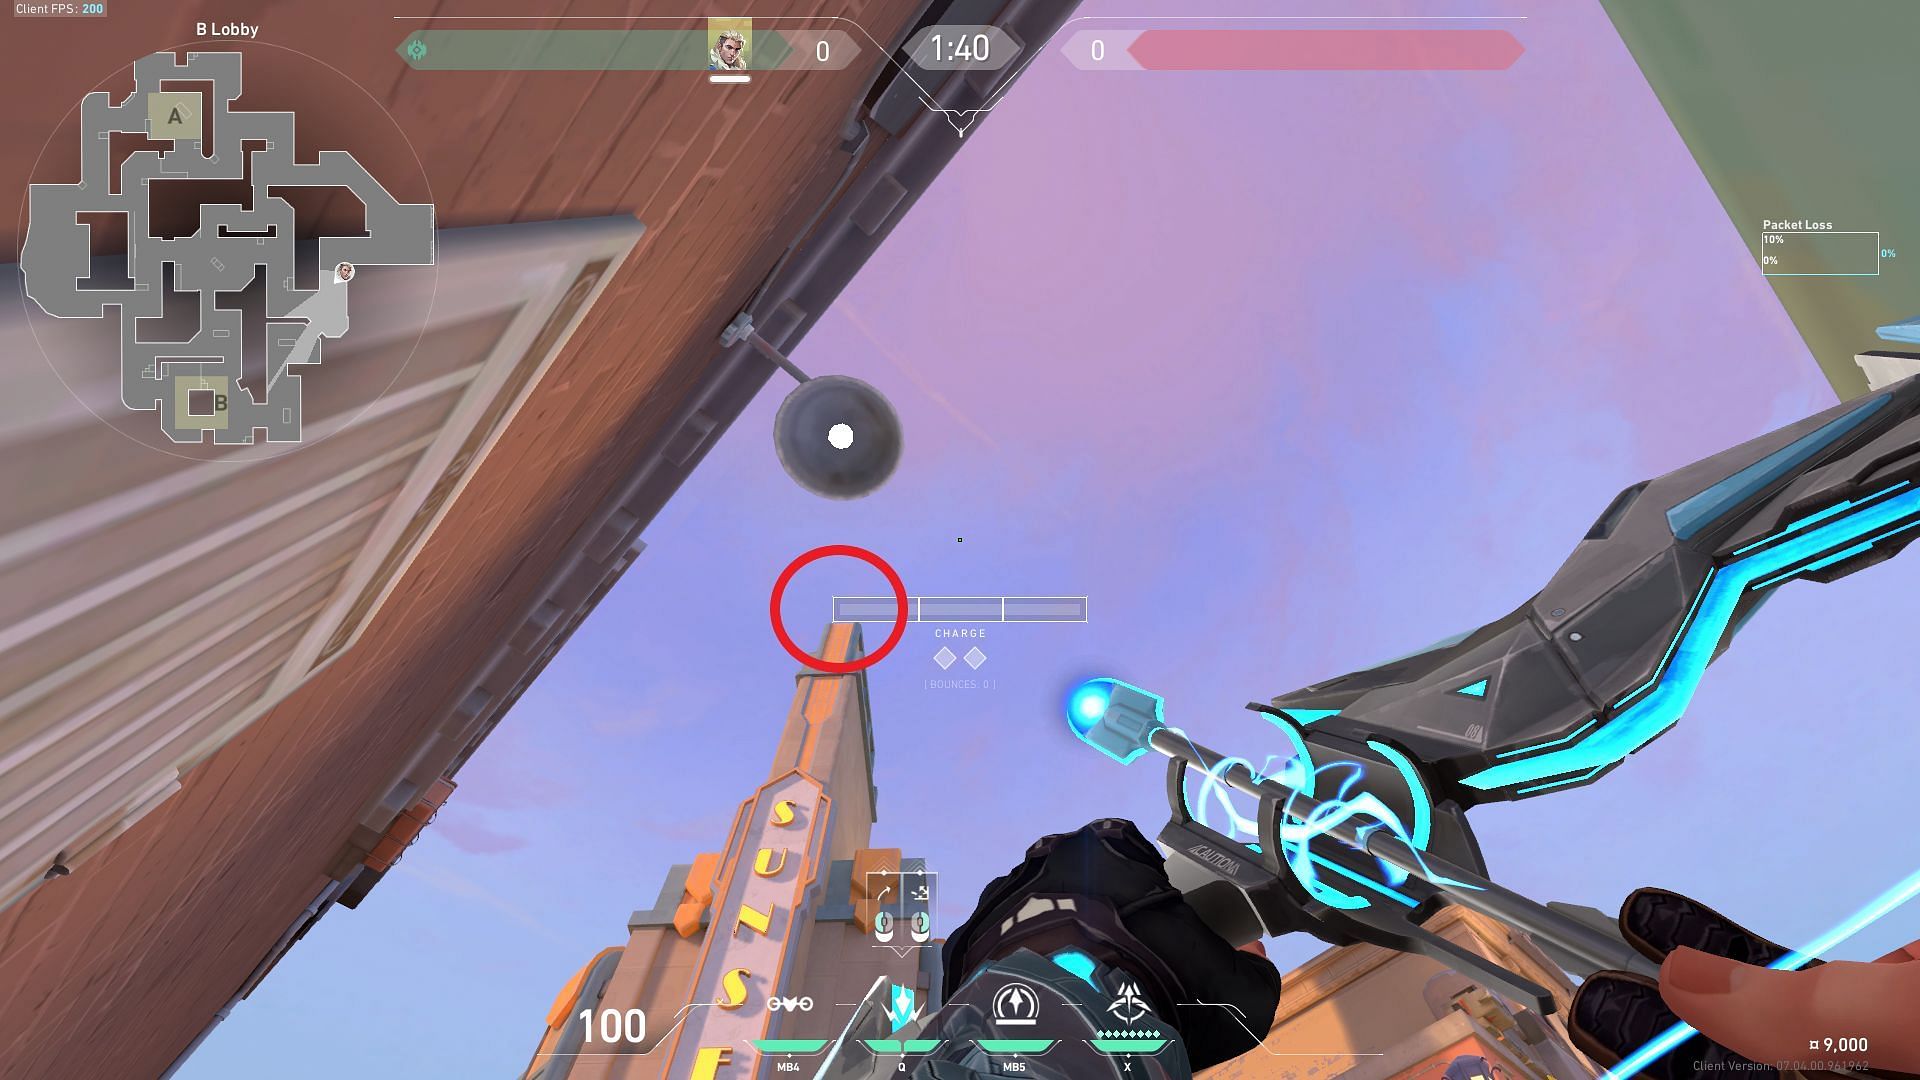
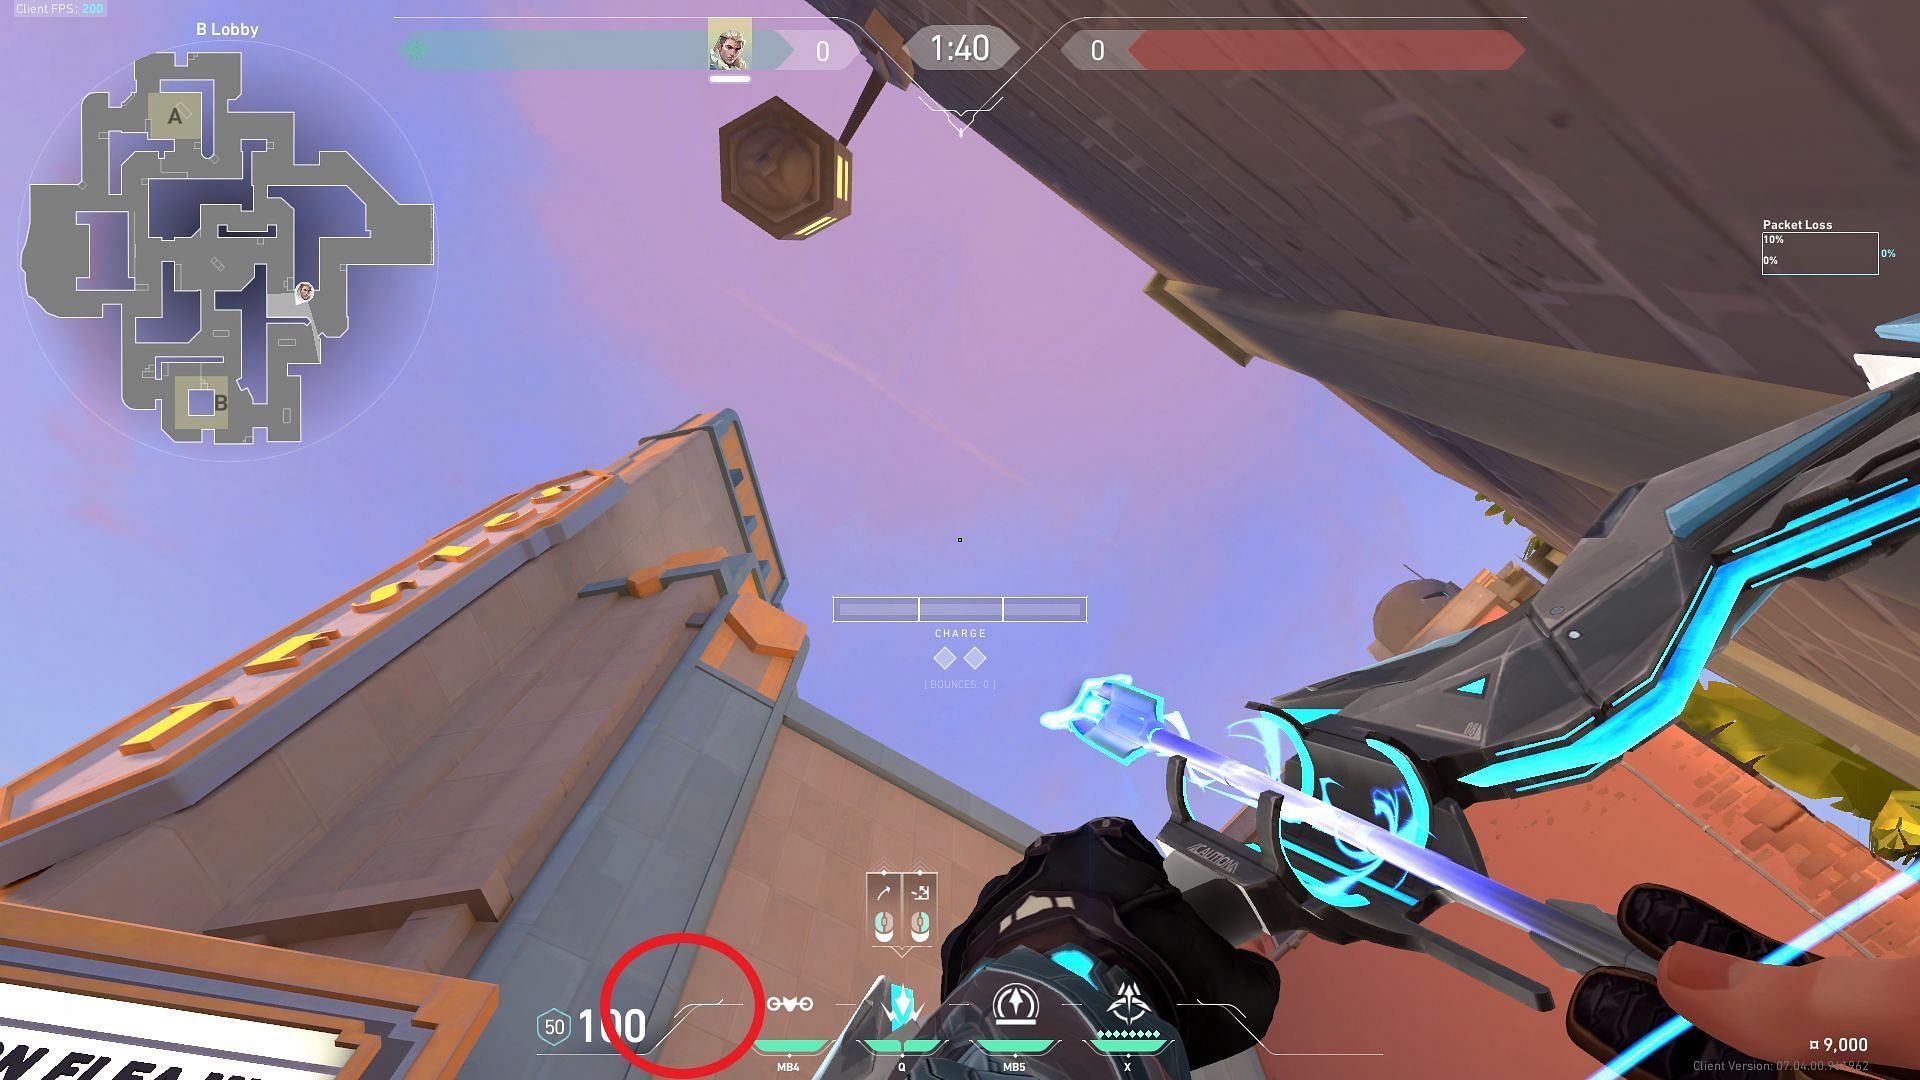
You will have to crouch and place the charge bar HUD on the top of the building (shown with a circle), then fire the first dart with two charges.
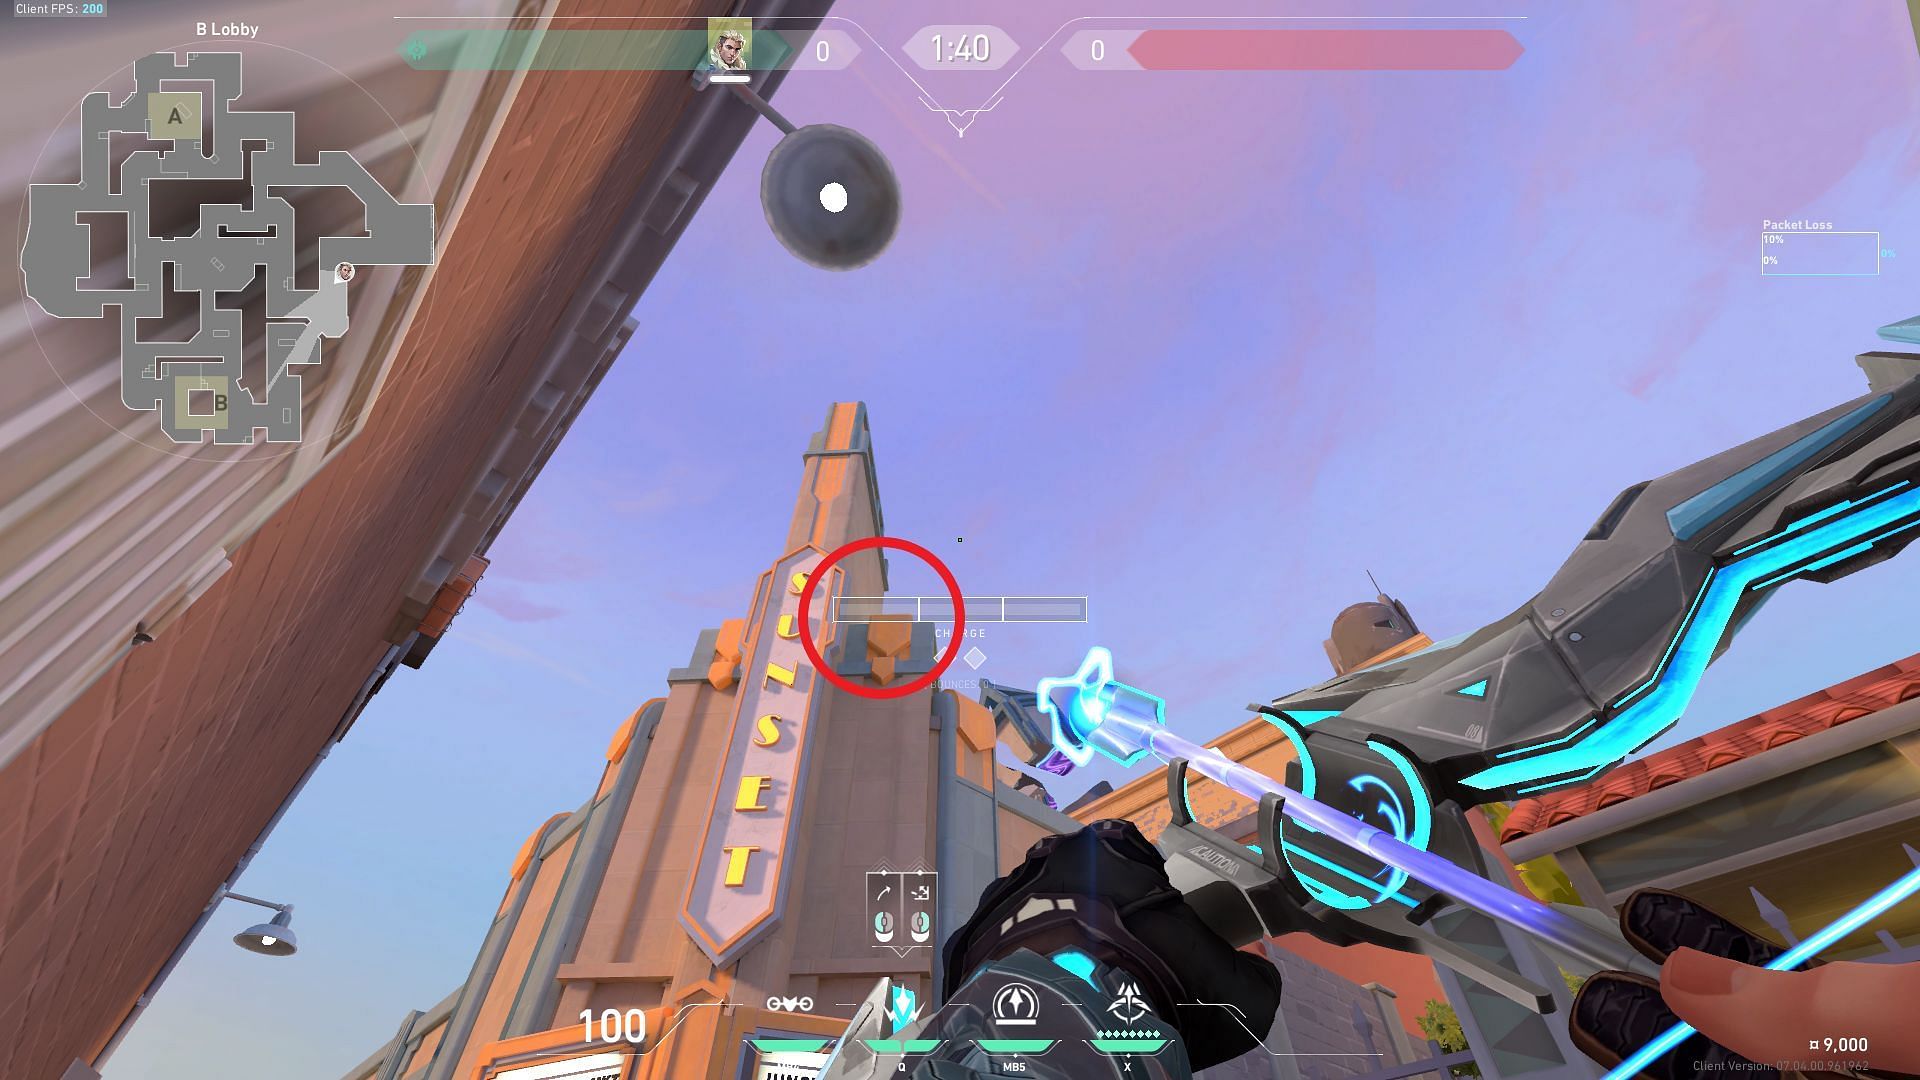
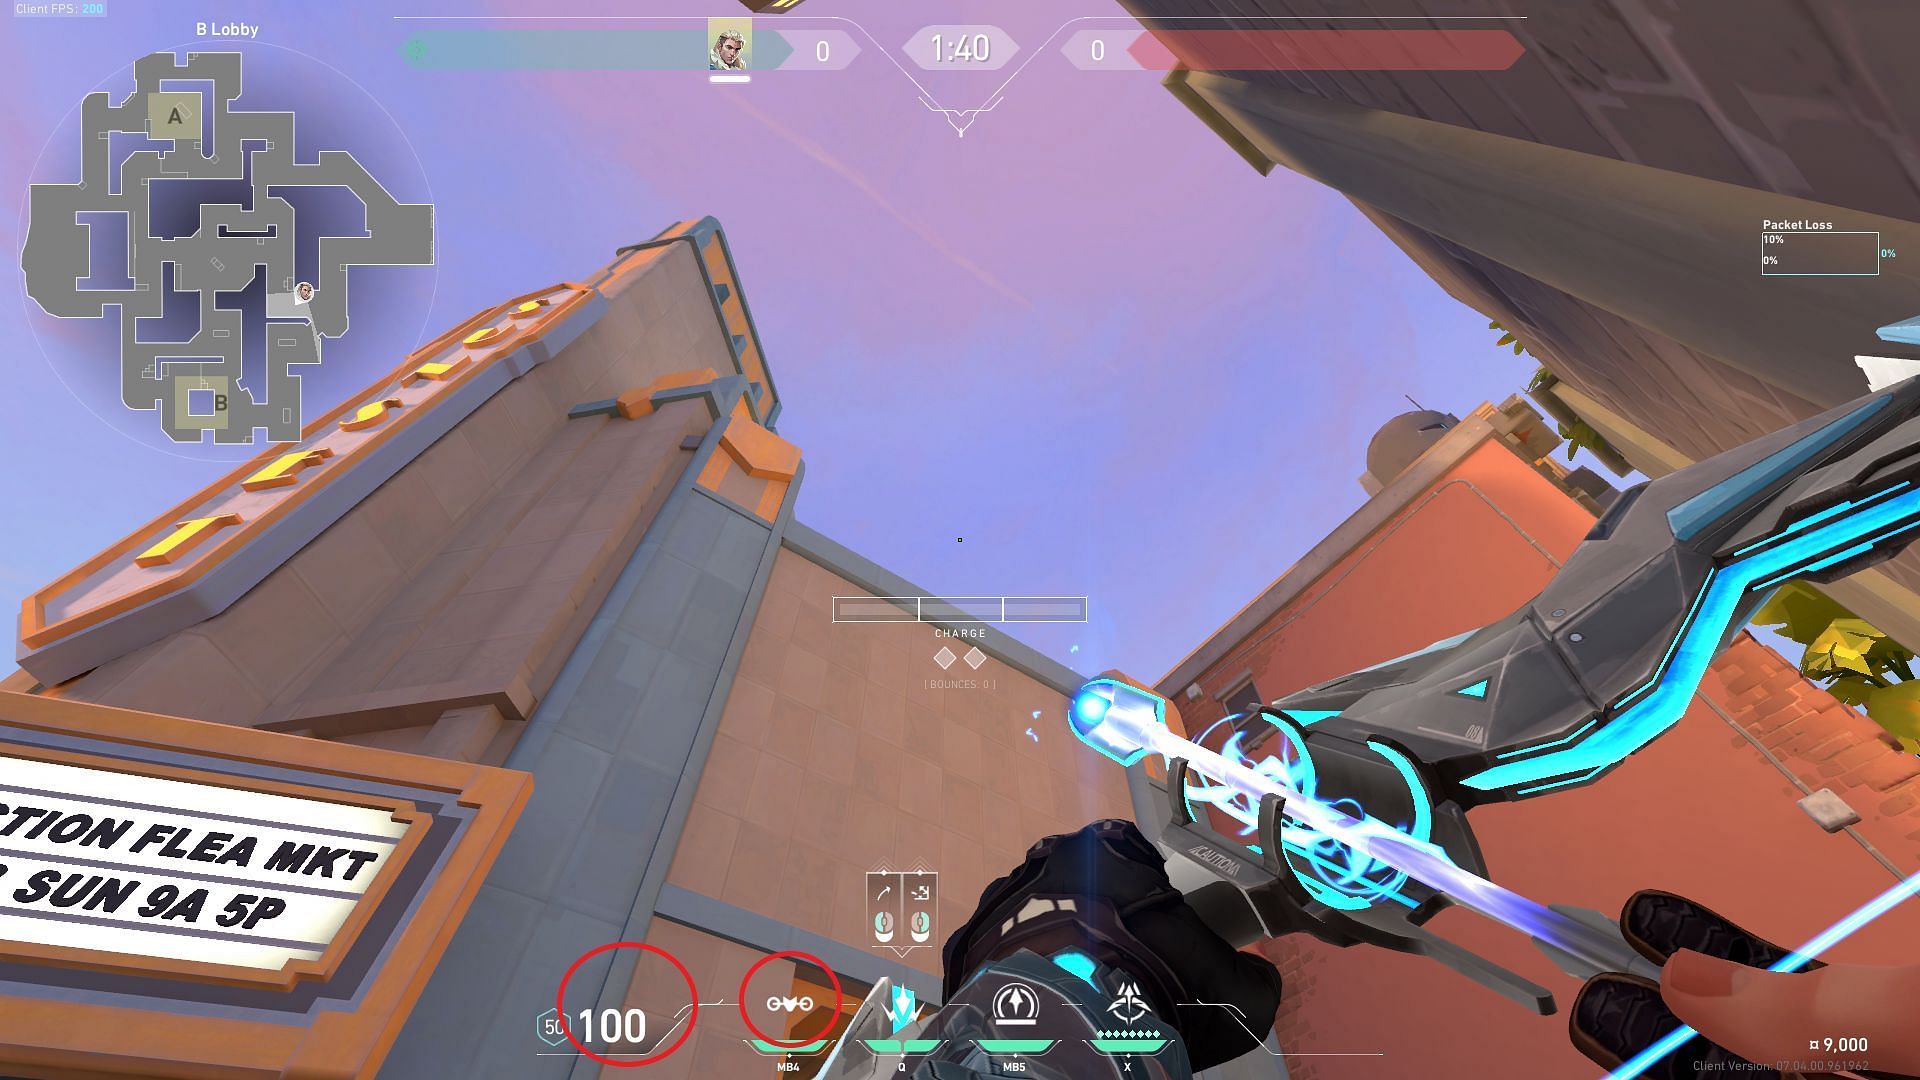
Remain in a crouched position and bring down your crosshair till the charge bar is placed on top of the low-rise roof (shown with a circle). Deploy your second dart with a single charge to send it towards B-Site.
If timed correctly, both the shock darts will land in front of the pillar in B-Site at the same time and take down anyone in the area.
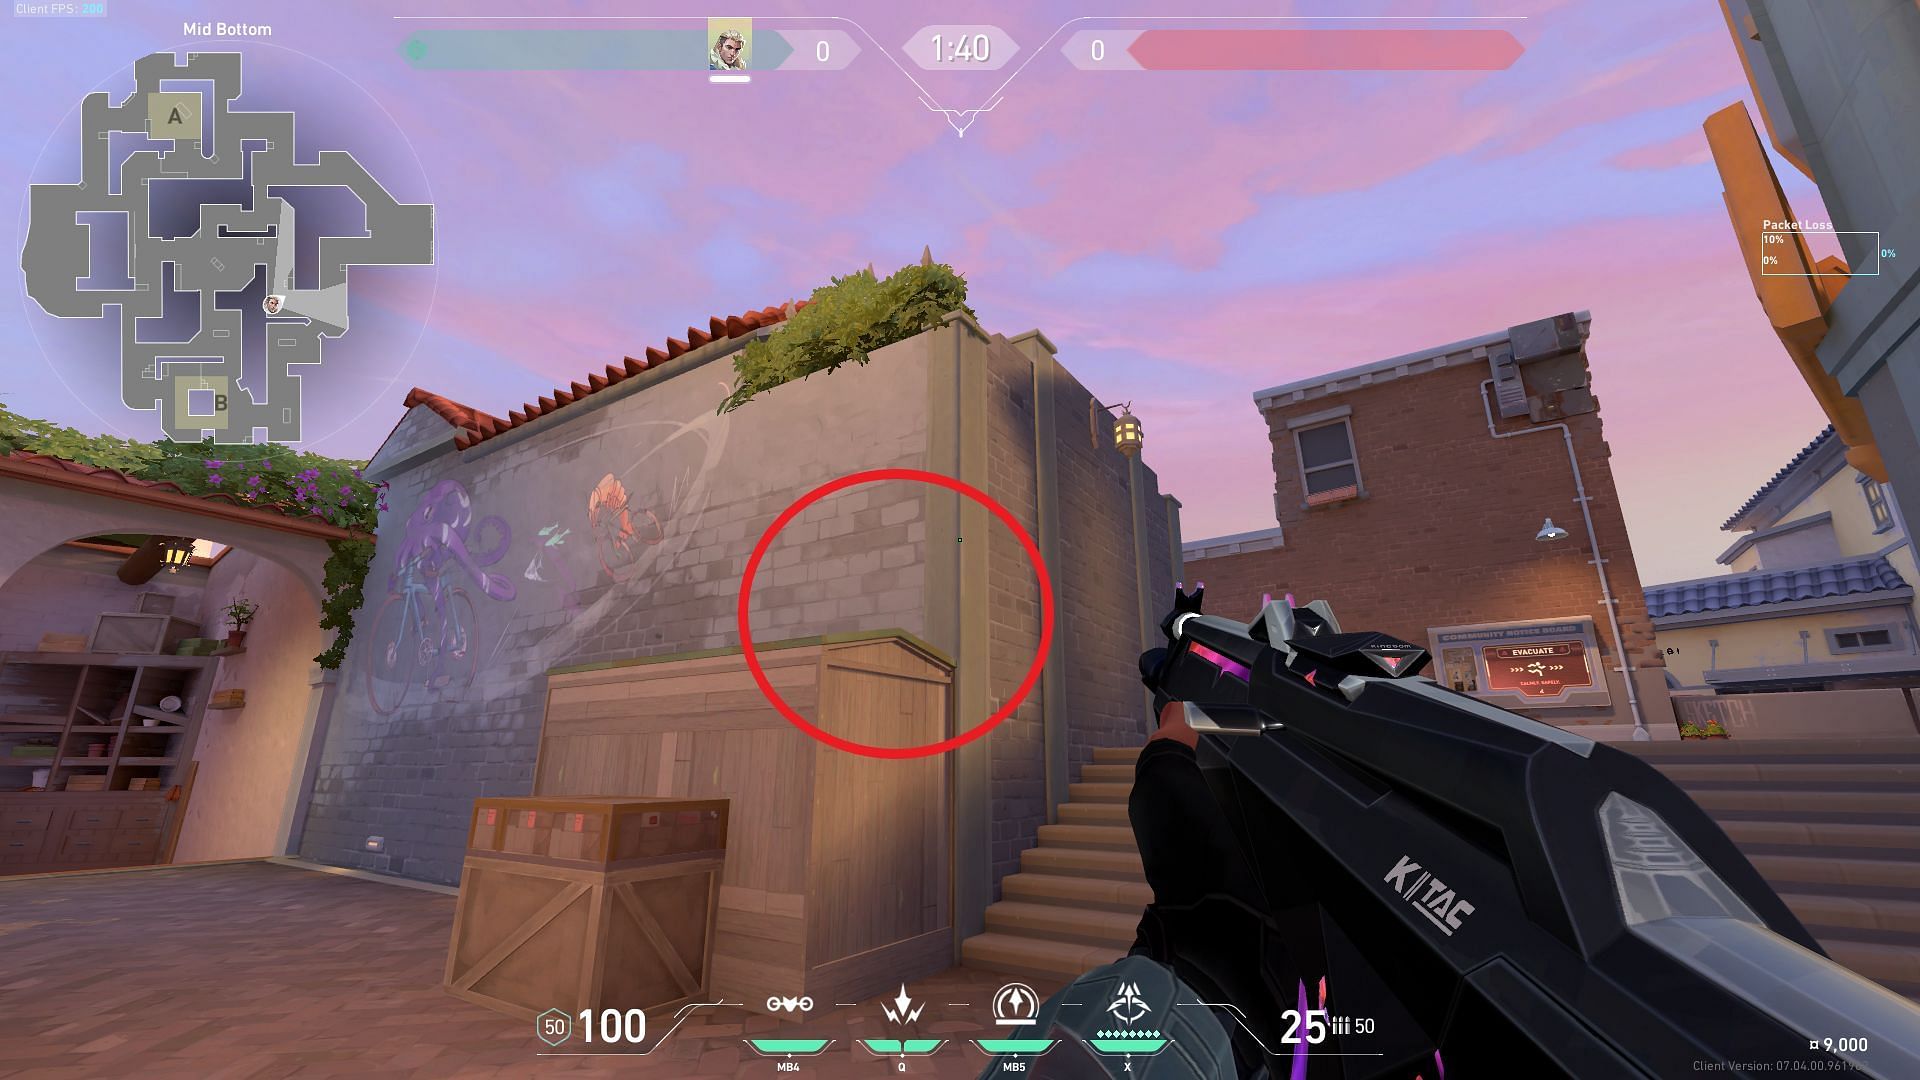
4) B-Lobby to B-Site Stairs
Position yourself on top of the stairs near the Mid-Bottom area and aim toward the B-Main roof, as shown in the image. This is a very precise lineup and may require some practice.
Place your left HUD in such a way that the line near the HP count overlaps the lining on the B-Main wall (shown with a circle). Fire your first dart with two charges towards the B-Site.
Bring down your crosshair such that the left HUD touches the wall lining and the Owl Drone icon is directly in the middle of the opening on the wall (shown with circles). Fire your dart with a single charge.
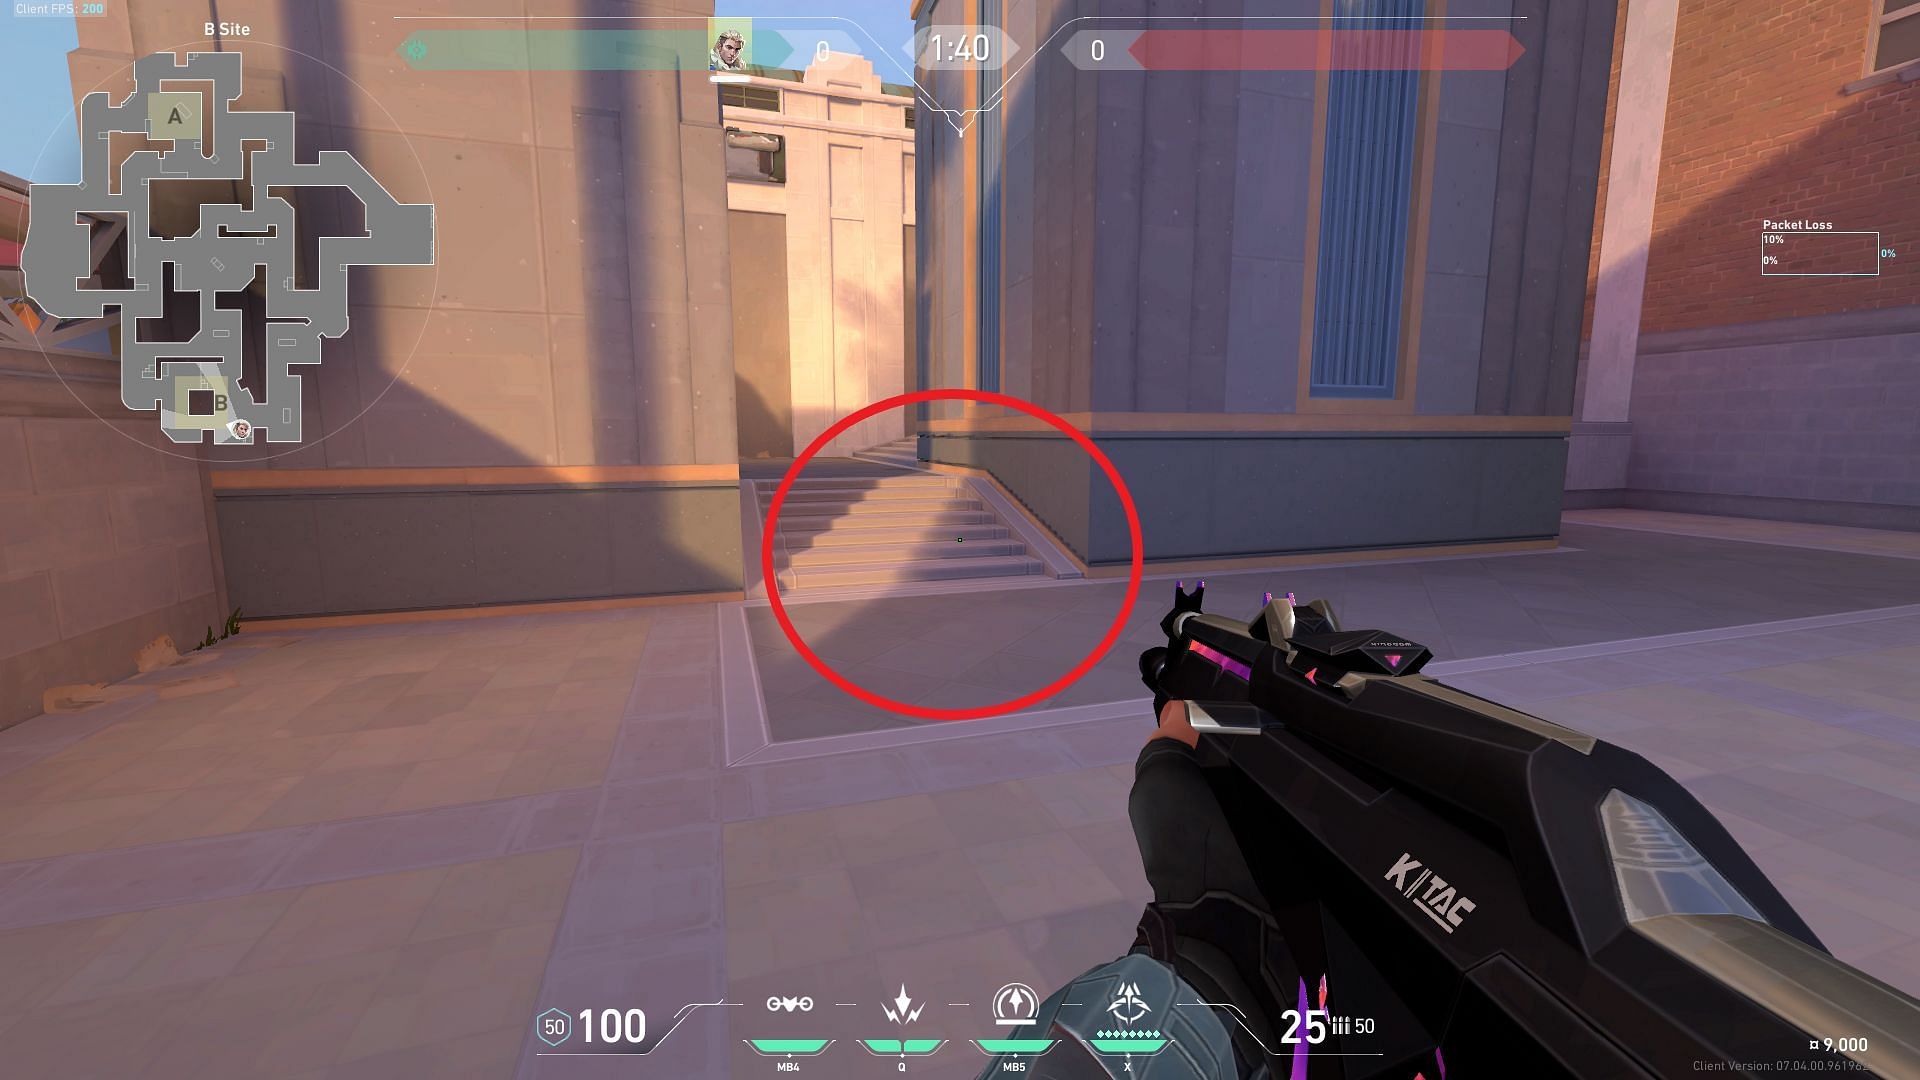
Both the shock darts land directly at the bottom of the stairs present in the B-Site.
5) Mid-Bottom to Mid-Top
This is a simple lineup and can be performed at the beginning of the round to disorient anyone peeking from the Mid-Top area. Position yourself on top of the Mid-Bottom boxes near the edge of the wall, as shown in the image.
Place your crosshair in such a way that the shock dart icon touches the roof ledge, and the charge bar HUD is parallel to the left wall (shown with circles). Launch both your shock darts from the same lineup.
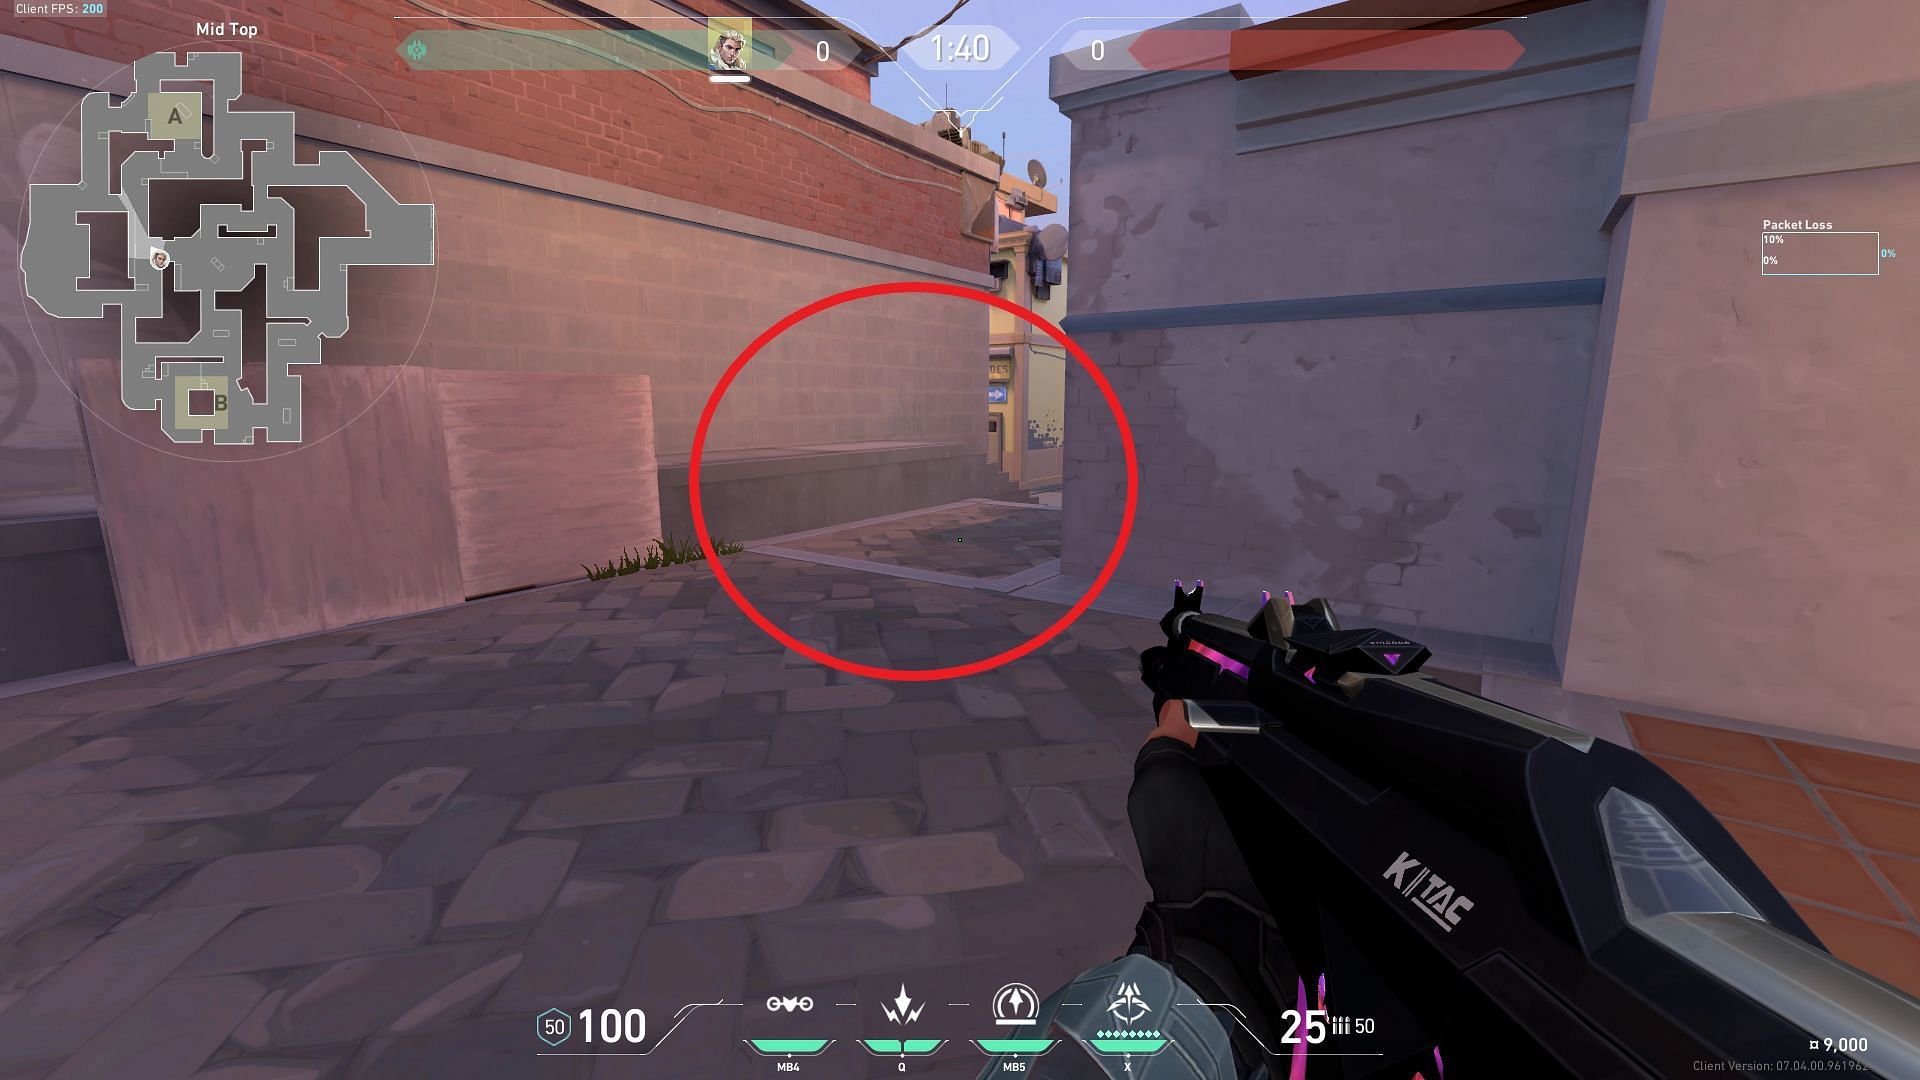
The shock darts land directly in the Mid-Top area on the left side to deter enemies from peeking the angle towards the Mid-Bottom region.
Stay tuned to Sportskeeda for more recent updates and Sunset map guides.
