
'%20x='0'%20y='0'%20height='100%25'%20width='100%25'%20%0A%20%20%20%20%20%20%20%20%20%20xlink%3Ahref='data:image/jpg;base64,/9j/2wBDAAYEBQYFBAYGBQYHBwYIChAKCgkJChQODwwQFxQYGBcUFhYaHSUfGhsjHBYWICwgIyYnKSopGR8tMC0oMCUoKSj/2wBDAQcHBwoIChMKChMoGhYaKCgoKCgoKCgoKCgoKCgoKCgoKCgoKCgoKCgoKCgoKCgoKCgoKCgoKCgoKCgoKCgoKCj/wgARCAAGAAoDASIAAhEBAxEB/8QAFgABAQEAAAAAAAAAAAAAAAAAAAUH/8QAFQEBAQAAAAAAAAAAAAAAAAAAAQT/2gAMAwEAAhADEAAAAMwlhP8A/8QAHhAAAgEEAwEAAAAAAAAAAAAAAQIDAAQRIQUSJVX/2gAIAQEAAT8A4d4IEvFuYkcpArqBGD2JXGznI1UdzxvRfBiOvoT1/8QAFxEAAwEAAAAAAAAAAAAAAAAAAAIDMv/aAAgBAgEBPwCWmP/EABoRAAICAwAAAAAAAAAAAAAAAAERAAIDQdH/2gAIAQMBAT8Awk2b1wT/2Q=='%3E%3C/image%3E%3C/svg%3E)
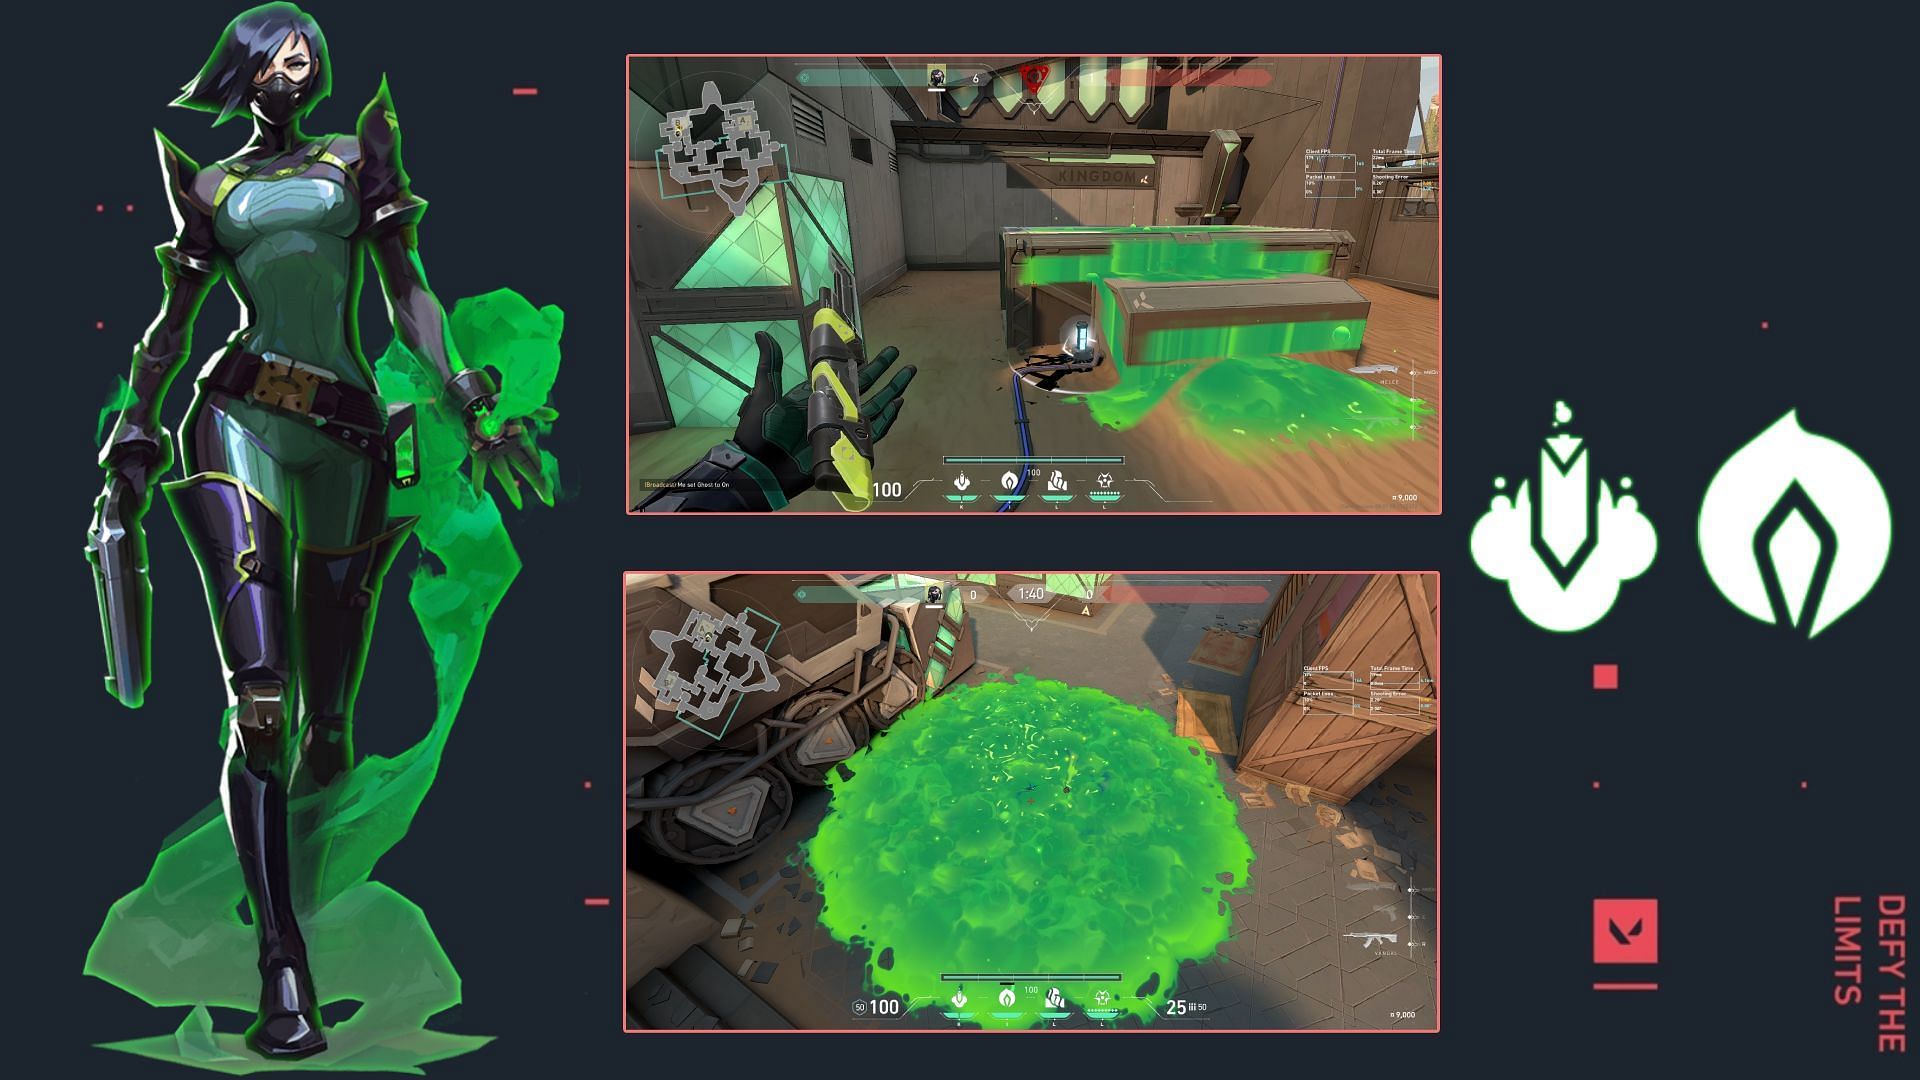
In Valorant, Viper lineups on Bind showcase the versatility of the slithery Controller since it can be applied in diverse scenarios. With one of the most unique ability sets, Viper is crucial for shaping the game's tempo on Bind. Equipped with a strong repertoire of Viper lineups, you can disrupt Spike dynamics and exert influence across the map.
Therefore, this article aims to provide a comprehensive resource for all essential Viper lineups for Snake Bite (Viper molly) and Poison Cloud (orb/bubble) on the Bind map.
Note: Some aspects of this article are subjective and solely reflect the opinions of the writer

Viper lineups on Bind map for post-plant, anti-plant, and more in Valorant
1) Viper lineup on Bind for the A Short Poison Orb
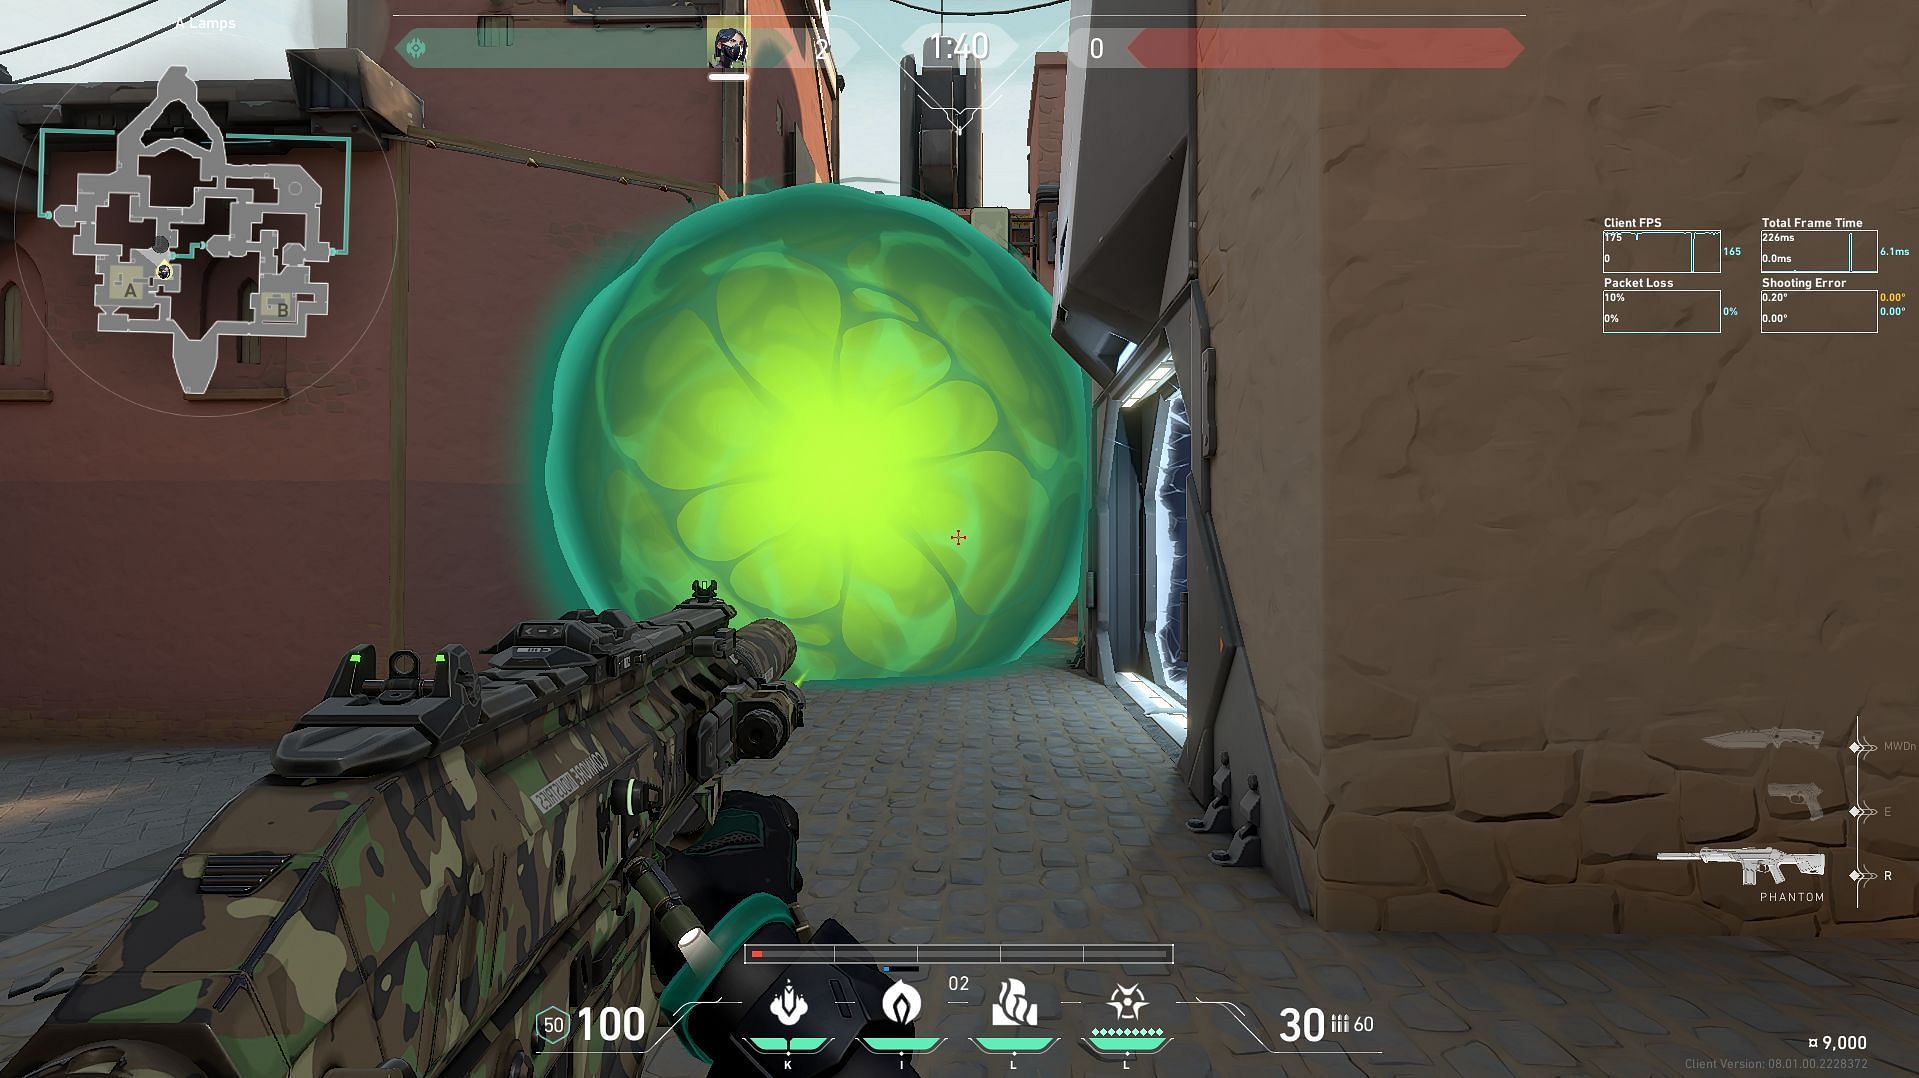
This Viper lineup on Bind, which puts the Poison Orb to defend A Short, can be performed in the Buy Phase from the Defenders' spawn. By using this lineup you get enough time to set up your Viper wall on the B site during the Buy Phase and defend both sites on Bind.
To perform this Viper lineup on Bind, carefully go through the guide below:

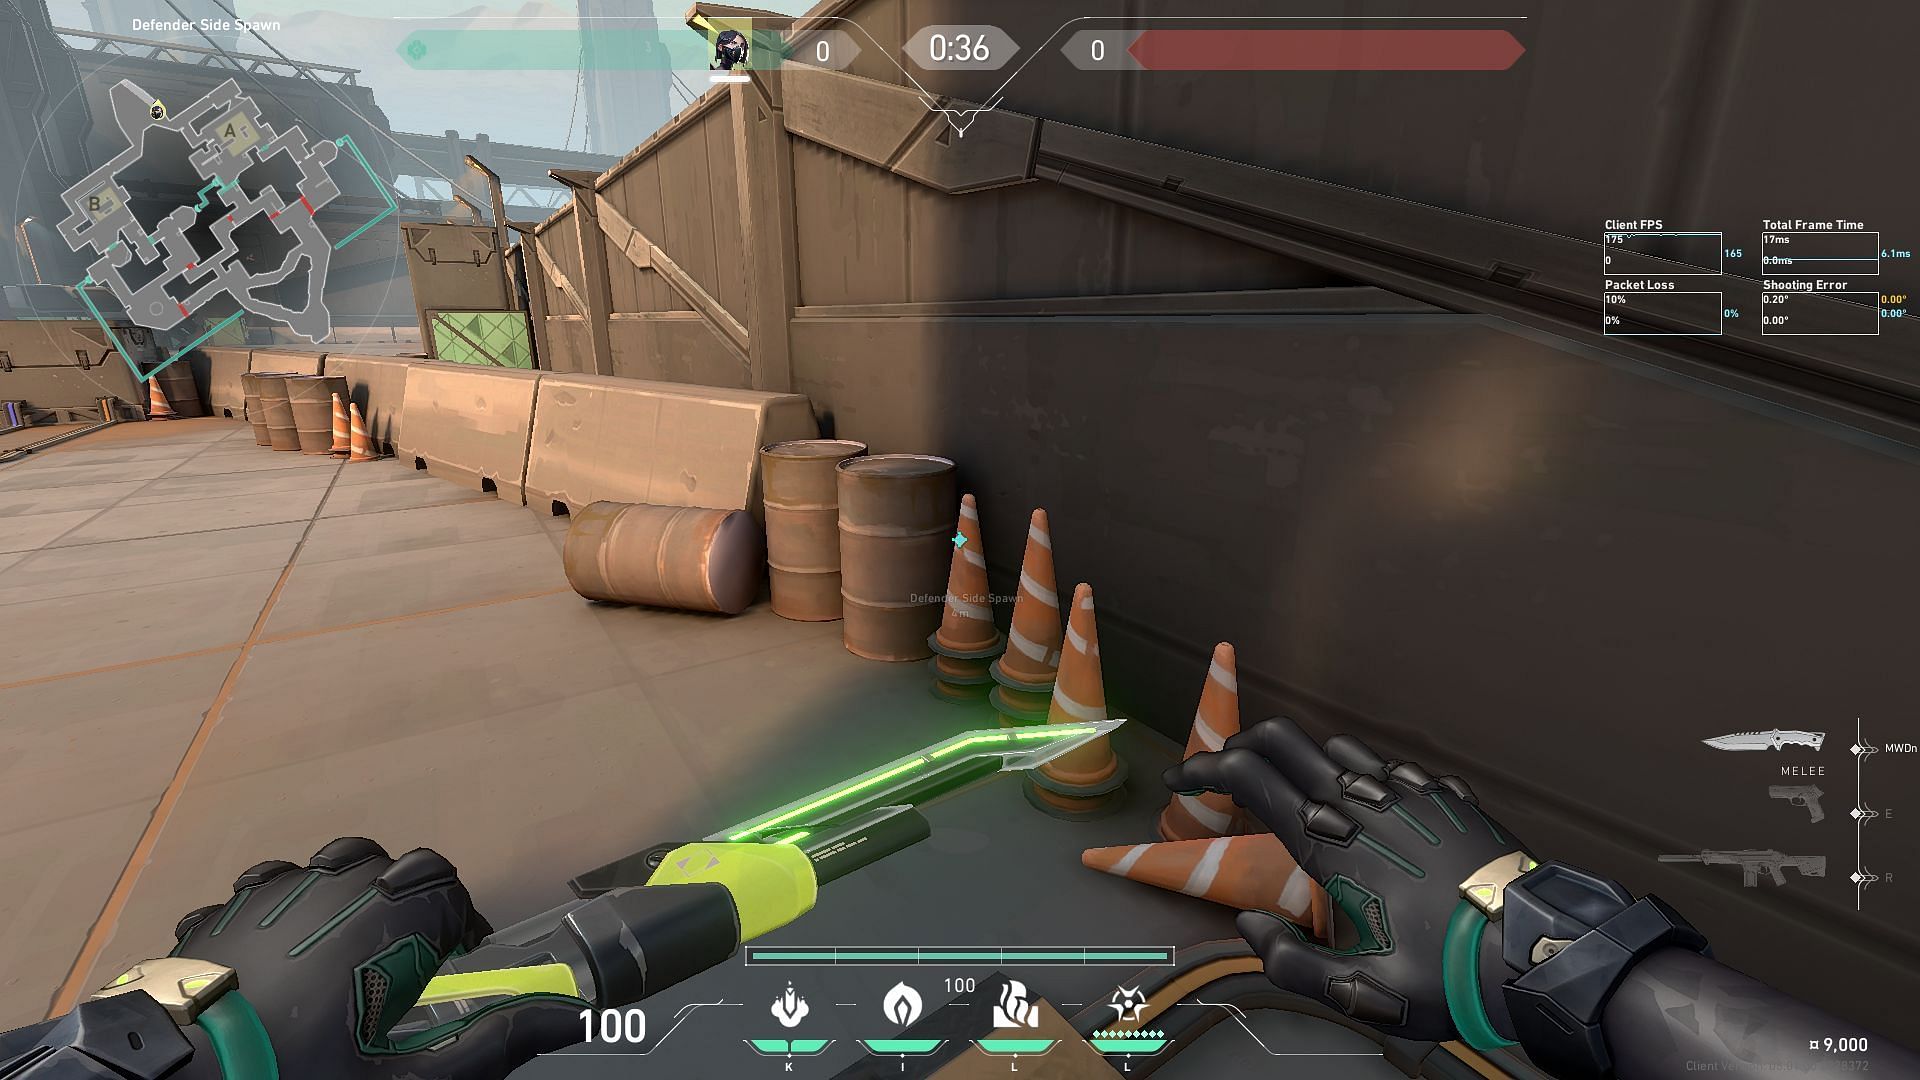
During the Buy Phase of the round, stand close to the wall against the drums and cones in the Defenders spawn area.
Align the top-right corner of your Poison Bar with the lower portion of the dark brick beneath the arches on the wall ahead. Then perform a quick jump throw by simultaneously pressing your Jump key and left-click.
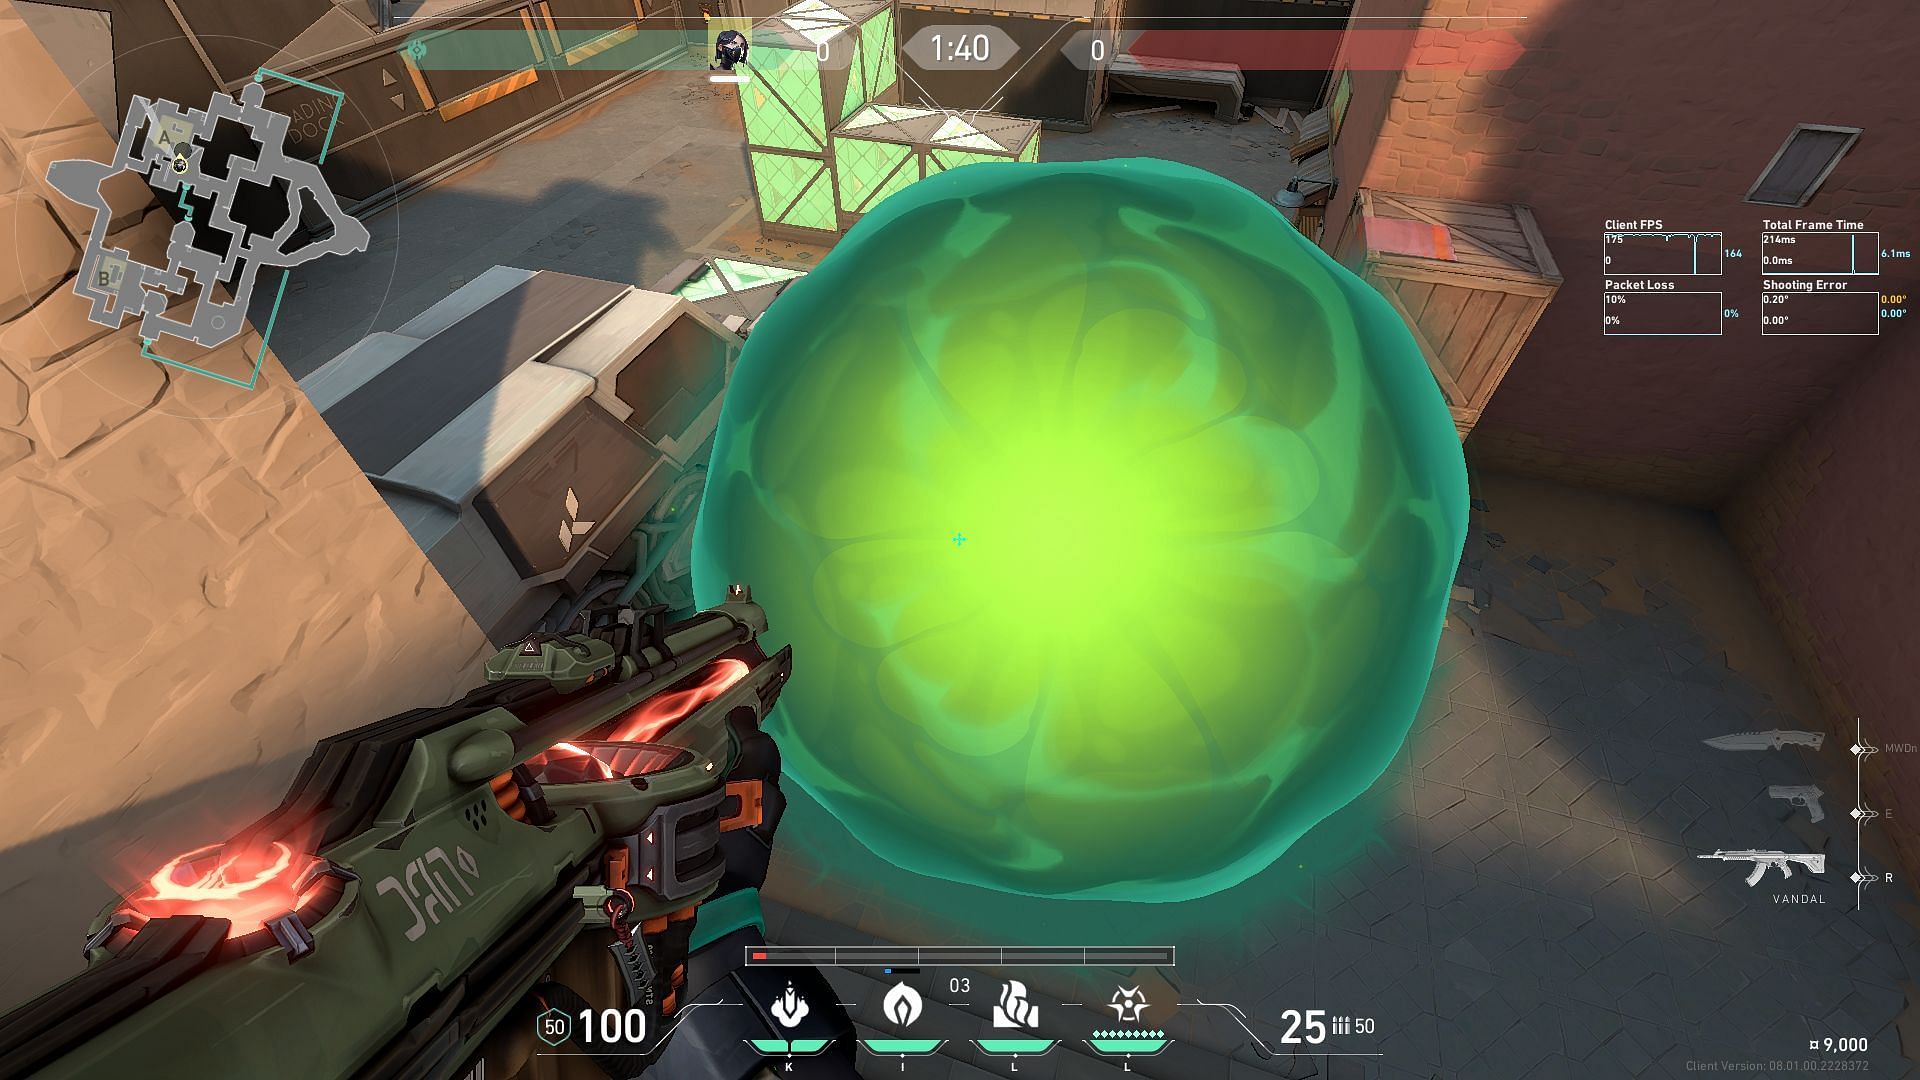
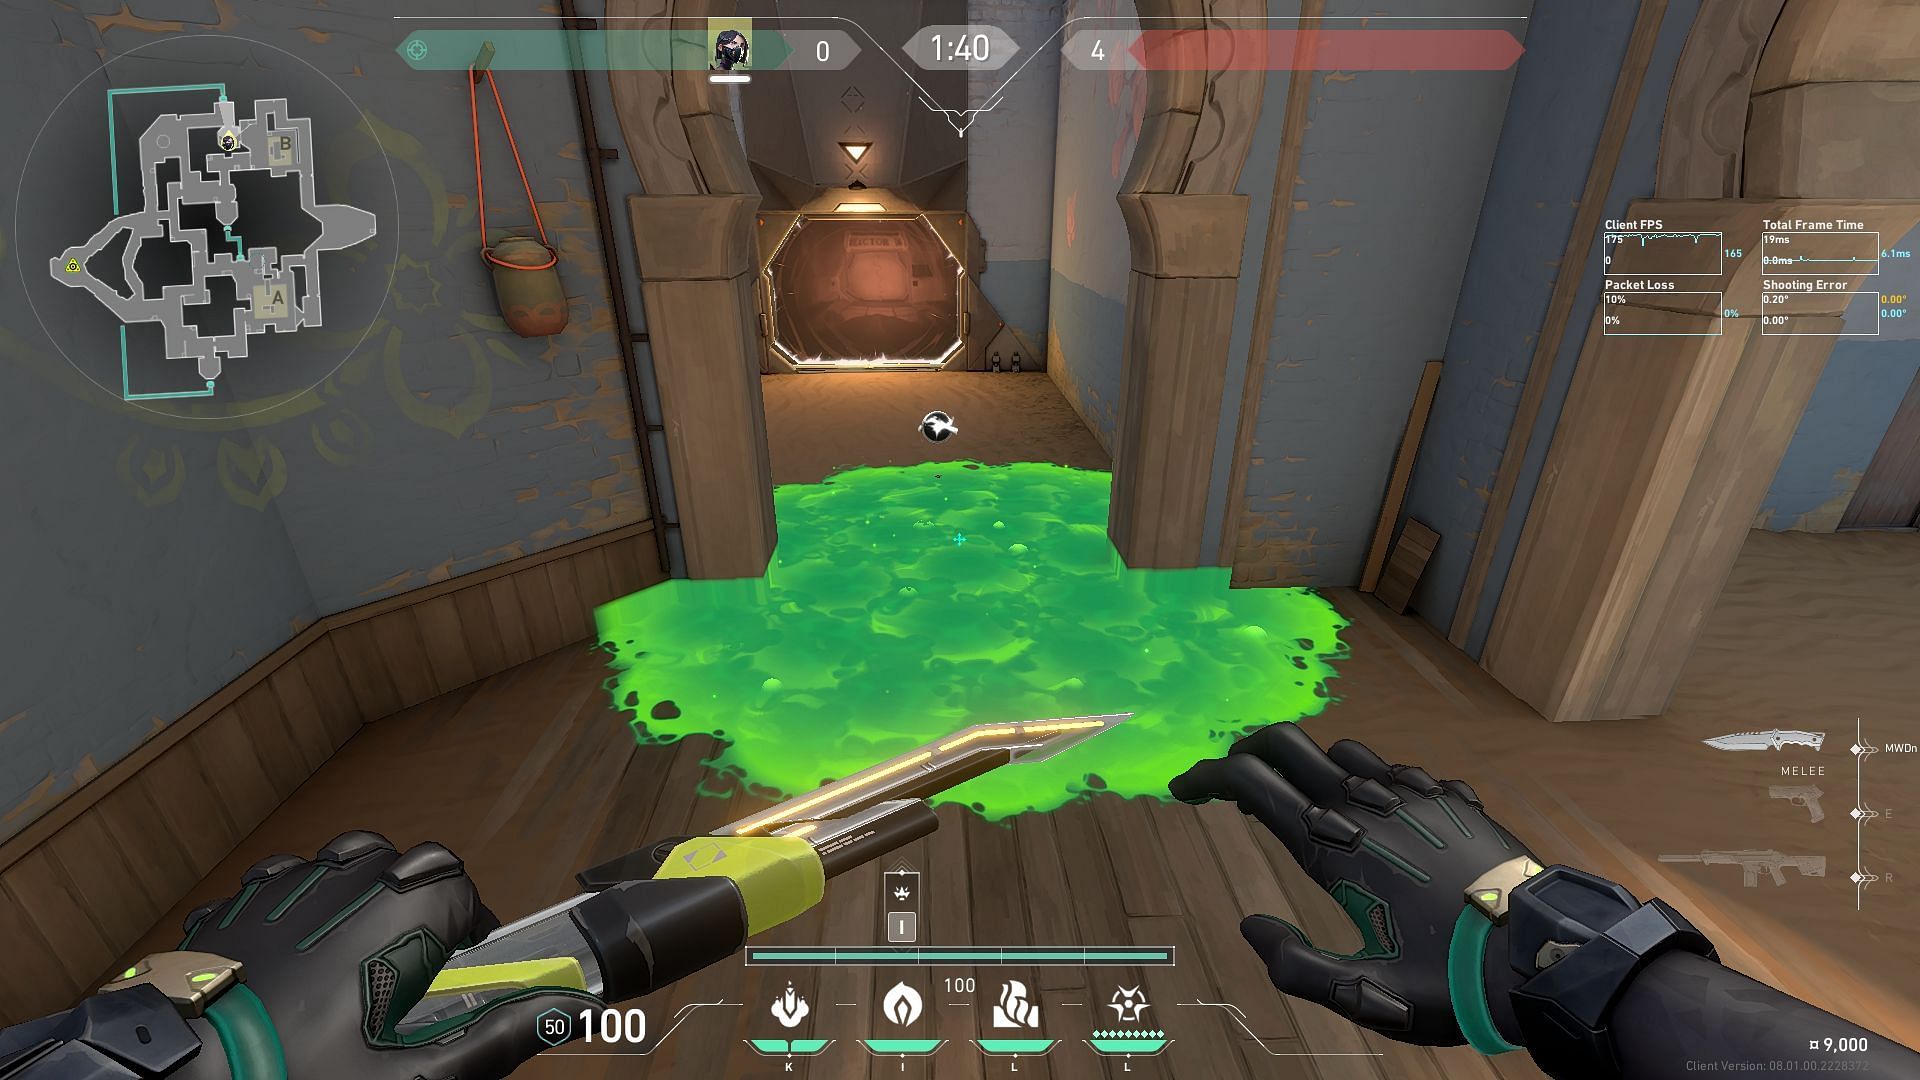
2) Best post-plant Viper lineup on Bind for A site
Get into the corner created by the stacked boxes along the wall in the A Short area on Bind. Do not step up onto the boxes. Once you're in position, ready your Snake Bite by aiming your crosshair at the bend in the railing atop A Lamps and use left-click to throw the Viper molly on the bomb.
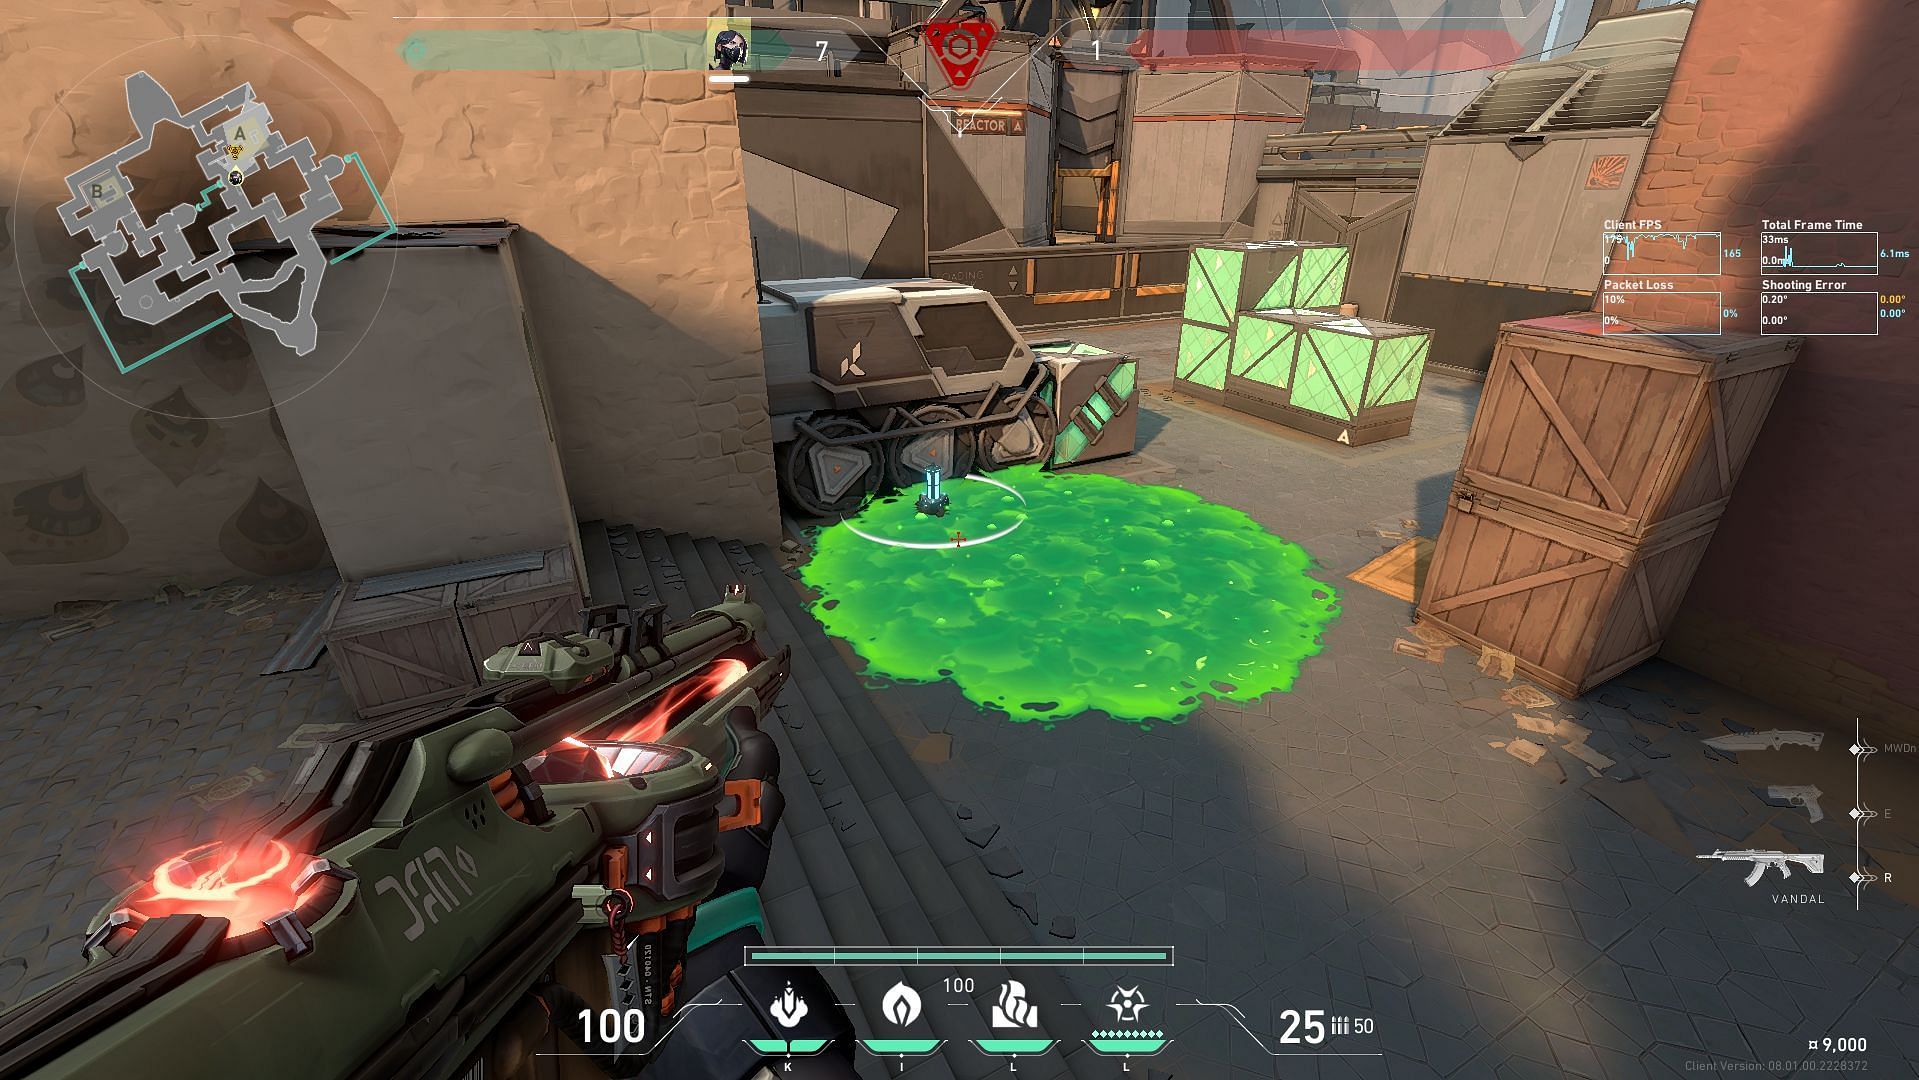
This Viper molly is designed to be quickly thrown to deny Defenders any chance to defuse the Spike planted in the default spot on the A site. With this Snake Bite lineup, you can provide maximum support to your teammates in the post-plant scenario since you stay close to the action.
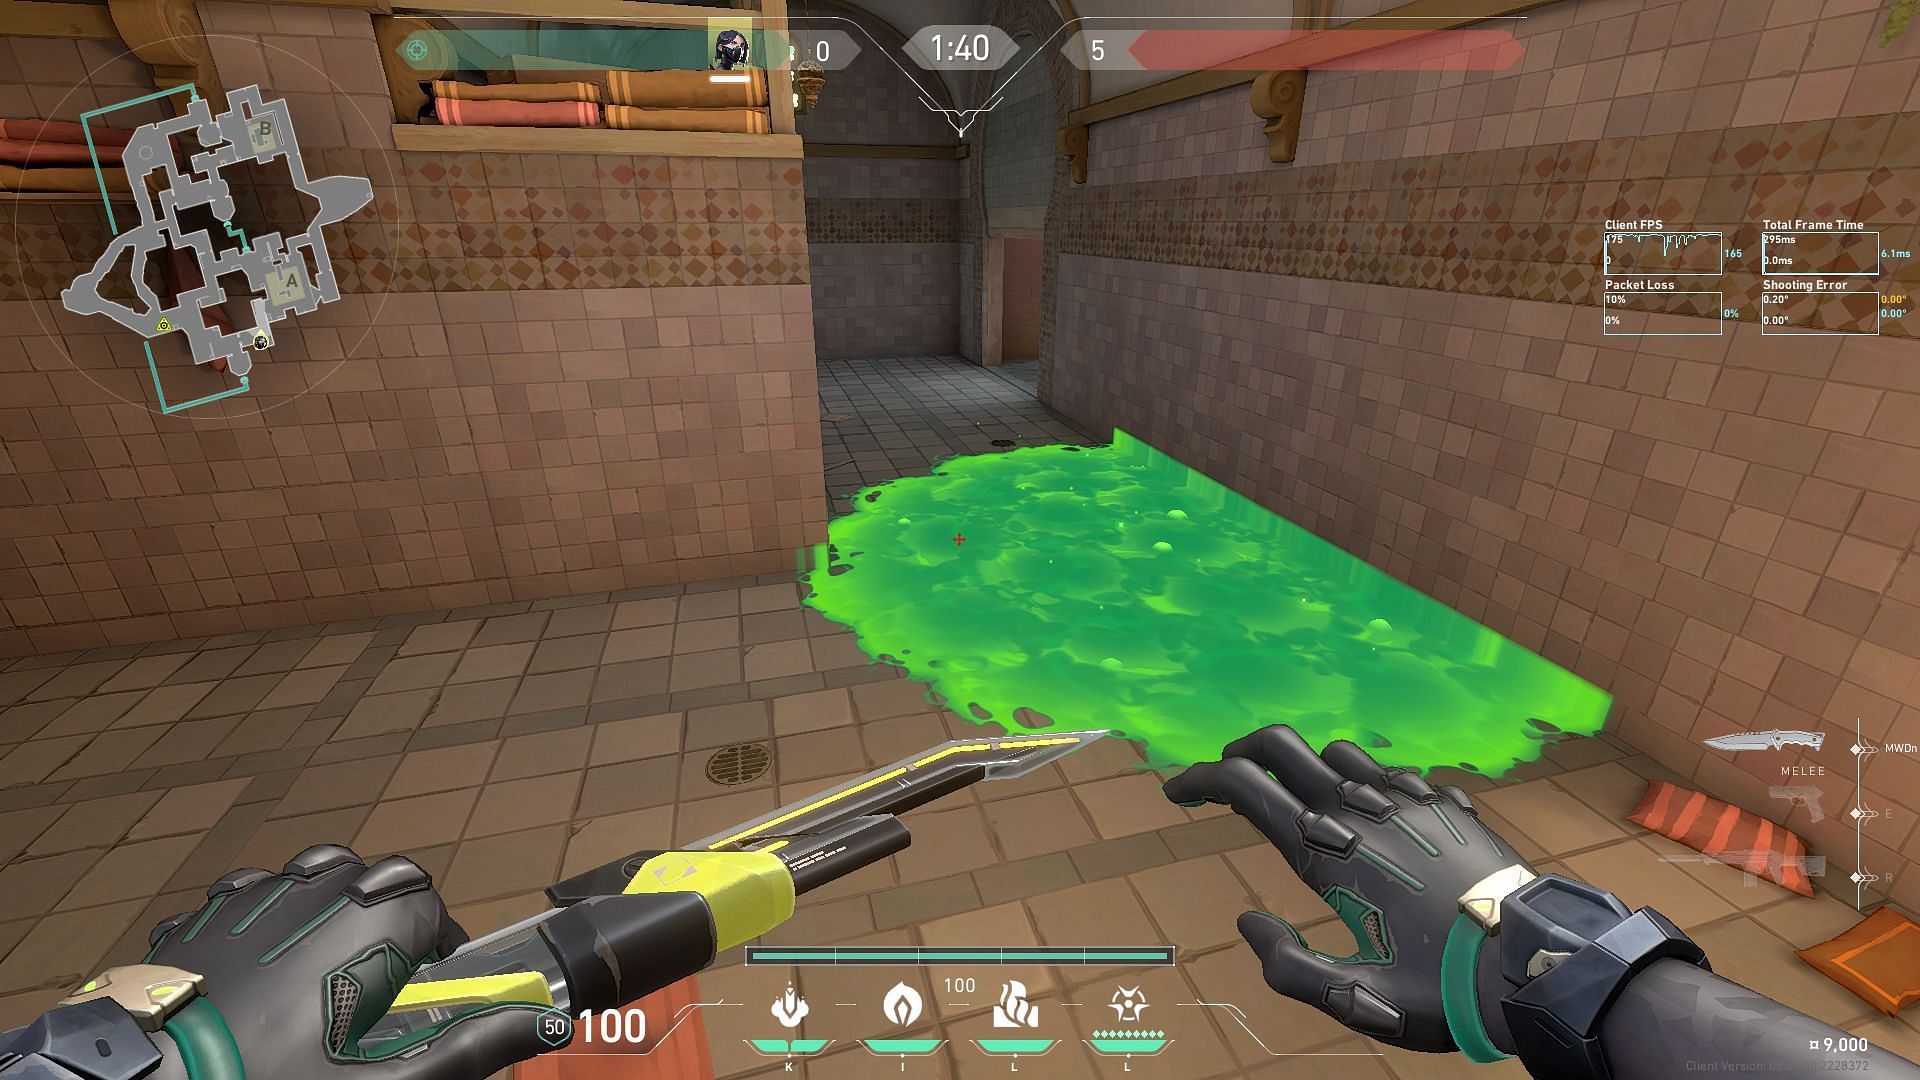
3) Best post-plant Viper lineup on Bind for B site
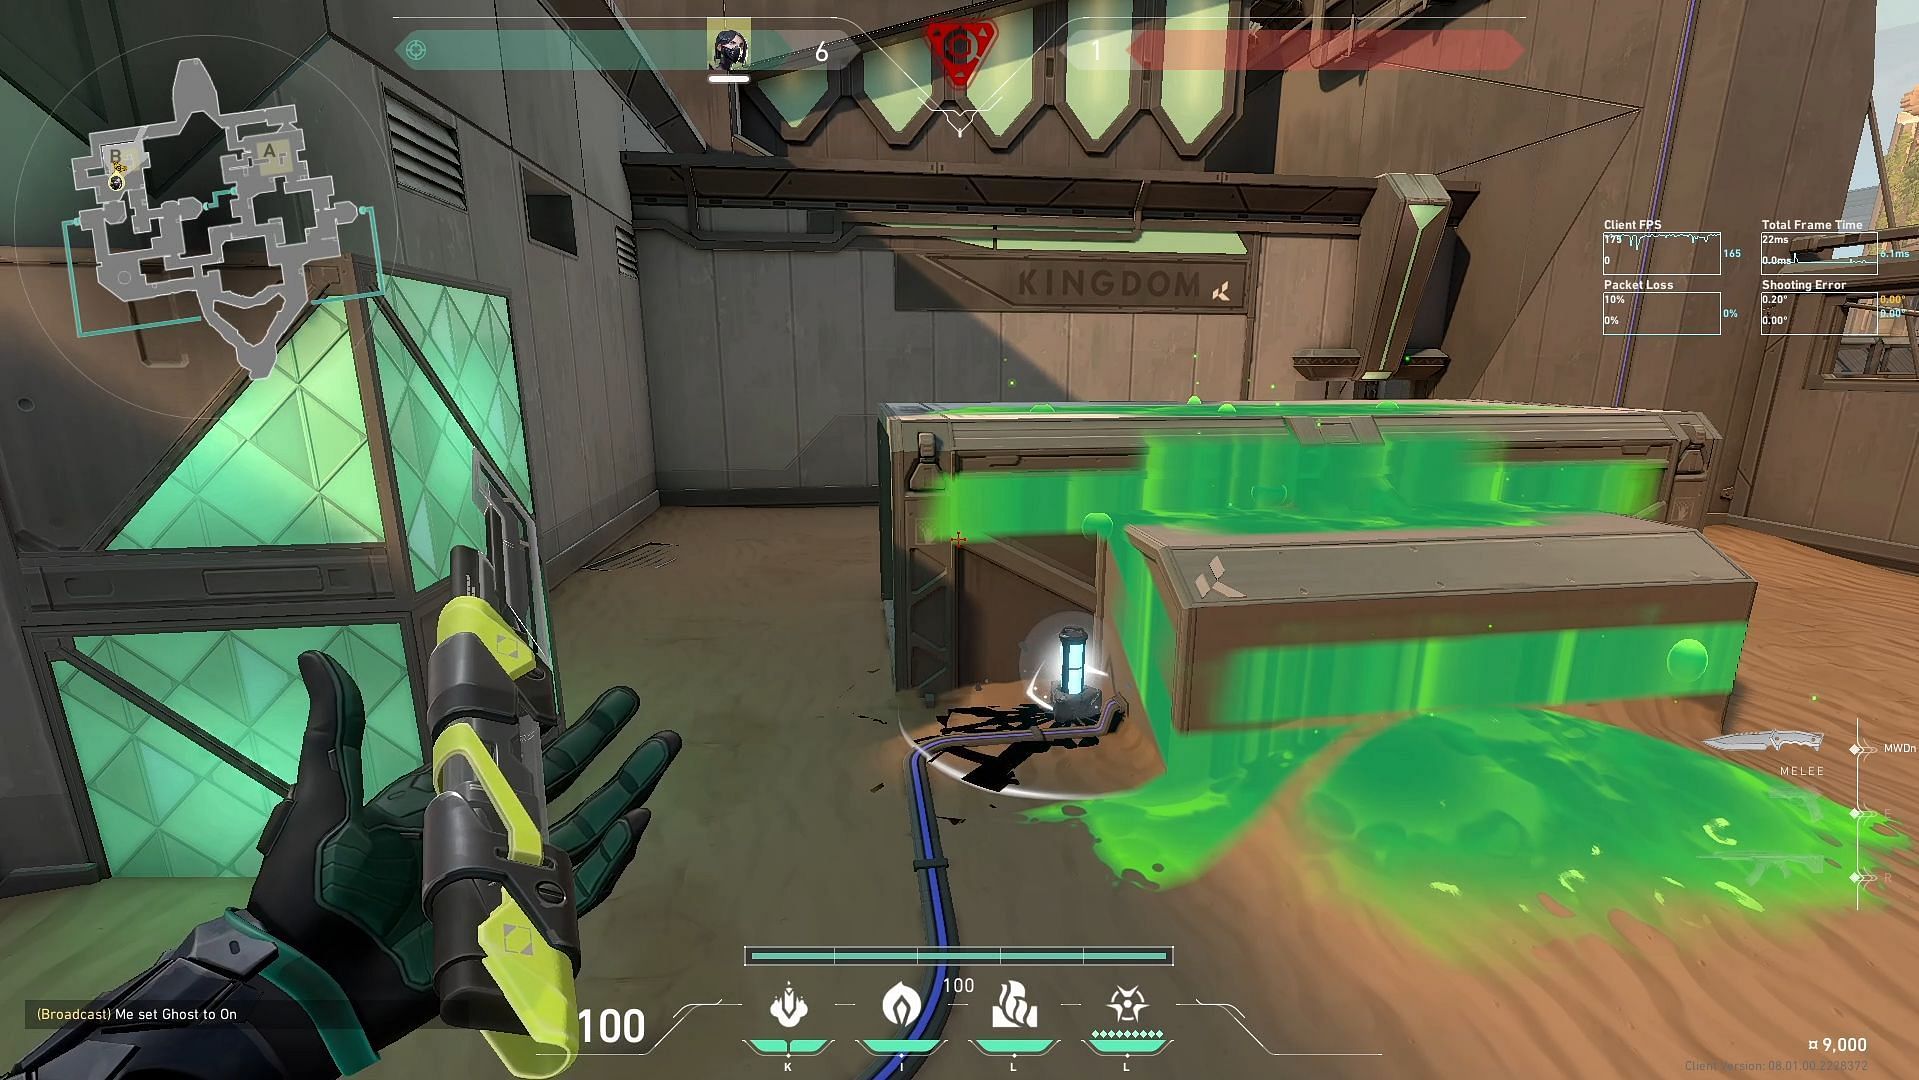
This Snake Bite lineup presents a challenging situation for Defenders attempting to defuse the Spike planted on the B site. The way the game renders the area of effect of this Snake Bite makes it difficult to determine if it reaches the Spike from this angle.
If Defenders indeed fall into the trap and believe that the lineup was missed, they will suffer the double damage debuff upon coming into contact with the Viper molly.
To perform this Viper lineup on Bind, carefully go through the guide below:
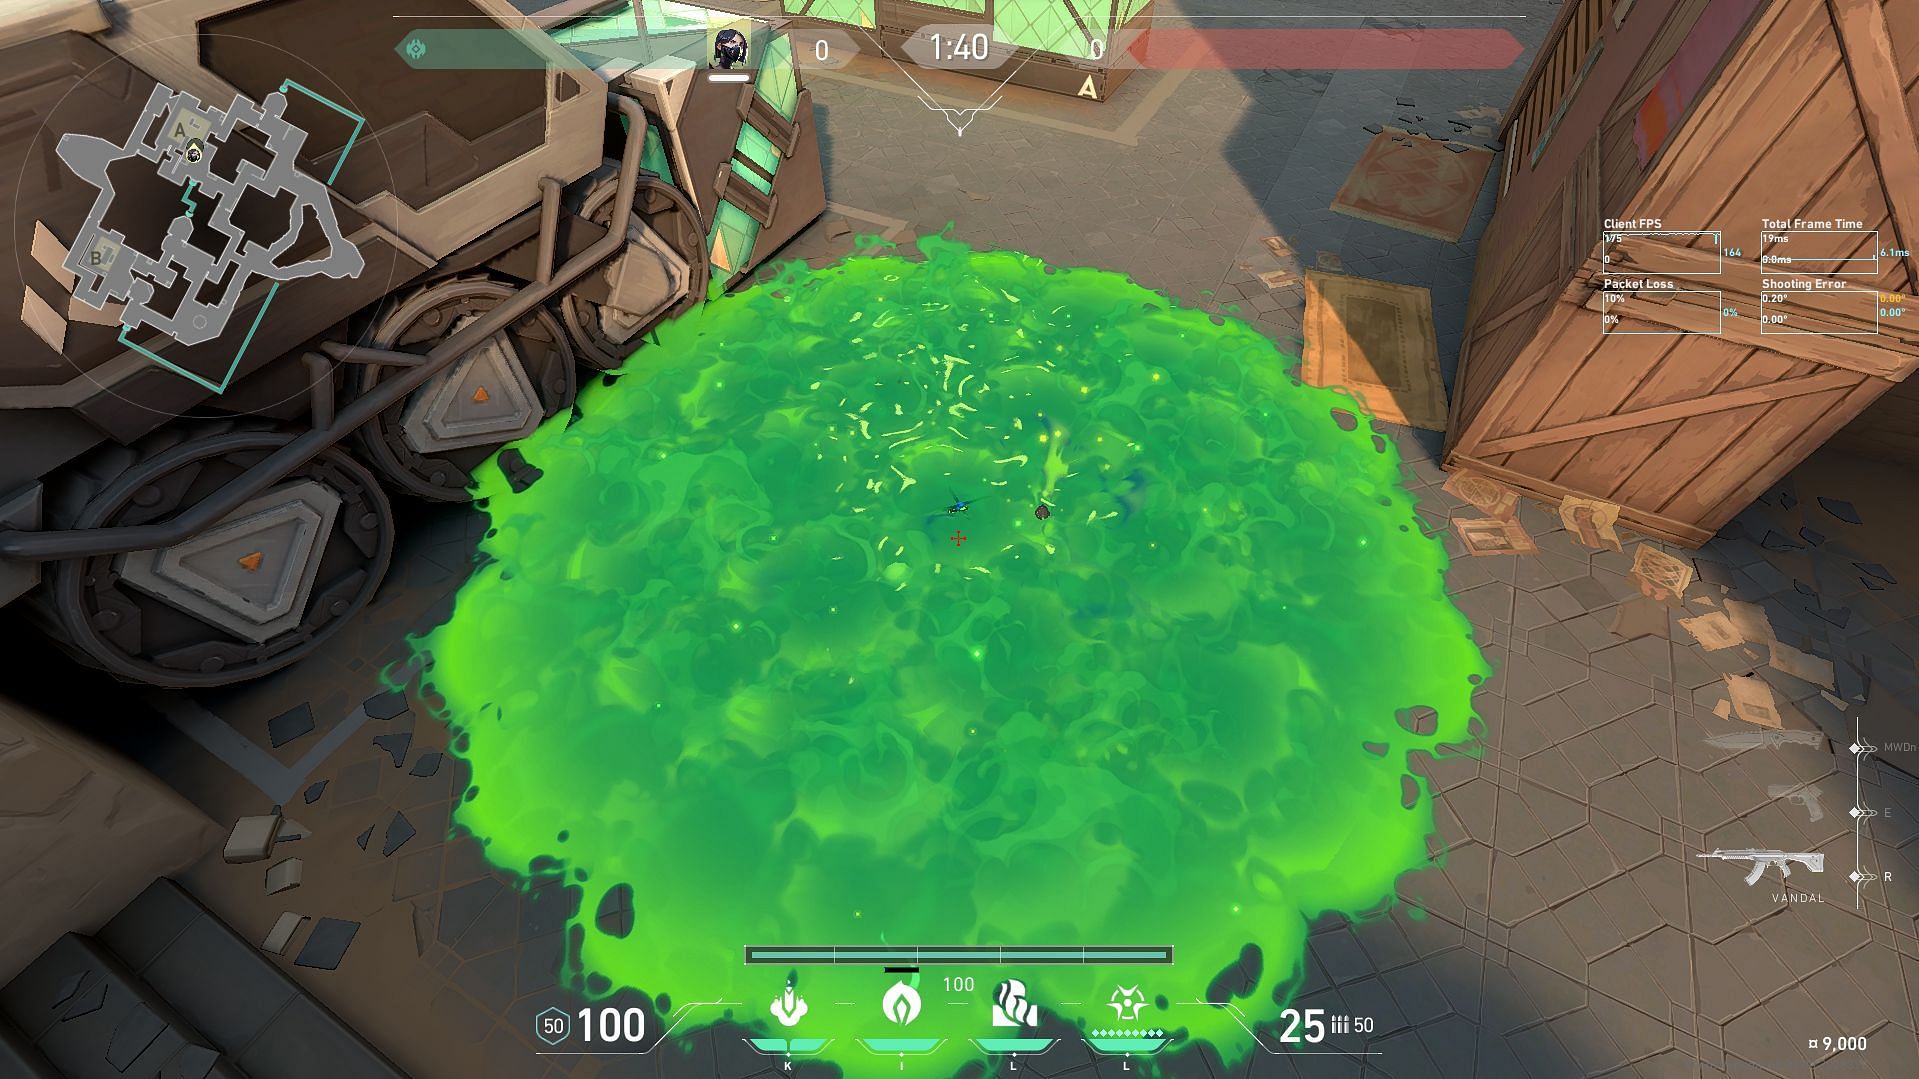
Stand in front of the left flower vase in B Hookah and face the B site.
Equip the Snake Bite and position the left end of the rightmost heads-up display (HUD) line to the spot where the floor tile's crack meets the edge of the brown carpet underneath you. Use left-click to throw the Viper molly onto the Spike.
4) Anti-plant Viper lineup on Bind
Utilizing Poison Orb and Snake Bite in tandem during attack-side post-plants to thwart a defender attempting to defuse the Spike may appear typical to many players. However, this strategy, involving Viper's abilities, can also be effectively employed on defense to prevent Attackers from planting the Spike.
This represents the updated strategy for playing Viper on Bind. On this map, her role involves anchoring the B site while maintaining the ability to influence the round should the Attackers opt for the A site.
To initiate this play, you'll need to follow a series of steps and consider a few scenarios. Therefore, carefully go through the guide below:
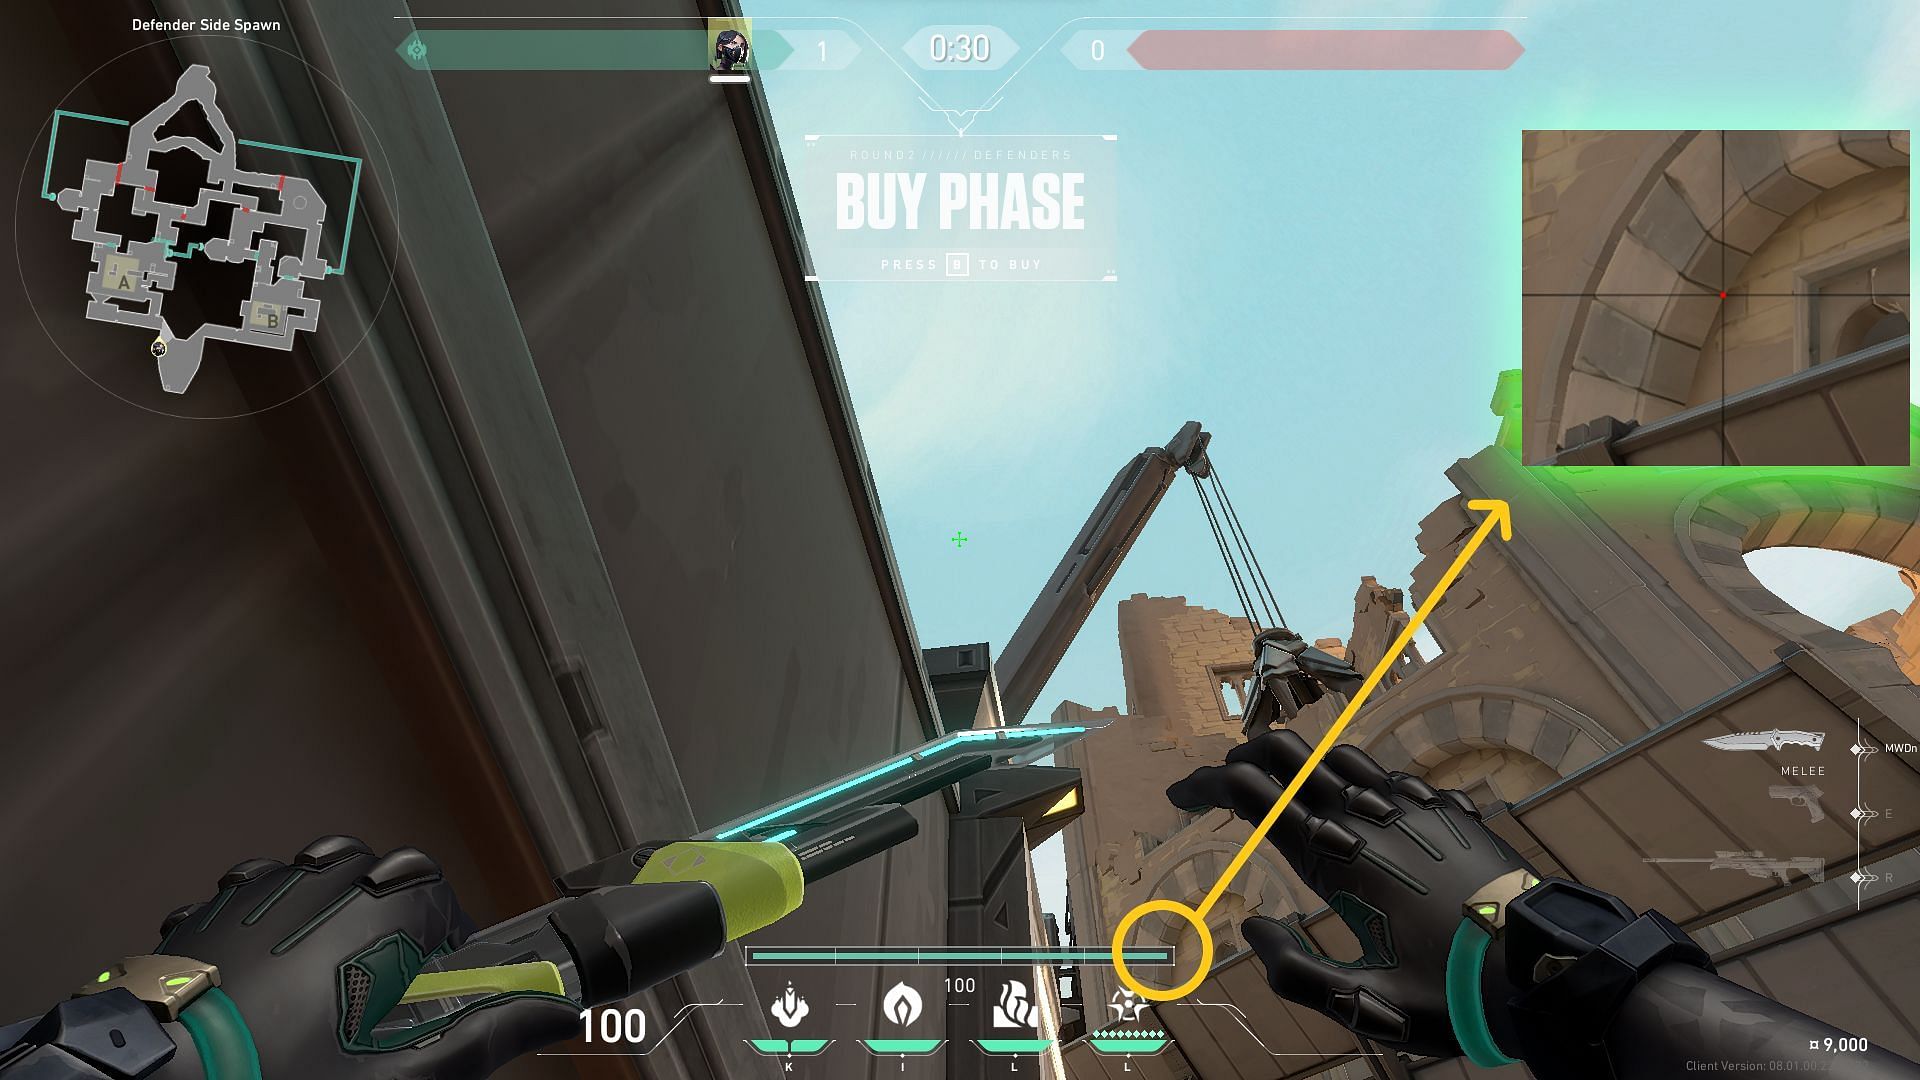
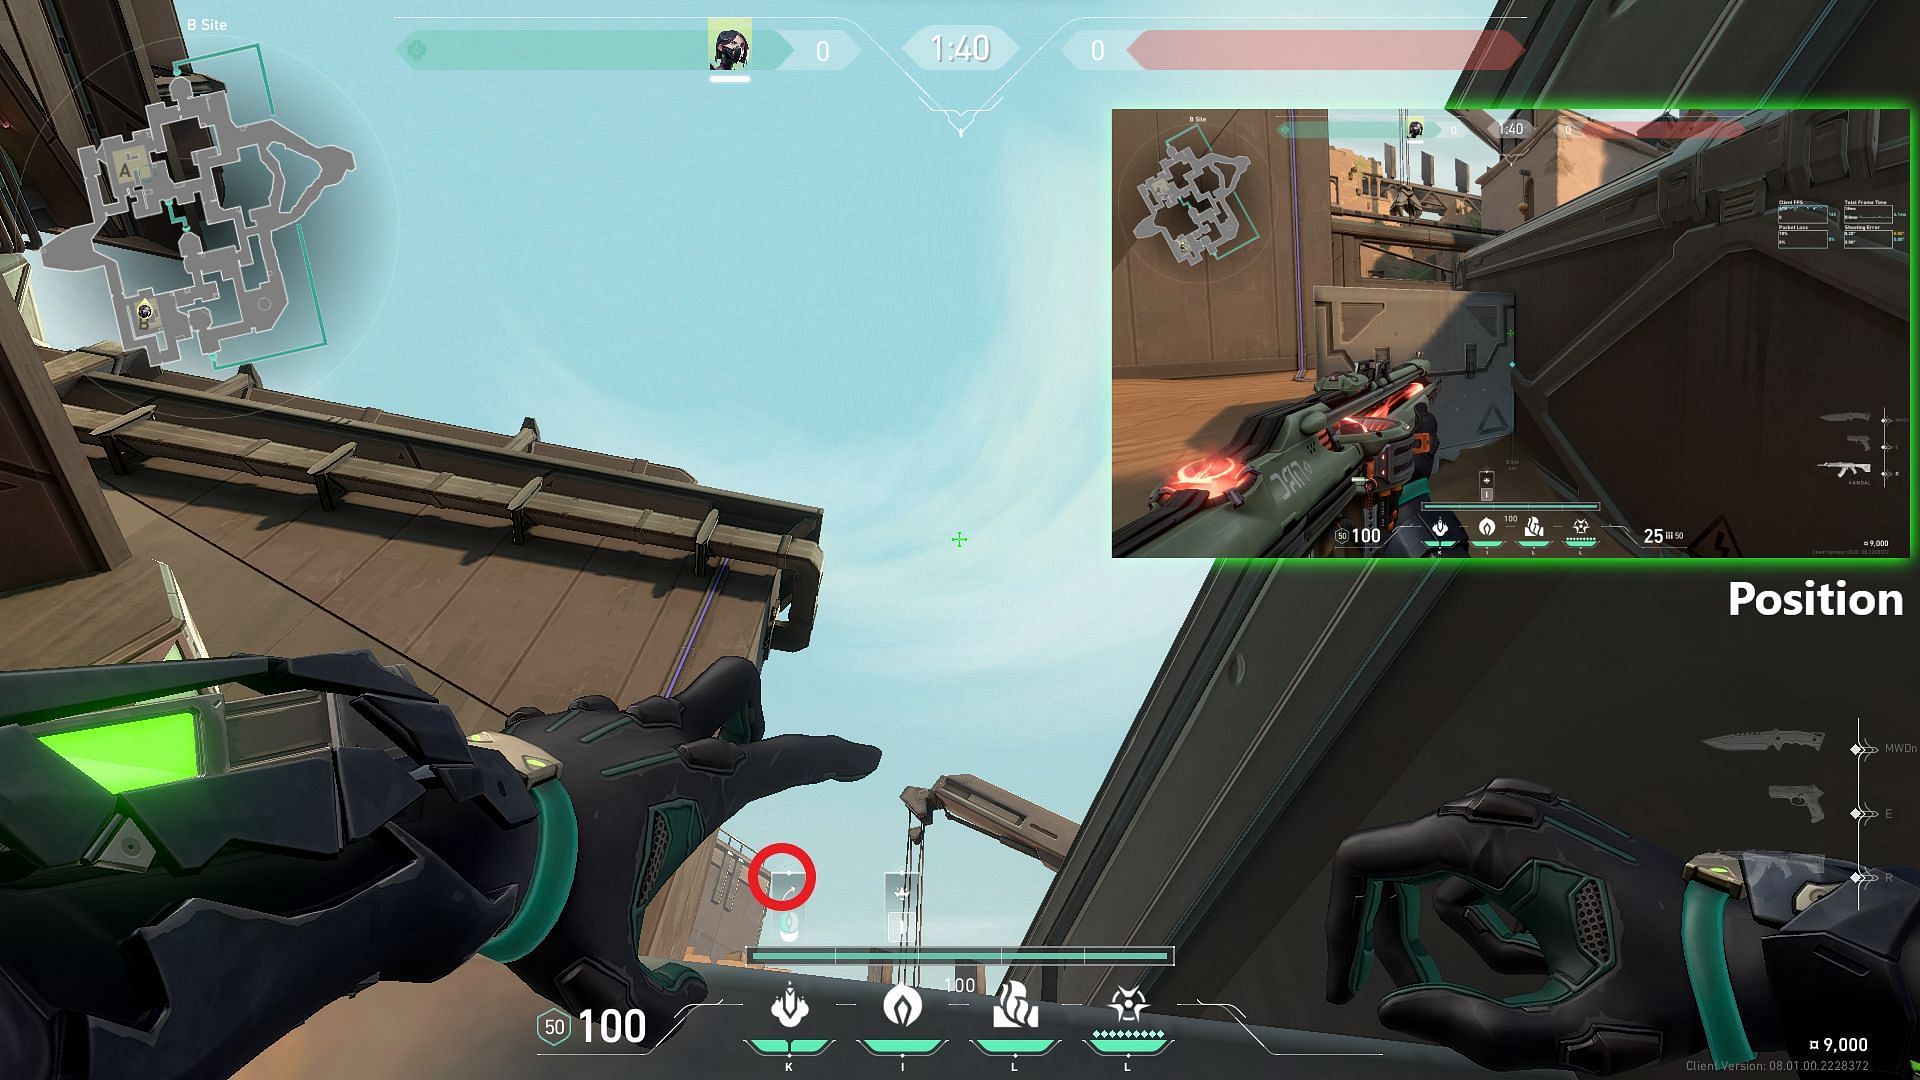
Step 1: Putting the Poison Orb on the A site Spike plant zone
This Poison Orb, when switched on, is meant to decrease (over time) the health of the Attacker who is trying to plant the Spike onto the A site.
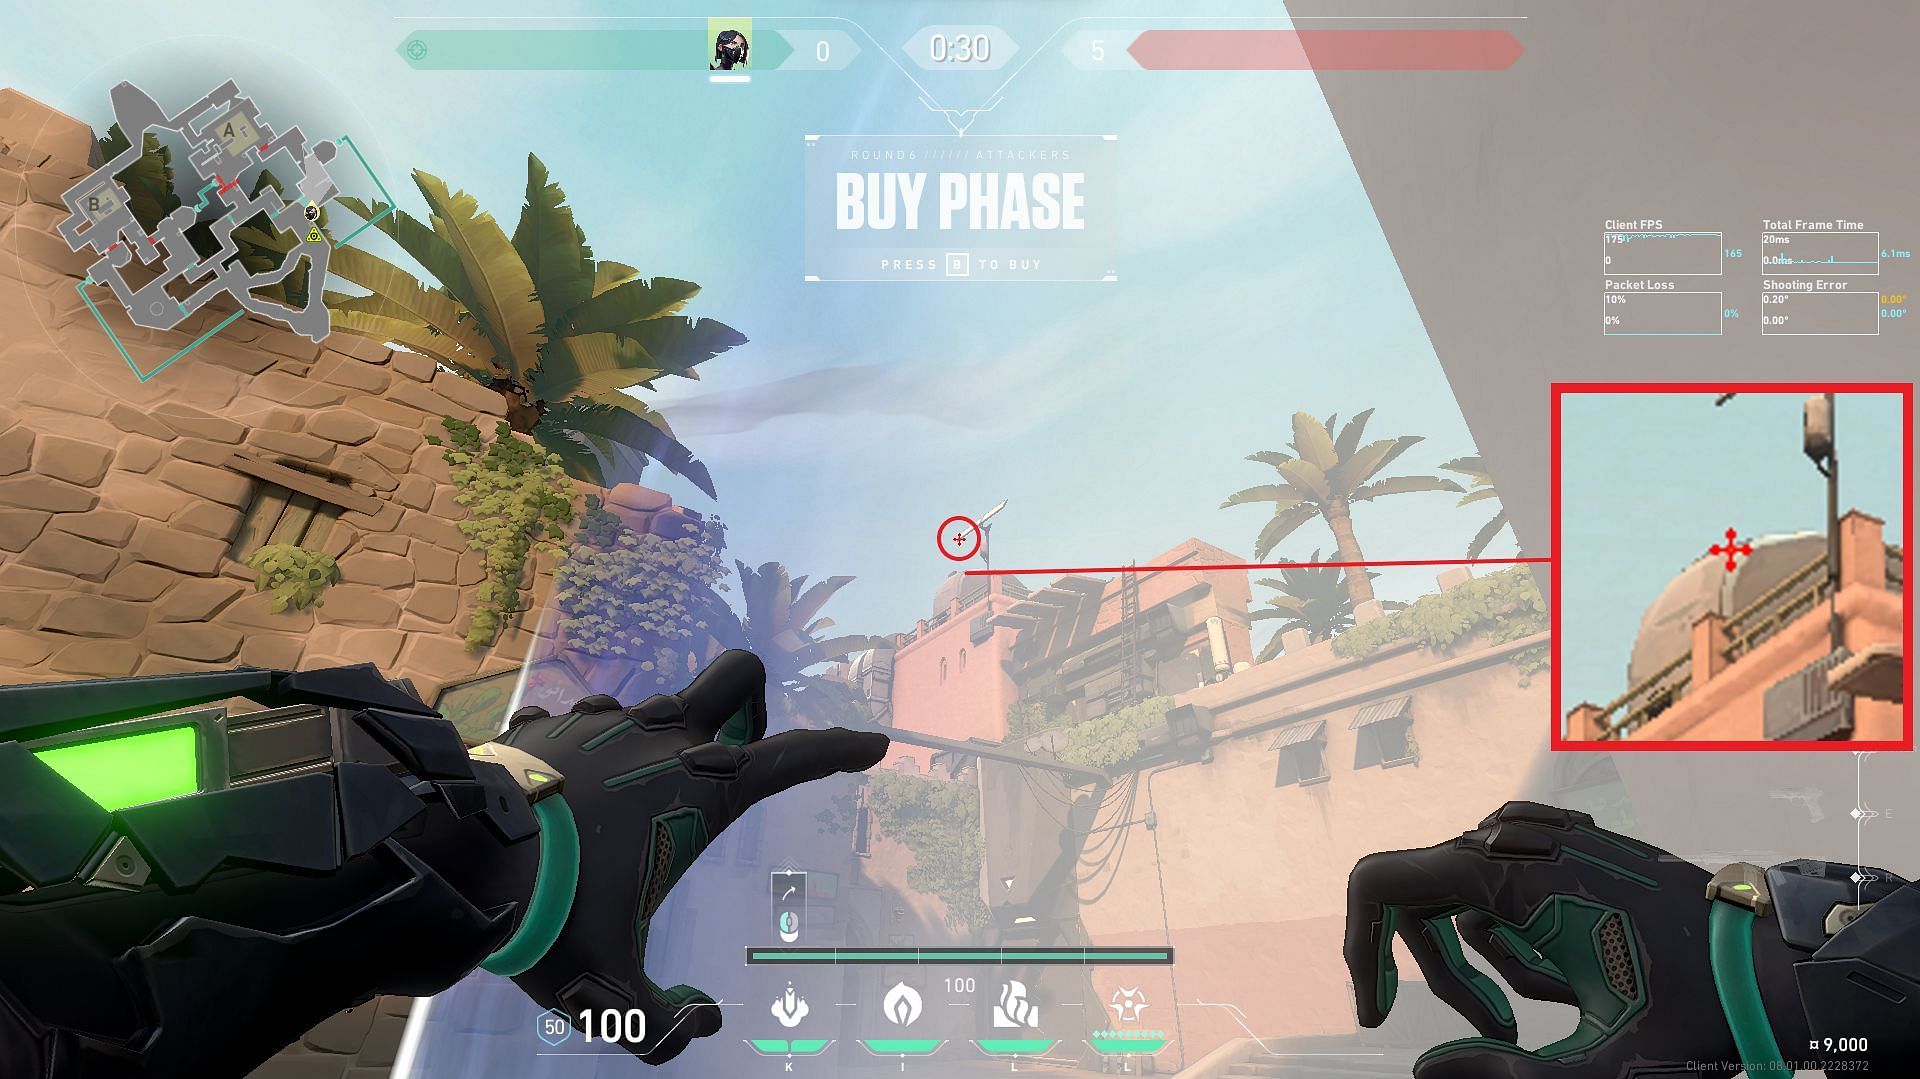
To land this Viper orb onto the A site Spike plant zone, stand close to the wall, against the drums and cones in the Defenders spawn area during the Buy Phase of the round. By using this lineup, you get enough time to set up your Viper wall on the B site during the Buy Phase.
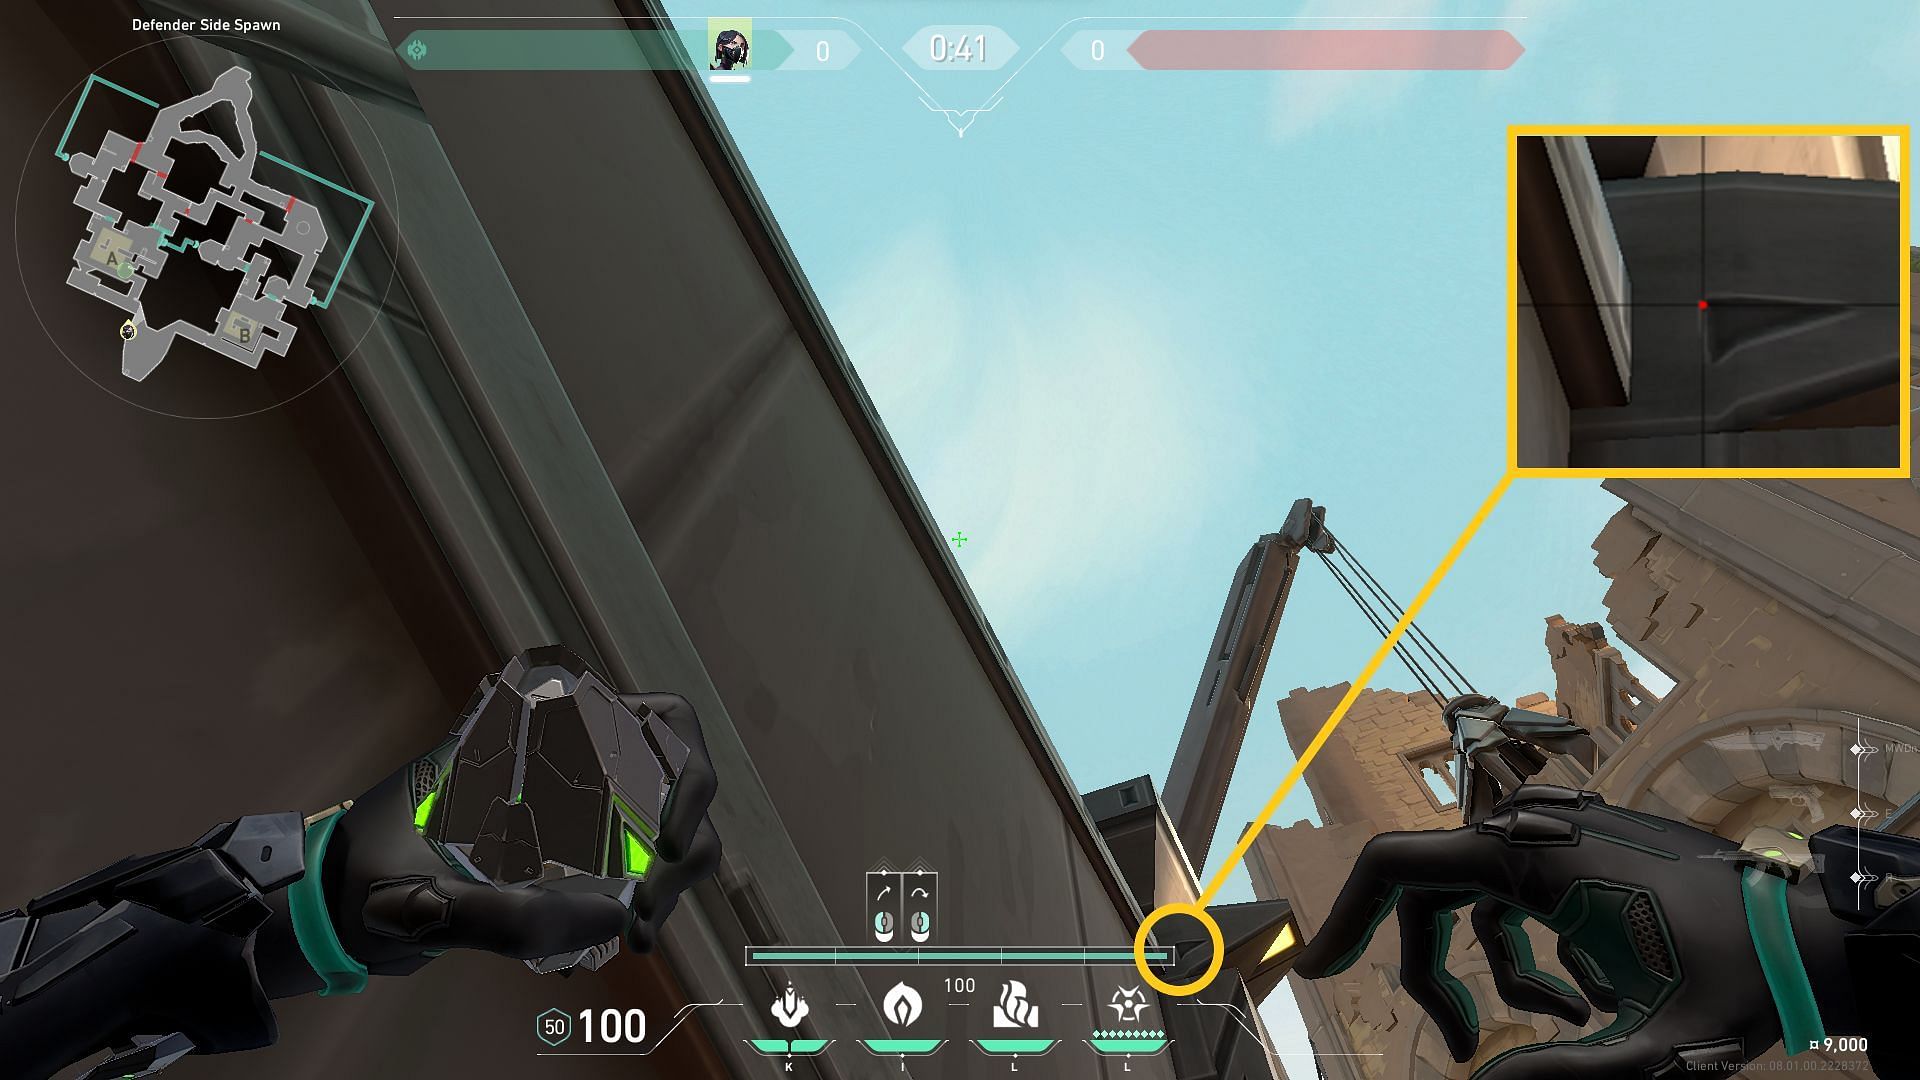
Align the top-right section of your Poison Bar with the top vertice of the black triangle on the protruding ledge. Then, perform a quick jump throw by simultaneously pressing your Jump key and left-click.
Step 2: Throwing the Snake Bite on the A site Spike plant zone
This Snake Bite is designed for use when holding the B site. However, when anchoring a site, many scenarios can affect your decision to defend a specific map area on Bind.
As a result, the following lineups for landing a precise Snake Bite on the A site to prevent the Spike plant are designed to be executed from various positions.
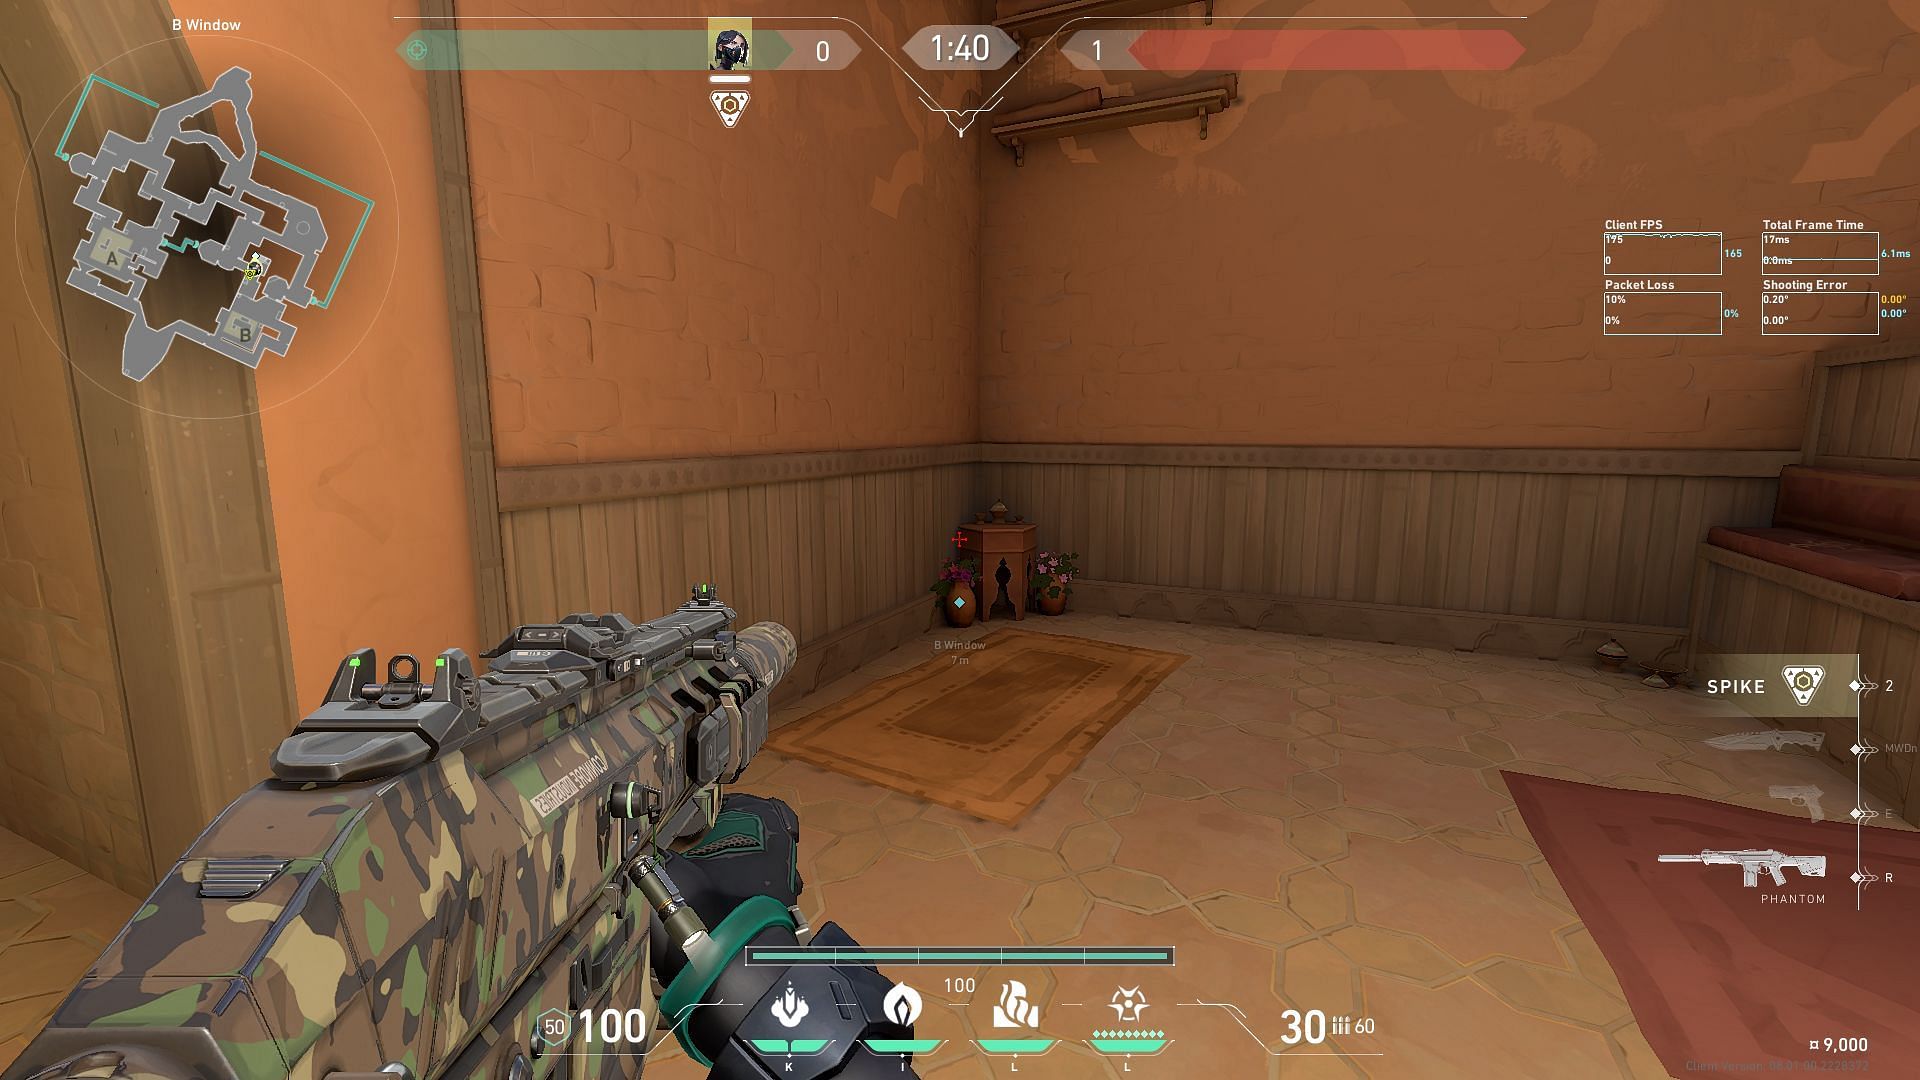
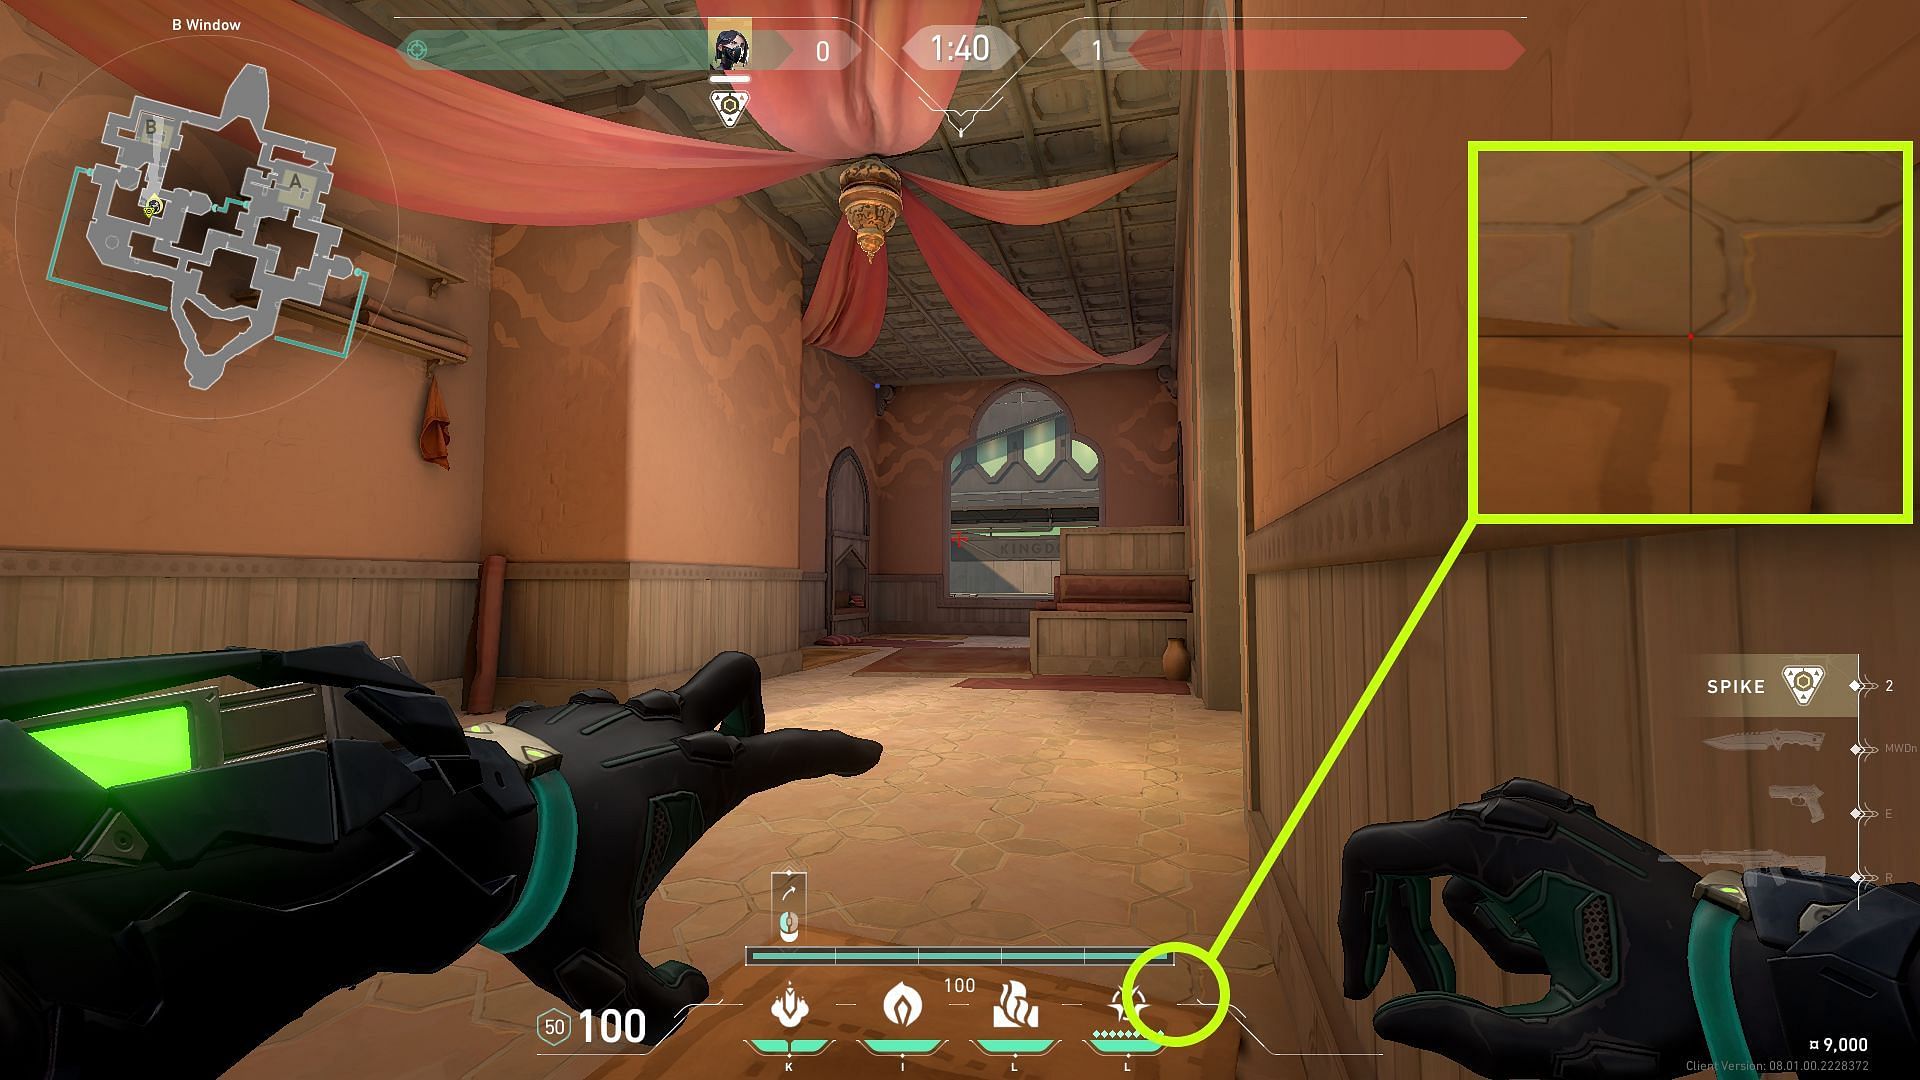
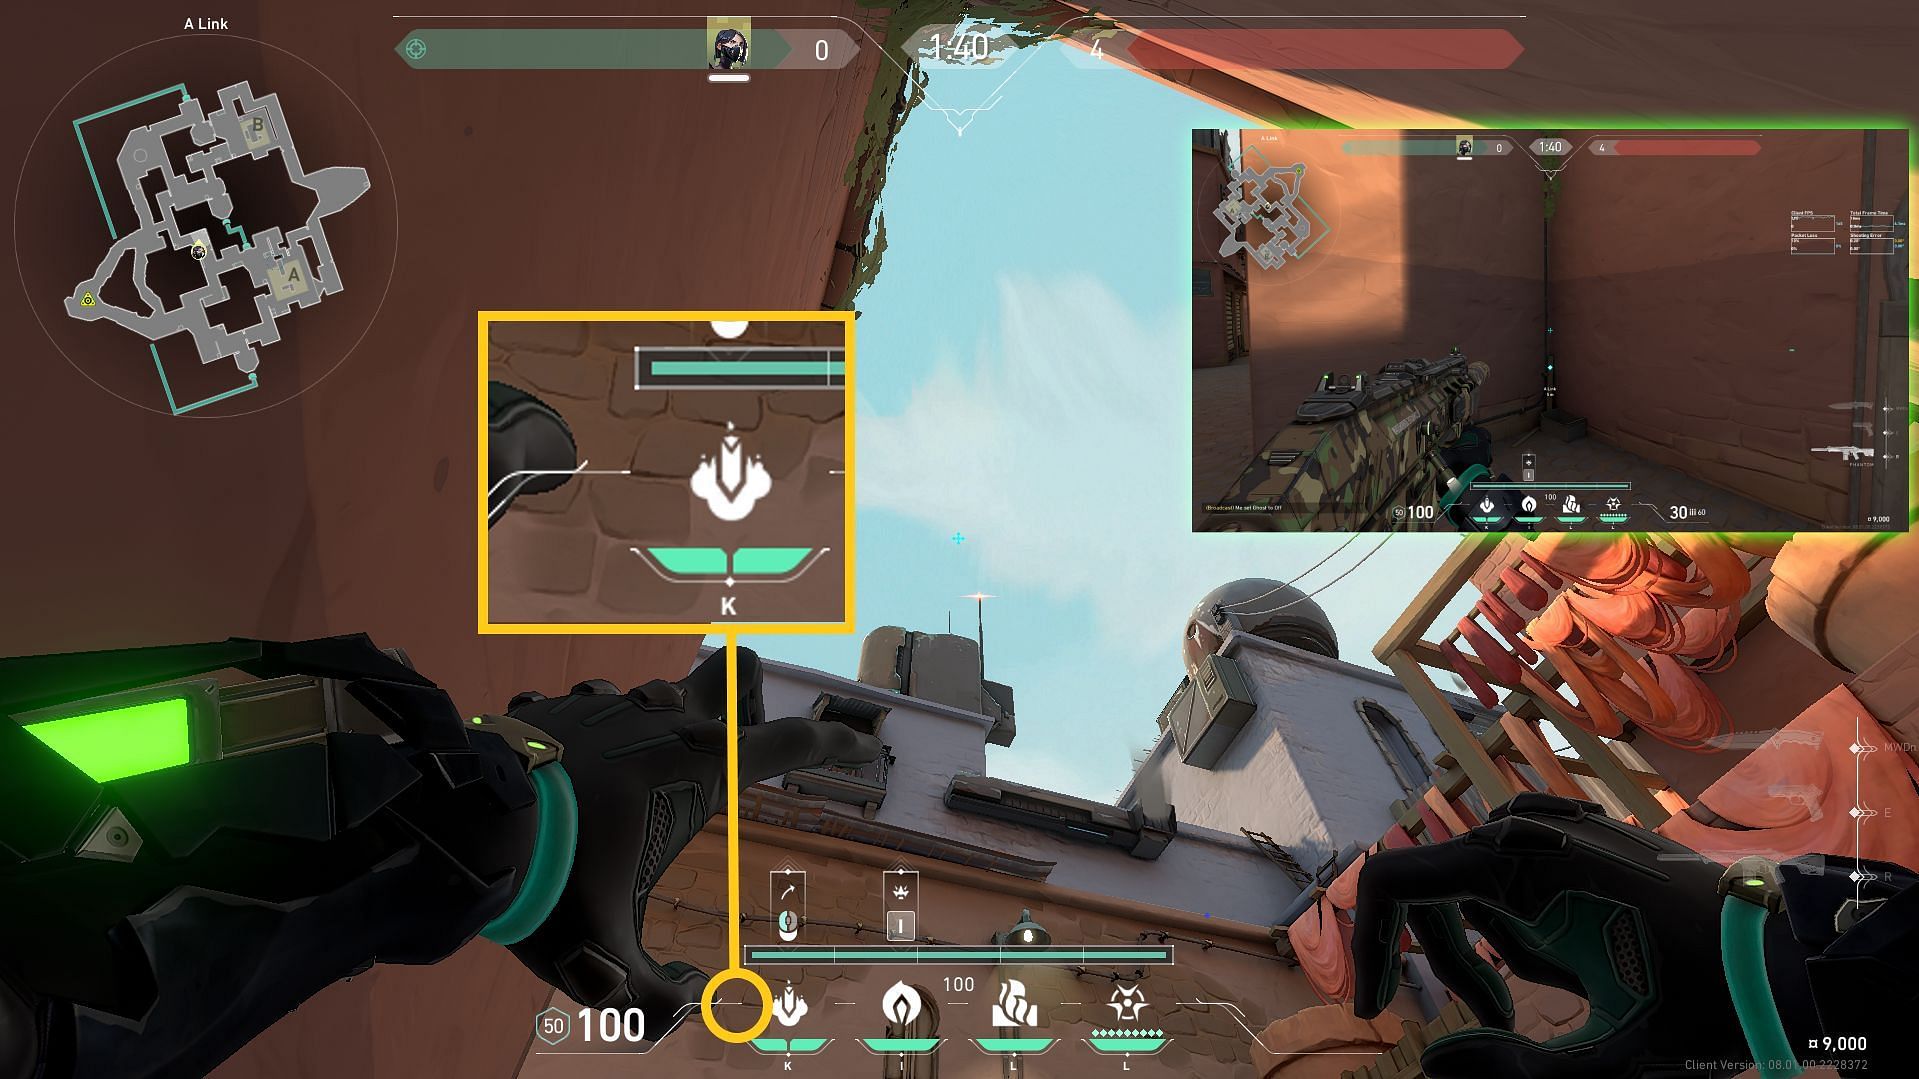
Anti-plant Viper lineup on Bind from B back site on Bind
Get into the position highlighted in the image above. Then, equip the Snake Bite and align the top-left corner of the highlighted rectangle with the top corner of the building in front. After lining up the HUD, simply left-click to launch the Viper molly.
Anti-plant Viper lineup on Bind from for rotating to A site from Defender spawn
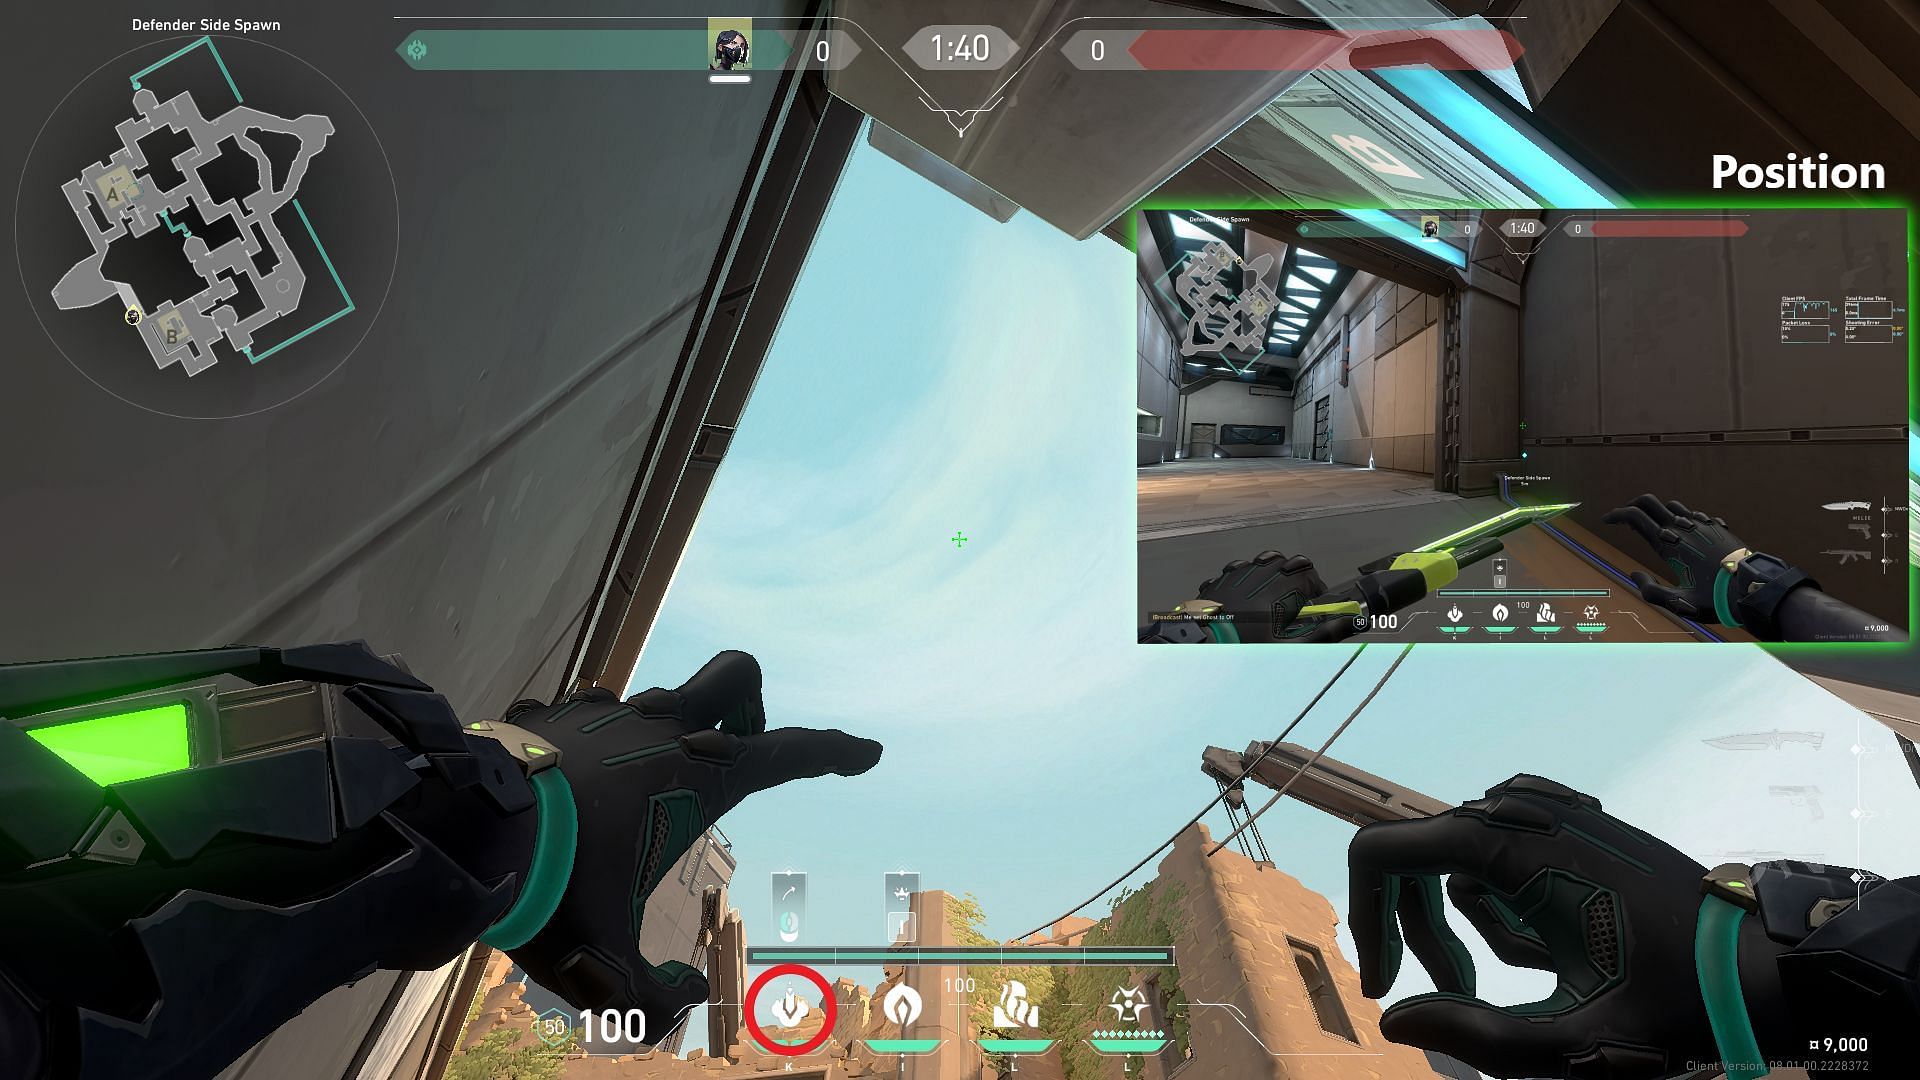
Get into the position highlighted in the image above. Then, equip the Snake Bite and place its icon on top of the highlighted part of the bricked structure in front. After lining up the HUD, simply left-click to launch the Viper molly.
Anti-plant Viper lineup on Bind for rotating to A site from B Long teleporter
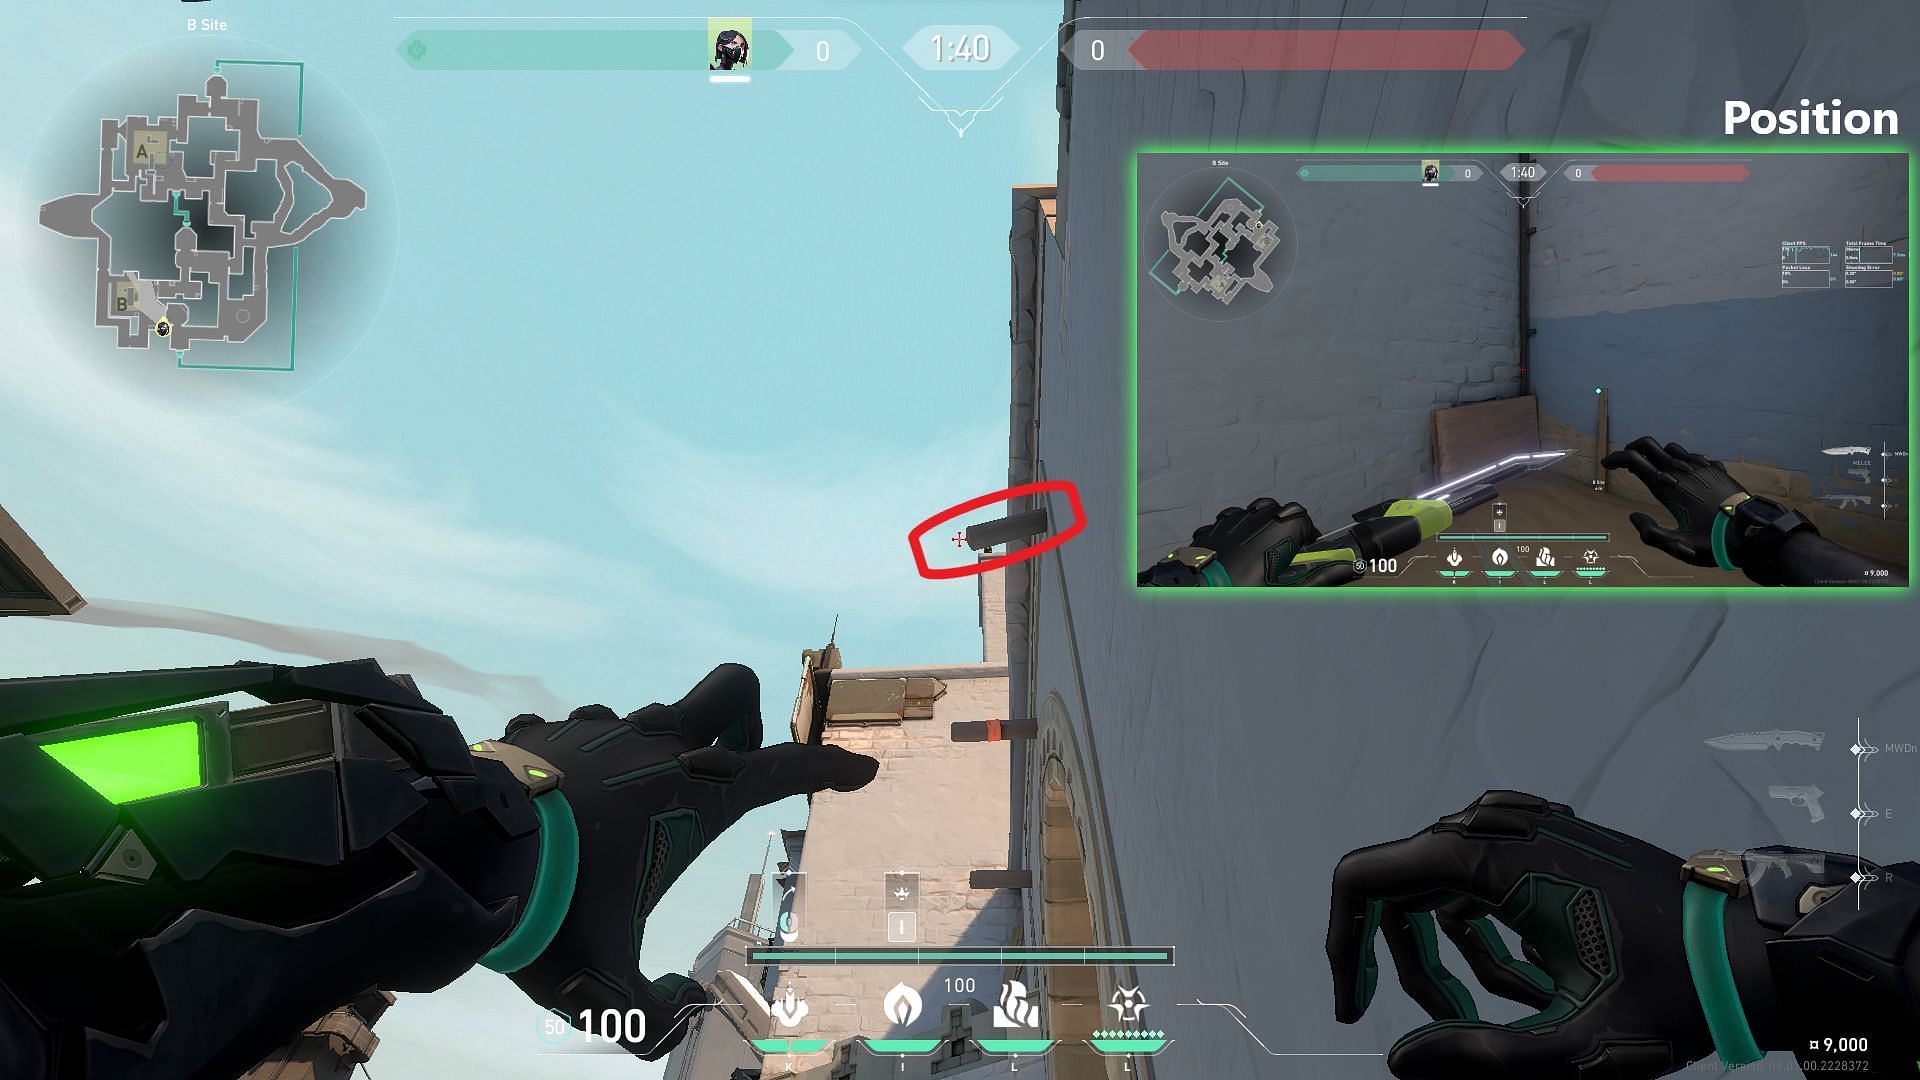
Get into the position highlighted in the image above. Then, equip the Snake Bite and put your crosshair on the left of the closest protruding beam as shown in the image above. After lining up the HUD, perform a quick jump throw by simultaneously pressing your Jump key and left-click.
Anti-plant Viper lineup on Bind from B Hookah
Get into the position highlighted in the image above by stepping on the first level of the stacked boxes in B Hookah. Then, equip the Snake Bite and align the left end of the rightmost heads-up display (HUD) line with the pointed end of the white pattern on the wall in front, as shown in the image above. After lining up the HUD, simply left-click to launch the Viper molly.
5) Viper lineup on Bind to initiate attacks
Viper molly can also be used as an initiating utility for attacking rounds like other Initiators such as KAY/O. However, the following Snake Bite lineups should be used only when your team has shown a clear intention of taking some important map space very quickly as the round begins.
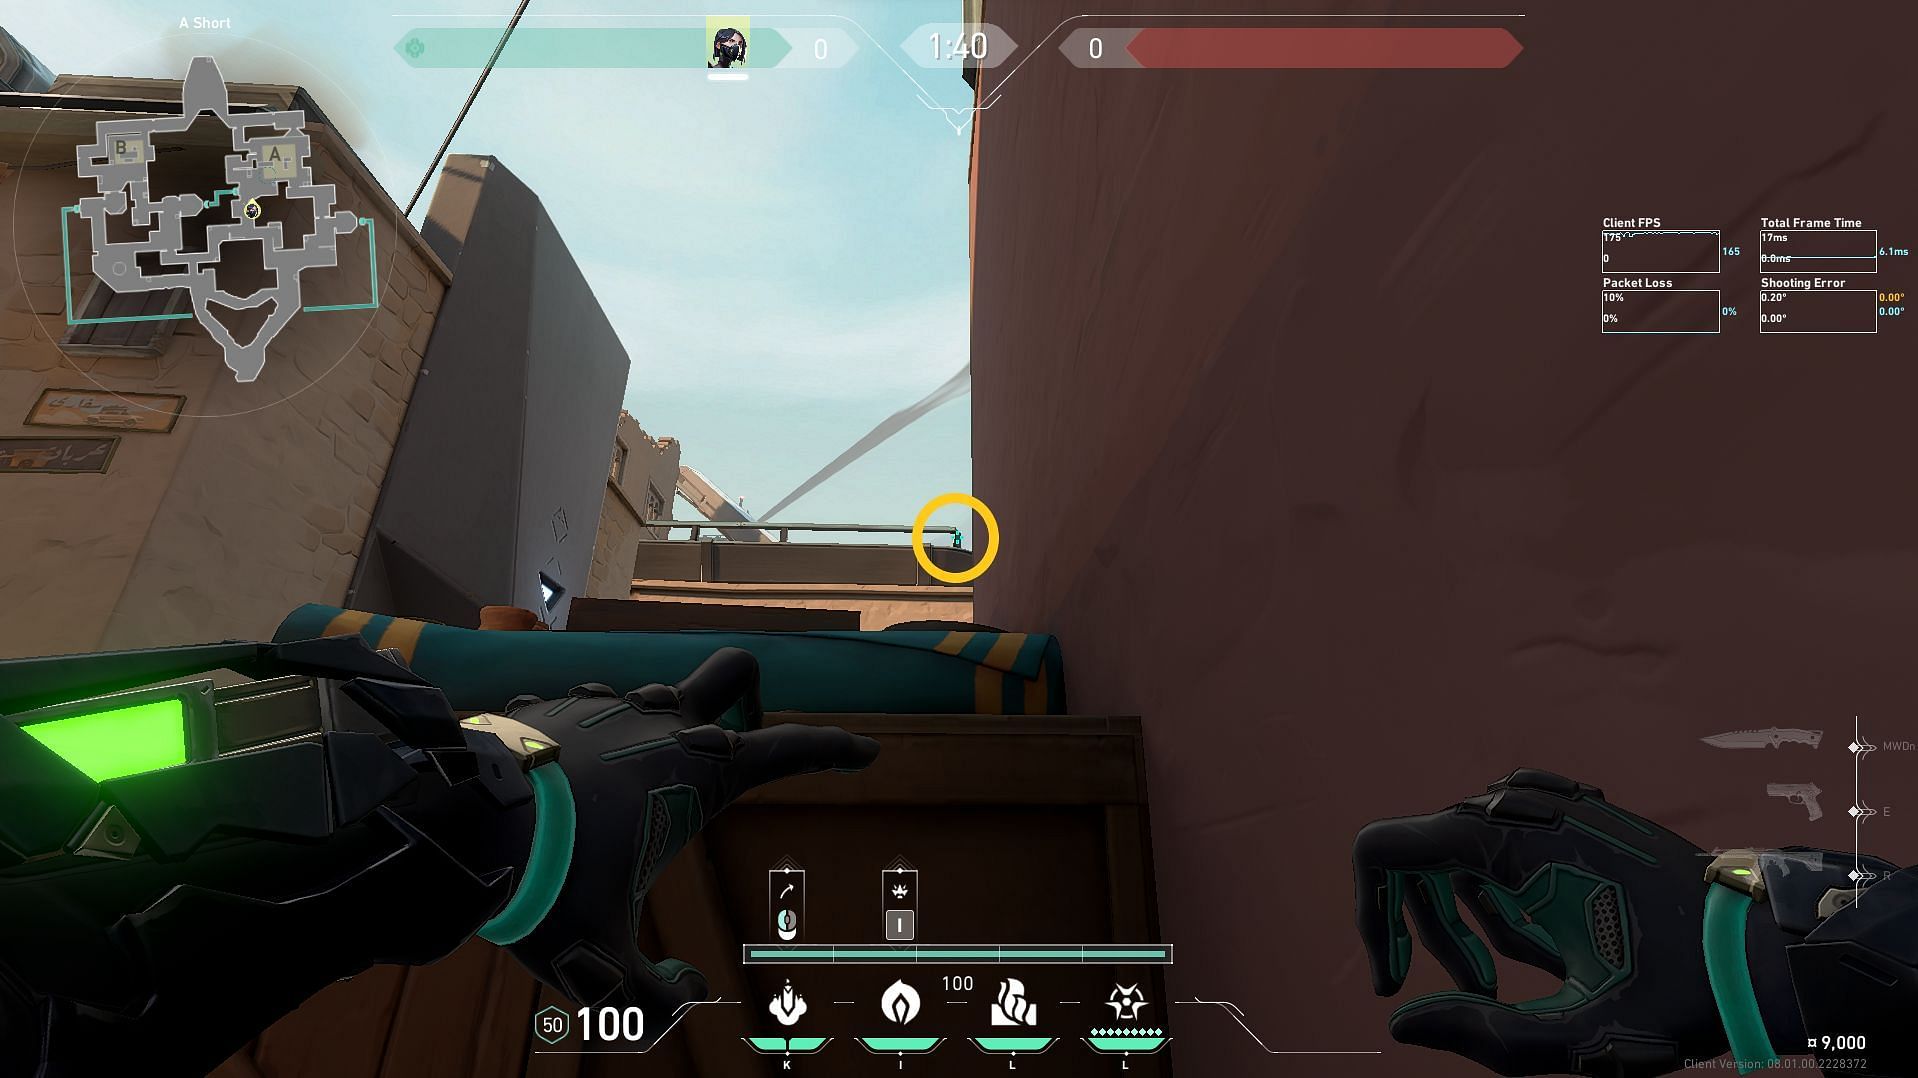
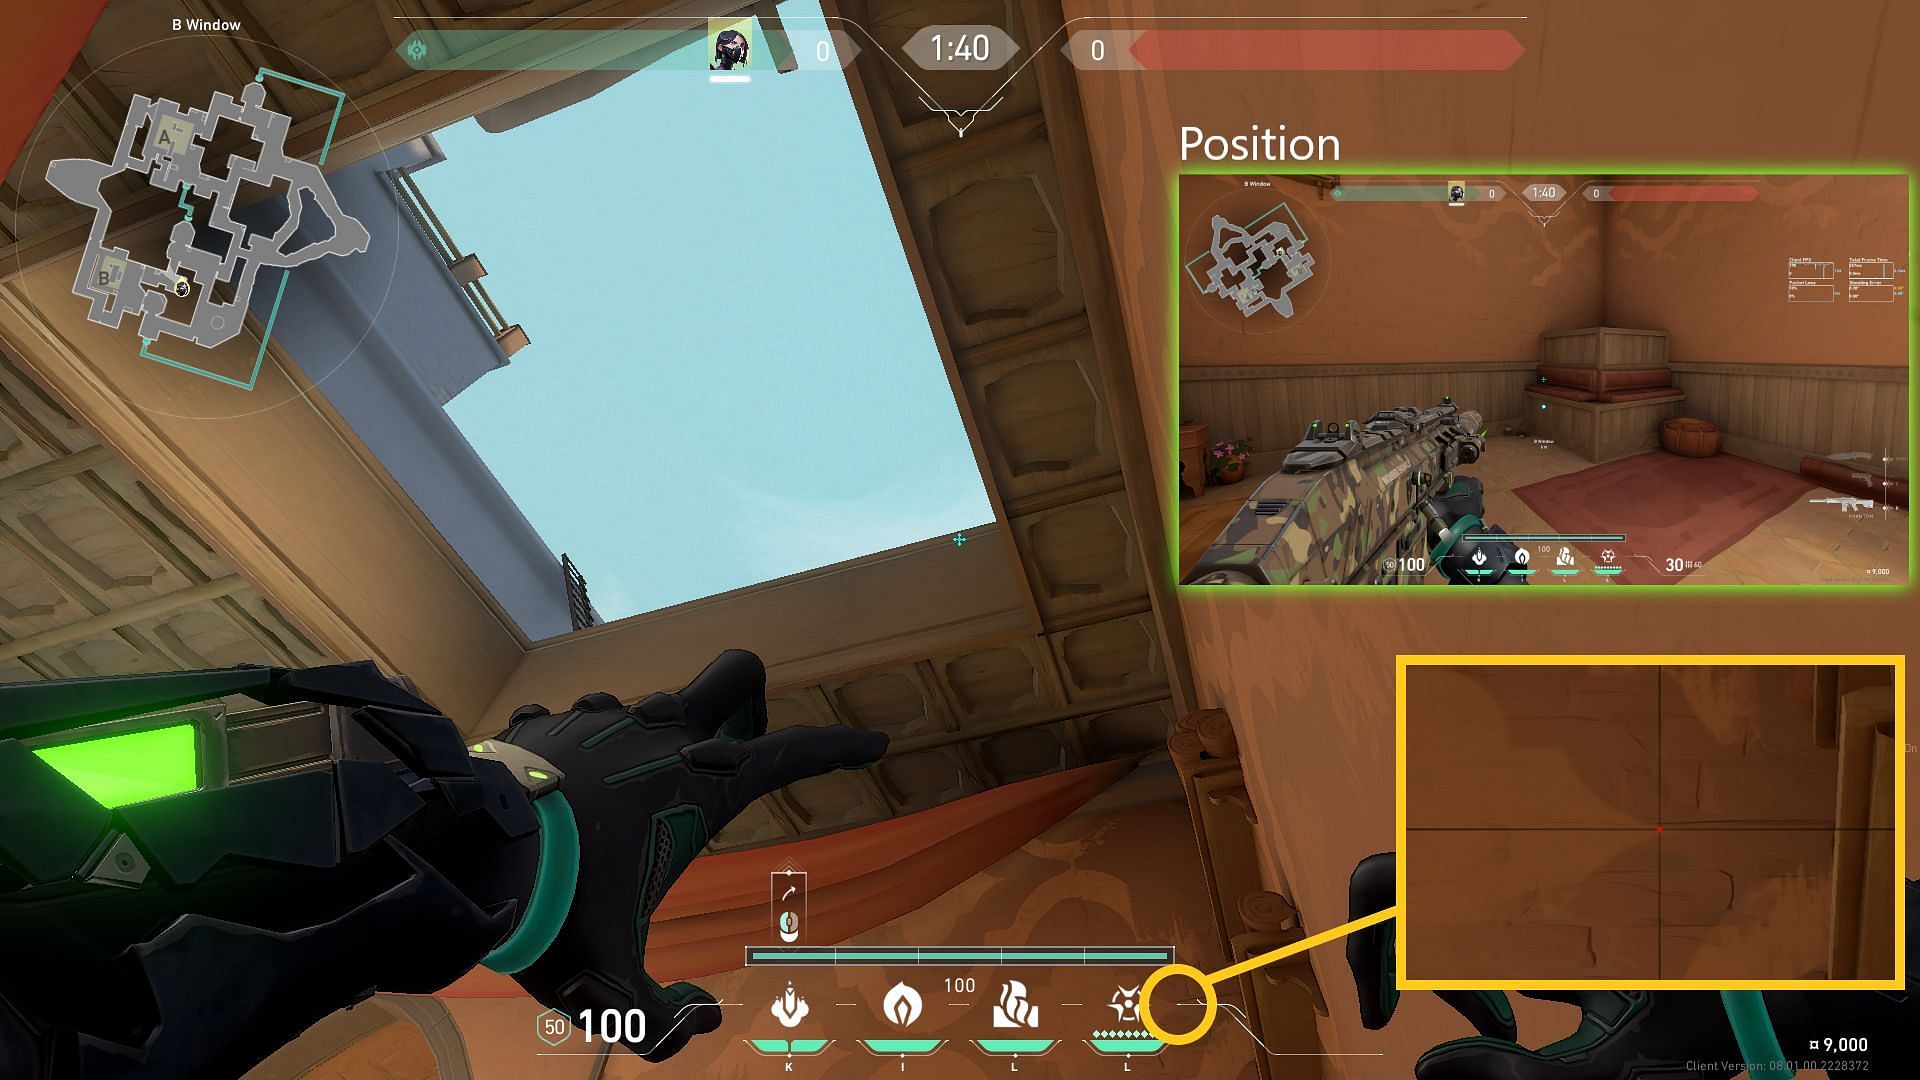
Snake Bite lineup for B Garden
This Snake Bite lineup allows you to deny Defenders from peeking at your attacking teammates who are trying to safely scale up the B Long area of the map. This lineup works very well against Defenders with sniper rifles and flashbang abilities.
To perform this Viper lineup, carefully go through the guide below:
Get into the right corner near the A Link pre-round barrier. Then, equip the Snake Bite and align the right end of the leftmost heads-up display (HUD) line with the dark corner of the brick highlighted in the image above. After lining up the HUD, simply left-click to launch the Viper molly.
Snake Bite lineup for A Bath
This Snake Bite lineup allows you to deny Defenders from peeking at your attacking teammates who are trying to safely scale up the A Bath area of the map.
To perform this Viper lineup carefully go through the guide below:
During the Buy Phase, wedge yourself into the corner formed by the pre-round barrier and the adjacent wall near the Attacker Spawn Cave.
Prepare to position your crosshair at the bottom-left corner of the distant solar panel as the round commences and the barriers drop. Begin moving forward by pressing the 'W' key exclusively, ensuring your mouse remains stationary. As you run, wait until your crosshair aligns with the top edge of the grey structure beneath the solar panel before left-clicking to deploy the Viper molly.
Check out our other Valorant guides:
Best Viper lineups on Valorant Sunset map || Viper walls for Bind in Valorant || Complete Valorant Viper Sunset guide || Valorant Outlaw weapon guide || 5 best Cypher one-way cages on Sunset in Valorant || Best KAY/O Knife lineups on Sunset map in Valorant || 5 tips to play Cypher like nAts in Valorant
