
'%20x='0'%20y='0'%20height='100%25'%20width='100%25'%20%0A%20%20%20%20%20%20%20%20%20%20xlink%3Ahref='data:image/jpg;base64,/9j/2wBDAAYEBQYFBAYGBQYHBwYIChAKCgkJChQODwwQFxQYGBcUFhYaHSUfGhsjHBYWICwgIyYnKSopGR8tMC0oMCUoKSj/2wBDAQcHBwoIChMKChMoGhYaKCgoKCgoKCgoKCgoKCgoKCgoKCgoKCgoKCgoKCgoKCgoKCgoKCgoKCgoKCgoKCgoKCj/wgARCAAGAAoDASIAAhEBAxEB/8QAFgABAQEAAAAAAAAAAAAAAAAAAAUG/8QAFQEBAQAAAAAAAAAAAAAAAAAAAgP/2gAMAwEAAhADEAAAAKWCID//xAAhEAACAQMDBQAAAAAAAAAAAAABAgQAAwUGBxESFBVC0f/aAAgBAQABPwCLtfDgpcOEyEuNMZXTu2ch7Z9ekLxV/RWsRfuB80jOGPLeRk/K/8QAGREAAQUAAAAAAAAAAAAAAAAAAQACAwQR/9oACAECAQE/AKUz8IX/xAAZEQABBQAAAAAAAAAAAAAAAAAAAQIDBBH/2gAIAQMBAT8AsRN1D//Z'%3E%3C/image%3E%3C/svg%3E)
Villagers are inarguably one of the most valuable mobs in all of Minecraft. They offer players nearly unlimited access to the game's best resources and materials, such as enchanted books, diamond tools, weapons, armor, and even rare items like ender pearls. This makes having a stockpile of villagers around for setting up new trades invaluable to any serious survival world.
Detailed below is how to build a very basic Minecraft Bedrock villager breeder so that you'll always have a few villagers tucked away. It's handy for setting up new trading halls or even just repairing an older trading hall that's had an unfortunate encounter with a creeper or zombie.

How to make a Minecraft Bedrock villager breeder
Materials needed
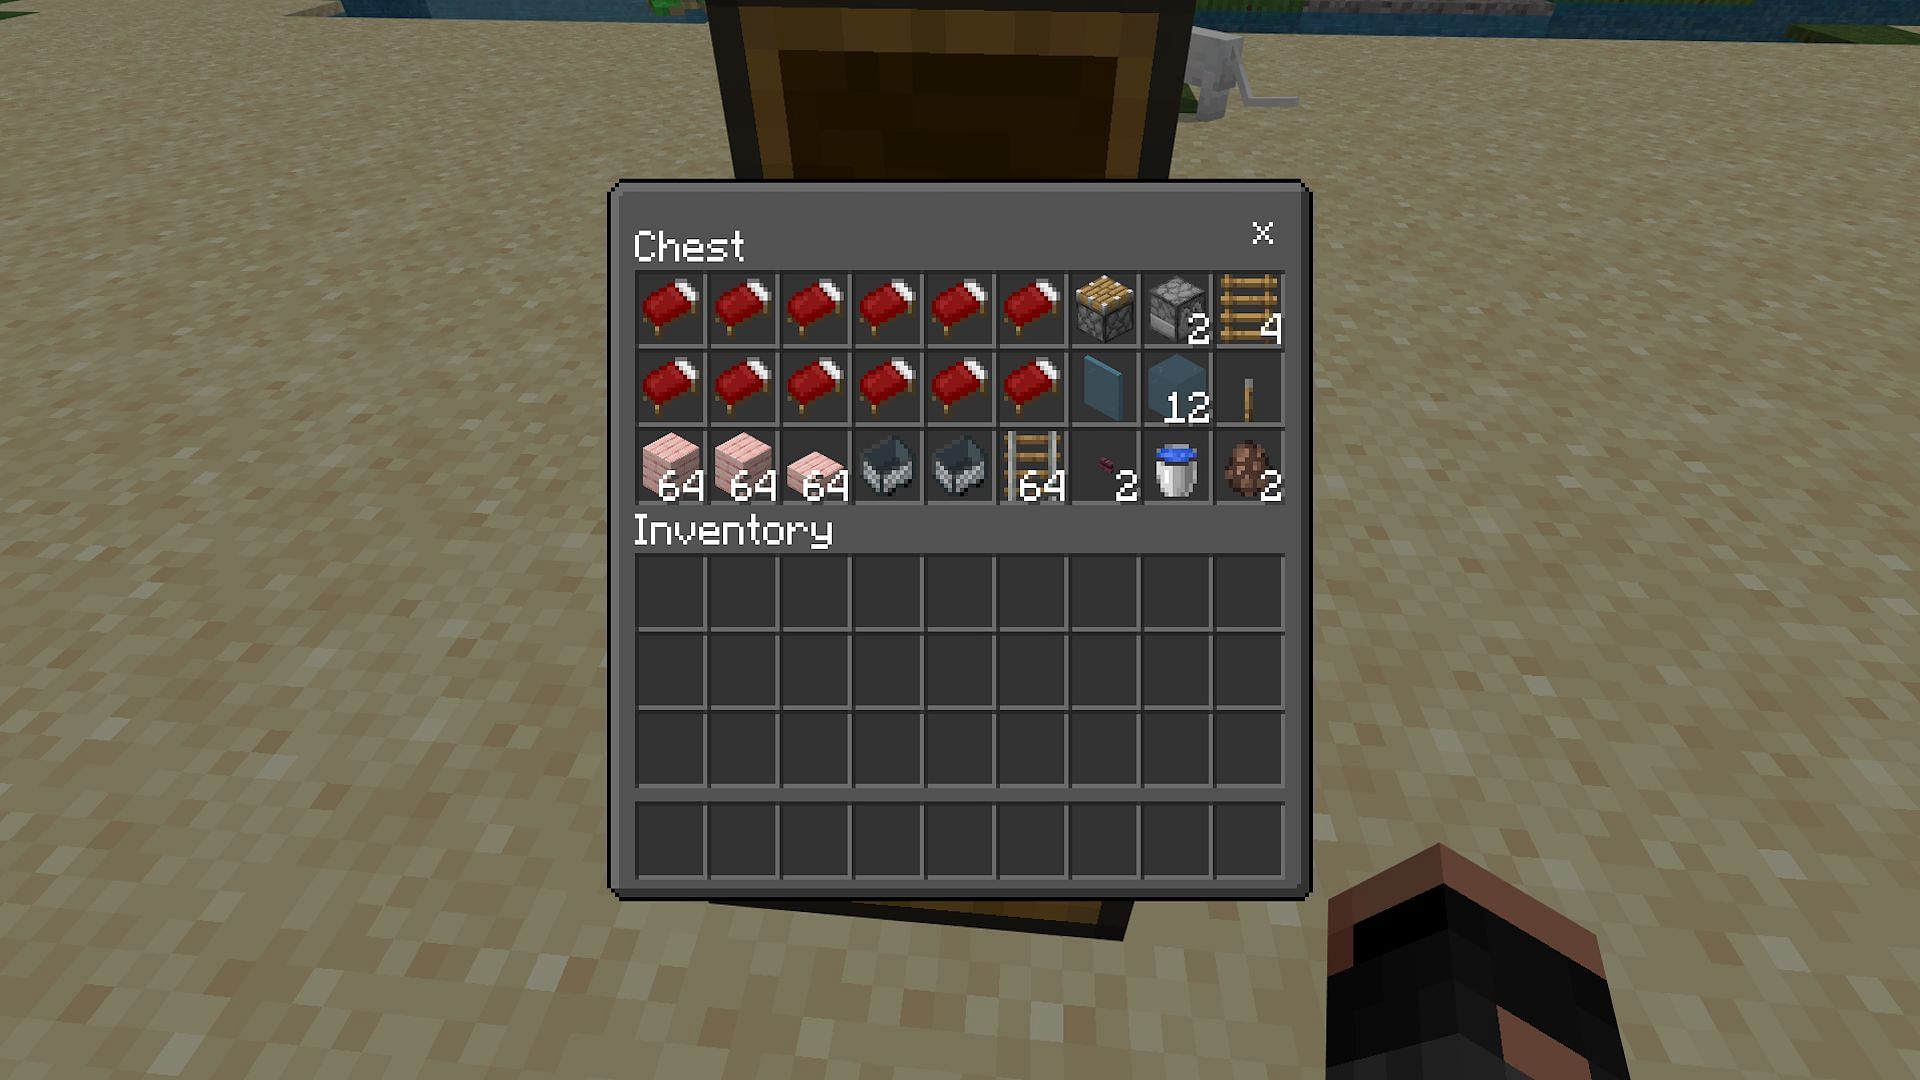
Thankfully, the materials for this simple Bedrock villager breeder shouldn't take very long to gather. The important thing to keep in mind for the materials is that technically only three beds and two minecarts are needed to produce a single baby villager at a time and transport the two adults into the farm.
However, the farm will be much more efficient with more beds; this example farm uses a total of 12 beds, as more villagers can spawn before the village cap is reached. Getting the wool needed for this number of beds is probably the hardest part of making this farm, though a simple Minecraft wool farm should solve that issue.
1) Find a spot
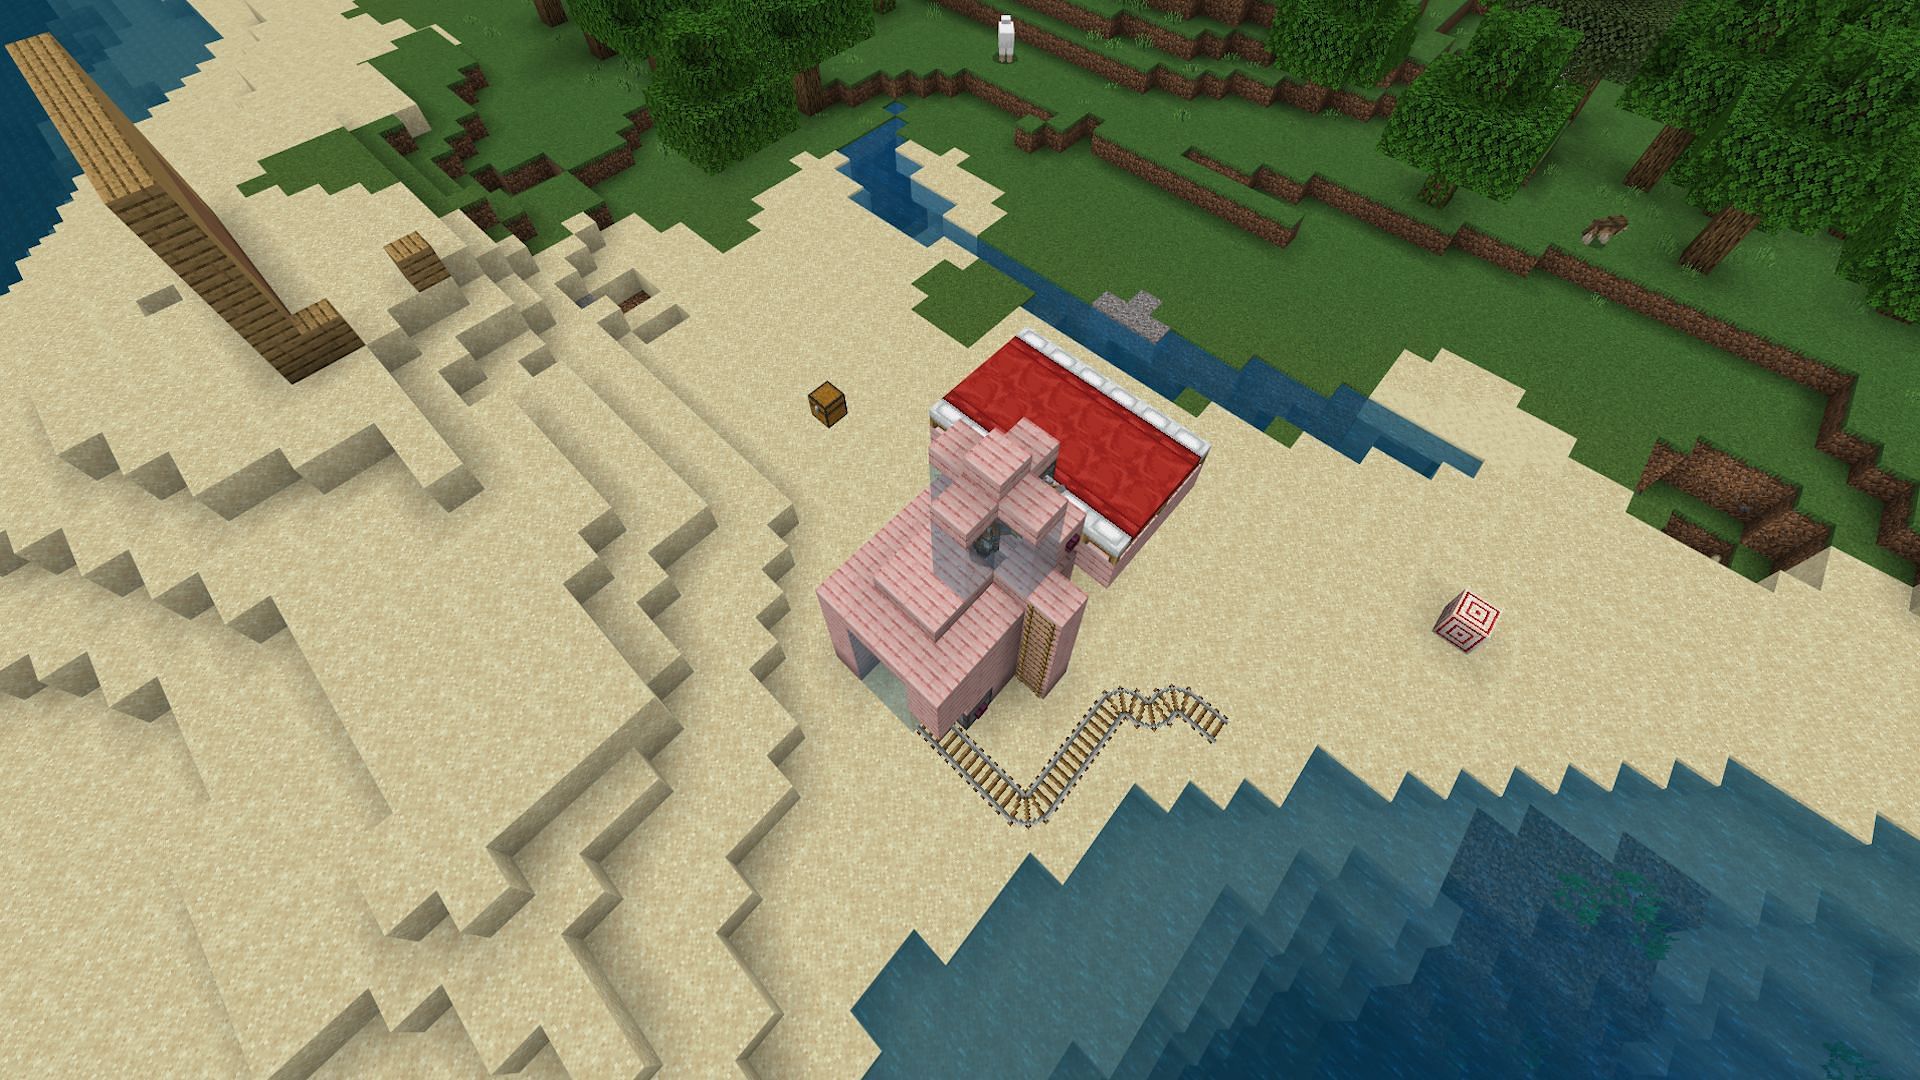
The first thing you'll need to do to set up a Bedrock villager breeder is pick out a suitable spot. Anywhere can work, thankfully, but make sure to be at least 100 blocks away from any other villages, beds, or Minecraft villager profession blocks. This will ensure that there's no improper linking of villagers that might cause issues with the breeder.
2) Create the foundation for the farm's output
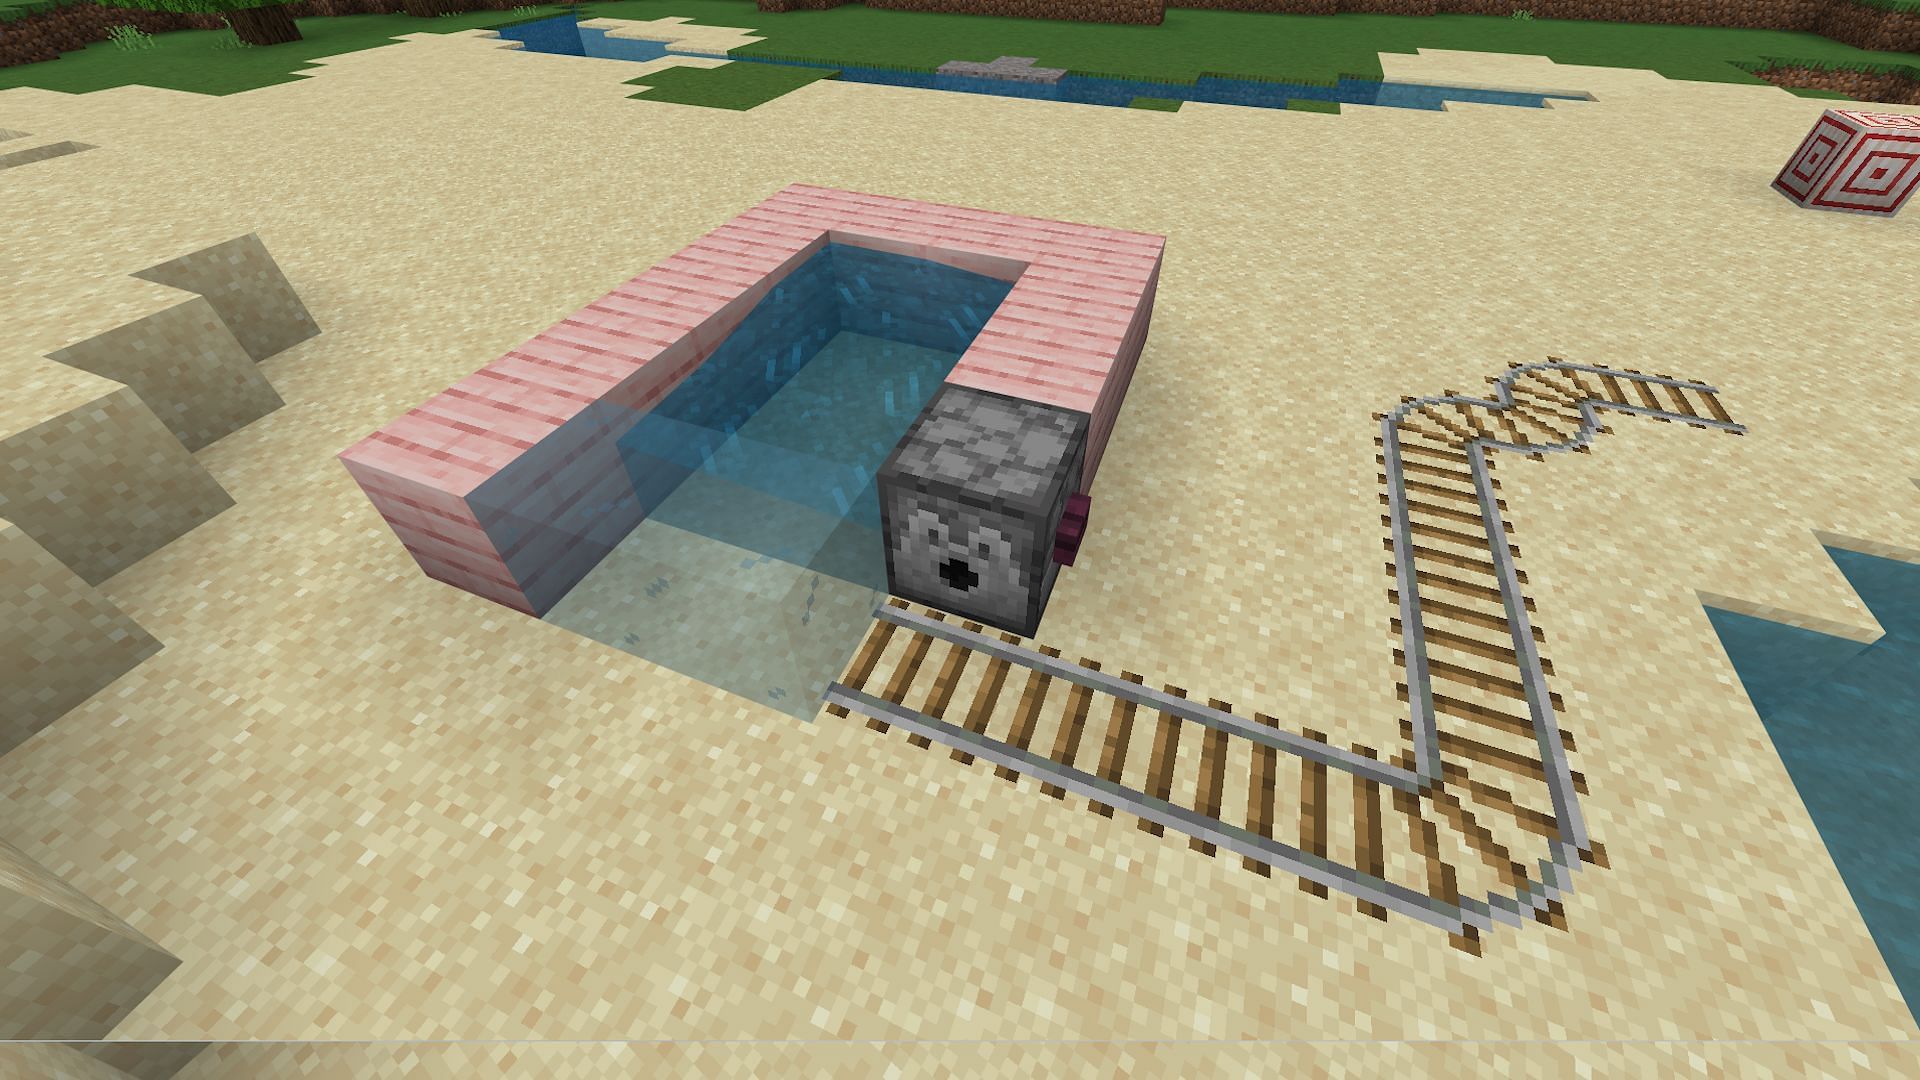
Place down a dispenser facing towards you, and put a button on the right side of it. This will eventually be the collection system for villagers, so make sure to leave 15 or so blocks of space behind the dispenser. Fill up this dispenser with minecarts. Then, place some rails running perpendicular to the dispenser, away from the farm. This is the actual output for villagers.
To finish creating the foundation of the output area, place down two glass blocks, starting to the left of the block in front of the dispenser. Then, place five regular blocks going back. From here, finish the outline of the rectangle, using the dispenser as part of the right-hand wall of the farm.
3) Build up the walls and villager platform
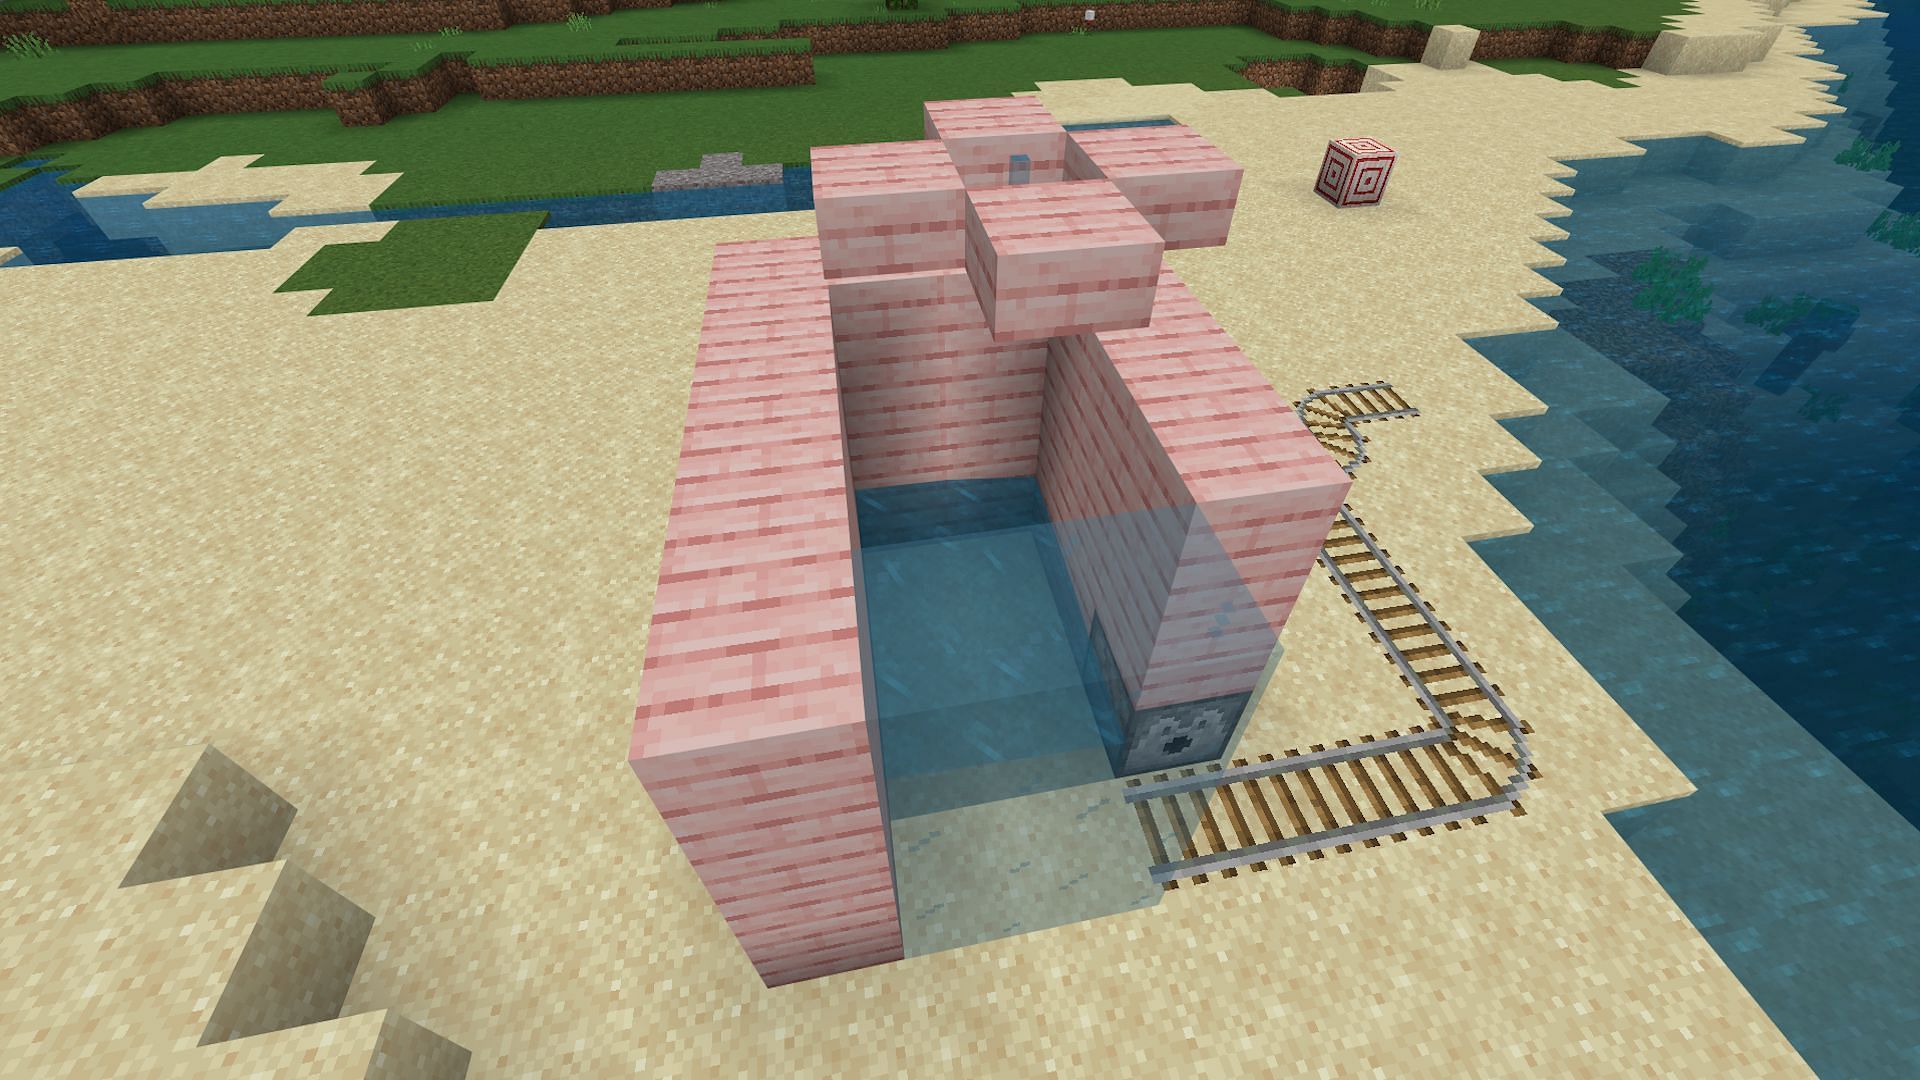
From here, build up two blocks for the entire wall. Place solid blocks over the other regular blocks and dispenser, but make sure to place glass over the foundation's glass rather than solid blocks. This will allow for a window into the farm to make sure it's working.
From here, place temporary blocks in the back right corner, and then place four slabs, one in each cardinal direction, around these temporary blocks. Break the temp blocks and place a glass pane in the center of the slabs. This creates a surface for the adult villagers to stand on but allows for a gap small enough for baby villagers to slip through.
4) Spawn proof and add a ladder
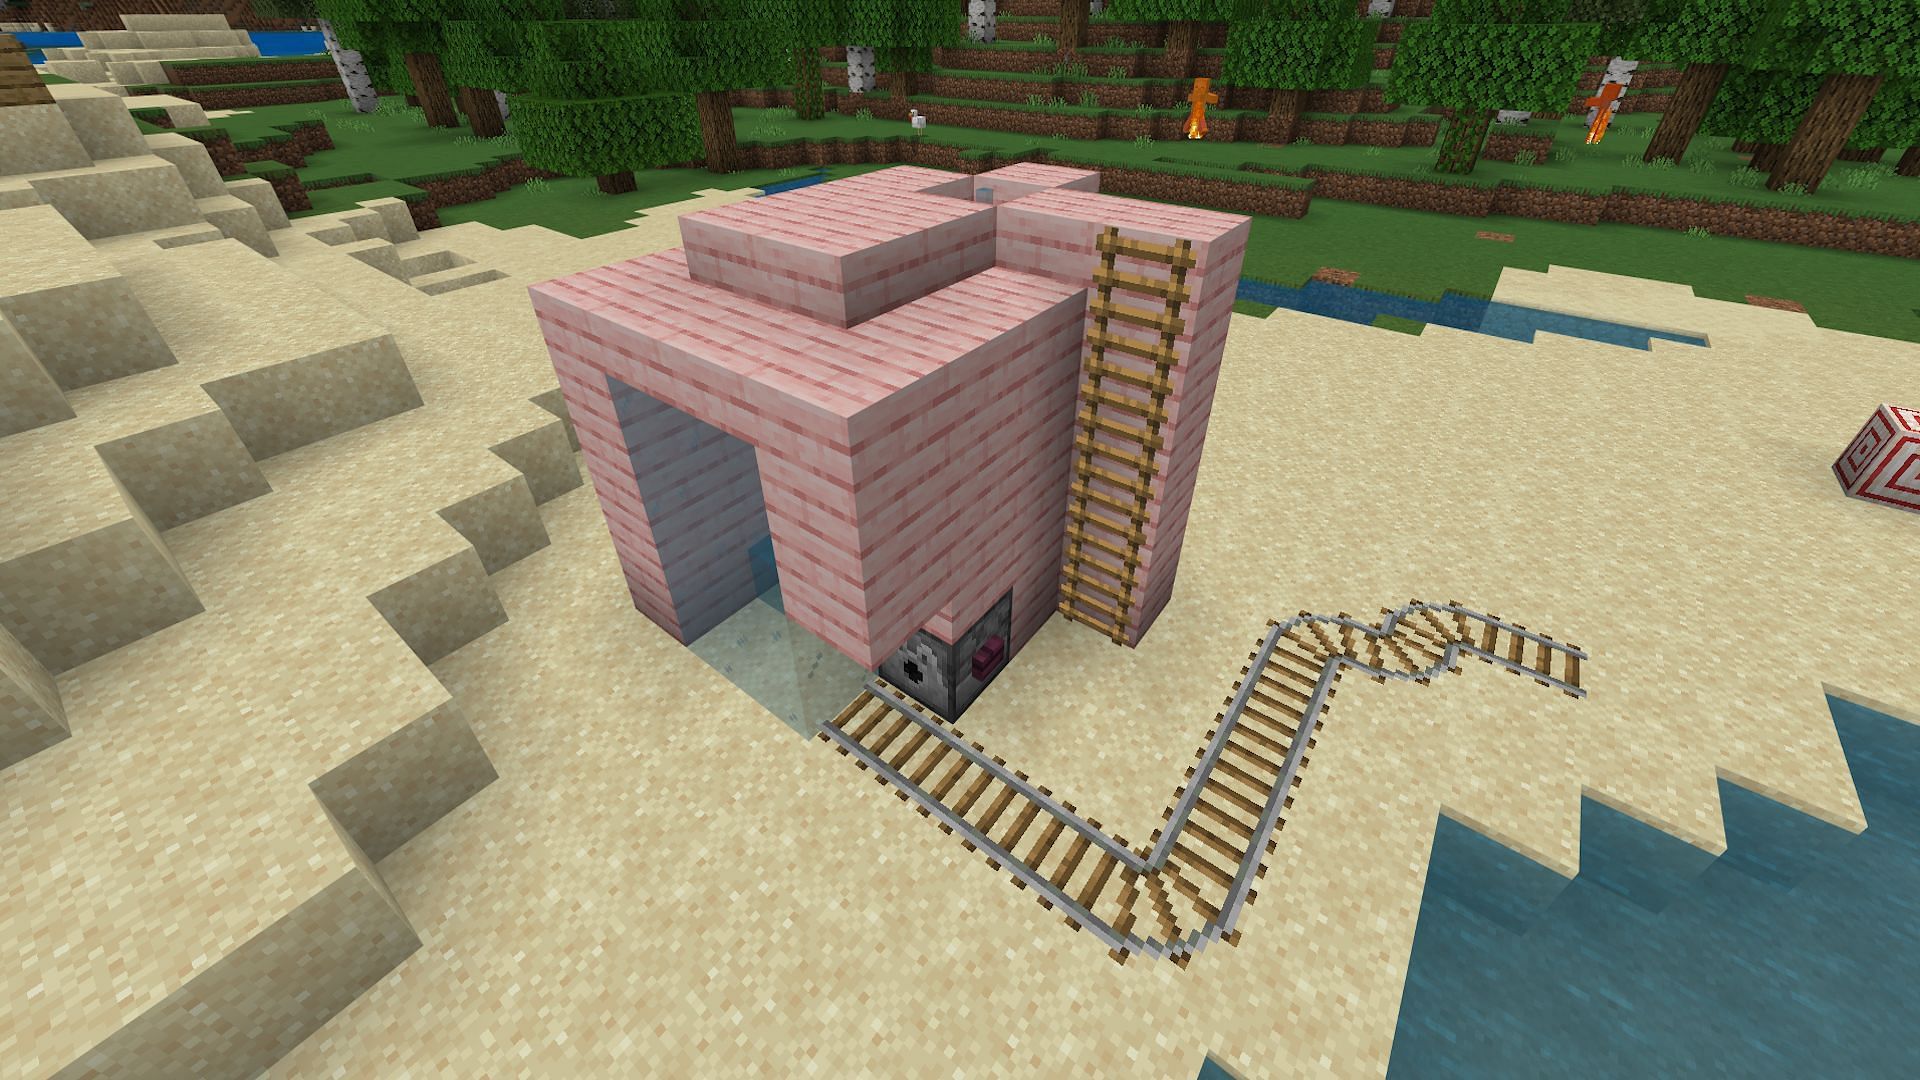
Make sure to place slabs on top of the walls of the farm. Also, add slabs next to the villager platform to completely seal off the lower chamber. This will keep hostile mobs from spawning on top of the build, since they're slabs, and it also creates a roof to keep waiting villagers safe from any wandering hostile mobs or flying phantoms.
From here, place four blocks next to the farm and add Minecraft ladders. This will help you reach the upper level of the farm to give food to the waiting villagers.
Also, place a slab on the top half of the block above the dispenser. This will stop any wandering zombies from being able to hit waiting villagers through the corner. It is also useful for keeping your stockpile of zombies from needing to be reverted back into regular Minecraft villagers. Place a block and a slab on top of this slab to bring it up to the same level as the rest of the roof.
5) Finish the villager chamber
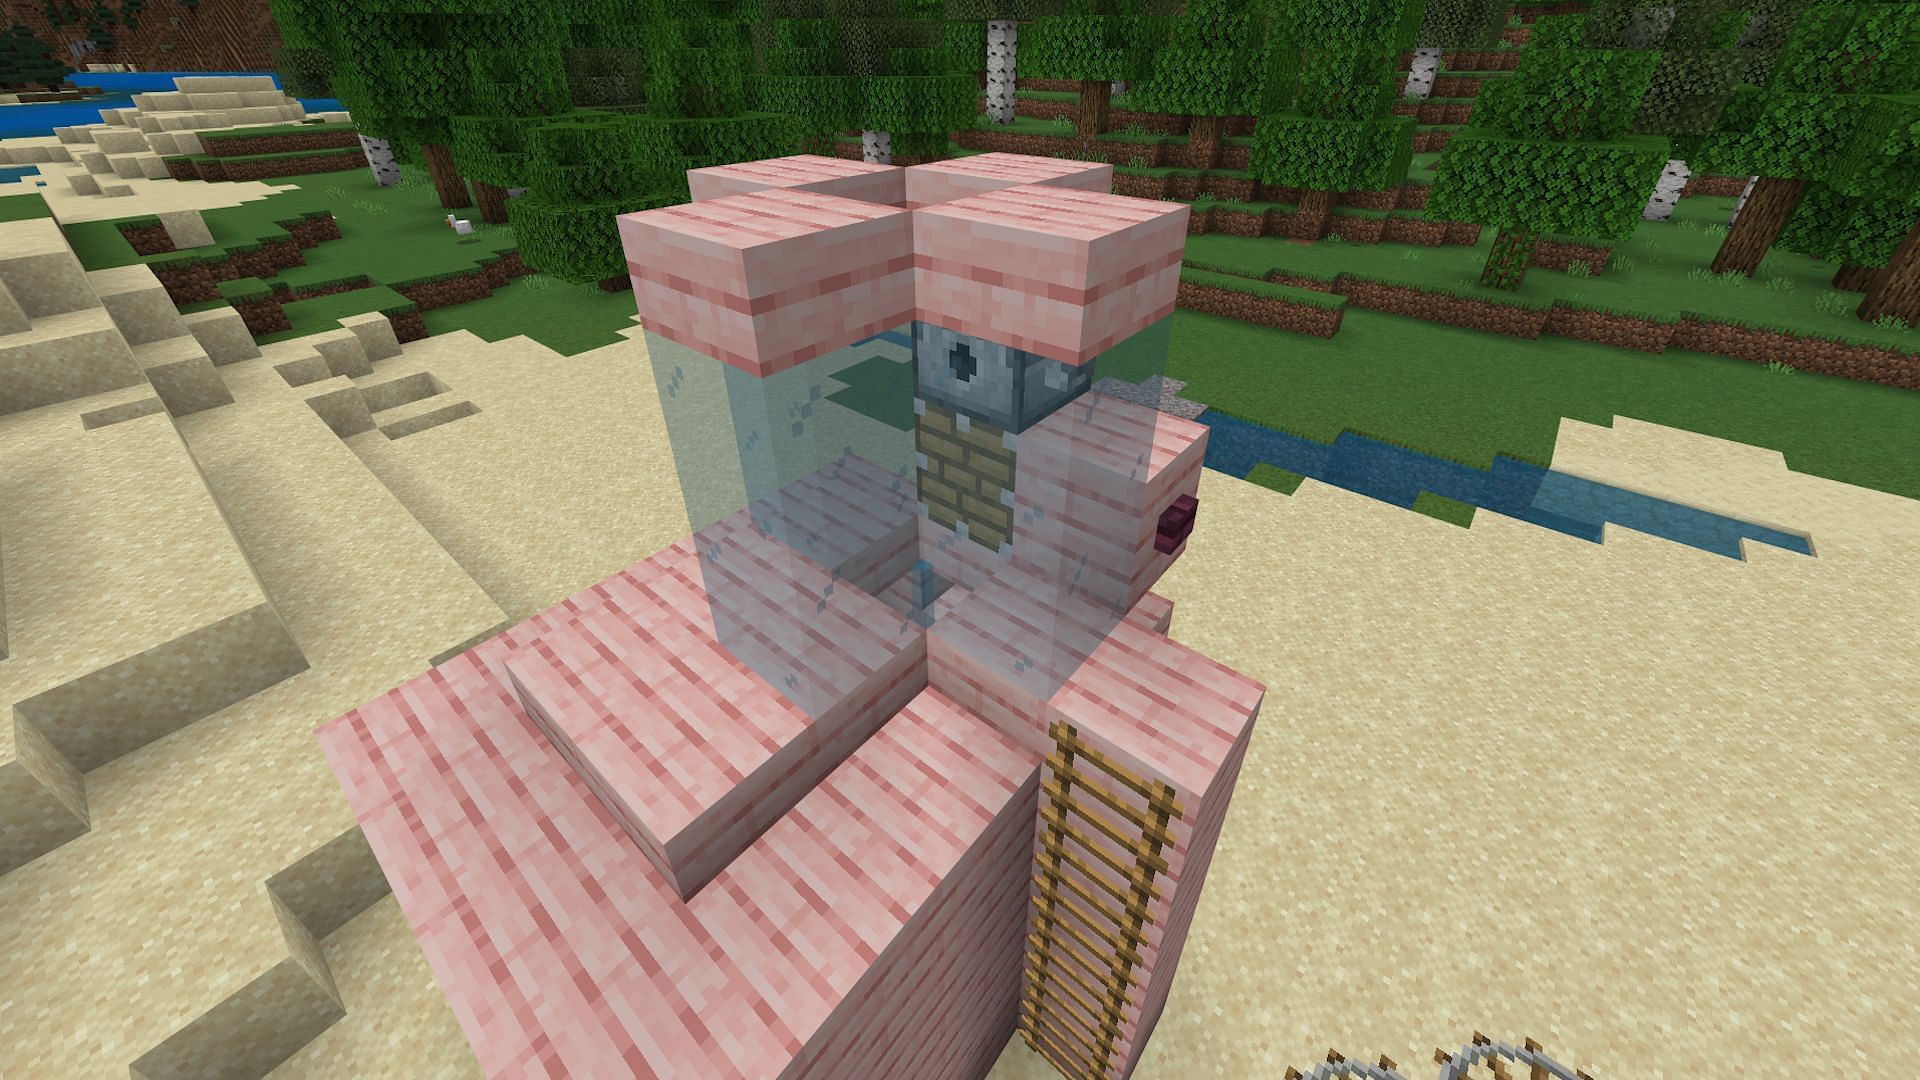
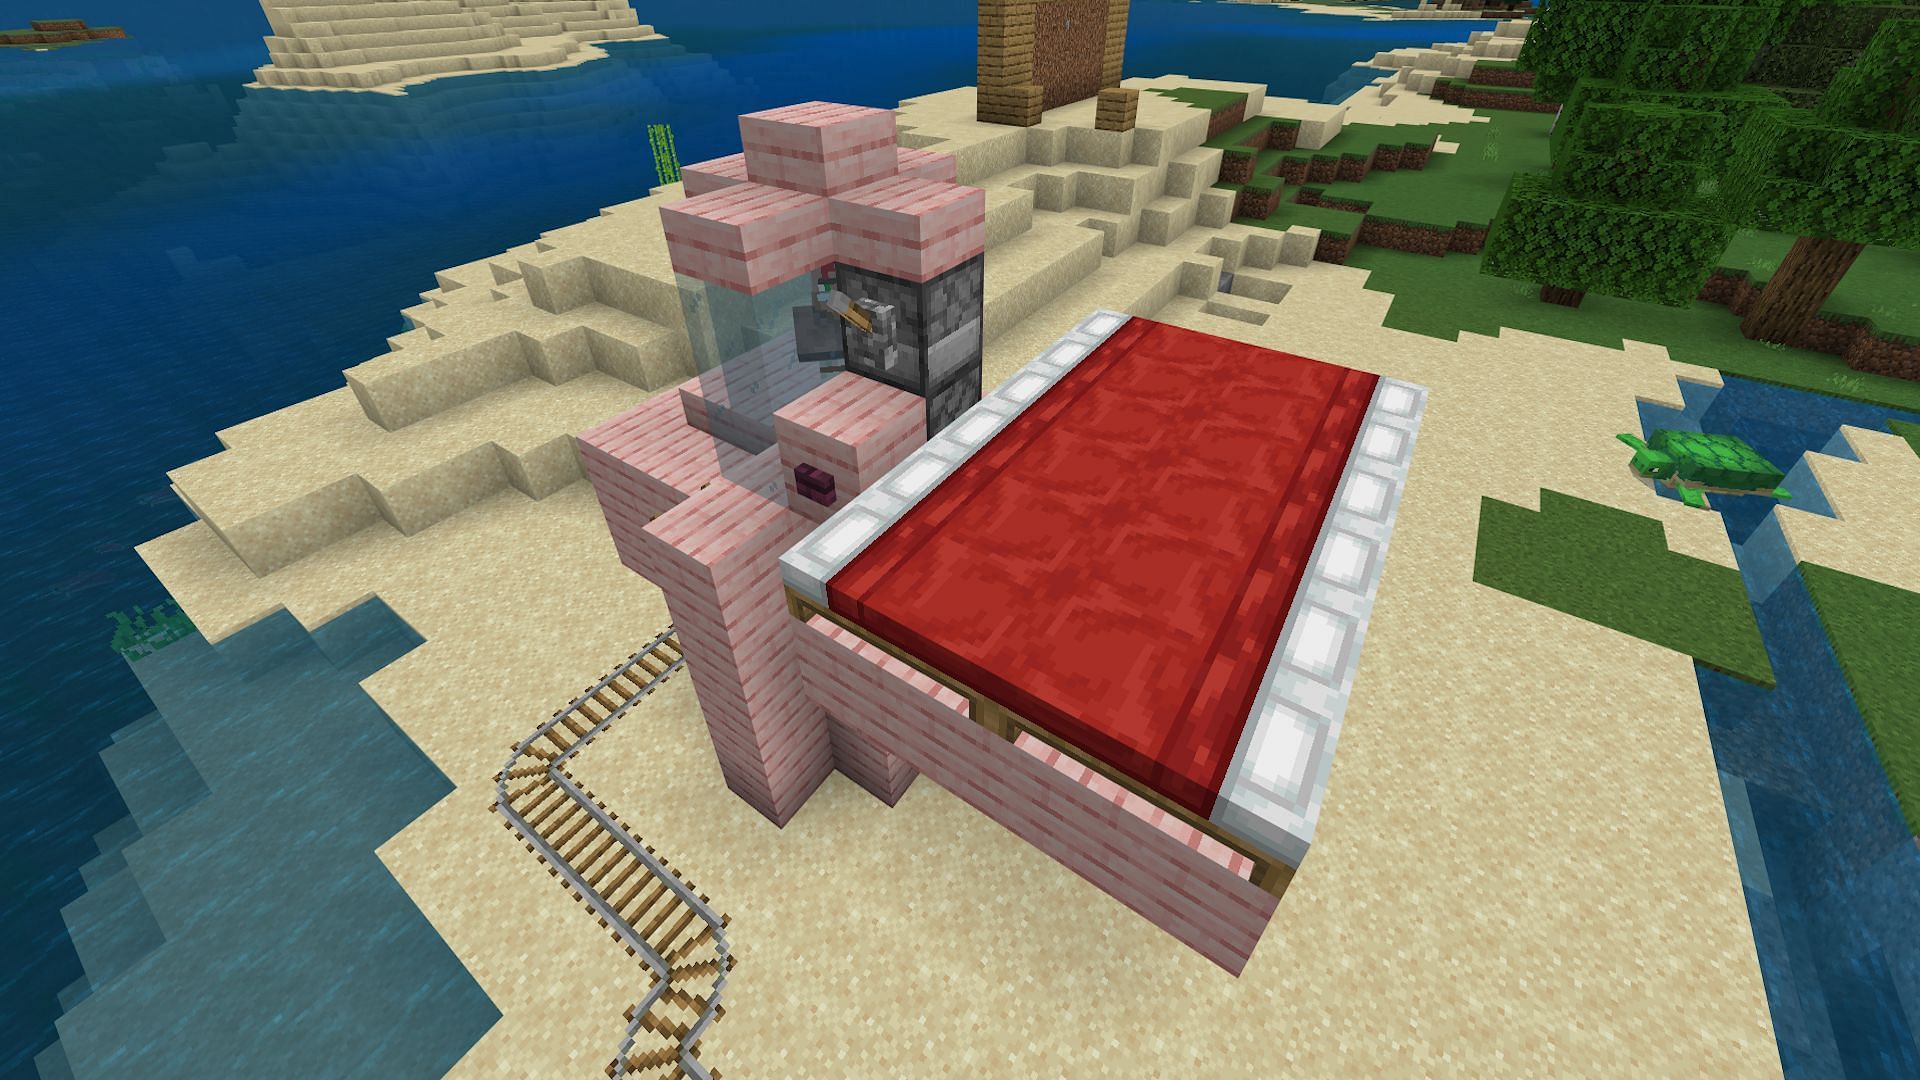
Next, you'll want to finish building up the villager chamber which will contain the adult villagers. To do this, place a piston, normally used in Minecraft piston doors, facing the glass pane on the slab furthest from the original dispenser. Speaking of dispensers, place one on top of the piston facing the pane as well. This will be where you dispense food to make the villagers willing.
Place a lever on the side of the dispenser and a block with a button next to the piston. Don't place the button directly on the piston, as it will be broken when the piston expands.
Then, build up two glass blocks on each side of the chamber to create a safe spot for the villagers to live. Place slabs on top of the dispenser and glass blocks.
6) Get villagers
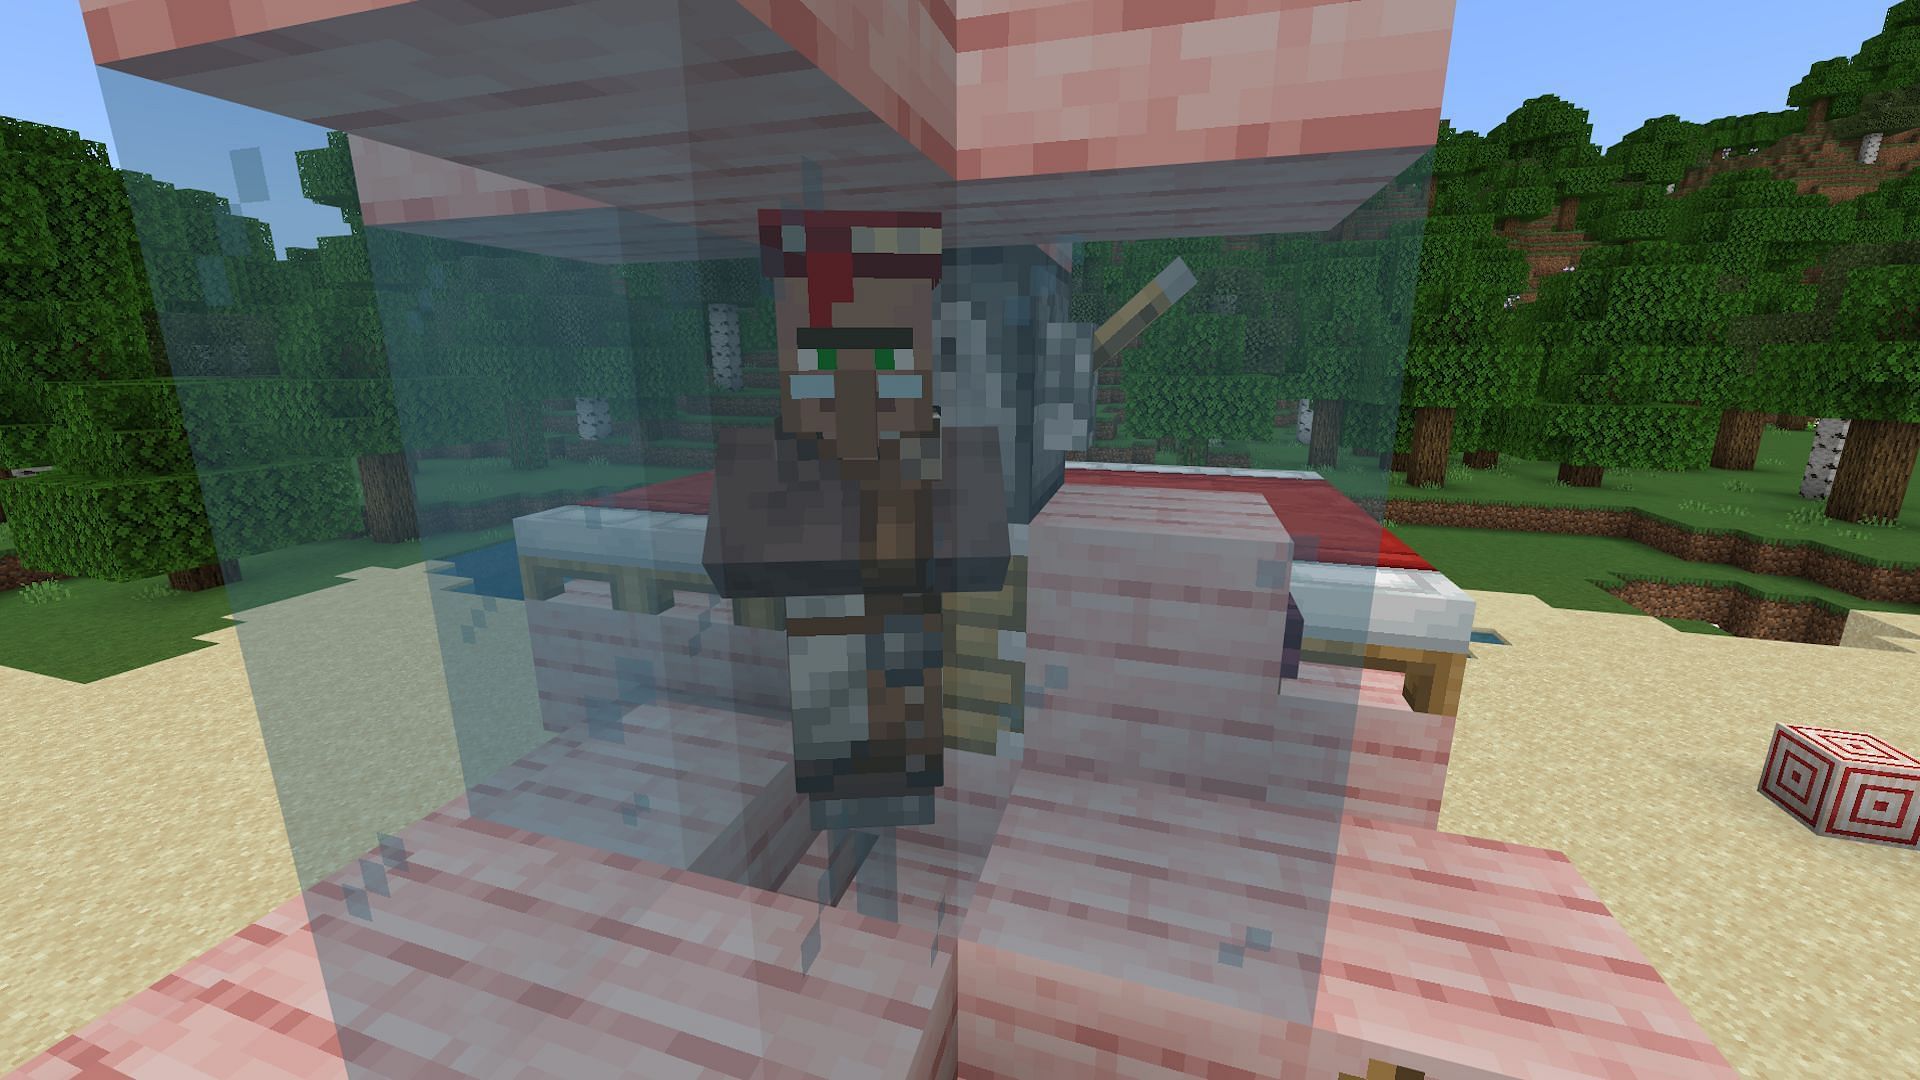
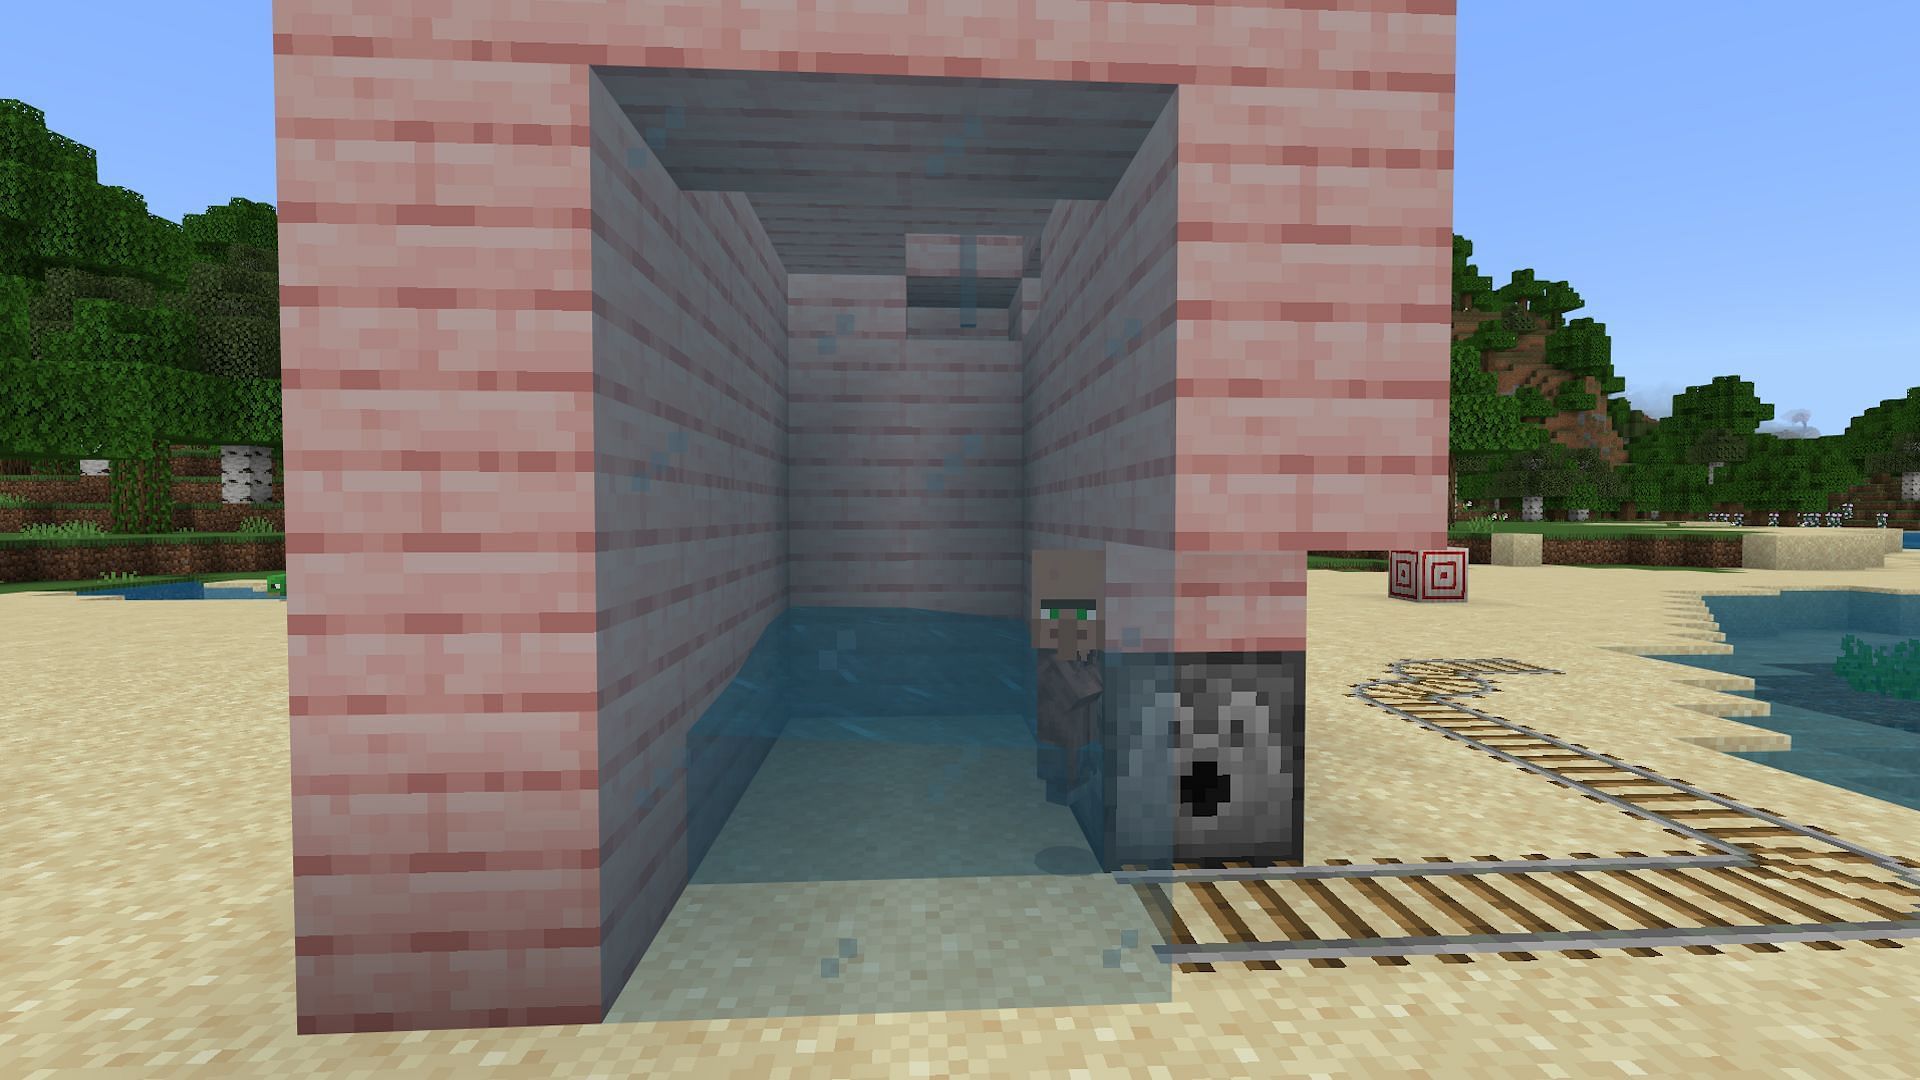
With the walls of the villager chamber in place, it's time for the most challenging part of the build: getting villagers into the farm. Thankfully, there are a few easy ways to move Minecraft villagers, including boats on leads and minecarts, that should make this process relatively simple. Once the villagers are in place, put a block over them to stop Minecraft's hostile mobs from falling in and killing them.
7) Build out the bed platform
With the adult villagers in place, the final step is to build the bed platform.Add a platform behind the villager chamber that's six blocks by four blocks. Then, place down twelve total beds. This will allow for 10 total villagers to be waiting to be collected from the output at any one time.
This should provide more than enough villagers to set up a Minecraft villager trading hall. Additionally, the output of the farm could be sent to the closest swamp for access to mending books once the Minecraft villager trading rebalance finally debuts.
8) Finishing touches
The final step to finishing this Bedrock villager breeder is to add the Minecraft minecarts to the output dispenser and the bread to the villager food dispenser. Go ahead and fill up both dispensers, if possible, as that will ensure the maximum amount of time needed between refills.
Once the bread has been added, flip the lever several times allowing the villagers to breed. This provides a great opportunity to test the farm and ensure it is functioning properly. If a baby villager spawns but doesn't drop down, use the button connected to the piston. This will push the baby villager over the gap, ensuring it falls into the output chamber.
Obsessed with Crosswords, Wordle, and other word games? Take our quick survey and let us get to know you better!
