'%20x='0'%20y='0'%20height='100%25'%20width='100%25'%20%0A%20%20%20%20%20%20%20%20%20%20xlink%3Ahref='data:image/jpg;base64,/9j/2wBDAAYEBQYFBAYGBQYHBwYIChAKCgkJChQODwwQFxQYGBcUFhYaHSUfGhsjHBYWICwgIyYnKSopGR8tMC0oMCUoKSj/2wBDAQcHBwoIChMKChMoGhYaKCgoKCgoKCgoKCgoKCgoKCgoKCgoKCgoKCgoKCgoKCgoKCgoKCgoKCgoKCgoKCgoKCj/wgARCAAGAAoDASIAAhEBAxEB/8QAFgABAQEAAAAAAAAAAAAAAAAAAAUH/8QAFQEBAQAAAAAAAAAAAAAAAAAAAgP/2gAMAwEAAhADEAAAAMjnFT//xAAeEAABBAMAAwAAAAAAAAAAAAABAgMEEQAFEhUxU//aAAgBAQABPwBryWp1UiMZzjsRI4LRWeaNegbrET9rwmprtV9lZ//EABYRAQEBAAAAAAAAAAAAAAAAAAIAEf/aAAgBAgEBPwBtMnb/xAAWEQEBAQAAAAAAAAAAAAAAAAACADH/2gAIAQMBAT8AQJy//9k='%3E%3C/image%3E%3C/svg%3E)
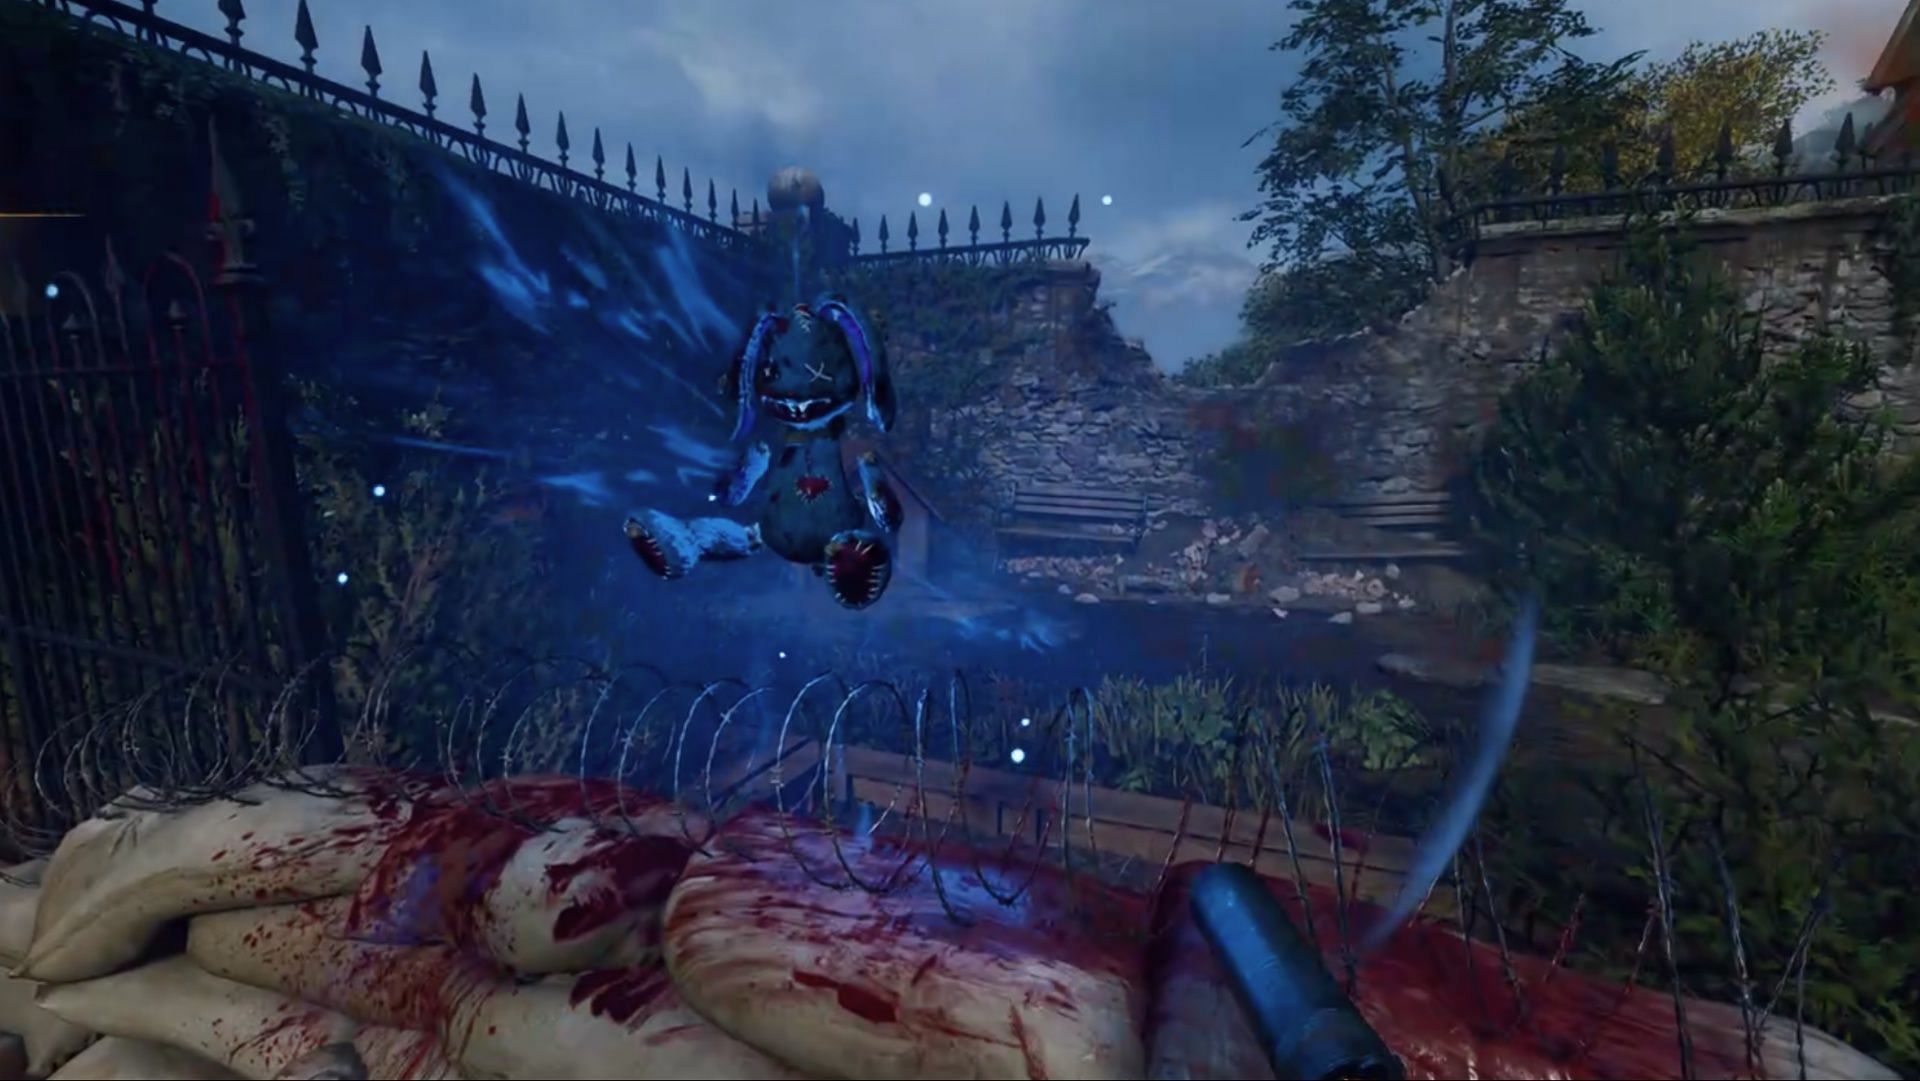
The new Black Ops 6 Zombies map, Shattered Veil, also features the Mr Peek Easter egg, just like the previous maps. However, it works a bit differently this time. Completing this Easter egg rewards you with a pet named Donut, which starts as a Vermin, then evolves into a Parasite, and eventually a Doppleghast, assisting you in combat.
It’s an interesting and straightforward Easter egg that also helps you complete one of the main quest challenges if you choose to pursue it.
This article will provide step-by-step instructions on how to complete the Mr Peek Easter egg, acquire Donut, and use it effectively in Black Ops 6 Zombies: Shattered Veil.
Guide to completing the Mr Peek easter egg in Black Ops 6 Zombies Shattered Veil
The Mr Peek Easter Egg in Shattered Veil requires you to locate six scattered parts of Mr. Peek across the map. Once you've collected all of them, head to a specific location to repair Mr Peek, which will reward you with your own pet zombie in the game.
That said, this companion won't stay with you for the entire match. As it earns kills, it will evolve through different stages — starting as a Vermin, transforming into a Parasite, and finally becoming a Doppleghast. After reaching its final form and accumulating some kills, it will die on its own.
Important Note:
- You can collect the parts in any order.
- Each part is always located at a pre-defined location in every match.
- If you successfully pick up the part, a purple flame will appear.
All six Mr Peek part locations
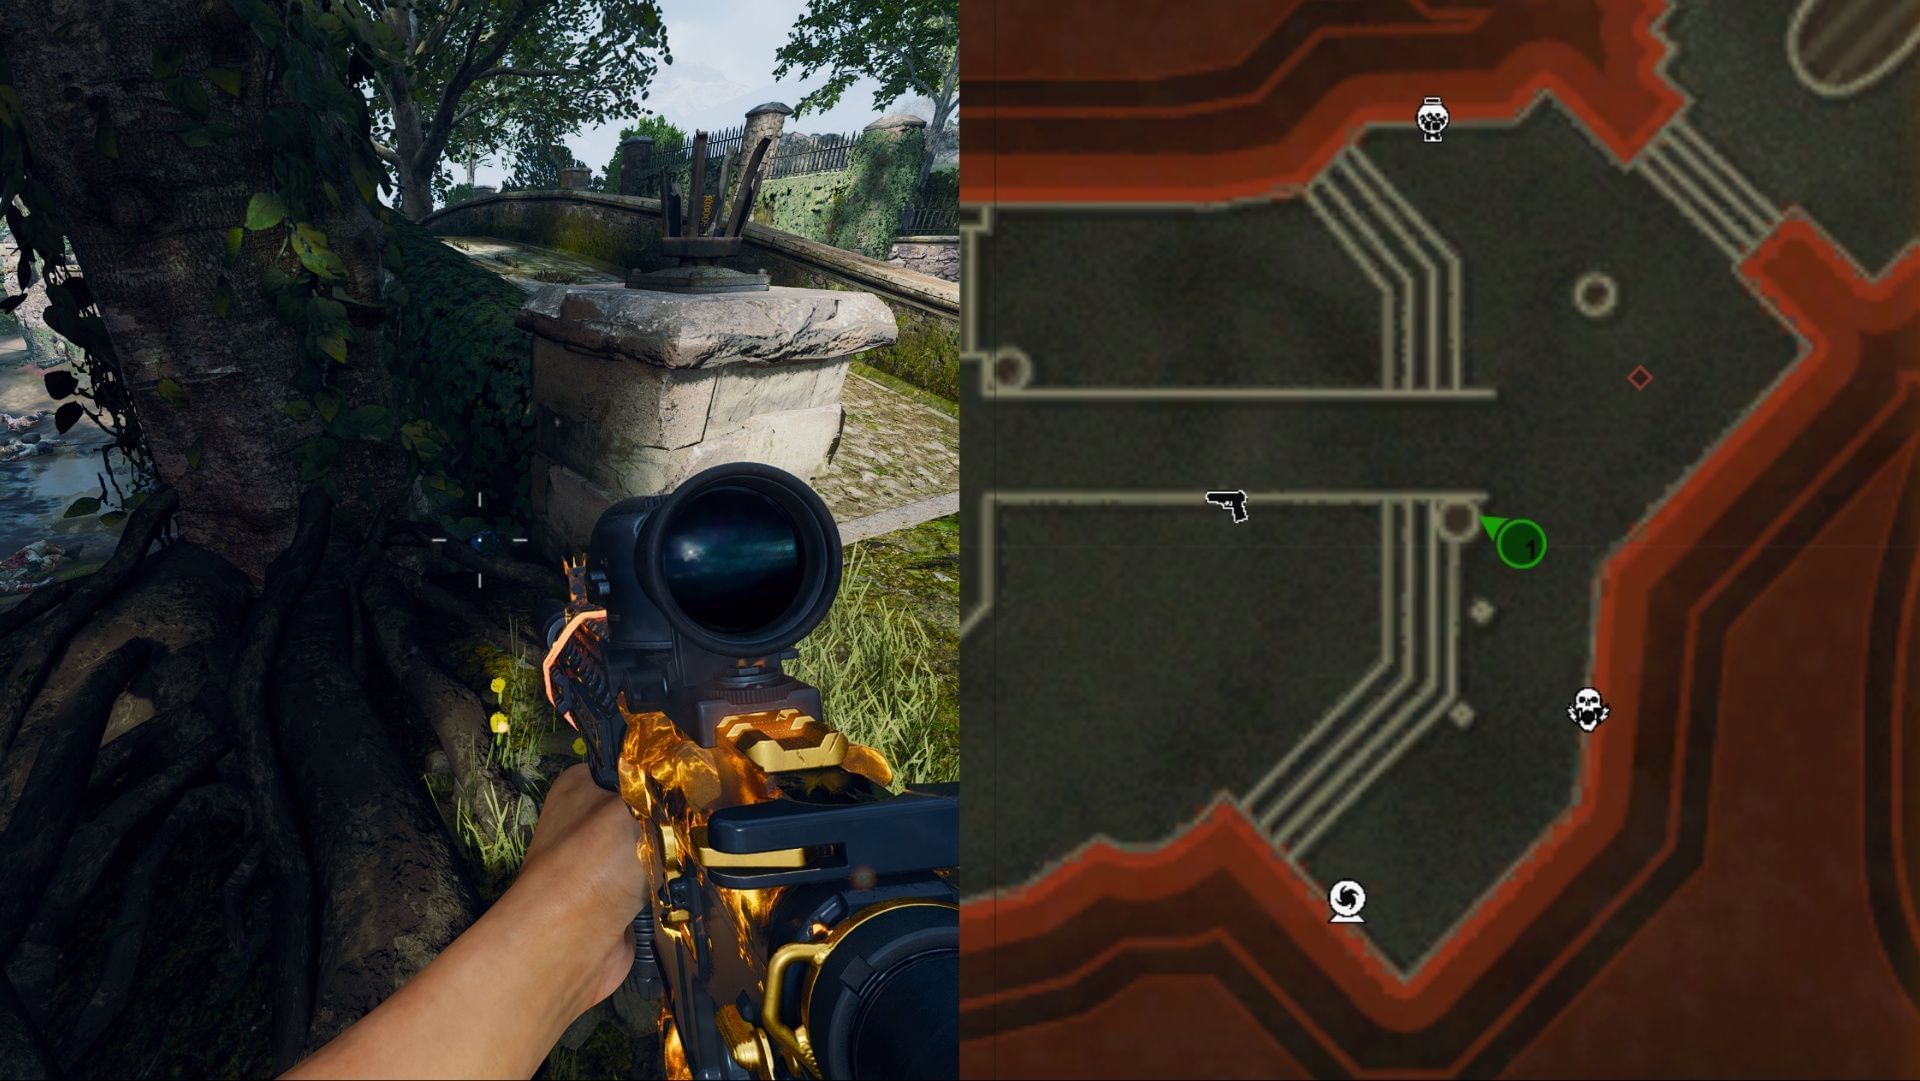
First part: Garden Pond (Spawn Area)
Head to the Rage Inducer machine at spawn. Just in front of it, you'll see a tree near the bridge. The first part is placed between the tree and the bridge. Interact with it to collect it.
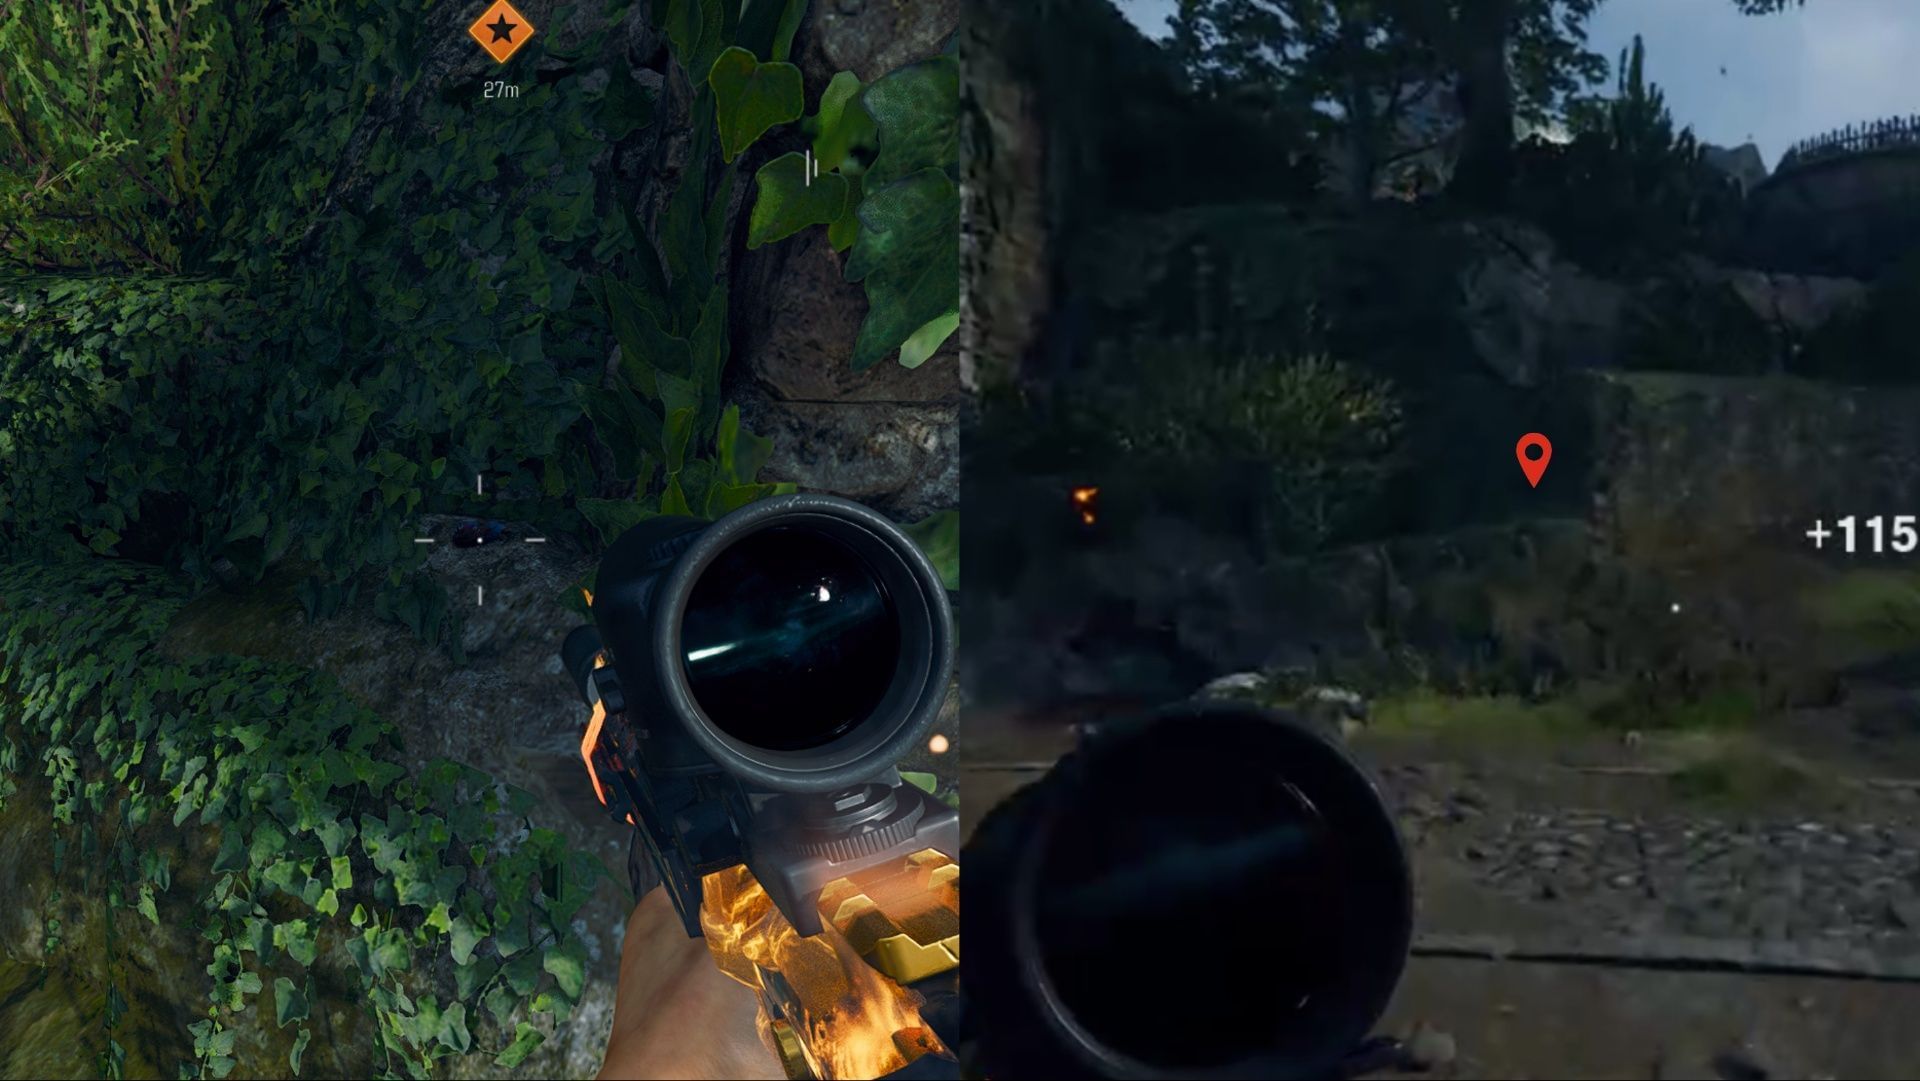
Second part: Shem’s Henge
Proceed through Garden Pond and unlock the first gate leading into Shem’s Henge. Look to your left, where you'll find an elevated stone platform. Check behind the leaves to spot the second part. This one is a bit tricky, so refer to the embedded image to locate it more easily.
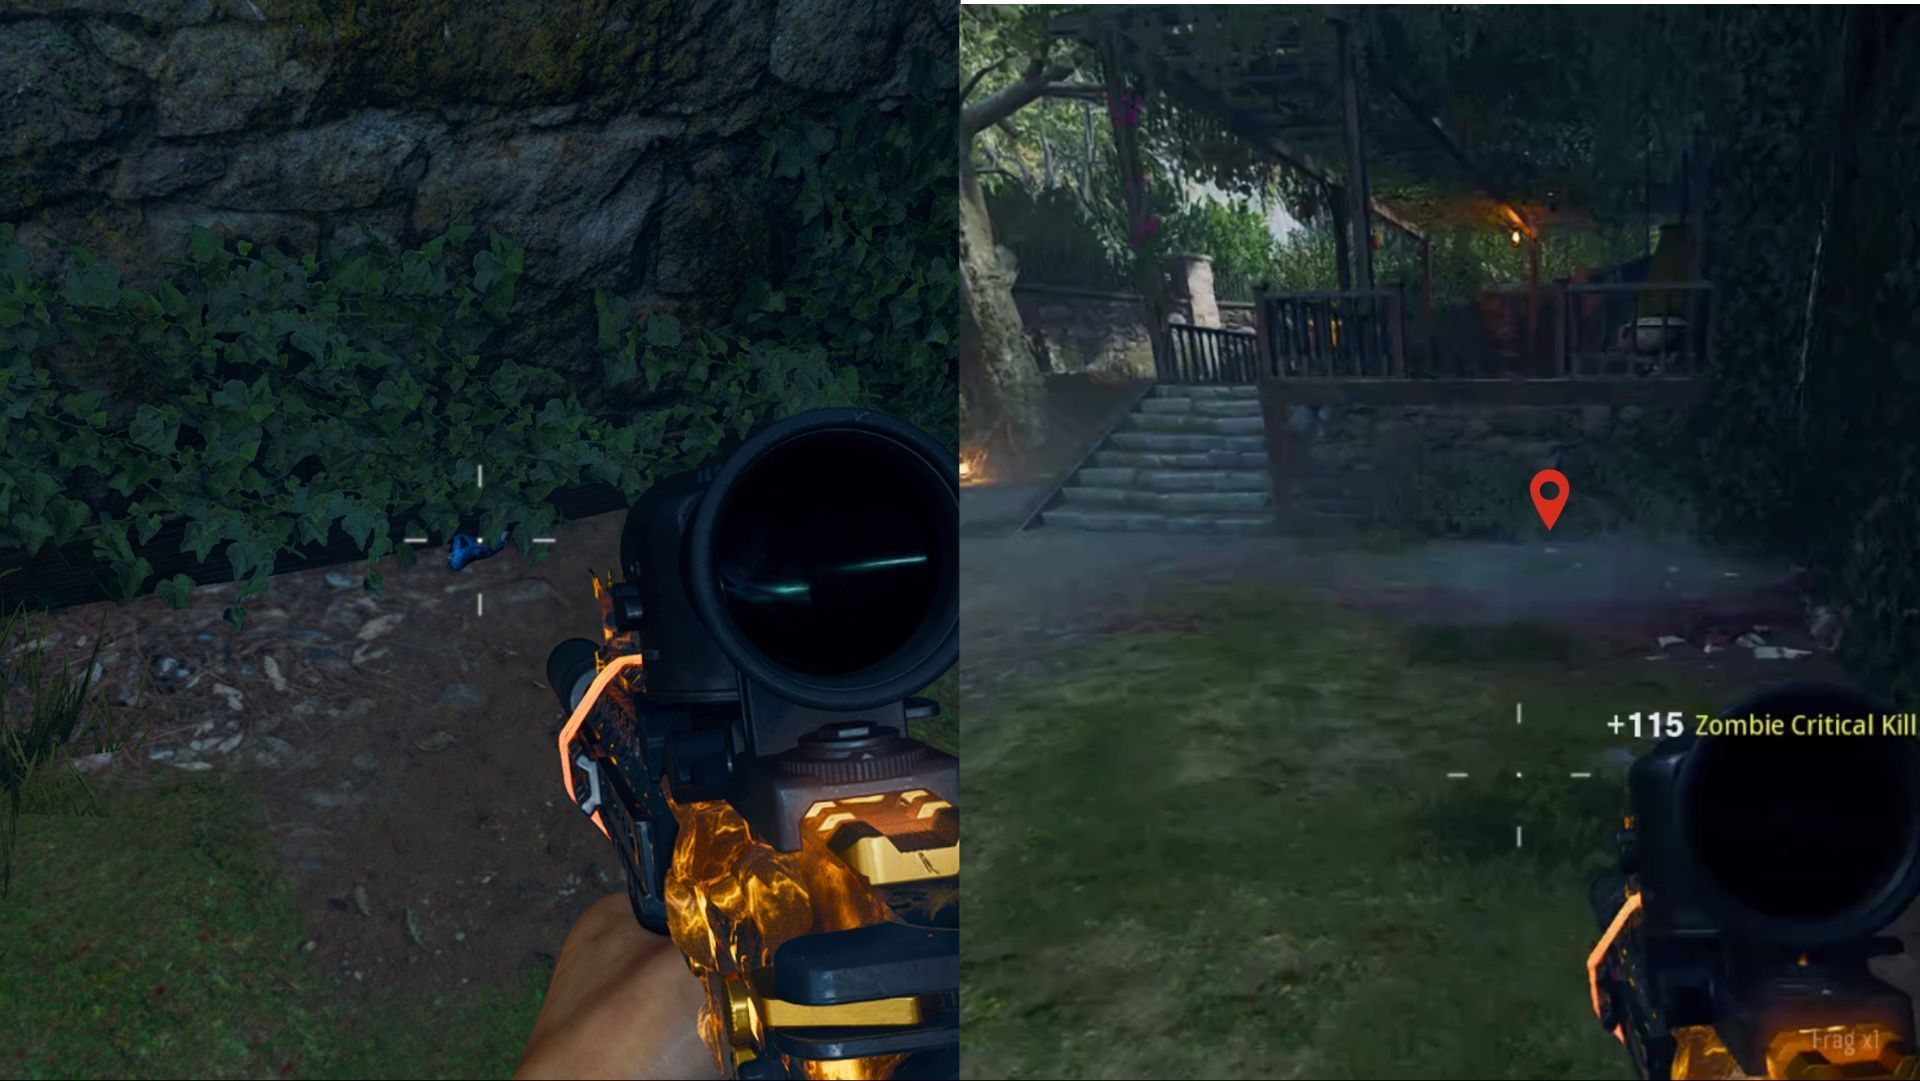
Third part: Conservatory (Quick Revive Area)
Make your way to the Conservatory, where the Quick Revive perk is located. In front of it, you’ll see a flight of stairs. Just to the left of the stairs' base, the third part lies visibly on the ground.
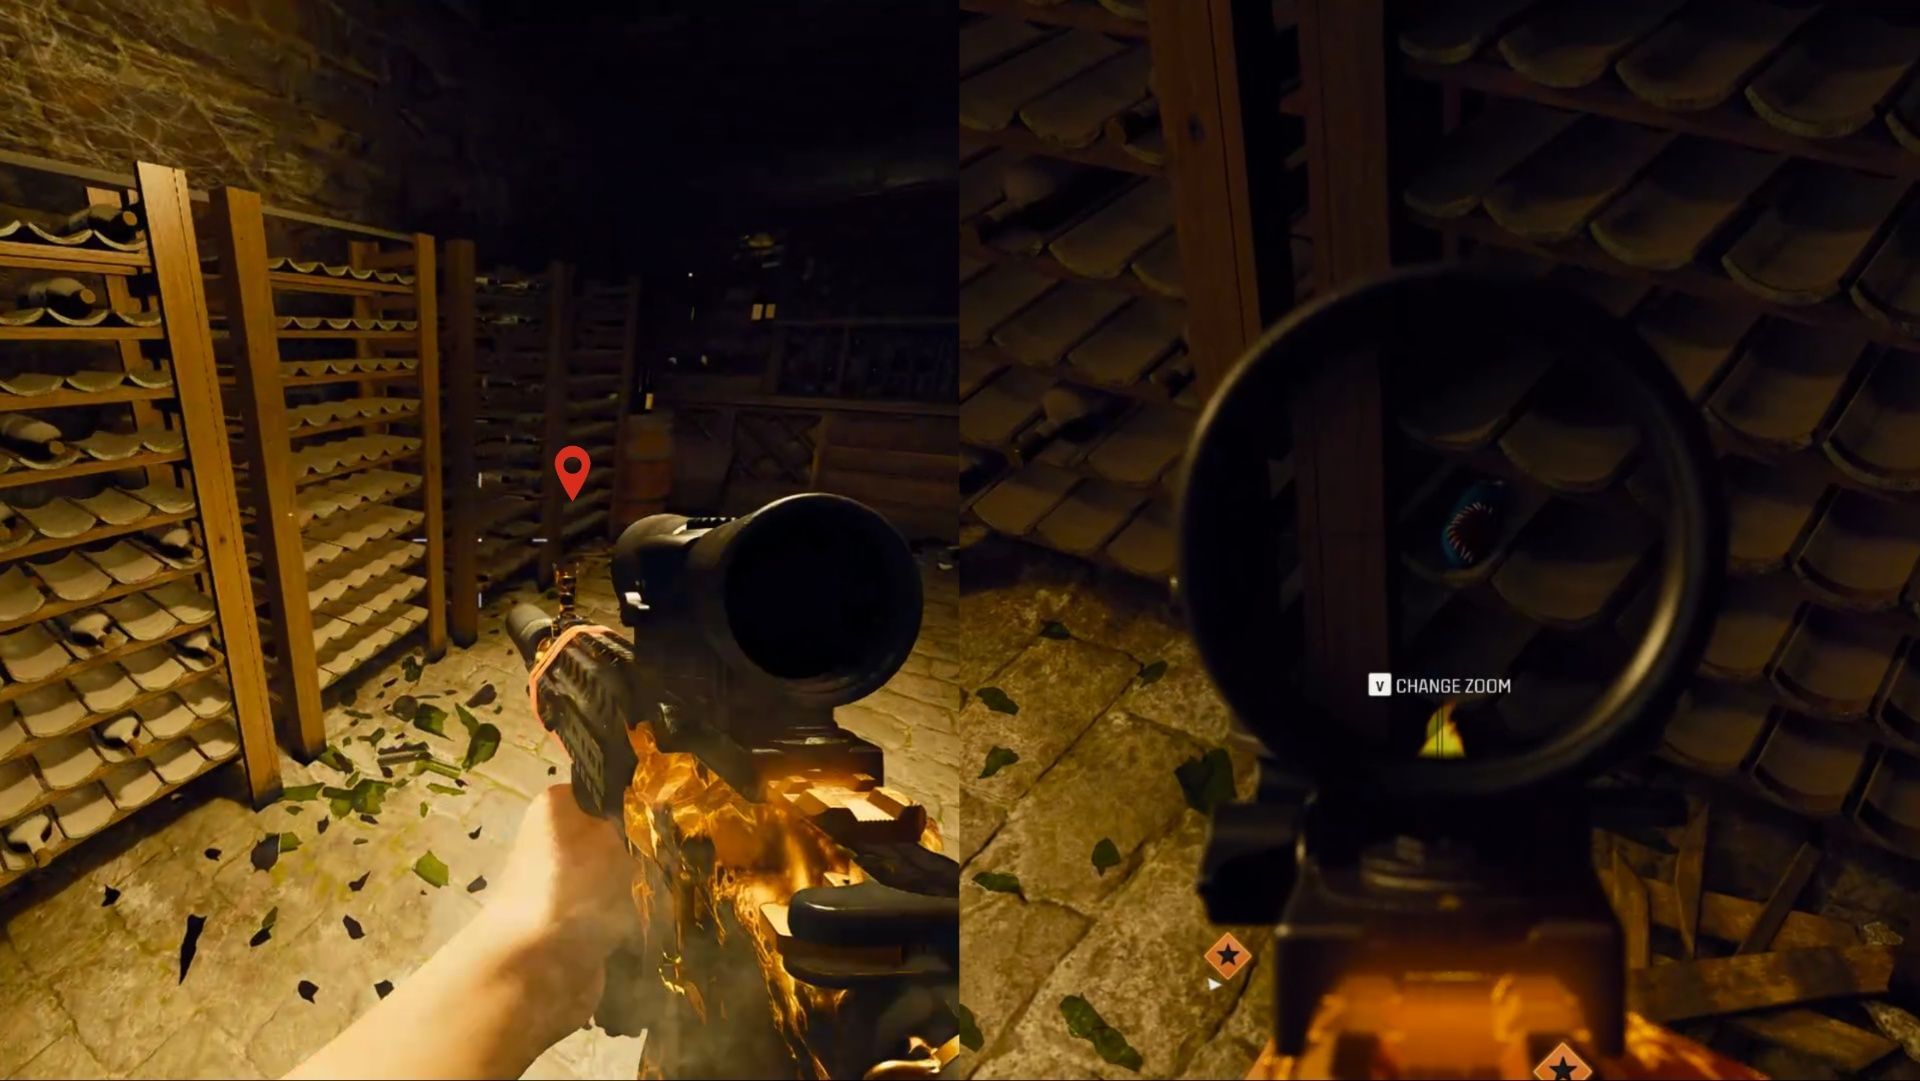
Fourth part: Bottlery
Head to the Bottlery room. On the west-side bottle shelves, check the far-right shelf on the second row from the bottom. The fourth part is placed there. Crouch for a clearer view.
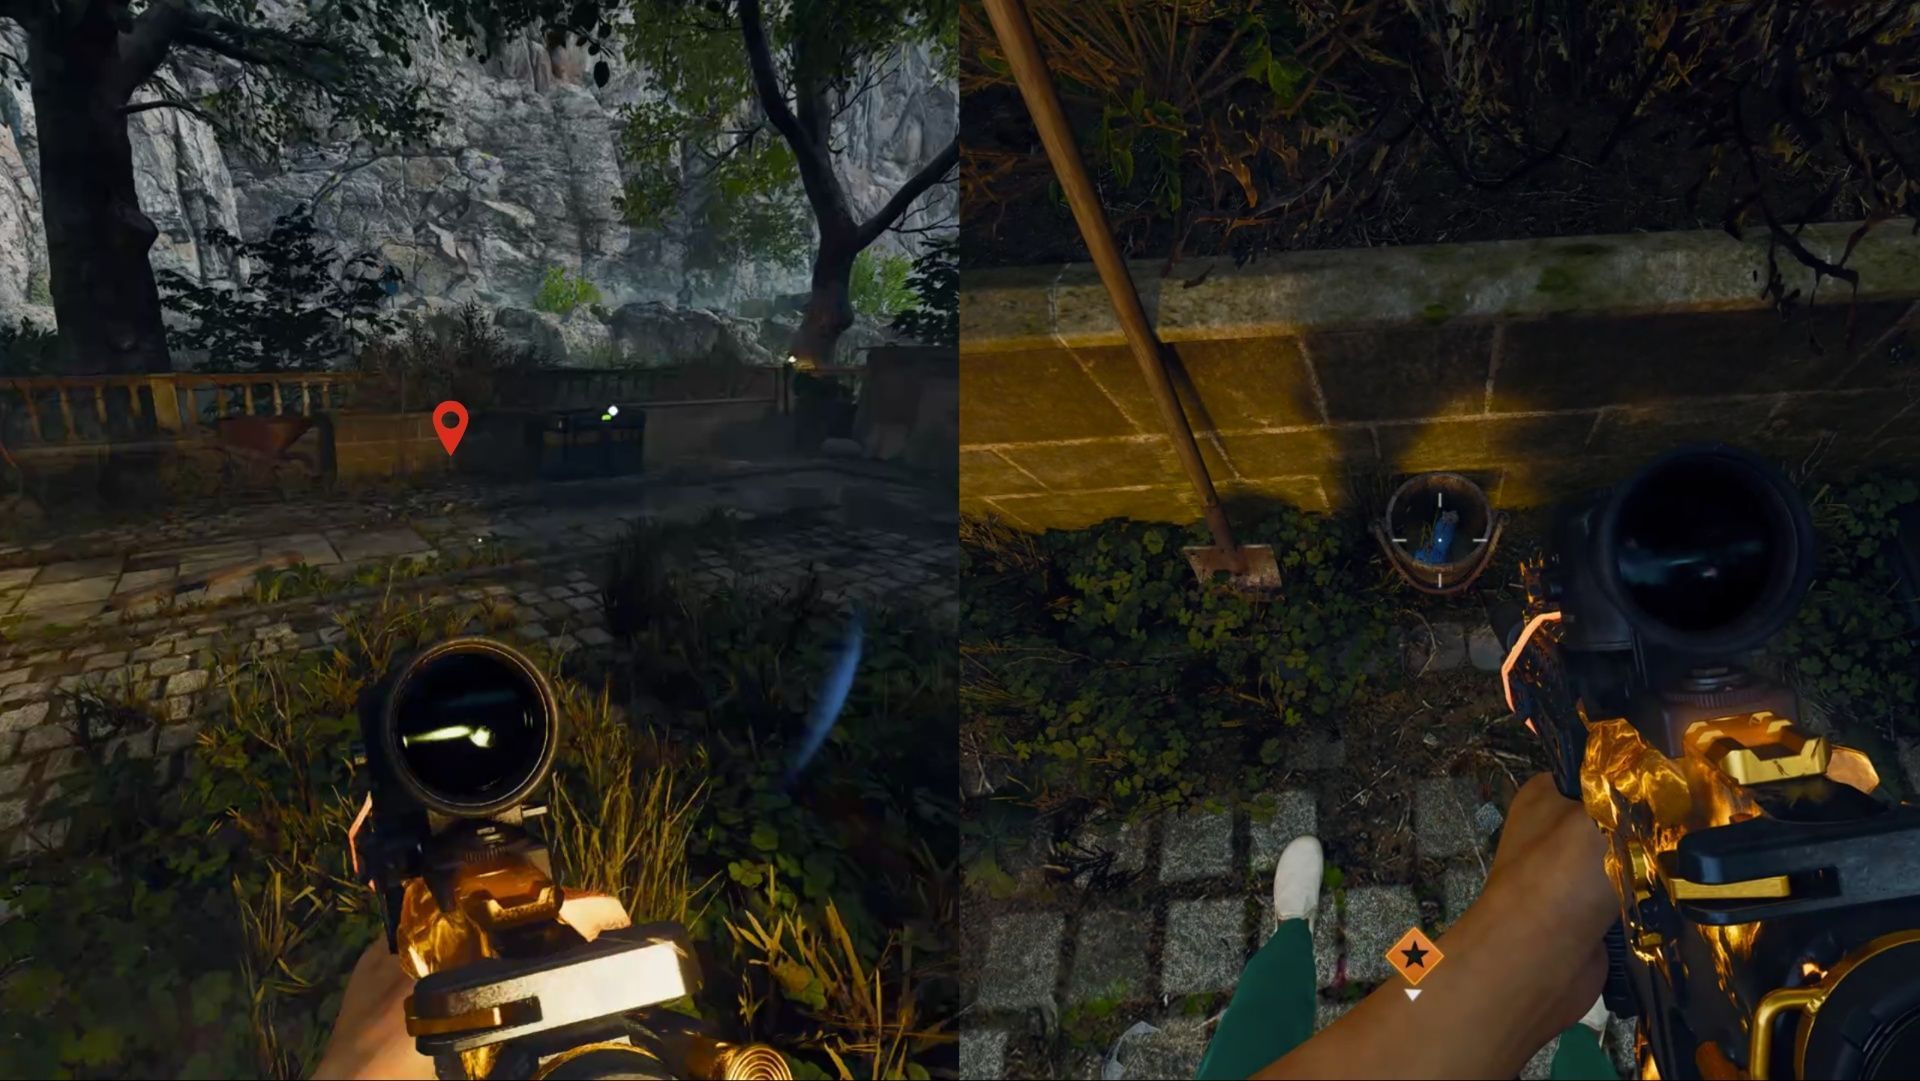
Fifth part: Rear Patio (Behind Double Tap)
Go to the Rear Patio, just behind the Double Tap perk. Near the Ammo Cache, look to its left to find a small bucket. Inside the bucket is the fifth part.
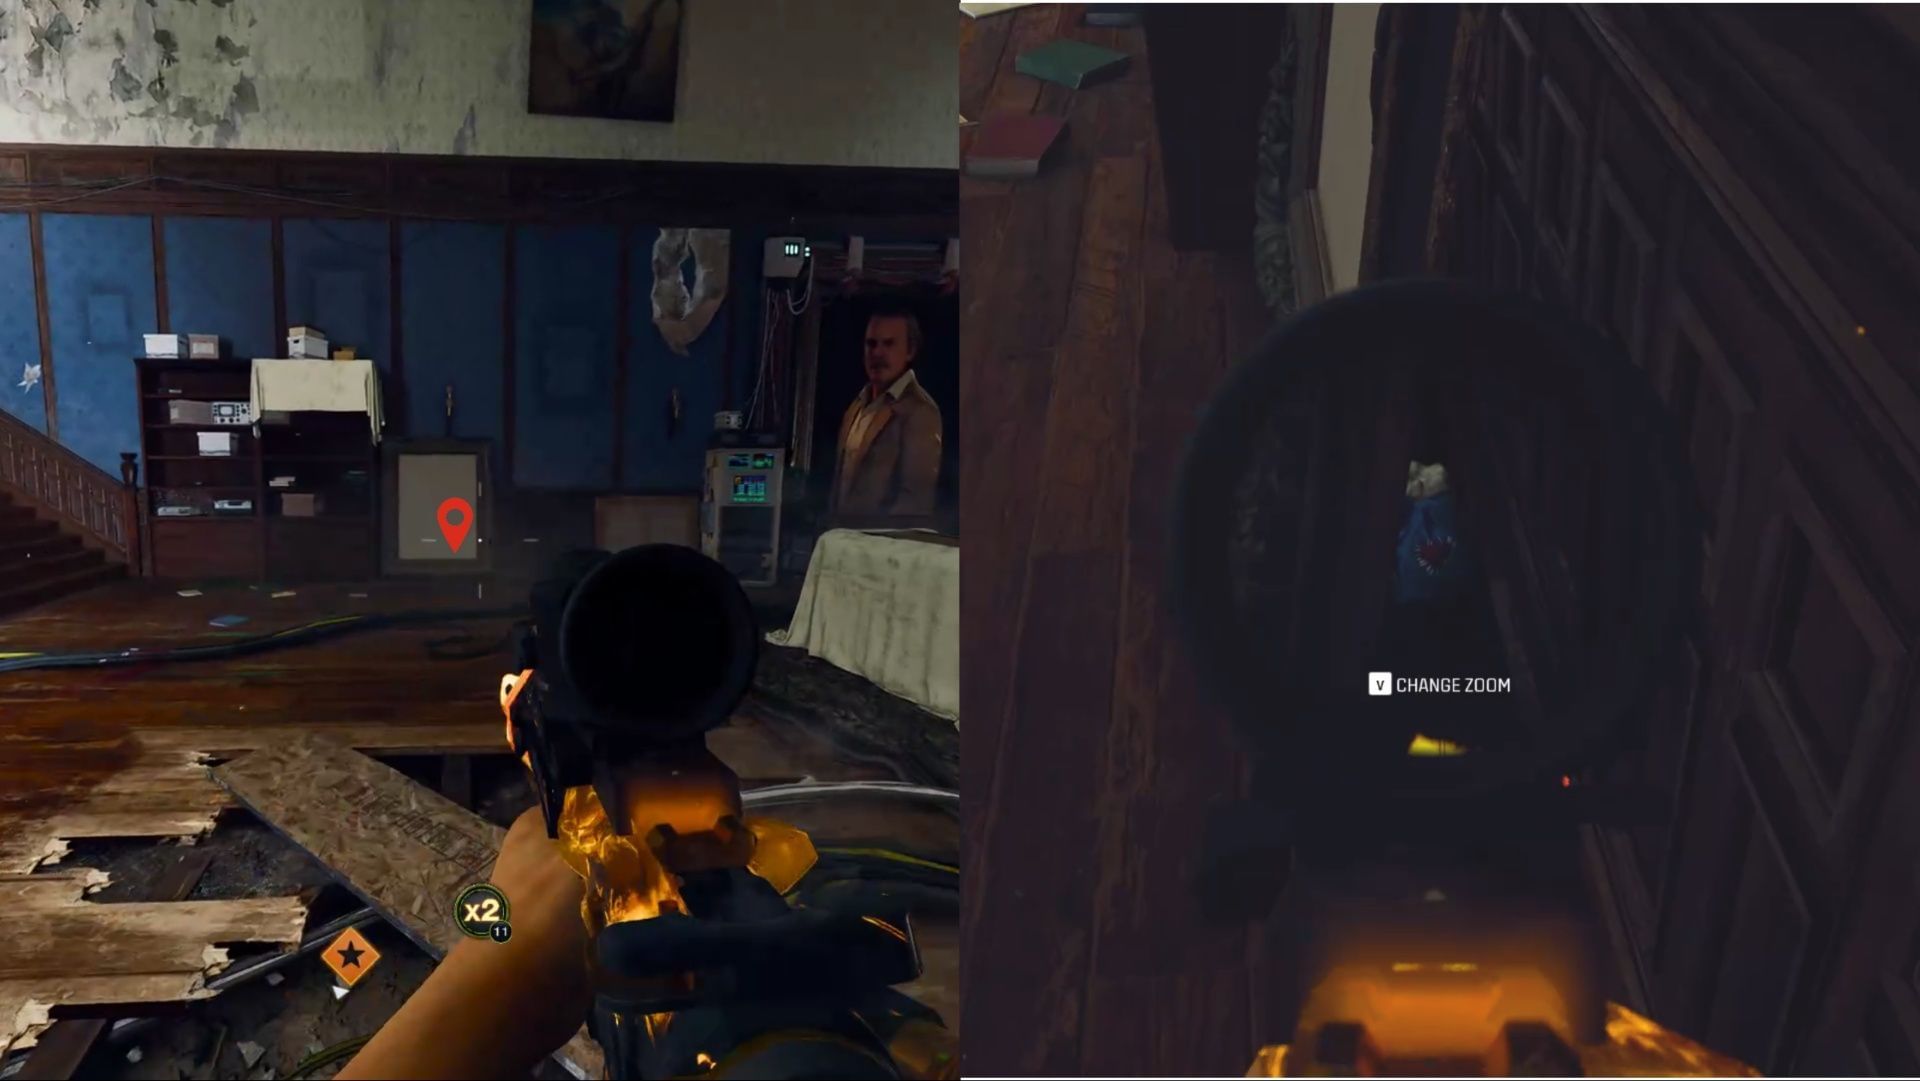
Sixth part: Library
Head to the Library area. To the left of the large wall painting, you’ll see an empty frame standing on the ground, supported by the wall. Check behind the frame to find the sixth and final part.
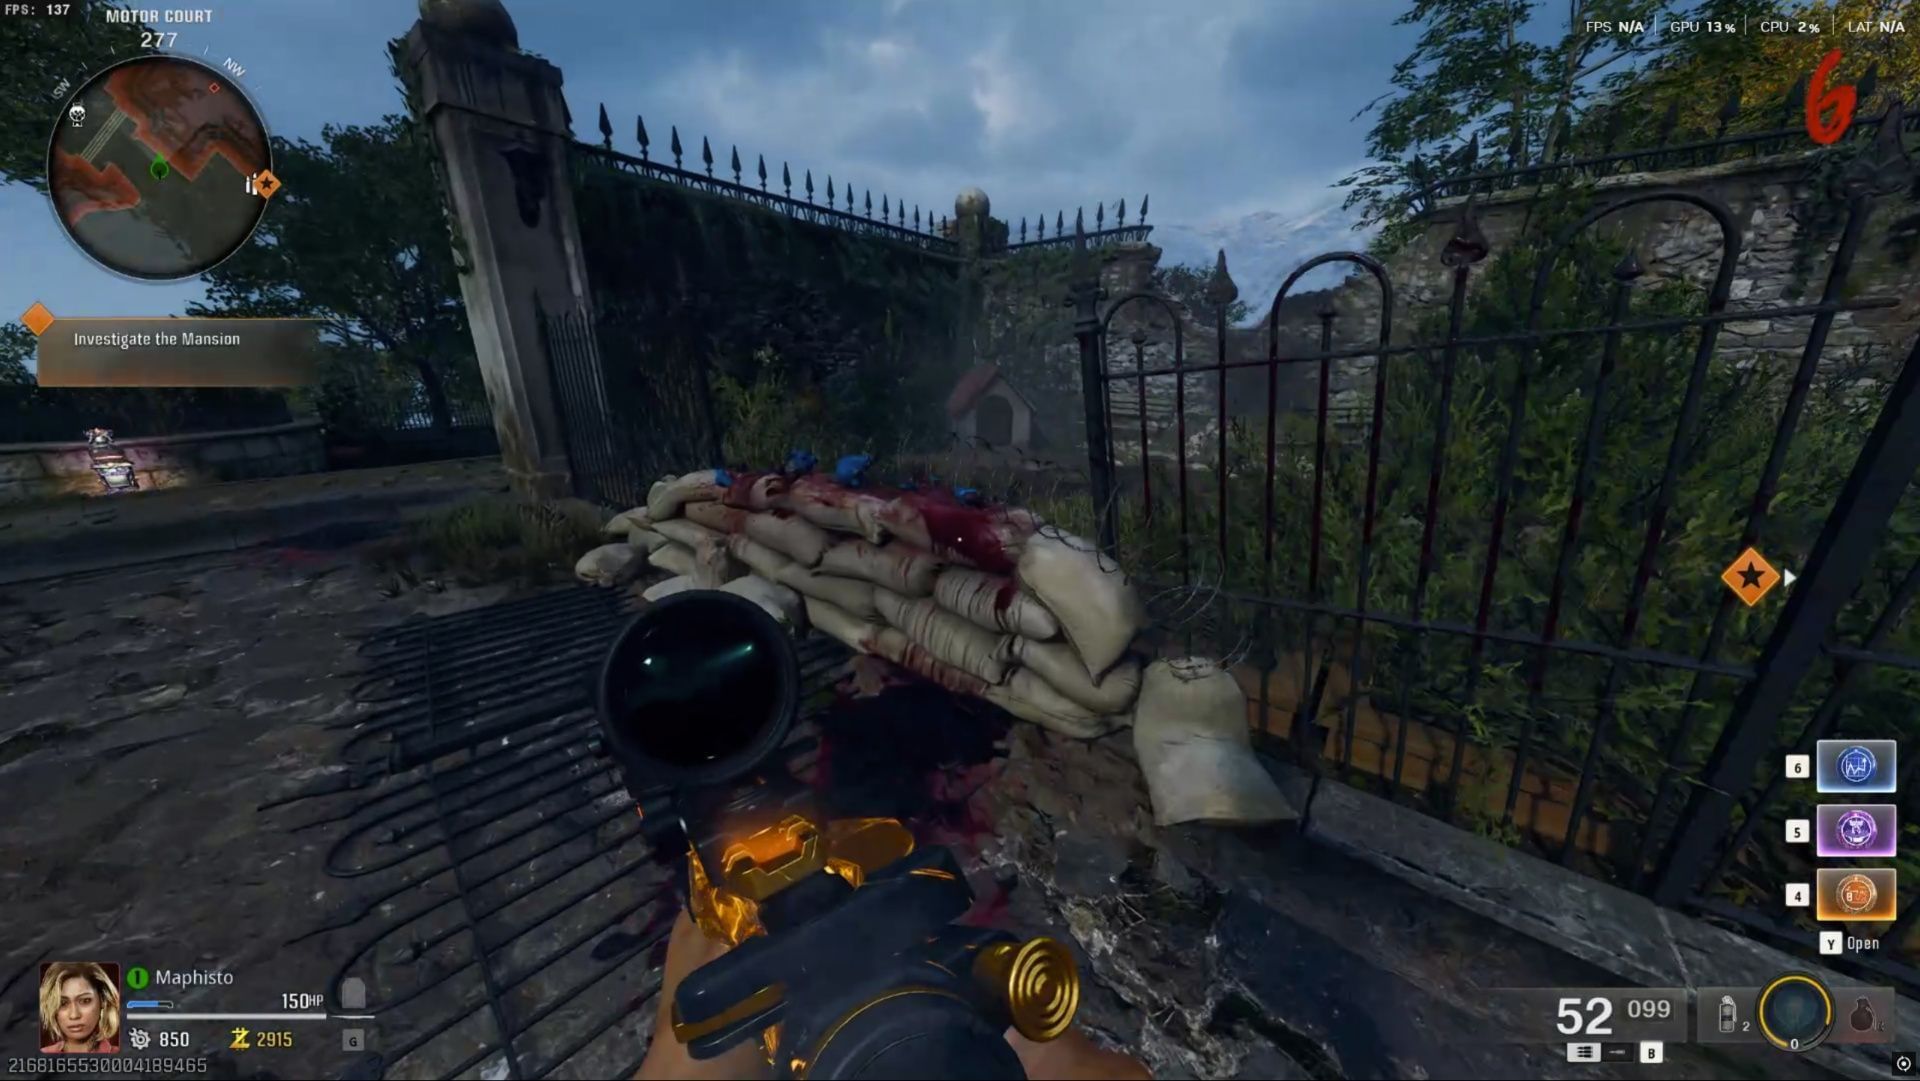
Repair Mr Peek
Once you've gathered all six parts, head to the Motor Court, located just outside the Mansion entrance. You’ll spot a dog house nearby and a pile of sandbags where Mr Peek’s broken body parts are present. Press and hold the interact button to repair it.
This Easter Egg also proves helpful when upgrading your Ray Gun Mark II into the R (Yellow) variant. During this process, you'll need to place four Plant Seeds into planters and defend them. Since the area is quite compact and swarms of zombies will attack from all directions, having Donut by your side can make a big difference.
Check out our other Call of Duty articles:
- Call of Duty has disabled the Snakeshot ammo for the Basilisk Revolver in Warzone again
- How to unlock the Crank Job 3D Emote in Warzone and Black Ops 6
- All Little Caesars Warzone Season 3 rewards and how to get them
- Warzone Season 3: Best Kar98K loadout to use after Verdansk update
- How to get Wunderwaffe DG-2 in Shattered Veil: Black Ops 6 Zombies easter egg guide