The perfect Warzone 2 loadout is not complete without the right lethal equipment. Having the same at the right time can turn even the most hopeless situations around. Choosing the right items at the beginning of each deployment is extremely important. It can help ensure that anyone entering a DMZ match will survive an engagement and that an operator extracts successfully.
Currently, players can choose from ten different options for this type of equipment in Warzone 2. Each one functions differently, but every single one of them can achieve the same goal when used correctly.
Note: This list is subjective and reflects the opinions of the writer
Looking for Crossword hints & solutions? Check out latest NYT Mini Crossword Answers, LA Times Crossword Answers, and Atlantic Crossword Answers
How effective are lethal equipment in Warzone 2?
Lethal equipment can be just as effective as a gun when used correctly, and utilizing them properly requires skills that players can pick up. However, it takes some time and a bit of practice to use them efficiently since they don't work as straightforwardly as the guns in the game.
Once a player becomes well-versed with the different lethal equipment at their disposal, they will surely become a force to be reckoned with in Warzone 2.
5) Throwing Knife
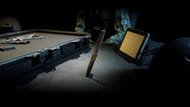
The Throwing Knife and the Throwing Star are unique among the lethal equipment found in Warzone 2, not causing an explosion when used. The former's immediate availability to be chosen justifies its presence on this list. This is unlike the Throwing Star, which requires a certain task to be completed before it can be equipped.
The Throwing knife is perfect for taking down individual targets. The silent but deadly weapon can make short work of even the most heavily armored foes. It is also perfect for immediately dispatching a downed target to prevent them from self-reviving without wasting ammo.
The Throwing Knife is also great for operators who do solo runs on DMZ since it can clear a group of AI hostiles without alerting their allies to the players' presence. Lastly, it can be recovered by simply walking over it, so it helps save resources.
4) Proximinity Mine
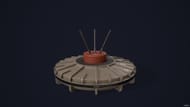
The Proximity Mine can be used to set up traps behind doors or narrow corridors. It works perfectly as a type of security to prevent enemies from sneaking up behind players when posted up or camping.
The proximity mine basically launches into the air when someone walks near it or over it. After that, it does significant damage through a huge explosion. Aside from being able to take out an individual or a group of individuals, it can also damage vehicles in Warzone 2.
3) C4
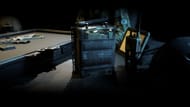
The C4 is perfect for setting up an ambush or for blowing up enemy vehicles. This deadly explosive can be attached to surfaces or vehicles. It can be detonated remotely whenever the person who planted it deems it appropriate.
Timing the explosion of a C4 perfectly can give a player the upper hand even when they are outnumbered. Additionally, having the capability to decide when it detonates makes it perfect for taking out groups of enemies bunched together. Players can also maximize the C4's damage by timing the explosion properly.
2) Semtex
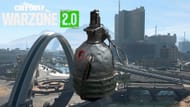
The Semtex is shaped like a hand grenade and functions like one but with an added benefit. It will stick to anyone unlucky enough to get hit by it before exploding. This ensures that the intended target cannot run away from the damage radius.
This lethal equipment can also be stuck onto vehicles or surfaces. Players must remember that it explodes shortly after being thrown. Thankfully, this sticky explosive does not stick to the players' hands, reducing the chances of operators accidentally taking themselves out with their own Semtex.
1) Drill Charge
The Drill Charge is capable of causing damage through walls. A player can simply throw this at any surface, and it will attach itself. Afterward, it will cause an explosion that damages or takes out targets on the other side of that surface.
This deadly explosive can help players clear out a room before entering, effectively taking out targets without exposing themselves directly to enemy fire. It can be especially useful against campers or enemy AI that are inside strongholds.
Additionally, the Drill Charge can damage enemies inside vehicles. Successfully sticking this lethal equipment to a vehicle can damage or eliminate anyone on board before they can disembark.
In order for a Warzone 2 loadout to be considered complete, the right lethal equipment needs to be a part of it. Thankfully, it is possible to carry several items in DMZ Mode.
A player with different types of lethal and tactical equipment in their backpack can give themselves an advantage over their enemies, especially if they know which one to equip at any given moment.
Are you stuck on today's Wordle? Our Wordle Solver will help you find the answer.
