
'%20x='0'%20y='0'%20height='100%25'%20width='100%25'%20%0A%20%20%20%20%20%20%20%20%20%20xlink%3Ahref='data:image/jpg;base64,/9j/2wBDAAYEBQYFBAYGBQYHBwYIChAKCgkJChQODwwQFxQYGBcUFhYaHSUfGhsjHBYWICwgIyYnKSopGR8tMC0oMCUoKSj/2wBDAQcHBwoIChMKChMoGhYaKCgoKCgoKCgoKCgoKCgoKCgoKCgoKCgoKCgoKCgoKCgoKCgoKCgoKCgoKCgoKCgoKCj/wgARCAAGAAoDASIAAhEBAxEB/8QAFgABAQEAAAAAAAAAAAAAAAAAAAUH/8QAFQEBAQAAAAAAAAAAAAAAAAAAAwX/2gAMAwEAAhADEAAAAMqoB1P/xAAeEAABBAEFAAAAAAAAAAAAAAABAgMREgAEFSFEYf/aAAgBAQABPwDQvBDVElXBisCpzcp6rI8AGf/EABURAQEAAAAAAAAAAAAAAAAAABEA/9oACAECAQE/ABv/xAAVEQEBAAAAAAAAAAAAAAAAAAAAAv/aAAgBAwEBPwCX/9k='%3E%3C/image%3E%3C/svg%3E)
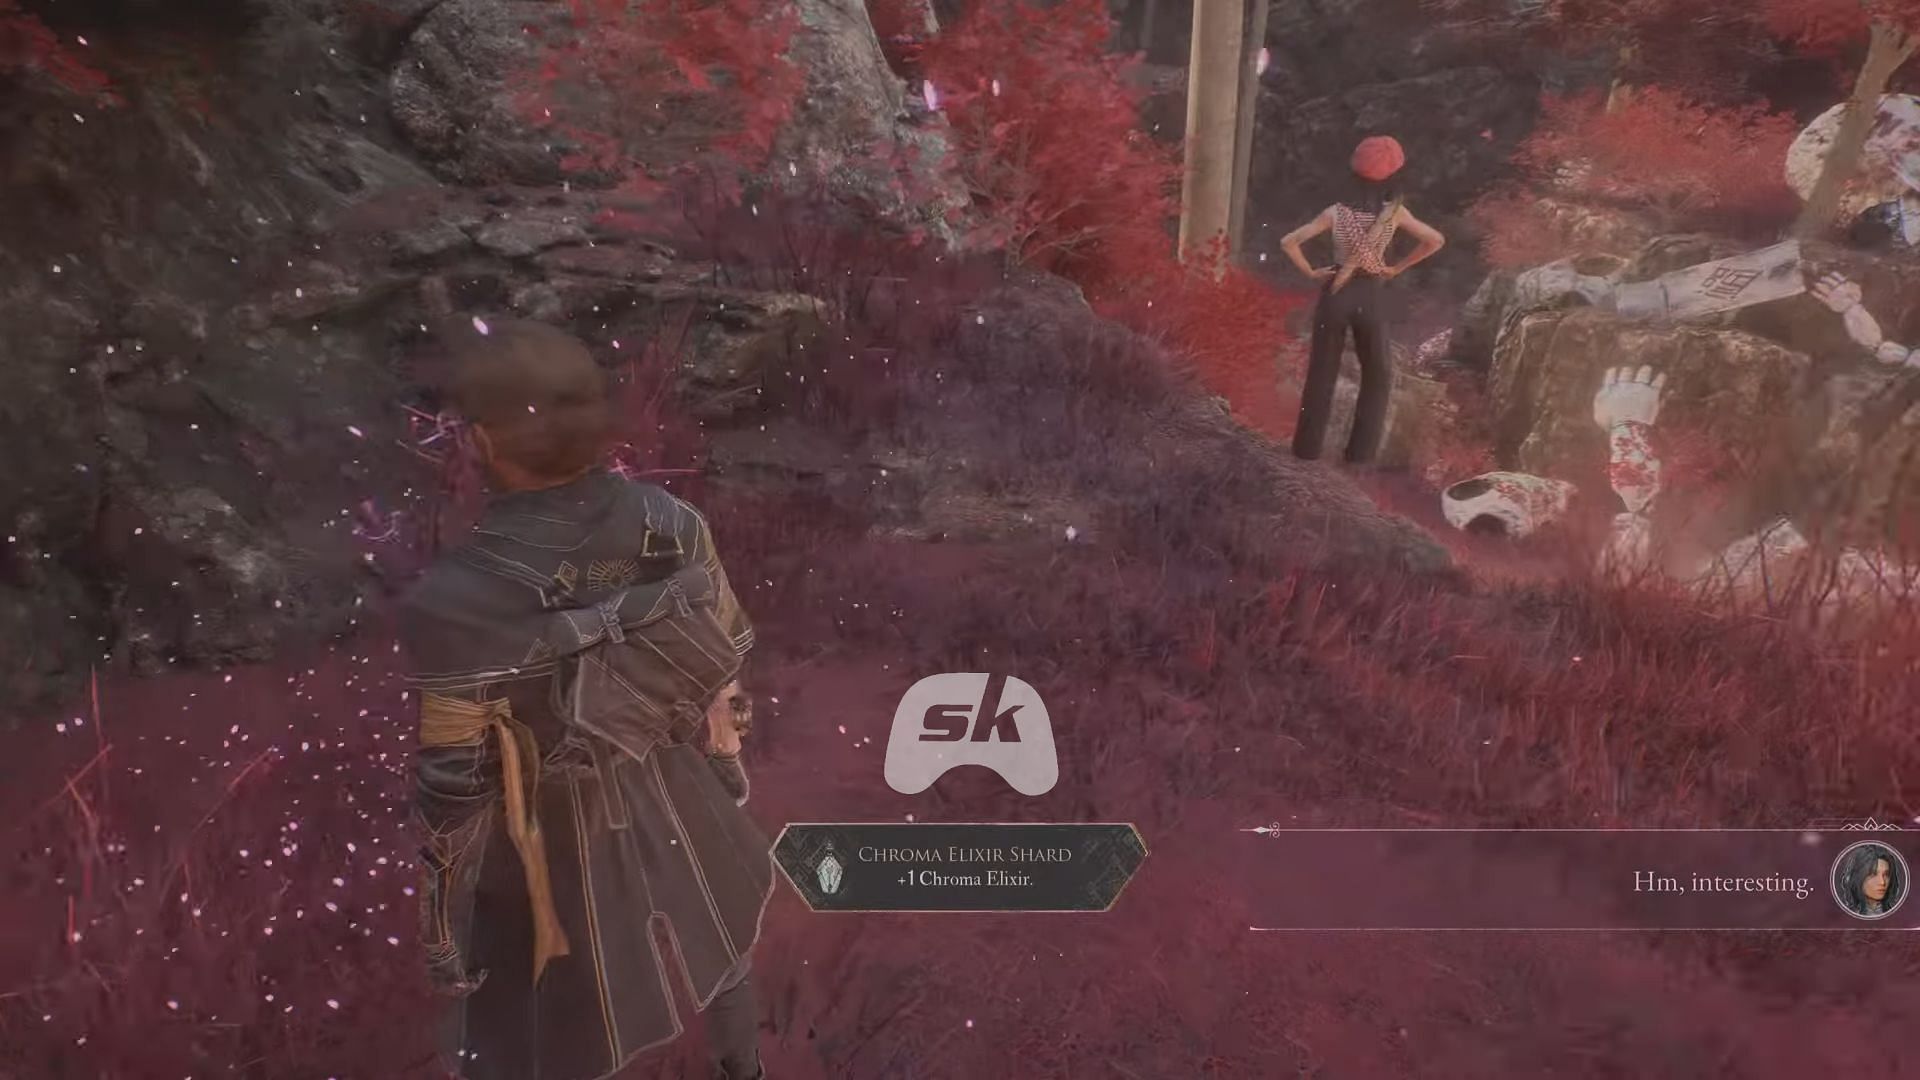
Knowing about all the Chroma Elixir Shard Locations in Clair Obscur: Expedition 33 is important if you want to increase your Chroma Elixir carry capacity. This usable item is one of the ways through which you can heal all your party members whenever you're out of combat. It replenishes every time you rest at an Expedition Flag.
You'll get a single Chroma Elixir at the start. However, as the game progresses, you might need to heal your members more than once. These Shards give you the ability to do just that. This article guides you on all the Chroma Elixir Shards located in Clair Obscur: Expedition 33.
All the Chroma Elixir Shard Locations in Clair Obscur: Expedition 33
There are a total of four Shards throughout the game.
Looking for Crossword hints & solutions? Check out latest NYT Mini Crossword Answers, LA Times Crossword Answers, and Atlantic Crossword Answers
Note: The further sections might spoil some locations of the game. To paraphrase, you'll need to unlock three sphere-ish "locks" of a Paint Cage to acquire one shard. You'll come across three Cages as you play through the campaign, though you'll need to do some looking around to find them. If you want to know about the regions of all four shards, they are: Flying Waters, Ancient Sanctuary, Stone Wave Cliffs Cave, and Forgotten Battlefield.

The Chroma Elixir Shards will be trapped inside containers known as Paint Cages. These will look like dome-ish structures with black swirling waves roaming inside. There will also be a faint white light coming out of its continuously moving openings.
To open a Cage, you'll need to destroy three "locks." These will be swirling spherical structures with similar swirling black waves. They will be scattered across the immediate surroundings of the Cage. You can use the Free Aim mechanic to destroy them.
Here are all the Chroma Elixir Shard locations:
First Chroma Elixir Shard location

It will be located after the entrance of the Flying Waters map and before any Expedition Flags there. Find the tail end of a shark with a massive cage tied by a chain floating above to spot this. The first lock will be at the tail. The second one will be towards its left amid some green vines. The third one will be opposite the tail, to the right of a wide, golden broken pillar with a swirling pattern.
Second Chroma Elixir Shard location

After the Ancient Sanctuary map's Sanctuary Maze Expedition Flag, if you follow the main road to progress the story, you'll come across a buried domed building. You'll also fight against a Catapult Sakapate and a Robust Sakapate.
There will be an opening just to the left of it, between two wooden statues. Enter it and hop on the elevated platforms to reach the Cage. There will be a pile of white robot parts in the center below.
The first lock will be towards its left, the second one will be behind the two trees on the right of the parts, while the final lock will be behind the crates on the extreme right.
Third Chroma Elixir Shard location

The third Shard will be inside Stone Wave Cliffs Cave, which will be east of the titular Stone Wave Cliffs map in Clair Obscur: Expedition 33.

After you use the second grapple point and cross the narrow, long path, take a right and crawl down the space to use the golden rope. All the locks will be one after the other as you keep looking to the right side until you almost make a 360-degree look around.
The first one will be on top of a blimp airship to the right of the Cage. The second one is on another blimp, this time falling downwards (as seen in the above image). The third one will be to its right.
Fourth Chroma Elixir Shard location

The final Chroma Elixir Shard location will be in the Forgotten Battlefield Map. After reaching the Vanguard Point Expedition Flag, if you keep moving forward, you'll meet The Fading Woman NPC. Move straight ahead from her and take the right, and then the first left. You'll notice the Cage.
The first lock will be just across from it, behind some crates. For the second lock, head back, stop at the entrance of the area that holds the Cage, and look up.

From there, take a right and another right to reach some boxes and barrels, which will hold the final lock.
To use the Shards, open the Expedition menu. You'll see the prompt to use the Shard at the bottom right corner of the screen. Press the appropriate keybind and you'll increase your Chroma Elixir capacity in Clair Obscur: Expedition 33.
Check out our other articles on the game:
- Is Clair Obscur: Expedition 33 coming to Nintendo Switch and Switch 2?
- 7 best RPGs to play while waiting for Clair Obscur: Expedition 33
- Is there Romance in Clair Obscur: Expedition 33?
- How to parry, dodge, and jump in Clair Obscur: Expedition 33
- How to fast travel in Clair Obscur: Expedition 33

Are you stuck on today's Wordle? Our Wordle Solver will help you find the answer.