Having the best Ace loadout in Rainbow Six Siege will help you utilize the Operator to the fullest extent. Ace can use his unique set of utilities to hard breach any reinforced wall from a distance. There are numerous ways to breach those hatches with the “S.E.L.M.A Aqua” charges. Unlike Thermite, Ace’s SELMA charges are hard to destroy from the other side with breach denial characters like Bandit and Mute.
Keeping that in mind, this extensive guide will give you a brief idea about the best Ace loadout and how to play this hard breacher in Rainbow Six Siege.
Note: Some aspects of the article are subjective and solely reflect the author’s opinions.
Looking for Crossword hints & solutions? Check out latest NYT Mini Crossword Answers, LA Times Crossword Answers, and Atlantic Crossword Answers
Ace loadout in Rainbow Six Siege: Best weapon choices explored
This section of the article will discuss the best primary and secondary weapon loadout for Ace in Rainbow Six Siege.
Best primary weapon choices for Ace
AK-12

- Sights: Magnified A
- Barrels: Muzzle Brake
- Grip: Vertical Grip
- Underbarrel: Laser Sight
The AK-12 is the best primary weapon for this Ace loadout in Rainbow Six Siege. The Assault rifle excels mainly in long-range fights but can be effective in close-range scenarios too.
The Magnified A (1.5x) sight will help you spot enemies from a far distance. However, if you decide to run the title in low settings, you might want to opt for Magnified B (2.5x) scope for a better view of your enemies.
Meanwhile, both Muzzle Brake and Vertical Grip will help you reduce the weapon's huge vertical recoil, making it easier to track and shoot enemies over a long distance. Lastly, the Laser Sight slightly decreases the weapon's ADS time.
The AK-12 features an impressive 850 RPM fire rate and takes 3.40 seconds to reload. Apart from that, it also inflicts a lethal base damage of 40.
Read More: Best Mute loadout
Best secondary weapon choices for Ace
P9

- Barrels: Muzzle Brake
- Underbarrel: Laser Sight
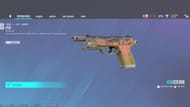
The P9 Pistol is the only secondary weapon option for this Ace loadout in Rainbow Six Siege. Using a Muzzle Brake will help you almost negate the weapon's slight vertical recoil. Meanwhile, the Laser Sight will decrease the ADS time, allowing you to react quickly upon an enemy's sudden arrival.
The P9 comes with an impressive reload time of 2.10 seconds and 40 base damage. It holds 16 bullets in a magazine and 113 in the reserve section. You can rely on this weapon instead of reloading your primary one to shoot some enemy targets.
Also Read: Best Alibi loadout
How to play Ace in Rainbow Six Siege

In this section, we'll explain how you can play this hard breacher using the best Ace loadout in Rainbow Six Siege.
As discussed, you must be a versatile player if you want to master Ace in a very short time. There are numerous ways you can play this two-speed two-armor Operator.
At times, you can play Ace as a primary breacher. In some cases, you can even flourish as a secondary breacher and go for the hatches or roam hunting with other teammates, such as Dokkaebi and Lion. However, you must keep yourself safe as your Operator plays a pivotal part in breaching reinforced walls quite efficiently in R6.
Another key aspect in regards to playing this Norwegian character is you must have a brief idea of where to place your SELMA gadget to avoid your opponent's breach-denial utilities, including Mute's jammer and Bandit's batteries. If you're going for a hatch, and if it's electrocuted with a Kaid charge, you can place your two SELMA charges on the floor to breach it with ease.
You might be interested in: Best Kaid loadout
Apart from hatches, you can break other devices, such as Mira Walls and Deployable shields, making it hard for the enemies to hold tight angles behind those devices.
On the other hand, you can also use your SELMA charges on soft walls to create footholes or rotation holes to catch your opponents off-guard. These unexpected angles are a nightmare for Defenders.
Lastly, you can either choose the Claymore or Breach Charge as your secondary gadget. Most players opt for the Claymore Charge as it alerts them to incoming flanks or can eliminate Defenders attempting to ambush your team. However, if you opt to choose a more vertical approach or create more angles inside the map, you must choose the Breach Charge.
To sum it up, it all really depends on your playstyle and the team's approach (whether you should play passively and take on those enemies aggressively).
That's all you need to know about the best Ace loadout in Rainbow Six Siege and the ways to exploit the Norwegian Operator.
For more loadout guides, make sure to follow Sportskeeda's Rainbow Six Siege page.
Are you stuck on today's Wordle? Our Wordle Solver will help you find the answer.
