
'%20x='0'%20y='0'%20height='100%25'%20width='100%25'%20%0A%20%20%20%20%20%20%20%20%20%20xlink%3Ahref='data:image/jpg;base64,/9j/2wBDAAYEBQYFBAYGBQYHBwYIChAKCgkJChQODwwQFxQYGBcUFhYaHSUfGhsjHBYWICwgIyYnKSopGR8tMC0oMCUoKSj/2wBDAQcHBwoIChMKChMoGhYaKCgoKCgoKCgoKCgoKCgoKCgoKCgoKCgoKCgoKCgoKCgoKCgoKCgoKCgoKCgoKCgoKCj/wgARCAAGAAoDASIAAhEBAxEB/8QAFgABAQEAAAAAAAAAAAAAAAAAAAQH/8QAFAEBAAAAAAAAAAAAAAAAAAAABP/aAAwDAQACEAMQAAAAx2gKv//EAB0QAAIDAAIDAAAAAAAAAAAAAAECAwQRAAUGEyH/2gAIAQEAAT8A8etVmr2JJacZ9aoyNutv1Typ2dVasKy1mdwihmBA05z/xAAWEQADAAAAAAAAAAAAAAAAAAAAAQP/2gAIAQIBAT8Aoj//xAAWEQADAAAAAAAAAAAAAAAAAAAAAQL/2gAIAQMBAT8Ahn//2Q=='%3E%3C/image%3E%3C/svg%3E)
AI Limit includes in-game tutorial options, but not everything gets covered in depth. Most mechanics will require you to experiment with them, and knowing them early could make a considerable difference. This guide discusses important topics including, but not limited to, which stats are best to level up, where to find weapons early on, and how to pin down upgrade materials successfully.
We break down all the important things you need to know in this Soulslike.
Top stats to prioritize in AI Limit’s early game
Looking for Crossword hints & solutions? Check out latest NYT Mini Crossword Answers, LA Times Crossword Answers, and Atlantic Crossword Answers
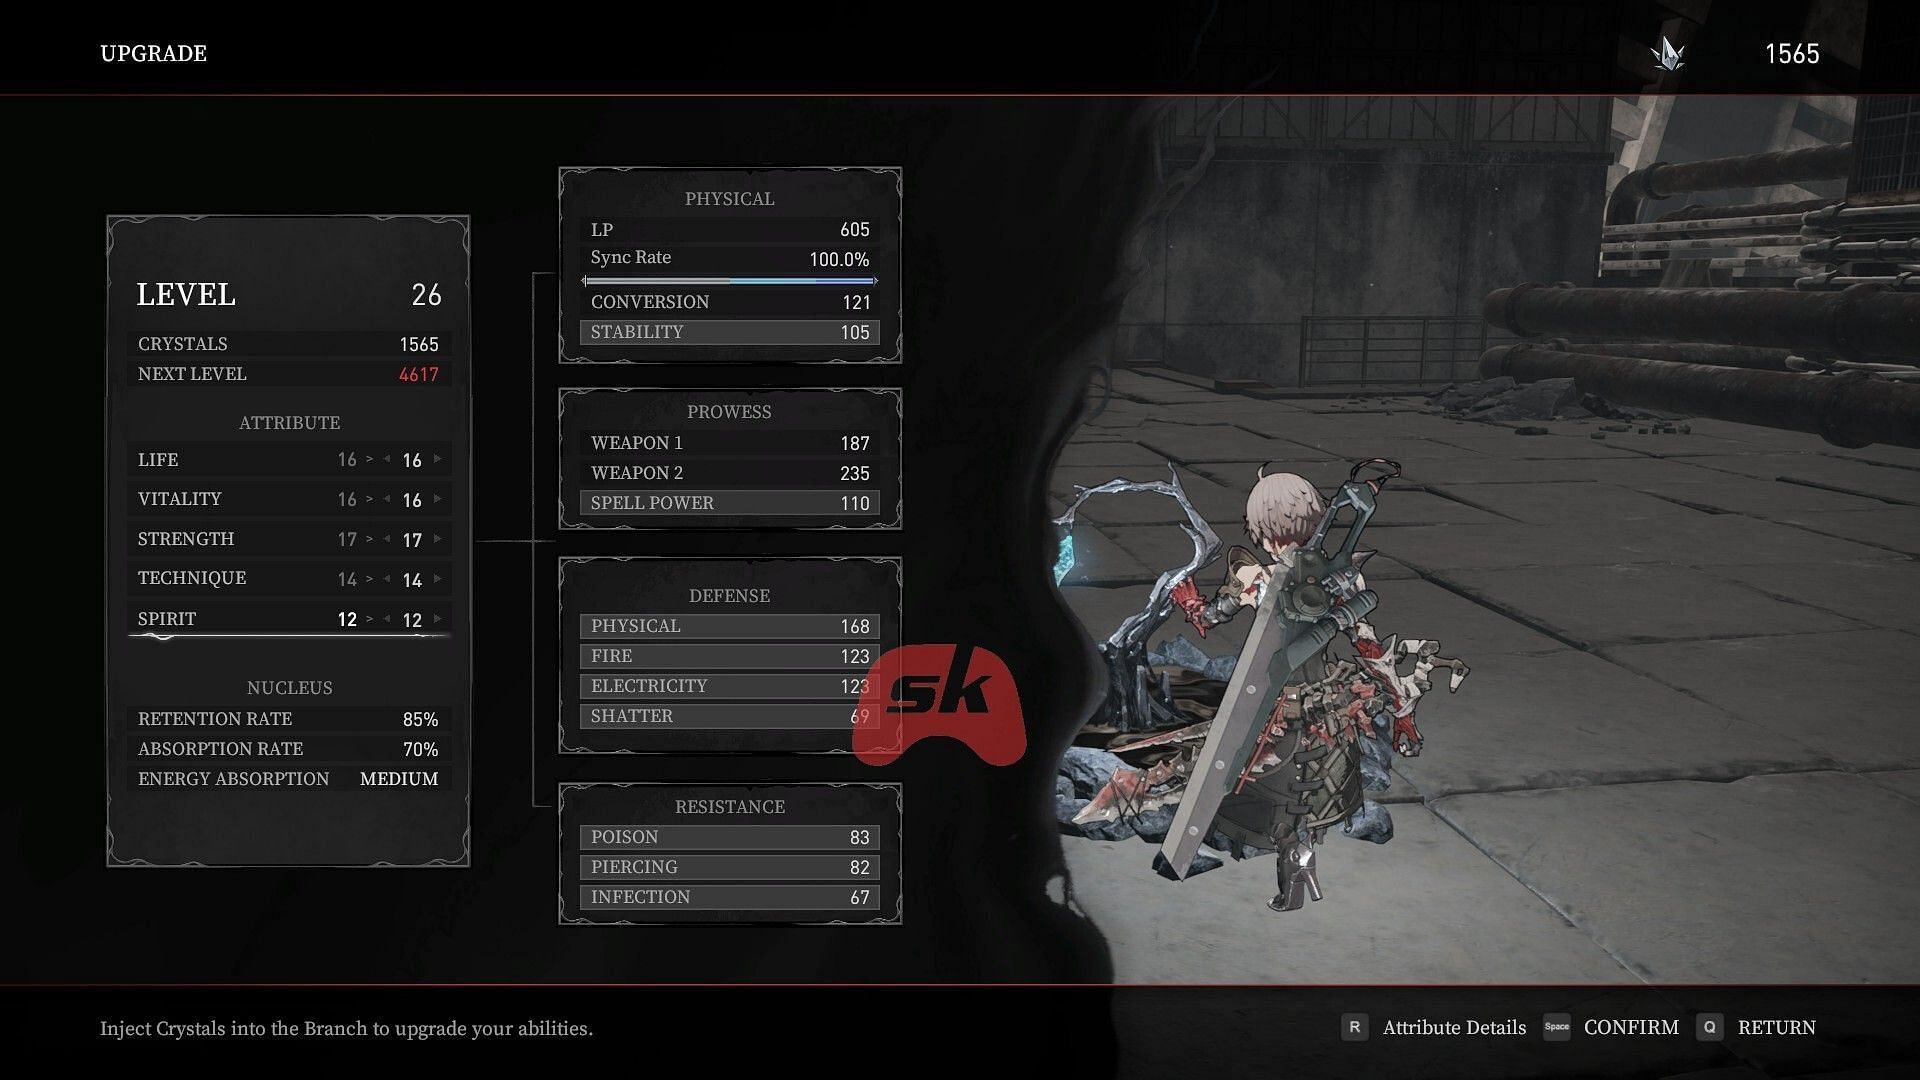
In AI Limit, the best thing to do is upgrade Life and Strength early. Life is slightly overpowered, because more HP allows you to live longer, be more aggressive, and learn from mistakes. In short, you can't hit anything if you're dead, so Life is the optimal investment straight off the bat.
Immediately after that, Strength needs to be upgraded, because most of the best early weapons scale with it. Higher Strength means better damage output, which speeds up fights and makes enemies less of a threat.
Other stats don’t hold much weight in the early game unless you aim to meet specific weapon or spell requirements, so sinking points into them too soon will just slow down your progression.
Read out: All AI Limit Trophies and Achievements
Best Weapons, Armor, Seals, Spells, and Accessories to use early in AI Limit
The early-game Weapons, Armor, Seals, Spells and Accessories will give you the survivability and damage output needed to push through the toughest fights. While you’ll come across plenty of loot, not everything is worth using These items stand out as the strongest choices:
Best early-game Weapons
1) Blader Greatsword
- Physical damage: 160
- Scaling: Strength (C), Technique (E)
- Requirements: 12 Strength, 10 Technique
- How to get: Choose it as one of the starter weapons at the beginning of the game.
2) Corrupted Blader Greatsword
- Physical damage: 142
- Piercing damage: 17
- Scaling: Strength (C), Technique (E)
- Requirements: 15 Strength, 10 Technique
- How to get: Dropped by a corrupted Blader on the road between Abandoned Houses and Cemetery.
Best early-game Seals
1) Metastability (Normal Seal)
- +50 Stability
- How to get: Found near the Before Upward Elevator Branch in Sewer Town.
2) Hardened Skin (Normal Seal)
- +50 Physical Defense
- How to get: Located next to a massive tree between the Abandoned Houses and Cemetery Branches in the Outer-Wall Ruins.
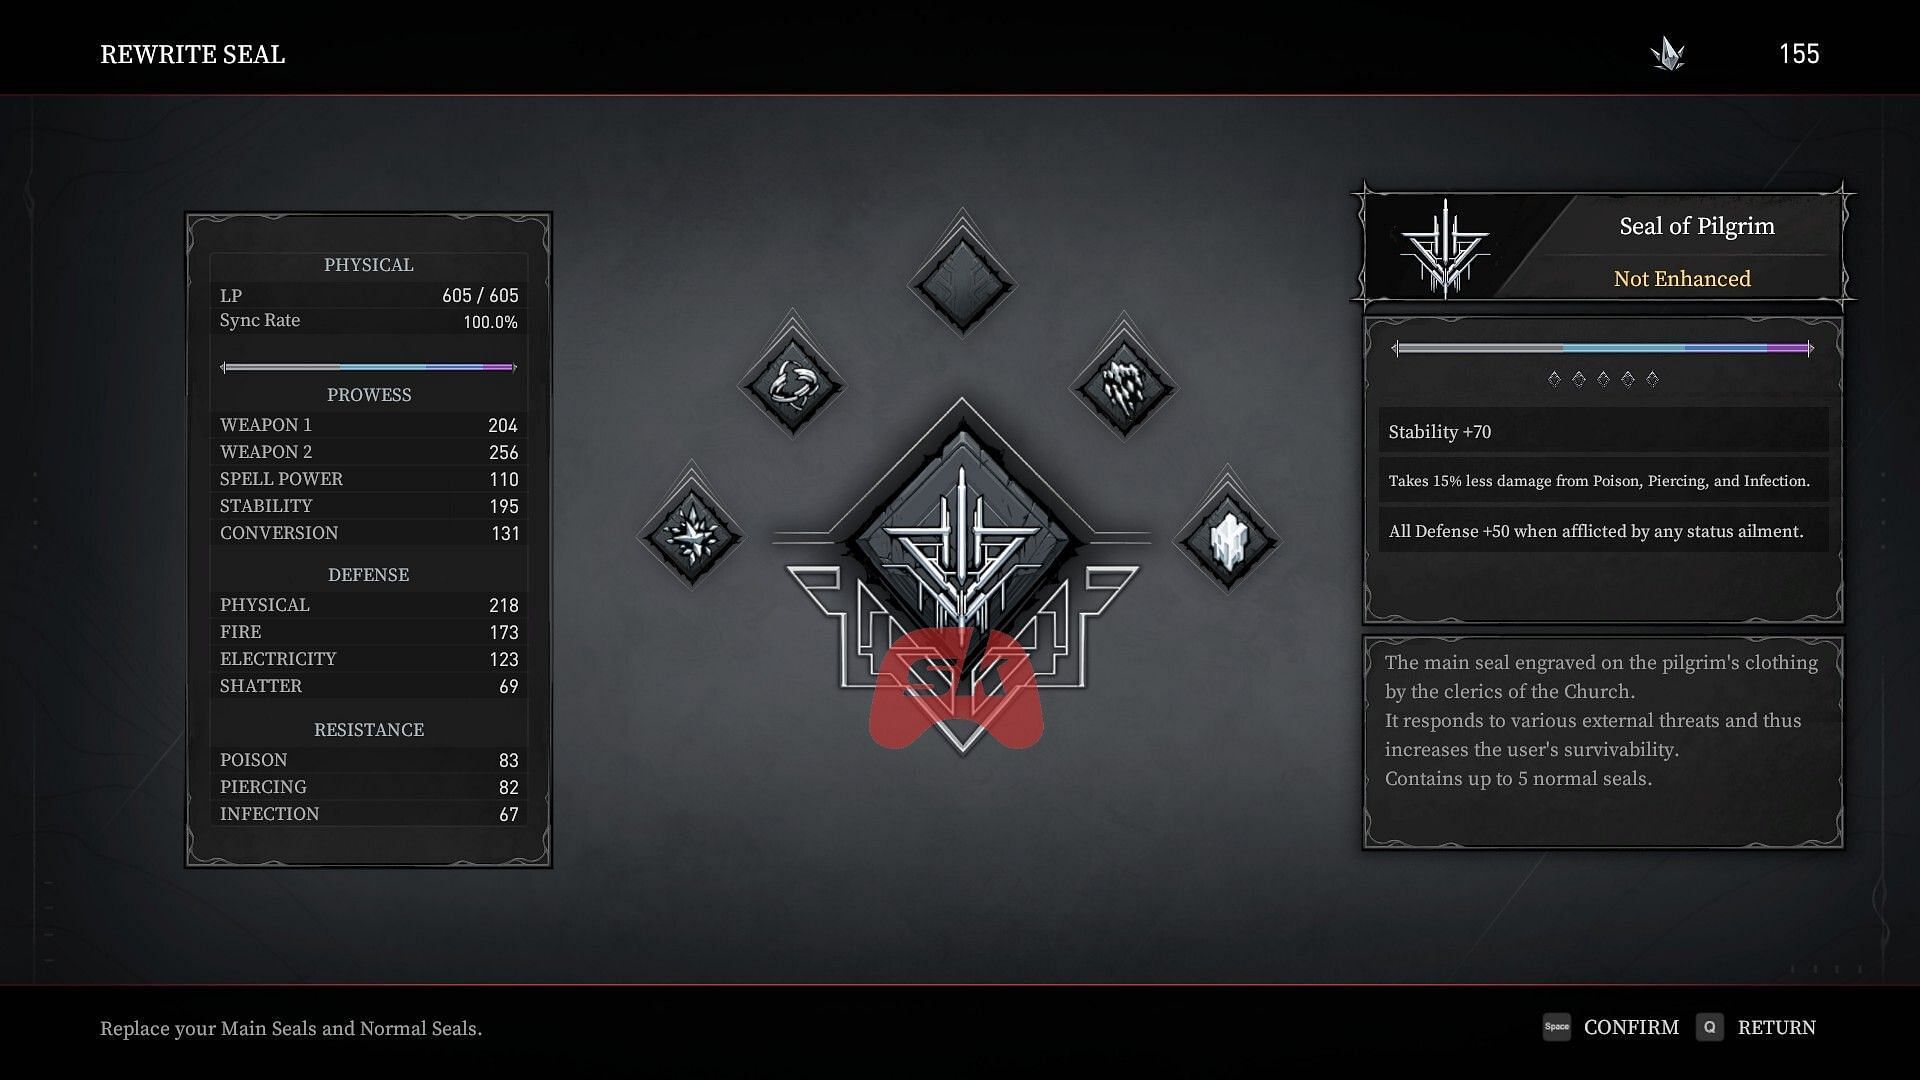
3) Seal of Pilgrim (Main Seal)
Bonuses:
- +70 Stability
- 15% less damage from Poison, Piercing, and Infection
- +50 All Defense when afflicted by a status ailment
How to get: Talk to Shirley three times inside the Temporary Campsite.
Best early-game Armors
1) Iron Pot (Headwear)
- Best stats: 50 Physical, 30 Piercing Defense
- How to get: Found on a rooftop next to the Abandoned Houses Branch. Kick down the ladder to reach it.
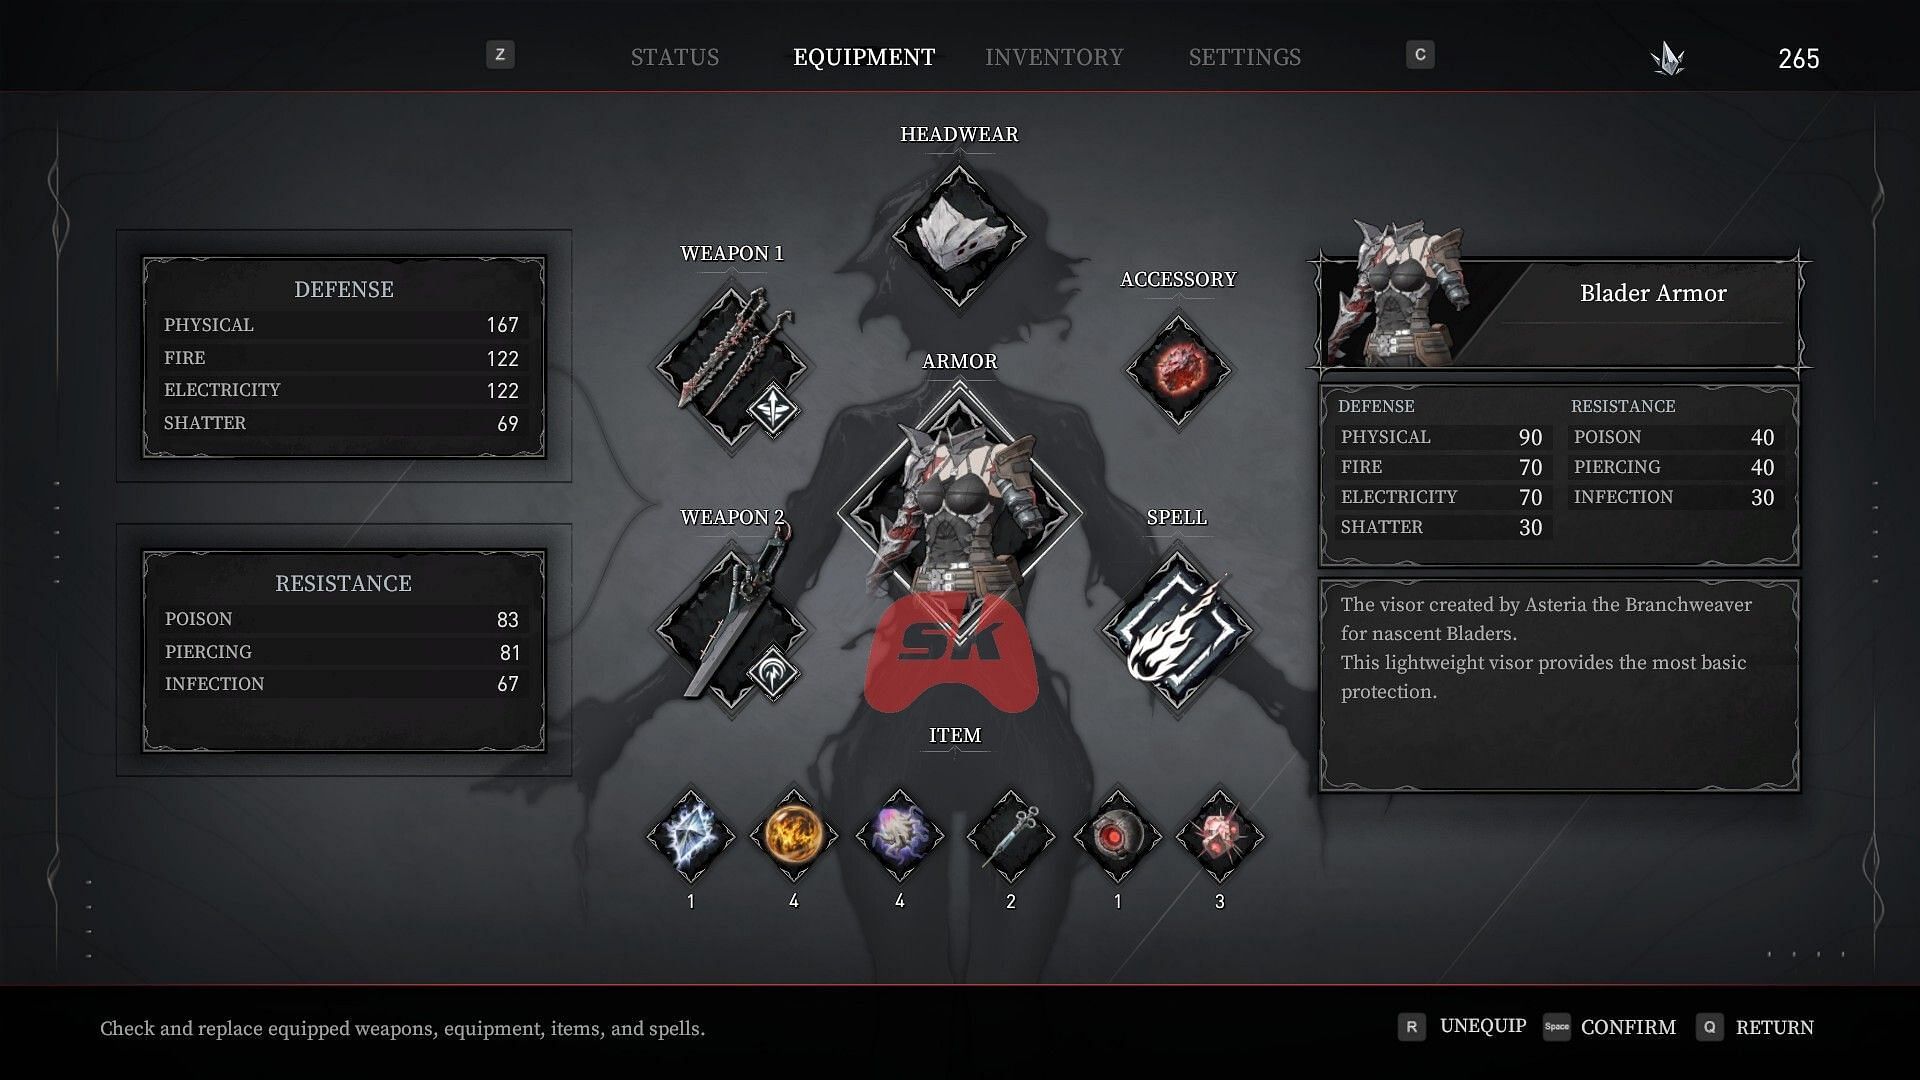
2) Blader Armor(Body Armor)
- Best stats: 90 Physical, 70 Fire, 70 Electricity Defense
- How to get: Found in a safe next to the Maintenance Access Branch.
3) Blader Visor (Headwear)
- Best stats: Balanced resistances across all damage types
- How to get: Also found in a safe near the Maintenance Access Branch.
4) Traveler's Outfit
Defense:
- Physical: 70
- Fire: 80
- Electricity: 70
- Shatter: 40
Resistance:
- Poison: 70
- Piercing: 30
- Infection: 10
How to get: If you spot a red valve safe, open it — these blend into the environment but hold valuable loot. One in the sewer level contains the Traveler's Outfit, a solid early-game armor set.
Best early-game Accessory
Turbid Nucleus
- Retention rate: 85%
- Absorption rate: 70%
- Energy absorption: Medium
- How to get: Defeat the Scavenger Patriarch in the area past the Abandoned Houses Branch within the Outer-Wall Ruins.
If you don’t want to lose a ton of Crystals upon death, the Turbid Nucleus is a must-have. Its high Retention Rate ensures you keep more Crystals, making it perfect for farming and minimizing setbacks.
Best early-game Spell
Railgun
- Sync cost: 20%
- Spirit requirement: 10
- How to get: This is the first spell you unlock in the game.
The Railgun is a solid ranged attack that lets you deal with enemies from a distance. The best part? It doesn’t require heavy Spirit investment, so even if you’re not running a magic-heavy build, it’s still useful for picking off foes before they close the gap.
Read also: AI Limit: Release date, platforms, and system requirements revealed
Acquiring and switching Seals

Seals in AI Limit function as special buffs that enhance the Blader’s abilities, but equipping them isn’t as straightforward as just picking them up. If you’ve been collecting Seals throughout the game but can’t figure out how to use them, you’re missing a key item. Without it, Seals remain locked in your inventory, offering no benefits.
Steps
After getting through the opening section, you’re in the Outer-Wall Ruins. Move through this slum area until you get to the third branch called Abandoned Houses. From here, slide down a couple of ladders to the right, cross the street, and enter the open house with an enemy on their knees at the door. Then, you will find the Seal Needle, which is the essential item to unlock and modify Seals. Once you pick it up, a tutorial will automatically start to tell you how the system works.
With the Seal Needle in your possession, you can return to the branch you just left and interact with it. You will now have a new option called Rewrite Seal to equip and switch Seals as you want. This menu allows you to select a primary Seal for your main buffs and a secondary Seal for an additional buff.
If you’re looking for new Seals, you can obtain them by defeating powerful enemies, interacting with memories, exploring hidden locations, or talking to NPCs. Some will only give you a Seal after exhausting their dialogue, so keep talking until they start repeating the same generic lines.
One of the first Main Seals available is the Seal of Pilgrim, which you can get by repeatedly speaking to Shirley at the Temporary Campsite. Keep selecting Talk, and eventually, she’ll hand it over.
Upgrading Seals
Seals can also be upgraded for better effects. Access the Enhance option at a branch and use the D-Pad to navigate to the Seal upgrade menu. Upgrading requires special materials, which can be found throughout the world or purchased from specific merchants.
Read also: Is AI Limit Deluxe Edition worth buying?
Best ways to increase Life Dew charges in AI Limit
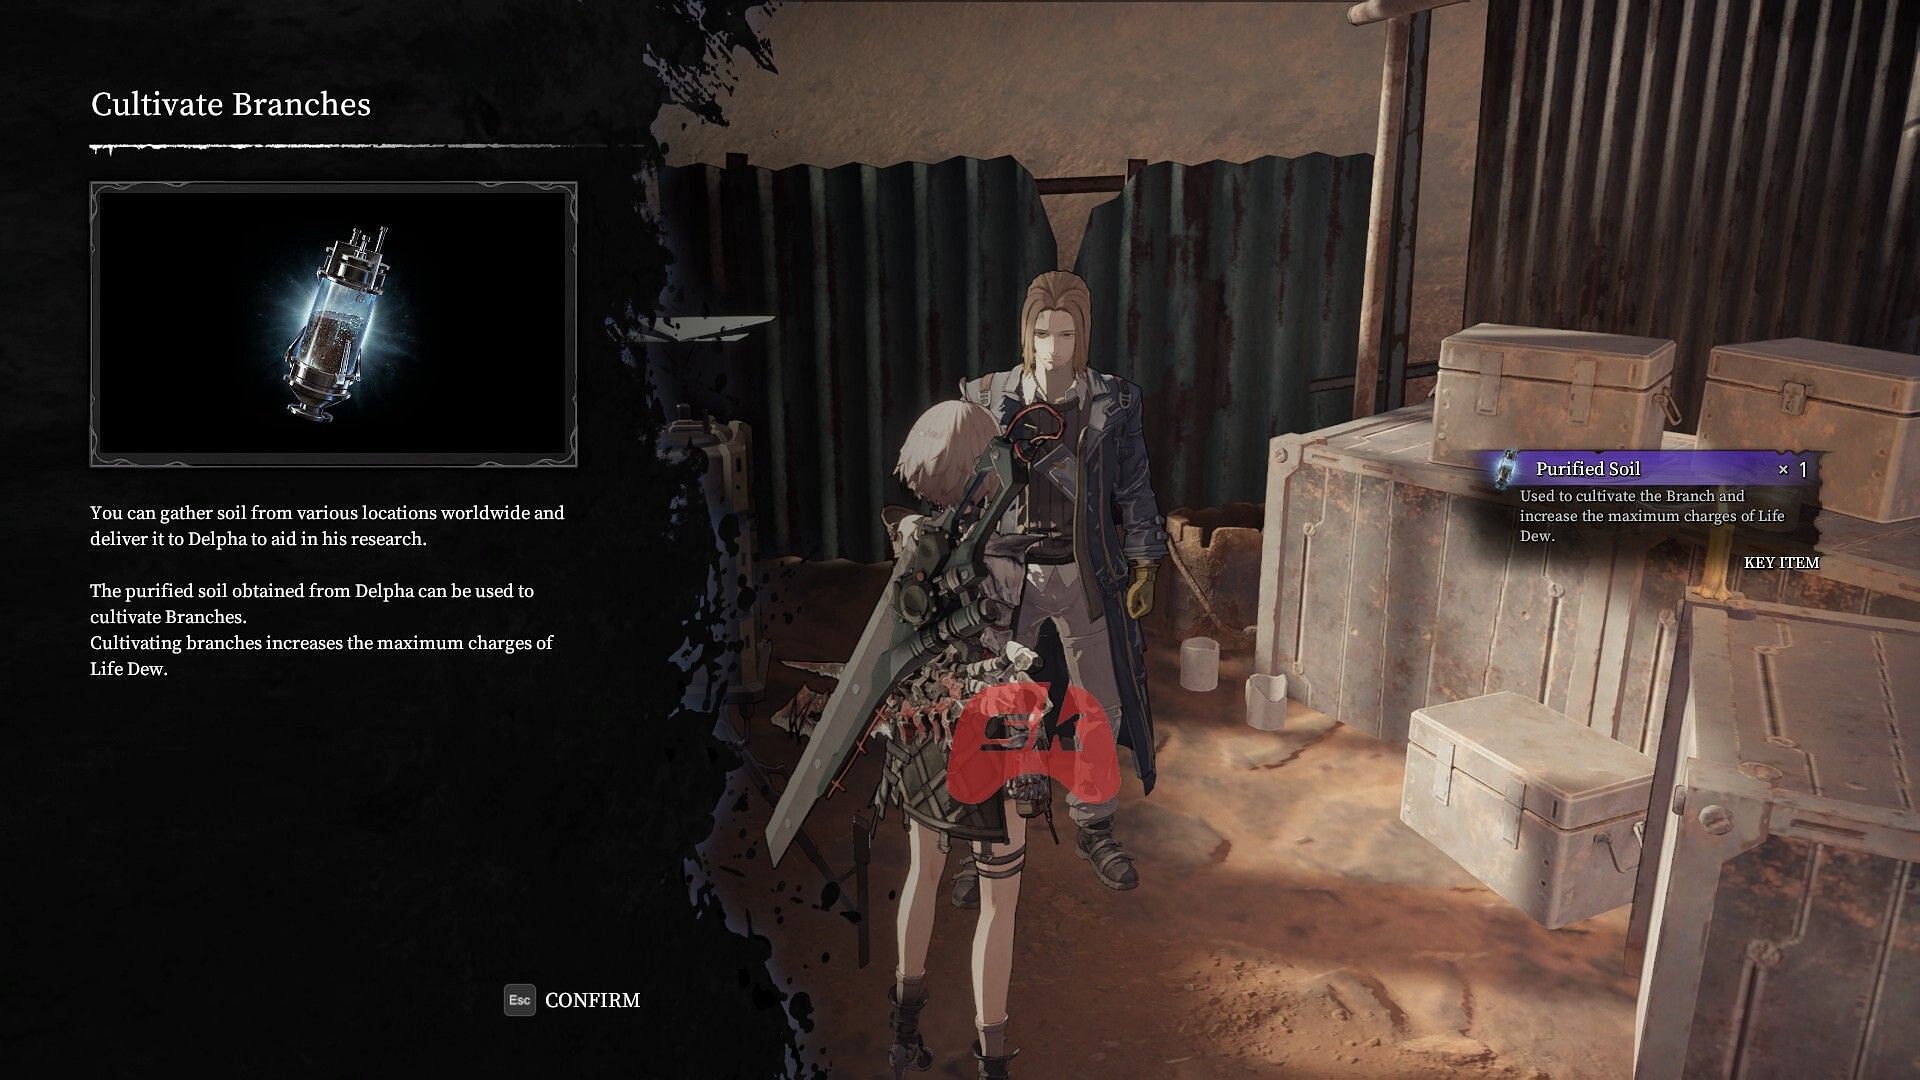
Knowing how to increase your Flask (Life Dew) charges in AI Limit is crucial for survival. These healing items replenish at Branches, but to increase their quantity, you'll need to go through a specific process involving an NPC named Delpha, the Soil Researcher and a rare item called Purified Soil.
Unlocking your first Life Dew upgrade
After you defeat the first boss and exit the sewers, you'll be in the Slums and will find the Temporary Campsite. There, you'll encounter Delpha, a soil research specialist NPC. Talk to him and use up all of his lines, and he'll give you one Purified Soil.
To upgrade your Life Dew, visit the closest branch and choose Cultivate Branch — it will boost your healing charges.
How to get more Life Dew upgrades
The initial upgrade is easy, but additional upgrades take a little more work. To acquire more Purified Soil, you need to
- Acquire a Soil sample – These are found all over the world in certain places. After you have obtained one, go back to Delpha.
- Defeat the Necros leader – This is the main boss where you acquired the Soil Sample. If you already have the sample, you've probably defeated the boss.
- Purify the soil – Continue talking to Delpha until the Purify Soil option becomes available. Choose it to obtain another chunk of Purified Soil.
- Cultivate the branch – Return to any Branch and use the Cultivate Branch option to increase your Life Dew count.
Do this each time you find a new Soil Sample, and you'll gradually build up the amount of Life Dew charges, and battles will become considerably more manageable.
Best early-game farming spots for upgrade materials in AI Limit
It's important to know how to farm early game upgrade materials in AI Limit so you won't have much trouble later. There are four major materials to search for: Luminous Carbon, Luminous Diamonds, Tiny Resonance, and Contemporary Resonance. Although you can obtain them as collectibles, the most efficient way to farm them is by defeating elite enemies in particular locations.
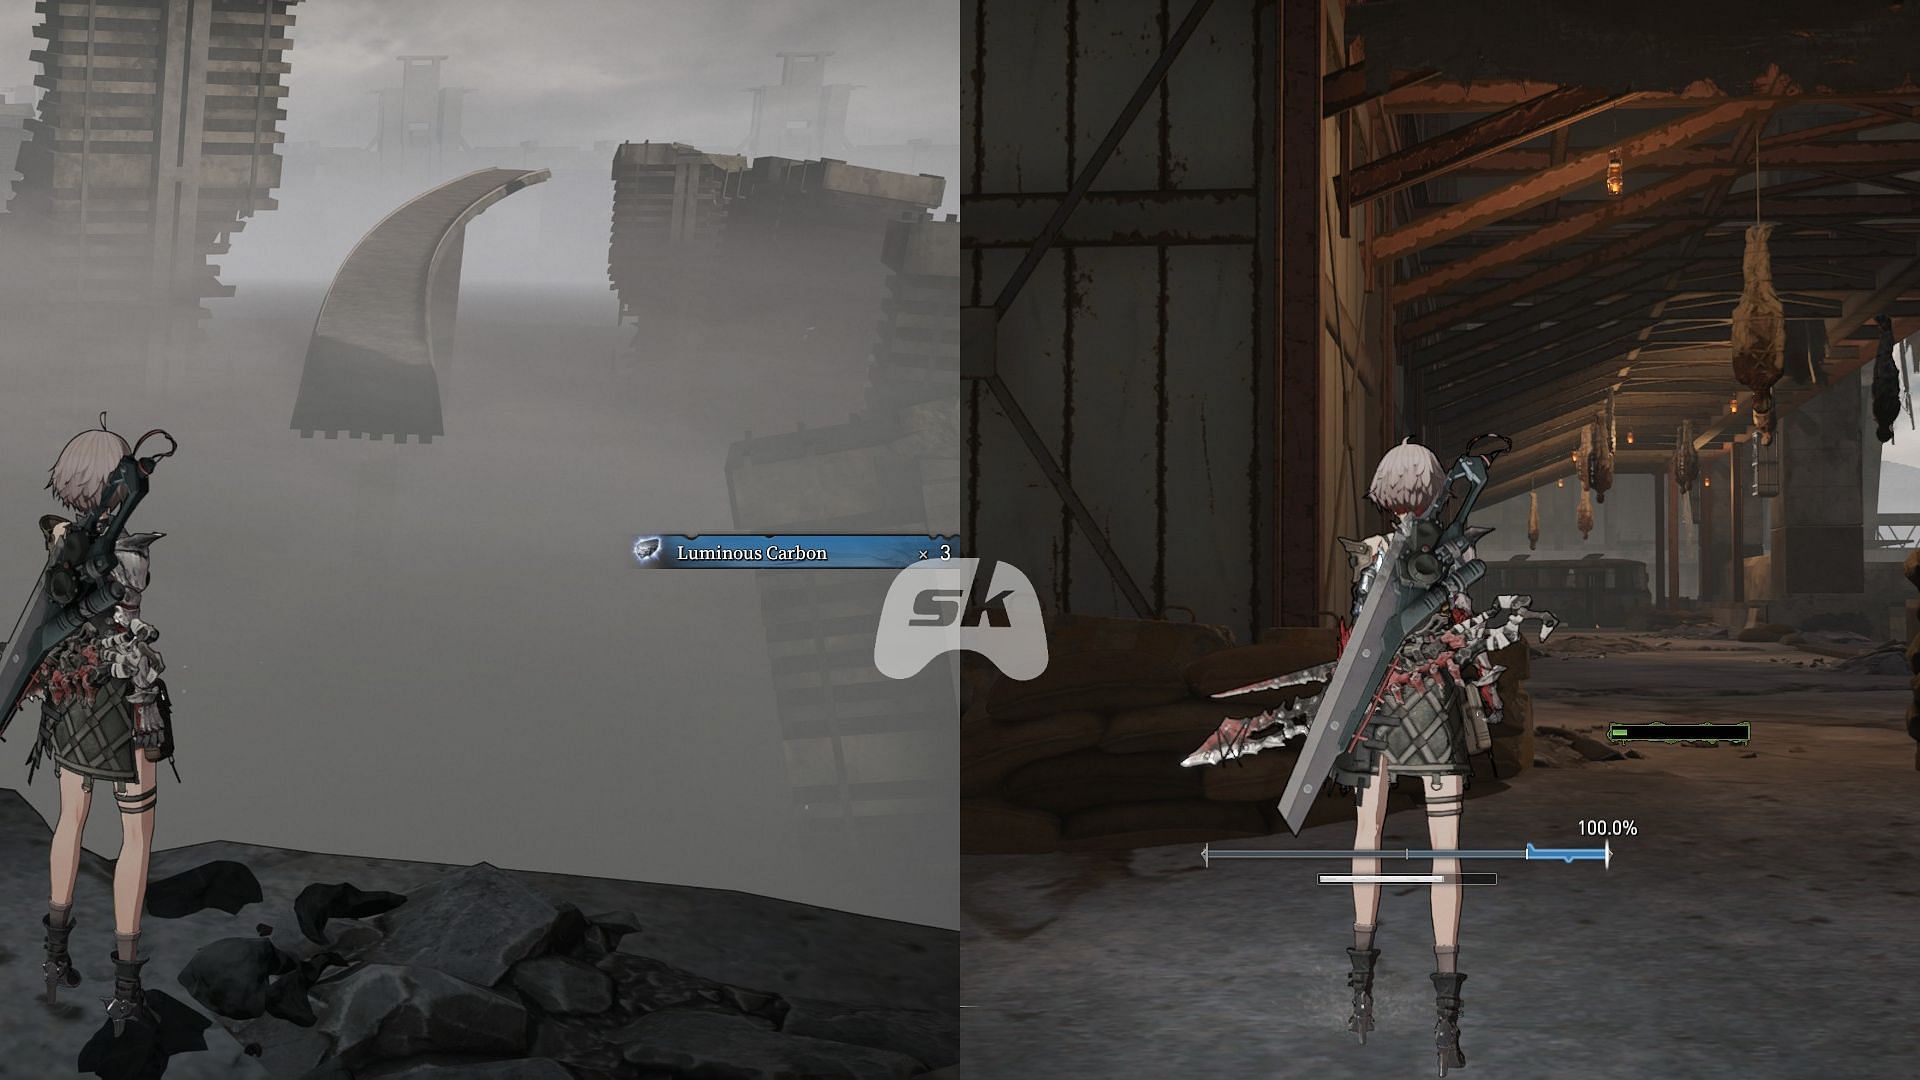
1) Where to obtain Luminous Carbon
Best farm location: Sunken City Overground Boundary Bridge
- How to farm: The enemies here endlessly respawn, making them the best source of Luminous Carbon early on.
Although it is only utilized up to the third weapon upgrade, Luminous Carbon is a bit difficult to farm. If you don't get enough from exploration, stick to this area for consistent drops.
2) Where to get Luminous Diamonds
- Best farm location: Hagios Patir Upper Levels
- Alternate source: Purchase from Merchant Kyen for 3,000 Crystals once you deliver Covenant: Sewer Town.
Luminous Diamond is a medium-grade weapon upgrading material available as a collectible and an enemy drop. It can be purchased from Kyen at the Sunken City Overground Top Apron once you deliver Covenant: Sewer Town, which you can find in the Sewer Town Sedimentation Tank area control room.
3) Where to get Tiny Resonance
- Best farm spot: Buy from Millaire’s Spell Workshop at Temporary Campsite for 1 Adaptive Fragment.
- Alternate farm: Drops from elite enemies in mid-game areas.
Tiny Resonance is a starter Main Seal upgrade material and becomes available for purchase once Millaire spawns at the Temporary Campsite after escaping the Hunter of Bladers' cage with her.
4) Where to get Contemporary Resonance
- Best farm spot: Hagios Patir Upper Levels
- How to farm: Take down elite Church enemies in this area for consistent drops.
Contemporary Resonance is a mid-to-late-game Main Seal upgrade material that only drops from elite enemies in later sections of the game. The Upper Levels of Hagios Patir are packed with these enemies, making it the best farming spot.
Read also: AI Limit pre-order guide: Editions, bonuses, and more
Best beginner tips for AI Limit

1) Weapons with Pierce or Poison are overpowered early on
Even though High-damage guns would look to be the easy option, Pierce and Poison ones are preferable with additional DPS and stagger opportunity. Poison chips the life from foes slowly over time, but Pierce weapons break off attack continuances, hence ideal to go for early on in the game.
2) Safes contain rare gear — Open them whenever you see one
If you notice a safe with a red valve, open it up right away. They're hard to spot because they camouflage, but they have good loot. One of the early safes in the sewer level contains the Traveler's Outfit, a good armor set that provides additional protection — something you'll be in dire need of early on.
3) Don't stockpile Mud Balls — Use them whenever you need to heal
Mud Balls are healing consumables that heal HP over time. They don't replenish at Branches like Life Dew, so it's tempting to hoard them for emergencies. But they're relatively easy to get, dropping from enemies and available all over the world. Use them liberally during long battles or when traveling between Branches to keep your HP topped up.
4) Unlock your camera for Mobility, lock it for precision
AI Limit's battle mechanics rewards accurate positioning, and camera handling is a major factor. Free camera movement allows you to move more freely, dodging attacks more easily. When spells or melee combos are utilized, however, locking on provides more accurate shots. Training how to change between locked and unrestricted camera modes will make you more combat-effective.
5) You can change Seals — You’re not stuck with your first choice
Your Main Seal determines a lot about your playstyle, but many players don’t realize they can swap it out later in the game. As you progress through the Outer-Wall Ruins, you’ll find an item that lets you rewrite your Seals while resting at a Branch. This means you can experiment with different builds without starting over, so don’t be afraid to test new Seals as you unlock them.
6) Explore every area — There are hidden paths everywhere
AI Limit rewards thorough exploration. Many hidden paths and parkour sections lead to rare weapons, armor, and upgrade materials. If an area looks suspiciously empty, chances are there’s a secret nearby. Backtracking to old locations after gaining new abilities may also reveal previously inaccessible areas.
7) Spend your Crystals before switching Nuclei
Crystals serve as AI Limit’s currency and experience points, but if you switch Nuclei, you’ll lose unspent Crystals. Before making changes to your build, ensure you’ve spent all your Crystals at a vendor or for upgrades to avoid unnecessary losses.
8) Sell "Goods" items — They have no other use
If you come across items marked as Goods, don’t waste inventory space — they’re meant to be sold. Vendors will buy these for extra Crystals, so cash them in whenever you visit a shop.
9) Talk to NPCs until they repeat themselves
NPCs in AI Limit often give out items after multiple conversations. If an NPC has something important to say, keep talking until their dialogue repeats — this usually means you’ve exhausted their interactions and claimed any rewards they had to offer.
10) Choose the right Armor and Seals for each Boss fight
If you’re struggling with a boss, check what type of damage they deal. AI Limit has damage resistances, so stacking Piercing Resistance for enemies that use piercing attacks or Lightning Defense for bosses with lightning abilities can make a huge difference. While Physical Defense is always useful, matching resistances to the enemy’s attack type will give you the best survivability.
11) Check the notepad for hidden gameplay tips
AI Limit doesn’t hold your hand, and many gameplay mechanics are only explained in the Notepad. However, the Notepad isn’t found in the standard menu. Instead, you need to open your map (right on the D-Pad on PS5) and press the Notepad button (Square on PS5) listed in the bottom-right corner. If you ever forget how a system works, check the Notepad first.
12) Don’t upgrade every Weapon and Seal — Save your materials
Upgrade materials are limited in AI Limit, so don’t waste them on random Seals or weapons. Instead, focus on upgrading the items you plan to use long-term. Investing in the wrong gear can leave you underpowered later on, so choose wisely.
This concludes our best Beginner Guide for AI Limit. Also, check out our full review of the game.
Are you stuck on today's Wordle? Our Wordle Solver will help you find the answer.