As we slowly head towards the end-season of Y9S3 Operation Twin Shells, players are wondering about the best Ela loadout in Rainbow Six Siege. She has been a formidable force on the defenders' side, ever since her release alongside Ying and Lesion in Operation Blood Orchid. She boasts a two-armor two-speed kit and a deadly weapon arsenal that makes it imperative to actively look out for during attack rounds.
Also known as Elżbieta Bosak, Ela hails from Wrocław, Poland, and is a trapper operator in Rainbow Six Siege who went to the Nighthaven Squad after internal complications arose. She performs well in flanker, trapper, and hyper-aggressive playstyles and excels at keeping attackers at bay.
In this article, we shall look at the best Ela loadout in Rainbow Six Siege and how players can get the most out of her kit in a round.
Looking for Crossword hints & solutions? Check out latest NYT Mini Crossword Answers, LA Times Crossword Answers, and Atlantic Crossword Answers
Best Ela loadout in Rainbow Six Siege for Operation Twin Shells

While choosing an Ela loadout in Rainbow Six Siege Y9S3, players must assess the map size and objective site they are going to defend. This will help in choosing a primary weapon, and a secondary gadget out of all the available choices given to Ela.
Note that Ela can shoot a Grzmot mine at Attackers when she is down and they are approaching her. This is a niche gadget usage scenario that's usually ineffective.
Primary weapon choices for Ela loadout in Rainbow Six Siege

In the primary weapon slot, the infamous Scorpion EVO 3 A1 witnesses a lot of usage. It has a history of notoriety after being dubbed the most broken gun for quite some time since its release. However, after several balancing updates, it now performs well but doesn't exceed expectations.
This weapon performs well across close and medium ranges and can eliminate targets quickly. In large-scale maps and objective sites, this is a no-brainer pick. The Scorpion boasts a high fire rate with a hefty 40+1 round magazine which makes it a beast in the right hands.
Also read: Best Deimos loadout in Rainbow Six Siege

As for the FO-12 primary shotgun, it is a high fire rate and recoil shotgun that excels at CQB but falls off as soon as the targets go farther than a point-blank range. However, unlike some other shotguns, the addition of an extended barrel allows players to dish out more damage with this highly destructive weapon.
Secondary gadget choices for Ela loadout in Rainbow Six Siege

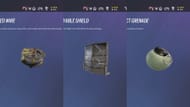
In Ela's secondary gadget slot, players can choose from three options. Two of these offer teamwide assistance while the last is essentially a tool for aggressive plays. Barbed Wire and Bulletproof Shield allow Ela to trap attackers' approaches or allow defenders to contest attackers from a deployable cover.
The last option is an Impact Grenade especially useful in breaking attacker flank traps like Claymore, Airjab, Trax Stingers, and so on. It can also be used to create rotations or quick escapes when stuck in a pressure-heavy zone.
Also read: Best Gridlock loadout in Rainbow Six Siege
How to play Ela in Rainbow Six Siege

When picking the most optimal Ela loadout in Rainbow Six Siege, prep the site as using your primary gadget does not consume much time. So help your team out with wall reinforcements, site preparation like making rotations, lines of sight, footholes (when using FO-12), and placing Barbed wire or Bulletproof shields when using these particular secondary gadgets.
Once done, use your gadgets like traps and notify your team with intel. Additionally, if you plan to remain aggressive, try to stay within the visual range of your Grzmot mines so you can take advantage of the situation when an attacker gets disoriented.
Use Impact grenades whenever necessary to either create rotations or quickly escape from attackers. Additionally, use them to destroy attackers' traps. As a fragger, Ela shines thanks to her primary gadget which allows her to have an advantage when taking gunfights.
For more news on Rainbow Six Siege, follow Sportskeeda:
- 5 biggest changes in Rainbow Six Siege Y9S3 Operation Twin Shells
- Best Ace loadout in Rainbow Six Siege
- Best Capitao loadout in Rainbow Six Siege
Are you stuck on today's Wordle? Our Wordle Solver will help you find the answer.
