Road to the Singularity is a quest introduced in Genshin Impact 4.1 that takes place near the New Fontaine Research Institute. Getting to it can be difficult since it's not the most intuitive. Not to mention, there are a few puzzles in this quest. Regarding combat, players should be prepared to defeat some Clockwork Meka. The whole quest should take about 10-20 minutes, depending on your efficiency.
There aren't any requirements to get started, meaning you don't have to complete any pre-requisite quests. Completing Road to the Singularity will be helpful for using any Energy Concentration Components you might have already collected. You can utilize them at the ending location of this Genshin Impact quest.
Genshin Impact quest guide: Road to the Singularity
![This is how you enter the tunnel involving the Road to the Singularity quest (Image via HoYoverse)](https://staticg.sportskeeda.com/editor/2023/09/8f033-16958331135553-1920.jpg?w=190 190w, https://staticg.sportskeeda.com/editor/2023/09/8f033-16958331135553-1920.jpg?w=720 720w, https://staticg.sportskeeda.com/editor/2023/09/8f033-16958331135553-1920.jpg?w=640 640w, https://staticg.sportskeeda.com/editor/2023/09/8f033-16958331135553-1920.jpg?w=1045 1045w, https://staticg.sportskeeda.com/editor/2023/09/8f033-16958331135553-1920.jpg?w=1200 1200w, https://staticg.sportskeeda.com/editor/2023/09/8f033-16958331135553-1920.jpg?w=1460 1460w, https://staticg.sportskeeda.com/editor/2023/09/8f033-16958331135553-1920.jpg?w=1600 1600w, https://staticg.sportskeeda.com/editor/2023/09/8f033-16958331135553-1920.jpg 1920w)
Looking for Crossword hints & solutions? Check out latest NYT Mini Crossword Answers, LA Times Crossword Answers, and Atlantic Crossword Answers
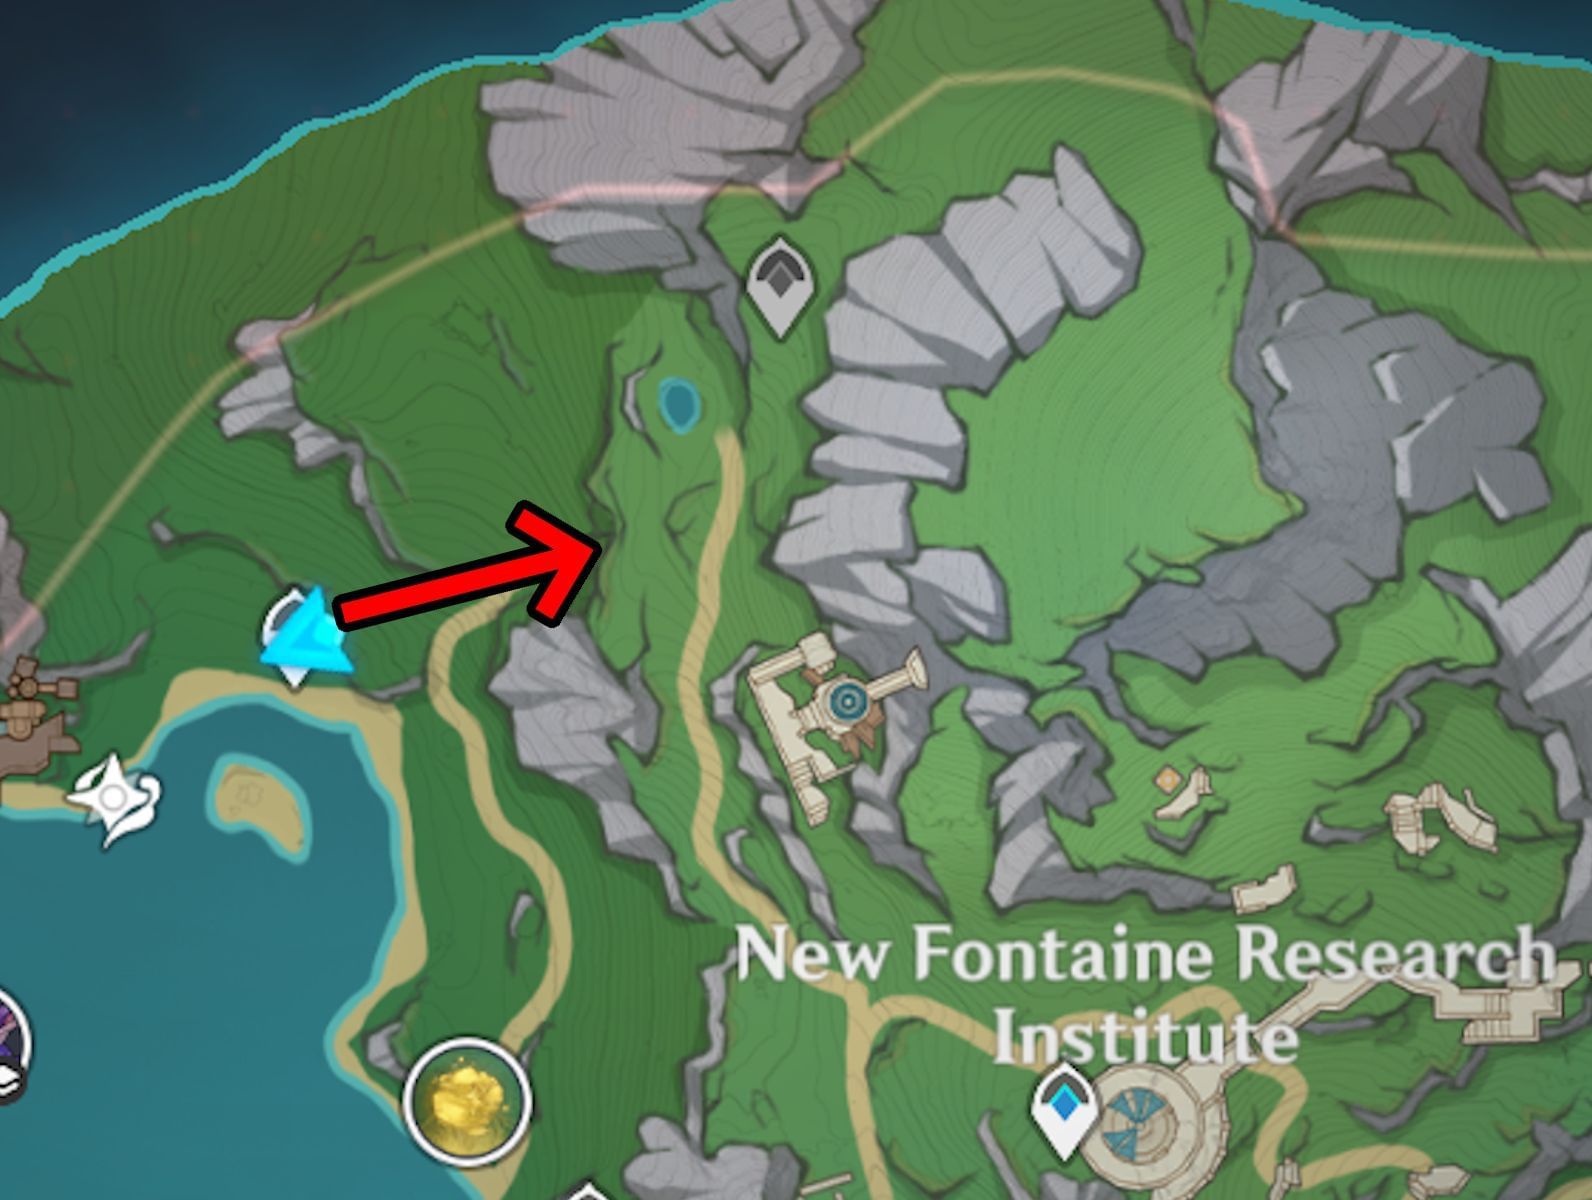
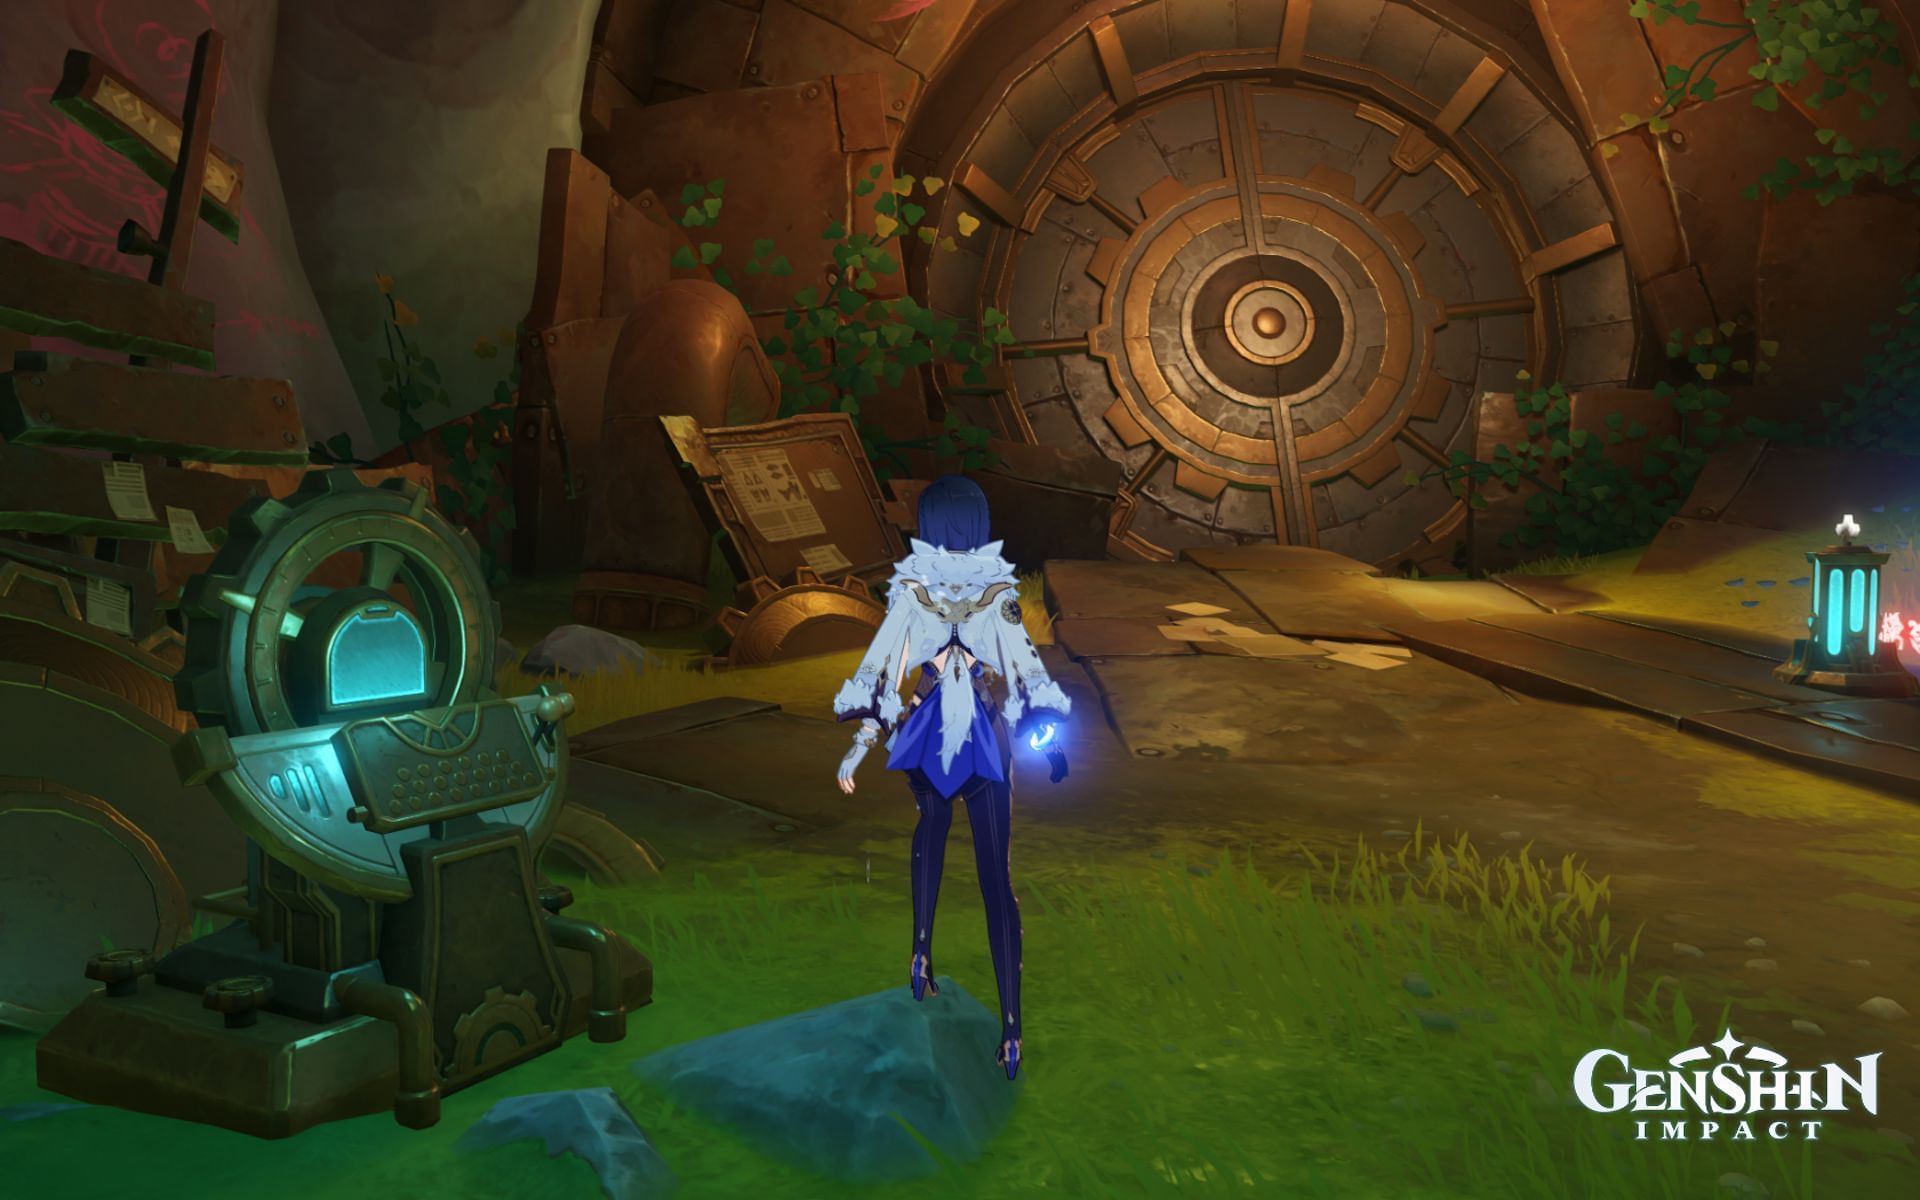
To get started, use the Teleport Waypoint by the beach northwest of the New Fontaine Research Institute and head east into a tunnel. This won't initiate Road to the Singularity but will get you close to where you begin this world quest.
![This is a simple puzzle to solve (Image via HoYoverse)](https://staticg.sportskeeda.com/editor/2023/09/970a2-16958332981496-1920.jpg?w=190 190w, https://staticg.sportskeeda.com/editor/2023/09/970a2-16958332981496-1920.jpg?w=720 720w, https://staticg.sportskeeda.com/editor/2023/09/970a2-16958332981496-1920.jpg?w=640 640w, https://staticg.sportskeeda.com/editor/2023/09/970a2-16958332981496-1920.jpg?w=1045 1045w, https://staticg.sportskeeda.com/editor/2023/09/970a2-16958332981496-1920.jpg?w=1200 1200w, https://staticg.sportskeeda.com/editor/2023/09/970a2-16958332981496-1920.jpg?w=1460 1460w, https://staticg.sportskeeda.com/editor/2023/09/970a2-16958332981496-1920.jpg?w=1600 1600w, https://staticg.sportskeeda.com/editor/2023/09/970a2-16958332981496-1920.jpg 1920w)
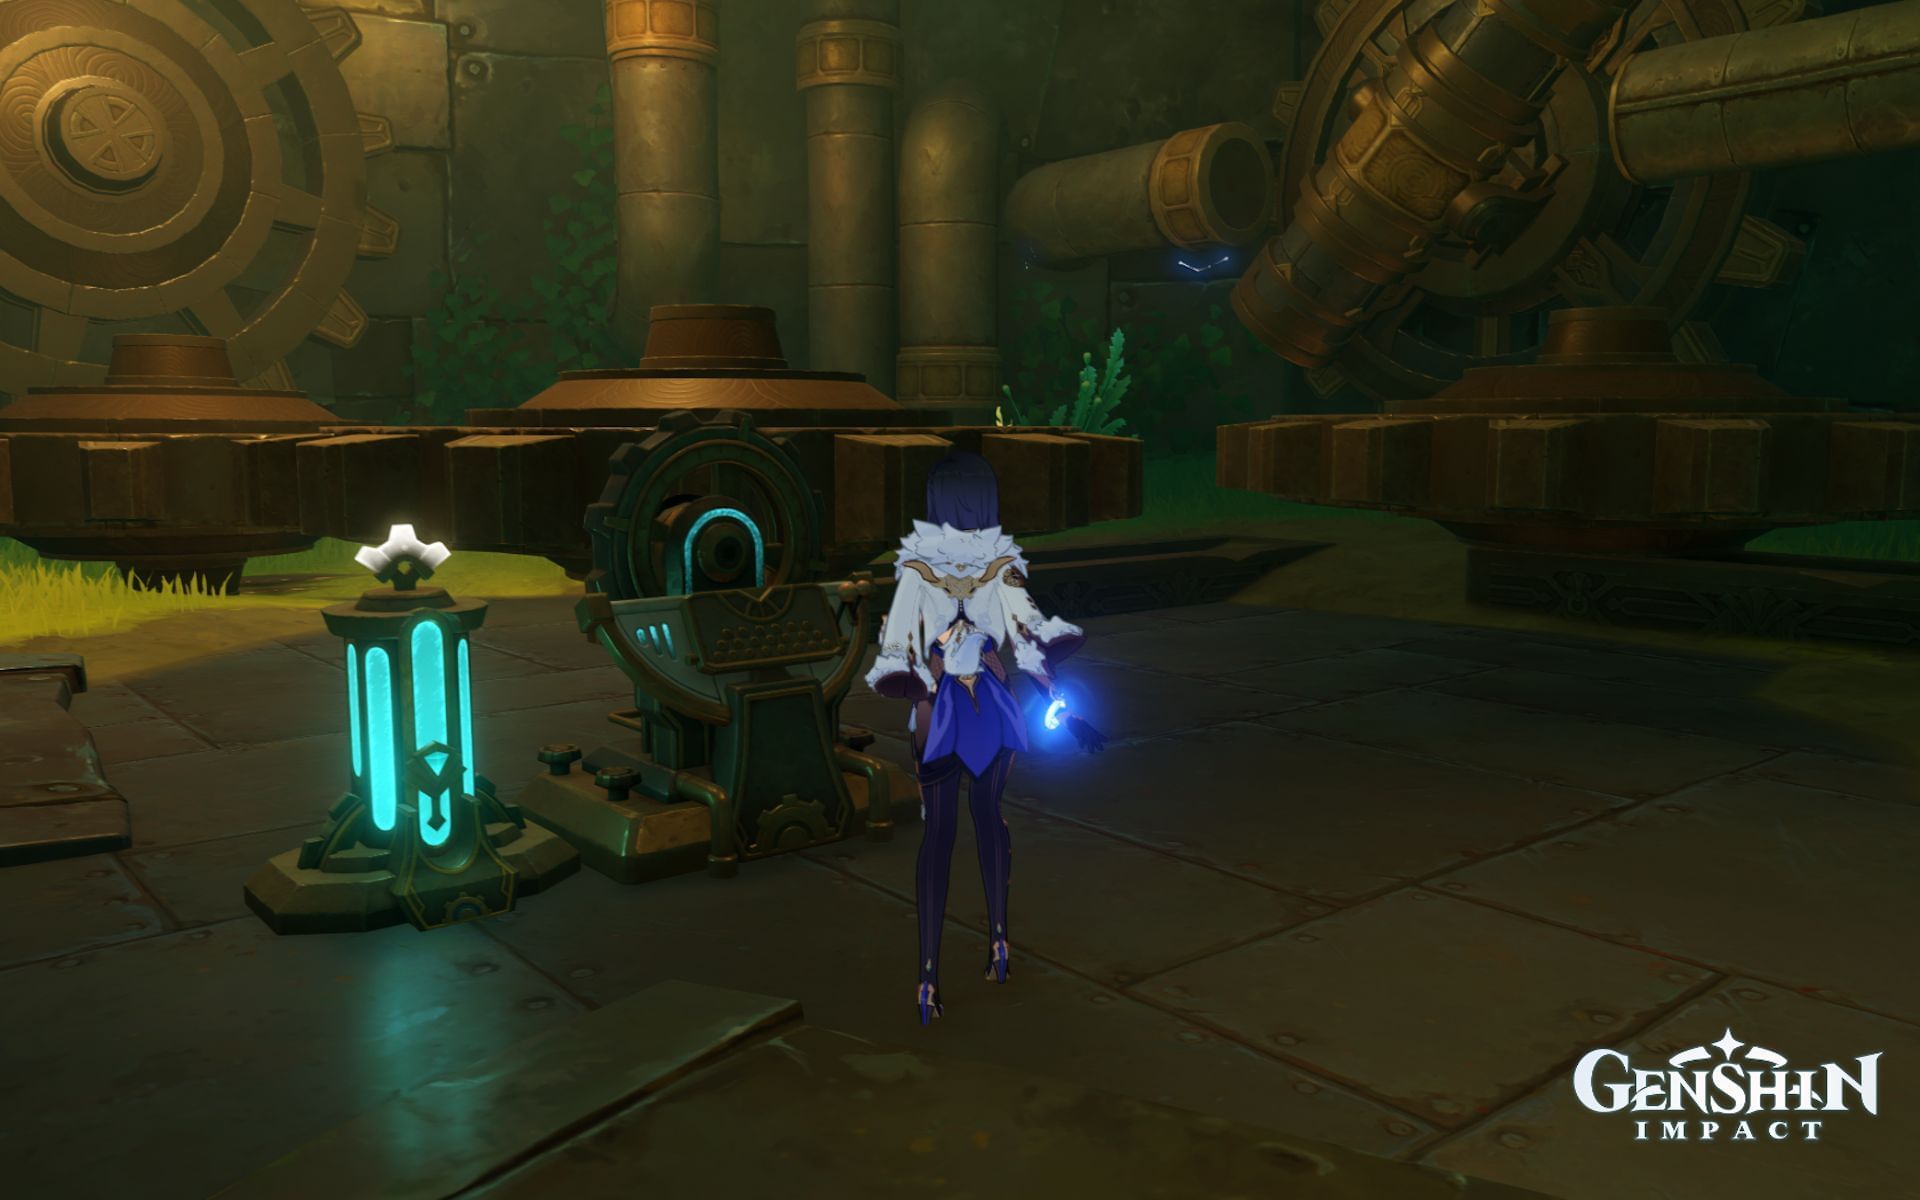
Proceed through the tunnel until you reach a small puzzle. Grab the Ousia Block at the end of the room and attack the yellow glowing device near the elevator. Enter the newly opened area and select the Activate Lift option to proceed to the next location.
Some dialogue will play in the meantime. Once that's done, exit the lift to officially start Road to the Singularity in Genshin Impact.
Completing Road to the Singularity in Genshin Impact
![Talk to the caged person shown here (Image via HoYoverse)](https://staticg.sportskeeda.com/editor/2023/09/e18d1-16958336360325-1920.jpg?w=190 190w, https://staticg.sportskeeda.com/editor/2023/09/e18d1-16958336360325-1920.jpg?w=720 720w, https://staticg.sportskeeda.com/editor/2023/09/e18d1-16958336360325-1920.jpg?w=640 640w, https://staticg.sportskeeda.com/editor/2023/09/e18d1-16958336360325-1920.jpg?w=1045 1045w, https://staticg.sportskeeda.com/editor/2023/09/e18d1-16958336360325-1920.jpg?w=1200 1200w, https://staticg.sportskeeda.com/editor/2023/09/e18d1-16958336360325-1920.jpg?w=1460 1460w, https://staticg.sportskeeda.com/editor/2023/09/e18d1-16958336360325-1920.jpg?w=1600 1600w, https://staticg.sportskeeda.com/editor/2023/09/e18d1-16958336360325-1920.jpg 1920w)
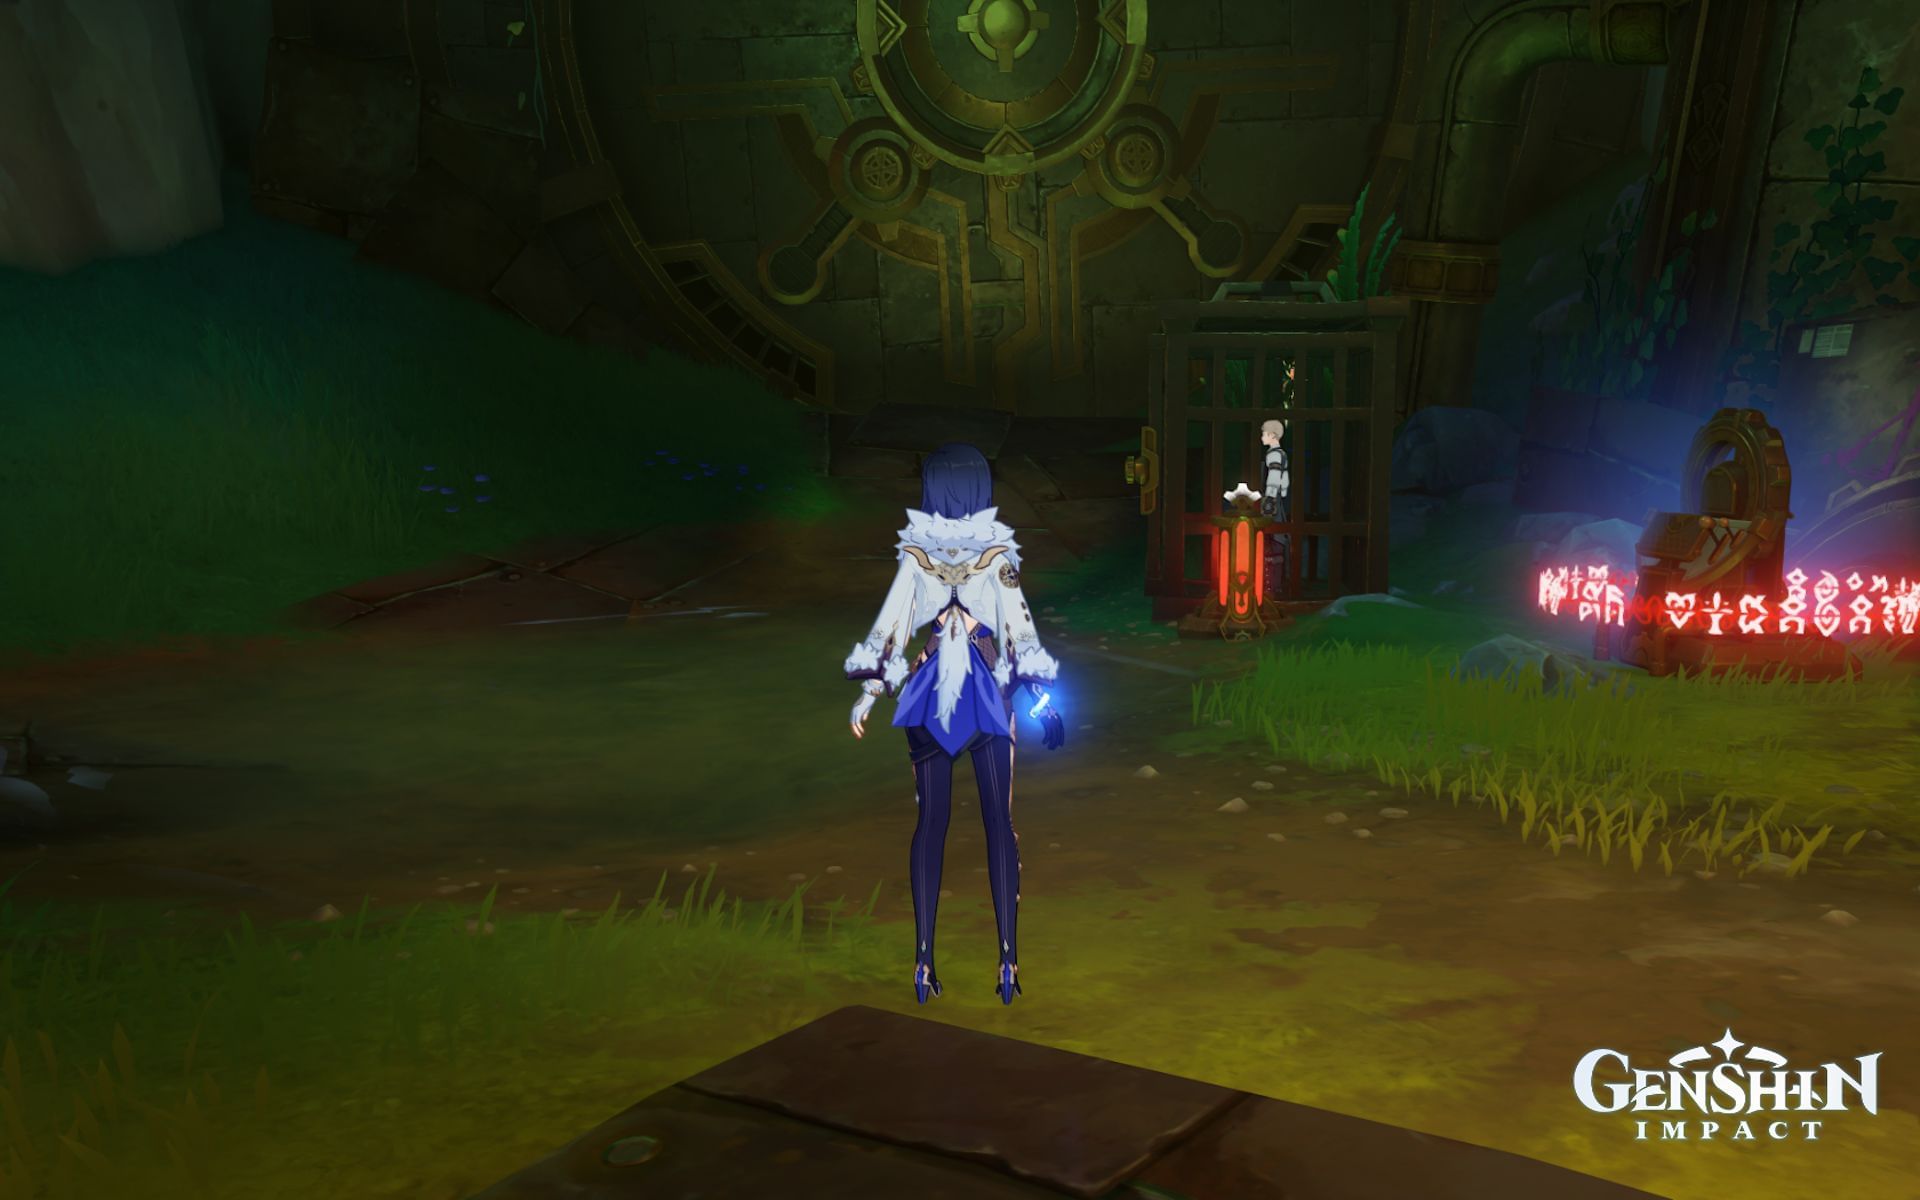
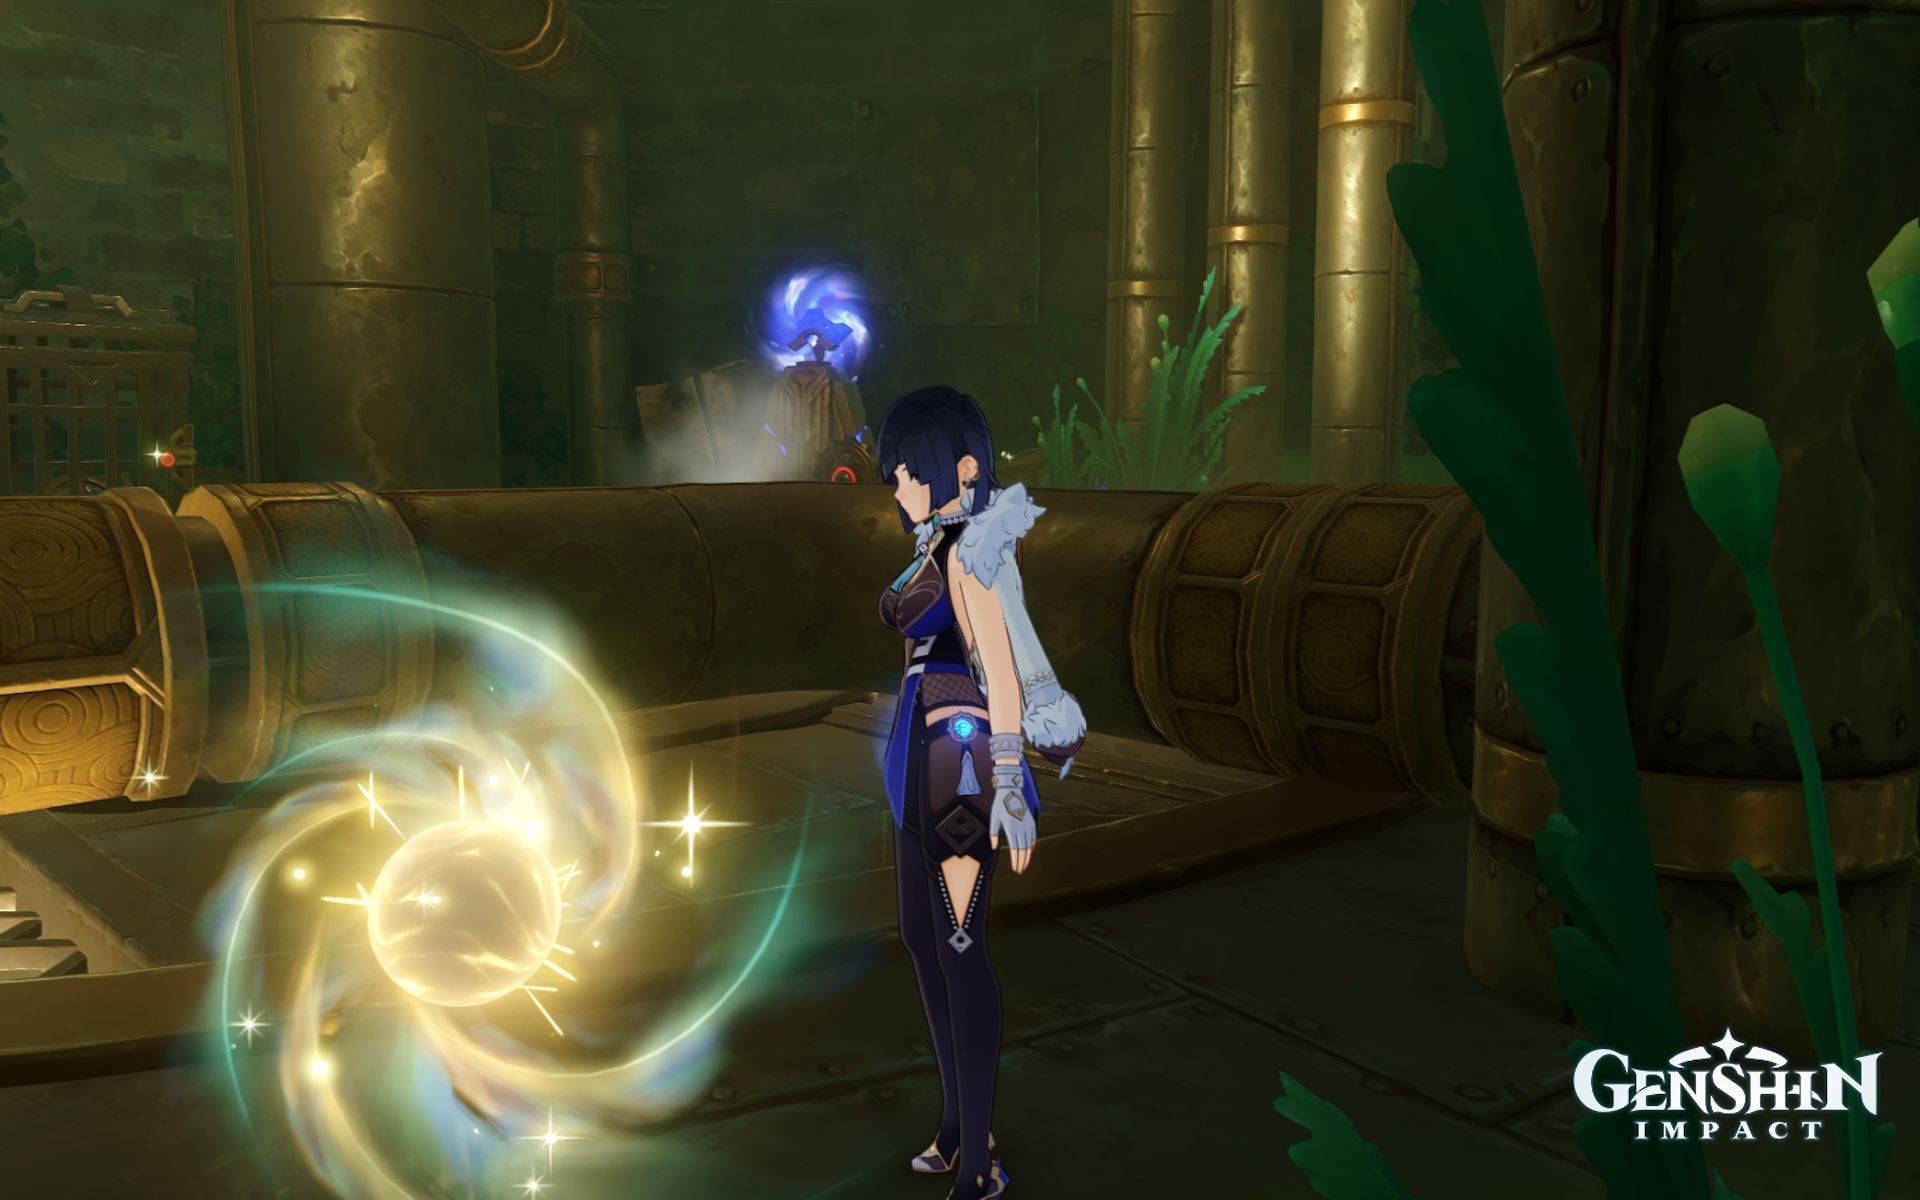
This quest isn't too hard or long, yet this guide will simplify everything for the reader's convenience. "Explore the mysterious building" is your first objective, which involves you proceeding through the tunnel until you see somebody stuck in a cage.
The locked-up NPC is named Kuisel. After some dialogue, you will begin the next objective.
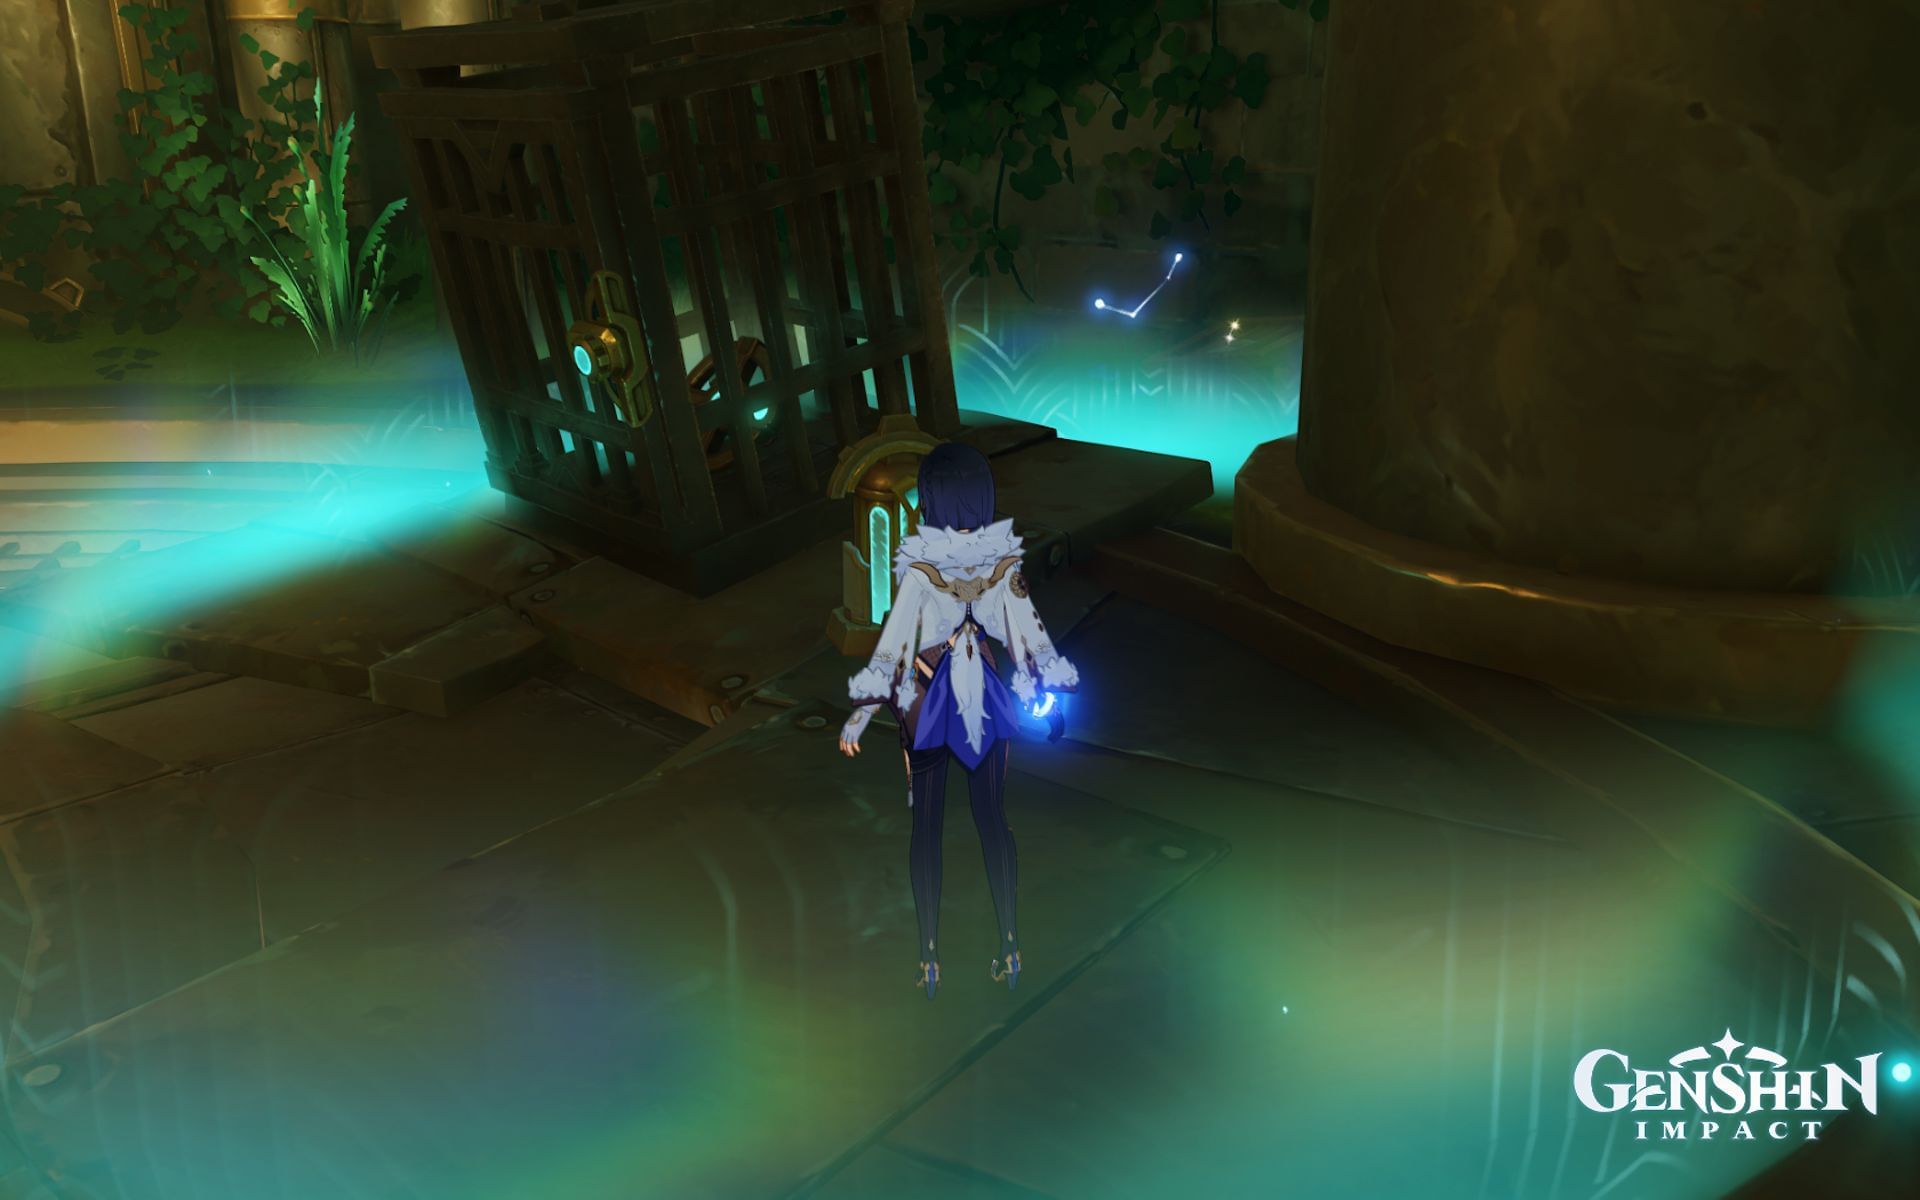
Operate the Energy Transfer Terminal to open the cell
![Interact with the object on the left of this image (Image via HoYoverse)](https://staticg.sportskeeda.com/editor/2023/09/11c21-16958337596993-1920.jpg?w=190 190w, https://staticg.sportskeeda.com/editor/2023/09/11c21-16958337596993-1920.jpg?w=720 720w, https://staticg.sportskeeda.com/editor/2023/09/11c21-16958337596993-1920.jpg?w=640 640w, https://staticg.sportskeeda.com/editor/2023/09/11c21-16958337596993-1920.jpg?w=1045 1045w, https://staticg.sportskeeda.com/editor/2023/09/11c21-16958337596993-1920.jpg?w=1200 1200w, https://staticg.sportskeeda.com/editor/2023/09/11c21-16958337596993-1920.jpg?w=1460 1460w, https://staticg.sportskeeda.com/editor/2023/09/11c21-16958337596993-1920.jpg?w=1600 1600w, https://staticg.sportskeeda.com/editor/2023/09/11c21-16958337596993-1920.jpg 1920w)
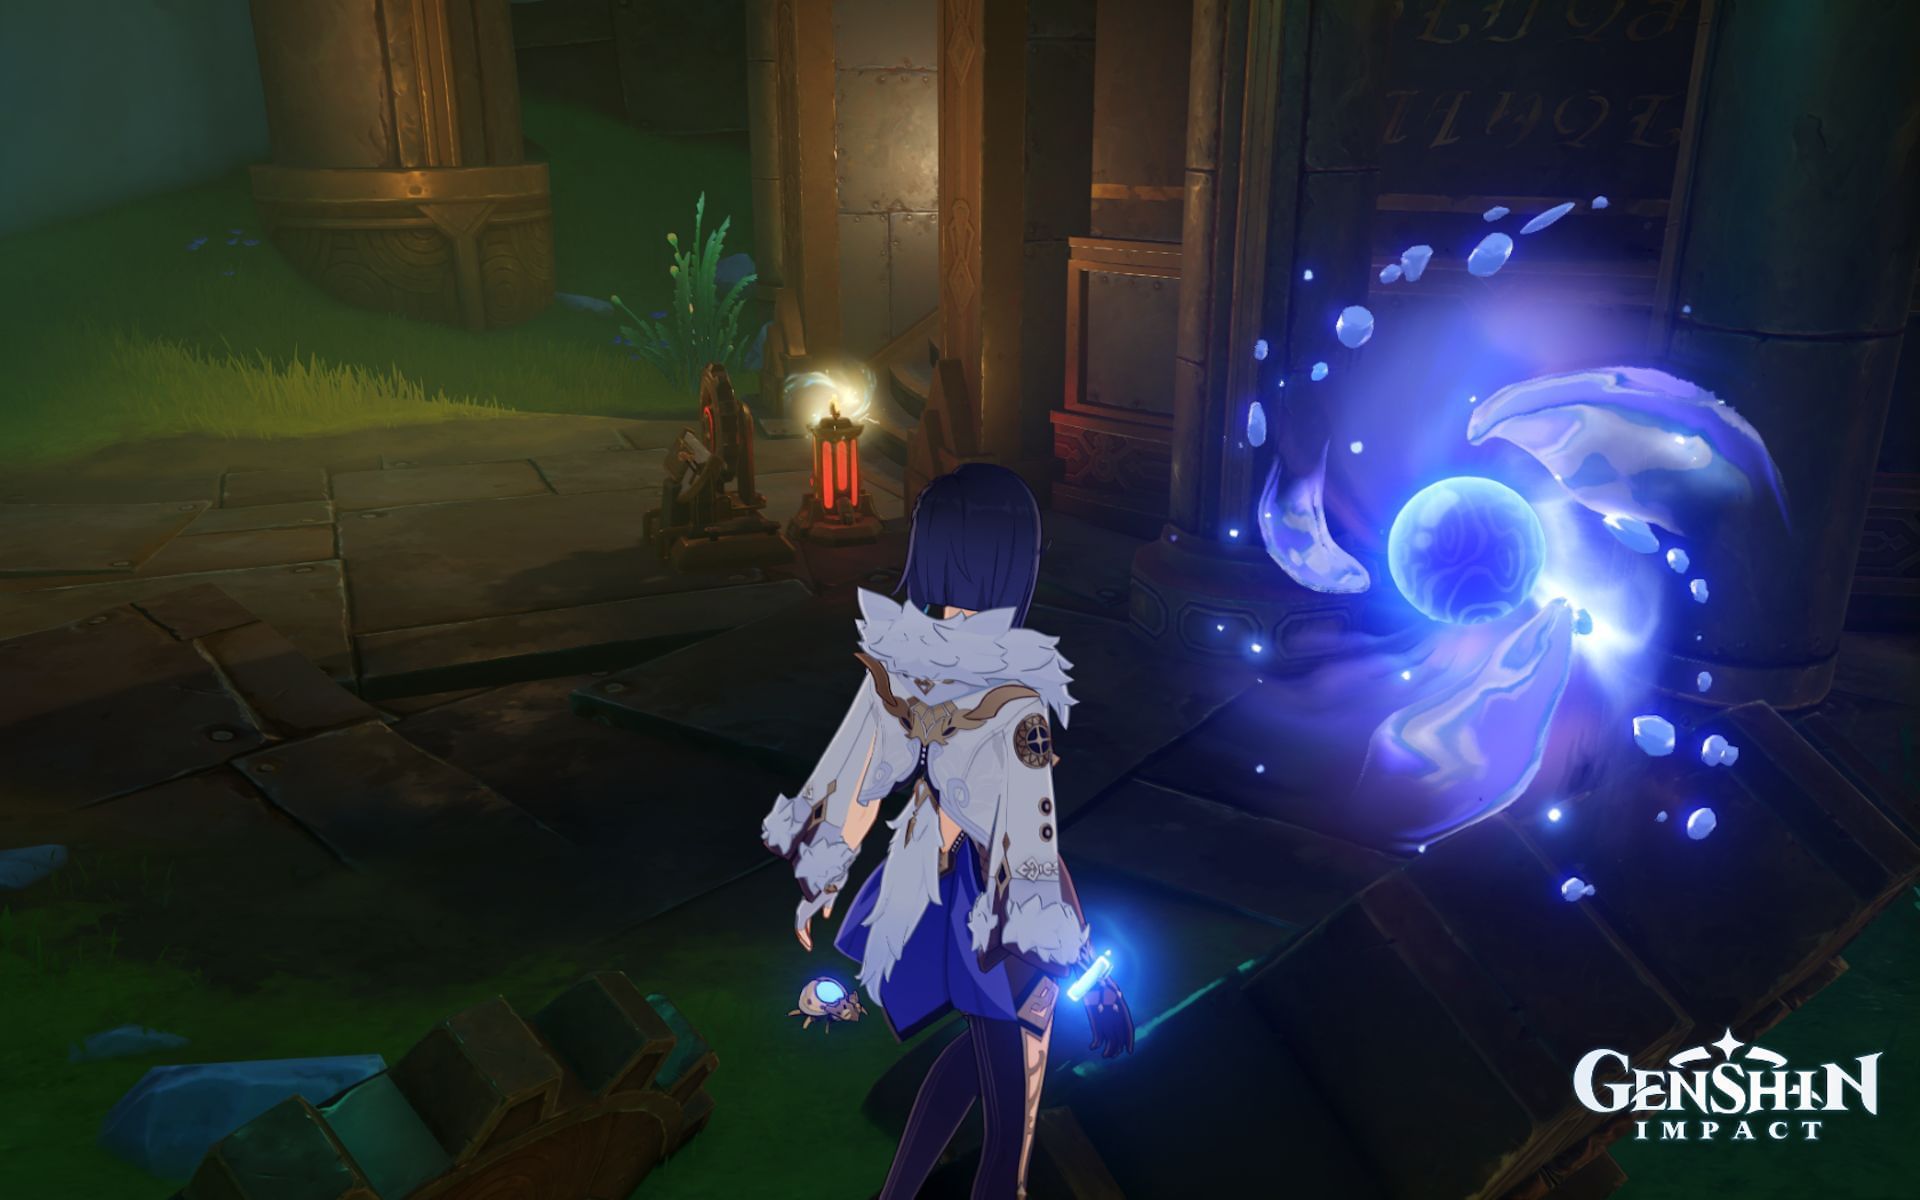
Next to the Cage is an Energy Transfer Terminal. You should see an Activate option when you approach. Select it. You will switch to a different perspective.
![A simple solution to this puzzle (Image via HoYoverse)](https://staticg.sportskeeda.com/editor/2023/09/ffb06-16958341673887-1920.jpg?w=190 190w, https://staticg.sportskeeda.com/editor/2023/09/ffb06-16958341673887-1920.jpg?w=720 720w, https://staticg.sportskeeda.com/editor/2023/09/ffb06-16958341673887-1920.jpg?w=640 640w, https://staticg.sportskeeda.com/editor/2023/09/ffb06-16958341673887-1920.jpg?w=1045 1045w, https://staticg.sportskeeda.com/editor/2023/09/ffb06-16958341673887-1920.jpg?w=1200 1200w, https://staticg.sportskeeda.com/editor/2023/09/ffb06-16958341673887-1920.jpg?w=1460 1460w, https://staticg.sportskeeda.com/editor/2023/09/ffb06-16958341673887-1920.jpg?w=1600 1600w, https://staticg.sportskeeda.com/editor/2023/09/ffb06-16958341673887-1920.jpg 1920w)
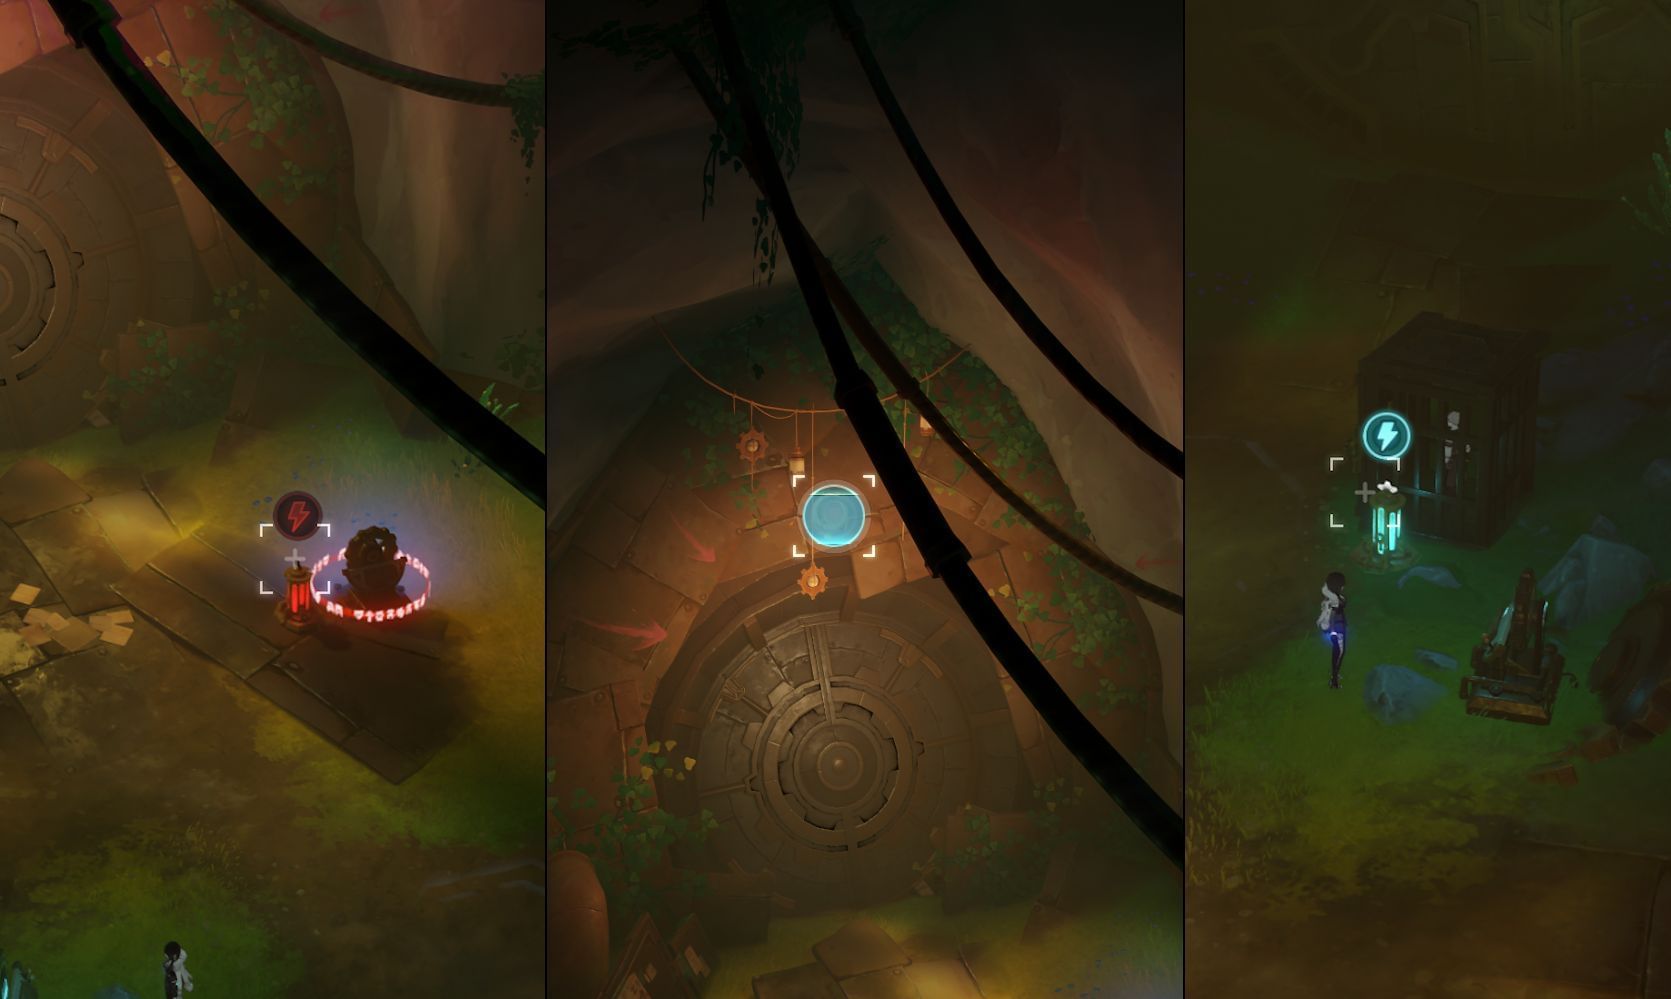
The goal is to turn off the first device you see, then swap to a different part of the room by hovering your cursor above the door (as pictured above). Afterward, activate the red device near the cage to turn it blue. Exit this screen and talk to Kuisel.
Your protagonist will end up in a cage, and it's up to Paimon to save the day. Here are the dialogue options you should select:
- Try the terminal by the cage.
- Activate the energy storage device by the door.
- Activate the energy storage device by the cage.
Now, it's time to go deeper into this strange tunnel. That will complete "Explore up ahead" in Genshin Impact's Road to the Singularity.
Find a way to open the sealed door
![Rotate the handwheel twice (Image via HoYoverse)](https://staticg.sportskeeda.com/editor/2023/09/a6c06-16958346623091-1920.jpg?w=190 190w, https://staticg.sportskeeda.com/editor/2023/09/a6c06-16958346623091-1920.jpg?w=720 720w, https://staticg.sportskeeda.com/editor/2023/09/a6c06-16958346623091-1920.jpg?w=640 640w, https://staticg.sportskeeda.com/editor/2023/09/a6c06-16958346623091-1920.jpg?w=1045 1045w, https://staticg.sportskeeda.com/editor/2023/09/a6c06-16958346623091-1920.jpg?w=1200 1200w, https://staticg.sportskeeda.com/editor/2023/09/a6c06-16958346623091-1920.jpg?w=1460 1460w, https://staticg.sportskeeda.com/editor/2023/09/a6c06-16958346623091-1920.jpg?w=1600 1600w, https://staticg.sportskeeda.com/editor/2023/09/a6c06-16958346623091-1920.jpg 1920w)
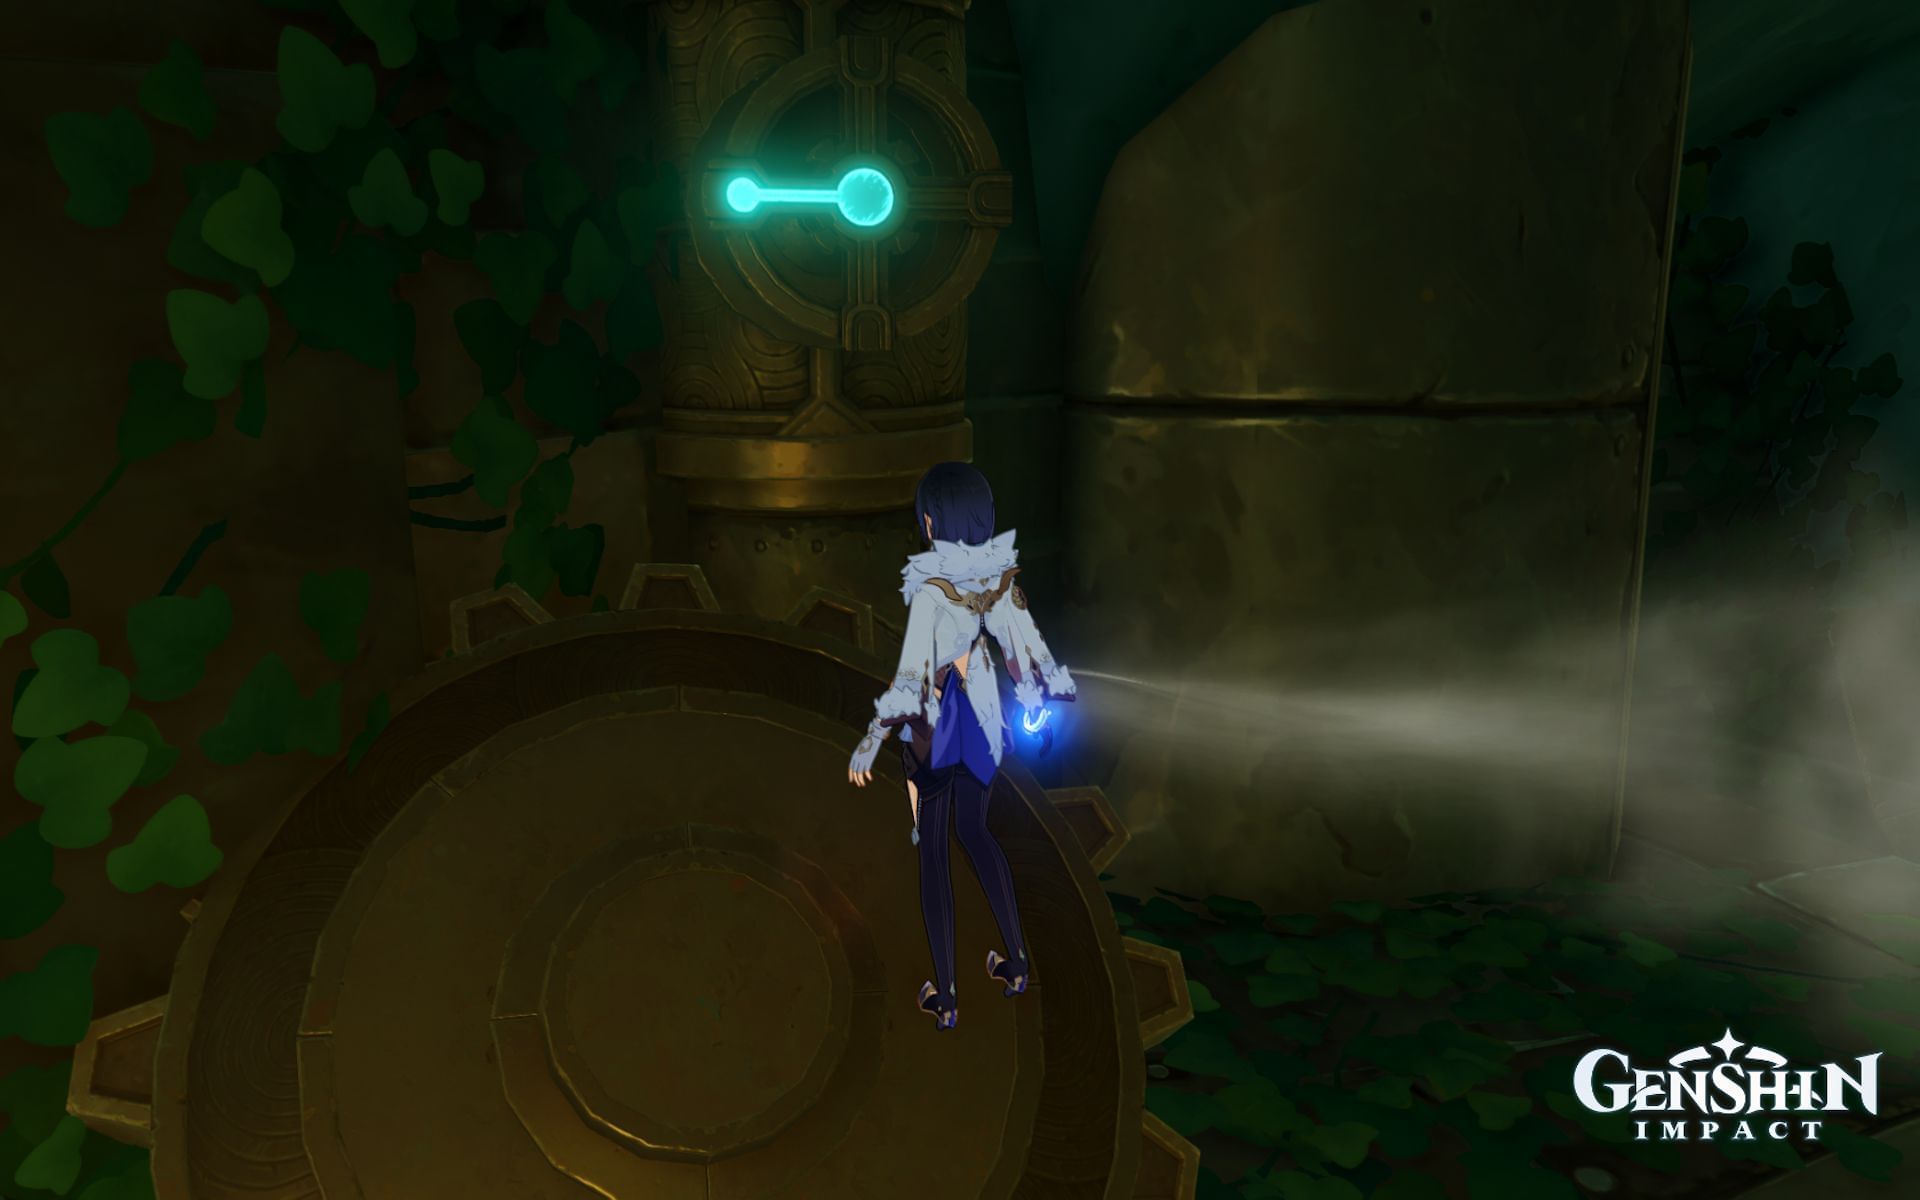
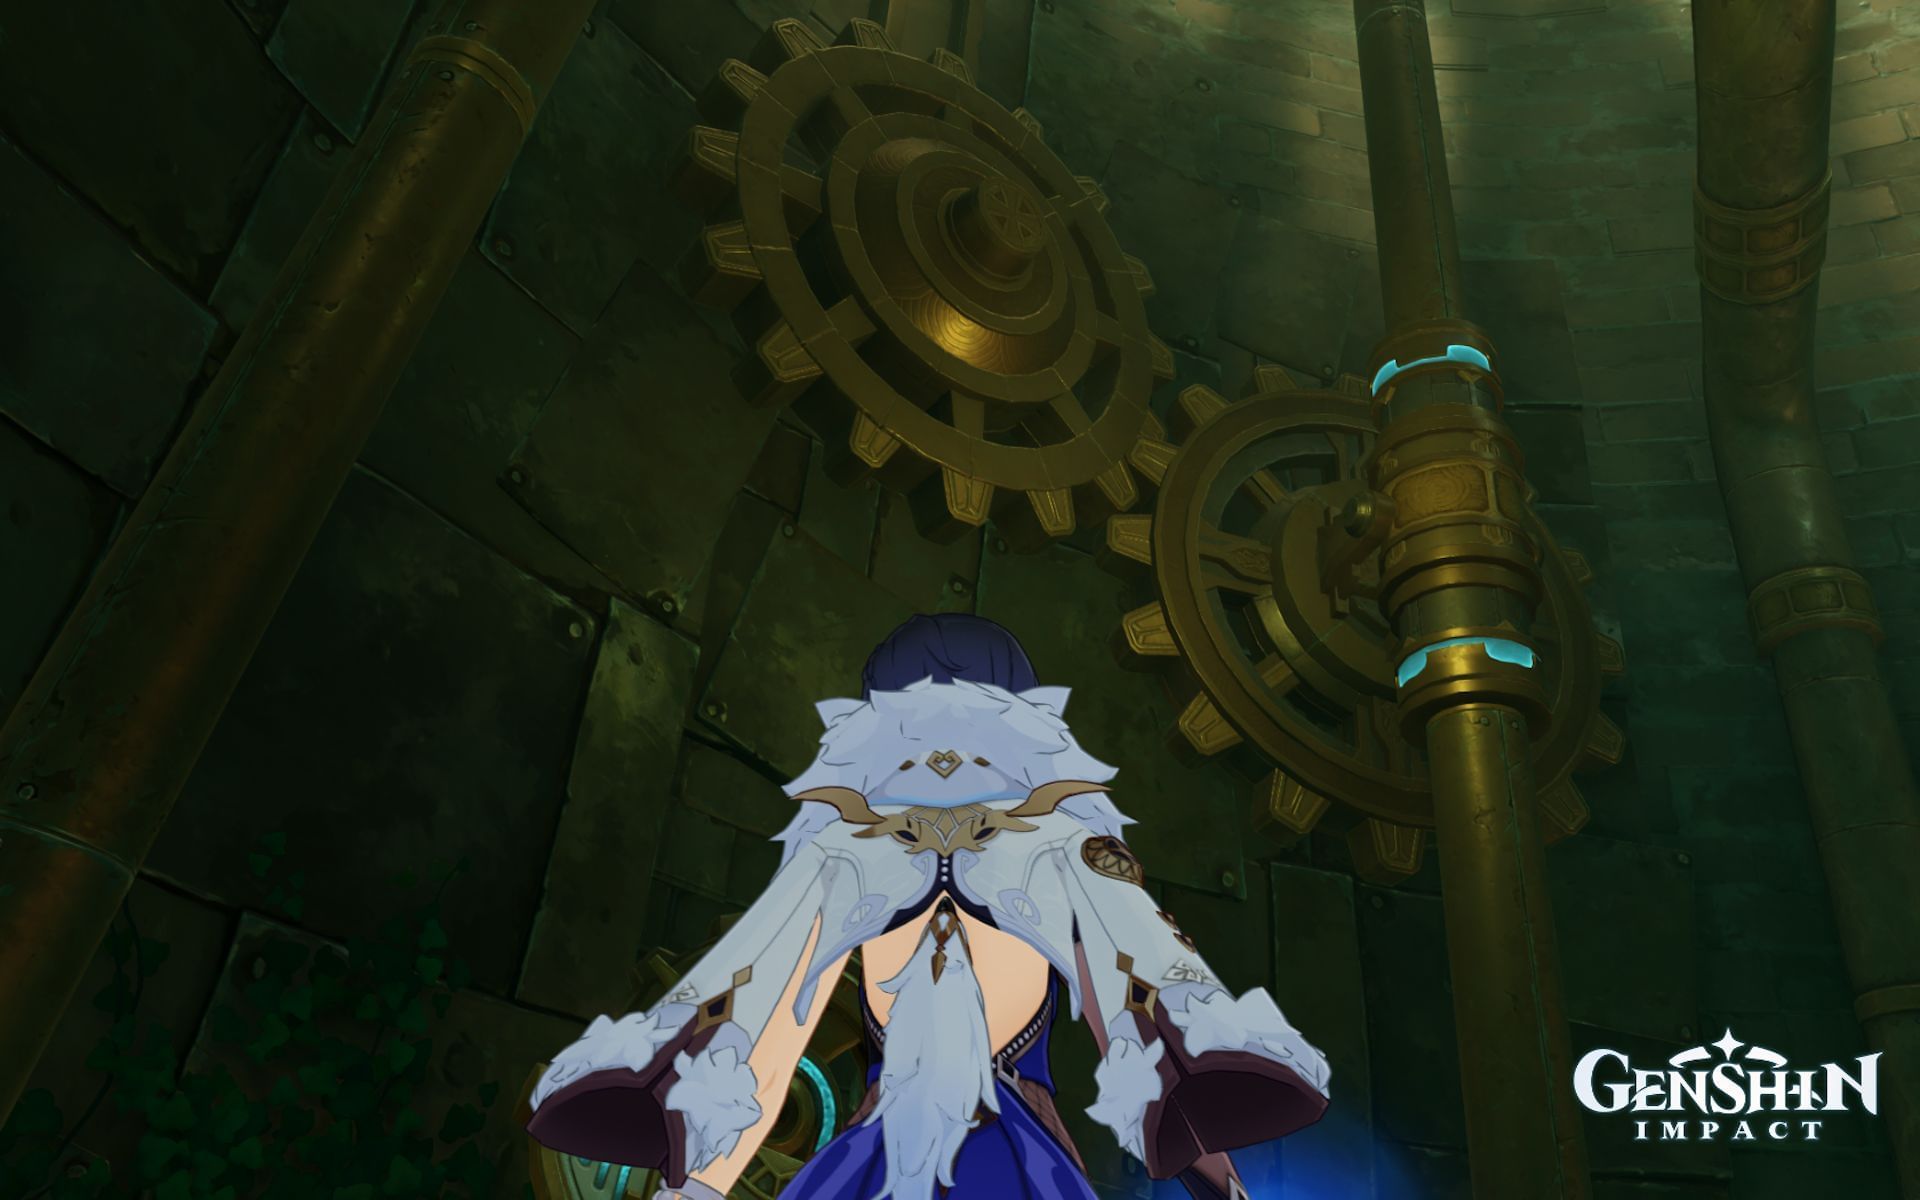
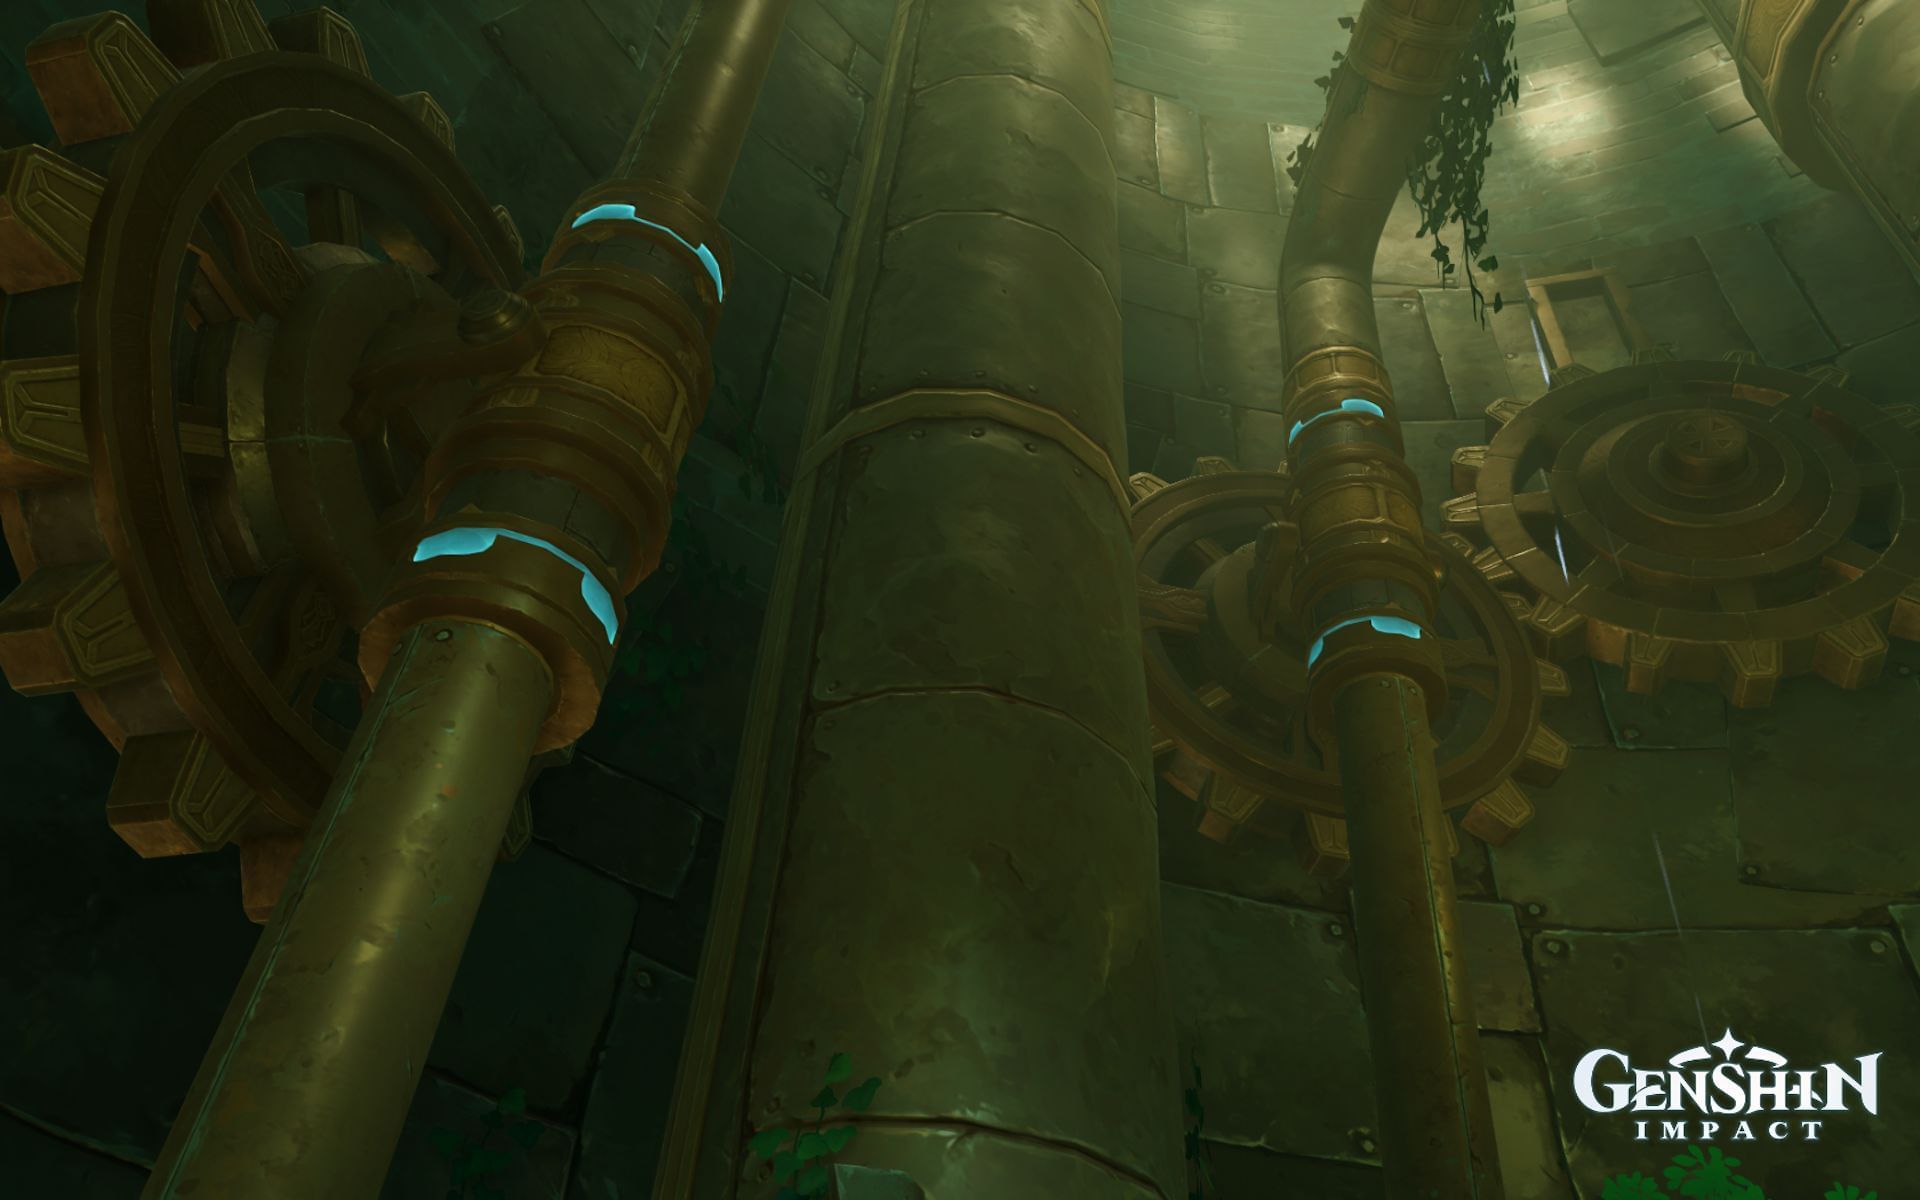
The next objective is a little trickier. Before jumping down, head to the right side, where you will notice gas pouring out of a pipe. Go near it to get the option for rotating the handwheel. Do that twice to stop the gas from leaking.
You should notice two more leaks below you.
![Jump down to this platform (Image via HoYoverse)](https://staticg.sportskeeda.com/editor/2023/09/1773a-16958347767311-1920.jpg?w=190 190w, https://staticg.sportskeeda.com/editor/2023/09/1773a-16958347767311-1920.jpg?w=720 720w, https://staticg.sportskeeda.com/editor/2023/09/1773a-16958347767311-1920.jpg?w=640 640w, https://staticg.sportskeeda.com/editor/2023/09/1773a-16958347767311-1920.jpg?w=1045 1045w, https://staticg.sportskeeda.com/editor/2023/09/1773a-16958347767311-1920.jpg?w=1200 1200w, https://staticg.sportskeeda.com/editor/2023/09/1773a-16958347767311-1920.jpg?w=1460 1460w, https://staticg.sportskeeda.com/editor/2023/09/1773a-16958347767311-1920.jpg?w=1600 1600w, https://staticg.sportskeeda.com/editor/2023/09/1773a-16958347767311-1920.jpg 1920w)
Rotate the left handwheel twice and the right one once. That will stop the gas leaks from that pipe. Now jump down to the ground.
![Use the Pneuma Block on the Ousia device here (Image via HoYoverse)](https://staticg.sportskeeda.com/editor/2023/09/528a3-16958349290026-1920.jpg?w=190 190w, https://staticg.sportskeeda.com/editor/2023/09/528a3-16958349290026-1920.jpg?w=720 720w, https://staticg.sportskeeda.com/editor/2023/09/528a3-16958349290026-1920.jpg?w=640 640w, https://staticg.sportskeeda.com/editor/2023/09/528a3-16958349290026-1920.jpg?w=1045 1045w, https://staticg.sportskeeda.com/editor/2023/09/528a3-16958349290026-1920.jpg?w=1200 1200w, https://staticg.sportskeeda.com/editor/2023/09/528a3-16958349290026-1920.jpg?w=1460 1460w, https://staticg.sportskeeda.com/editor/2023/09/528a3-16958349290026-1920.jpg?w=1600 1600w, https://staticg.sportskeeda.com/editor/2023/09/528a3-16958349290026-1920.jpg 1920w)
After you use the Pneuma Block on the nearby Ousia, pick up the floating device and drop it near the cage, as pictured below.
![This is where you put that device (Image via HoYoverse)](https://staticg.sportskeeda.com/editor/2023/09/d773b-16958351472451-1920.jpg?w=190 190w, https://staticg.sportskeeda.com/editor/2023/09/d773b-16958351472451-1920.jpg?w=720 720w, https://staticg.sportskeeda.com/editor/2023/09/d773b-16958351472451-1920.jpg?w=640 640w, https://staticg.sportskeeda.com/editor/2023/09/d773b-16958351472451-1920.jpg?w=1045 1045w, https://staticg.sportskeeda.com/editor/2023/09/d773b-16958351472451-1920.jpg?w=1200 1200w, https://staticg.sportskeeda.com/editor/2023/09/d773b-16958351472451-1920.jpg?w=1460 1460w, https://staticg.sportskeeda.com/editor/2023/09/d773b-16958351472451-1920.jpg?w=1600 1600w, https://staticg.sportskeeda.com/editor/2023/09/d773b-16958351472451-1920.jpg 1920w)
Open the cage and pick up the gear in it. Install it on the nearby pipe where some gas is leaking. Rotate it thrice to clear this Genshin Impact puzzle. Open the nearby door to continue onward with the Road to the Singularity quest.
Complete the next several quick quest objectives
![These steps are all easy (Image via HoYoverse)](https://staticg.sportskeeda.com/editor/2023/09/1bf99-16958353786508-1920.jpg?w=190 190w, https://staticg.sportskeeda.com/editor/2023/09/1bf99-16958353786508-1920.jpg?w=720 720w, https://staticg.sportskeeda.com/editor/2023/09/1bf99-16958353786508-1920.jpg?w=640 640w, https://staticg.sportskeeda.com/editor/2023/09/1bf99-16958353786508-1920.jpg?w=1045 1045w, https://staticg.sportskeeda.com/editor/2023/09/1bf99-16958353786508-1920.jpg?w=1200 1200w, https://staticg.sportskeeda.com/editor/2023/09/1bf99-16958353786508-1920.jpg?w=1460 1460w, https://staticg.sportskeeda.com/editor/2023/09/1bf99-16958353786508-1920.jpg?w=1600 1600w, https://staticg.sportskeeda.com/editor/2023/09/1bf99-16958353786508-1920.jpg 1920w)
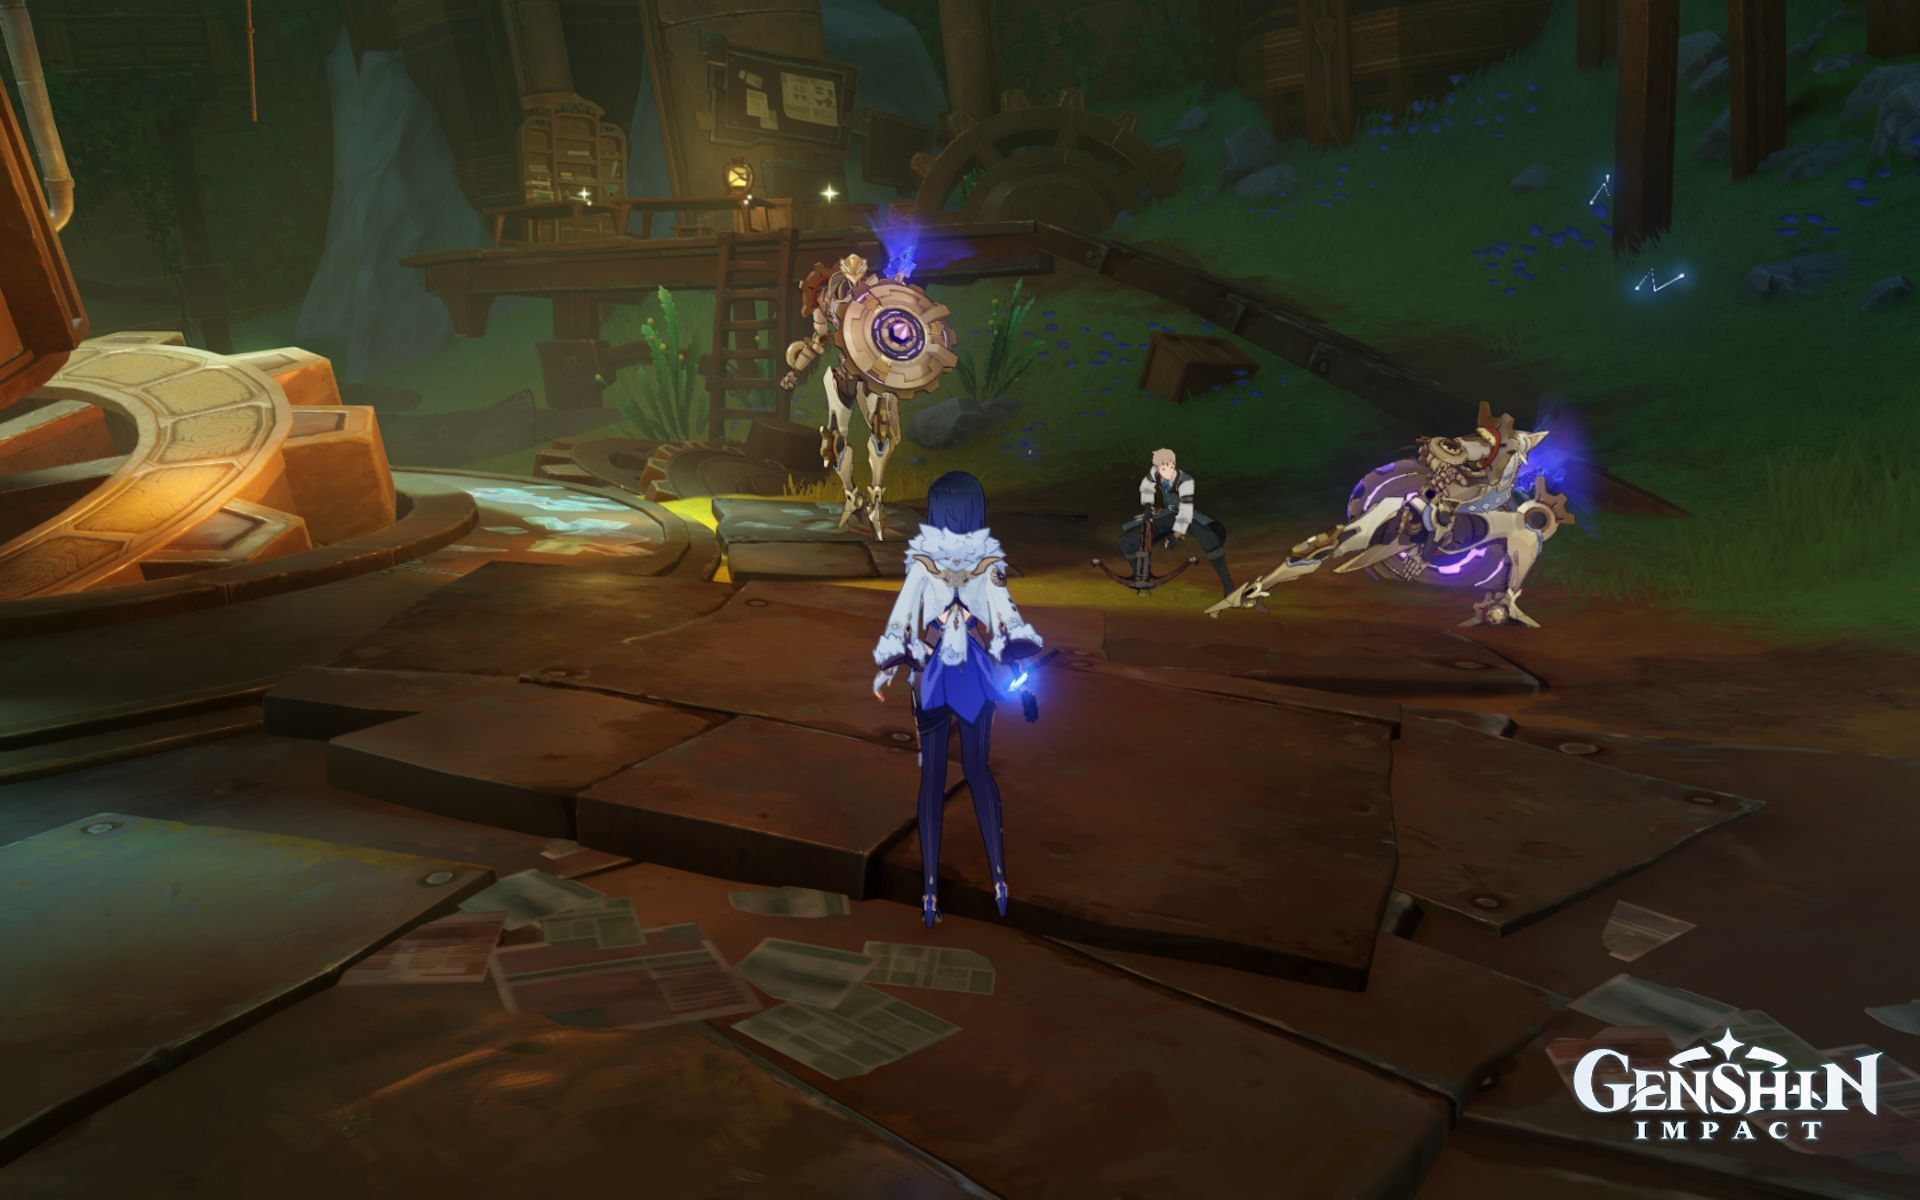
Defeat the Clockwork Meka in the next room. Now take the lift to go down. Continue exploring by going to the end of the following tunnel.
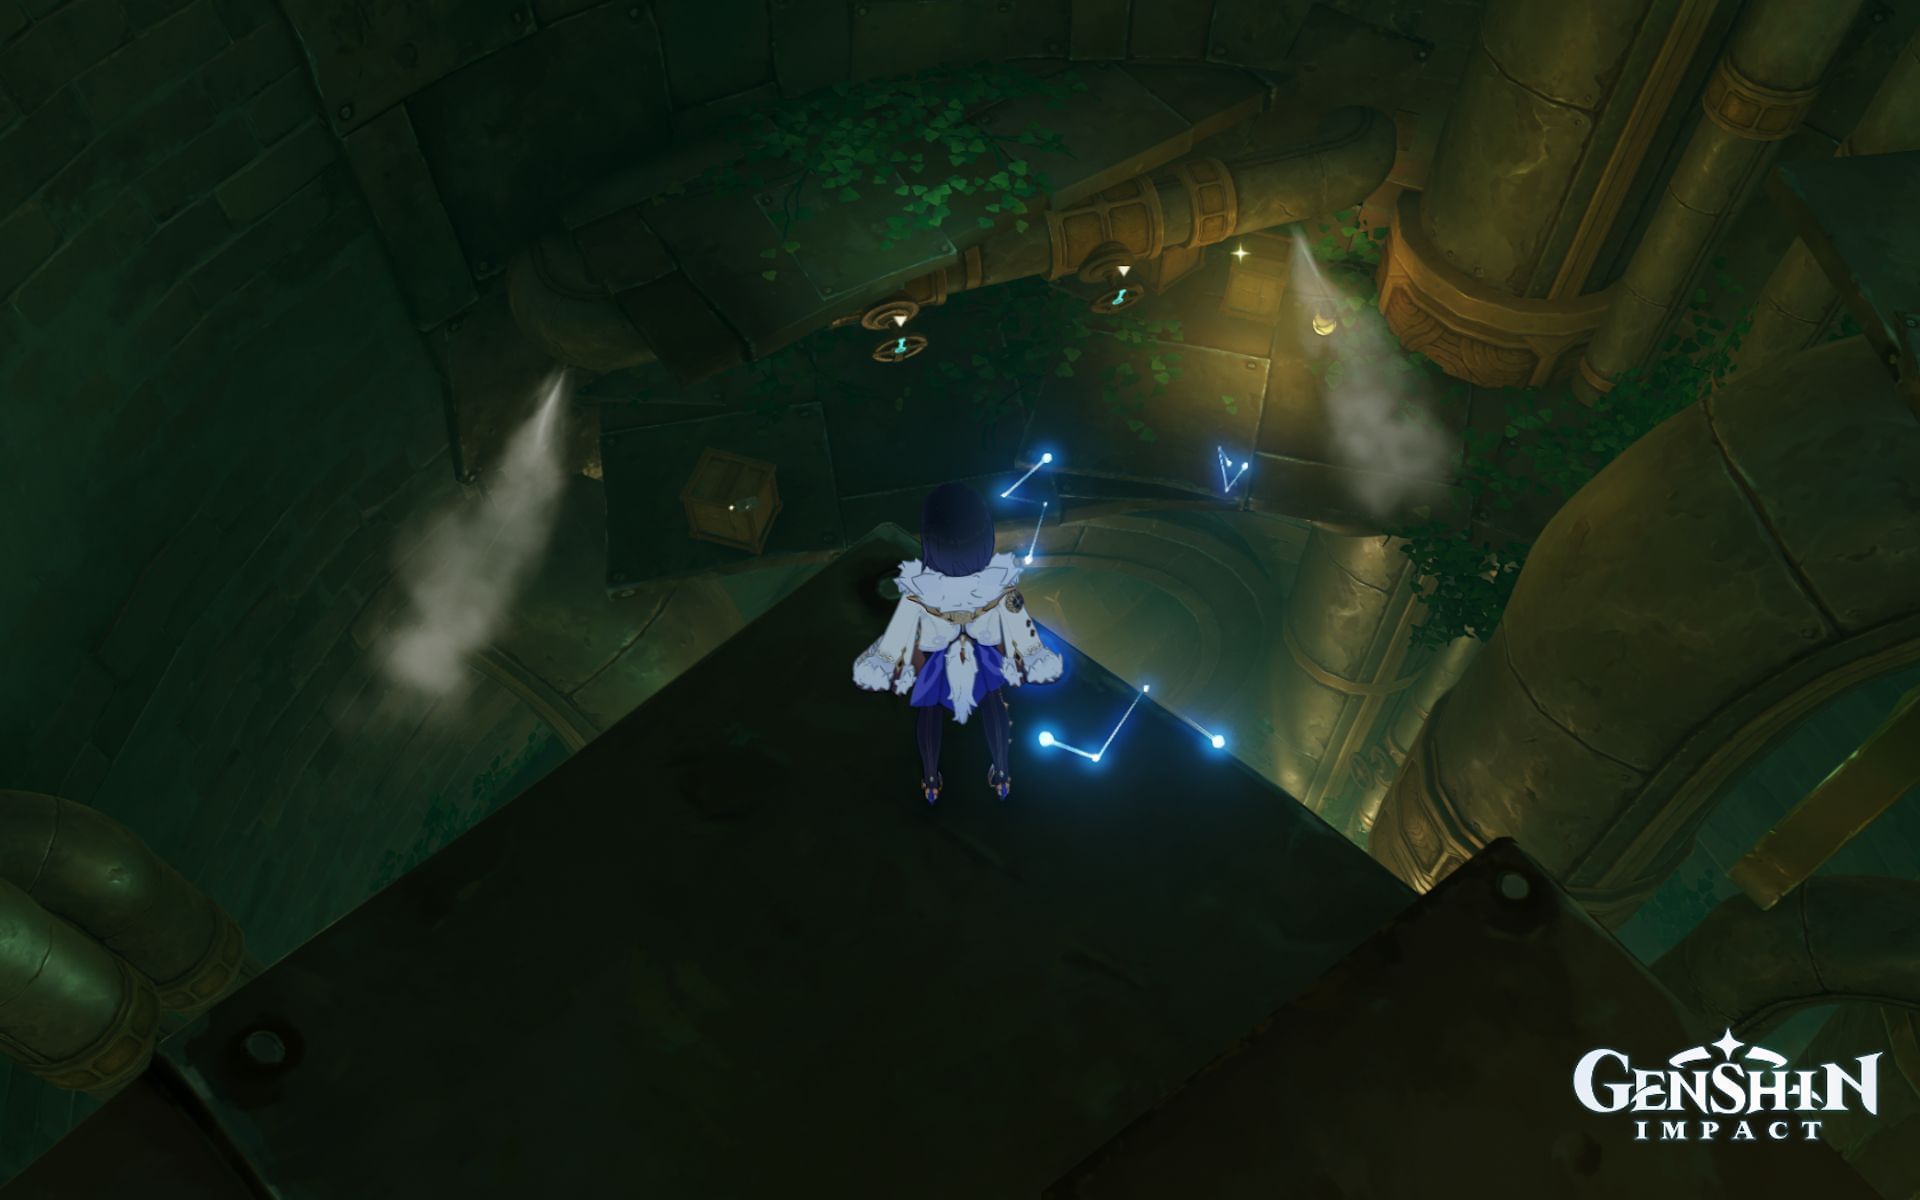
Find a way to open the sealed door (again)
![One puzzle down (Image via HoYoverse)](https://staticg.sportskeeda.com/editor/2023/09/fab71-16958355837075-1920.jpg?w=190 190w, https://staticg.sportskeeda.com/editor/2023/09/fab71-16958355837075-1920.jpg?w=720 720w, https://staticg.sportskeeda.com/editor/2023/09/fab71-16958355837075-1920.jpg?w=640 640w, https://staticg.sportskeeda.com/editor/2023/09/fab71-16958355837075-1920.jpg?w=1045 1045w, https://staticg.sportskeeda.com/editor/2023/09/fab71-16958355837075-1920.jpg?w=1200 1200w, https://staticg.sportskeeda.com/editor/2023/09/fab71-16958355837075-1920.jpg?w=1460 1460w, https://staticg.sportskeeda.com/editor/2023/09/fab71-16958355837075-1920.jpg?w=1600 1600w, https://staticg.sportskeeda.com/editor/2023/09/fab71-16958355837075-1920.jpg 1920w)
There are two gear puzzles in this room. Let's start with the northern one first. Select move once and then rotate. Stop once the pipes align.
![This is the second puzzle being completed (Image via HoYoverse)](https://staticg.sportskeeda.com/editor/2023/09/b00ad-16958357734533-1920.jpg?w=190 190w, https://staticg.sportskeeda.com/editor/2023/09/b00ad-16958357734533-1920.jpg?w=720 720w, https://staticg.sportskeeda.com/editor/2023/09/b00ad-16958357734533-1920.jpg?w=640 640w, https://staticg.sportskeeda.com/editor/2023/09/b00ad-16958357734533-1920.jpg?w=1045 1045w, https://staticg.sportskeeda.com/editor/2023/09/b00ad-16958357734533-1920.jpg?w=1200 1200w, https://staticg.sportskeeda.com/editor/2023/09/b00ad-16958357734533-1920.jpg?w=1460 1460w, https://staticg.sportskeeda.com/editor/2023/09/b00ad-16958357734533-1920.jpg?w=1600 1600w, https://staticg.sportskeeda.com/editor/2023/09/b00ad-16958357734533-1920.jpg 1920w)
For the southern puzzle, move it once. Then rotate it and stop once the left pipe aligns perfectly. Now move it again. Rotate it so the left pipe is perfectly horizontal. Afterward, select the move option once more.
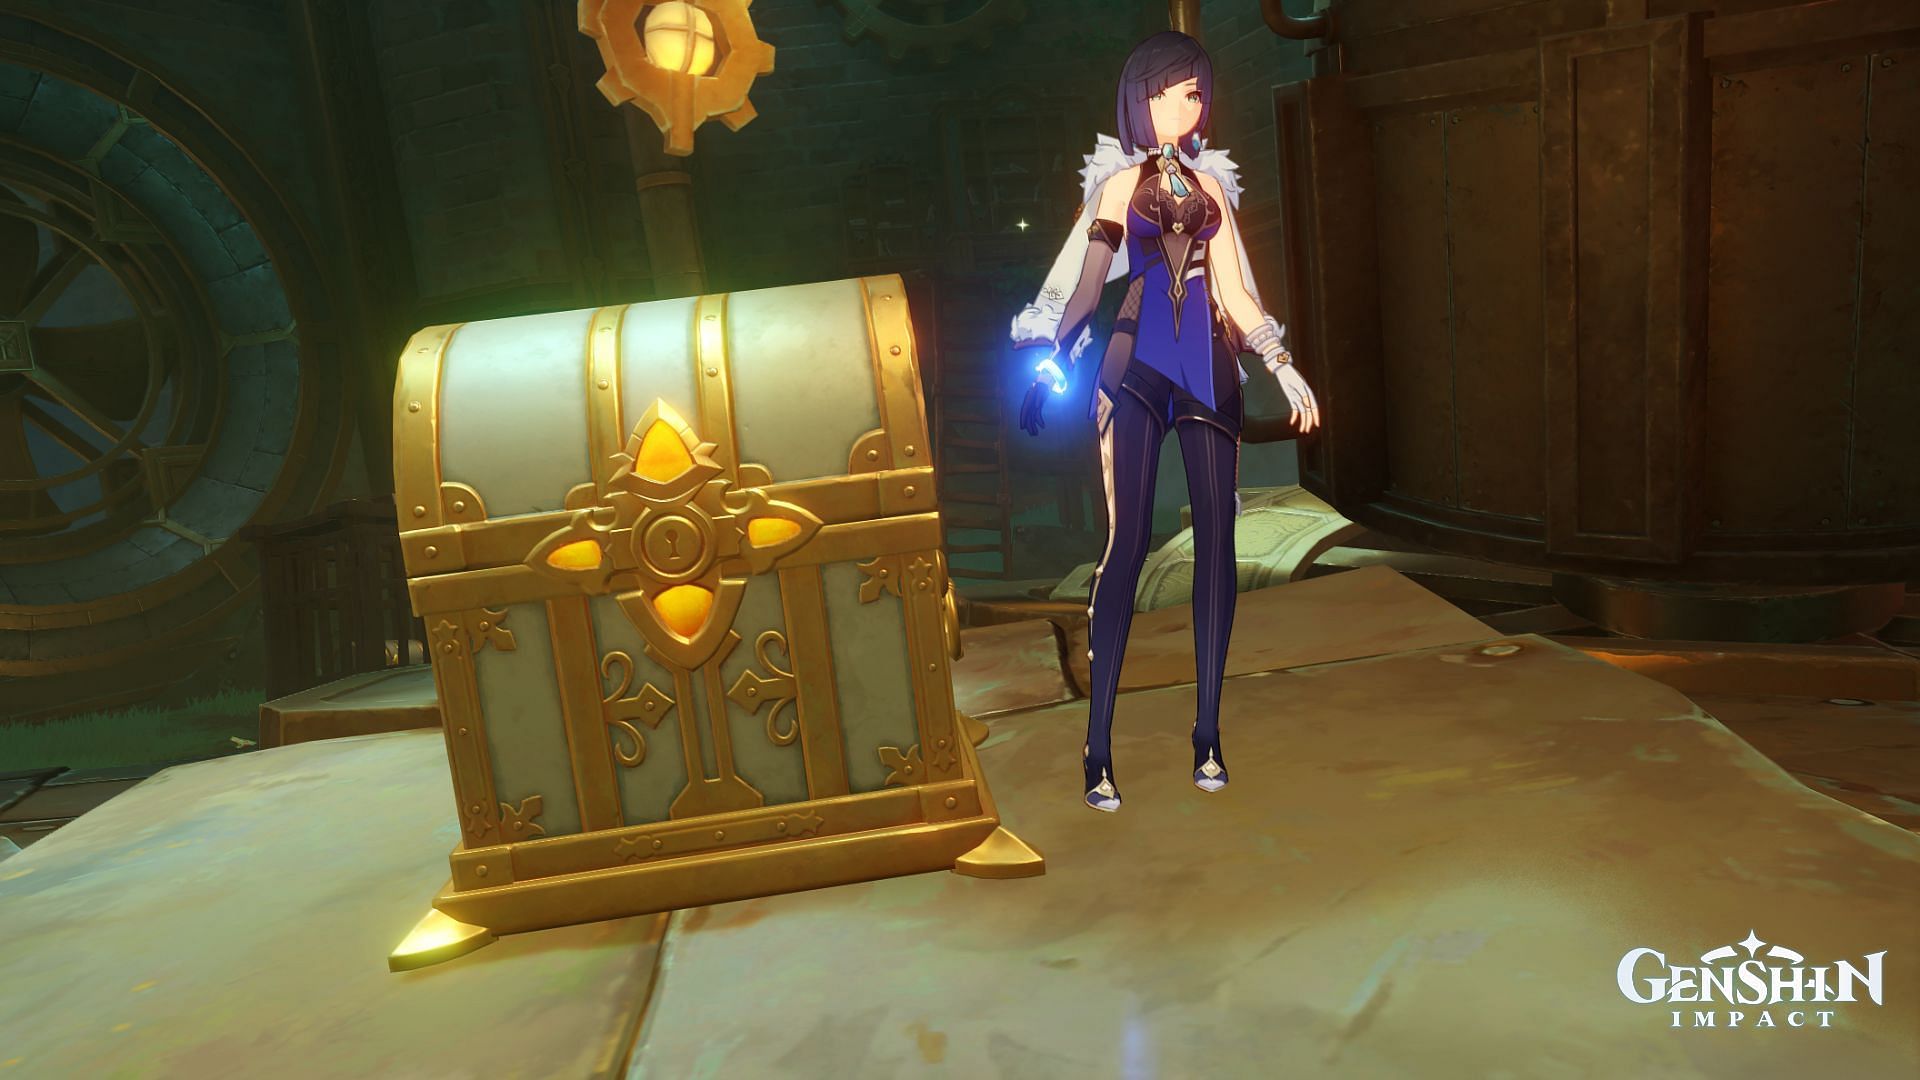
This will trigger a cutscene. Genshin Impact players can now fly upward to proceed with the Road to the Singularity quest. Don't forget to open the free Exquisite Chest at the top.
Defeat the Clockwork Meka
![Defeat the Clockwork Meka here (Image via HoYoverse)](https://staticg.sportskeeda.com/editor/2023/09/7b25f-16958360038274-1920.jpg?w=190 190w, https://staticg.sportskeeda.com/editor/2023/09/7b25f-16958360038274-1920.jpg?w=720 720w, https://staticg.sportskeeda.com/editor/2023/09/7b25f-16958360038274-1920.jpg?w=640 640w, https://staticg.sportskeeda.com/editor/2023/09/7b25f-16958360038274-1920.jpg?w=1045 1045w, https://staticg.sportskeeda.com/editor/2023/09/7b25f-16958360038274-1920.jpg?w=1200 1200w, https://staticg.sportskeeda.com/editor/2023/09/7b25f-16958360038274-1920.jpg?w=1460 1460w, https://staticg.sportskeeda.com/editor/2023/09/7b25f-16958360038274-1920.jpg?w=1600 1600w, https://staticg.sportskeeda.com/editor/2023/09/7b25f-16958360038274-1920.jpg 1920w)
Defeating these foes is simple. Once that's done, you will get two Energy Concentrating Components. Open the free Exquisite Chest while you're here.
Find a way to open the sealed door (another time)
![Go down below the Exquisite Chest to enter this room (Image via HoYoverse)](https://staticg.sportskeeda.com/editor/2023/09/9017a-16958362378469-1920.jpg?w=190 190w, https://staticg.sportskeeda.com/editor/2023/09/9017a-16958362378469-1920.jpg?w=720 720w, https://staticg.sportskeeda.com/editor/2023/09/9017a-16958362378469-1920.jpg?w=640 640w, https://staticg.sportskeeda.com/editor/2023/09/9017a-16958362378469-1920.jpg?w=1045 1045w, https://staticg.sportskeeda.com/editor/2023/09/9017a-16958362378469-1920.jpg?w=1200 1200w, https://staticg.sportskeeda.com/editor/2023/09/9017a-16958362378469-1920.jpg?w=1460 1460w, https://staticg.sportskeeda.com/editor/2023/09/9017a-16958362378469-1920.jpg?w=1600 1600w, https://staticg.sportskeeda.com/editor/2023/09/9017a-16958362378469-1920.jpg 1920w)
Here is what you do here:
- Move once.
- Rotate for two cycles.
- Move again.
- Rotate for one cycle.
You can now open the passage. Defeat some Clockwork Meka here. Afterward, proceed through the tunnel and take another lift. You will eventually see Kuisel again, but his real name is Coutrot.
Defeat Coutrot
![Defeat Coutrot to finish Road to the Singularity in Genshin Impact (Image via HoYoverse)](https://staticg.sportskeeda.com/editor/2023/09/8119a-16958365826856-1920.jpg?w=190 190w, https://staticg.sportskeeda.com/editor/2023/09/8119a-16958365826856-1920.jpg?w=720 720w, https://staticg.sportskeeda.com/editor/2023/09/8119a-16958365826856-1920.jpg?w=640 640w, https://staticg.sportskeeda.com/editor/2023/09/8119a-16958365826856-1920.jpg?w=1045 1045w, https://staticg.sportskeeda.com/editor/2023/09/8119a-16958365826856-1920.jpg?w=1200 1200w, https://staticg.sportskeeda.com/editor/2023/09/8119a-16958365826856-1920.jpg?w=1460 1460w, https://staticg.sportskeeda.com/editor/2023/09/8119a-16958365826856-1920.jpg?w=1600 1600w, https://staticg.sportskeeda.com/editor/2023/09/8119a-16958365826856-1920.jpg 1920w)
This step is easy as travelers only have to defeat Coutrot, who is much weaker than his nearby Clockwork Meka. That's the end of Road to the Singularity. Don't forget to open the nearby Luxurious Chest.
There is also another Luxurious Chest, which requires collecting all seven Energy Concentration Components in Genshin Impact. You get two just by doing Road to the Singularity.
Are you stuck on today's Wordle? Our Wordle Solver will help you find the answer.