
'%20x='0'%20y='0'%20height='100%25'%20width='100%25'%20%0A%20%20%20%20%20%20%20%20%20%20xlink%3Ahref='data:image/jpg;base64,/9j/2wBDAAYEBQYFBAYGBQYHBwYIChAKCgkJChQODwwQFxQYGBcUFhYaHSUfGhsjHBYWICwgIyYnKSopGR8tMC0oMCUoKSj/2wBDAQcHBwoIChMKChMoGhYaKCgoKCgoKCgoKCgoKCgoKCgoKCgoKCgoKCgoKCgoKCgoKCgoKCgoKCgoKCgoKCgoKCj/wgARCAAGAAoDASIAAhEBAxEB/8QAFgABAQEAAAAAAAAAAAAAAAAAAAUH/8QAFQEBAQAAAAAAAAAAAAAAAAAABQb/2gAMAwEAAhADEAAAAMrlFED/AP/EAB0QAAMAAgIDAAAAAAAAAAAAAAECAwQRABIGUWL/2gAIAQEAAT8A8Qz0hh5MZQBaa9N0If69cv1a1CzP2LEnWuf/xAAYEQACAwAAAAAAAAAAAAAAAAAAAQIRIv/aAAgBAgEBPwCCzZ//xAAXEQADAQAAAAAAAAAAAAAAAAAAAQMy/9oACAEDAQE/AKbZ/9k='%3E%3C/image%3E%3C/svg%3E)
With the release of Honkai Star Rail 3.0, you can now explore the exciting new world of Amphoreus. To reach the Eternal Land, you must play through the Heroic Saga of Flame-Chase Trailblaze Quest. One of the first things you will have to do in this quest is help March 7th take photographs of two locations in the region.
This article provides a guide on how to help March 7th take the two photographs in Honkai Star Rail 3.0.
Honkai Star Rail: Steps to help March 7th take photographs of two wondrous sights
Once you start the Honkai Star Rail 3.0 Heroic Saga of Flame-Chase: Silver Chariot, Away to that Blackened Land Trailblaze Quest, you will soon reach Amphoreus.
Looking for Crossword hints & solutions? Check out latest NYT Mini Crossword Answers, LA Times Crossword Answers, and Atlantic Crossword Answers
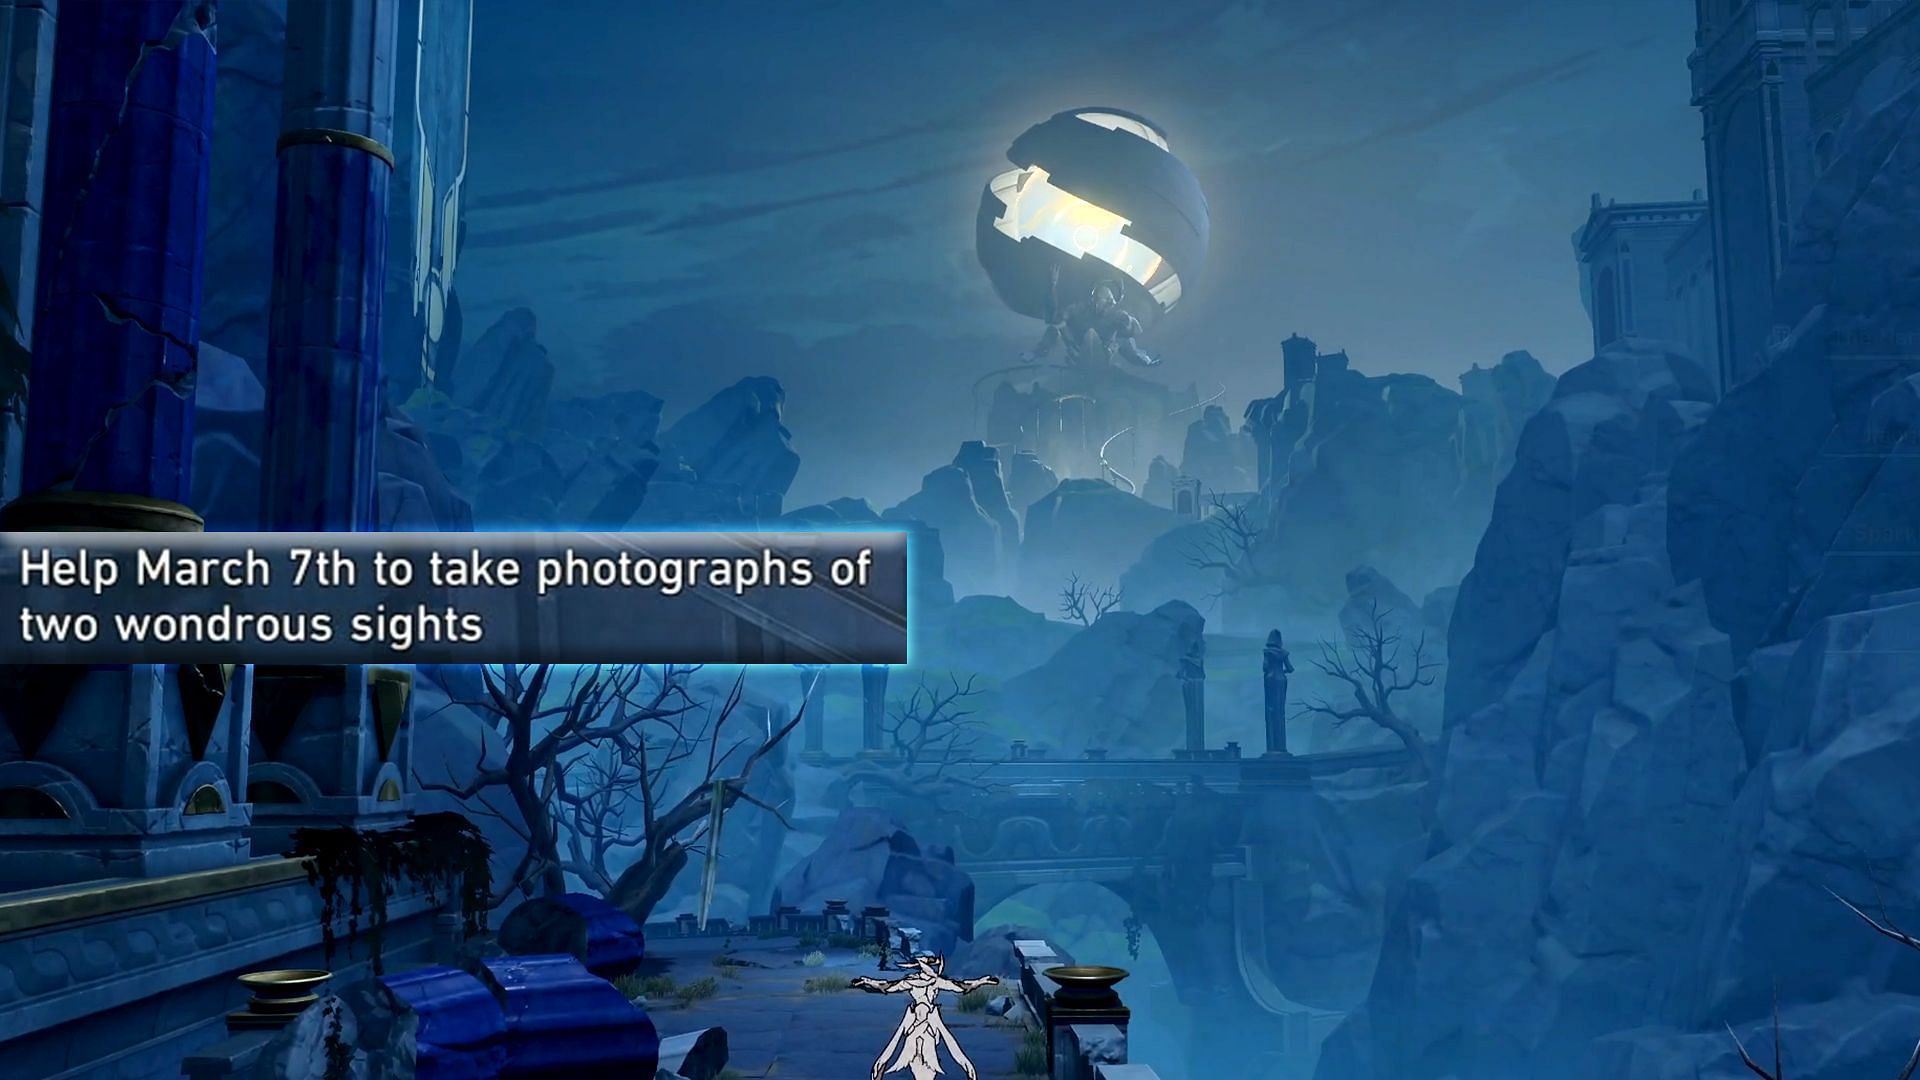
While you won't land in the main city right away, your initial starting point will be in a place known as the Abyss of Fate. Here, you will have to pause and take two photographs for March 7th (who has stayed behind on the Astral Express).
Follow these steps to take the photographs of the two wondrous sights:
Step 1: Walk up to the first photography area

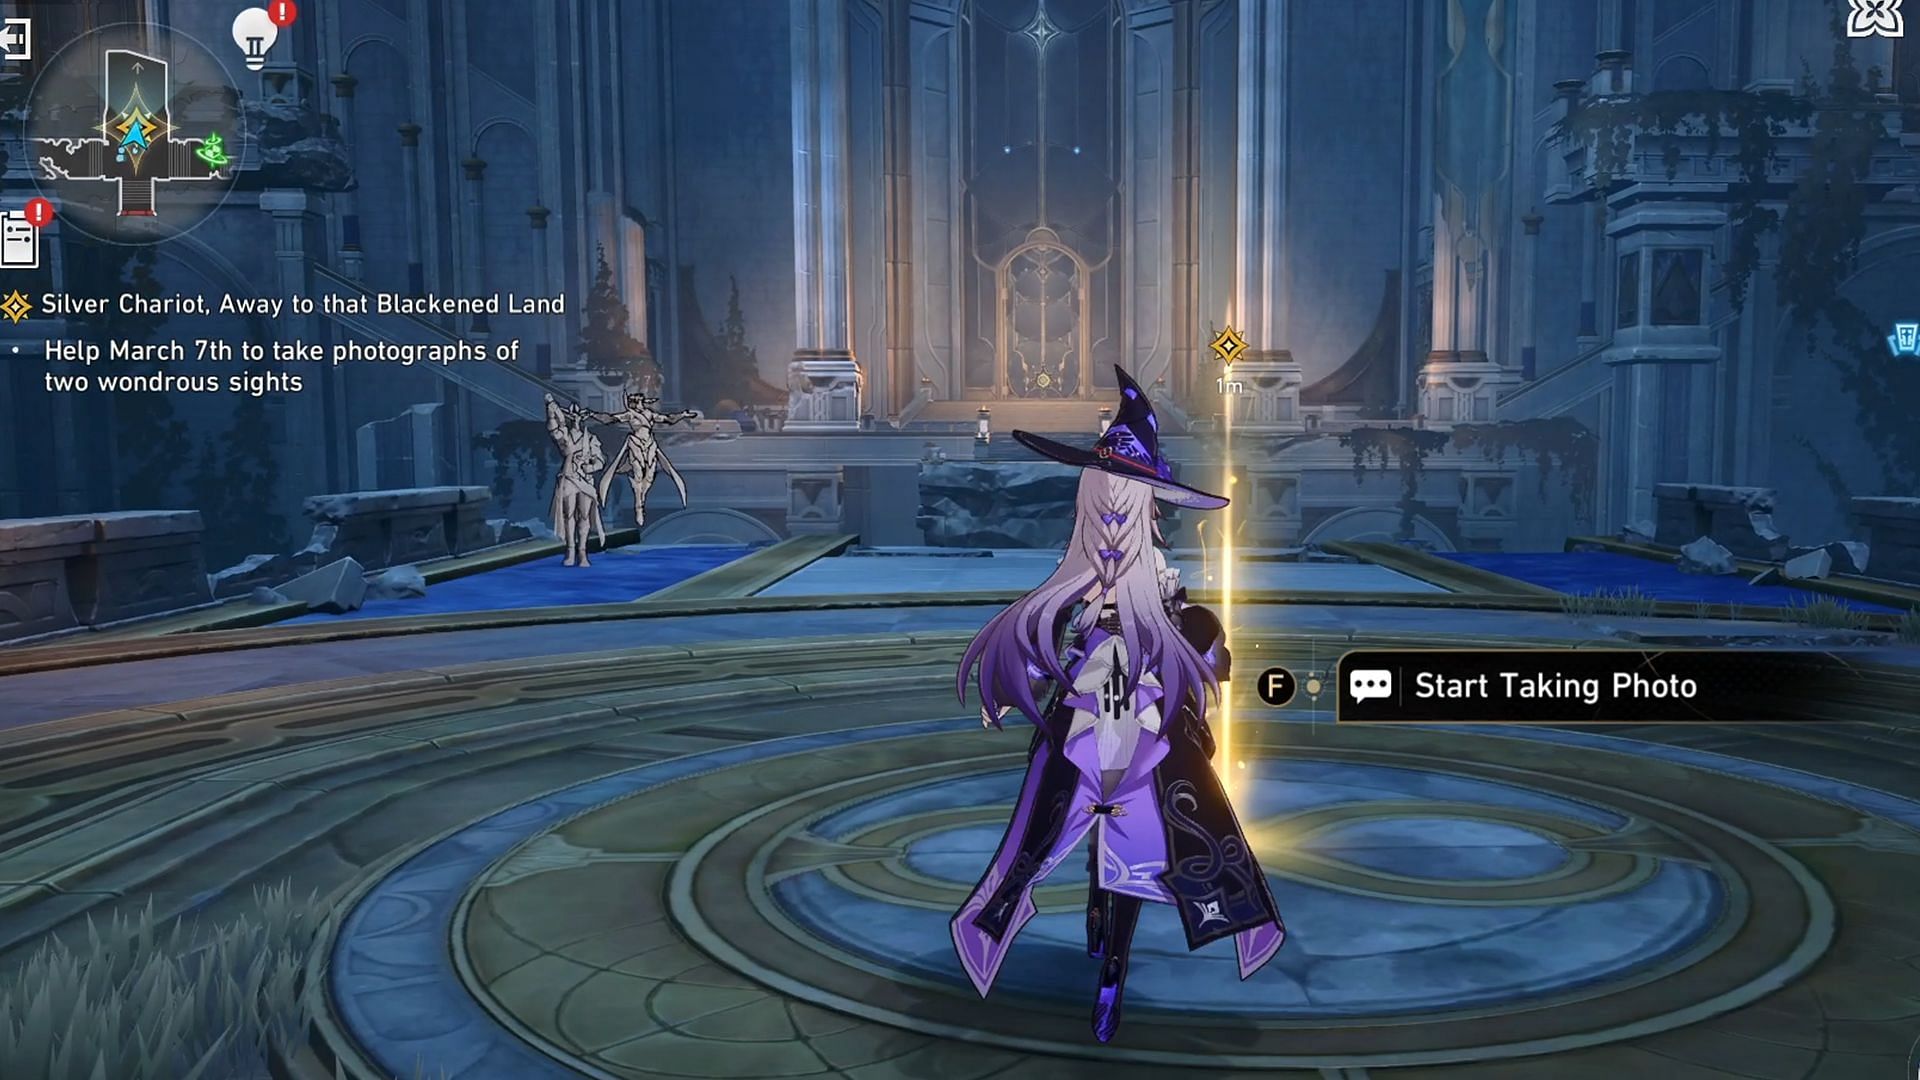
Once you get the mission to "help March 7th to take photographs of two wondrous sights," two designated photography areas will be marked for you.
Walk up to the first spot and click on the "Start Taking Photo" option.
Step 2: Take a photograph of the giant sphere
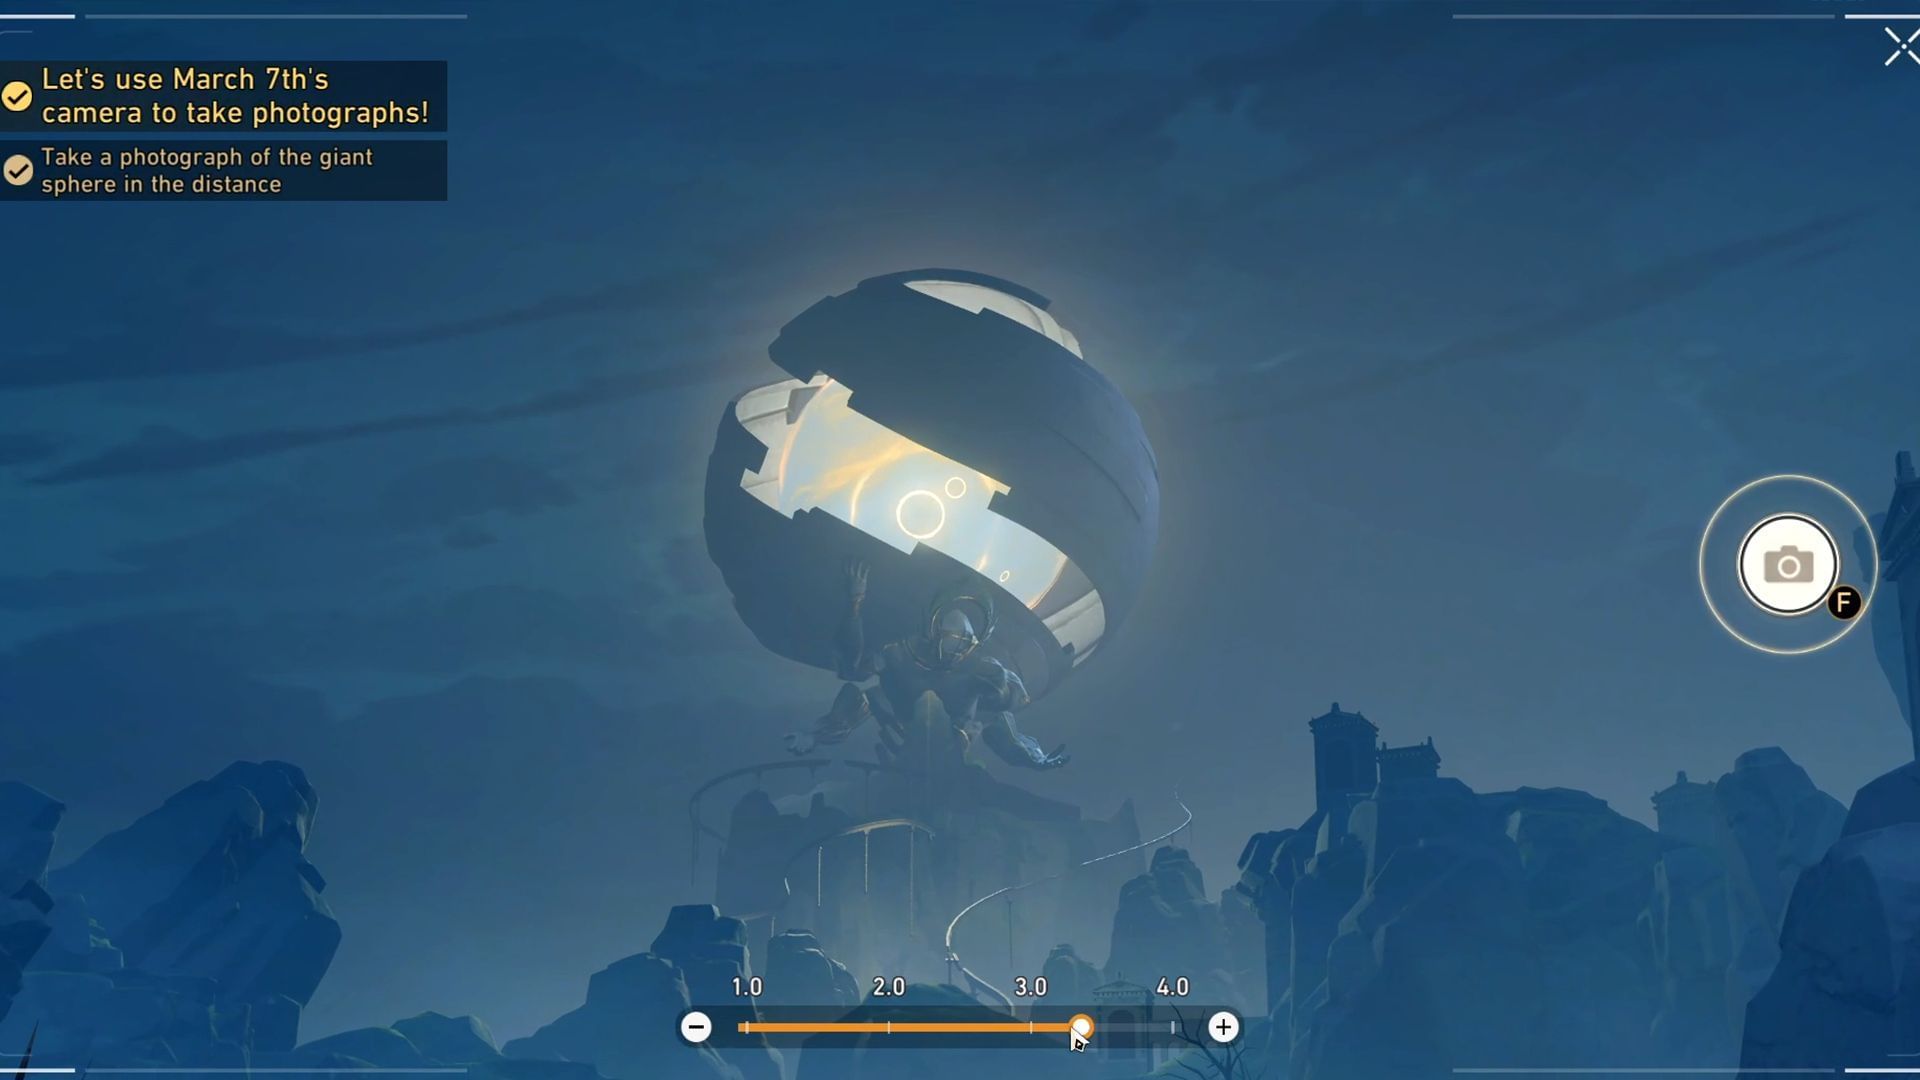
Your first photograph will need to be of the "giant sphere in the distance." Adjust the camera zoom however you want, making sure that the giant sphere is clearly visible. Snap the photograph.
Step 3: Walk up to the second photography area
After you are done with the first photograph, turn right and head to the next photography spot. Click on the "Start Taking Photo" option.
Step 4: Take a photograph of the city gate
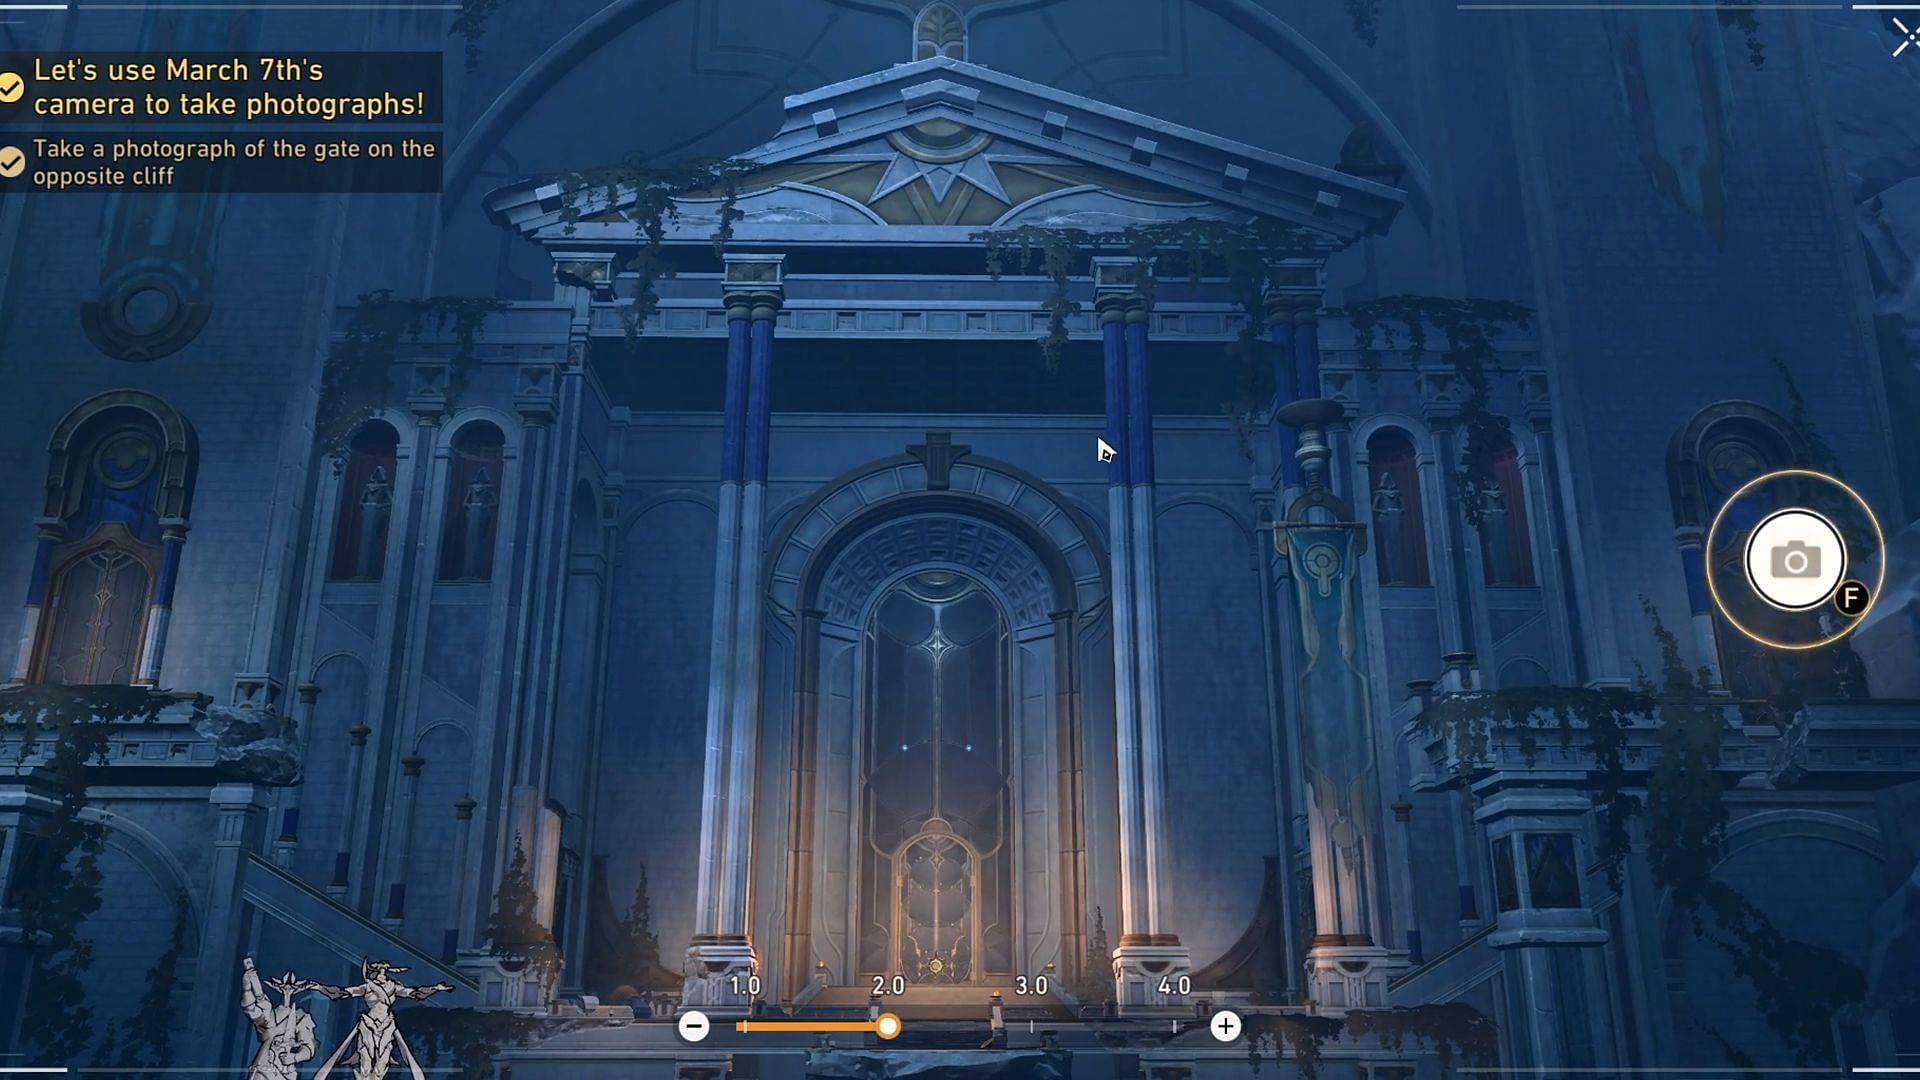
Now, you will need to take a picture of the "gate on the opposite cliff." Adjust the camera angle and zoom however you want, making sure that you get the entire gate in the frame. Take the photograph.
After you finish taking both photographs, the mission will be complete, and you can progress on with the Trailblaze Quest.
Also read: The Herta vs Aglaea: Best 5-star character to get in Honkai Star Rail 3.0.
Follow Sportskeeda for more Honkai Star Rail news, updates, and guides.
Are you stuck on today's Wordle? Our Wordle Solver will help you find the answer.