
'%20x='0'%20y='0'%20height='100%25'%20width='100%25'%20%0A%20%20%20%20%20%20%20%20%20%20xlink%3Ahref='data:image/jpg;base64,/9j/2wBDAAYEBQYFBAYGBQYHBwYIChAKCgkJChQODwwQFxQYGBcUFhYaHSUfGhsjHBYWICwgIyYnKSopGR8tMC0oMCUoKSj/2wBDAQcHBwoIChMKChMoGhYaKCgoKCgoKCgoKCgoKCgoKCgoKCgoKCgoKCgoKCgoKCgoKCgoKCgoKCgoKCgoKCgoKCj/wgARCAAGAAoDASIAAhEBAxEB/8QAFgABAQEAAAAAAAAAAAAAAAAAAAYI/8QAFAEBAAAAAAAAAAAAAAAAAAAAA//aAAwDAQACEAMQAAAAz9PiH//EAB8QAAEDAwUAAAAAAAAAAAAAAAIABCEBBREDBhIVYv/aAAgBAQABPwB5uV1cLP1zwRPRGR8liK0XLMr/xAAXEQADAQAAAAAAAAAAAAAAAAAAAQIx/9oACAECAQE/AKpvT//EABURAQEAAAAAAAAAAAAAAAAAAAEA/9oACAEDAQE/AAC//9k='%3E%3C/image%3E%3C/svg%3E)
The Duga Journalist Stash in Stalker 2 is one of the many Journalist Stashes you can find all over the Zone. These are mostly heavily guarded or hard to reach, but they contain some of the best loot in the game. The Duga Journalist Stash also contains a powerful rifle as well as a suit nearby.
This article details everything you need to know about finding the Duga journalist stash in Stalker 2.
Where is the Duga Journalist Stash in Stalker 2
Looking for Crossword hints & solutions? Check out latest NYT Mini Crossword Answers, LA Times Crossword Answers, and Atlantic Crossword Answers
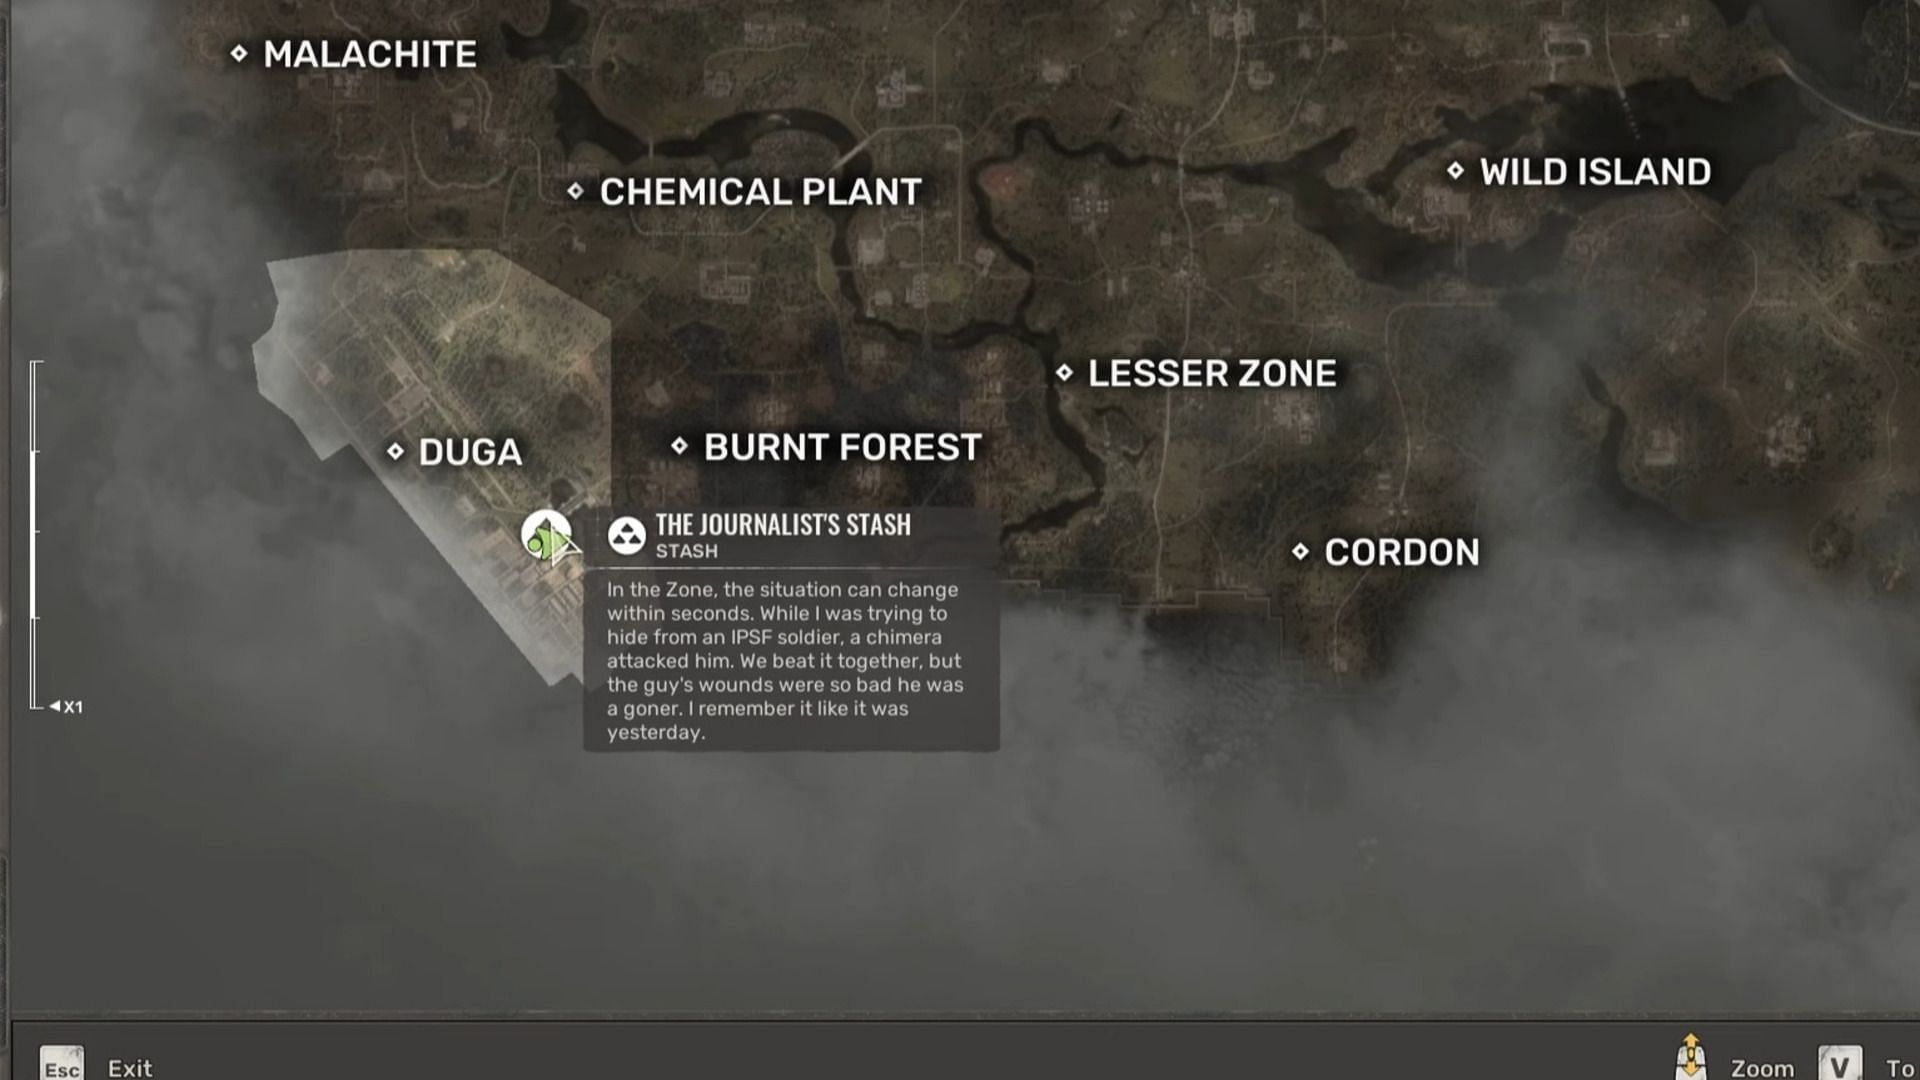
The stash is located in the Duga region, southwest of the map, past the Burnt Forest region. It is inside a heavily guarded military base. In the stash, you can find a "SA-U GABION" Rifle with ammo and a SEVA-1 Suit that can give you high PSI protection. Before you go into the facility ensure to equip a powerful shotgun and a sniper rifle to take down the enemies.
Read more: Stalker 2: Should you side with Noontide or the Ward in Wishful Thinking quest?
How to find the Duga Journalist Stash in Stalker 2

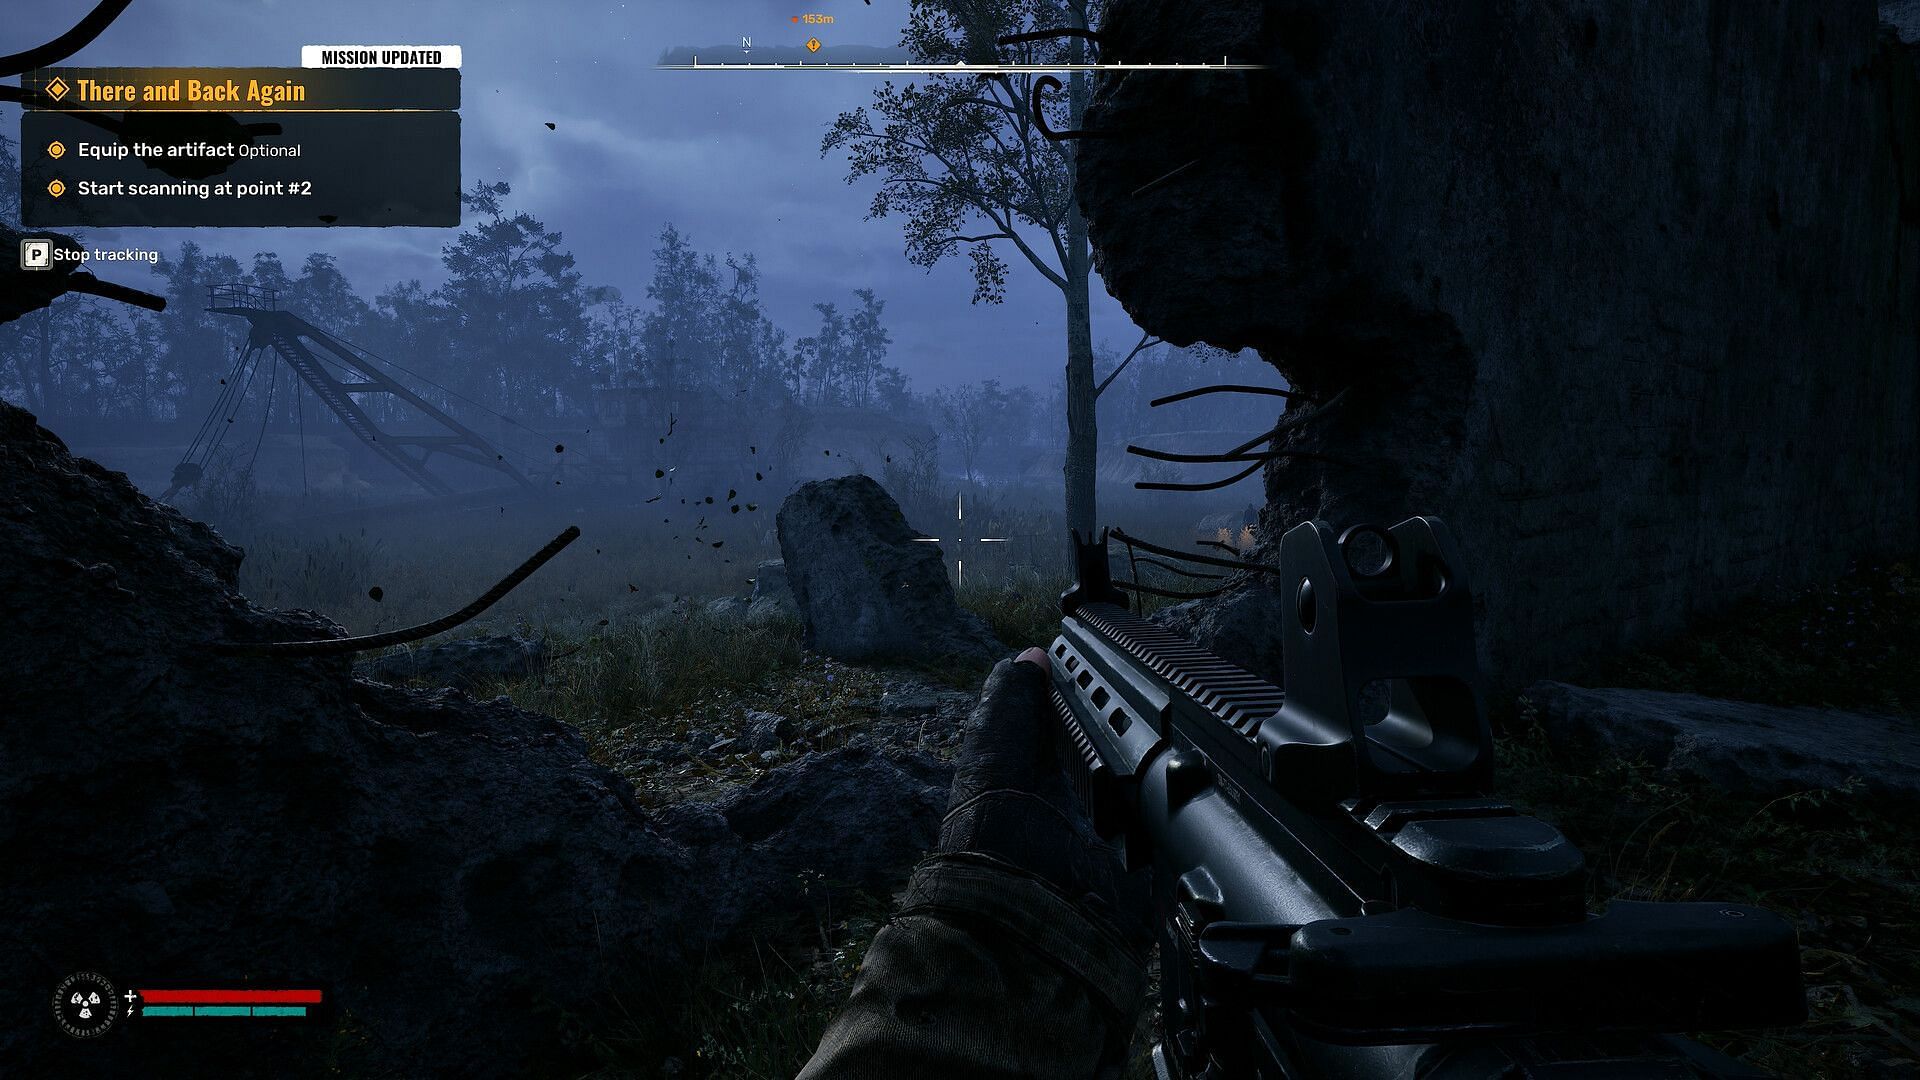
To enter the Duga Base safely, get in from the southern side. There’s a small, unguarded gate here that serves as the ideal entry point. Once inside, hug the buildings on the right as you advance toward the warehouse. Avoid open areas and the main gate, as the snipers stationed in the watchtowers can kill you in a single shot. Before entering the warehouse, save your game, just to be safe.
Inside the warehouse, you’ll encounter a Burer — one of the deadly mutants in Stalker 2. This mutant uses its psychic abilities to kill its prey. If you go near it, it will repel using force fields and yank the gun from your hand if you are too low on stamina. Use cover to stay protected and maintain a mid-range distance from it.
Also read: Stalker 2 walkthrough: How to complete All That is Left side mission
Take the Burer down quickly using a well-aimed shot to the head or several precise sniper shots from a safe distance. Once the Burer is defeated, save your game, as taking multiple attempts with this dollar store Yoda is not something you'll love to do.
The Journalist Stash is inside a locked cell at the end of the Warehouse. To open it, you must follow these steps:
- Activate the generator: Locate the generator near the cell in front of the containers and start it to restore power to the warehouse.
- Access the control room: Turn around, move forward, and head upstairs to the control room. Inside, press the red button on the console to unlock the cell doors.
Return to the now-open cell to get your rewards:
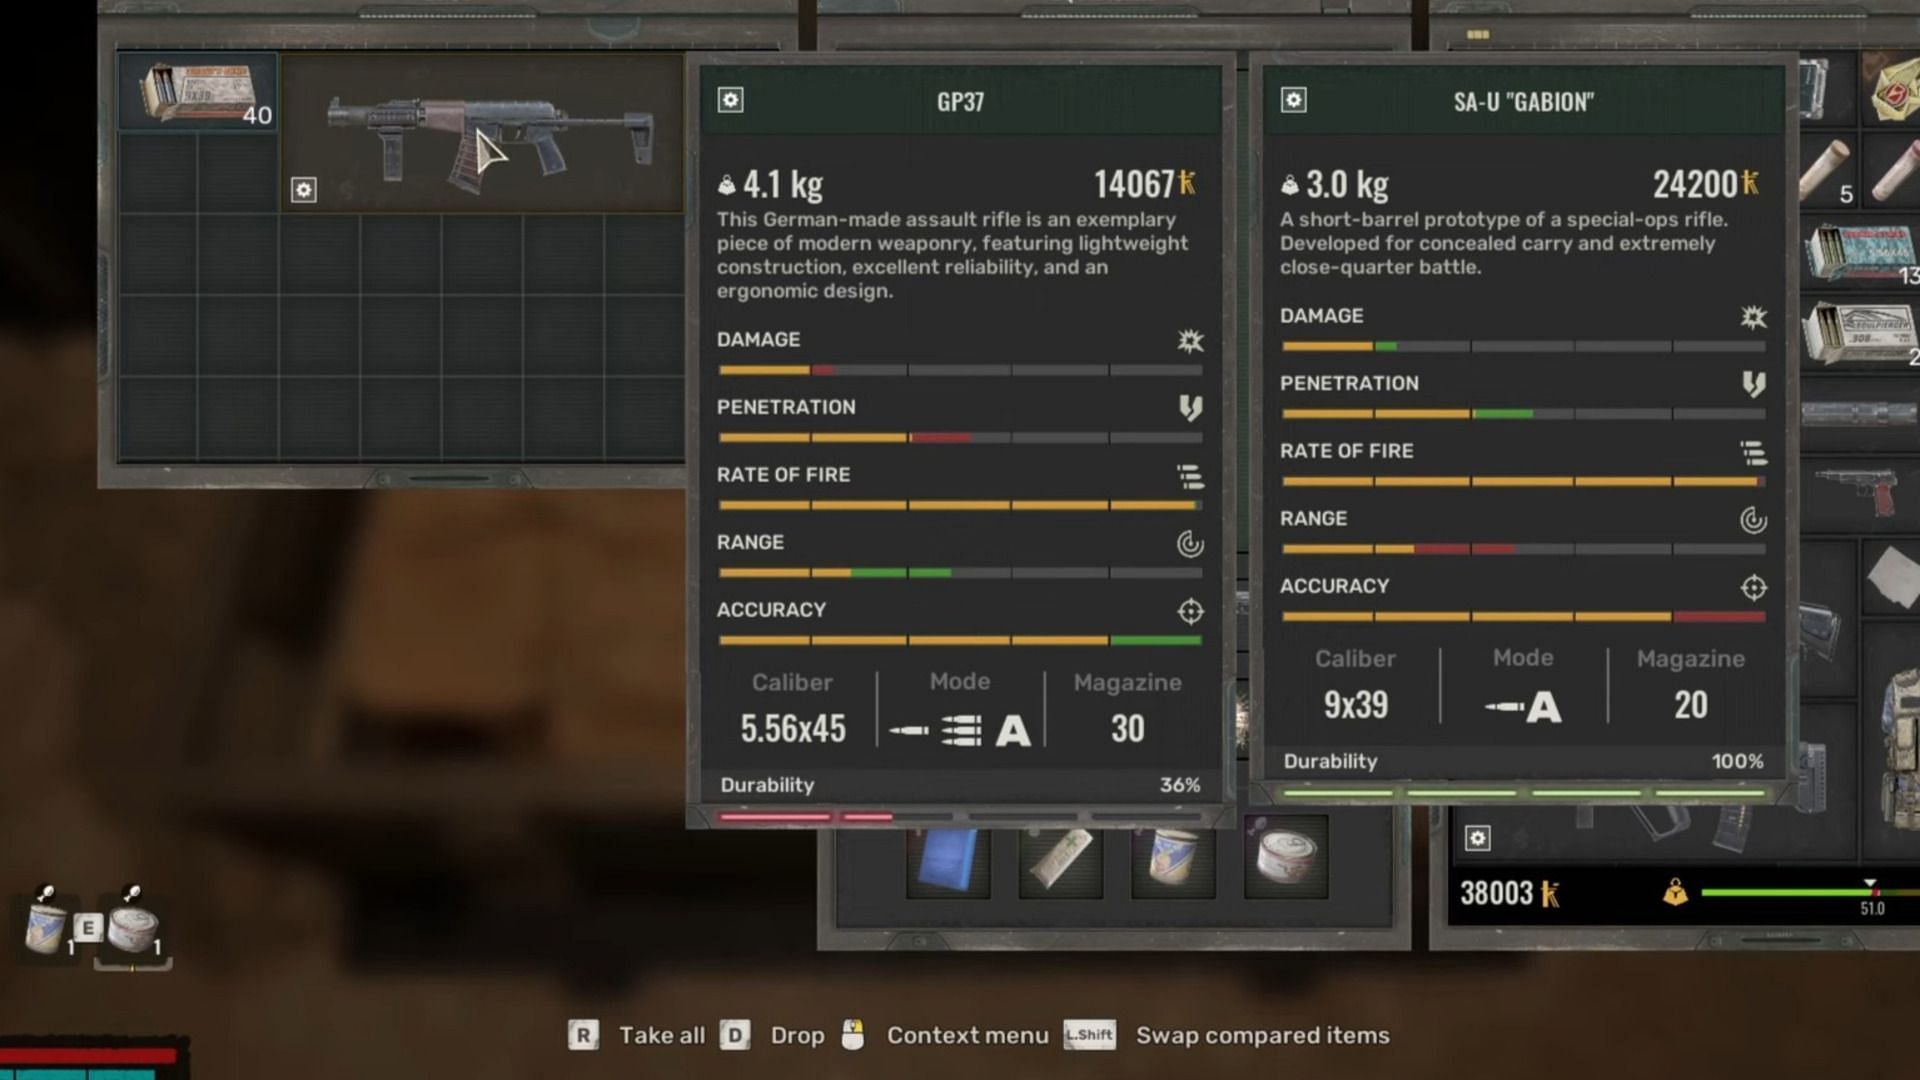
- The "SA-U GABION" Rifle with ammo.
- The "SEVA-1" Suit is located in a locker to the left of the stash.
To exit safely, retrace your steps and leave through the southern gate. Avoid the main entrance at all costs, as it will trigger the snipers.

Are you stuck on today's Wordle? Our Wordle Solver will help you find the answer.