You might want to find your saved recordings in Content Warning after capturing a spine-tingling moment or a hilarious glitch in the game. These recordings can be cherished for posterity, to share with friends or to immortalize your own bravery (or misfortune).
This guide will walk you through the simple process of finding your saved recordings in Content Warning, so you can relive the scares whenever you please. Whether you uploaded a video to the in-game platform SpookTube or used the built-in recording function, we'll help you unearth those digital chills and giggles.
Where to find saved recordings in Content Warning
Content Warning, with its unique take on the horror games genre, offers multiple ways to capture those unforgettable moments, from creepy encounters to hilarious glitches.
Looking for Crossword hints & solutions? Check out latest NYT Mini Crossword Answers, LA Times Crossword Answers, and Atlantic Crossword Answers
1) SpookTube uploads

If you have uploaded a recording to SpookTube, the in-game video-sharing platform, it won't be saved directly to your computer.
SpookTube uploads function more like social media posts within the game itself. You can revisit them by following these steps:
- Boot up Content Warning.
- Navigate to SpookTube within the game.
- Access your profile or upload history to view your saved recordings in Content Warning.
To save videos from SpookTube, first let the entire video play on the platform, and then use the Save to Desktop feature. More details on this feature later in the article.
Here's how to easily get more views in your SpookTube uploads.
2) Local recordings

If you used the built-in recording function to capture specific moments in Content Warning, here's where to find your saved treasure:
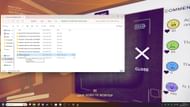
Desktop save: By default, pressing the designated key (usually E) during playback will prompt you to Save to Desktop. Look for the recording with a filename starting with content_warning on your desktop.
Record folder: Pressing F3 near the video extractor in-game will open the recording folder. This folder, located within your AppData directory, might be hidden by default. Here's how to access it on Windows:
Press the Windows Key + R to open the Run dialog box. Paste the following path, replacing <username> with your actual PC username:
C:\Users\<username>\AppData\Local\Temp\rec
It should be noted that there's currently no option to change the default save location for recordings.
How to record videos in Content Warning

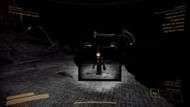
Recording something scary in Content Warning is key to amassing views on SpookTube. To snag a video, you'll first need the camera found outside your house. Head into the Old World and use the left mouse button to record.
You can even switch to selfie mode or zoom in for dramatic effect. Don't worry about recording right away - the real scares likely wait in the Old World. Once you've got your clip, wrap up recording and head back home to process it.
How to save videos in Content Warning

Saving videos in Content Warning involves a two-step process. First, you need to explore the Old World and capture footage with the camera. Once you return to your house, you'll find a device to extract the video from the camera.
After extraction, a CD containing your video will be produced. Play the CD on the TV and during playback, a Save to Desktop option will appear. Selecting this option will add the video to your directory of saved recordings in Content Warning.
With this knowledge in hand, you're no longer just a participant in the game's chilling world, but an archivist of your own spooky experiences. Go forth, unearth those digital gems, and relive the scares (or laughs) for yourself or friends with saved recordings in Content Warning.
For more articles and guides on Content Warning, check out the following:
- Is Content Warning free to play?
- How to update Thunderstore mod manager for Content Warning
- Best Content Warning tips and tricks
- Best Content Warning mods
Are you stuck on today's Wordle? Our Wordle Solver will help you find the answer.
