

'%20x='0'%20y='0'%20height='100%25'%20width='100%25'%20%0A%20%20%20%20%20%20%20%20%20%20xlink%3Ahref='data:image/jpg;base64,/9j/2wBDAAYEBQYFBAYGBQYHBwYIChAKCgkJChQODwwQFxQYGBcUFhYaHSUfGhsjHBYWICwgIyYnKSopGR8tMC0oMCUoKSj/2wBDAQcHBwoIChMKChMoGhYaKCgoKCgoKCgoKCgoKCgoKCgoKCgoKCgoKCgoKCgoKCgoKCgoKCgoKCgoKCgoKCgoKCj/wgARCAAGAAoDASIAAhEBAxEB/8QAFgABAQEAAAAAAAAAAAAAAAAAAAUI/8QAFAEBAAAAAAAAAAAAAAAAAAAAAf/aAAwDAQACEAMQAAAAzvCE/8QAHxAAAgAFBQAAAAAAAAAAAAAAAQIAAwUSISIlMVKh/9oACAEBAAE/AKSmz1J5TlVnpYwZQTjPMaevsf/EABURAQEAAAAAAAAAAAAAAAAAAAAC/9oACAECAQE/AKf/xAAVEQEBAAAAAAAAAAAAAAAAAAAAAv/aAAgBAwEBPwCX/9k='%3E%3C/image%3E%3C/svg%3E)
Pripyat in Stalker 2 is one of the most iconic and resourceful areas in the game, offering high-level gear and advanced opportunities for exploration. However, accessing Pripyat isn’t straightforward — it’s tied to the storyline. That said, there is a clever way to get there early or through standard progression. Mastering these methods can give you a significant edge in your journey through the Zone.
Here’s a detailed guide to help you navigate the journey to Pripyat in Stalker 2
Unlocking the path to Pripyat in Stalker 2
Looking for Crossword hints & solutions? Check out latest NYT Mini Crossword Answers, LA Times Crossword Answers, and Atlantic Crossword Answers
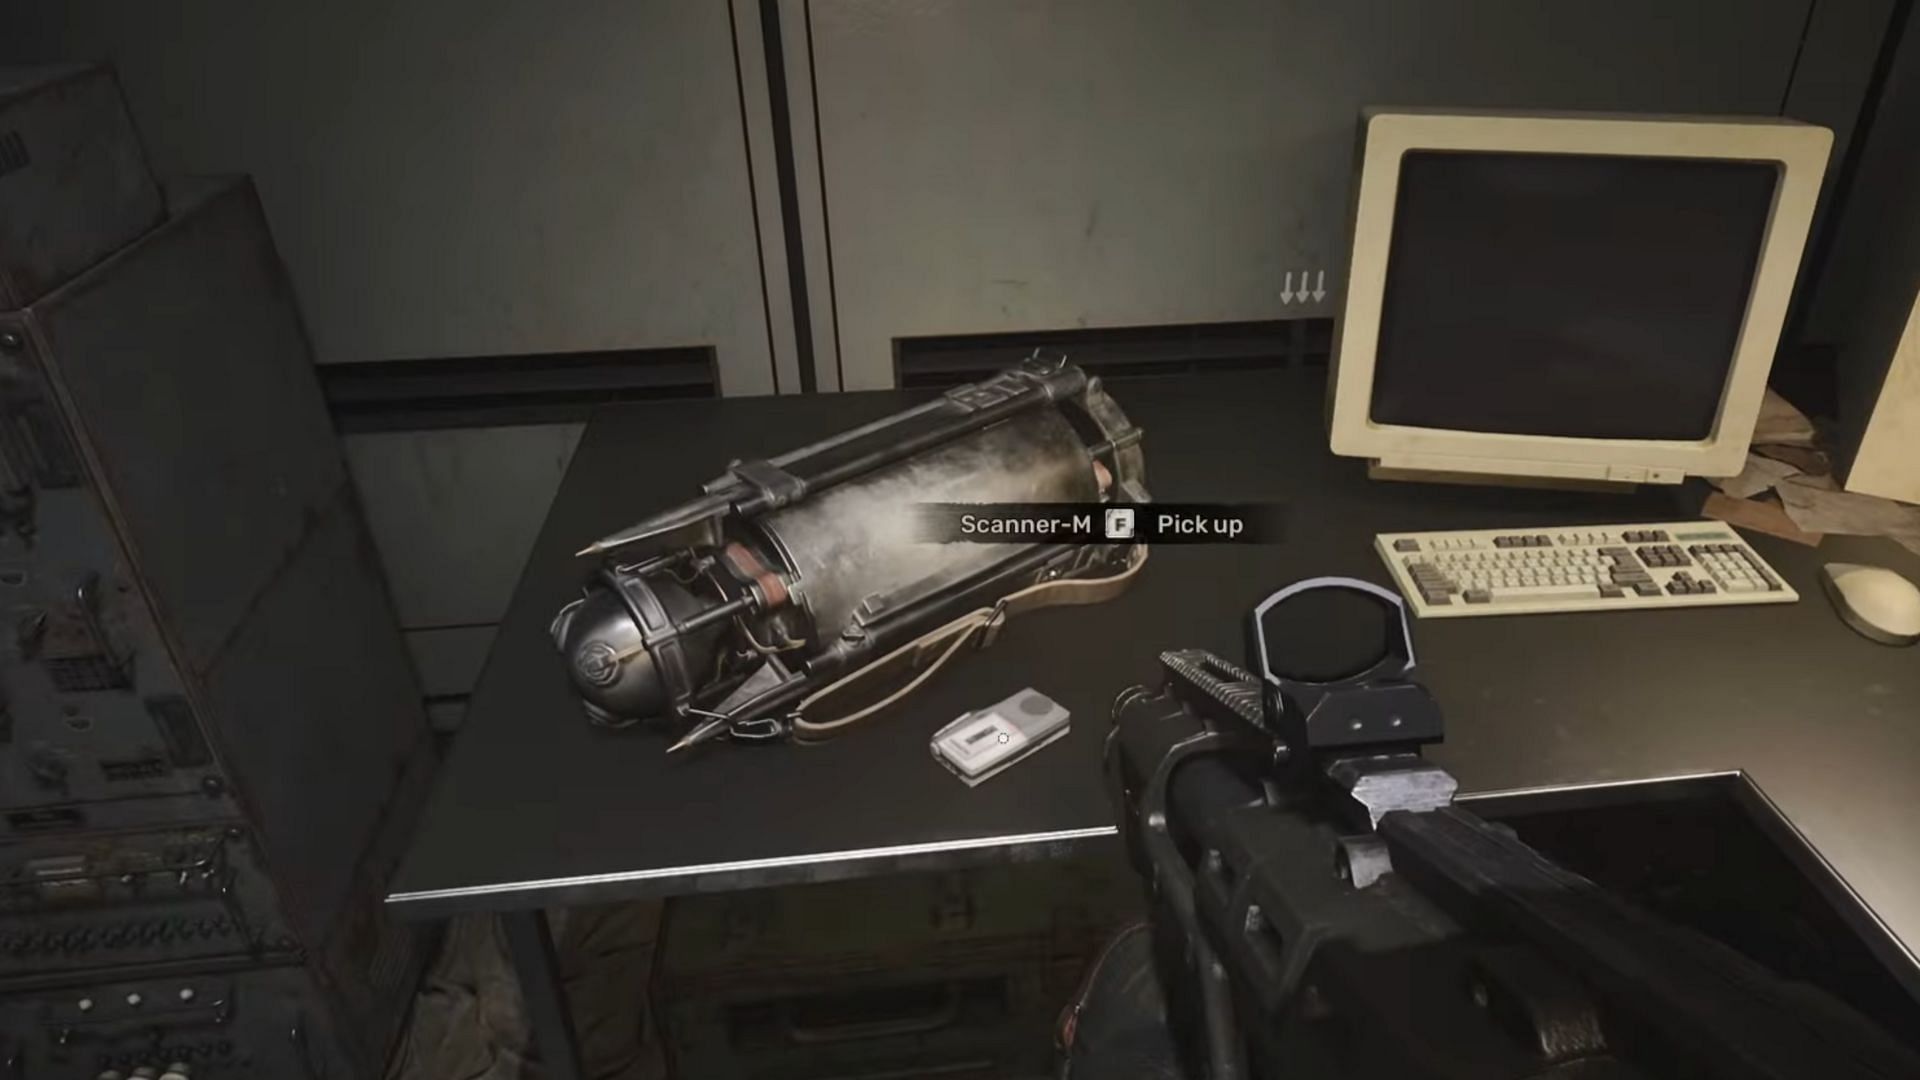
To reach Pripyat in Stalker 2 during normal gameplay, your key tool is the M-Scanner, which is obtained during the mission The Boundary. This device helps you bypass the electro-anomalies blocking the path. Once you have the M-Scanner, either use it yourself or trade it for a Pripyat permit. Let’s break down both options:
Using the M-Scanner yourself
- Head to Yaniv station: Locate the Tornado Anomaly near the station and find the tunnel near the abandoned train yard.
- Loop around the Anomaly: Carefully navigate the anomaly to reach the tunnel entrance.
- Set up the M-Scanner: Inside the tunnel, find the glowing semi-circle and place the scanner to deactivate the anomalies.
- Proceed with caution: Crouch and walk through the cleared path, using bolts to detect any lingering hazards.
This method provides direct access to Pripyat and Jupiter, making it a great choice if you prefer hands-on exploration.
Also read: How to get to the Zalissya Bar Stash in Stalker 2
Trading the M-Scanner for a Permit
After completing the Boundary mission you'll get the M-Scanner, which you'll need to trade to get to Pripyat.
- Find Dmytro Nor: At Yaniv Station, locate this NPC to trade the M-Scanner.
- Get the permit: Nor will exchange the scanner for a Pripyat permit, which varies based on your difficulty level (easier settings yield more).
- Use the permit: The permit allows you to unlock the Yaniv base door, making future travels to Pripyat smoother.
This route is popular for players who want a simpler path to Pripyat without managing anomalies directly.
Reaching Pripyat in Stalker 2 early
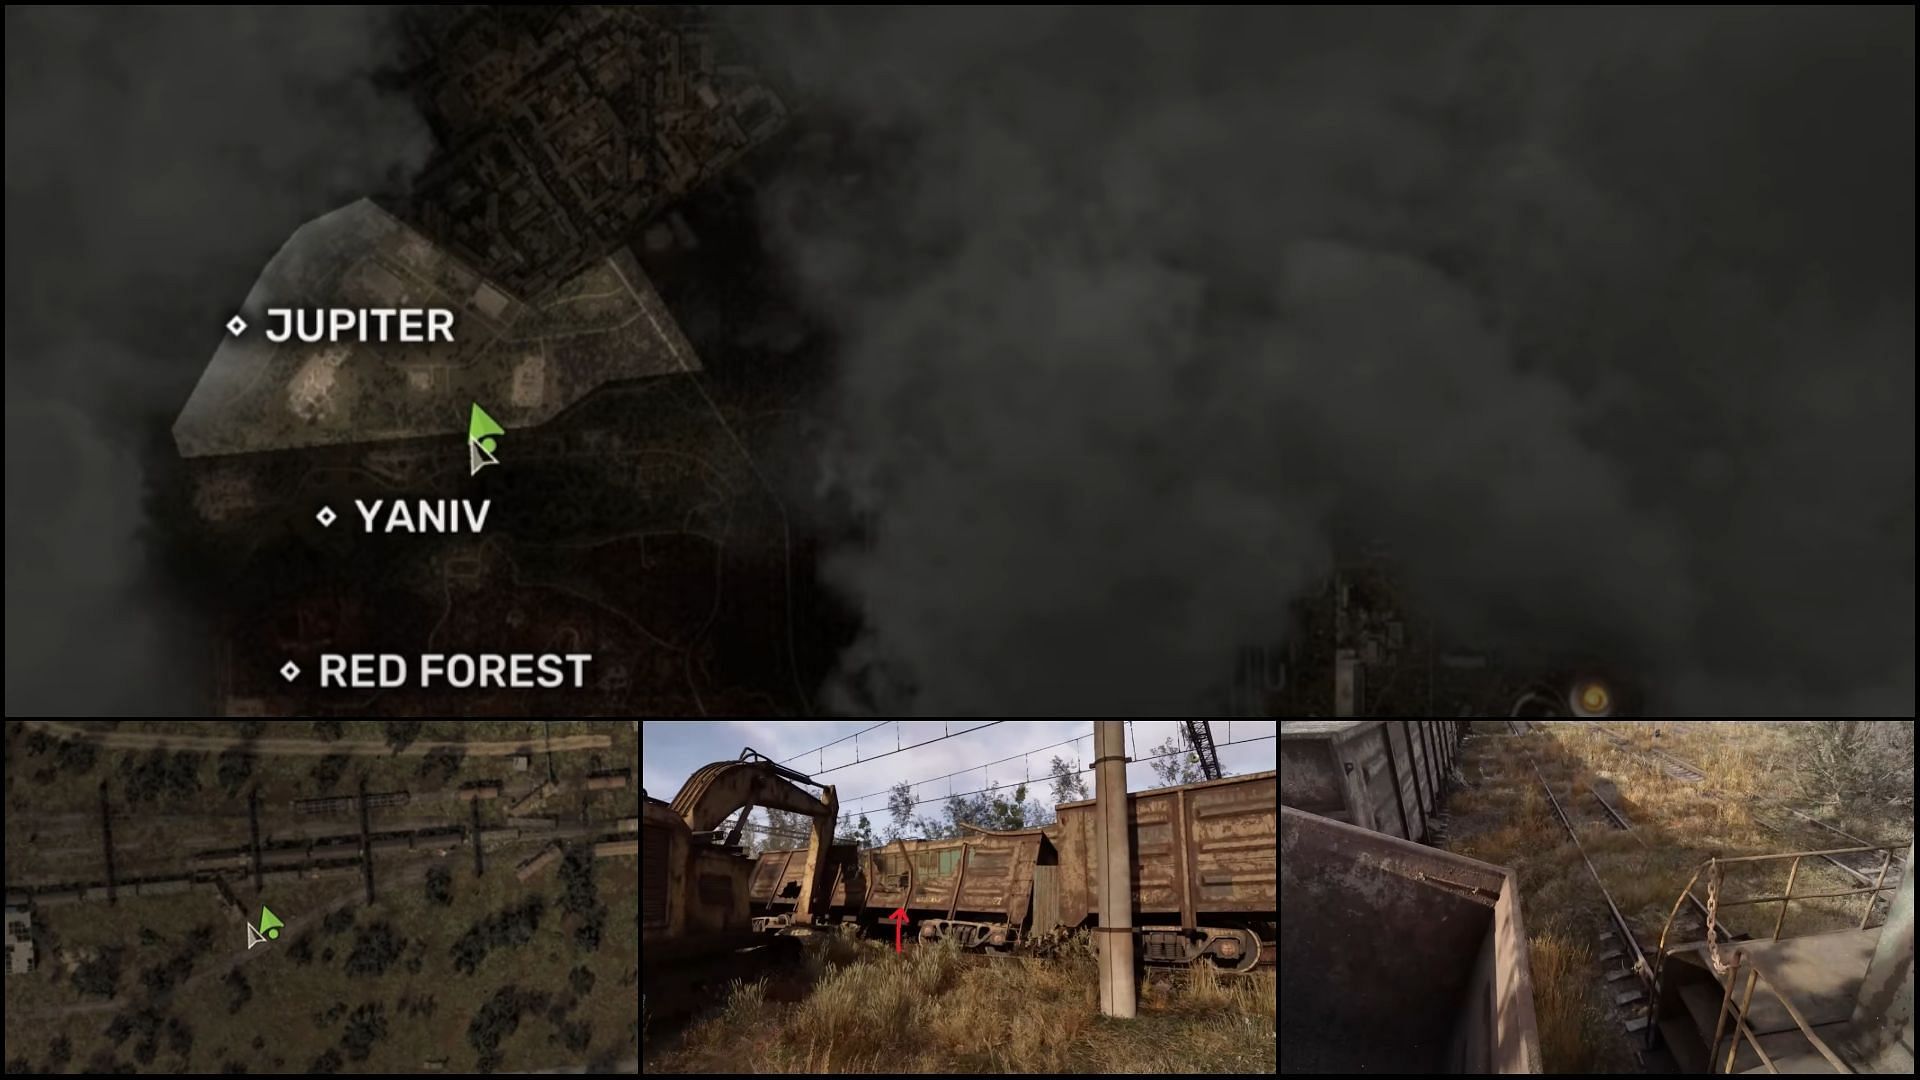
If you’re eager to explore Pripyat early, there’s a way to bypass both the storyline and the M-Scanner:
- Travel to the Garbage Region: Locate the border between Yaniv and Jupiter.
- Climb onto the Train bogie: Look for a specific broken train bogie near the border to start your shortcut.
- Run: Mark the location in the GPS and carefully follow the tracks to make your way into Pripyat.
While this method is faster, it comes with fewer rewards and skips parts of the storyline. Use it wisely if you’re looking for a quick edge in the game.
What to do after reaching Pripyat in Stalker 2
After reaching Pripyat, visit the Palace of Culture to find a guide. This NPC will help you safely return to other areas. Keep in mind that skipping parts of the story with shortcuts may limit your experience and loot, so consider your options carefully.
Also read: How to get Spitfire Assault Rifle in Stalker 2

Are you stuck on today's Wordle? Our Wordle Solver will help you find the answer.