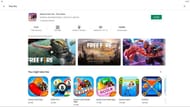
Free Fire has gained an extensive reach globally in the last few years with frequent introduction of updates.
The battle royale game is available on Android and iOS platforms. And players can also play the quick-paced BR title on their PCs using applications called emulators.
There are several emulators present on the internet that players can download and use. And BlueStacks is one of the most popular choices amongst users.
This article provides a step-by-step guide on how to play Free Fire on PCs via emulators.
Playing Free Fire on PCs using emulators in April 2021
BlueStacks is one of the oldest and most used emulators, thanks to the wide variety of features that it offers. Here are some of the key features that are available:
- Pre-set game controls with ease of customization.
- High definition graphics and high FPS.
- Shooting mode.
- Real-time translation.
- Ability to record gameplay with a single key.
- Multiple utility features, including disk clean-up and screenshot.
Users can follow the steps given below to download and play the battle royale title via the renowned emulator:
Step 1: Users must download the BlueStacks emulator on their PCs via its official website. The link for it has been provided below:
BlueStacks website: Click here.
Step 2: After installing the emulator, players should log in to their Google accounts.

Step 3: Open the Google Play Store application present on BlueStacks and type "Free Fire" on the search bar.

Step 4: Several outputs would appear. Click on the "Install" button present beside the most relevant results.
Step 5: The game would soon be downloaded and installed on BlueStacks. Once the process is complete, players can log in to their Free Fire accounts and enjoy playing the game.

It is essential to note that players should follow similar steps to download the game on emulators such as MEmu Play that have Google Play Store.
Check out the latest Free Fire MAX redeem codes here.