
'%20x='0'%20y='0'%20height='100%25'%20width='100%25'%20%0A%20%20%20%20%20%20%20%20%20%20xlink%3Ahref='data:image/jpg;base64,/9j/2wBDAAYEBQYFBAYGBQYHBwYIChAKCgkJChQODwwQFxQYGBcUFhYaHSUfGhsjHBYWICwgIyYnKSopGR8tMC0oMCUoKSj/2wBDAQcHBwoIChMKChMoGhYaKCgoKCgoKCgoKCgoKCgoKCgoKCgoKCgoKCgoKCgoKCgoKCgoKCgoKCgoKCgoKCgoKCj/wgARCAAGAAoDASIAAhEBAxEB/8QAFgABAQEAAAAAAAAAAAAAAAAAAAQI/8QAFAEBAAAAAAAAAAAAAAAAAAAAA//aAAwDAQACEAMQAAAAzLMG3//EABsQAAEFAQEAAAAAAAAAAAAAAAEAAgMEIRFx/9oACAEBAAE/ABaquiDDVa0ga8aTqMsXTyPPF//EABYRAQEBAAAAAAAAAAAAAAAAAAEAEf/aAAgBAgEBPwAMb//EABYRAQEBAAAAAAAAAAAAAAAAAAEAIf/aAAgBAwEBPwBcv//Z'%3E%3C/image%3E%3C/svg%3E)
The Storm in Kingdom Come Deliverance 2 is the climactic finale of the first act. This mission places Henry in a dire situation within Trosky Castle. During this mission, you need to maintain stealth and carefully calculate your encounters, or this quest will end much faster than you could have anticipated.
This guide shares everything you need to know to successfully complete The Storm main quest in Kingdom Come Deliverance 2.
How to complete the The Storm main quest in Kingdom Come Deliverance 2
Looking for Crossword hints & solutions? Check out latest NYT Mini Crossword Answers, LA Times Crossword Answers, and Atlantic Crossword Answers
Phase 1: Trosky castle
Gearing up and going stealth
At the start of this quest, Henry has limited access to his usual equipment, forcing him to work with whatever he can find. Looting a fallen guard provides a temporary set of gear, though it is far from ideal. This is why the best approach for this section is stealth. Silently go in and eliminate guards where necessary or sneak past them altogether.
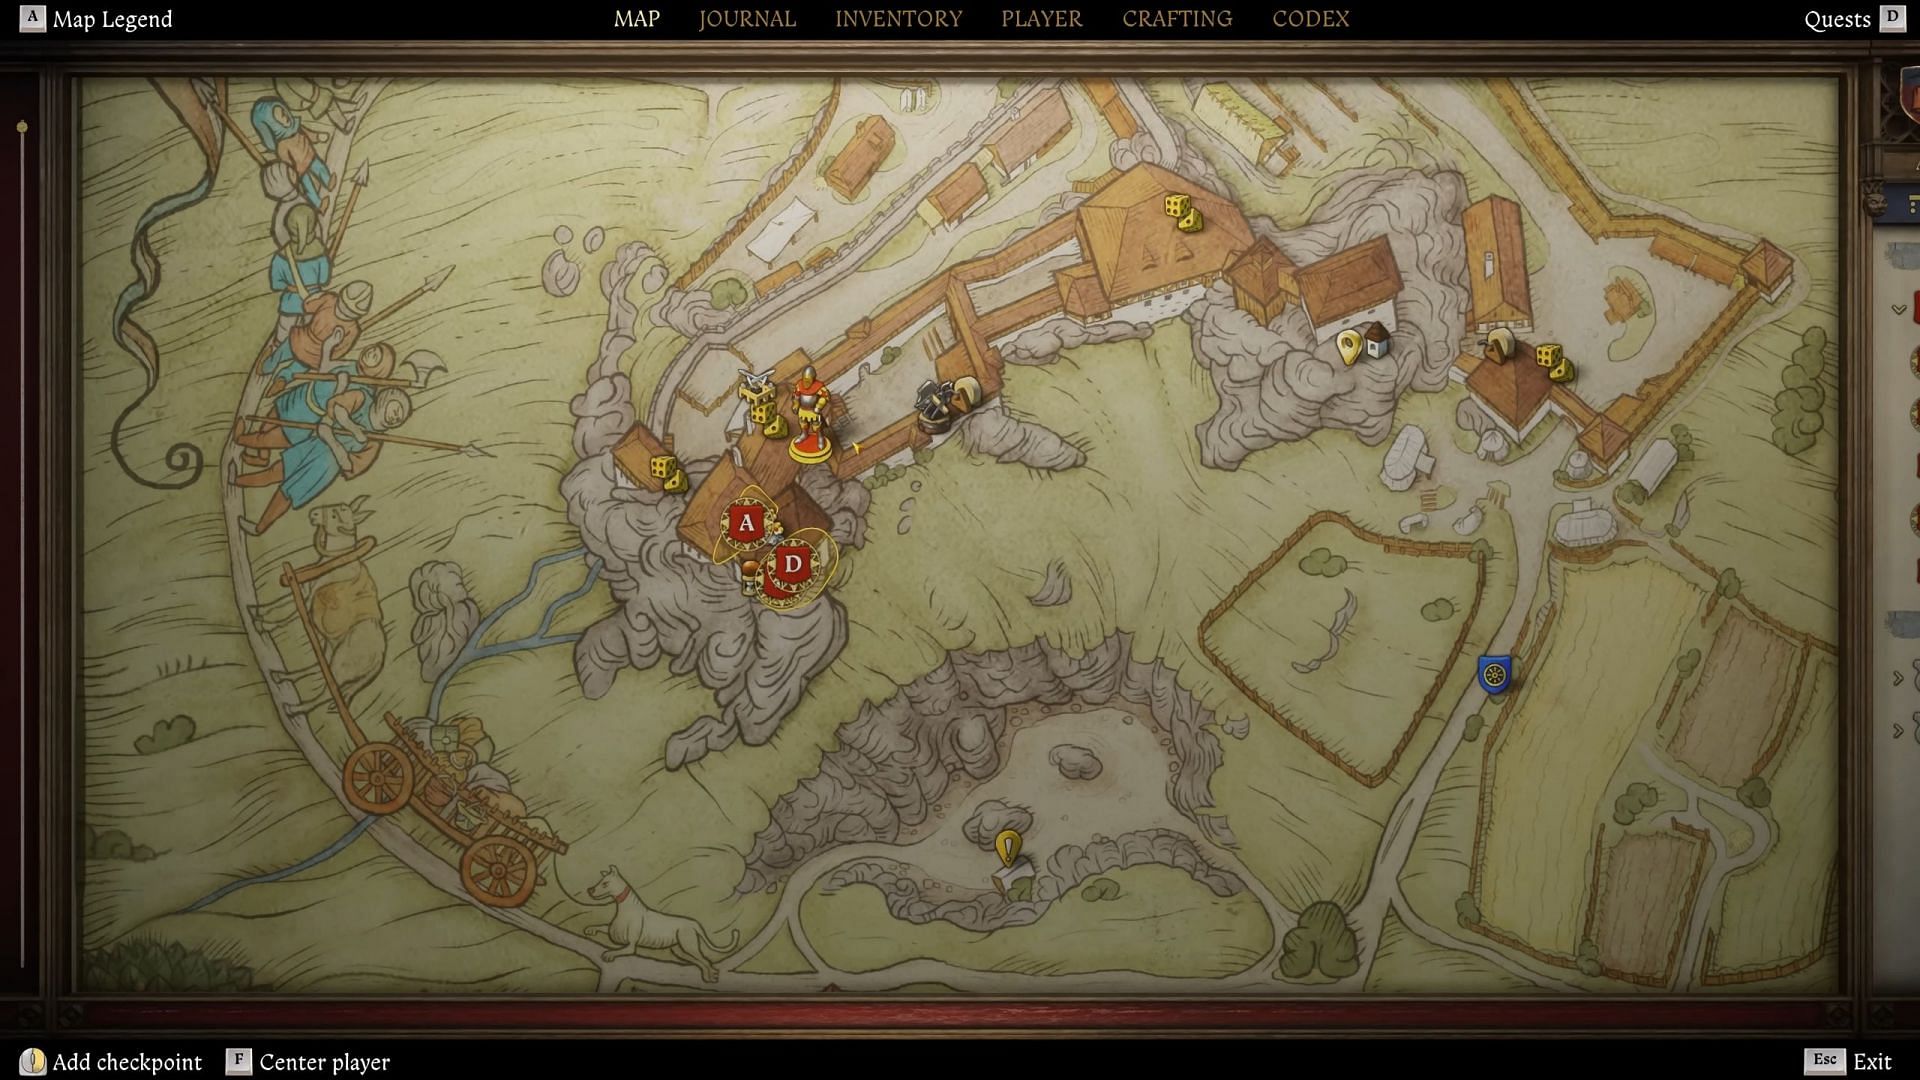
- Start by moving toward the wooden walkway leading to Crone Tower, situated in the western section of the castle.
- Use stealth and thievery skills to bypass or silently dispatch guards.
- Reach the top of the tower.
Read more: Kingdom Come Deliverance 2 walkthrough: How to complete For Whom the Bell Tolls main quest
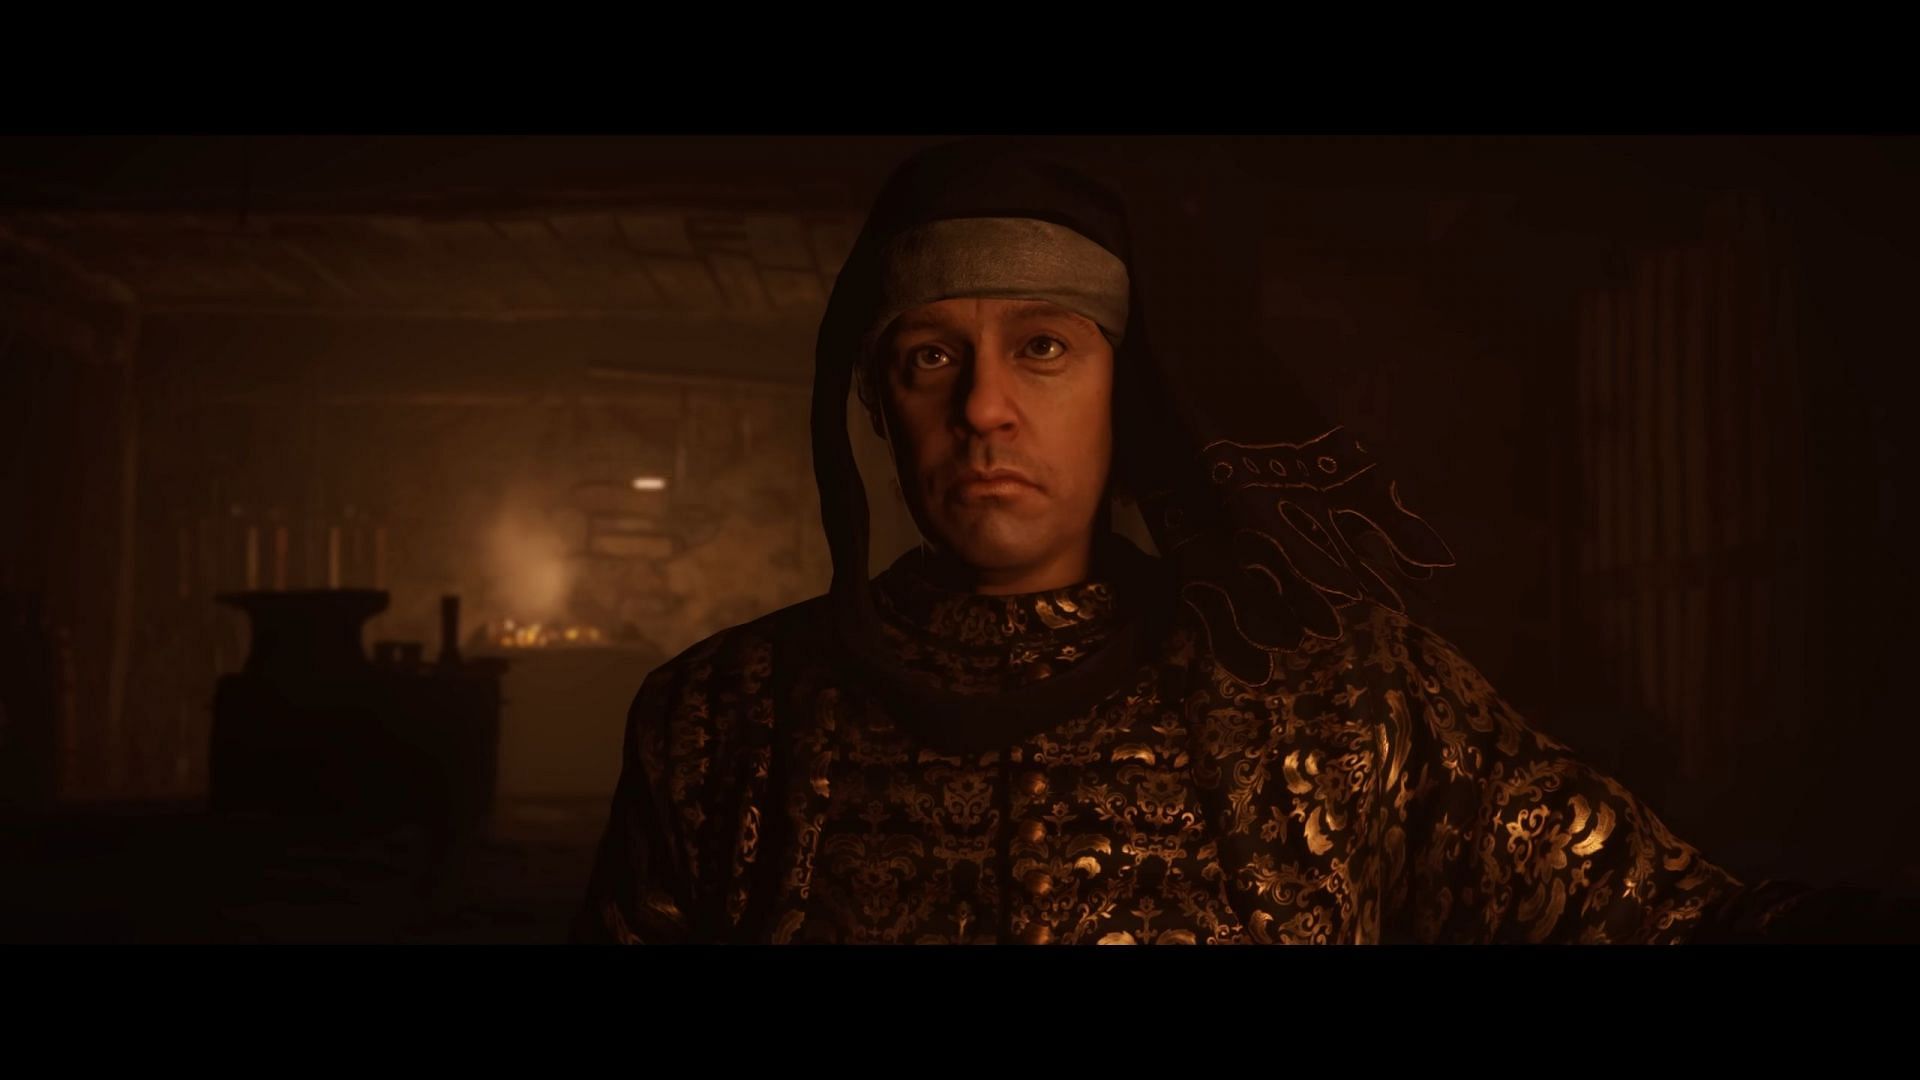
Phase 2: Istvan Toth
Deciding Toth’s Fate
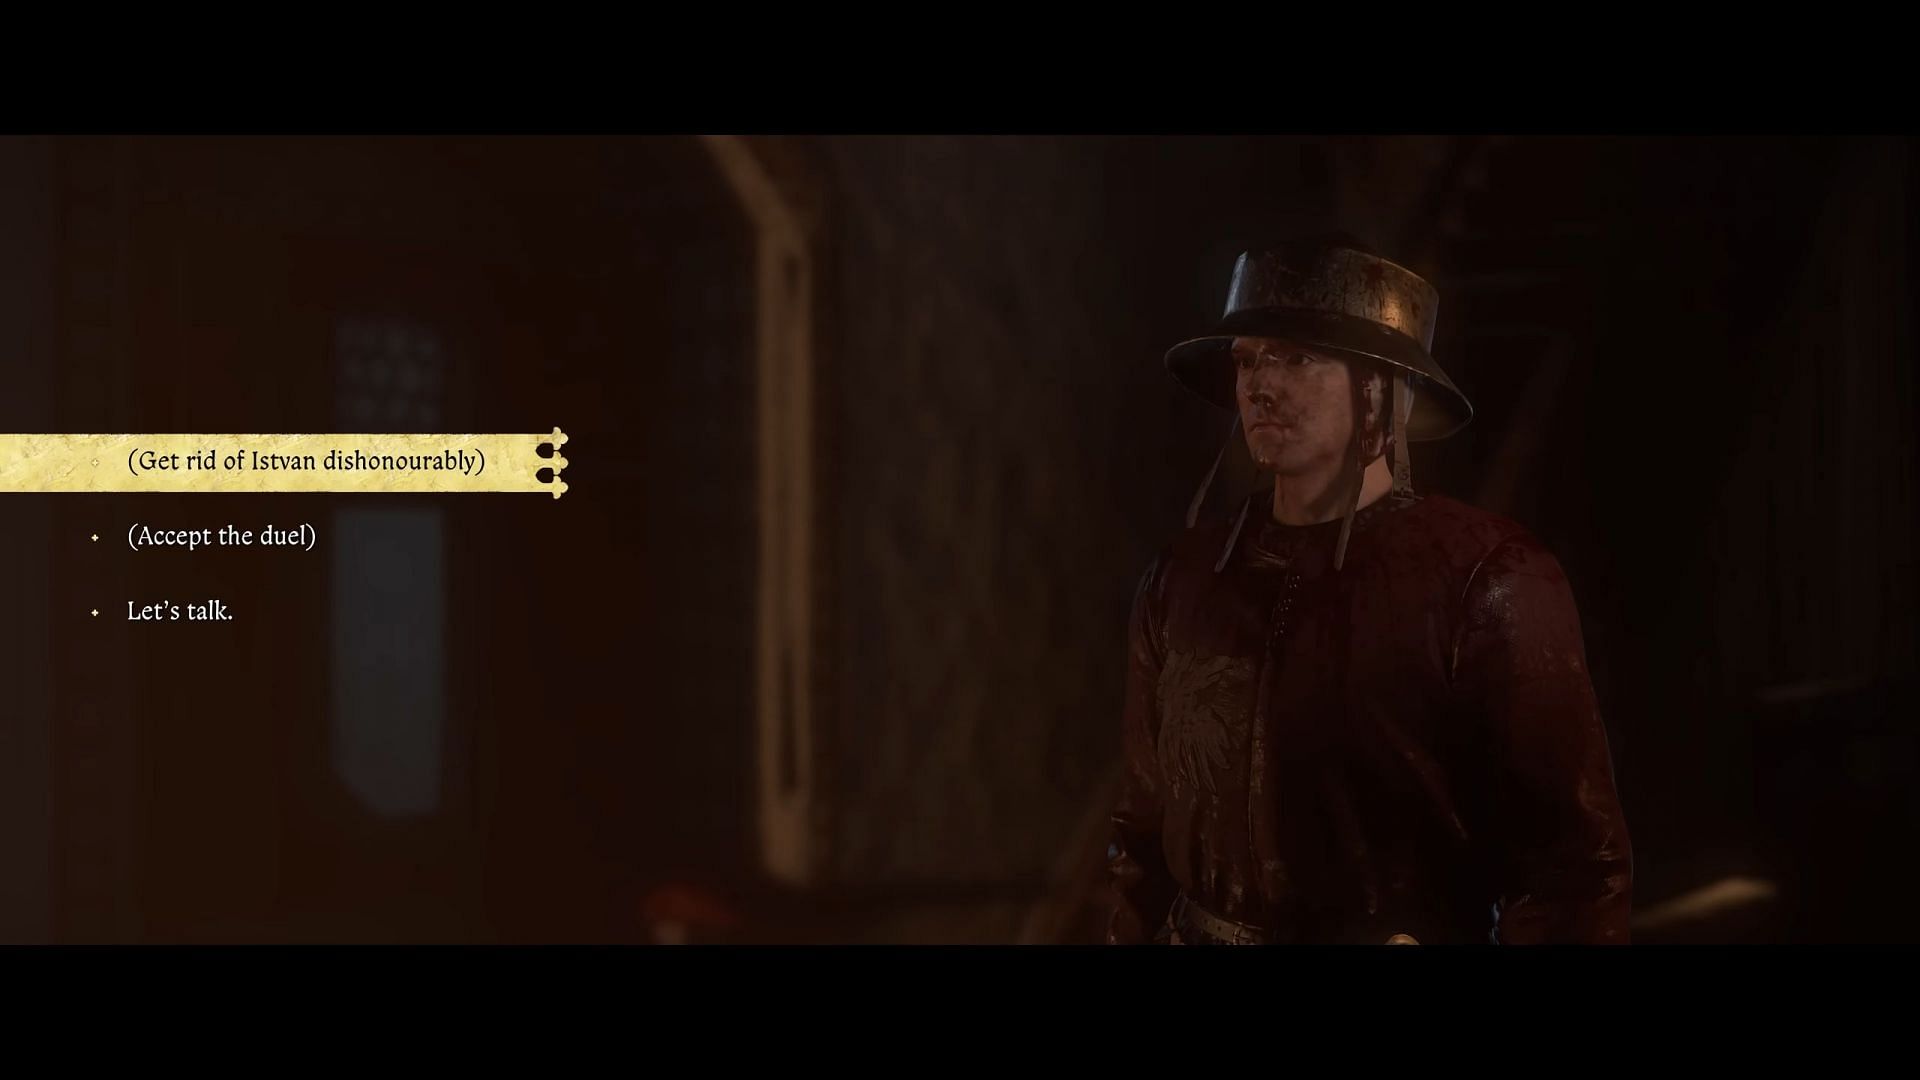
At the top of Crone Tower, Henry comes face-to-face with Istvan Toth, an old adversary. This moment presents you with multiple choices:
- Interrogate Toth – Engage him in dialogue to learn about his motives before deciding his fate.
- Fight Dishonorably – Strike him down immediately, ensuring a swift but less honorable victory.
- Engage in a Duel – Challenge Toth fairly, though this is a difficult fight as he wields Henry’s sword and is in better condition.
Toth is quite a challenging boss, and given Henry’s weakened state, carefully time blocks and counterattacks to avoid hitting the ground. Upon victory, a cutscene will show Toth’s demise, and Henry will reclaim Radzig Kobyla’s Longsword. Additionally, Henry’s confiscated belongings and key documents can be found in the upper chamber.
Phase 3: Escape from Trosky castle
Finding the hidden exit
Once Toth is dealt with, make your way to the dungeons beneath Maiden Tower. Inside a cell on the left-hand side, a hidden staircase leads to an underground passage in Kingdom Come Deliverance 2.
- Follow the staircase downward into a concealed tunnel.
- Midway through, look for a pool of water where a rope dangles with a pail—an optional collectible, the Gold Emperor’s Badge, can be found nearby.
- Continue through the passage until you come out to the hillside.
Also Check: Kcd2 Interactive Map
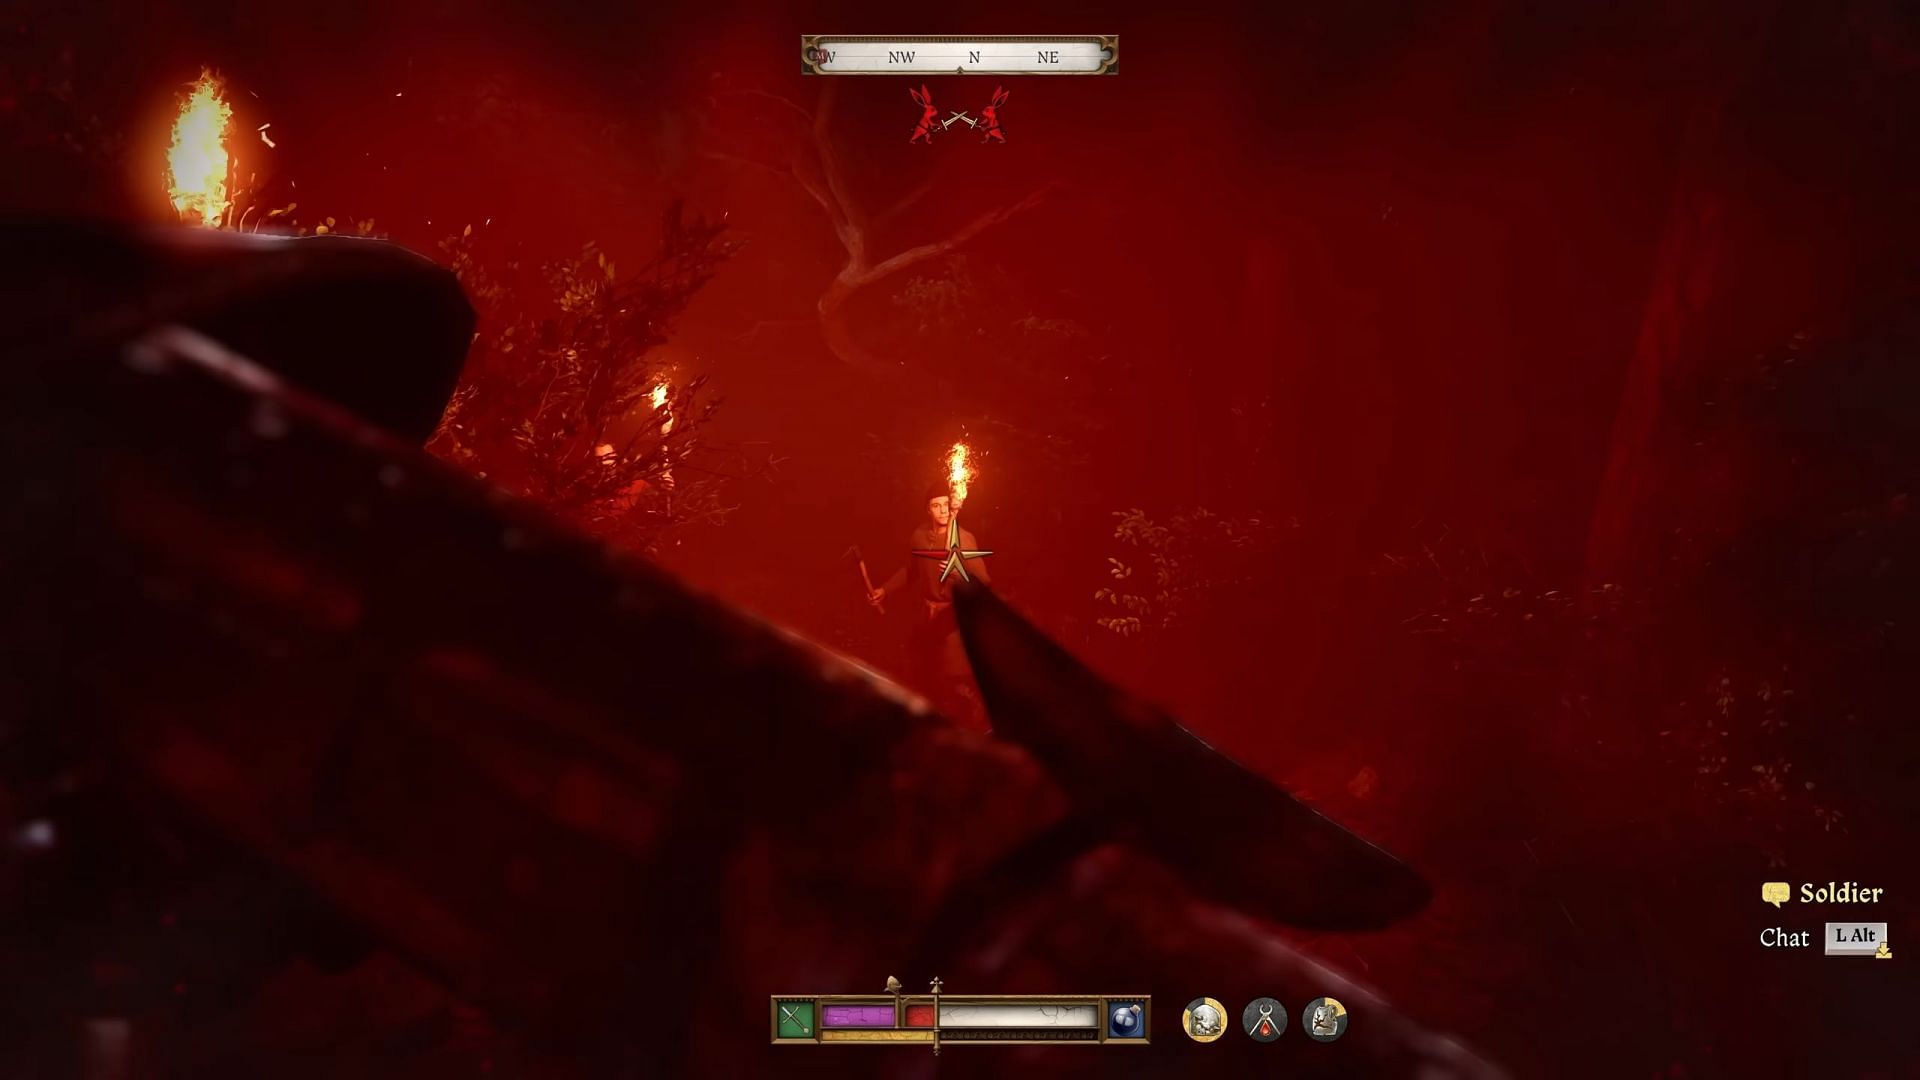
Phase 4: Evading the castle guards
Outside the tunnel, Henry and his companions realize the surrounding hills are teeming with patrols. Avoiding combat is necessary because of Henry’s weakened state and the overwhelming number of guards.
- Minimize noise and visibility – Unequip cumbersome gear to reduce detection chances.
- Use cover effectively – Stick to bushes and low ground to stay hidden.
- Avoid direct confrontation – Engaging in combat could lead to overwhelming odds and certain death.
By turning right from the tunnel exit and heading up the hill, you can take a safer route toward the next objective.
Also read: Is there a romance in Kingdom Come Deliverance 2?
Phase 5: Meeting with Mika
Securing assistance
The goal is to reach Mika in Kingdom Come Deliverance 2, an ally of Katherine’s who waits further along the main road. However, you will find him being harassed by a guard.
- Approach cautiously and take out the guard silently.
- Speak with Mika, who will inform Henry about coachmen positioned further south.
- This interaction triggers an autosave, securing progress before the final stretch.
Phase 6: The final escape route
Navigating the Hillside Roads
The last part of the escape involves going through a hazardous path filled with additional patrols and horsemen.
- Head east – Avoid engaging nearby guards and descend a sloping path.
- Move south-southeast – Keep to the edges of the road, using open terrain and bushes for cover.
- Approach the ruins – An autosave triggers here, but the area is heavily patrolled, so take your steps carefully.
By sticking to the right-hand side and advancing carefully, you'll reach a marked location near "Apollonia," triggering the final cutscene.
Completing this last step will mark The Storm completed. Henry and his companions are rescued, marking the transition to the game's second major act. The next segment takes place in Suchdol-Kuttenberg, but you can still freely travel between regions in Kingdom Come Deliverance 2.

Are you stuck on today's Wordle? Our Wordle Solver will help you find the answer.