Side missions in Stalker 2 are an excellent way to earn extra coupons, which is the currency that can prove to be very valuable in the desolate nuclear wasteland of the Chornobyl Exclusion Zone. One such mission, In The Name Of Science, involves finding some electronic collars and bringing them back, with some rewards awaiting you at the end of the mission.
However, there are some choices available to you that can influence the mission's events and ultimately affect its outcome. Below is a guide on completing this mission in Stalker 2, along with the different choices you will encounter.
Also read: Stalker 2: Point of no return explained
Looking for Crossword hints & solutions? Check out latest NYT Mini Crossword Answers, LA Times Crossword Answers, and Atlantic Crossword Answers
Completing In the Name of Science side mission in Stalker 2
Some prerequisites must be completed to access this mission. First, complete the main story mission In Search of Past Glory, which involves delivering the documents to Shcherba.
After that is done, complete the side mission Visions of Truth following which Shcherba will contact you via radio. Then, you can begin the In The Name Of Science mission by accepting the offer. Note that you will also get an option to decline the offer by saying that you're too busy.

If this is selected, the mission can still be started, but you will need to go to the Roofed Warehouse area of the Chemical Plant, and then speak with Shcherba to start it. He will then ask you to bring him some electronic collars that are located all over the map. In total, you need to collect four collars.
Every Electric Collar location for the In The Name of Science side mission in Stalker 2
Location 1 (Malachite)
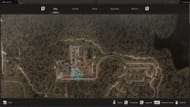

The first collar can be found in Malachite. Upon reaching the marker, you will discover that its location has moved. Head to the updated spot, where a group of soldiers have acquired the collar, and you can either fight or pay to acquire the collar. For the sake of simplicity, pay them off and acquire the collar.
Location 2 (Red Forest)

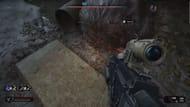
Next, proceed to Red Forest, near the Containers area, which you may have visited during the mission "Just Business". You may encounter human enemies here, so take them down. Afterward, enter the area blocked off by large crates and boxes, where a Pseudogiant enemy awaits. It will be challenging to take it down, but once done you will acquire another collar.
Location 3 (Zaton)
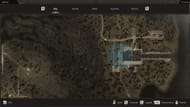
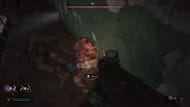
Head over to Zaton and to the Hydrodynamics Lab building, which is occupied by enemies. Clear out all the enemies to receive less damage from hostiles, as a Controller is roaming the area wearing the collar. Use your shotgun to land effective and powerful hits on it to take it down, and loot its body to acquire the third collar.
Location 4 (Wild Island/Garbage)

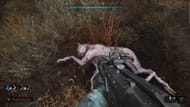
Make your way to Wild Island to acquire the fourth collar, which can be found by killing the enemy that keeps spawning. Reach the boathouse area to take it down with the assistance of two other friends, after which you can claim the collar.
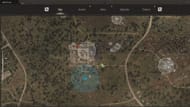
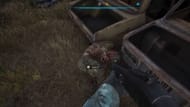
Alternatively, the mission marker might direct you to the Brood area in Garbage, if you had previously encountered the above enemy during another mission. Here, you will find a Snork scavenging near a cluster of cars. Take it down to acquire the collar.
Also read: Stalker 2 walkthrough: How to complete An Invisible Threat mission
Once the above steps have been completed and four collars have been acquired, head to Shcherba in the Roofed Warehouse. Upon examining the collars, he will determine that they are jammed and require fixing. This will take you to the Storage on the Hill POI, where you will need to venture inside to continue the mission.
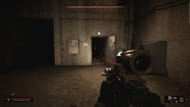
Take out the enemies and enter the room with the open door, where you will need to flip a switch. Continue along the path, passing through doors until you reach a room with acid covering the floor. There, you will find another lever to activate. Once done, carefully avoid the acid pools and proceed down the stairs. Here, expect to fight against many smaller rodent enemies.
Defeat them and head north, deeper into the area where a third lever will be present. Flip it to unlock a door in the room where the rodents were first encountered, and head through it. Two Poltergeists will be encountered here, so be wary of them and use your shotgun to take them down.
Once done, head up the stairs in this room and look for a ladder in the southwest corner. Climb it to proceed.
Turn and head to the northeastern end of the room, where you will find an open door. Head through it and immediately head east. Electric sparks will be visible on the floor, so avoid them and head downstairs.
On this lower level, find a table with the jammer. Now, you have two options, either disable or recalibrate the jammer. One option ends the mission immediately, while the other continues it.
- Disabling the jammer will continue the mission and have you return to meet Shcherba, who will be pleased with you.
- Recalibrating the jammer will lead to criticism from both Dvupalov and Shcherba for your choices. Exiting the bunker will end the mission, and you will receive your payment in the form of coupons. The dialogue prompts will not affect the eventual outcome.

If the jammer is recalibrated, the mission ends. On the other hand, destroying and as a result disabling the jammer will have Shcherba invite you back to the warehouse. After speaking with Dvupalov, who will offer you some Vodka, head into the room where you will find Shcherba accompanied by three bloodsuckers. Following the conversation, he will lead you to your reward.

Head into the room following the marker, but it will suddenly be locked. Now, consume the vodka. Skif realizes Shcherba has betrayed him and now has to fight the three bloodsuckers. After defeating them, follow the marker to confront Shcherba. A cutscene will play, revealing his true intentions.
When prompted, choose to attack or spare Shcherba. If he is attacked, your standing with the Scientists goes down, but there are no negative repercussions for sparing him. In any case, Dvupalov will give you a Gauss Gun, following which you can leave the lab to end the mission.
Read more Stalker 2 articles below:
- How to find Lex The Legend's stash in Stalker 2
- 7 games similar to Stalker 2 that you can play on PS5
- Who is Strelok in Stalker 2?
- Stalker 2's unique Easter egg references the Harry Potter series
Are you stuck on today's Wordle? Our Wordle Solver will help you find the answer.
