

'%20x='0'%20y='0'%20height='100%25'%20width='100%25'%20%0A%20%20%20%20%20%20%20%20%20%20xlink%3Ahref='data:image/jpg;base64,/9j/2wBDAAYEBQYFBAYGBQYHBwYIChAKCgkJChQODwwQFxQYGBcUFhYaHSUfGhsjHBYWICwgIyYnKSopGR8tMC0oMCUoKSj/2wBDAQcHBwoIChMKChMoGhYaKCgoKCgoKCgoKCgoKCgoKCgoKCgoKCgoKCgoKCgoKCgoKCgoKCgoKCgoKCgoKCgoKCj/wgARCAAGAAoDASIAAhEBAxEB/8QAFgABAQEAAAAAAAAAAAAAAAAAAAMF/8QAFAEBAAAAAAAAAAAAAAAAAAAABf/aAAwDAQACEAMQAAAAjphjH//EACEQAAAGAgEFAAAAAAAAAAAAAAECAwQFBgASESEjMlTS/9oACAEBAAE/AKbY3MbWY4U45uq3QYaHIdybumFTbfx6DitzfAqcBho/nn2TfGf/xAAZEQABBQAAAAAAAAAAAAAAAAACAAEEFCH/2gAIAQIBAT8AvyBxiX//xAAYEQACAwAAAAAAAAAAAAAAAAACAwAEIf/aAAgBAwEBPwBdNJ6Qz//Z'%3E%3C/image%3E%3C/svg%3E)
The Displacement puzzle in The Talos Principle 2 poses a formidable challenge. The puzzle is accessible in the Circular Oasis region, which is situated in the southern part of the game. This area comprises eight distinct puzzle types that demand a strategic approach for engaging with the central device.
This device serves as the endpoint for each puzzle in The Talos Principle 2. Upon interaction, the puzzle concludes, granting entry to the subsequent area.
While Displacement shares a common objective with other puzzles, its distinctive challenge lies in laser barriers. They pose obstacles throughout your puzzle progression; however, employing devices and activating switches can neutralize the laser barriers.
This article offers valuable strategies for successfully navigating and completing the Displacement puzzle in The Talos Principle 2.
Looking for Crossword hints & solutions? Check out latest NYT Mini Crossword Answers, LA Times Crossword Answers, and Atlantic Crossword Answers
How to complete the Displacement puzzle in The Talos Principle 2
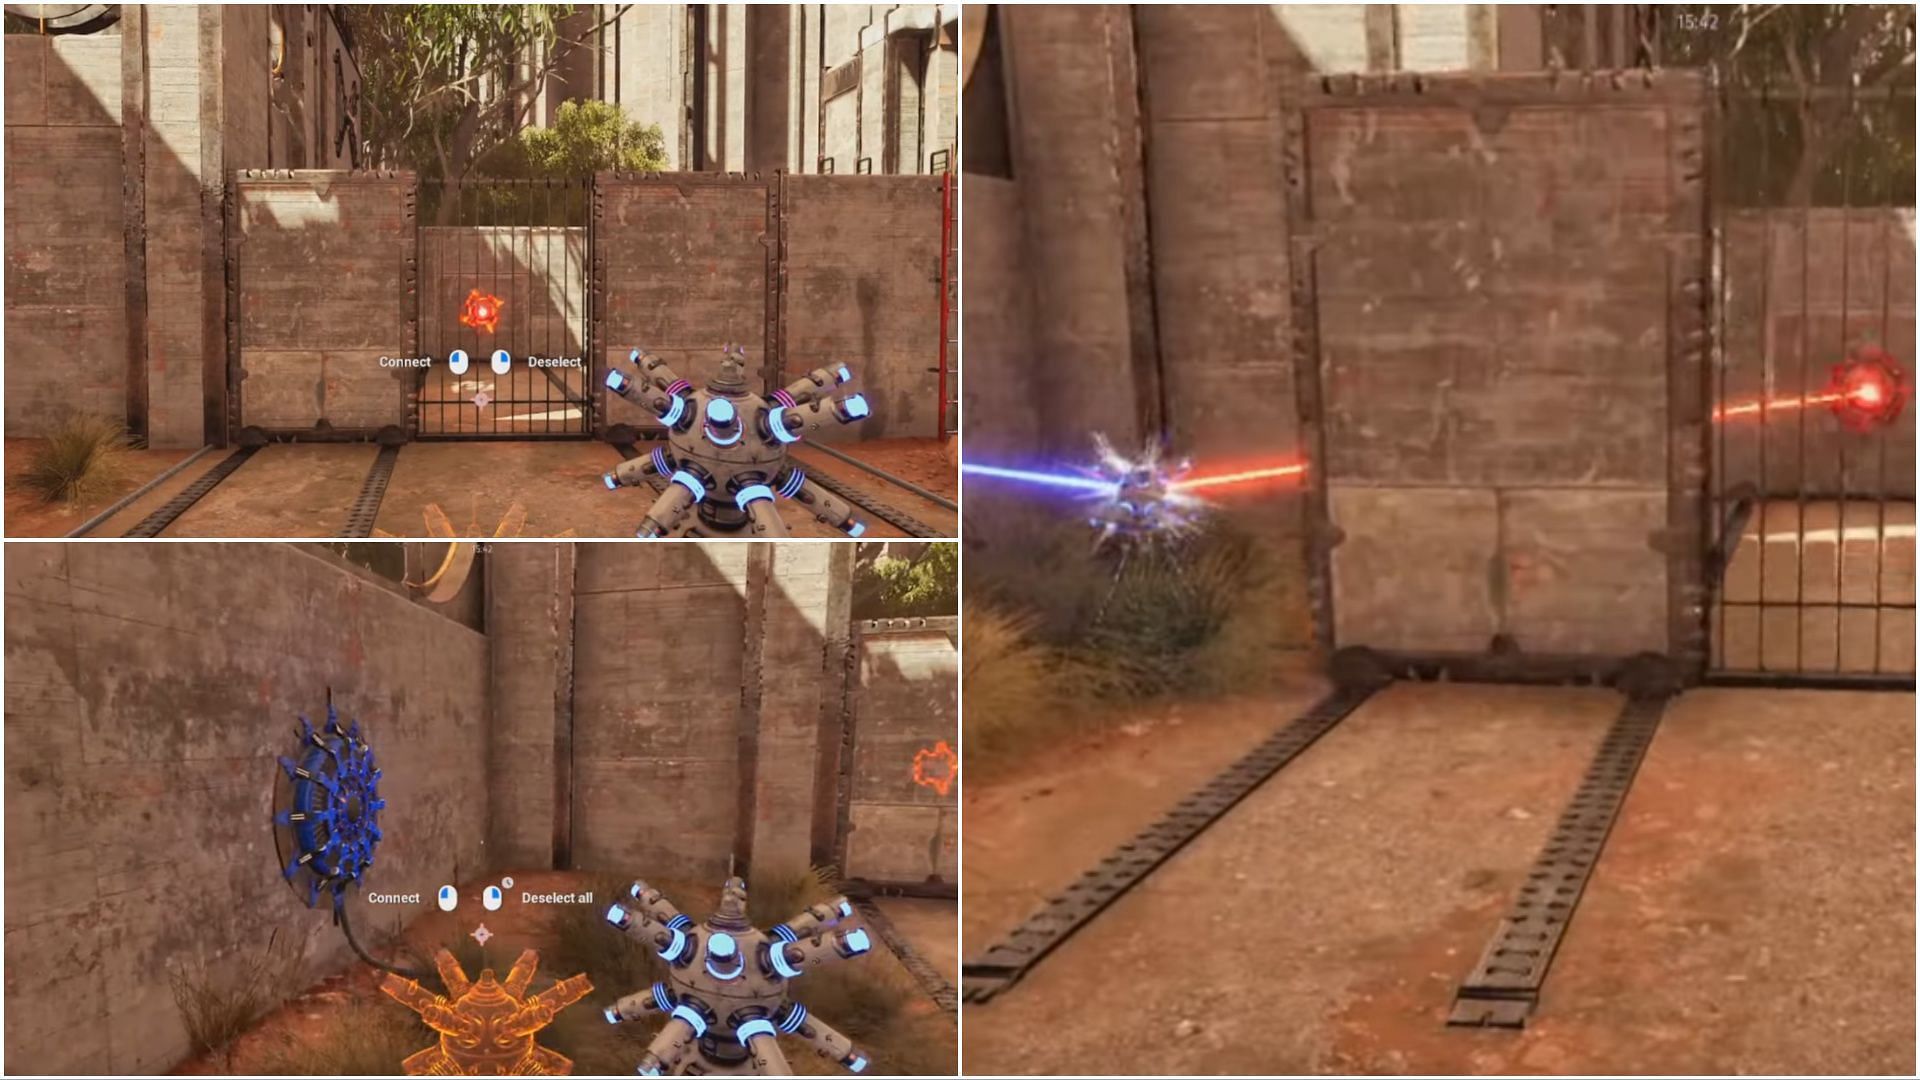
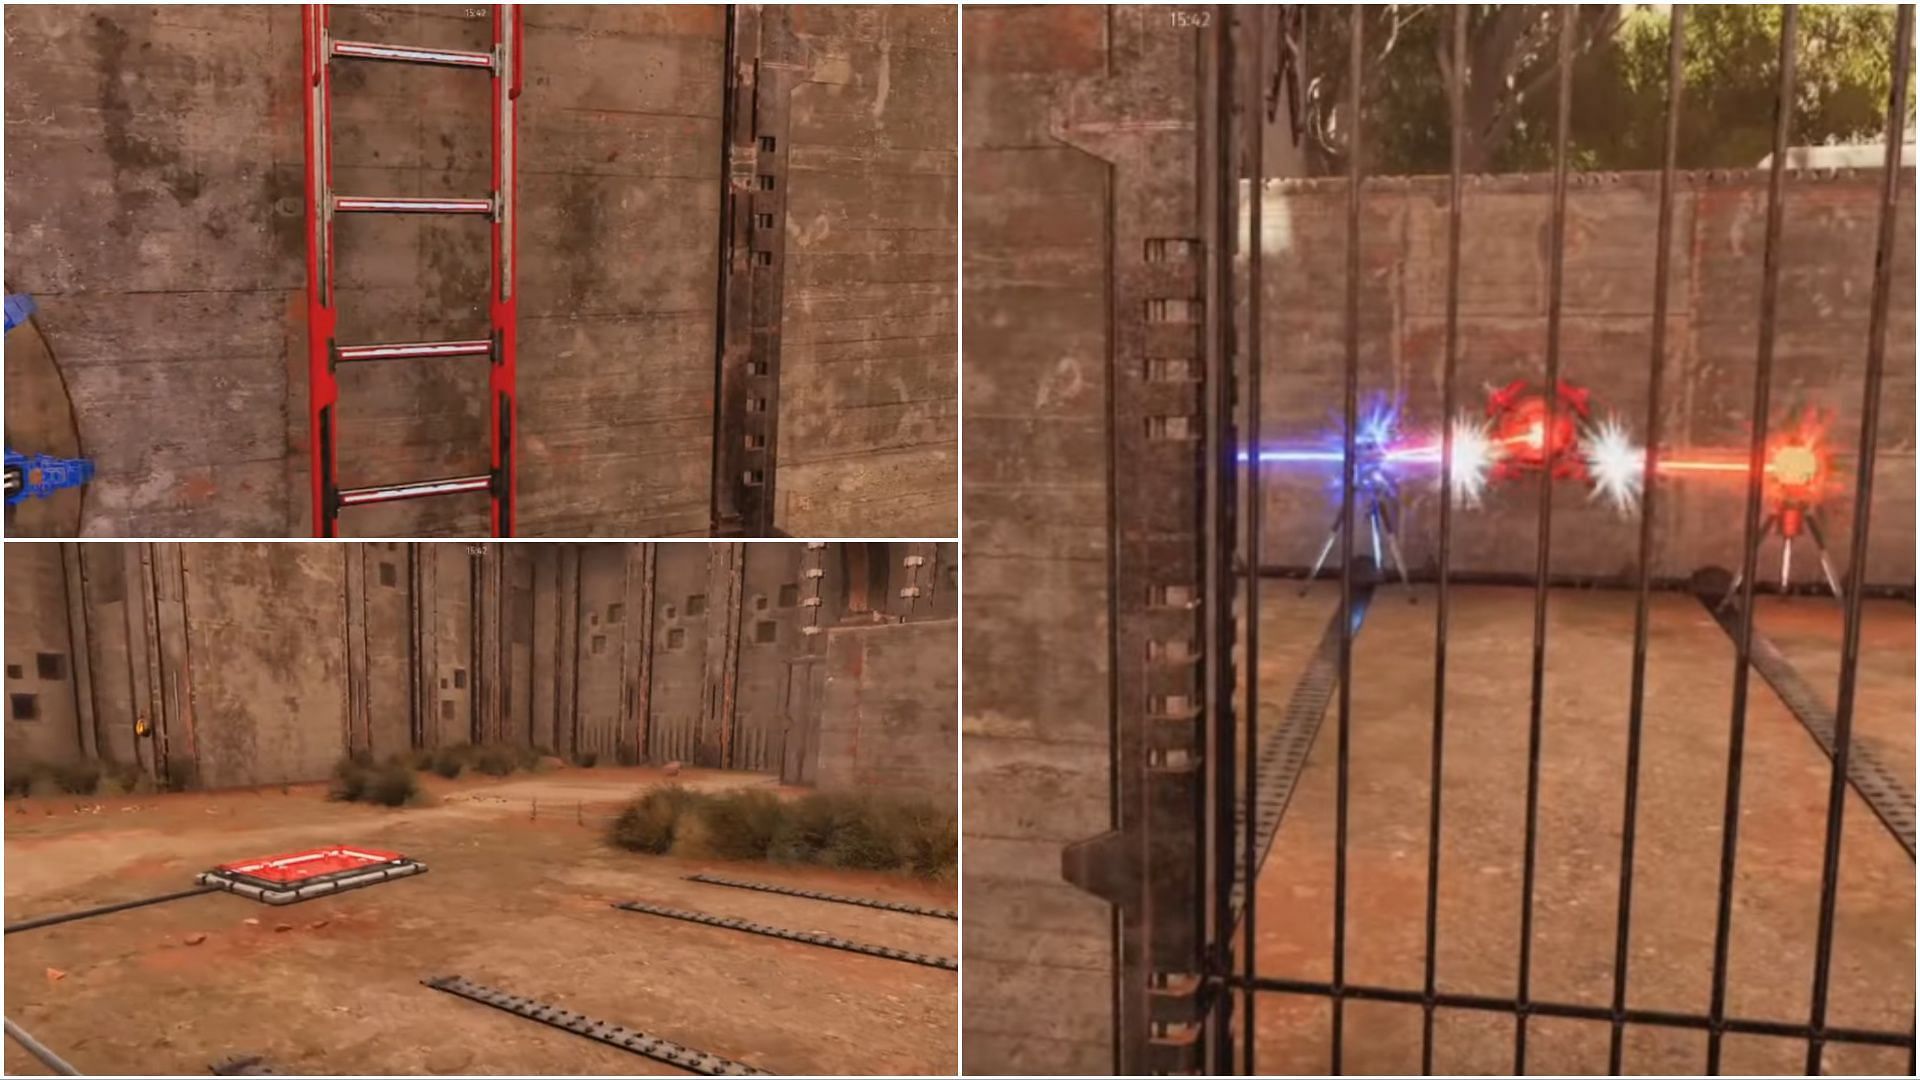
Upon entering the puzzle area, proceed to the left and pick up the inverter. Move forward until you encounter a wall with a cage door, behind which lies a red switch. Select this switch, keeping the inverter in hand, and then turn left to locate a blue switch. Select this switch as well. Now, position the inverter near the blue switch.
Retrace your steps and stand on the empty cubic slot. This action will bring the wall with the cage door towards you, aligning the blue and red switches with the inverter.
Retrieve the inverter, and you'll find yourself confined within the cage wall area. Select the blue switch, followed by the red switch, and place the inverter on the ground.
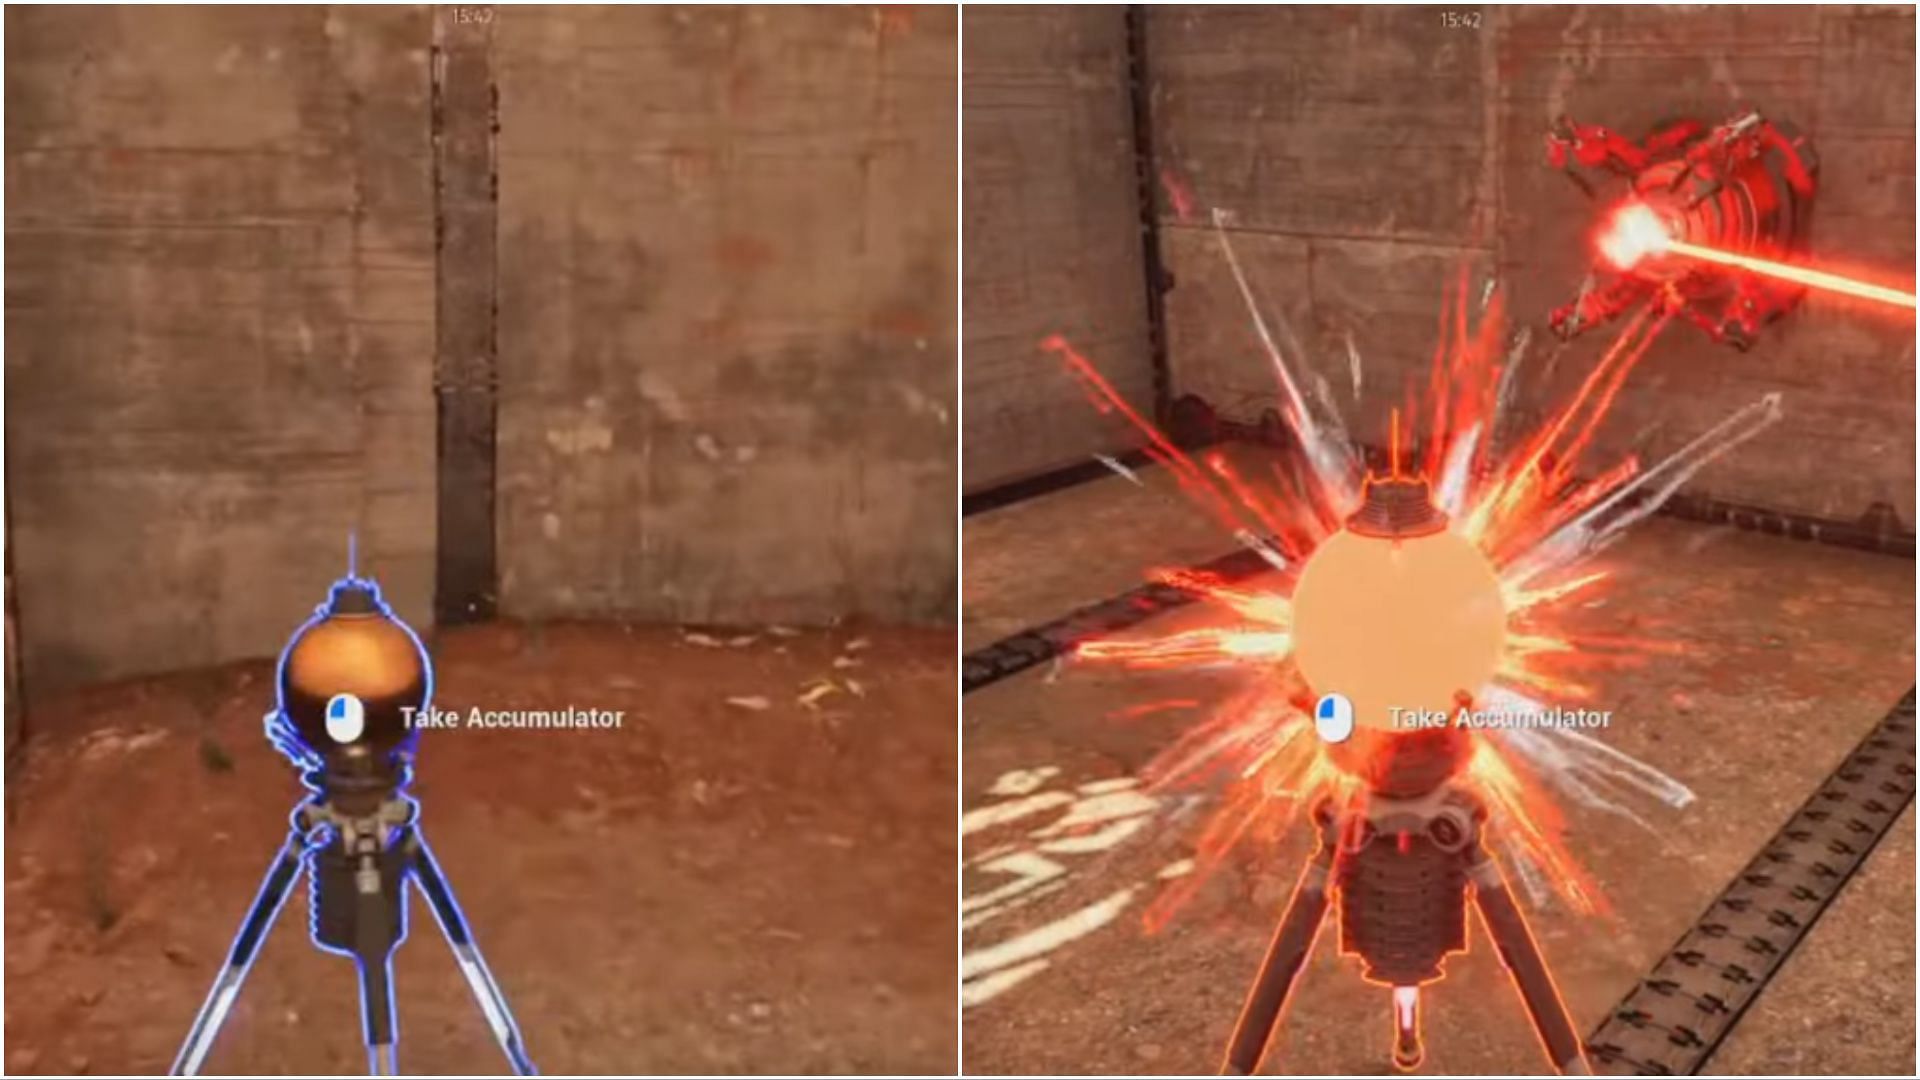
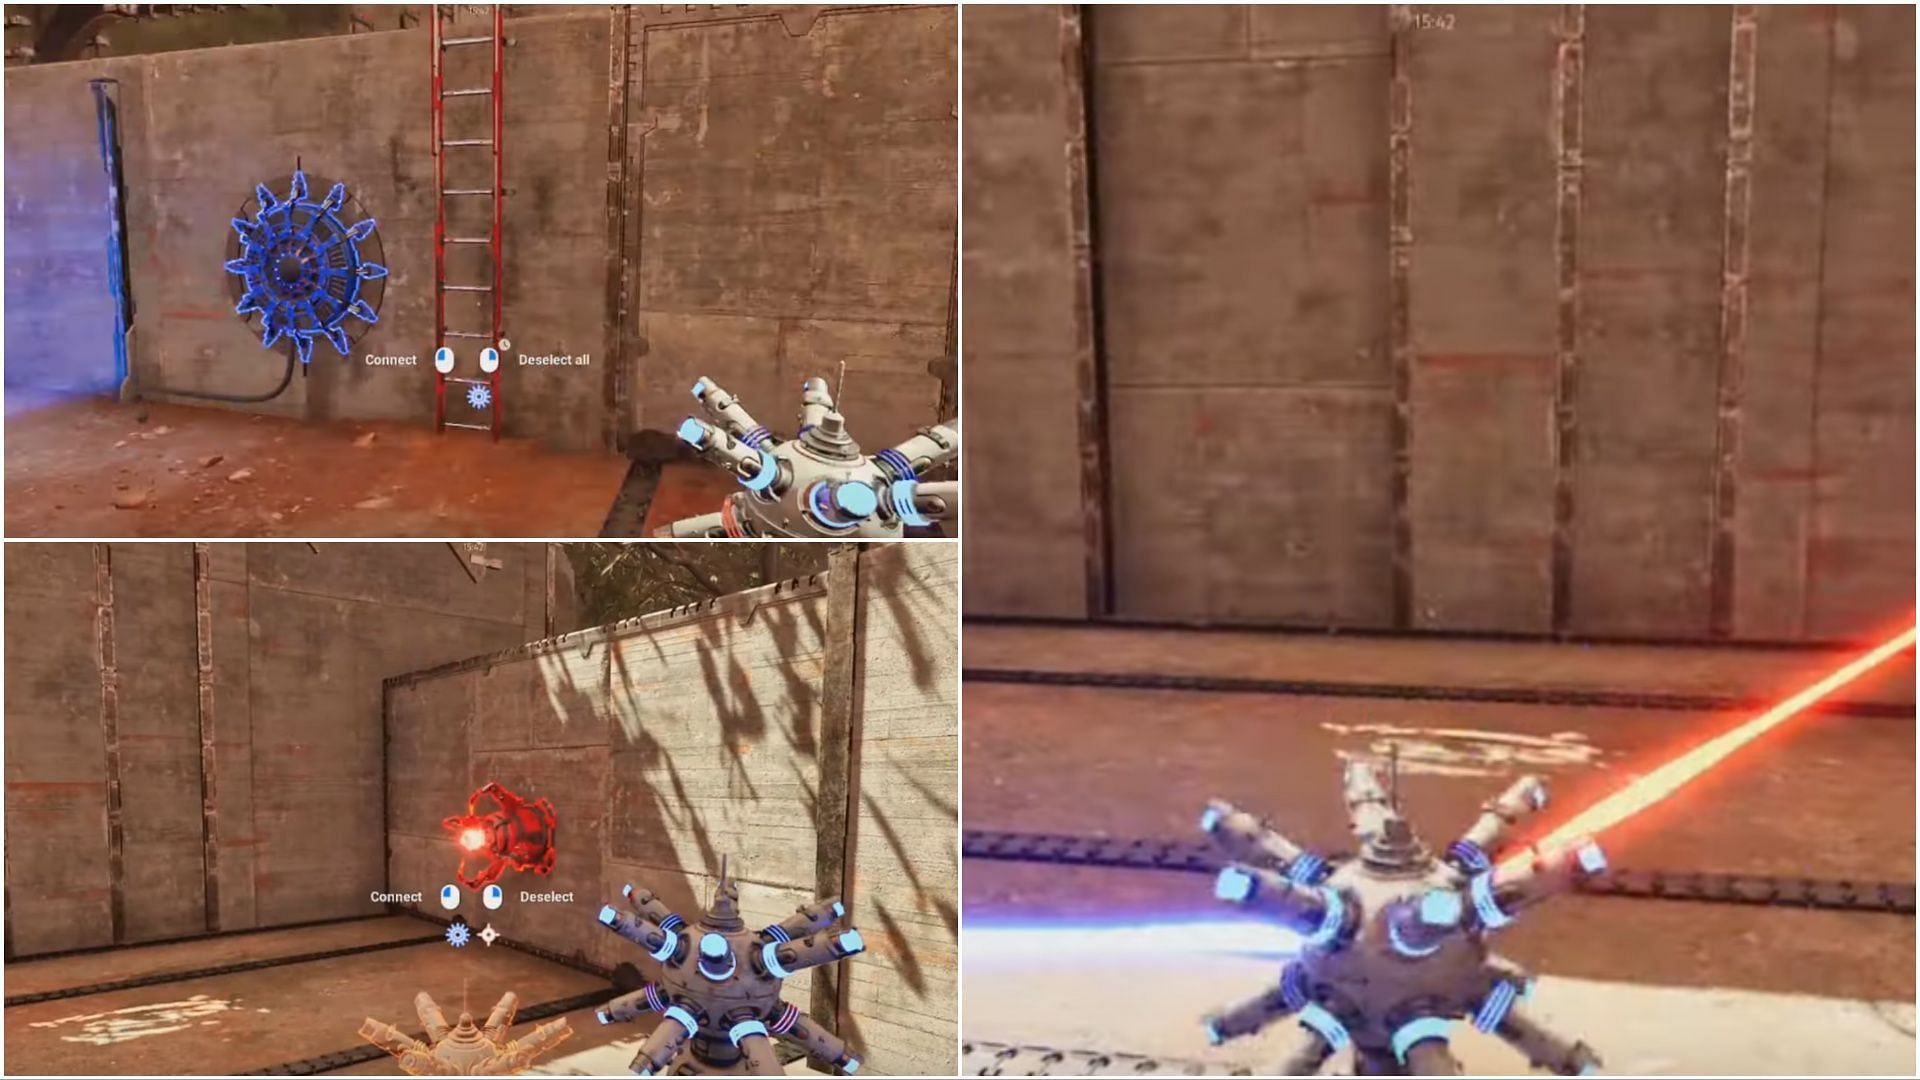
The switches will realign with the inverter, disabling the laser barrier on your left. After deactivating the laser barrier, you will find an accumulator. Pick it up and then select the red switch, causing the accumulator to emit a red glow. Place the accumulator on the ground, then pick up the inverter.
Select the red switch and the accumulator consecutively, and proceed to the cage door area. Locate a blue switch near the cage door, select it, and place the accumulator near the red switch. The inverter, red switch, accumulator, and blue switch are now aligned beyond the cage wall area.
Turn around and find a ladder. Use the ladder to exit the cage wall area and stand on the empty cubic slot. This action will bring the cage walls closer to you, aligning the devices with all the switches, including the blue switch outside the cage area.
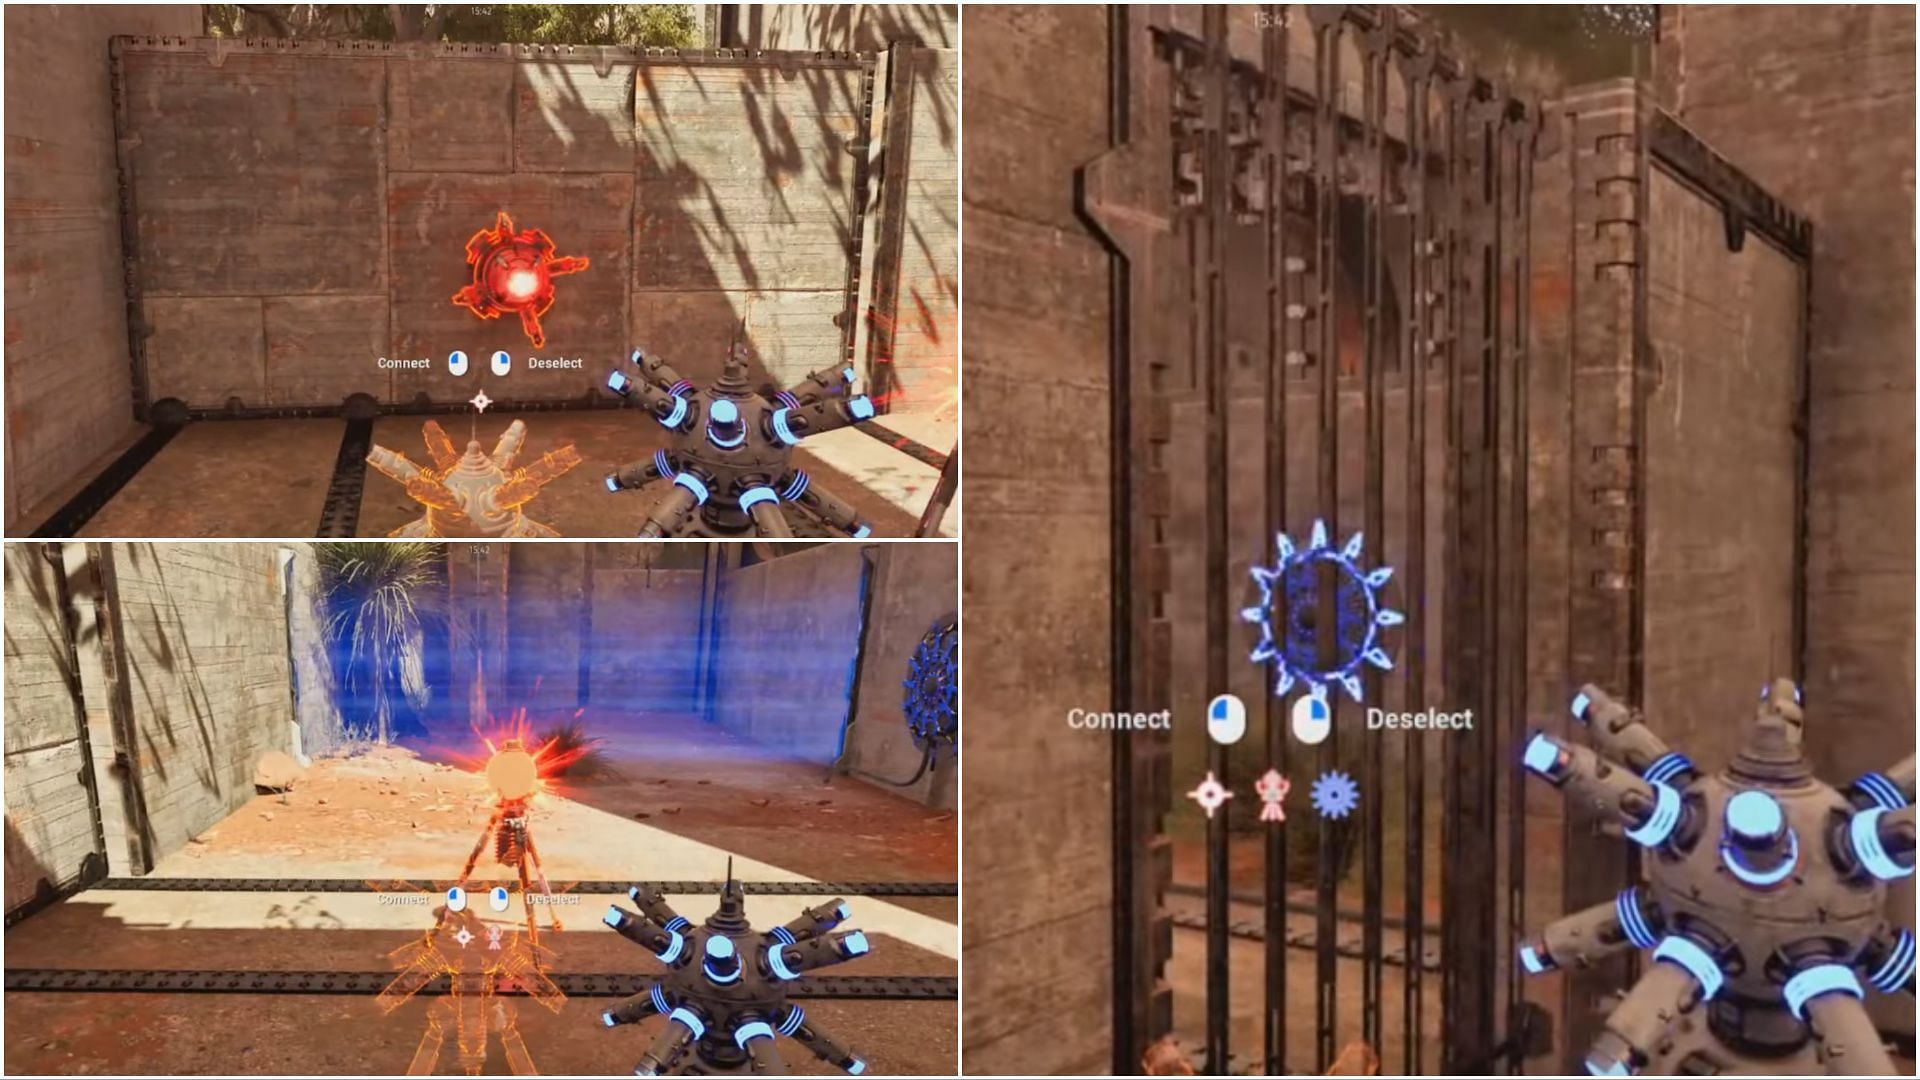
Re-enter the cage area, pick up the accumulator, and place it near the ladder. Retrieve the inverter, exit the cage area, and approach the empty cubic slot. Turn left to find a blue switch near the laser barrier obstructing the path to the main device. Activate the blue switch and place the inverter on the ground.
Return to the accumulator, pick it up, and head back to where you placed the accumulator. Select the accumulator, and the laser barrier will deactivate, clearing the path for the main device. Interact with the main device to complete the Displacement puzzle in The Talos Principle 2.

Are you stuck on today's Wordle? Our Wordle Solver will help you find the answer.