
'%20x='0'%20y='0'%20height='100%25'%20width='100%25'%20%0A%20%20%20%20%20%20%20%20%20%20xlink%3Ahref='data:image/jpg;base64,/9j/2wBDAAYEBQYFBAYGBQYHBwYIChAKCgkJChQODwwQFxQYGBcUFhYaHSUfGhsjHBYWICwgIyYnKSopGR8tMC0oMCUoKSj/2wBDAQcHBwoIChMKChMoGhYaKCgoKCgoKCgoKCgoKCgoKCgoKCgoKCgoKCgoKCgoKCgoKCgoKCgoKCgoKCgoKCgoKCj/wgARCAAGAAoDASIAAhEBAxEB/8QAFgABAQEAAAAAAAAAAAAAAAAAAAUH/8QAFAEBAAAAAAAAAAAAAAAAAAAABP/aAAwDAQACEAMQAAAAzeaPF//EACEQAAECBAcAAAAAAAAAAAAAAAIABAEGERIDISMxQWGx/9oACAEBAAE/AMSZHRjBwFtIEORDzXxHNji8tEN+1//EABcRAAMBAAAAAAAAAAAAAAAAAAABAiH/2gAIAQIBAT8Ainp//8QAFxEBAQEBAAAAAAAAAAAAAAAAAQIAE//aAAgBAwEBPwDjEgBv/9k='%3E%3C/image%3E%3C/svg%3E)
This is the only KAY/O Abyss guide that you will need to start getting those sweet frags on Valorant's new map. As Riot Games adds Abyss to their competitive map pool for Episode 9 Act 1, players must find the best ways to play their favorite agents in the most effective ways possible - and KAY/O might just be the perfect initiator for you.
KAY/O is an exciting initiator to play on Abyss, as you can make use of all your abilities to set up your team for success. Thus, gamers are looking for a good KAY/O Abyss guide to become more of a team player.
So this comprehensive guide might be useful for any KAY/O mains out there, looking to make a difference.
Note: This article is subjective and reflects the writer's opinions.
Looking for Crossword hints & solutions? Check out latest NYT Mini Crossword Answers, LA Times Crossword Answers, and Atlantic Crossword Answers
How to use Zero/Point on Abyss?
Getting that early info is a crucial responsibility of the KAY/O player and your trusty Zero/Point ability is all you need. It is an invaluable tool to take space and eliminate angles for your team and you must make sure to make the most out of it.
Here are some of the best spots on Abyss for your Zero/Point:
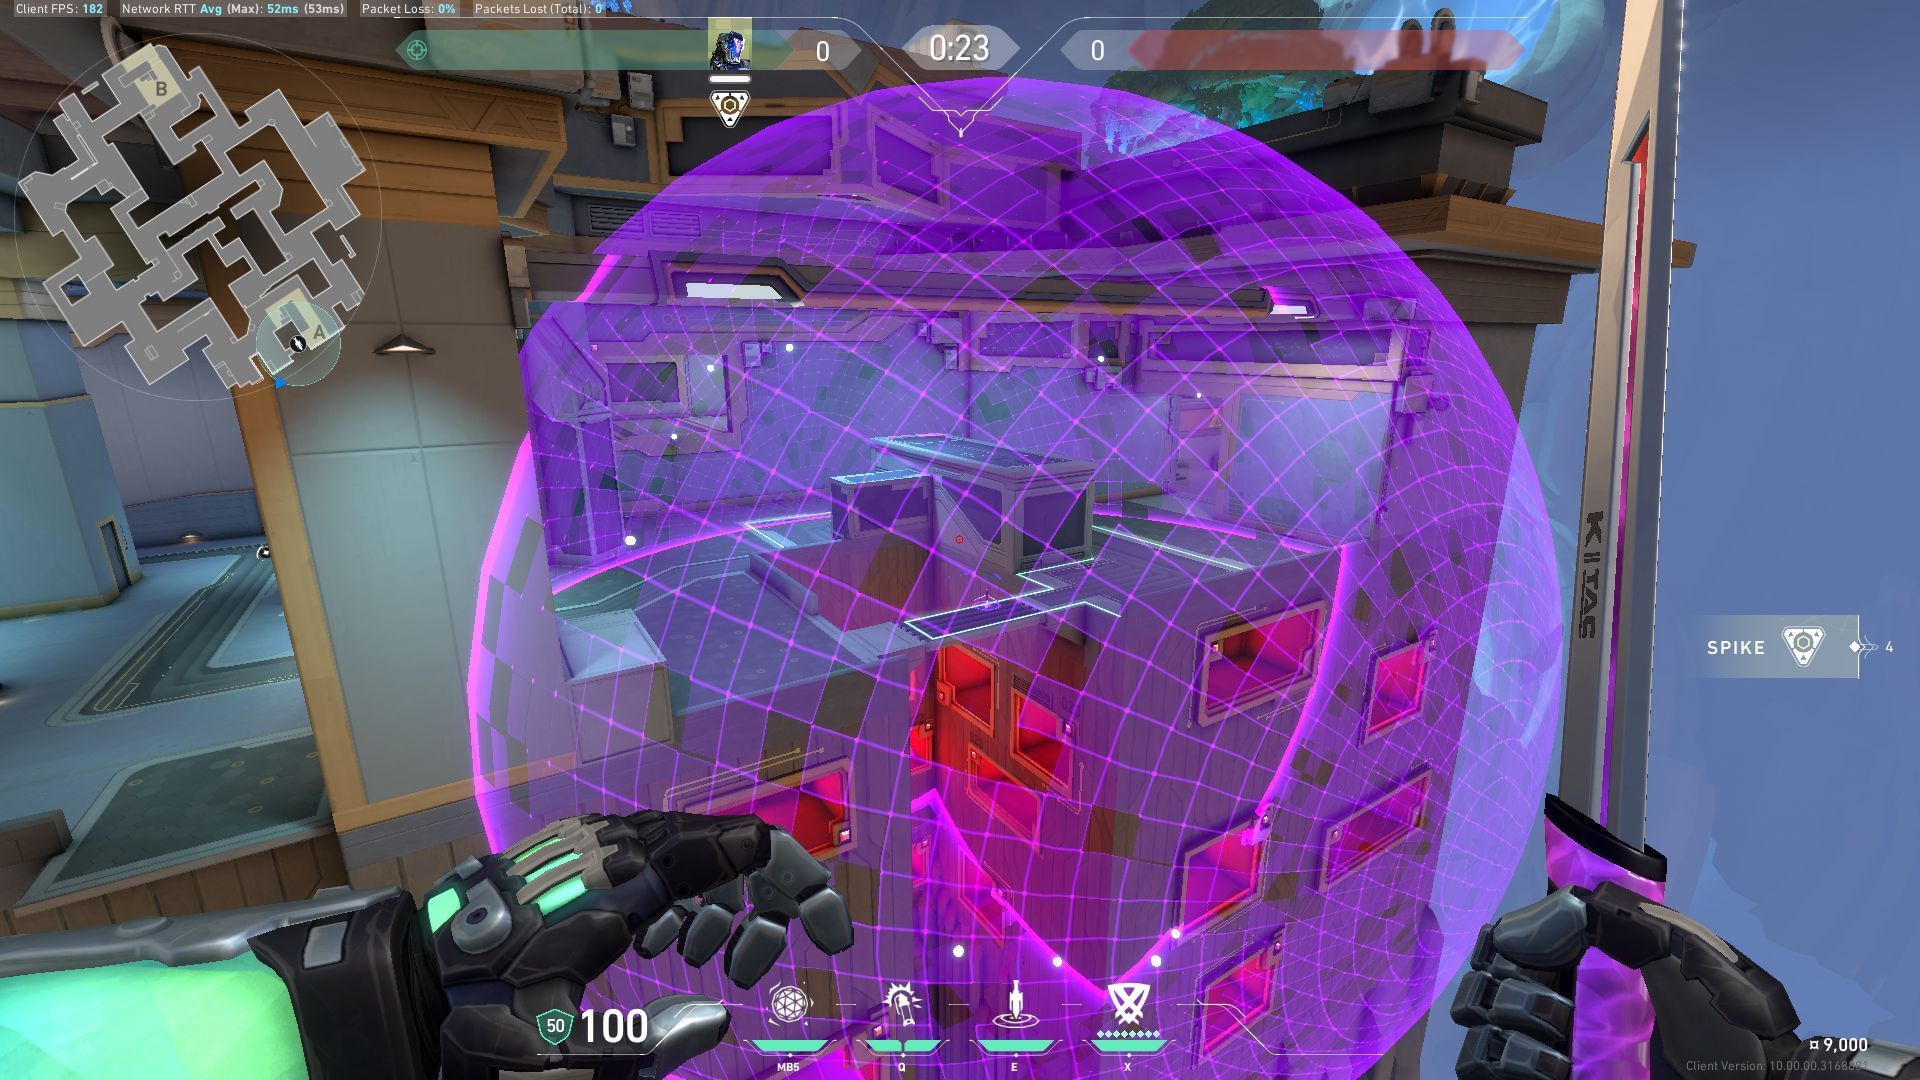
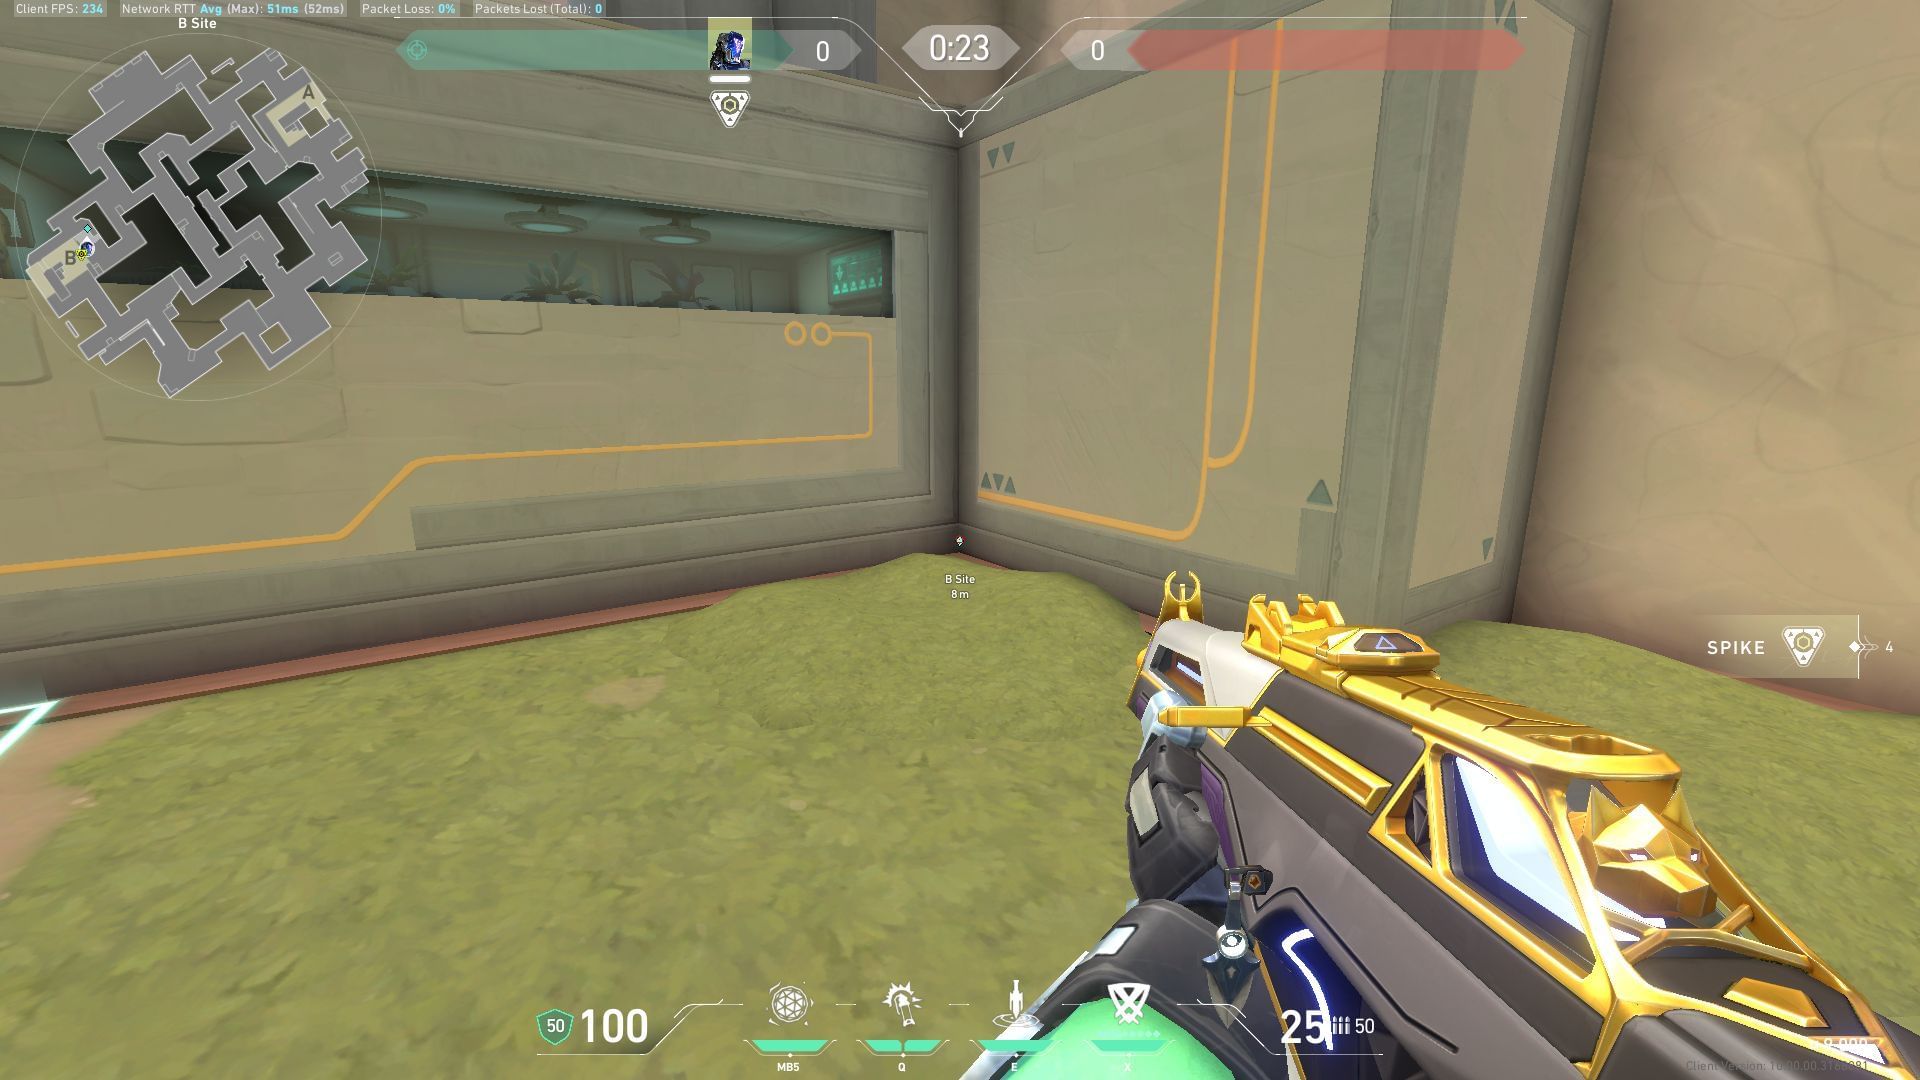
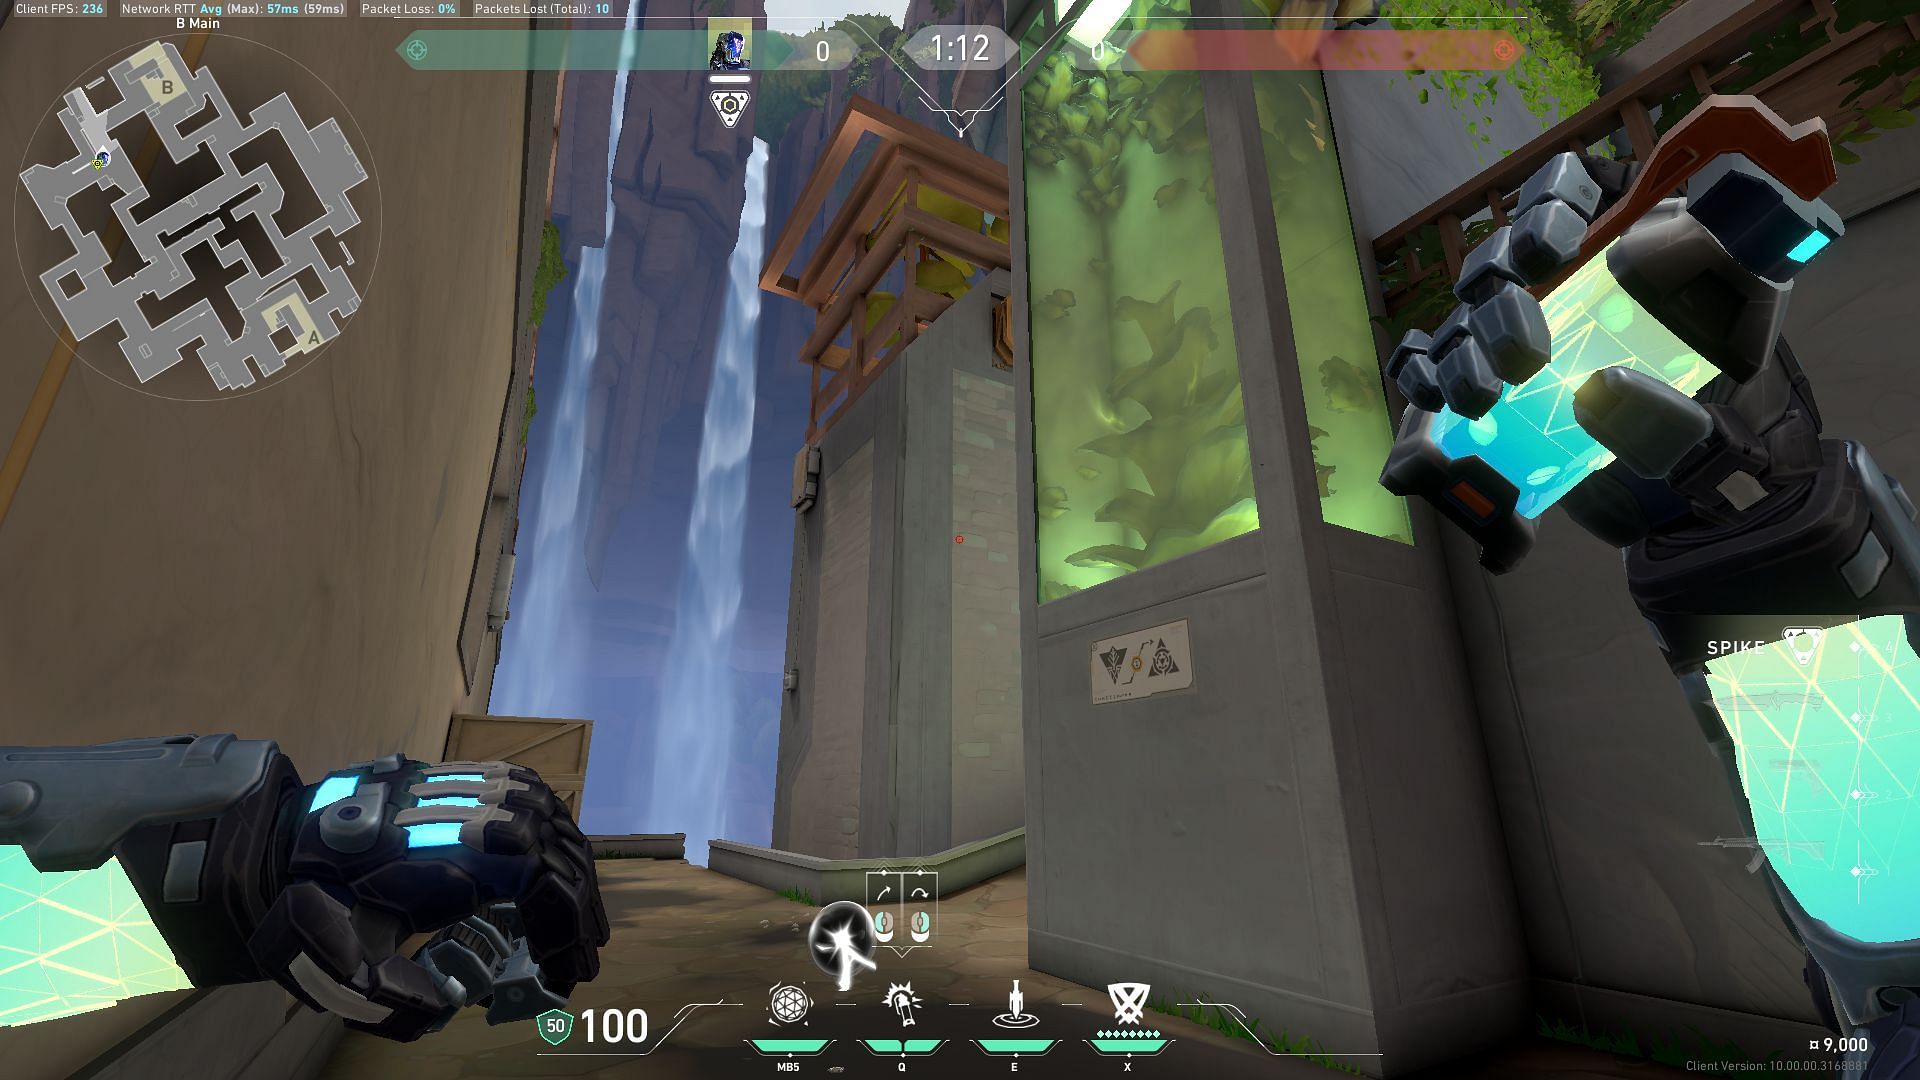
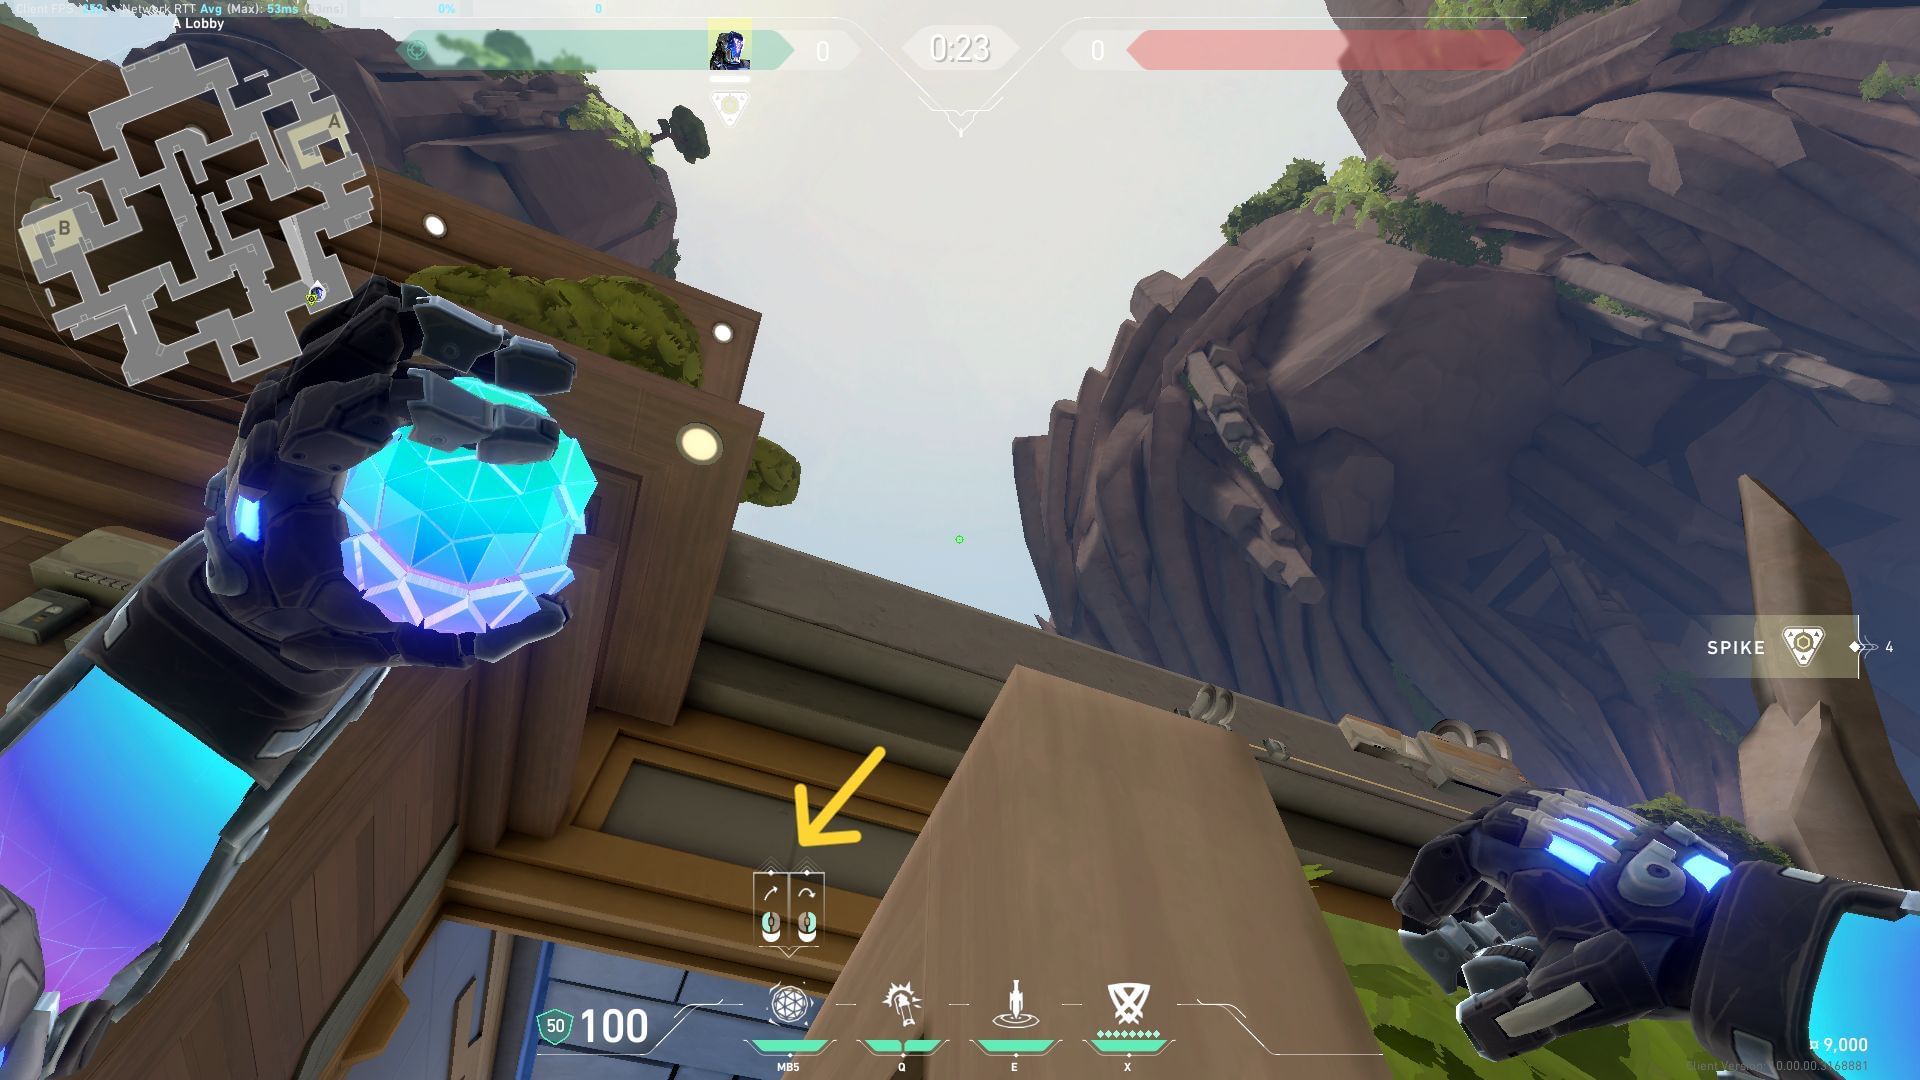
Attacking A-site
A-site Zero/Point lineup
Where to stand
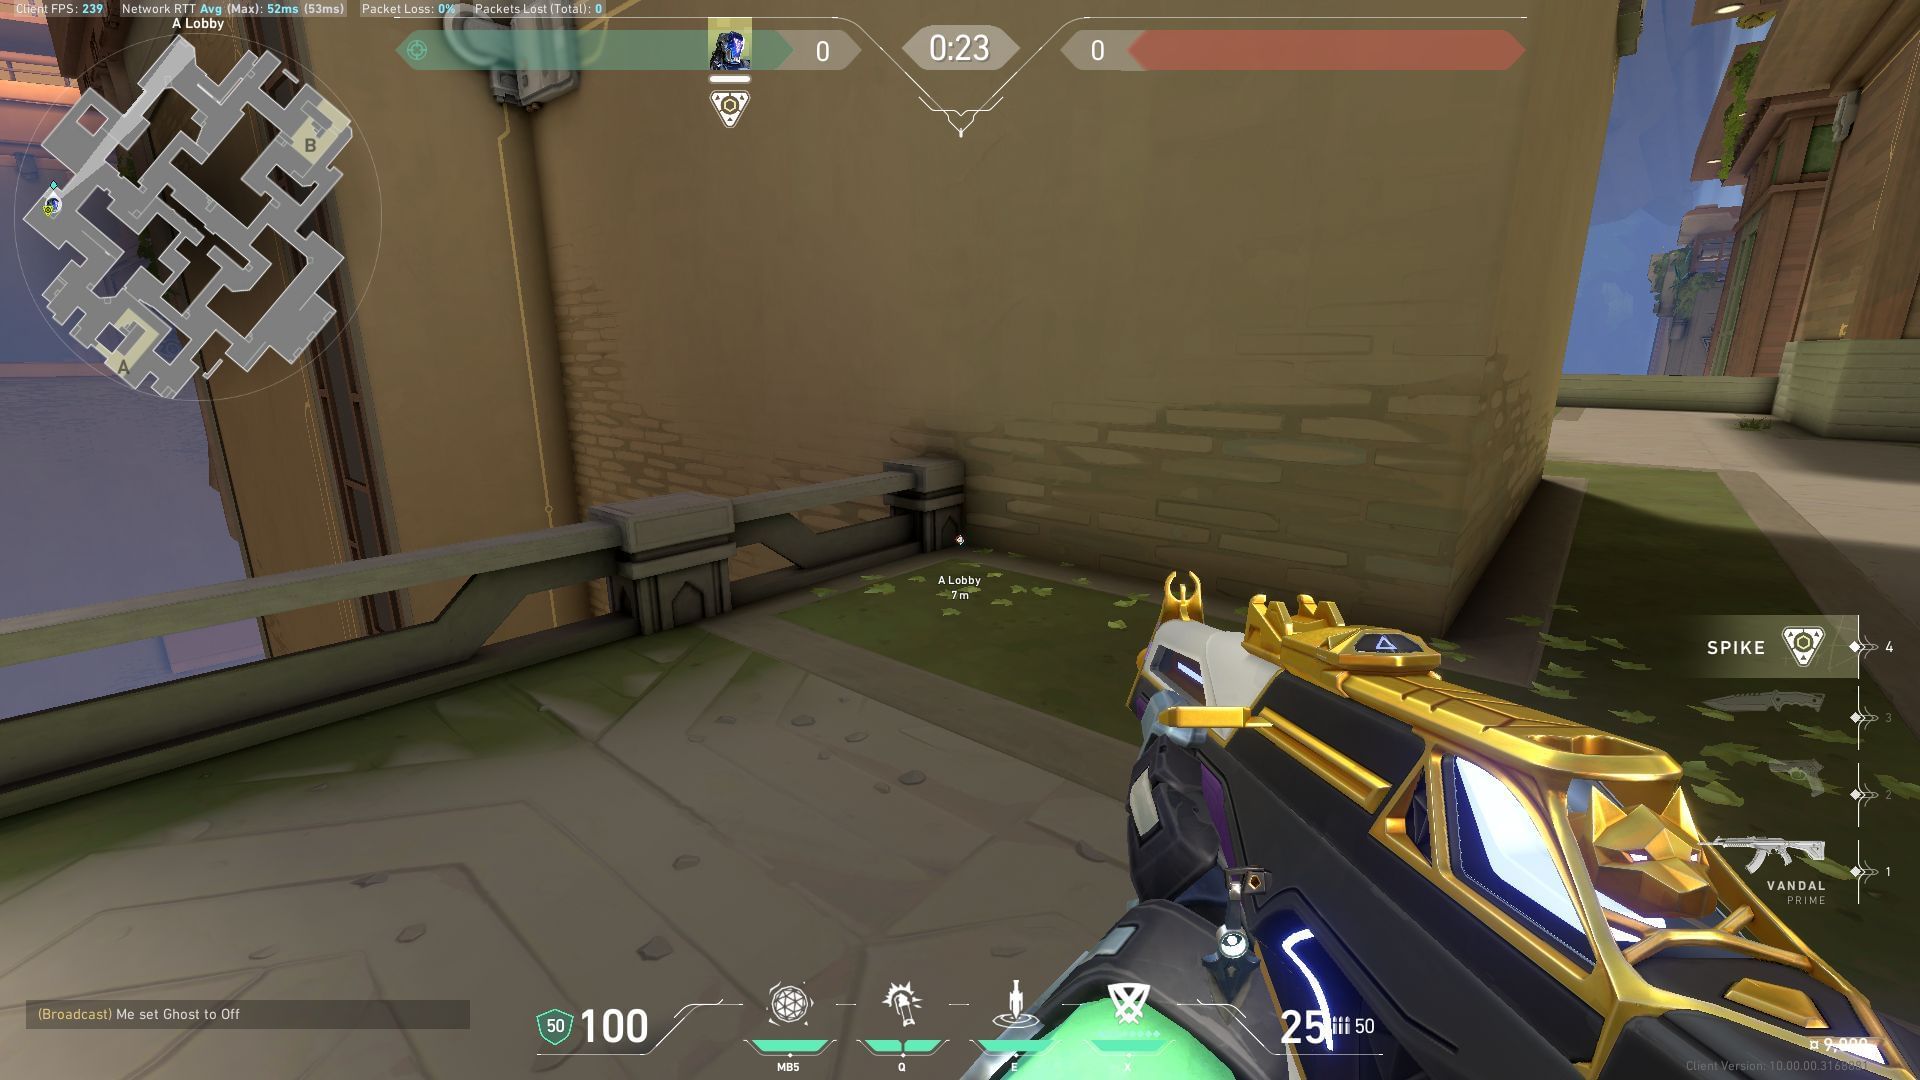
Adjust yourself at the edge of the railing at the A-lobby, as shown in the above image.
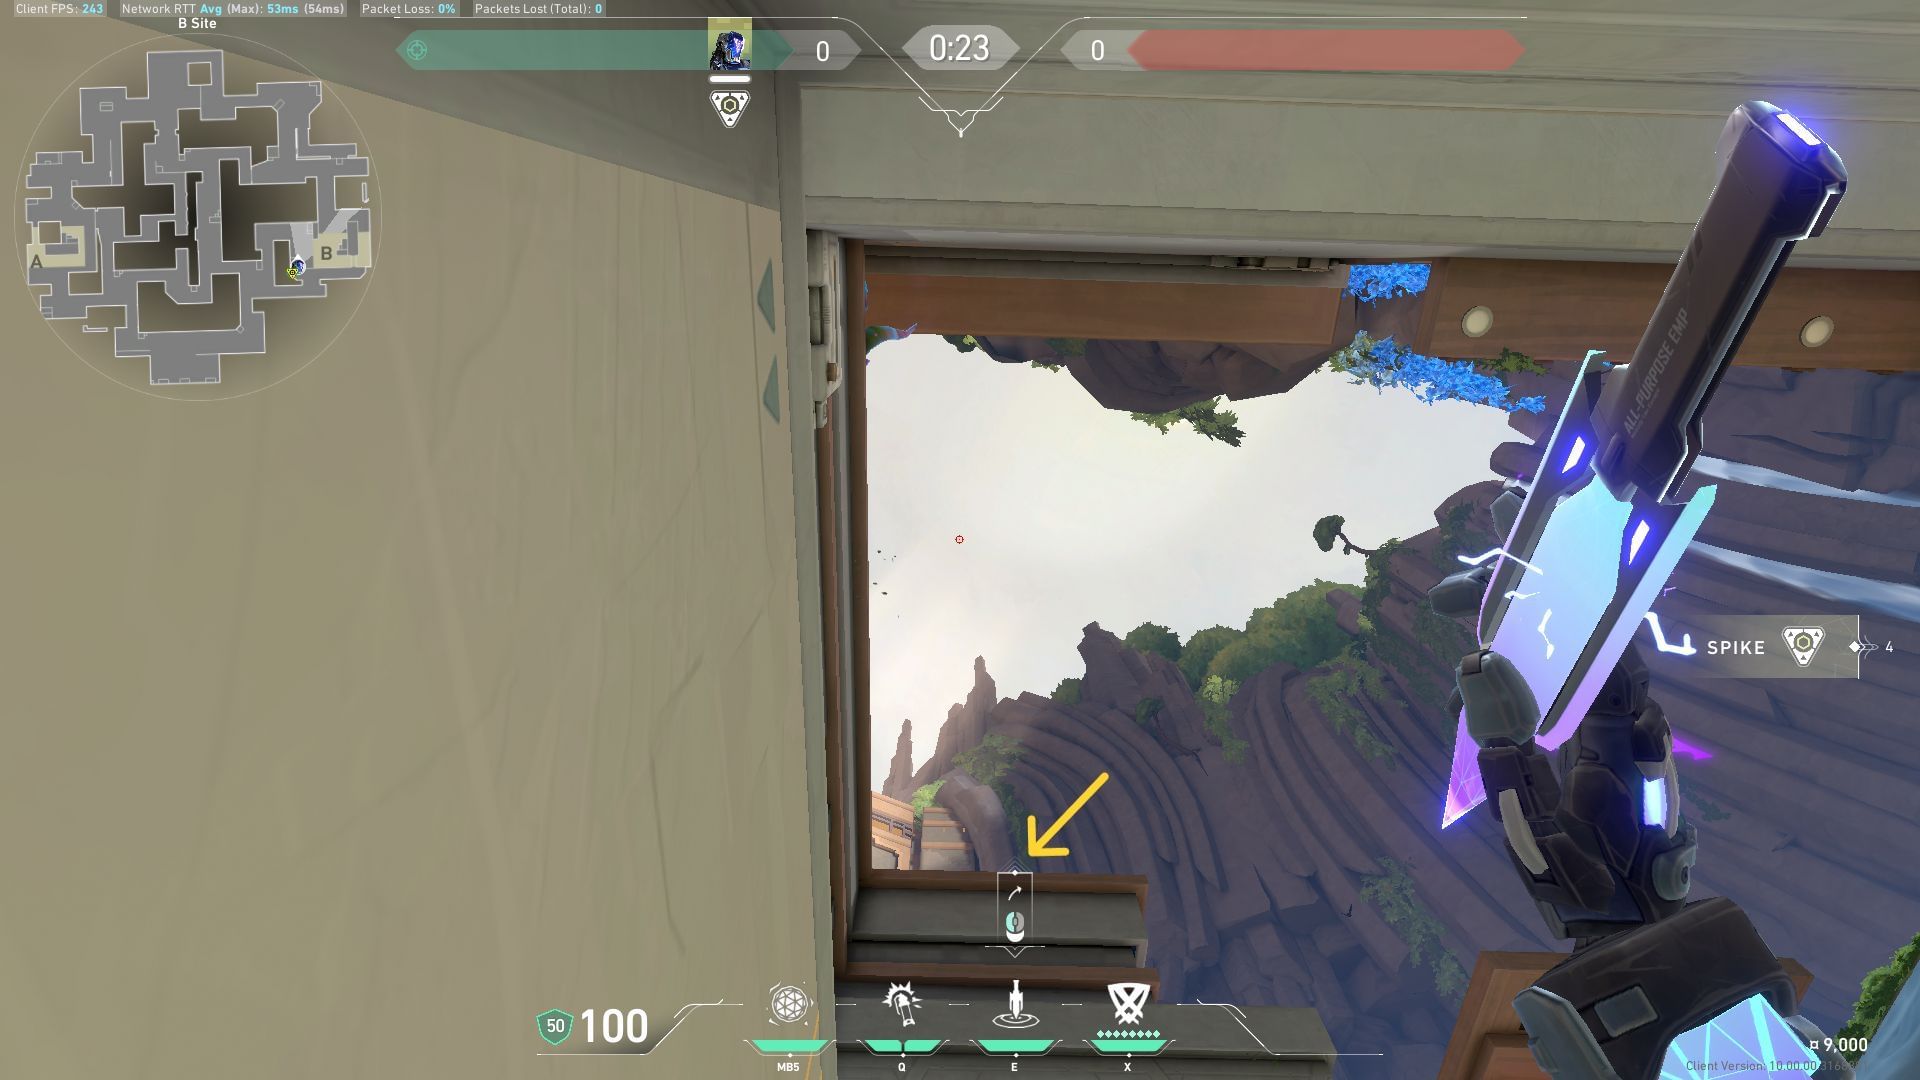
Where to aim
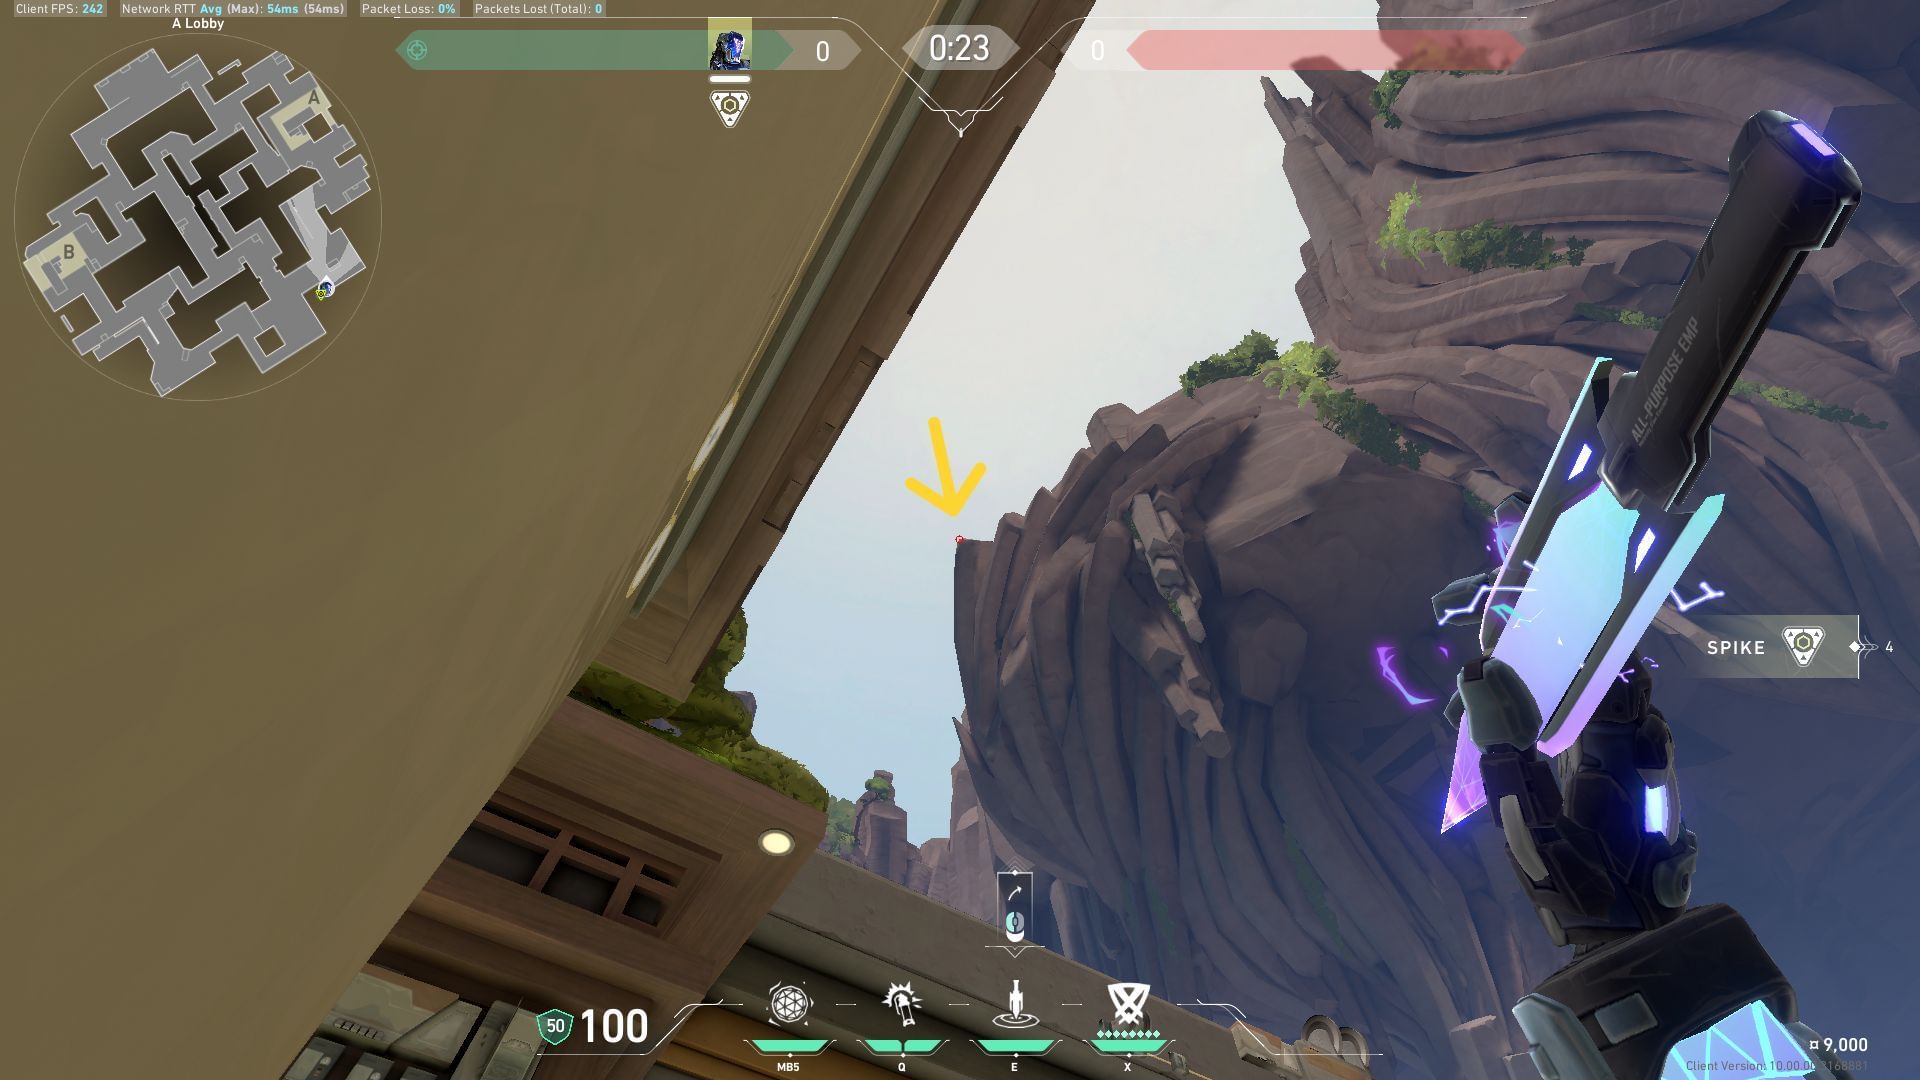
Equip the Zero/Point knife and move the crosshair above as indicated in the picture. Left-click to throw the blade upwards and let it land on A-Bridge in Valorant’s Abyss map.
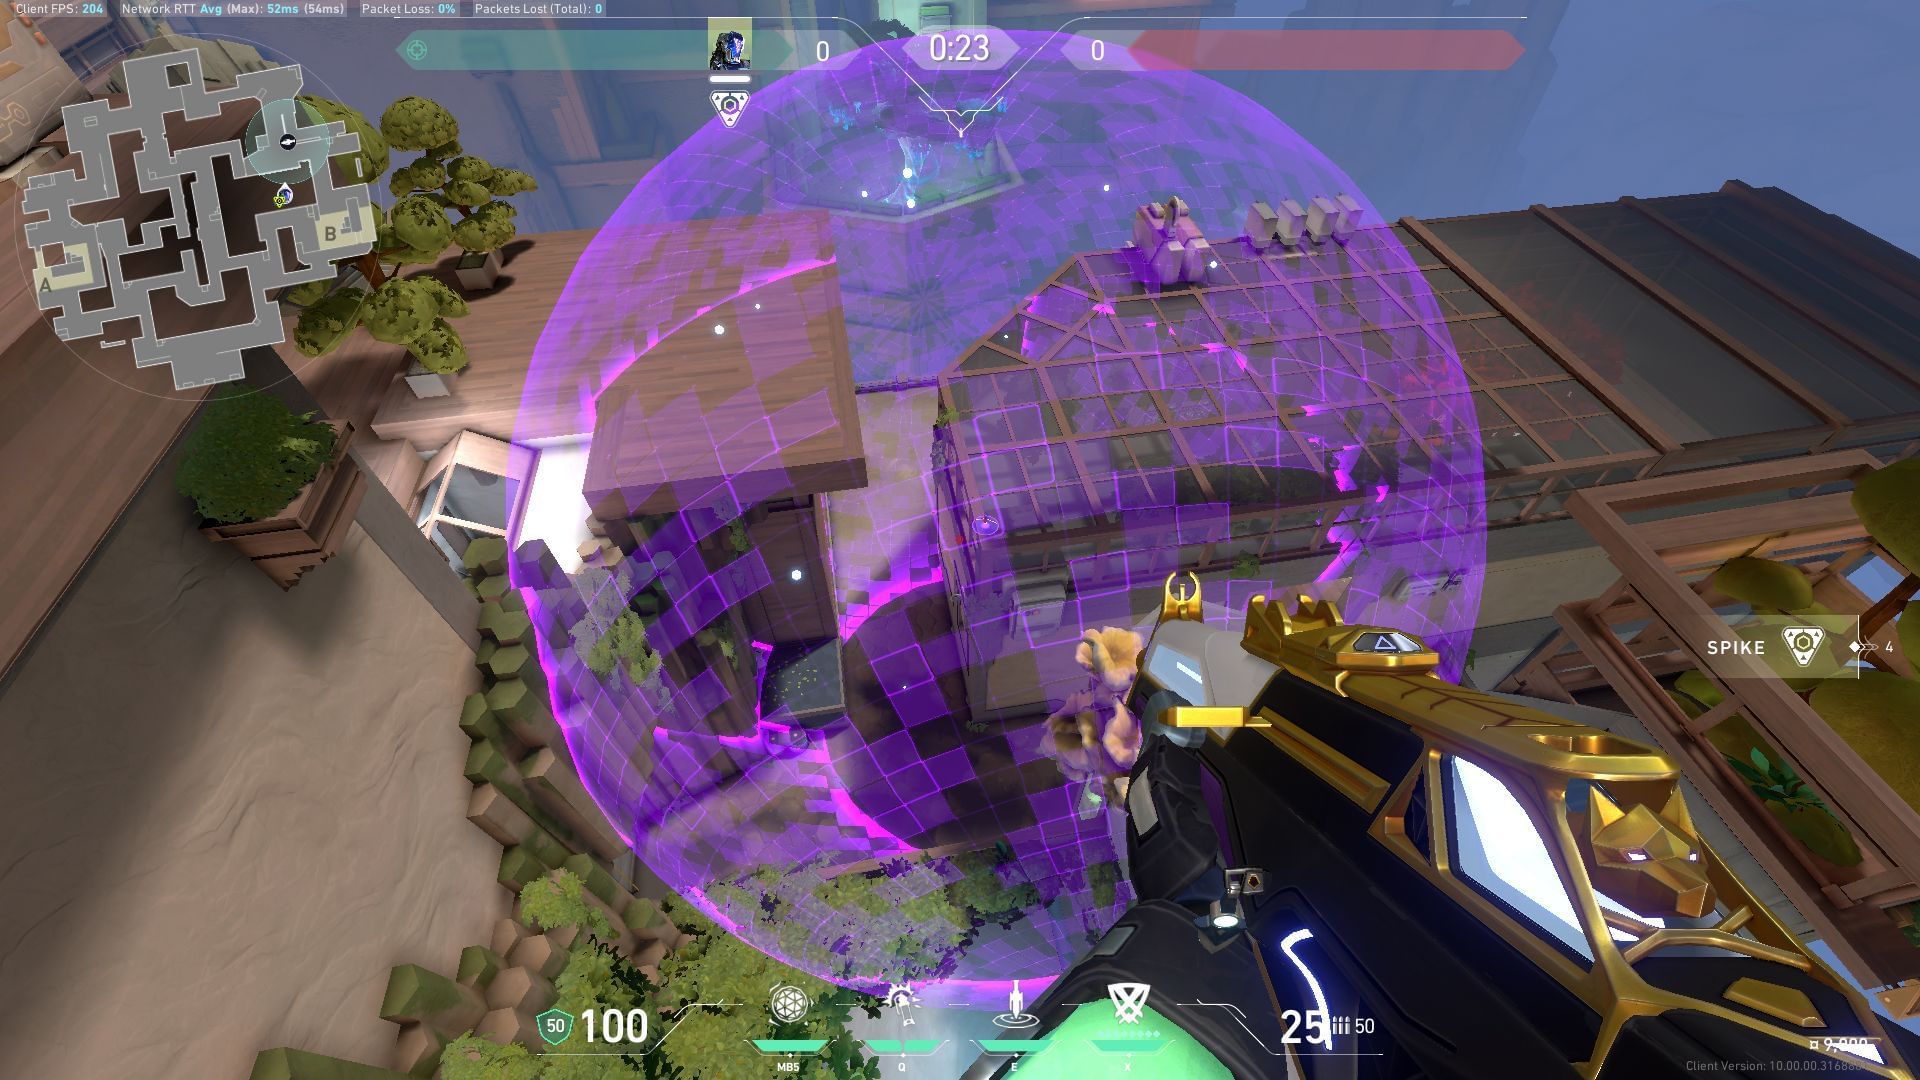
Result
Also read: Valorant Complete KAY/O Sunset Guide
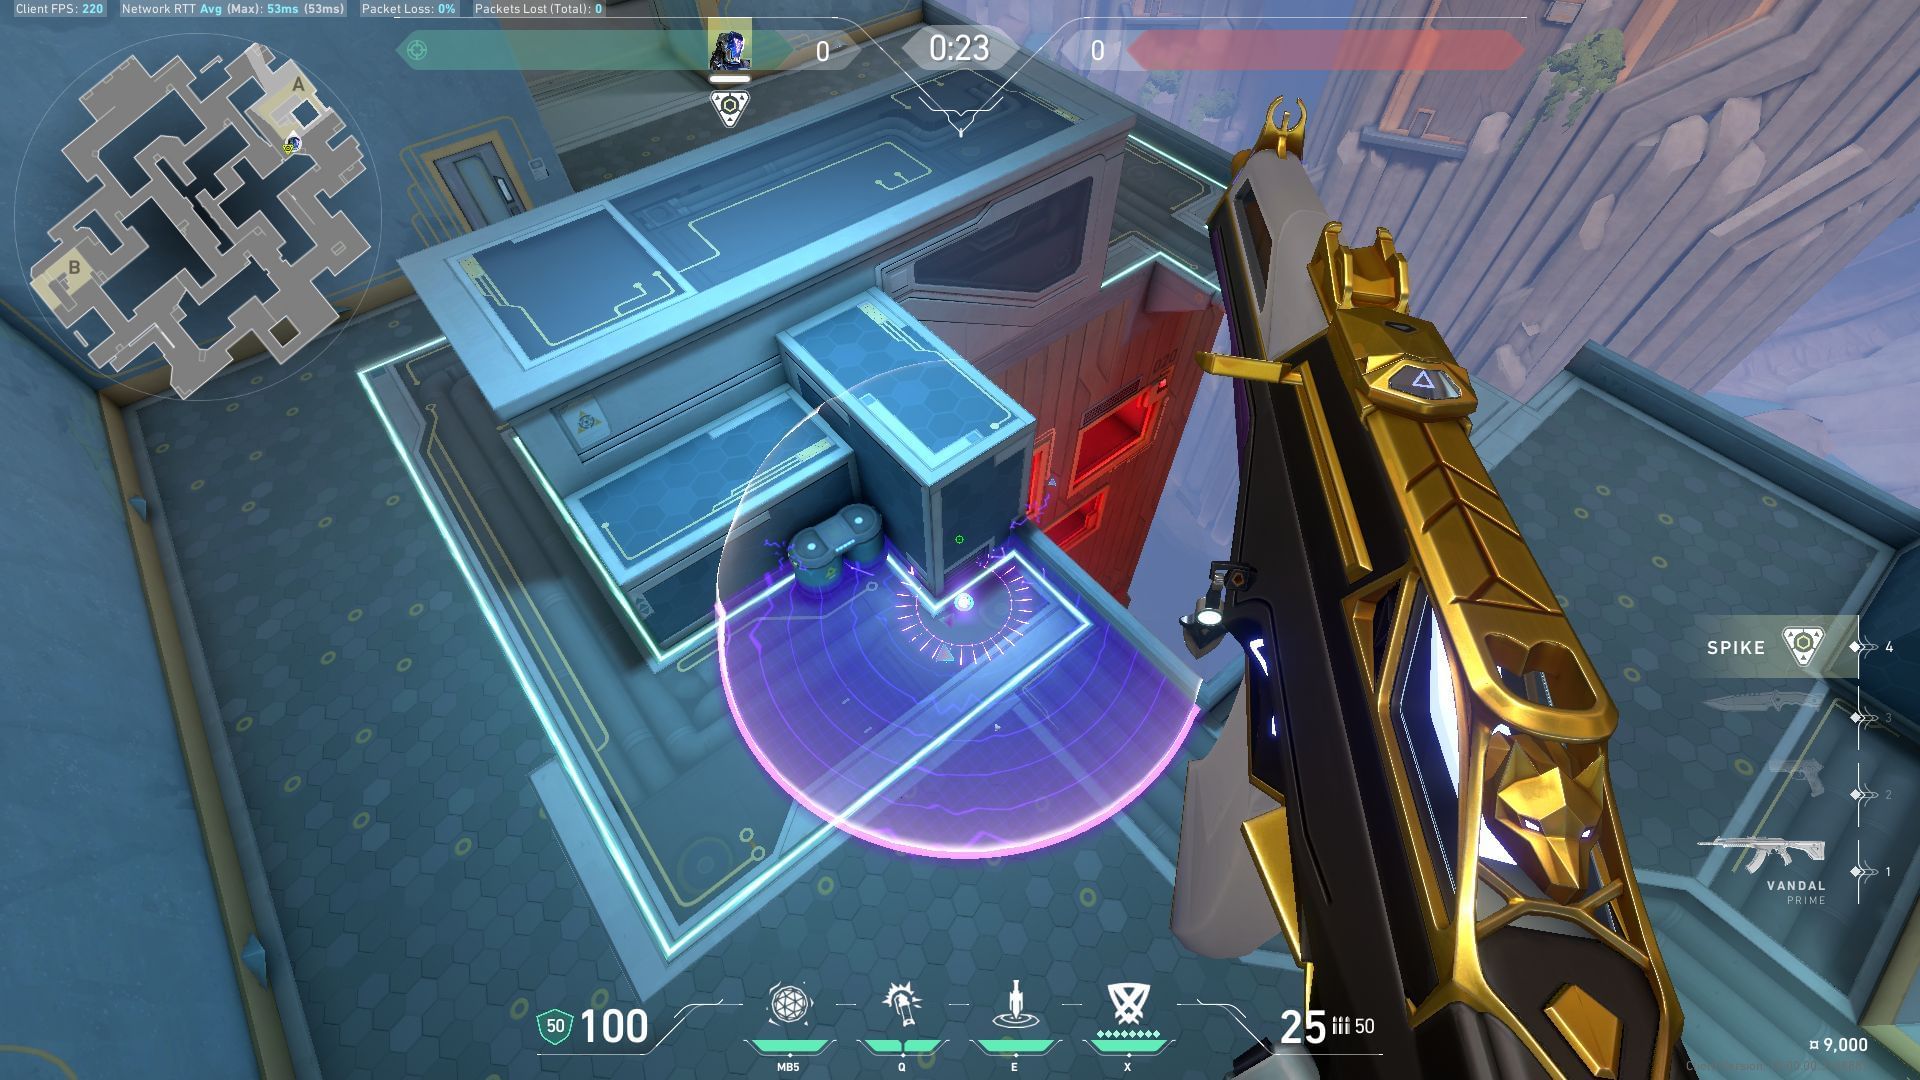
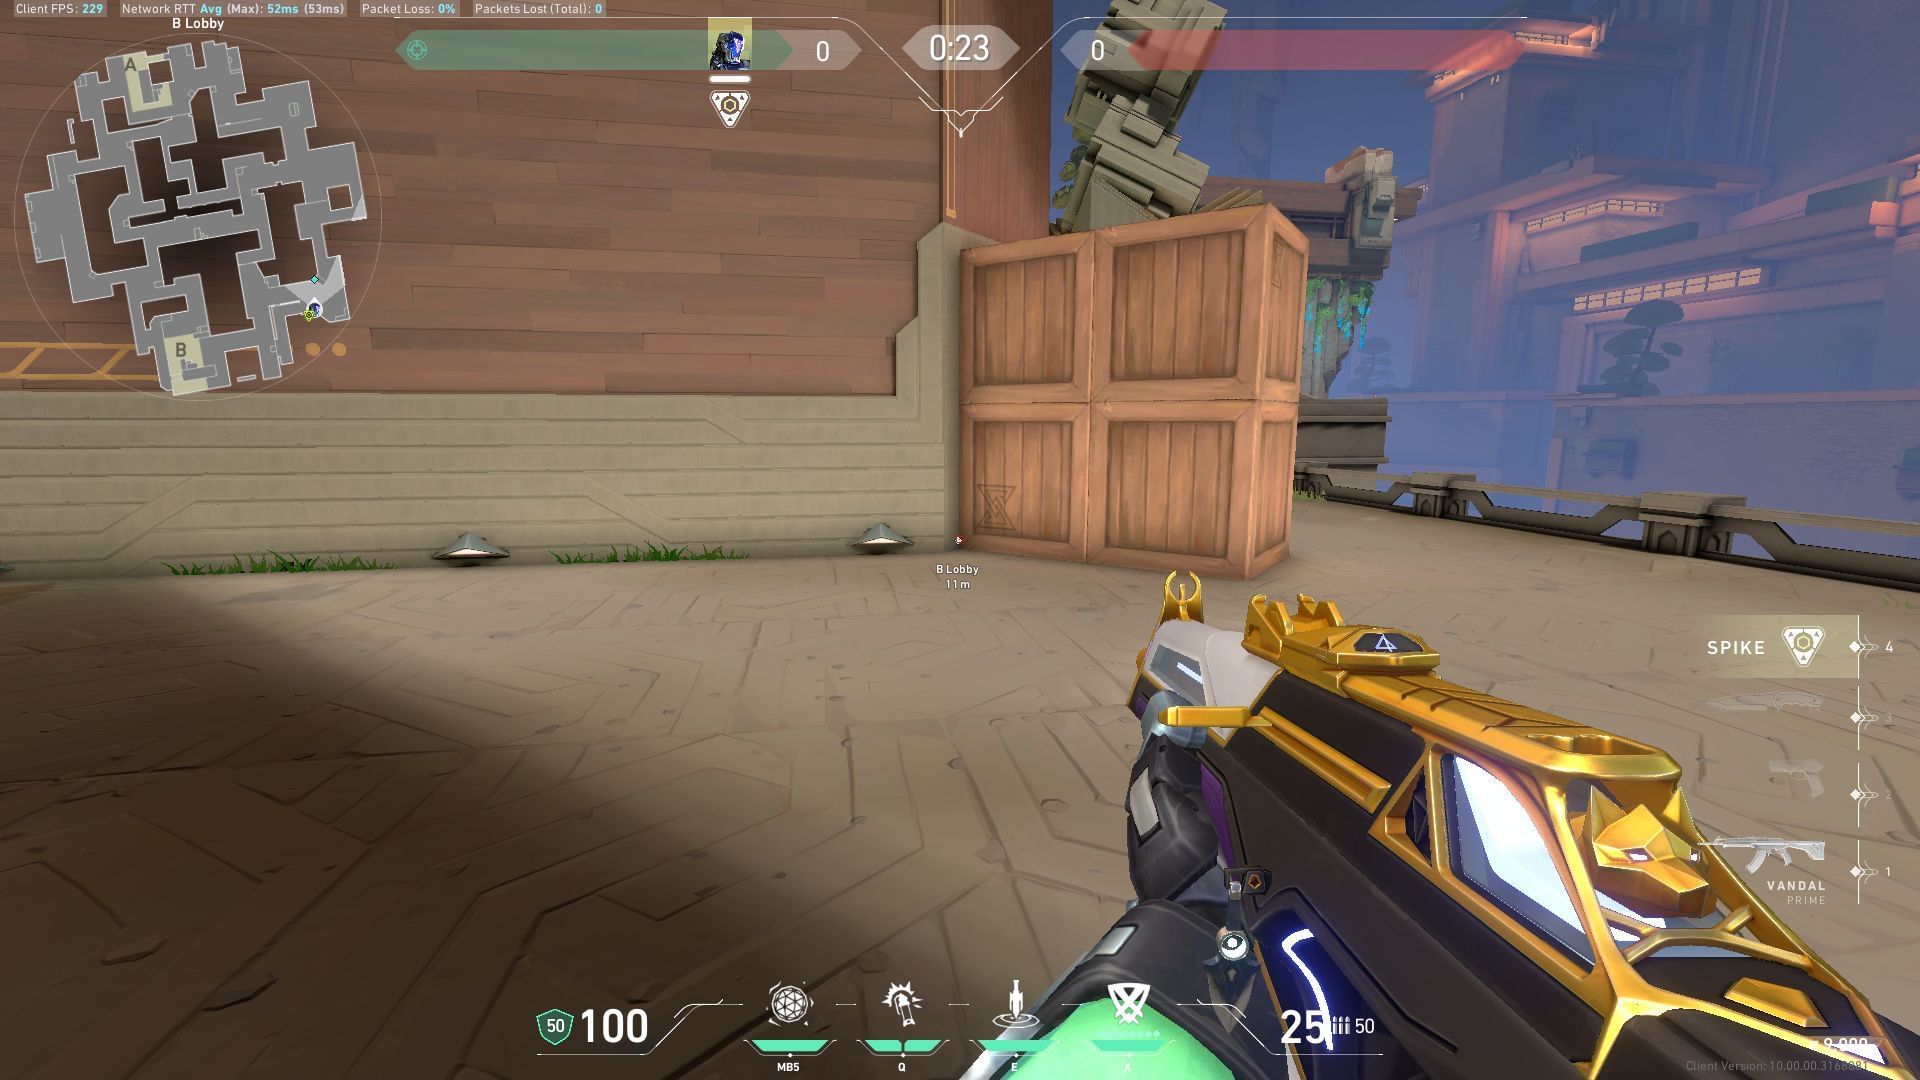
Attacking B-site
B-site Zero/Point lineup
Where to stand
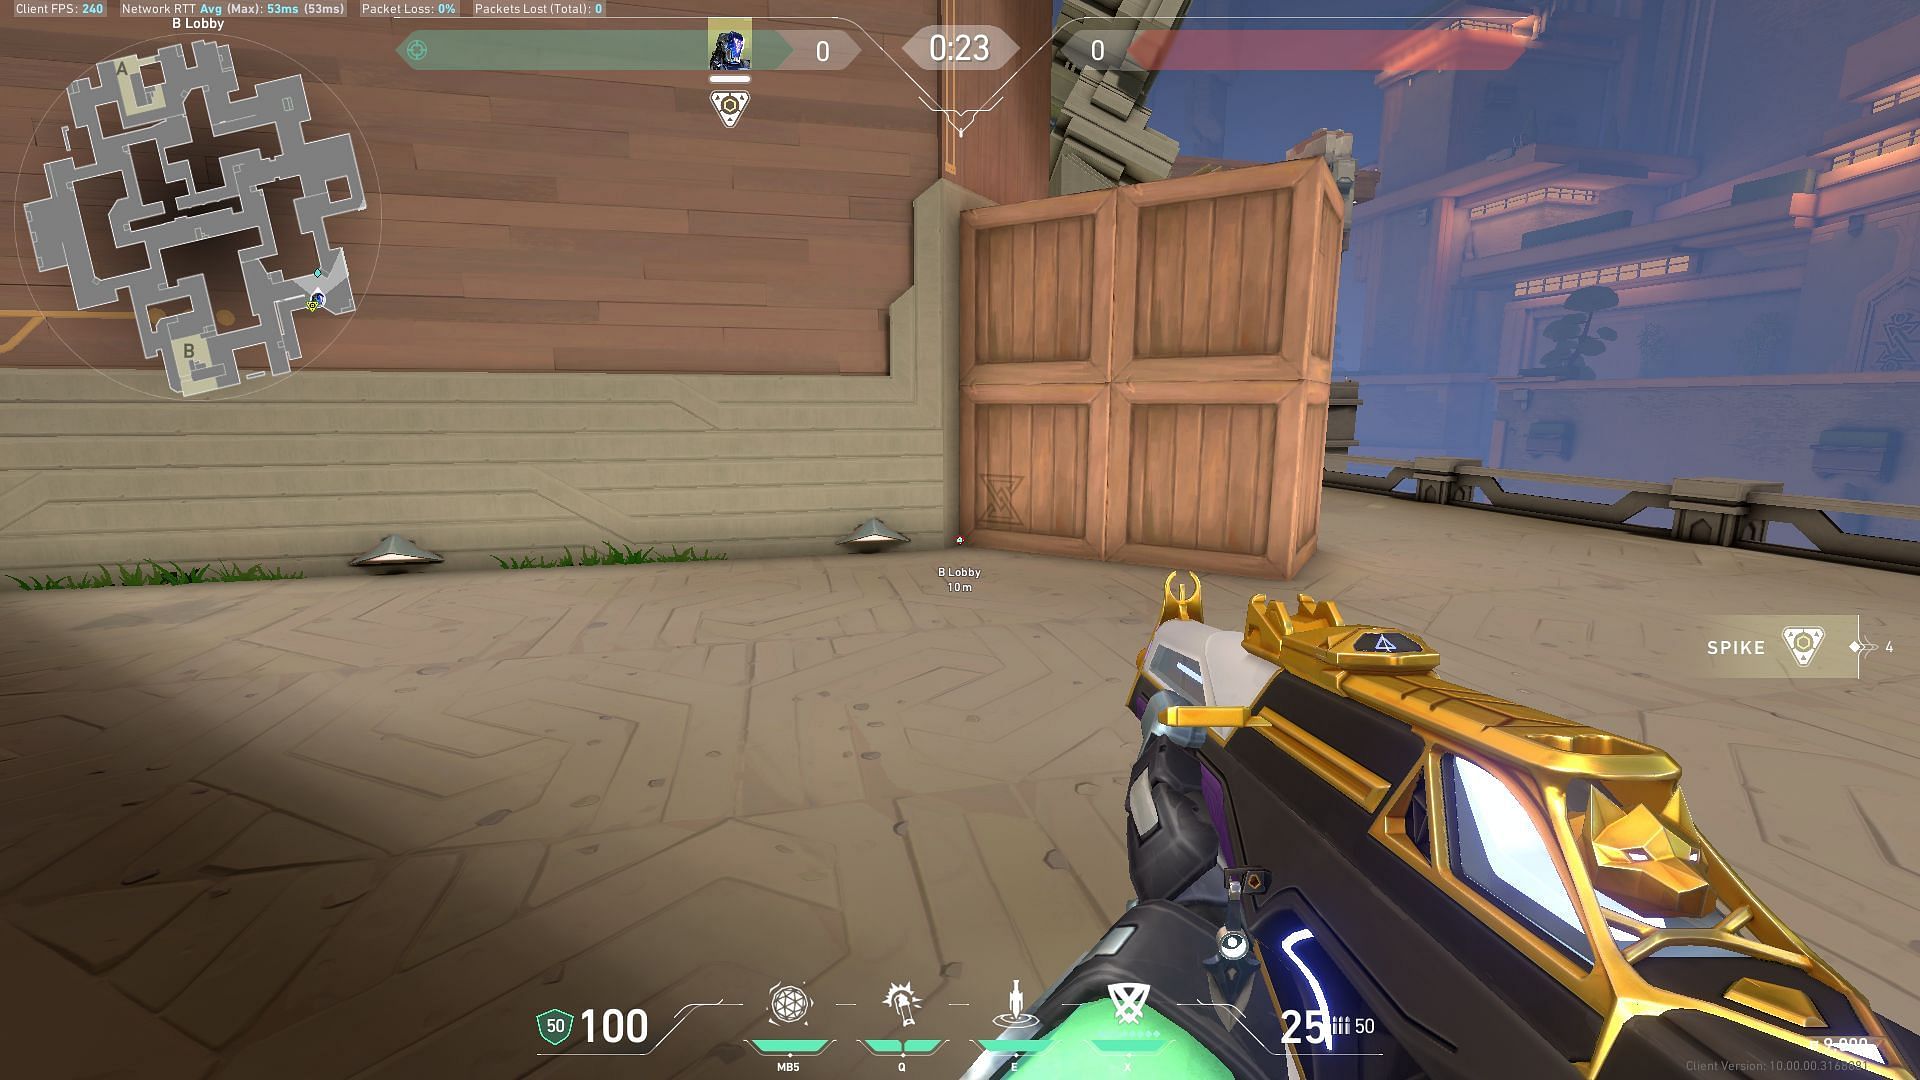
Place yourself in the corner of the box at B-Lobby of the Abyss map in Valorant.
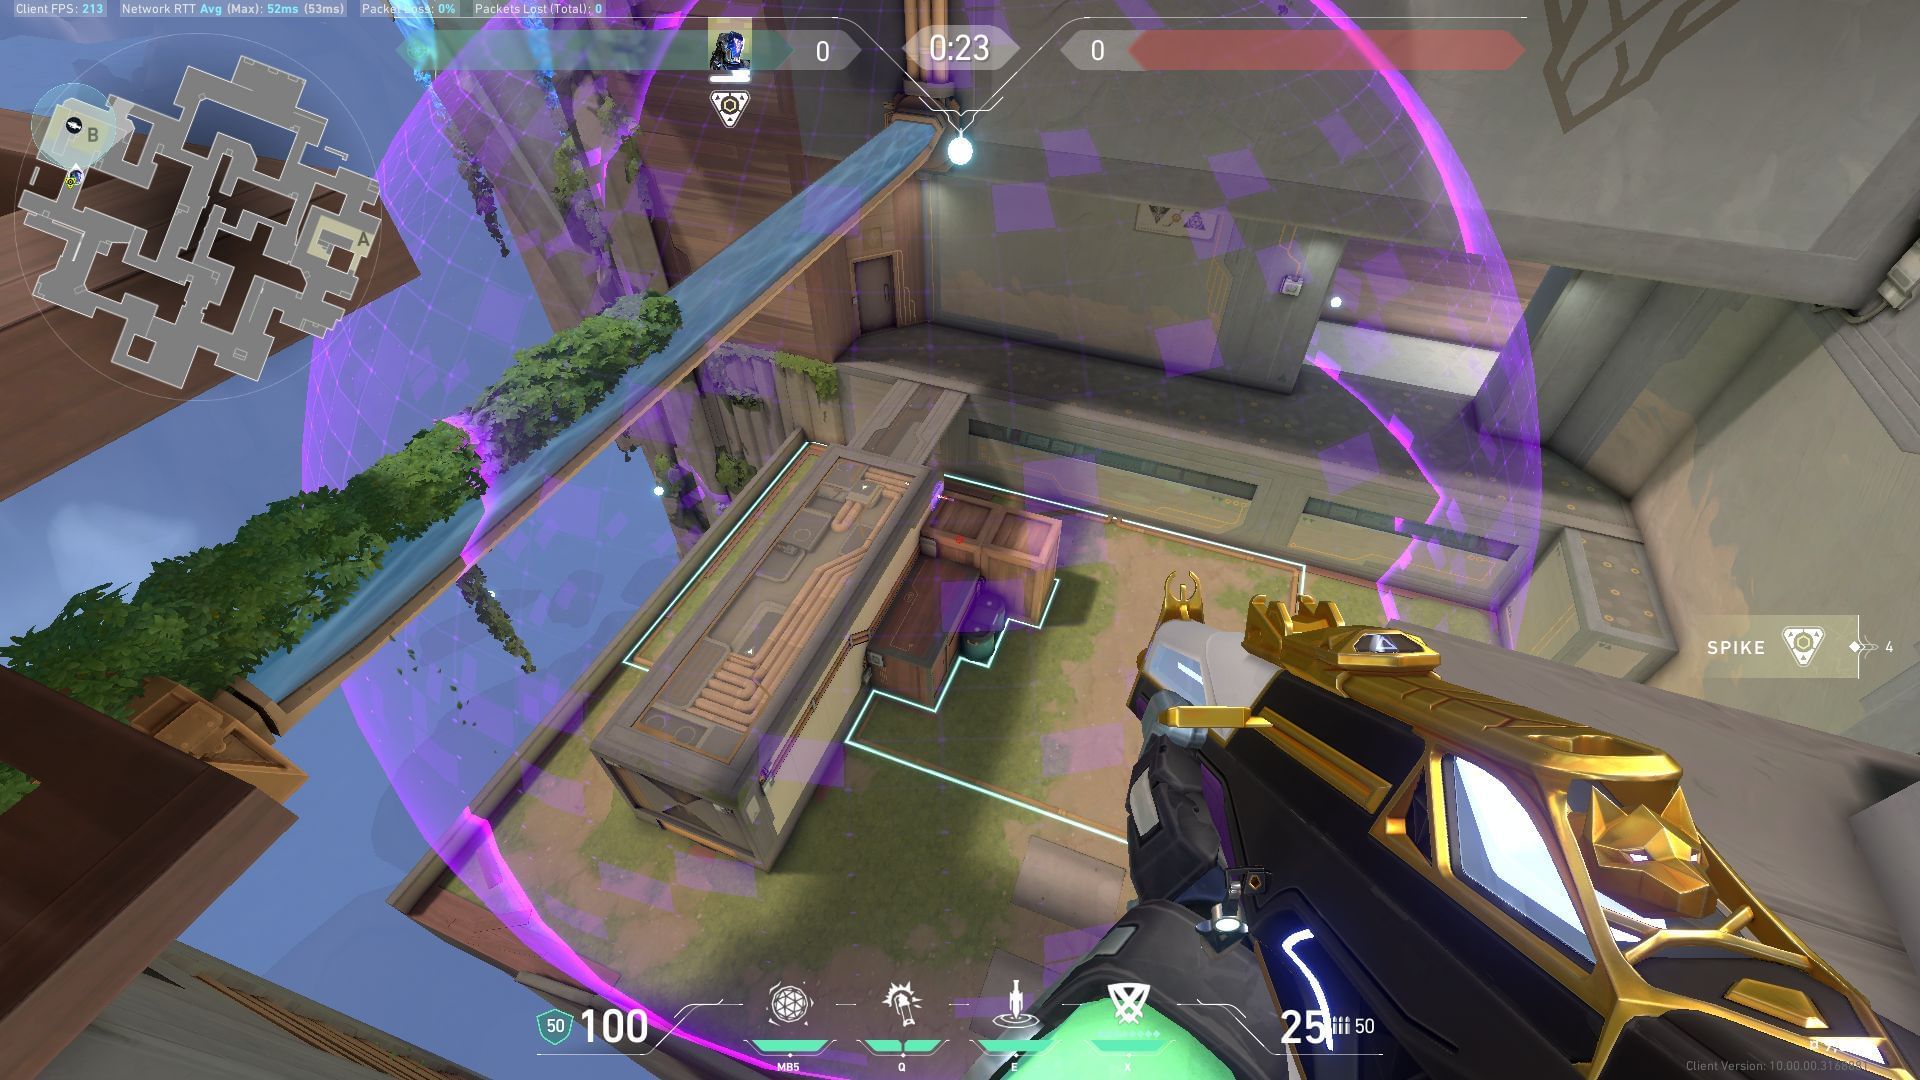
Where to aim

Move your crosshair upwards and place it at the bottom of the rock as indicated in the picture. Equip the Zero/Point blade and use the left click to throw. The blade will land on the default plant spot at B-site.
Result
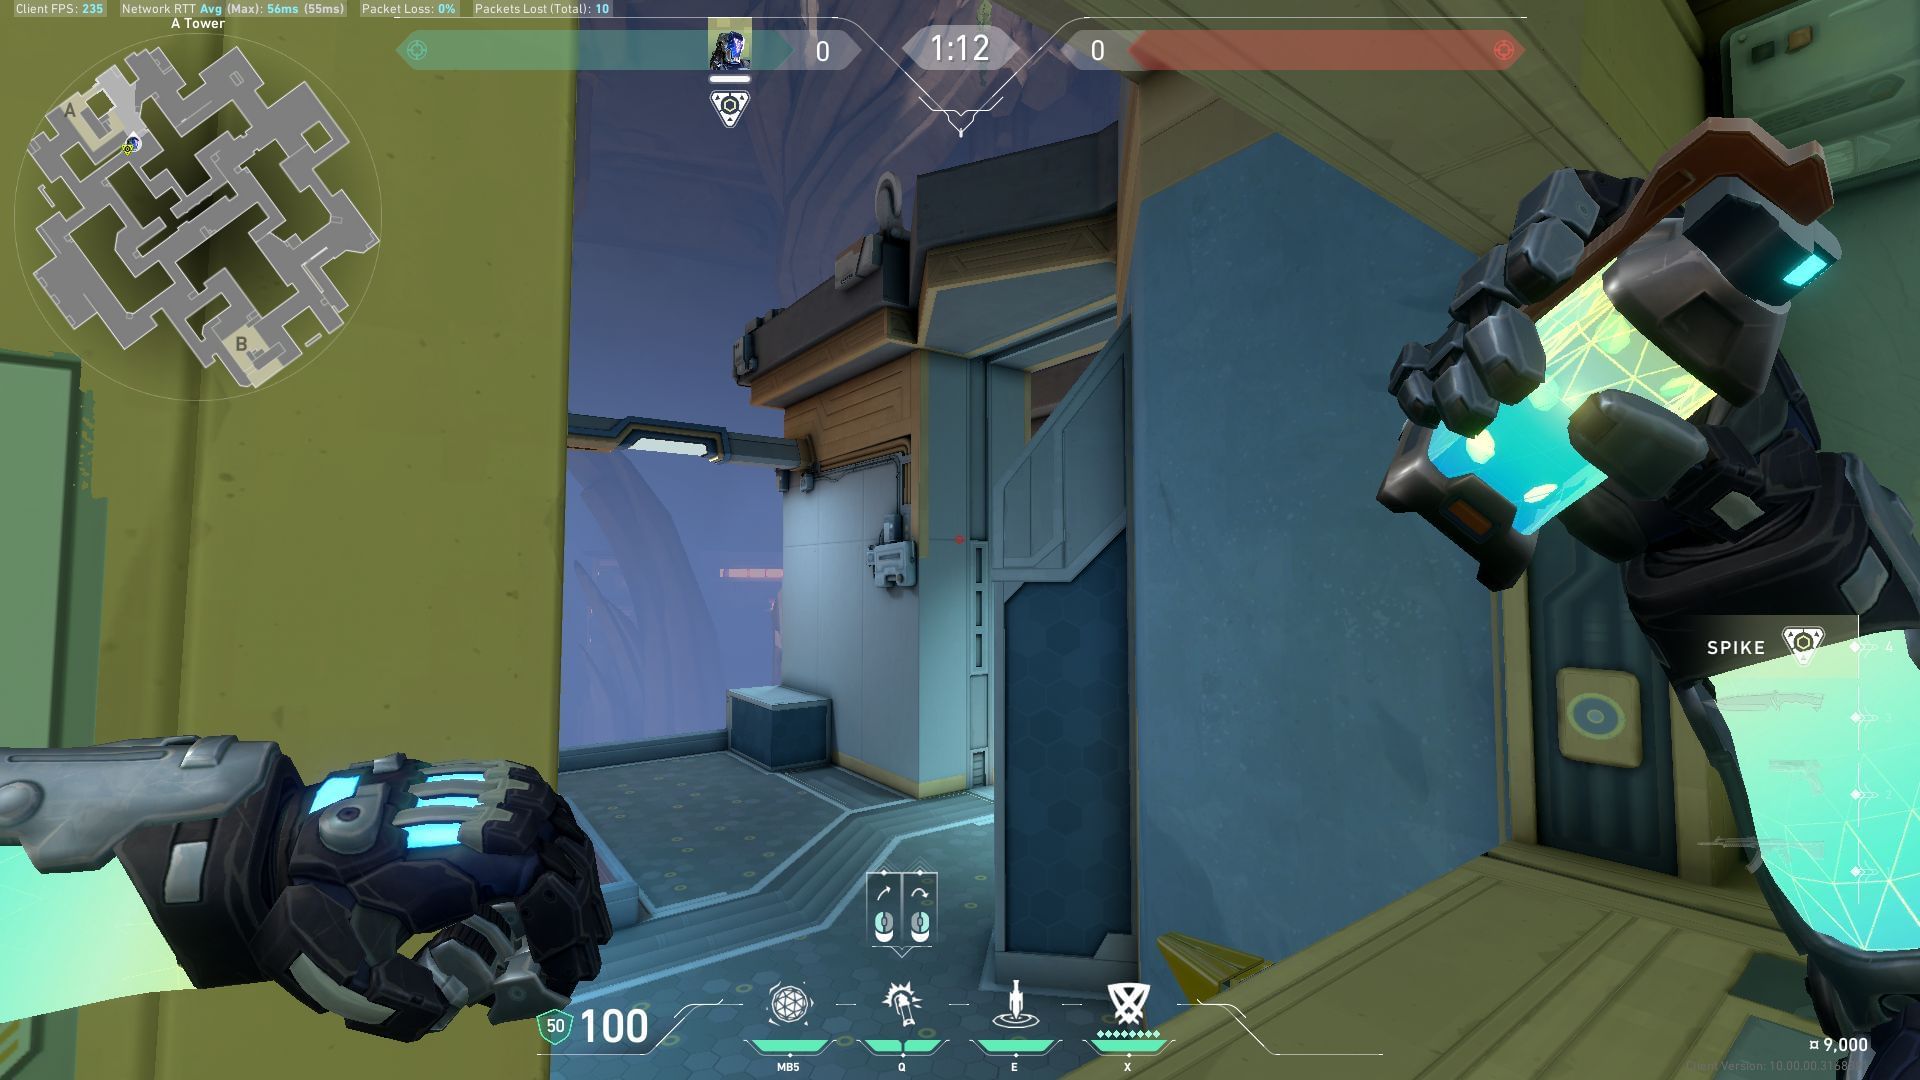
Defending A-site
A-site Zero/Point knife lineup for defense
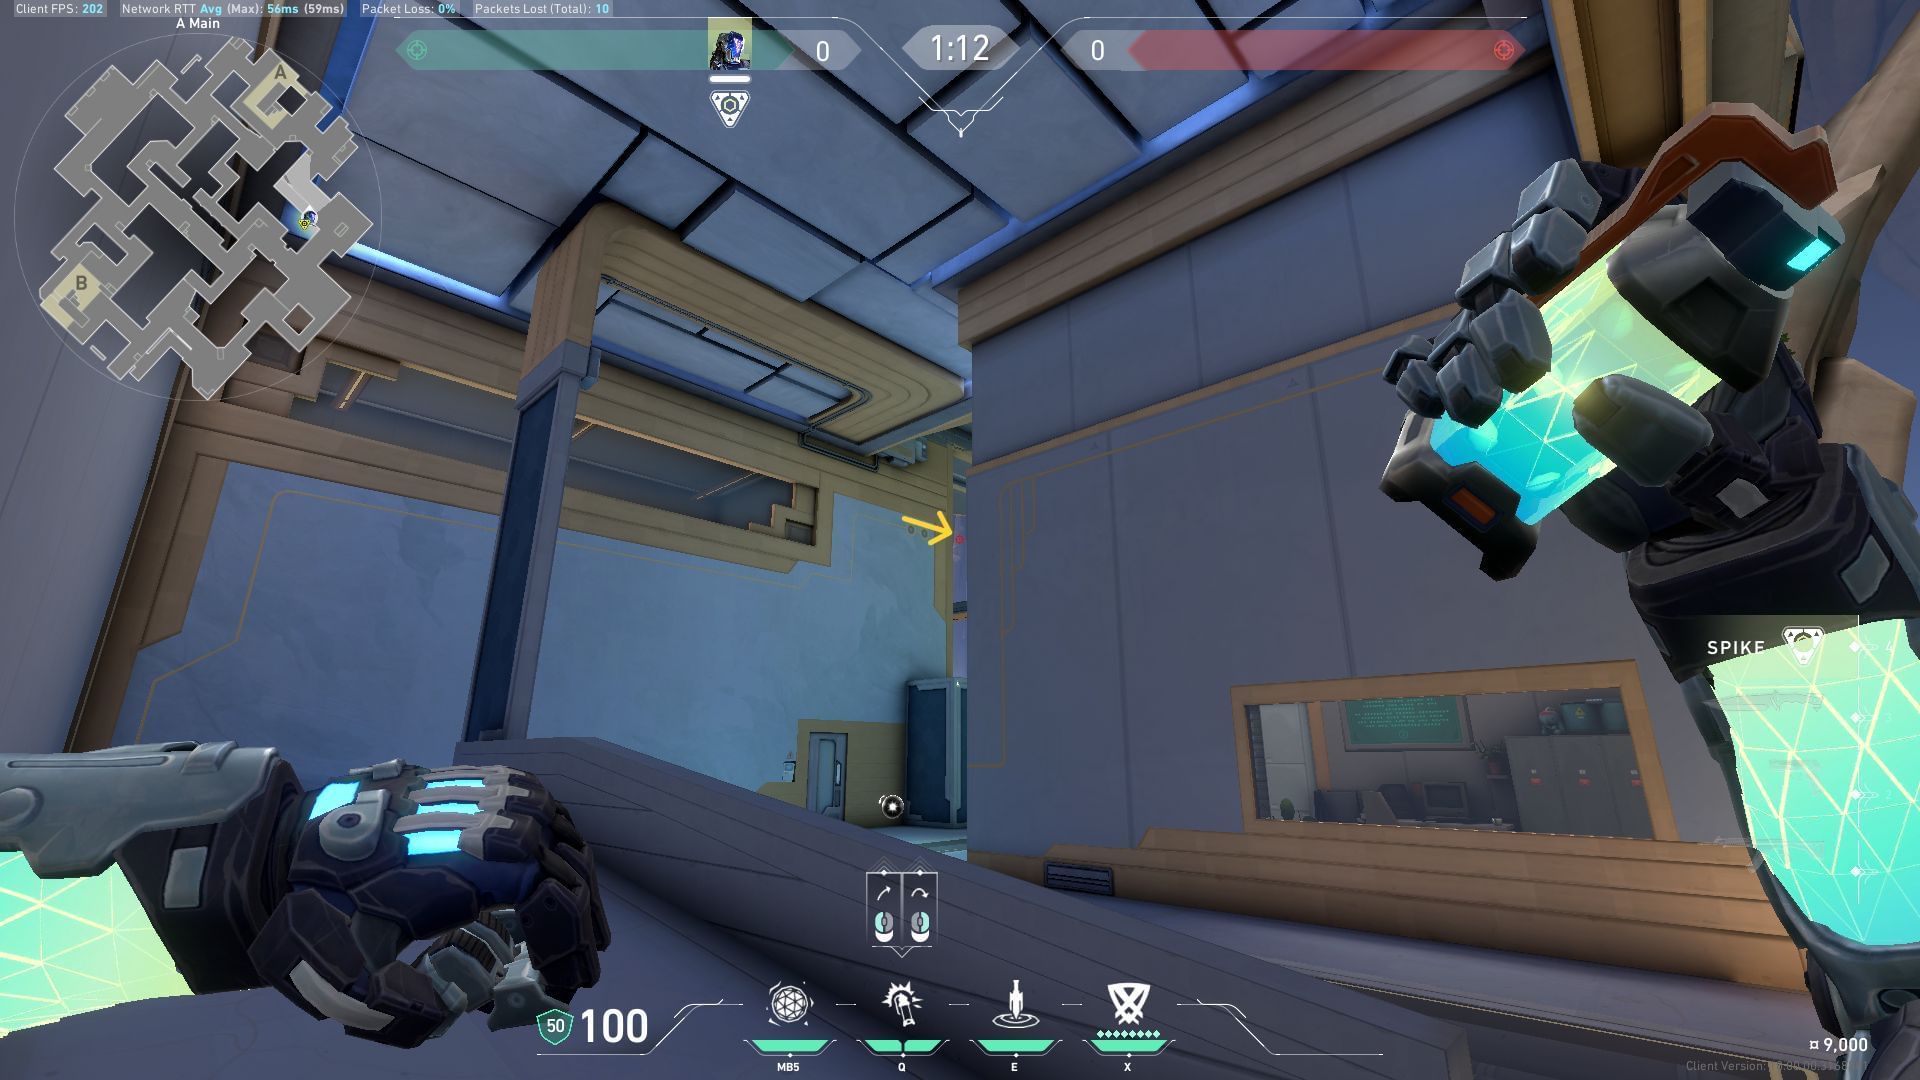
Where to stand

Where to aim
Place the HUD icon of the knife aligning with the design on the roofline as indicated in the picture. Left click to throw.
Result
Also read: All KAY/O lineups for Ascent map
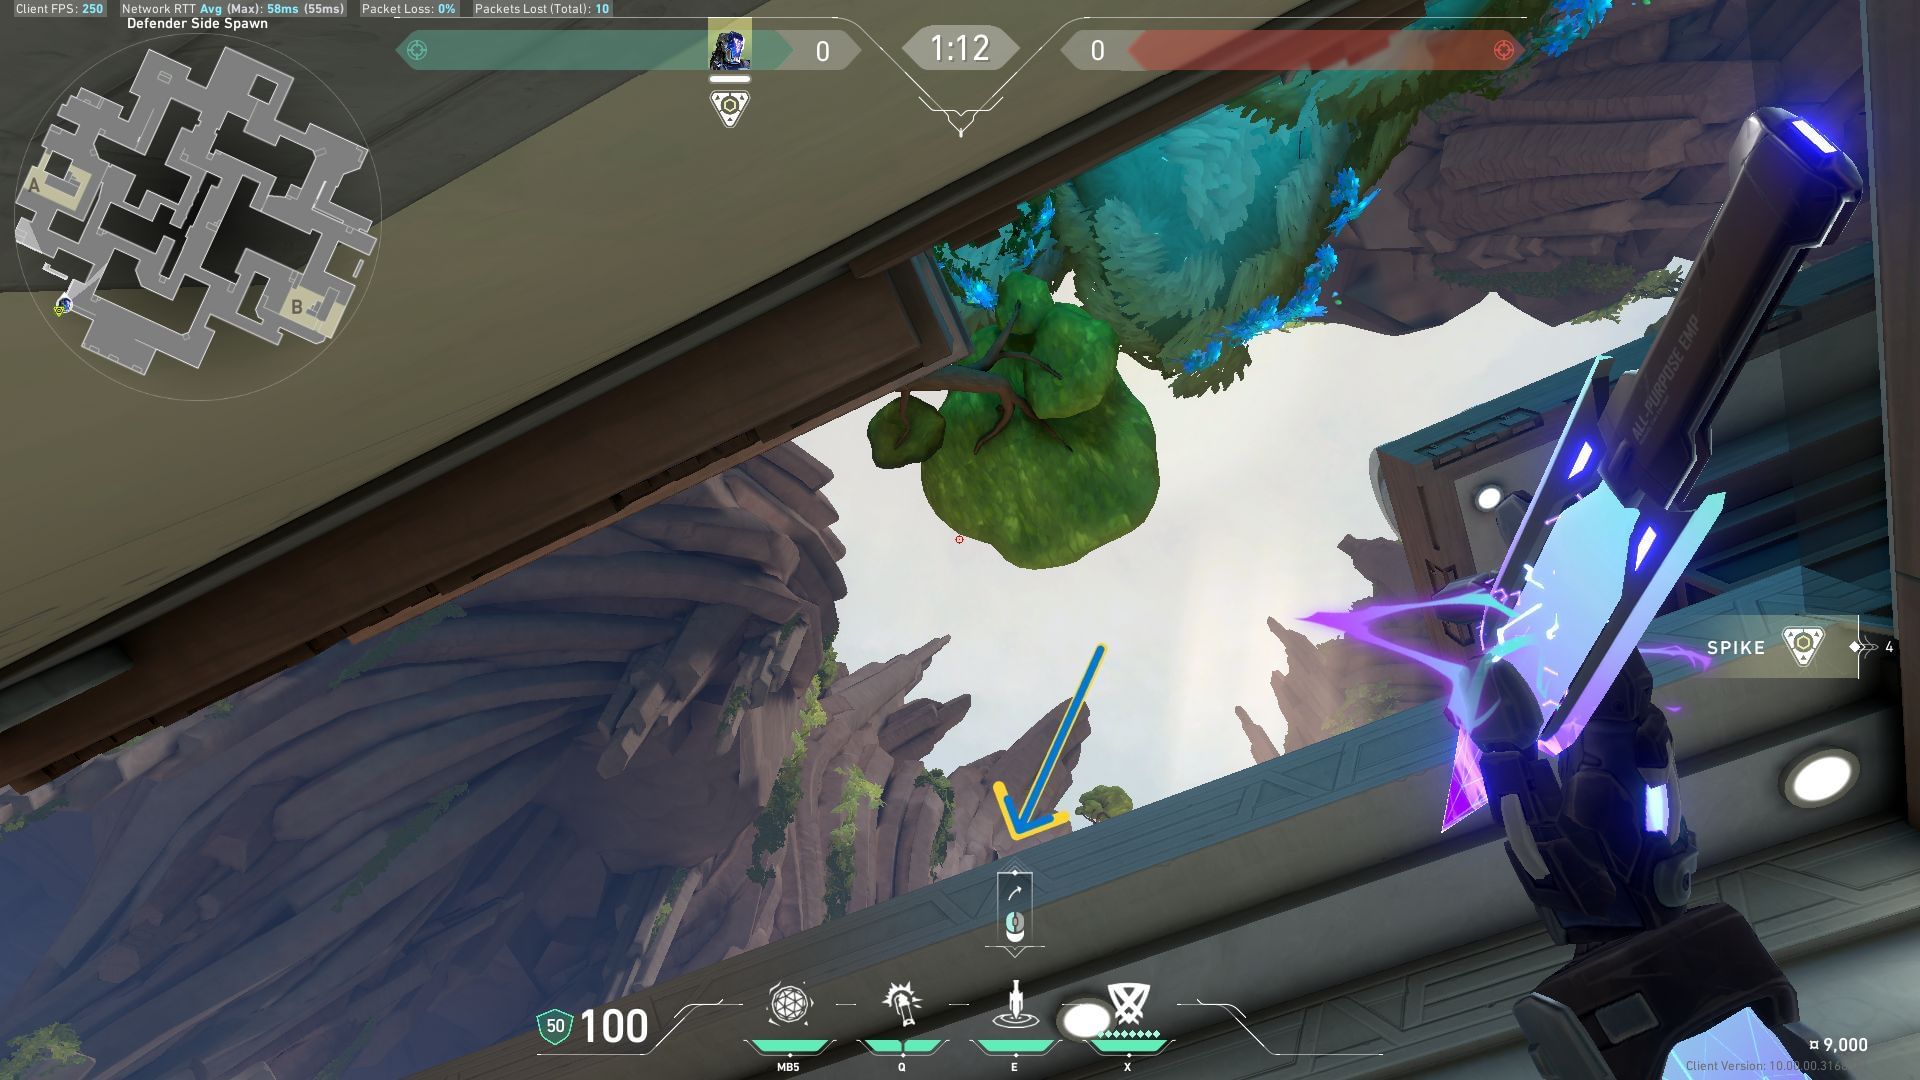
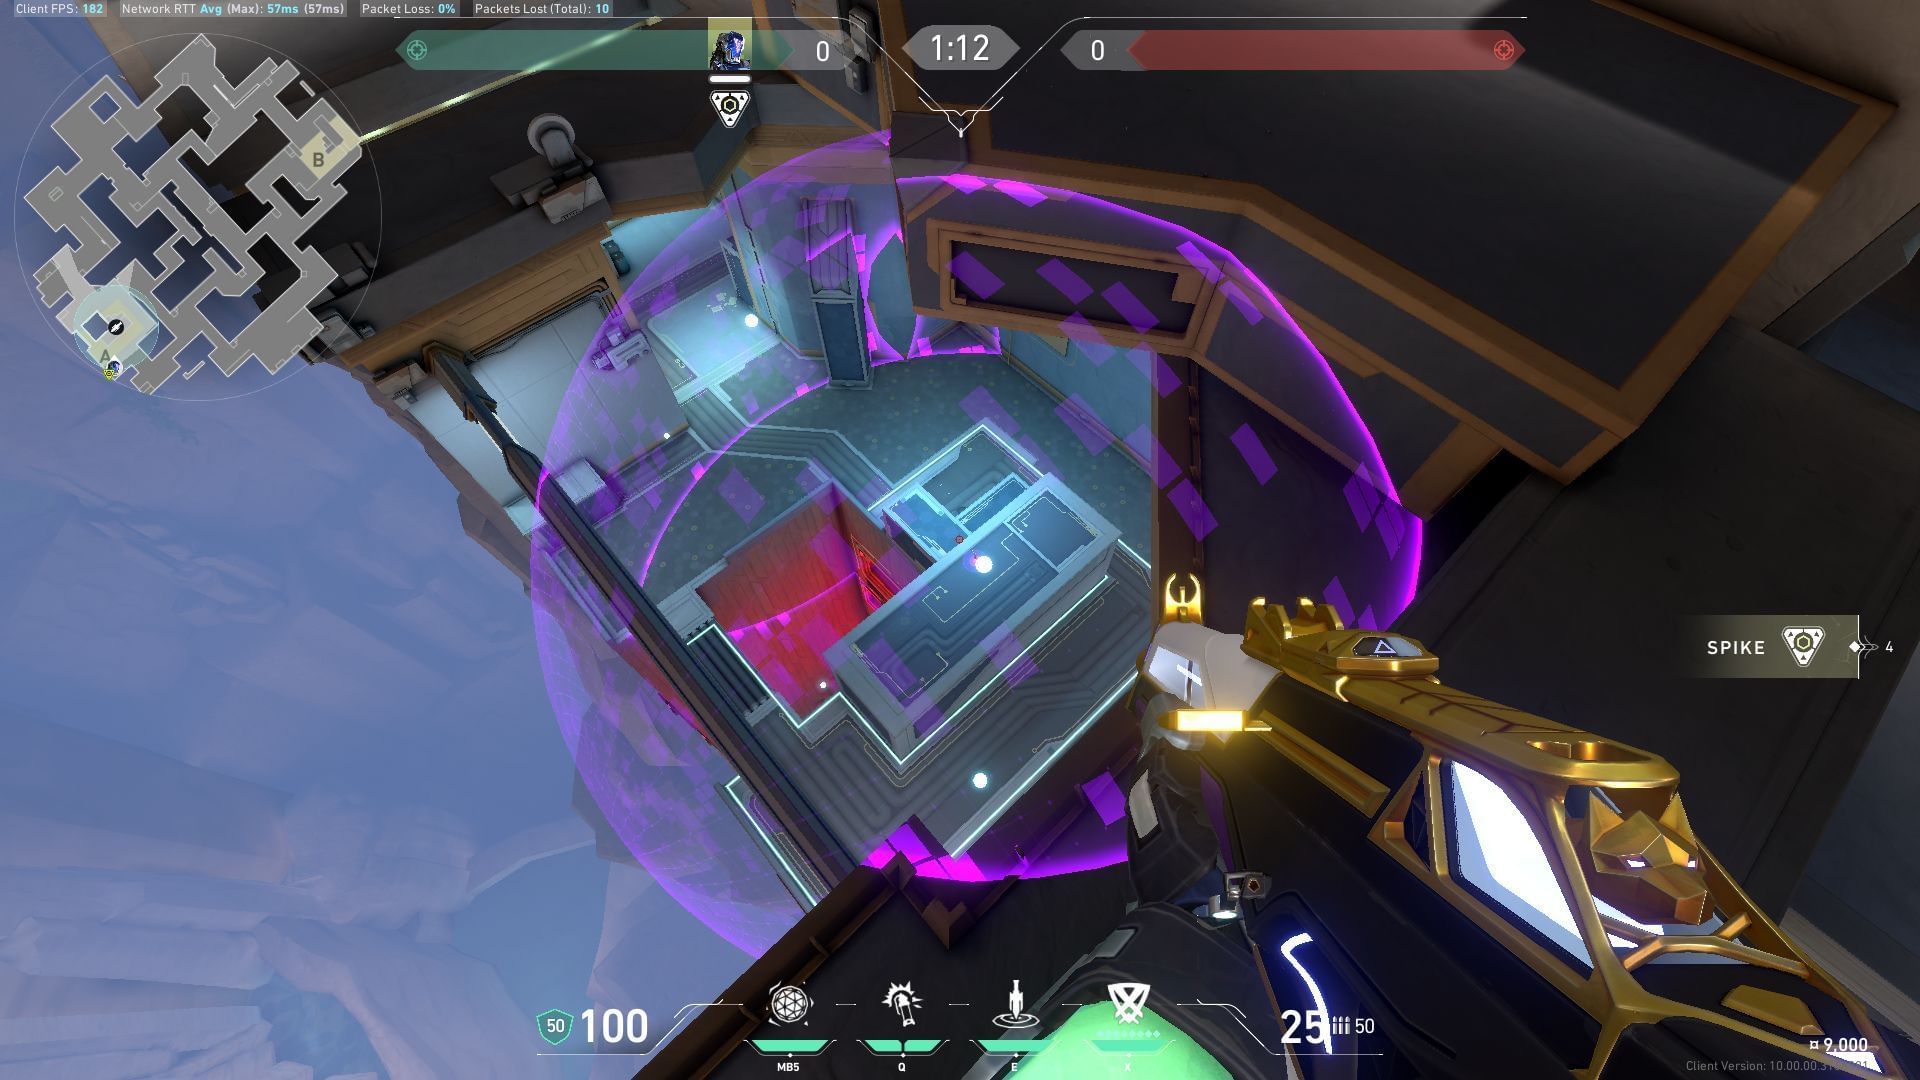
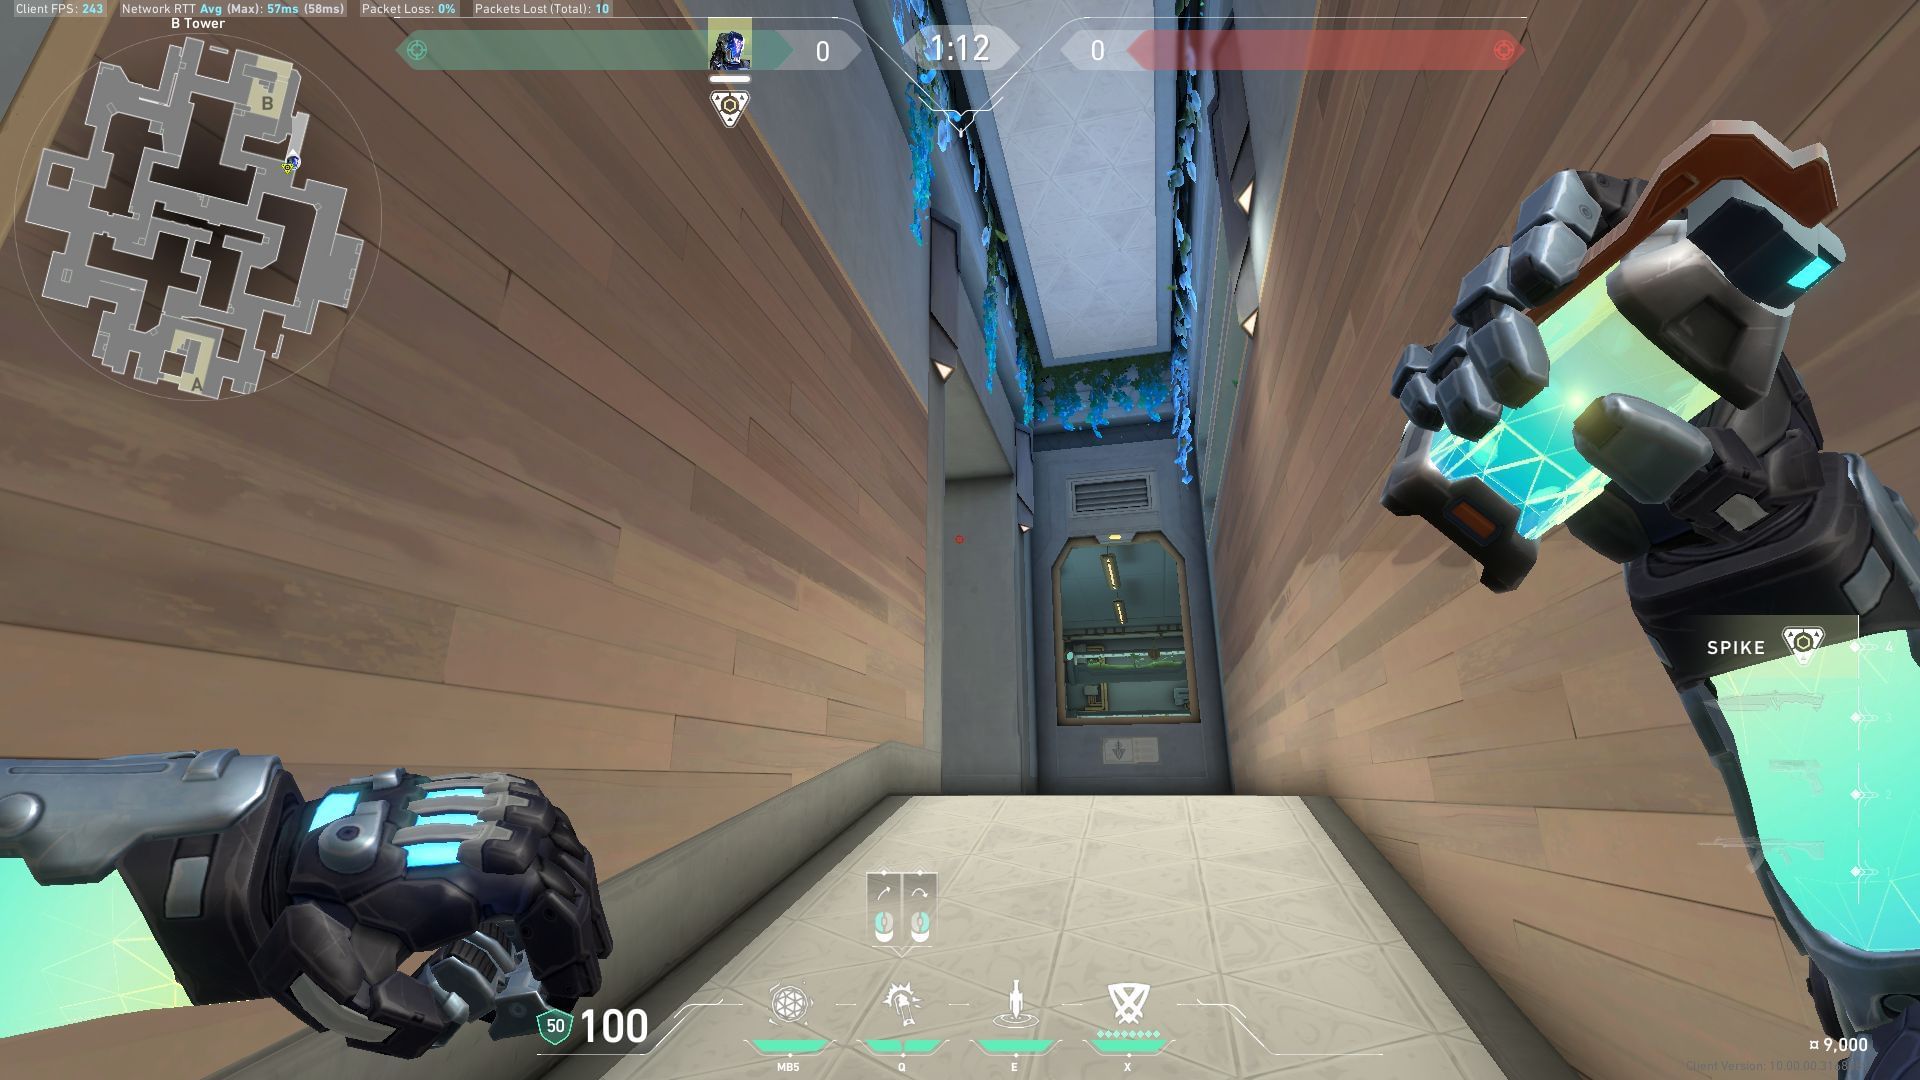
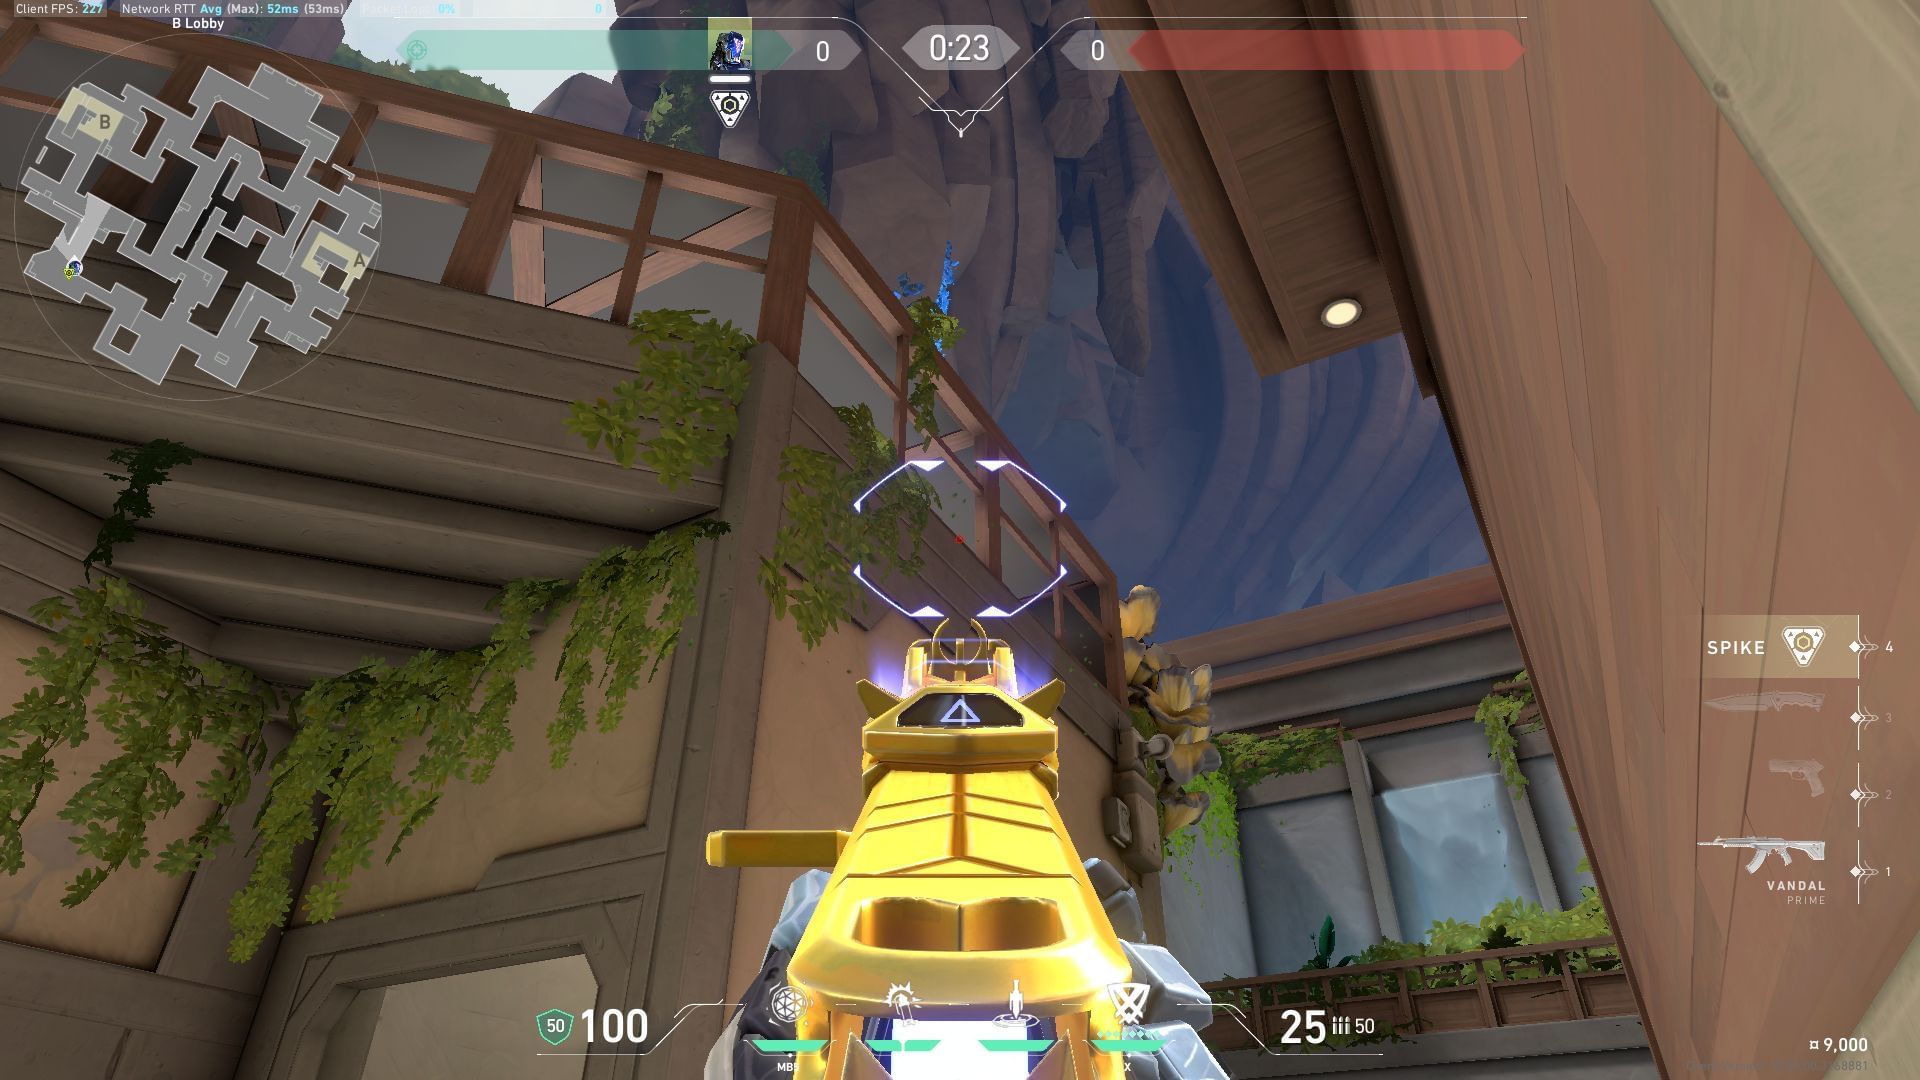
Defending B-site
B-site Zero/Point knife lineup
Where to stand
Place yourself at the corner of the wall at B-site.
Where to aim
Equip the knife and move the crosshair upwards till the HUD icon aligns with the roofline. Left click to throw.
Result
Also read: Best Valorant Agents to duo with KAY/O
How to use Flash/Drive on Abyss?
You can always put a flashbang to good use in Valorant. The Flash/Drive is one of the most important utilities in this KAY/O Abyss guide. All you have to do is pull the pin, line up your arc, and completely blind your opponents with ease.
That said, learning and executing lineups do demand a bit of practice, so make sure you use the images below to take your utility game to the next level.
Attacking A-site
Attacking B-site
Defending A-site
Defending B-site
How to use Frag/Ment on Abyss?
The Frag/Ment is a super useful tool in your loadout. It is highly effective for flushing out enemies hiding in deep angles and can even help you control the pace of a gunfight through area control. Beyond just that, you can make full use of this ability by setting up post-plant lineups for some easy wins.
A-site post-plant Frag/Ment lineup
Where to stand
Place yourself at the edge of the box in the A-Lobby of the Abyss map in Valorant.
Where to aim
Equip Frag/Ment ability and move the crosshair upwards to align the HUD icons with the line on the beam as indicated in the picture. Jump and left-click to throw.
Result
The Frag/Ment Nade will land on the default plant spot in A-Site.
B-site post-plant Frag/Ment lineup
Where to stand
Place yourself at the edge of the box at B-Lobby.
Where to aim
Place your crosshair at the linings of the rock as indicated in the picture. Equip Frag-Ment Nade then Jump and Left click simultaneously to fire.
Result
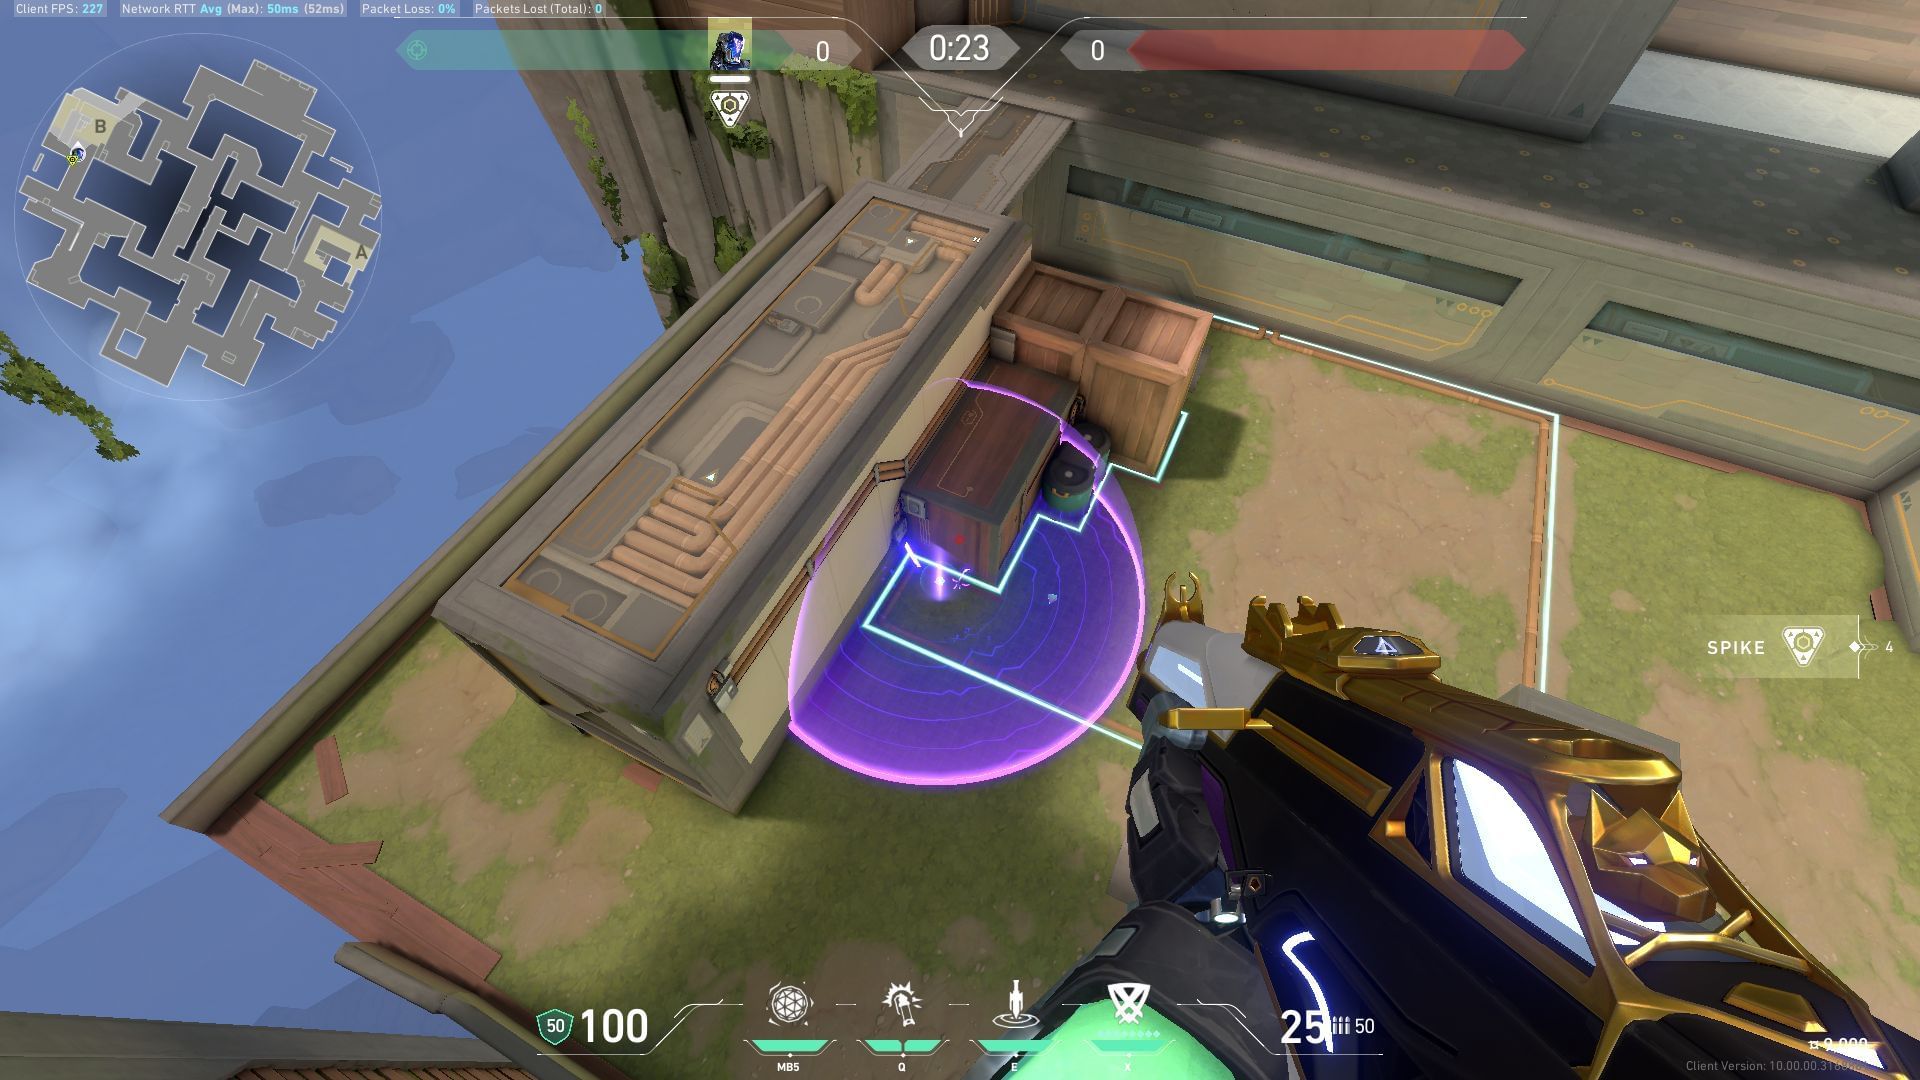
After carefully the lineup steps of this lineup, the Frag/Ment Nade will land on the default plant site at B.
How to use Null/CMD on Abyss?
The Null/CMD is the most straightforward ability in this whole KAY/O Abyss guide. Your ultimate ability is extremely strong and can be just the push your team needs to burst onto a site and take control. There are no specific lineups or timings to learn for this ability. All you have to remember is to play with your team and to cover each other's backs.
Also read: How to play KAY/O on Lotus in Valorant
Stay tuned to Sportskeeda for more updates.

Are you stuck on today's Wordle? Our Wordle Solver will help you find the answer.