

'%20x='0'%20y='0'%20height='100%25'%20width='100%25'%20%0A%20%20%20%20%20%20%20%20%20%20xlink%3Ahref='data:image/jpg;base64,/9j/2wBDAAYEBQYFBAYGBQYHBwYIChAKCgkJChQODwwQFxQYGBcUFhYaHSUfGhsjHBYWICwgIyYnKSopGR8tMC0oMCUoKSj/2wBDAQcHBwoIChMKChMoGhYaKCgoKCgoKCgoKCgoKCgoKCgoKCgoKCgoKCgoKCgoKCgoKCgoKCgoKCgoKCgoKCgoKCj/wgARCAAGAAoDASIAAhEBAxEB/8QAFgABAQEAAAAAAAAAAAAAAAAAAAUH/8QAFAEBAAAAAAAAAAAAAAAAAAAAA//aAAwDAQACEAMQAAAAhZ6A/wD/xAAhEAABAgUFAQAAAAAAAAAAAAABAgMABAURQhITFCMxYf/aAAgBAQABPwCizyajTi1tpYaaF0BtAvoCR79iYmmOQ71ZHER//8QAFxEAAwEAAAAAAAAAAAAAAAAAAAERMf/aAAgBAgEBPwDHD//EABYRAAMAAAAAAAAAAAAAAAAAAAARQf/aAAgBAwEBPwCM/9k='%3E%3C/image%3E%3C/svg%3E)
Our Valorant Tejo Bind guide aims to provide players with the best tips and lineups they can use in-game. He is the seventh Initiator and made his debut in the Season 2025 Act 1 update. Hailing from Columbia, Tejo's set of utilities focuses on explosives and intel gathering. On a map like Bind, Initiators play a vital role in clearing out tricky zones by collecting info and helping their team execute effectively.
Tejo is one of the best choices as Initiator in this map as his abilities act as a combination of both Duelist and Initiator roles in Valorant. This guide is all about detailed insights on the effective usage of Tejo in the Bind map of Valorant.
Valorant Tejo Bind guide: How to use the Stealth Drone
When it comes to checking corners and obtaining information about a certain location on the Bind map, Tejo's Stealth Drone is a useful tool. His Stealth Drone is also directly controllable, just like Sova's Owl Drone. However, like Cypher's camera, this ability reveals opponents in addition to disabling them, unlike Sova's drone. Pressing fire causes a pulse to be triggered, suppressing and exposing a group of enemies.
Looking for Crossword hints & solutions? Check out latest NYT Mini Crossword Answers, LA Times Crossword Answers, and Atlantic Crossword Answers
Use the Stealth Drone to clear out areas like the A-Lamps, A-Bath, B-Garden, B-Elbow, and other similar areas. Tejo is susceptible to enemy attacks when using this drone, therefore you should use it from a secure location.
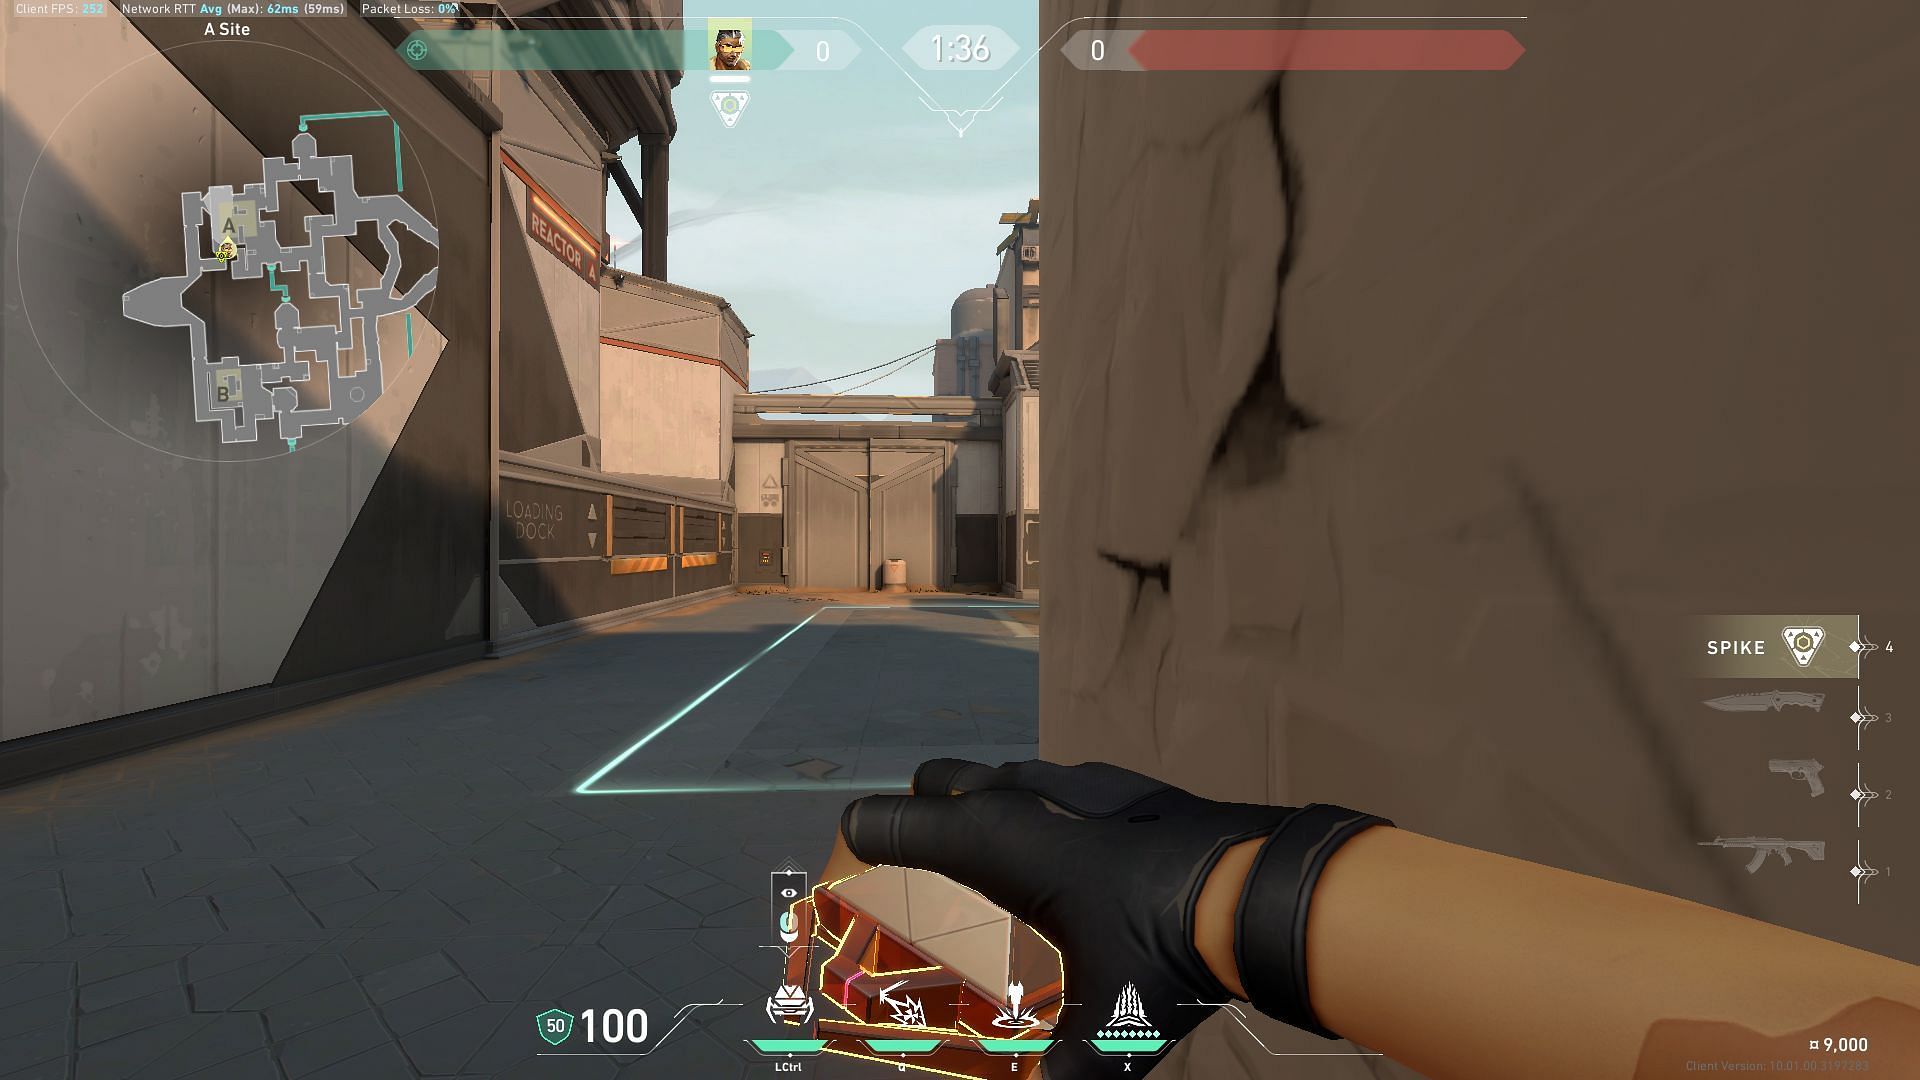
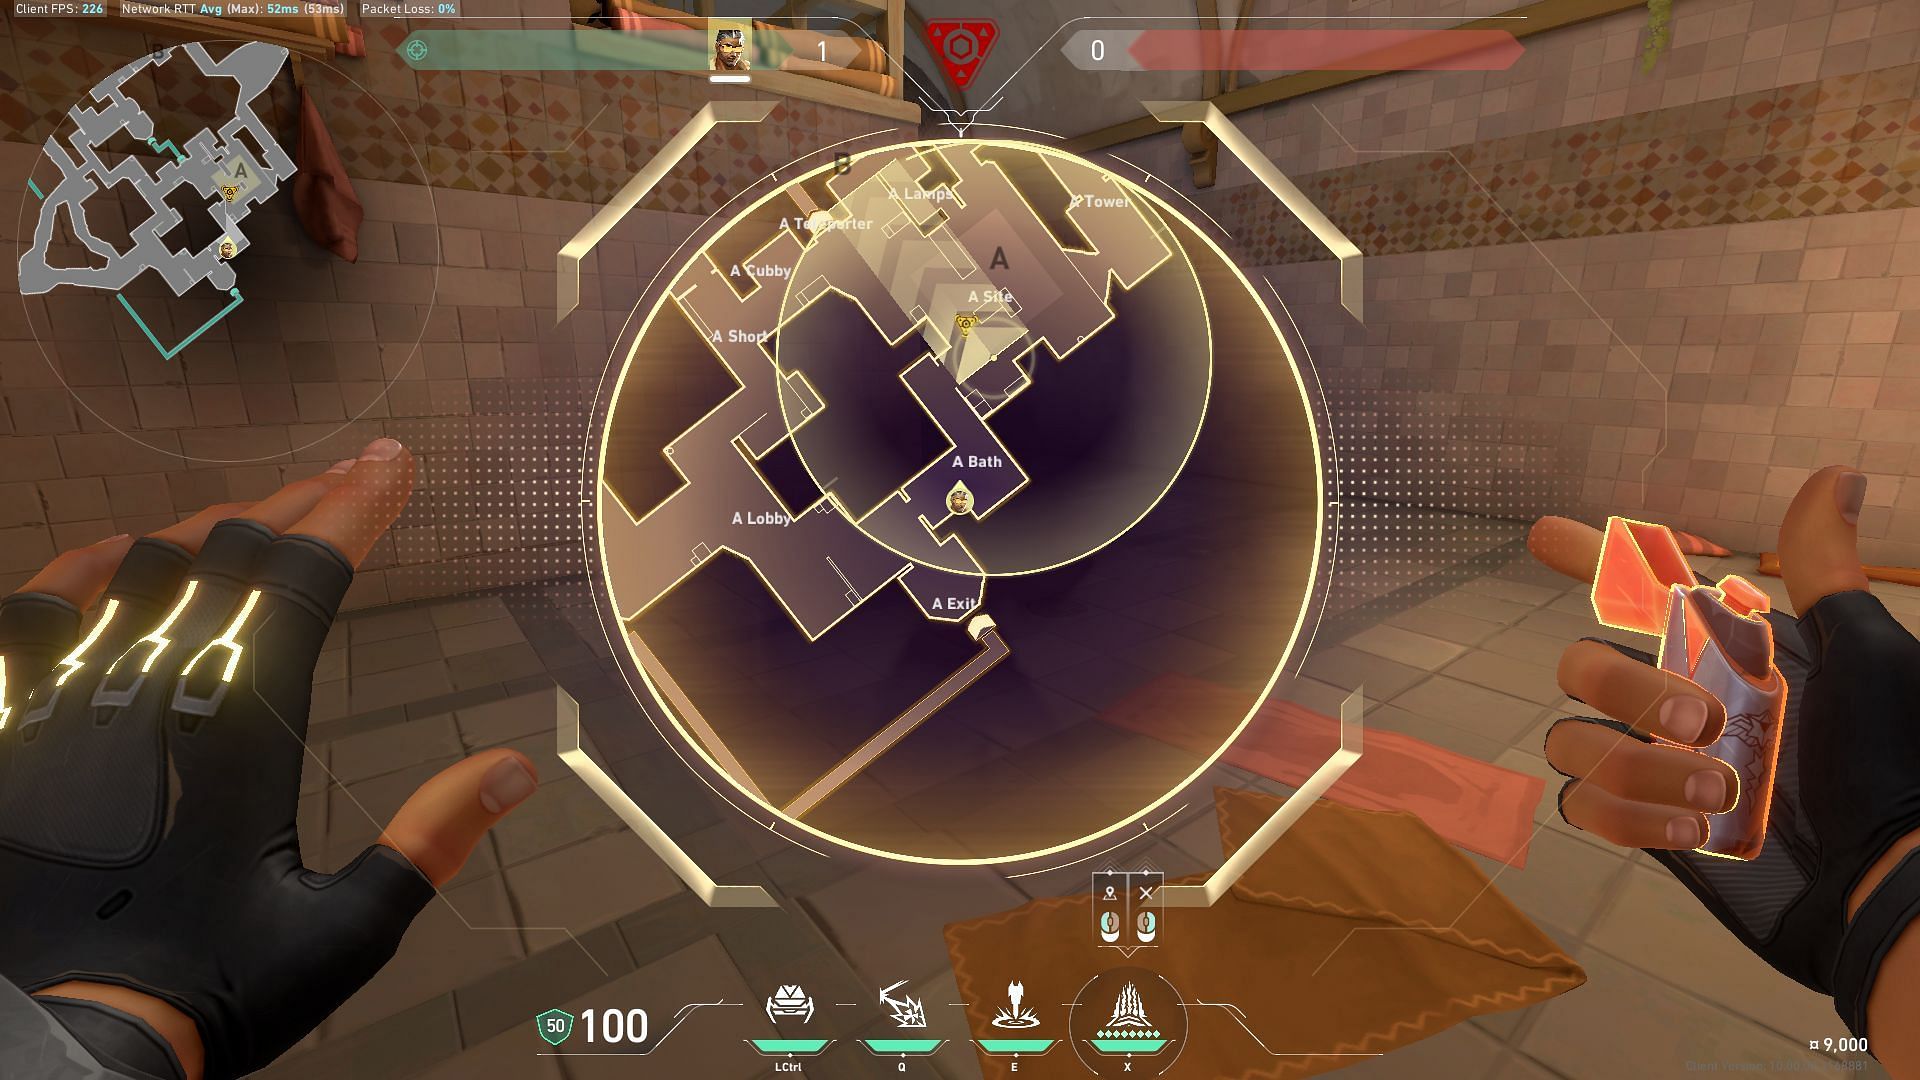
Attacking A site option 1
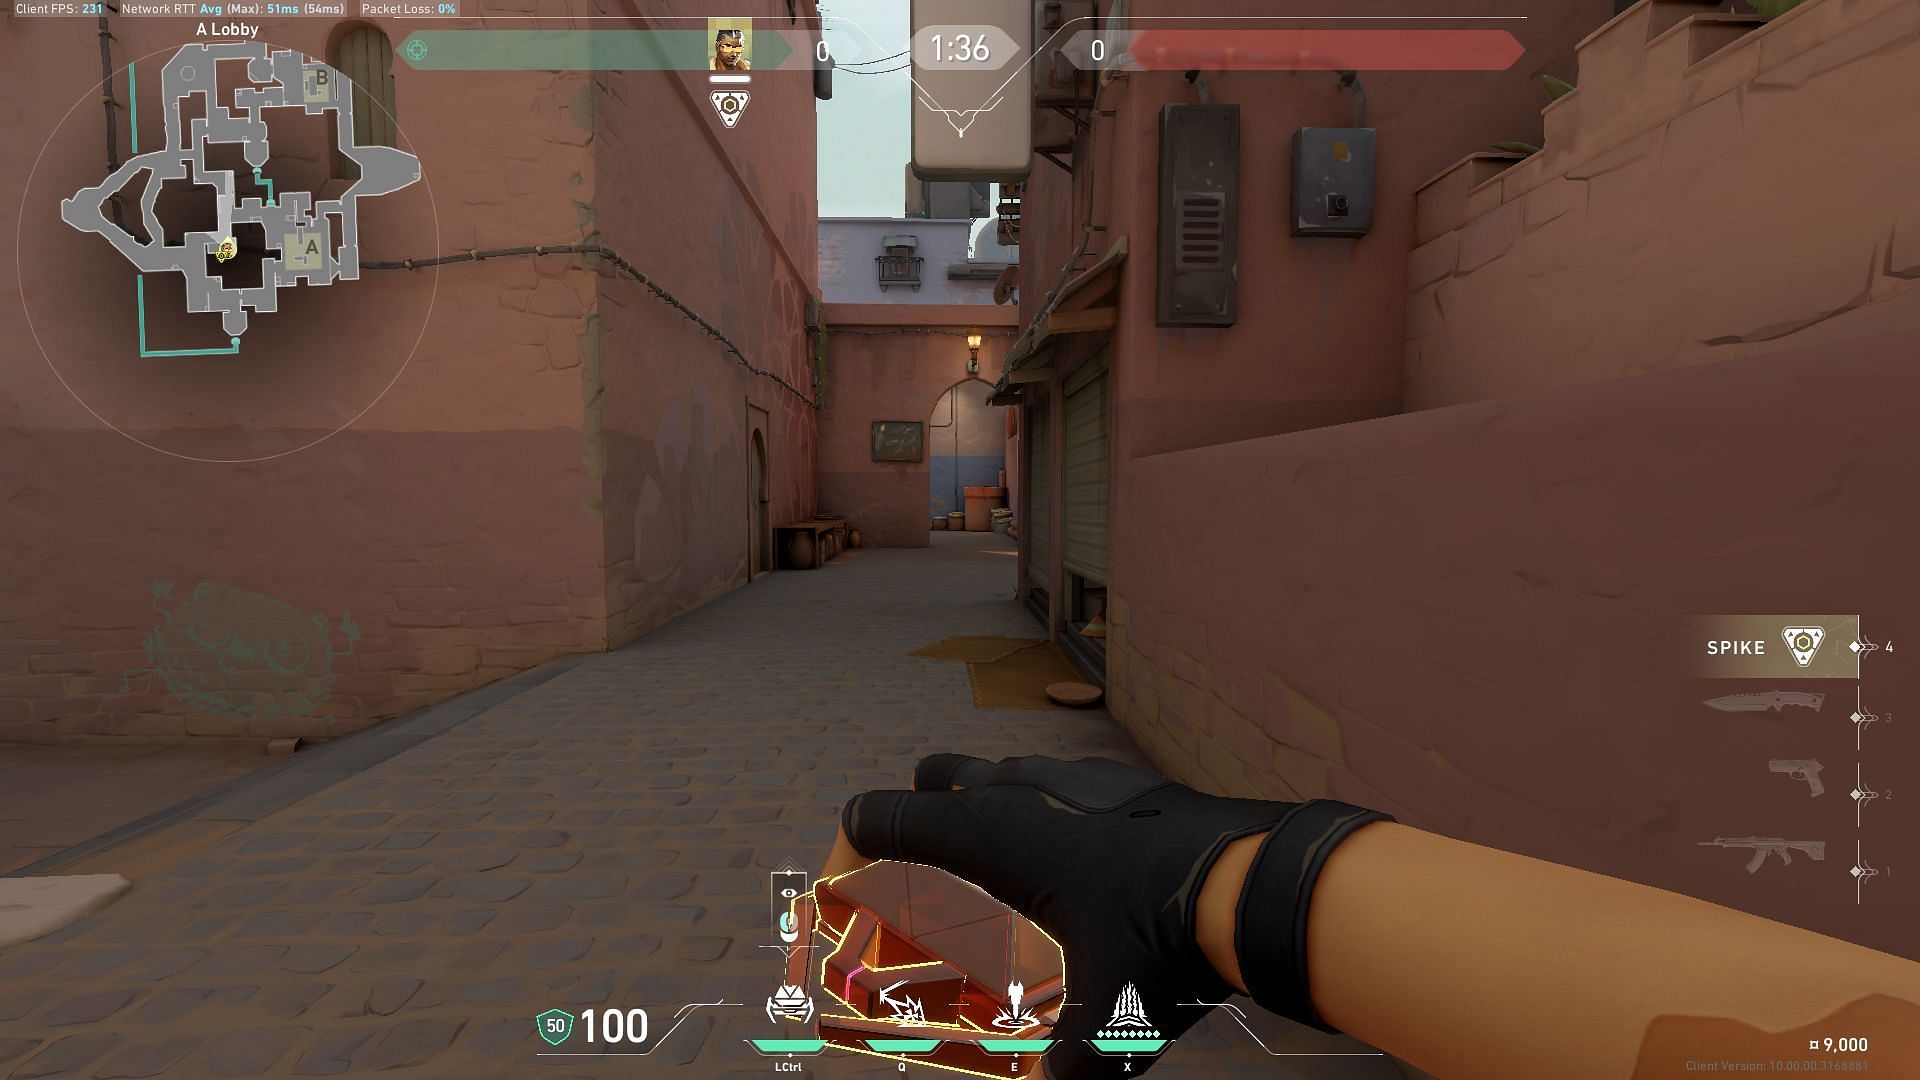
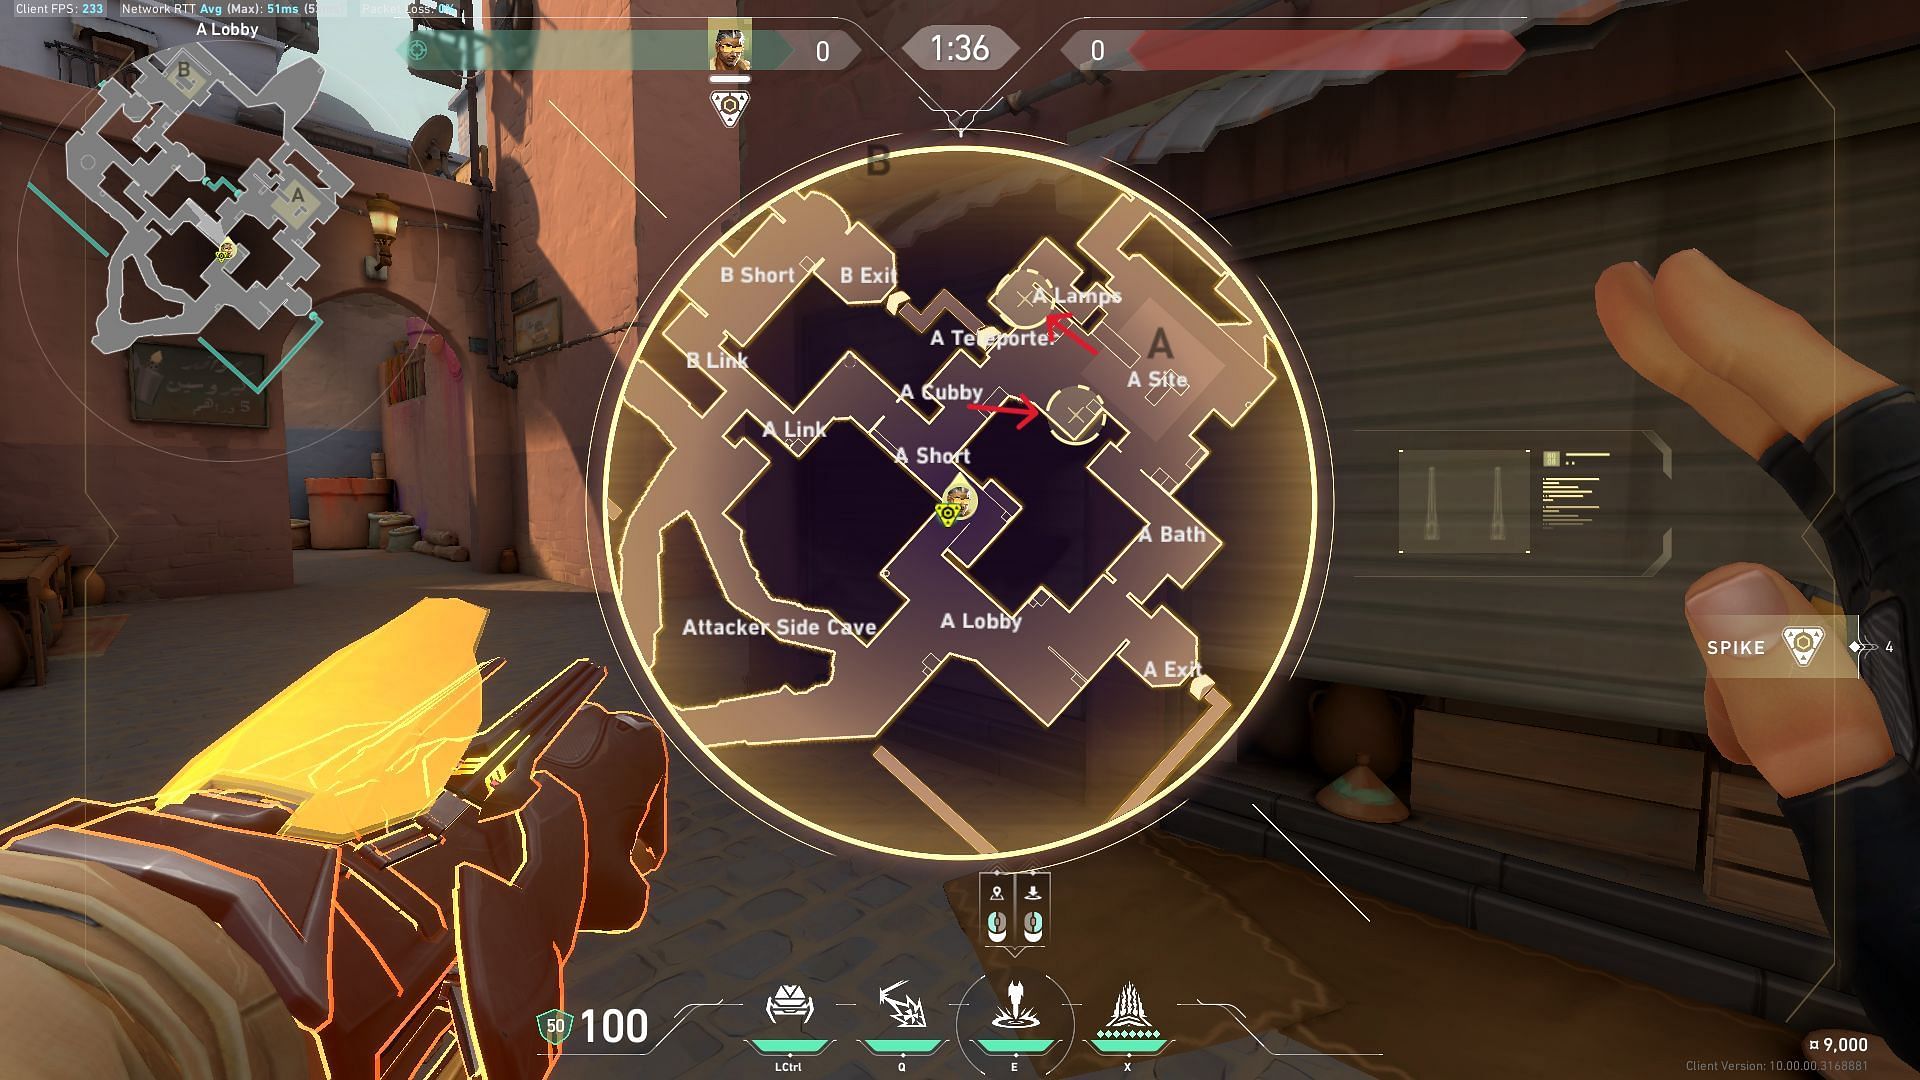
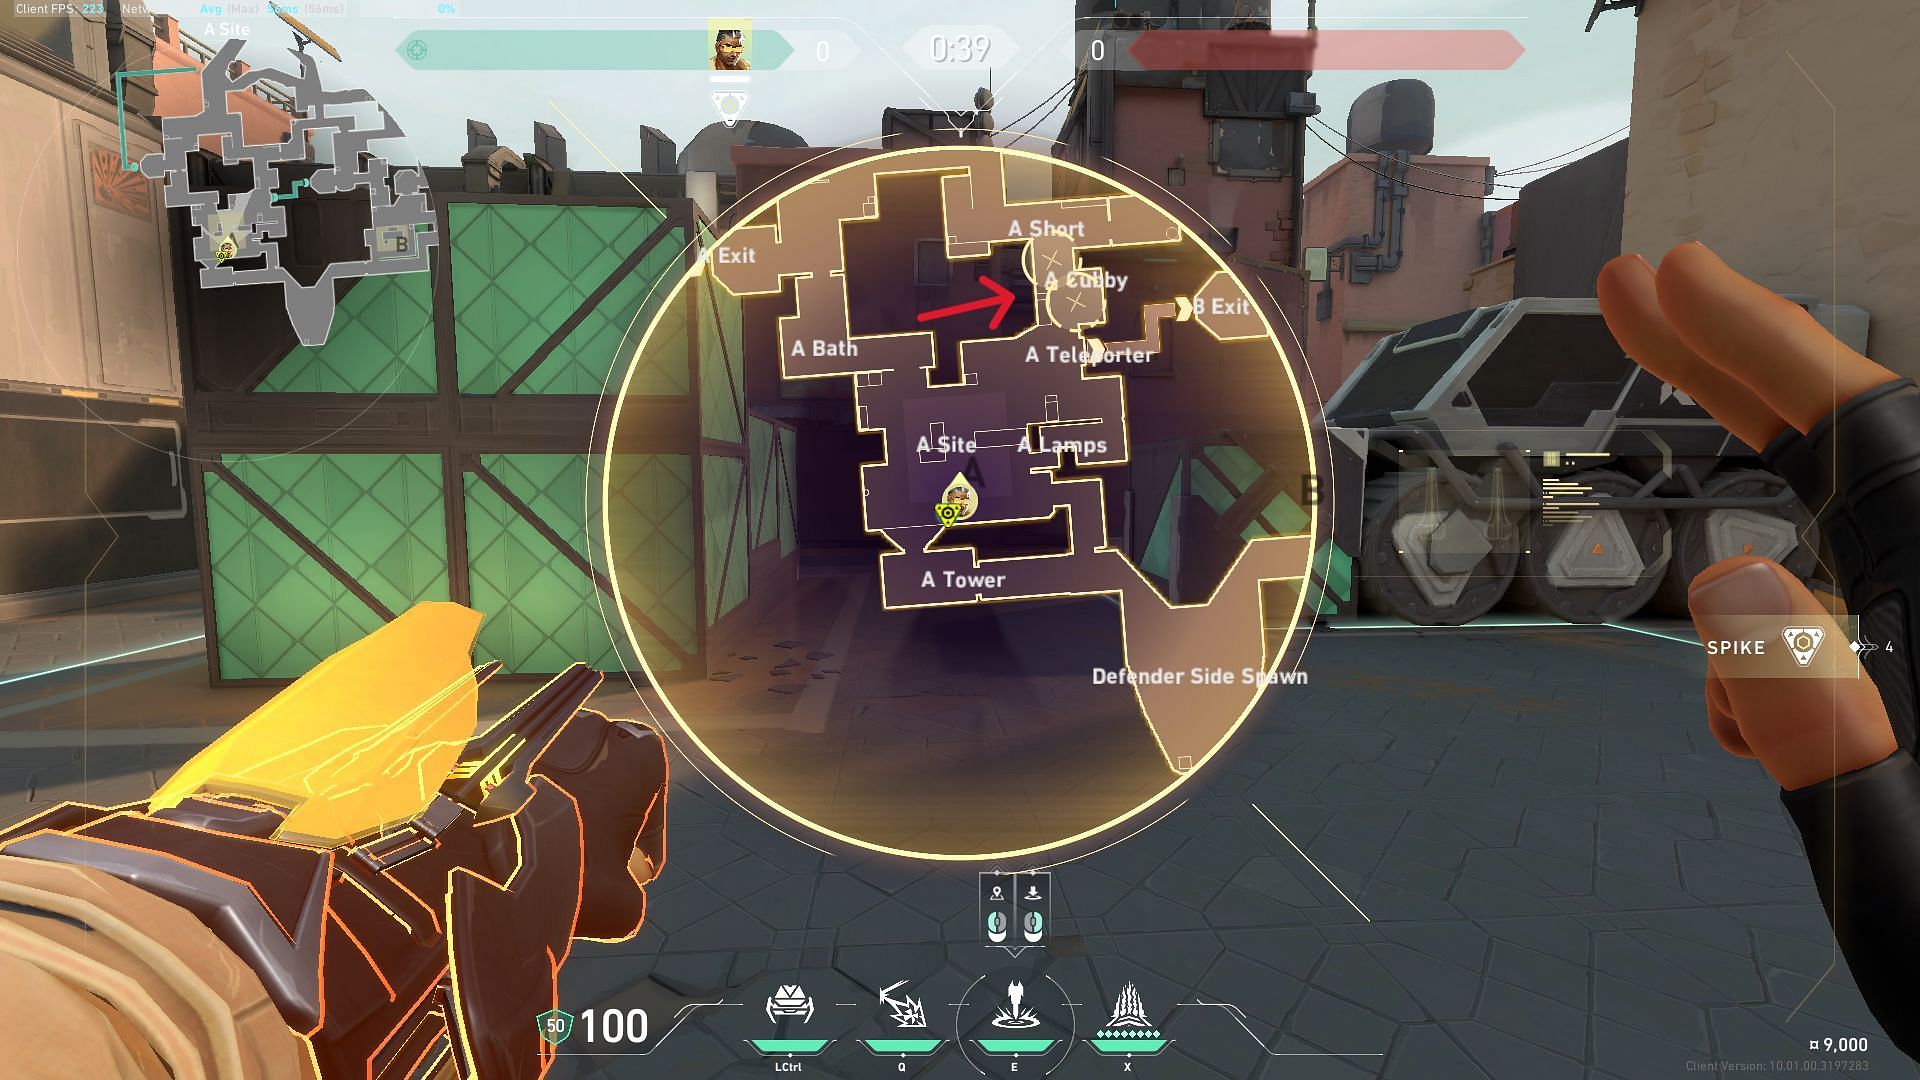
Deploy the Stealth Drone from A-Lobby to clear areas like the A-Short and A-Lamps.
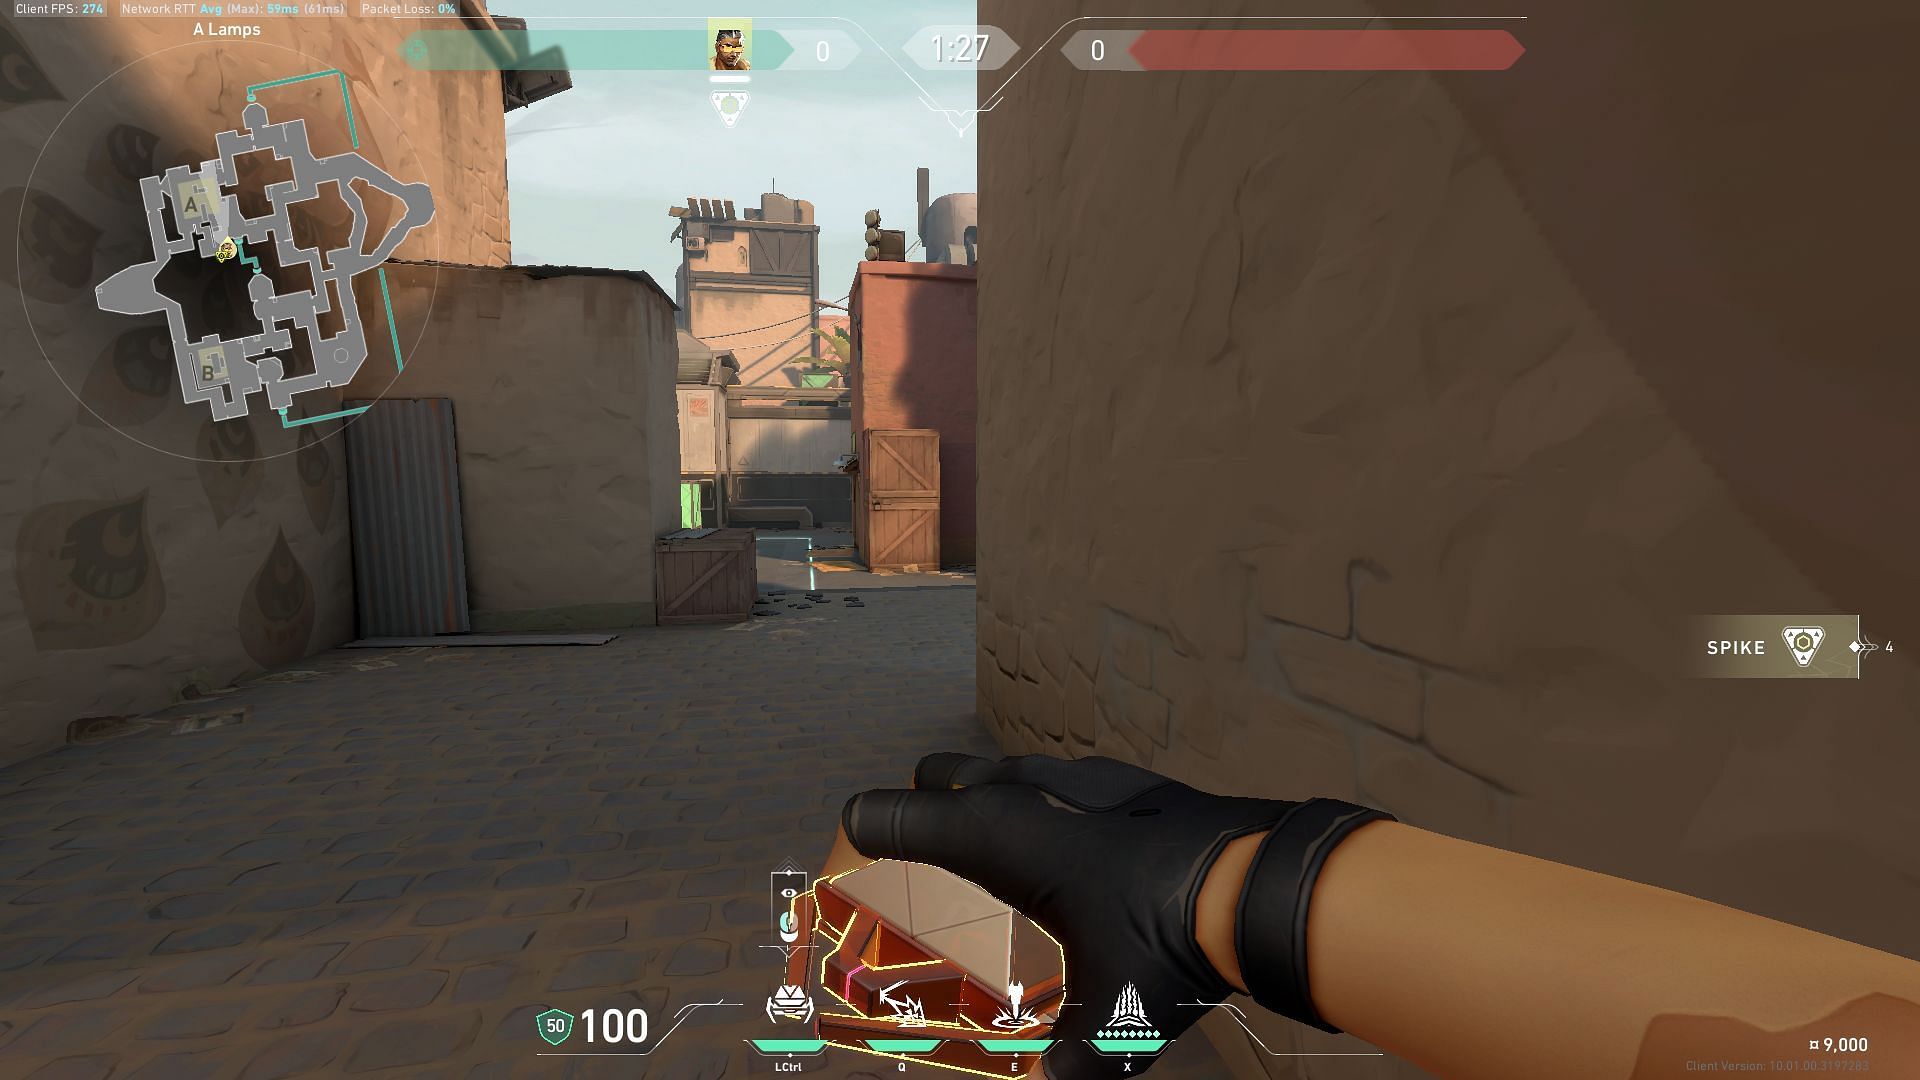
Attacking A site option 2
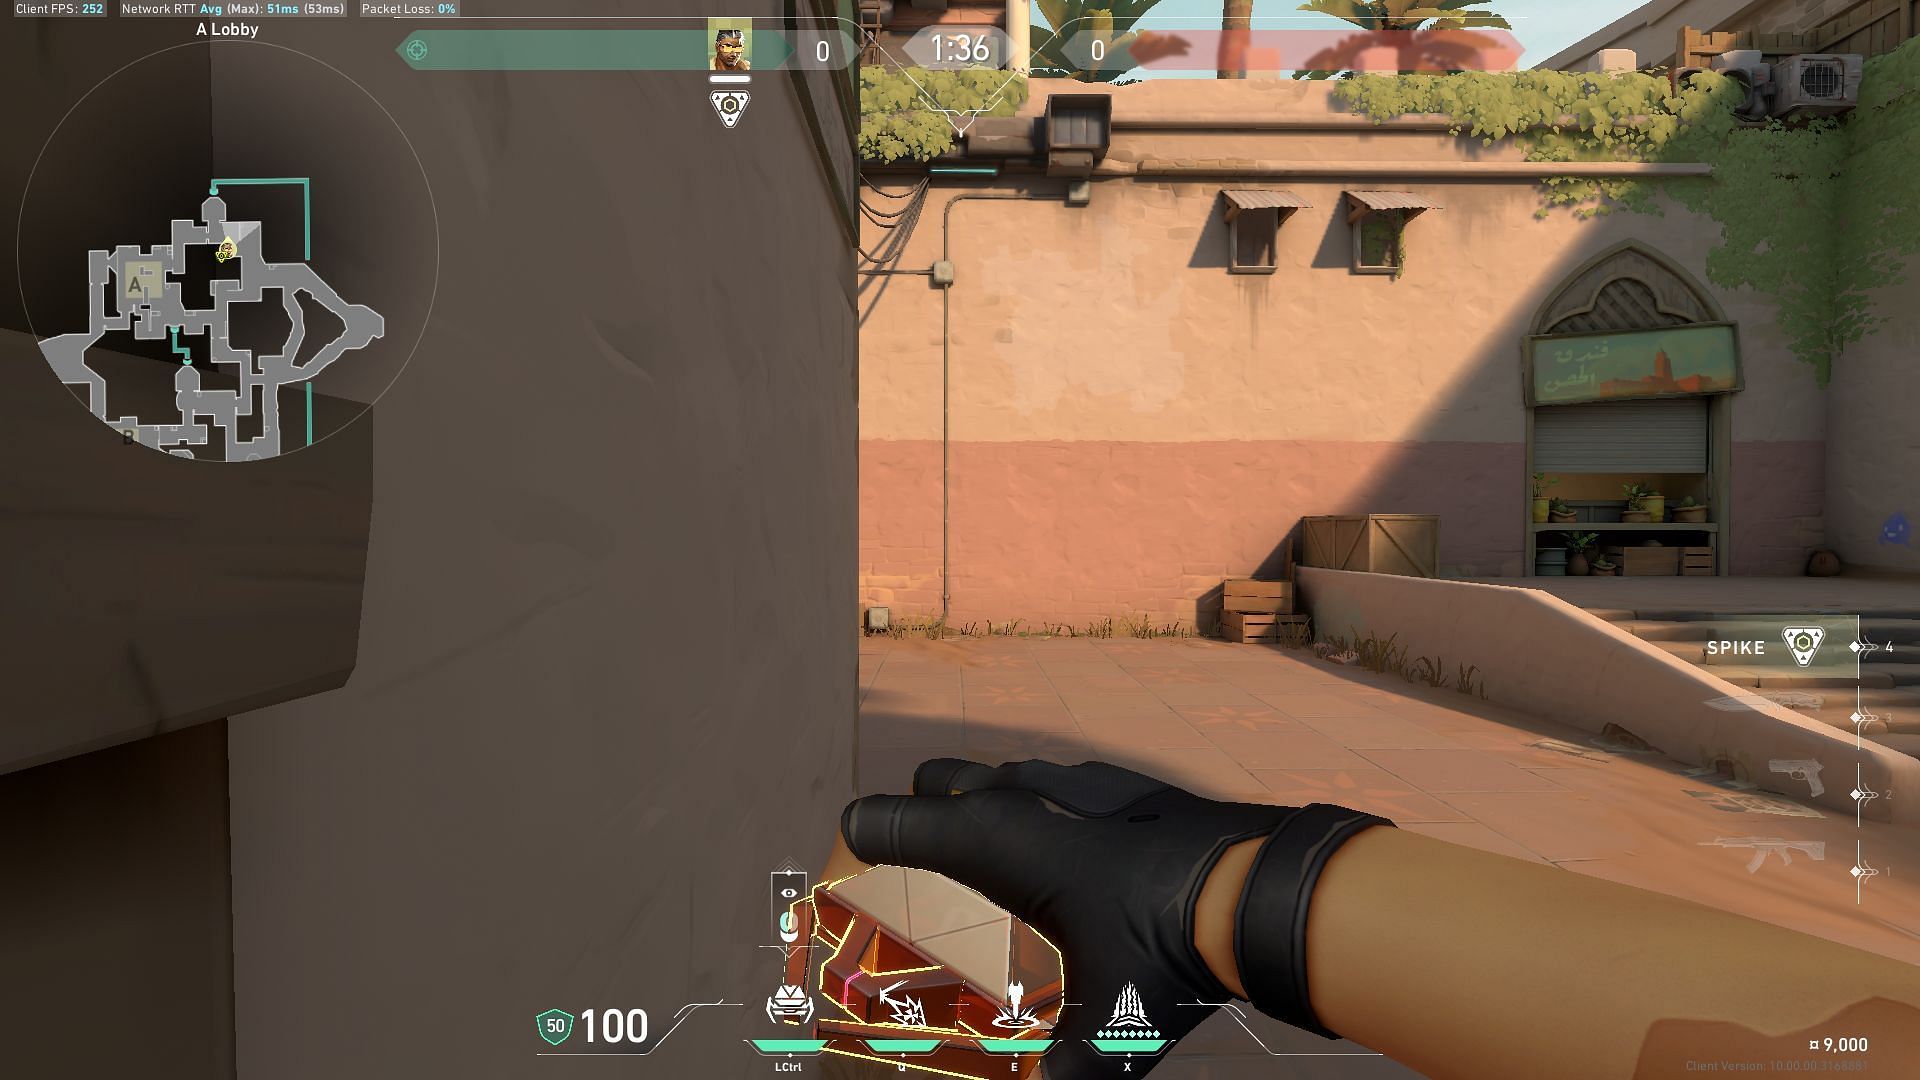
Deploy the Stealth Drone from A-Lobby to check for enemies on A-Bath.
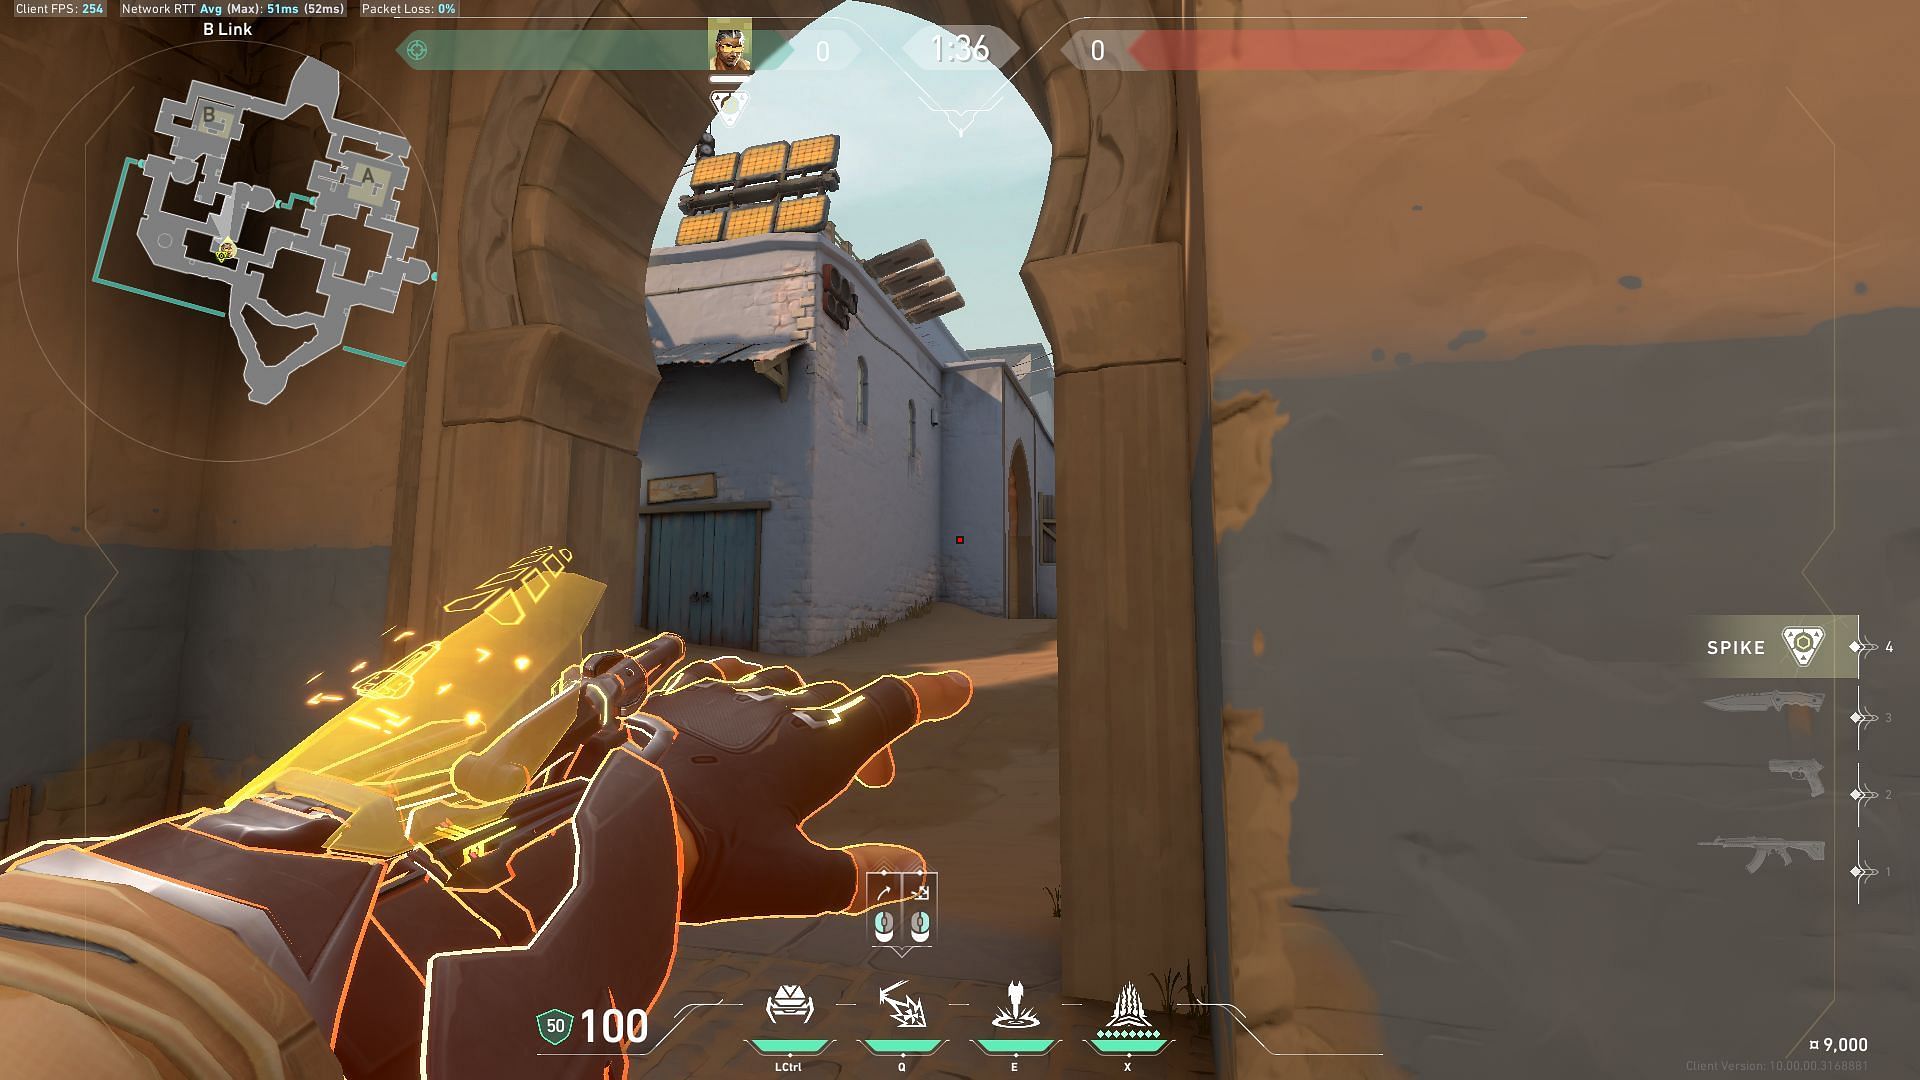
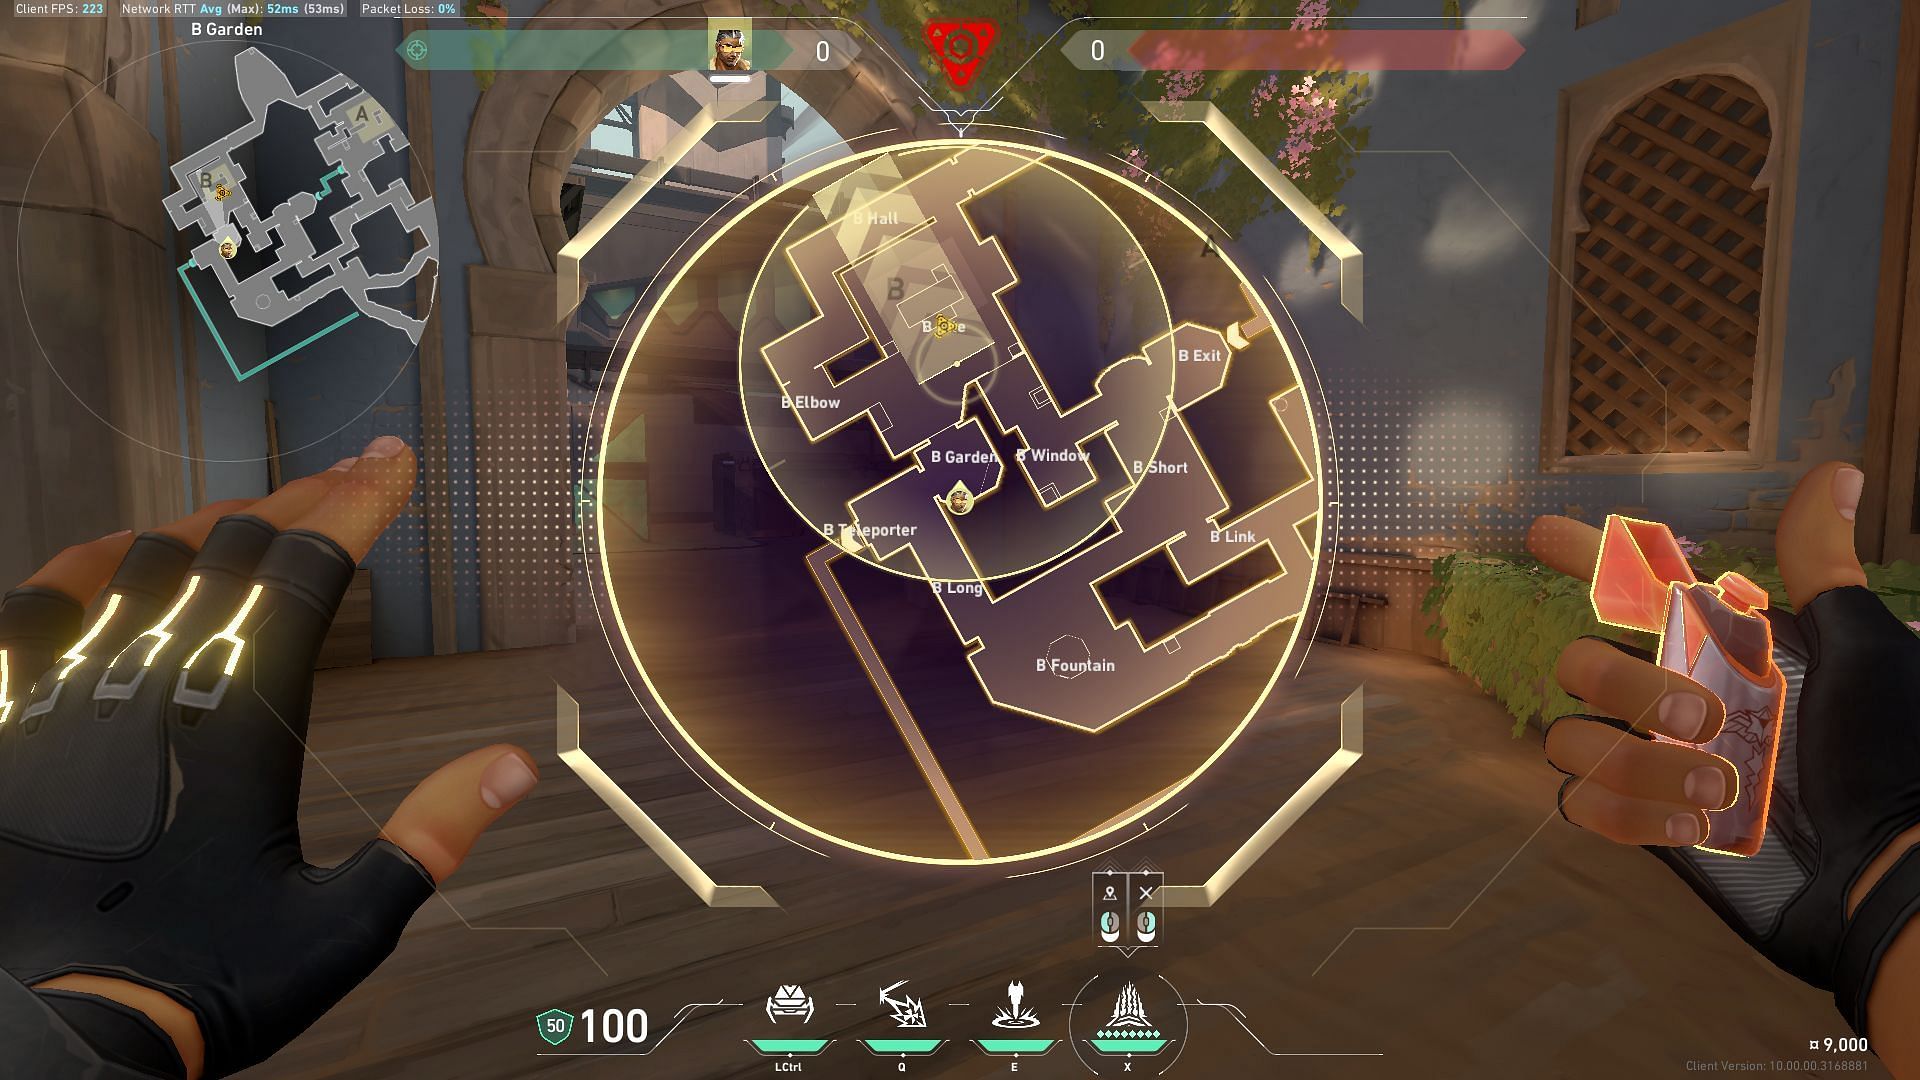
Attacking B site option 1
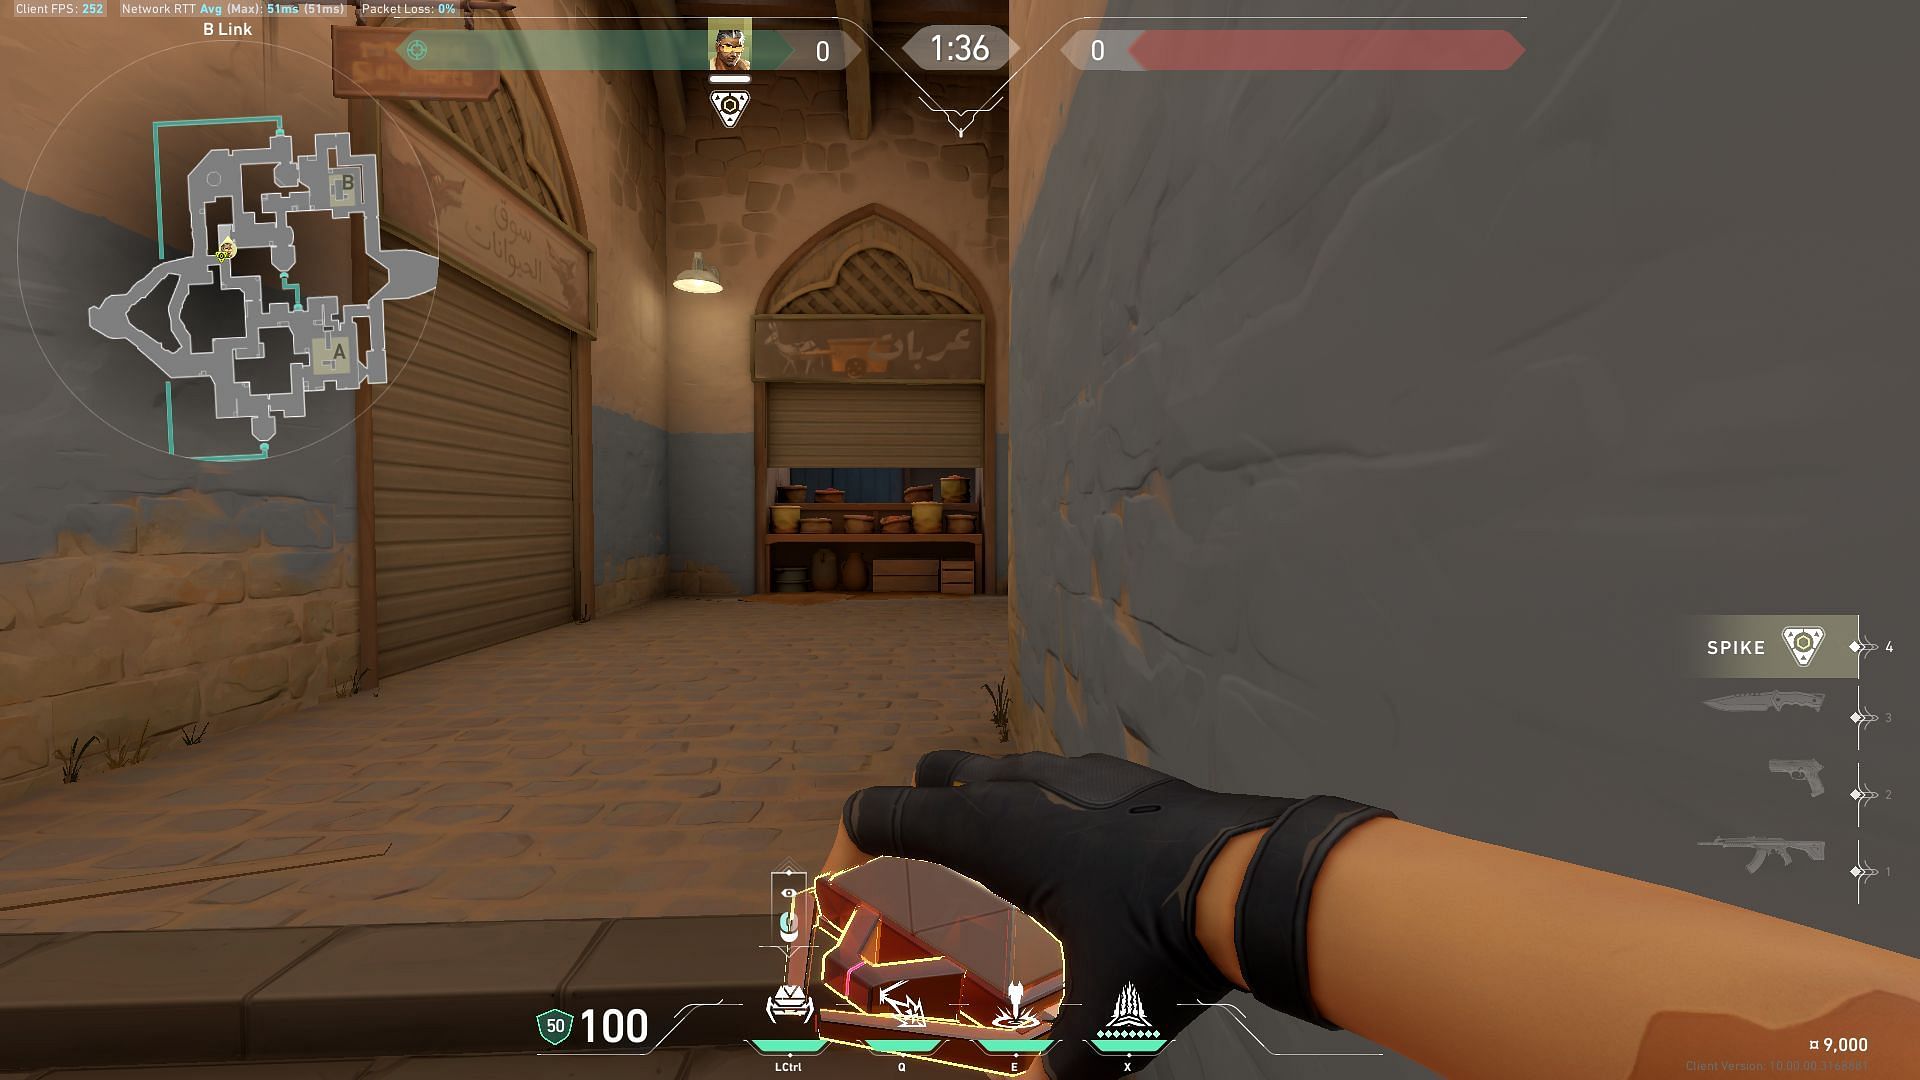
Deploy Tejo’ Stealth Drone from B-Link to tag enemies that might be holding positions at B-Hookah.
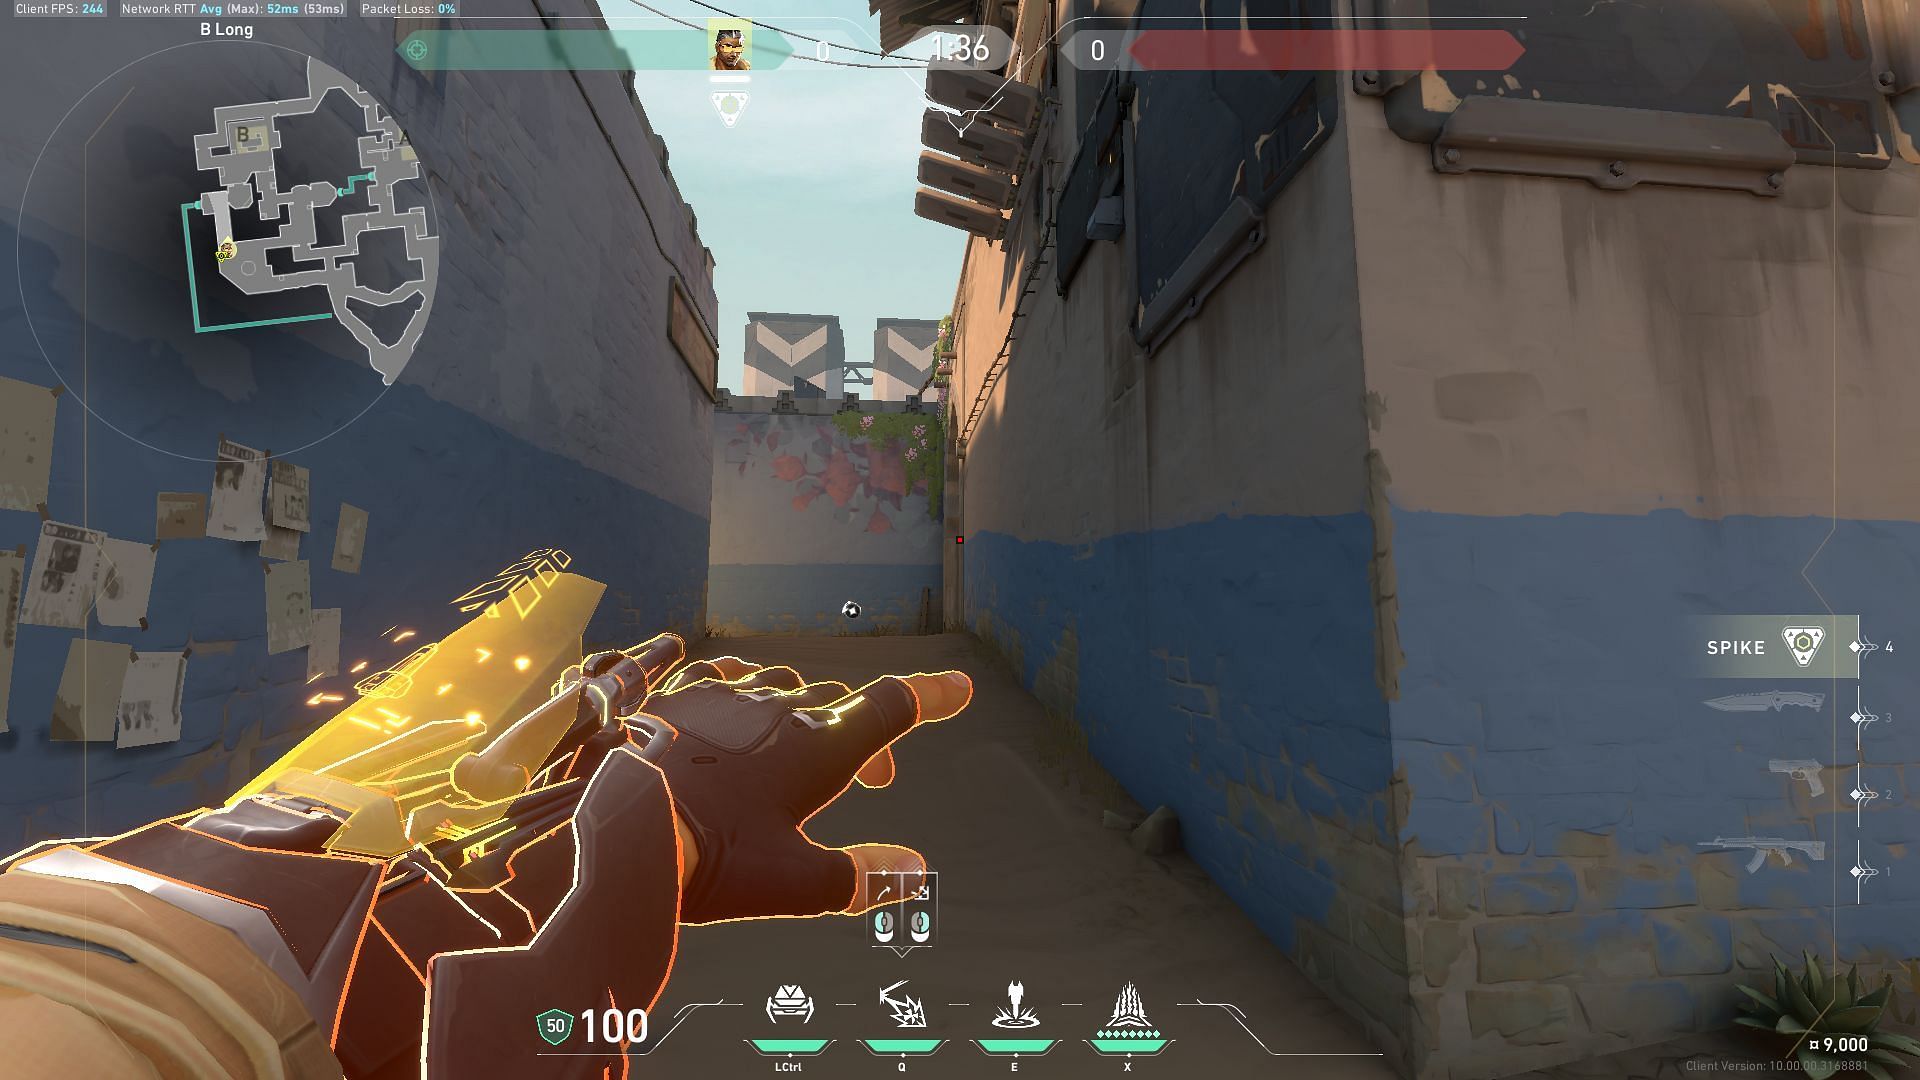
Attacking B site option 2
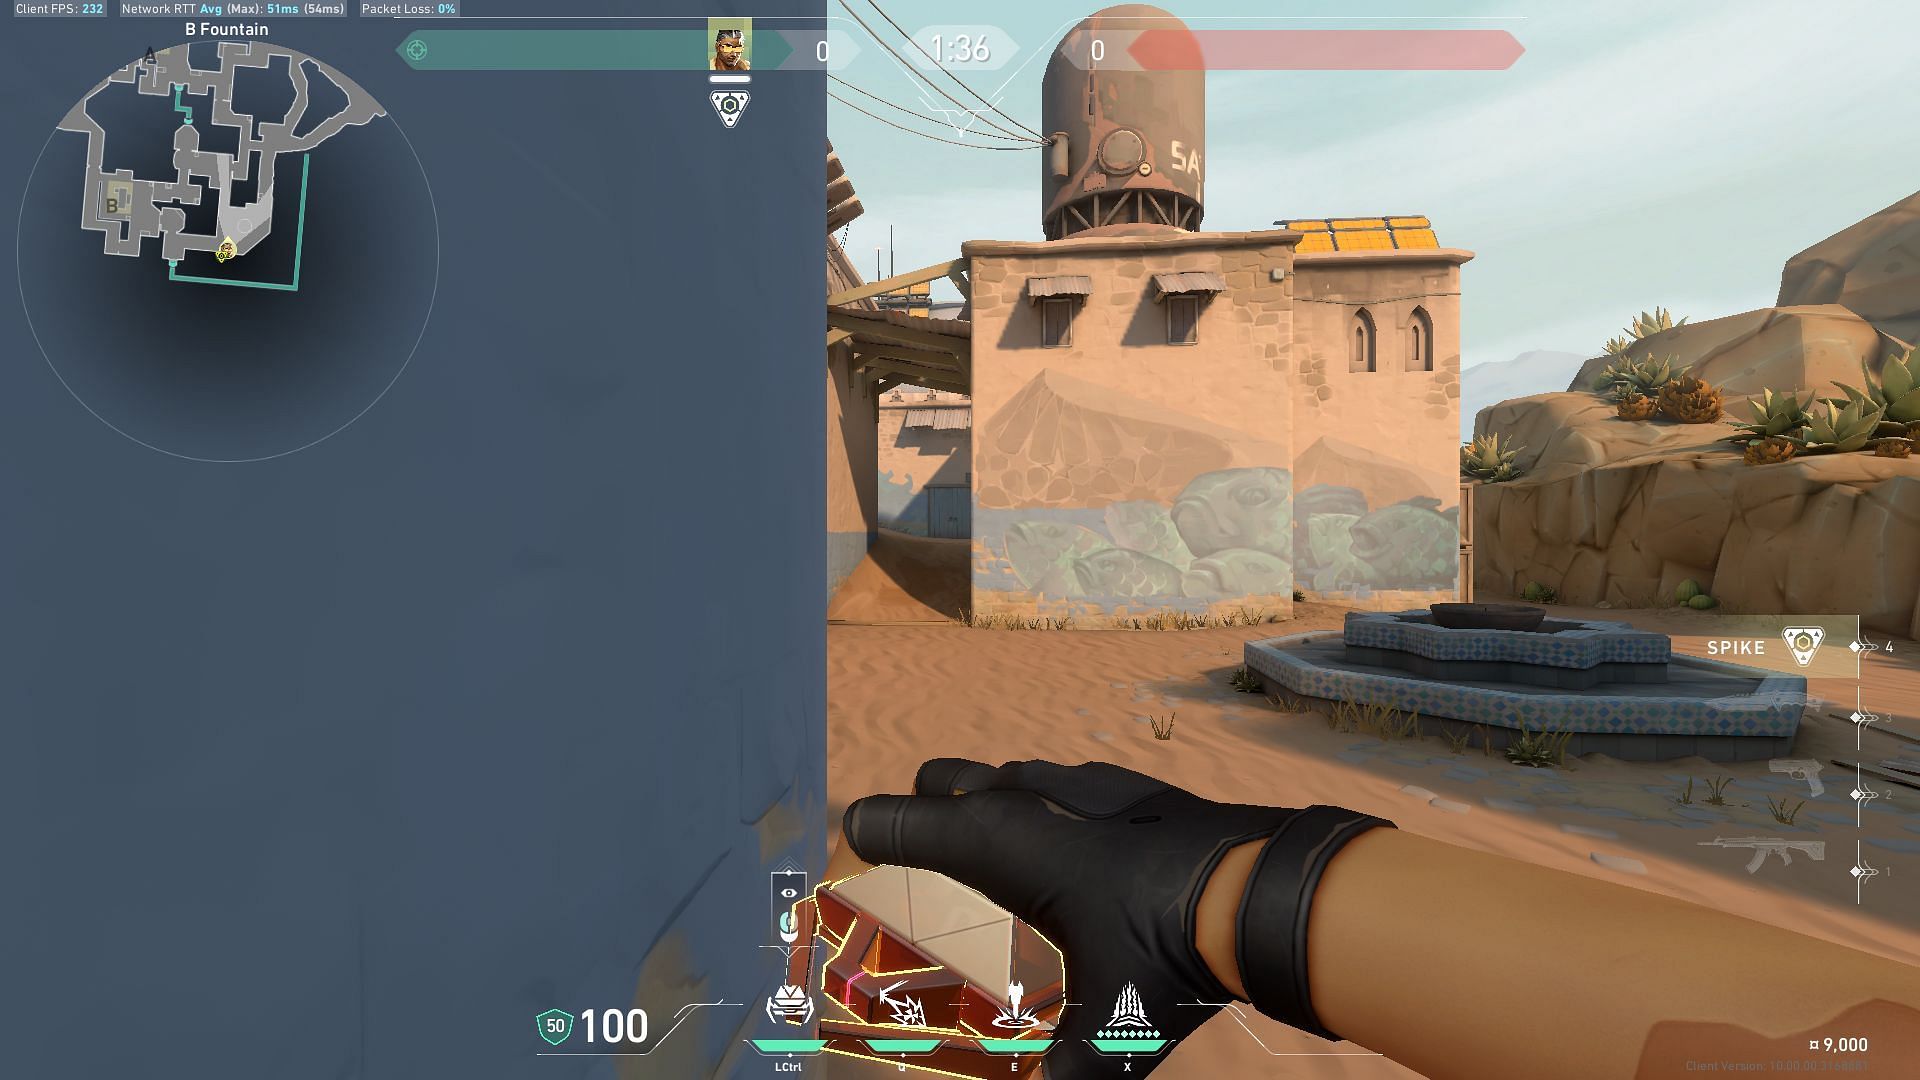
Deploy the Stealth Drone from B-Fountain to scout B-Garden and B-Teleporter.
Also read: Valorant Tejo all abilities and Agent Gear
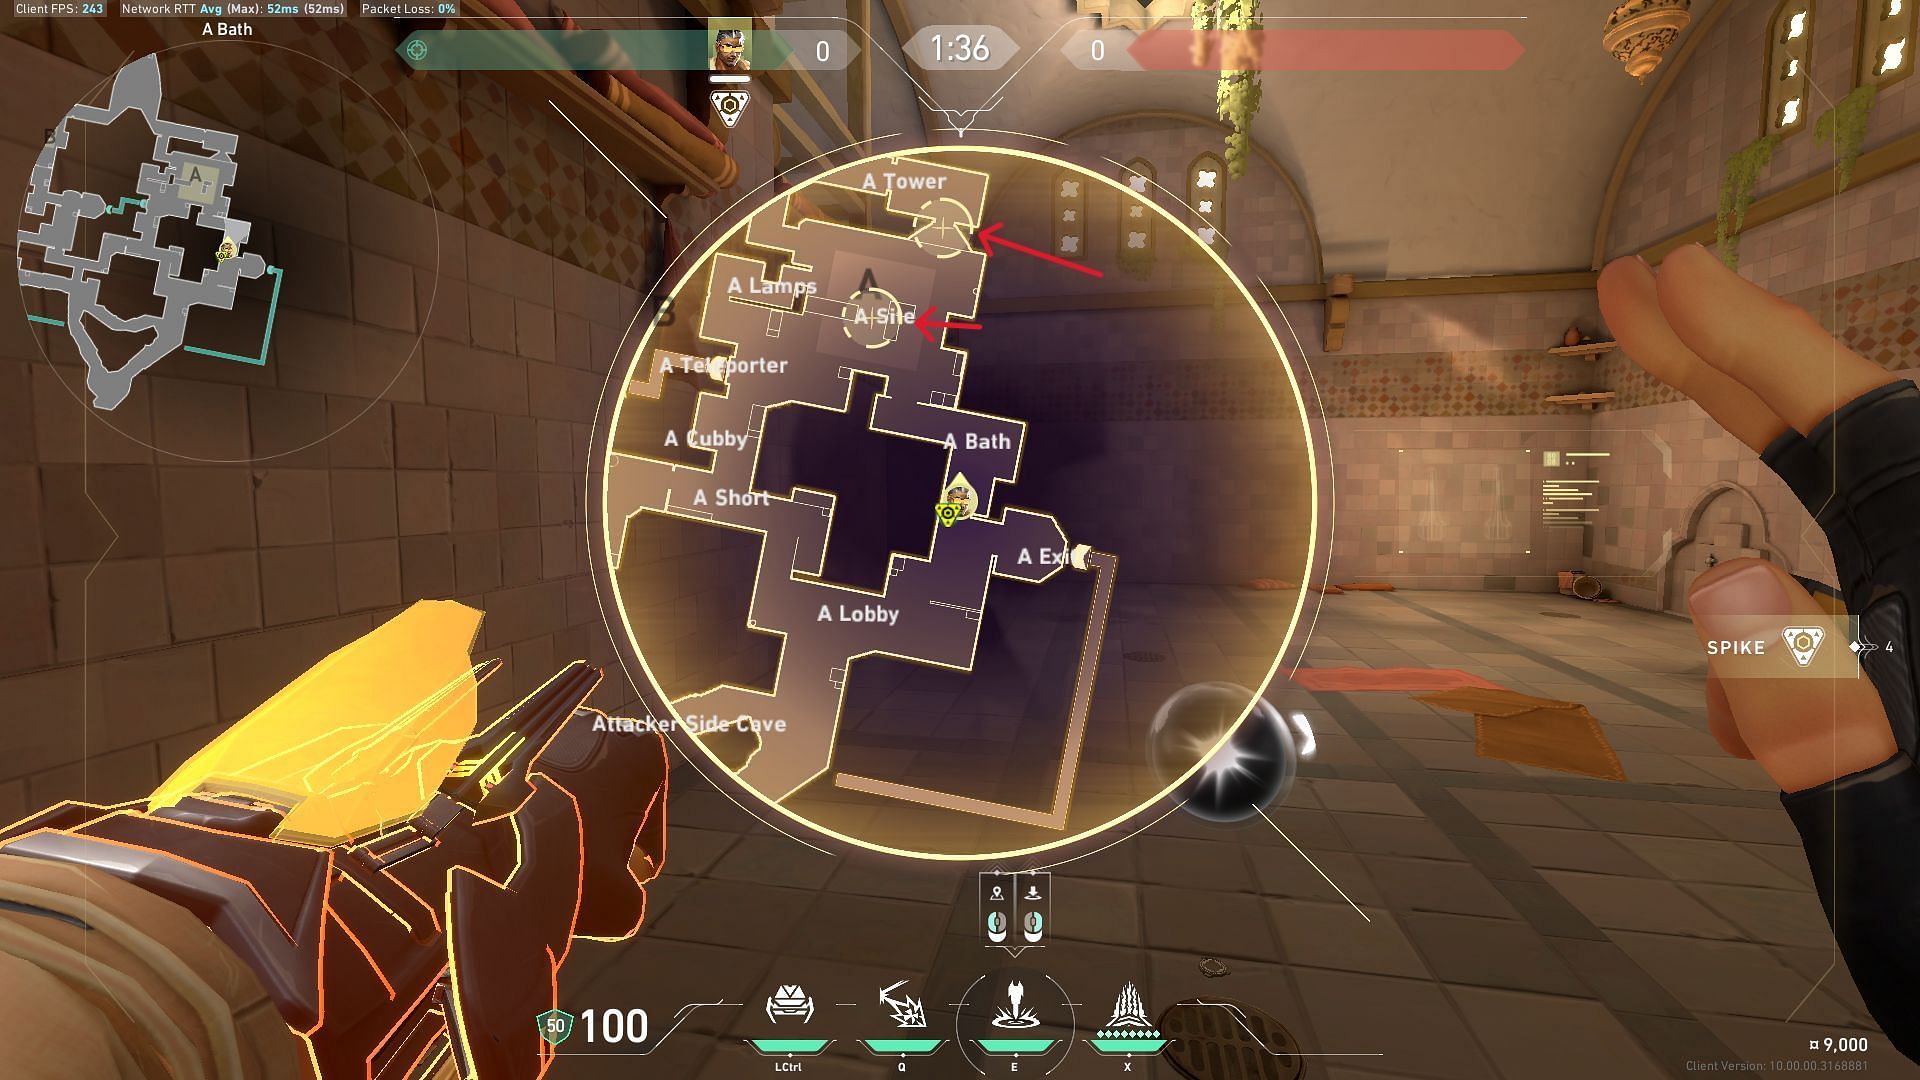
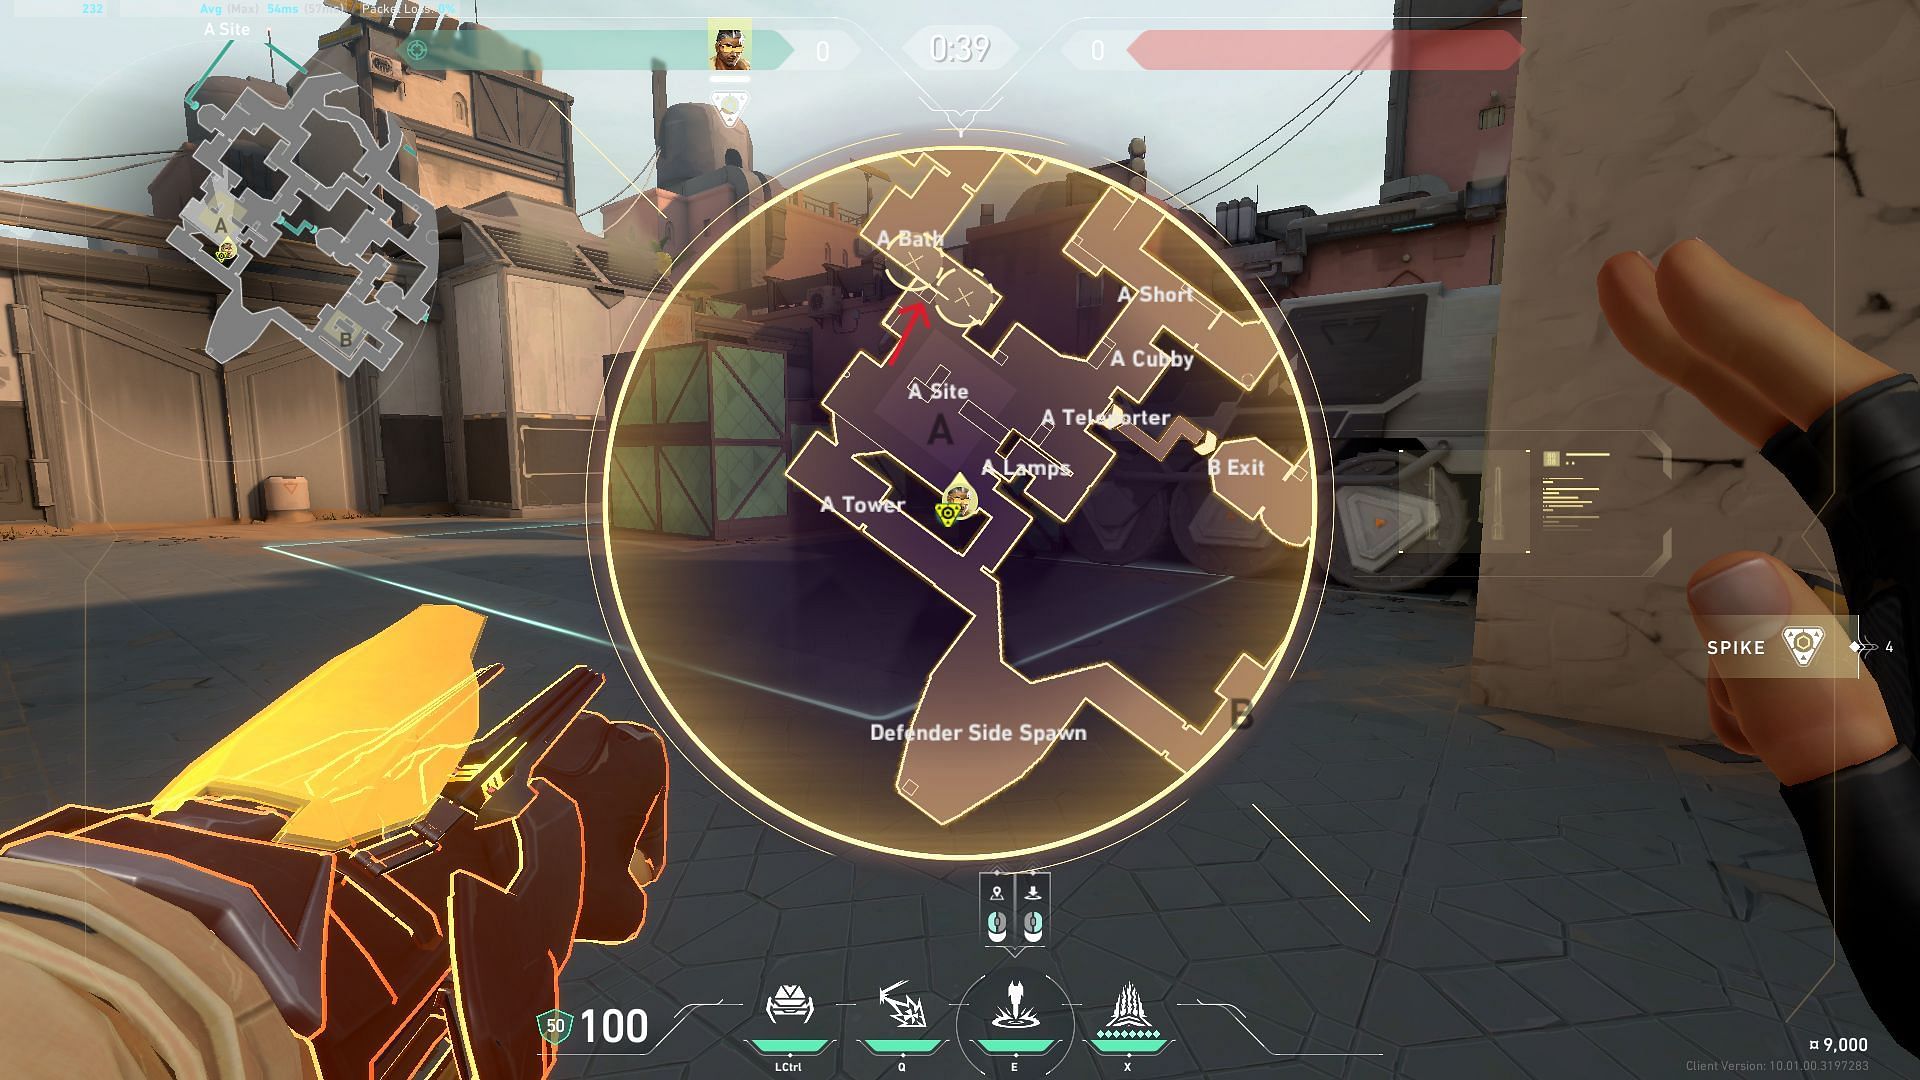
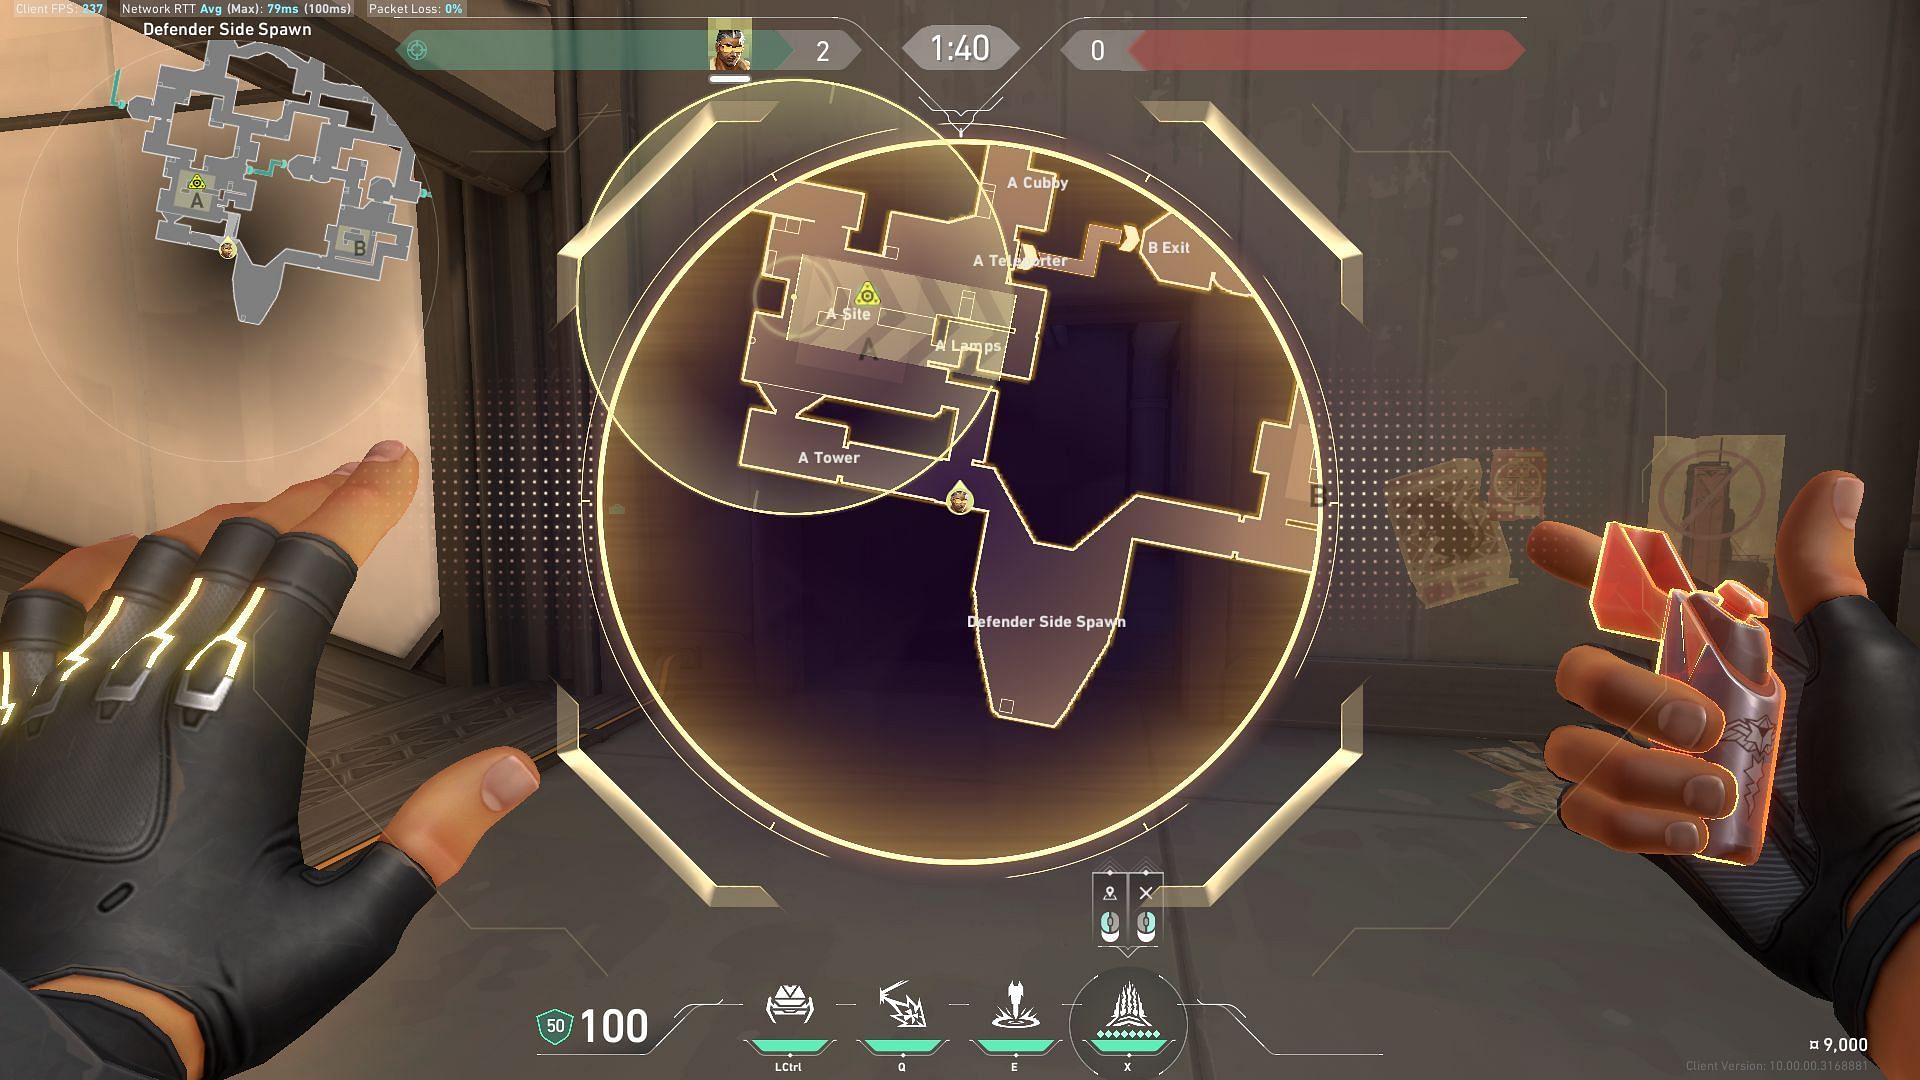
Defending A-Site option 1
Deploy the Stealth Drone from any safe spot in the A-Site to scout for enemies approaching from A-Bath.
Defending A-site option 2
Left-click to deploy the Stealth Drone from A-Lamps to scout/suppress enemies approaching from A-Short.
Also read: Valorant Tejo Abyss guide
Valorant Tejo Bind guide: How to use the Special Delivery
Tejo carries a sticky grenade that detonates when it comes into contact with a surface. He can hit opponents within his impact zone with the Special Delivery ability. This grenade can be used to disrupt enemies hiding in small spaces or concuss them during close-range combat.
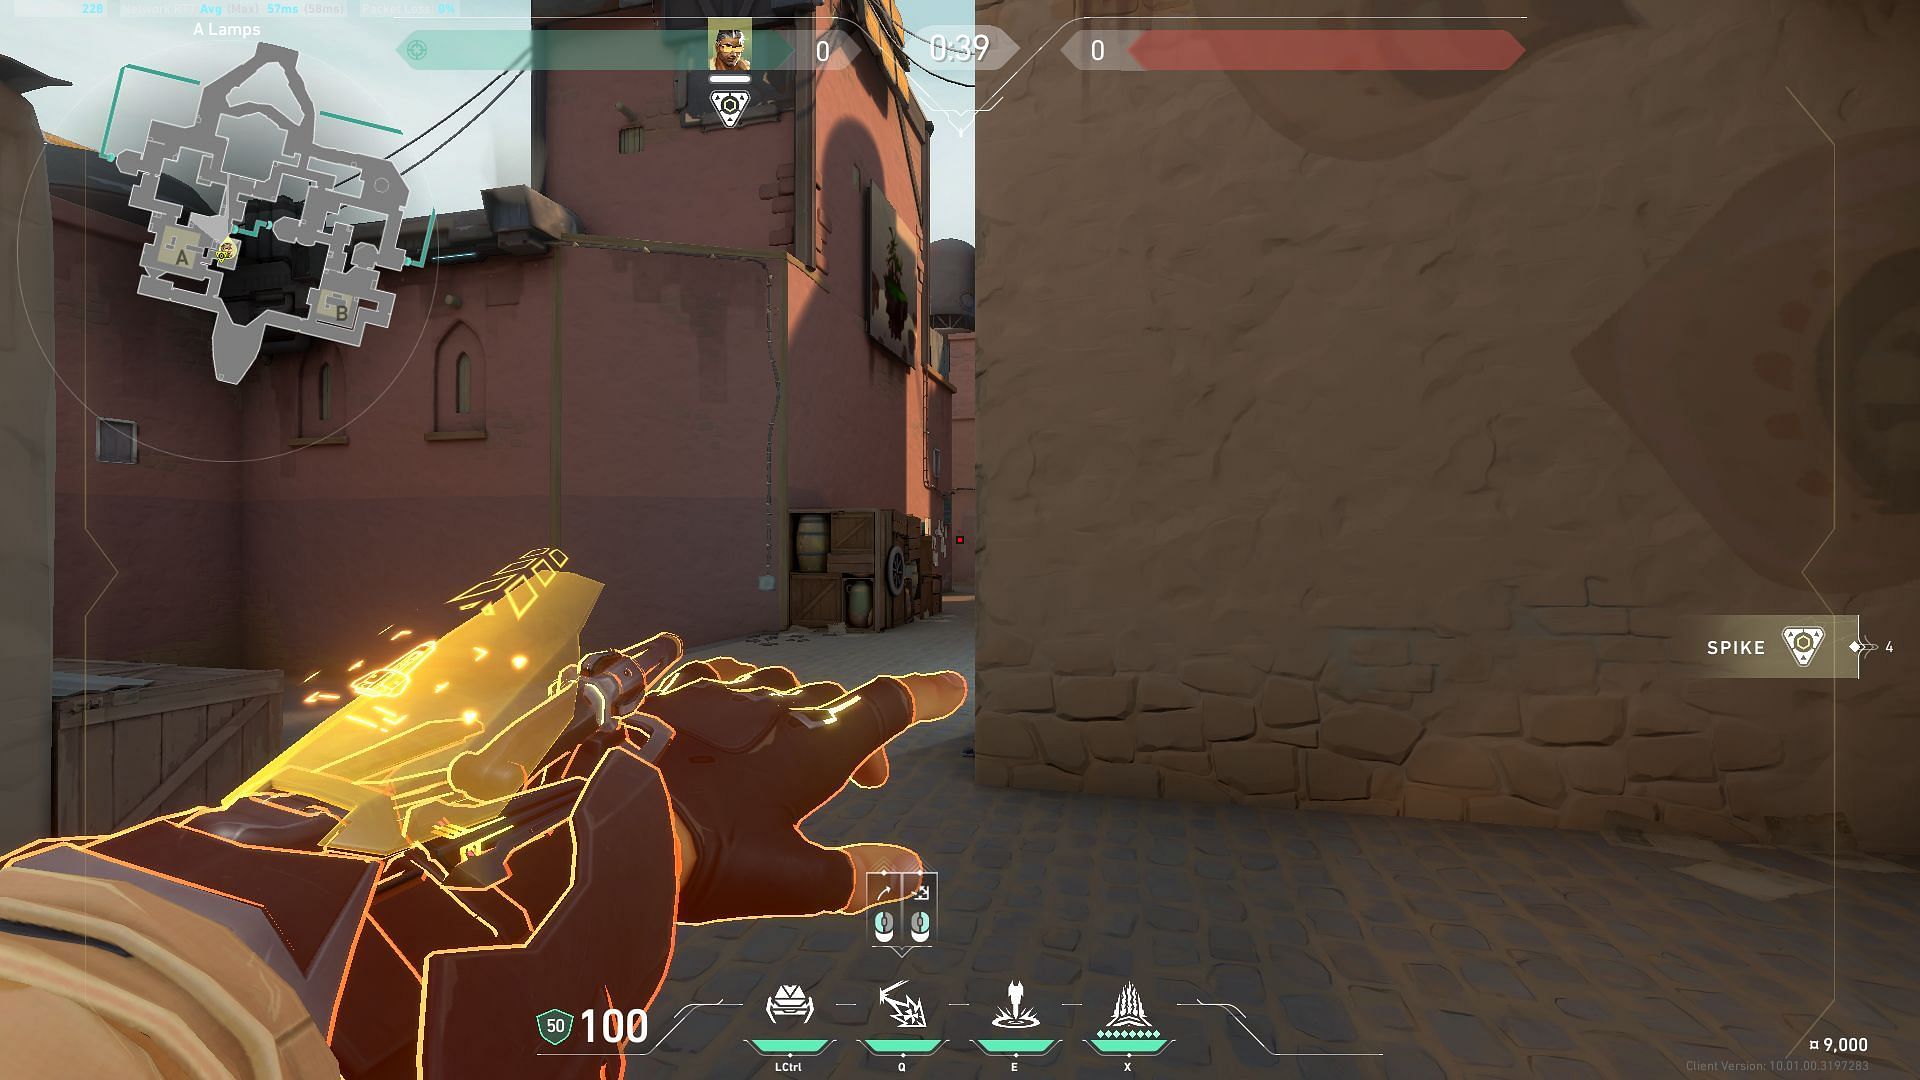
Attacking A- Site option 1
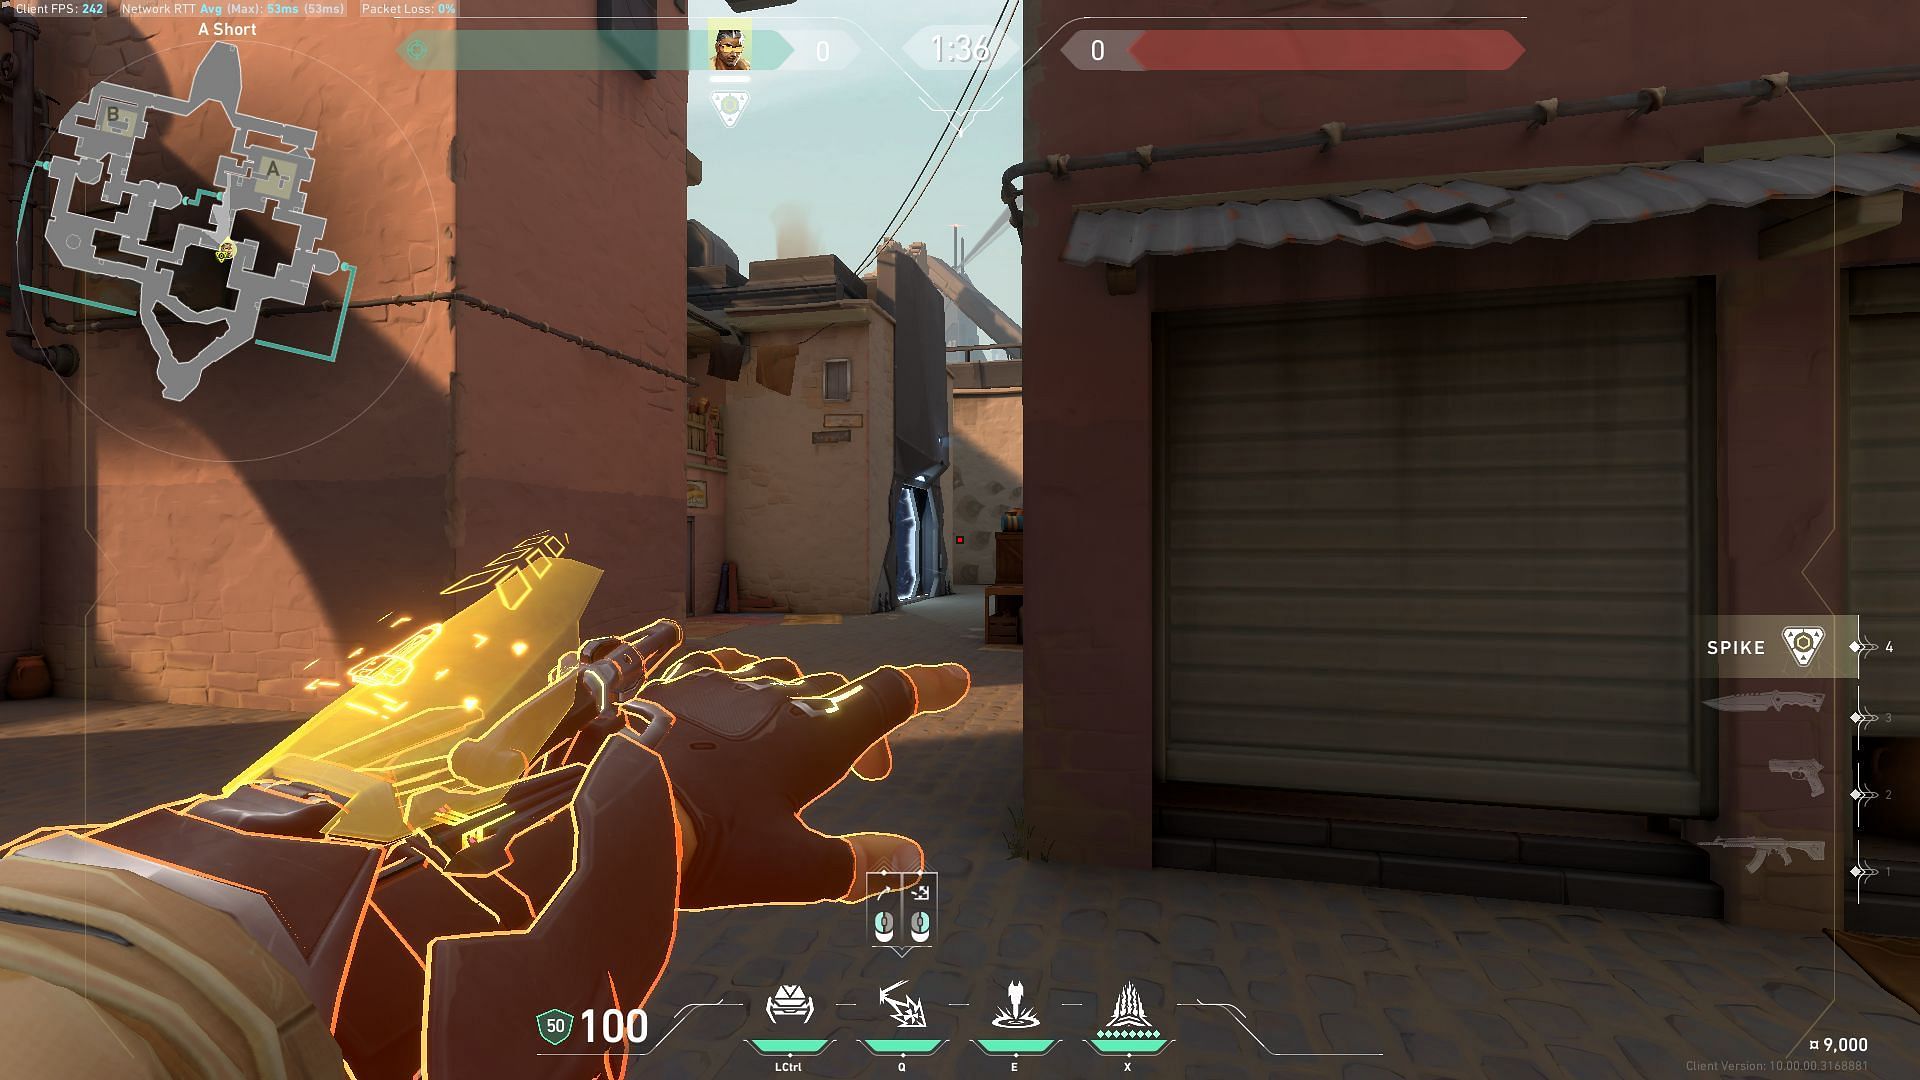
Left-click to deploy the Special Delivery Grenade to concuss enemies holding angles in A-Lamps.
Attacking A-Site option 2
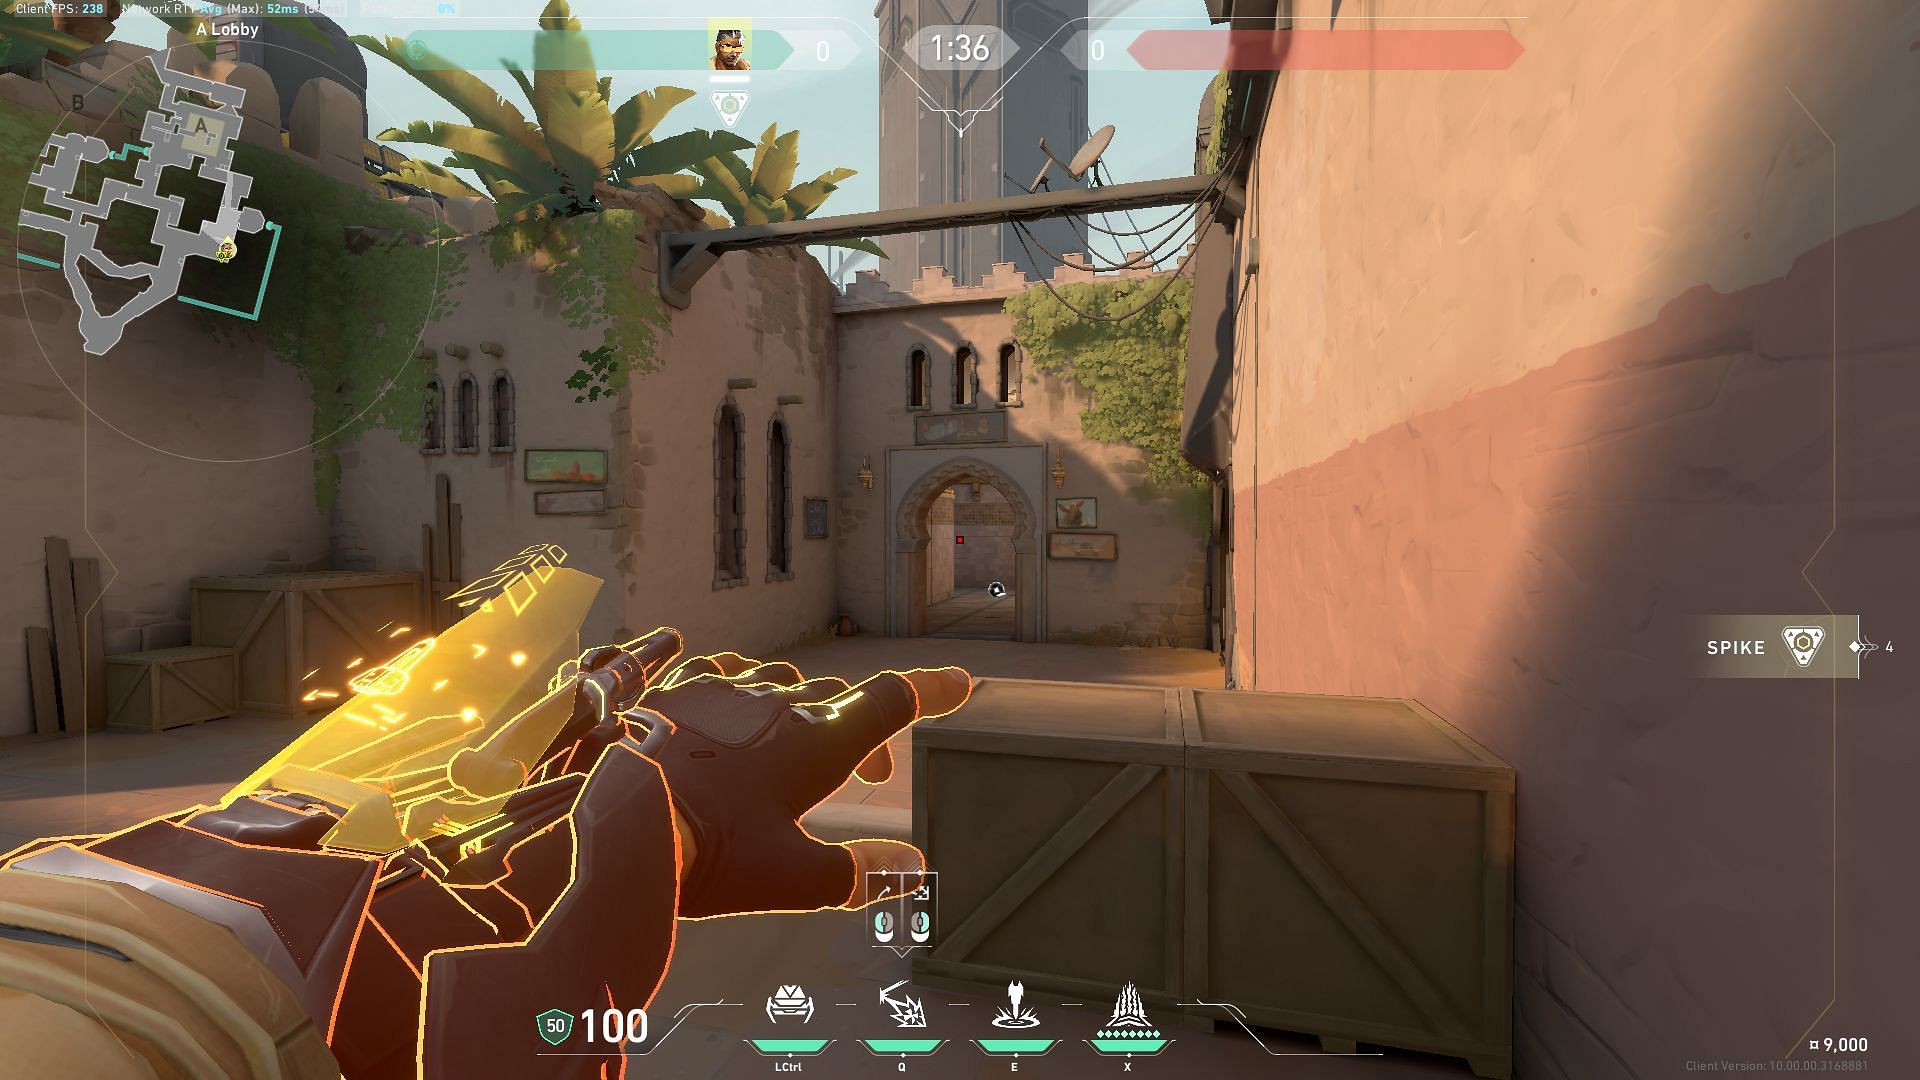
In order to concuss enemies hiding at A-Bath, deploy Tejo’s Special Delivery grenade from A-Lobby.
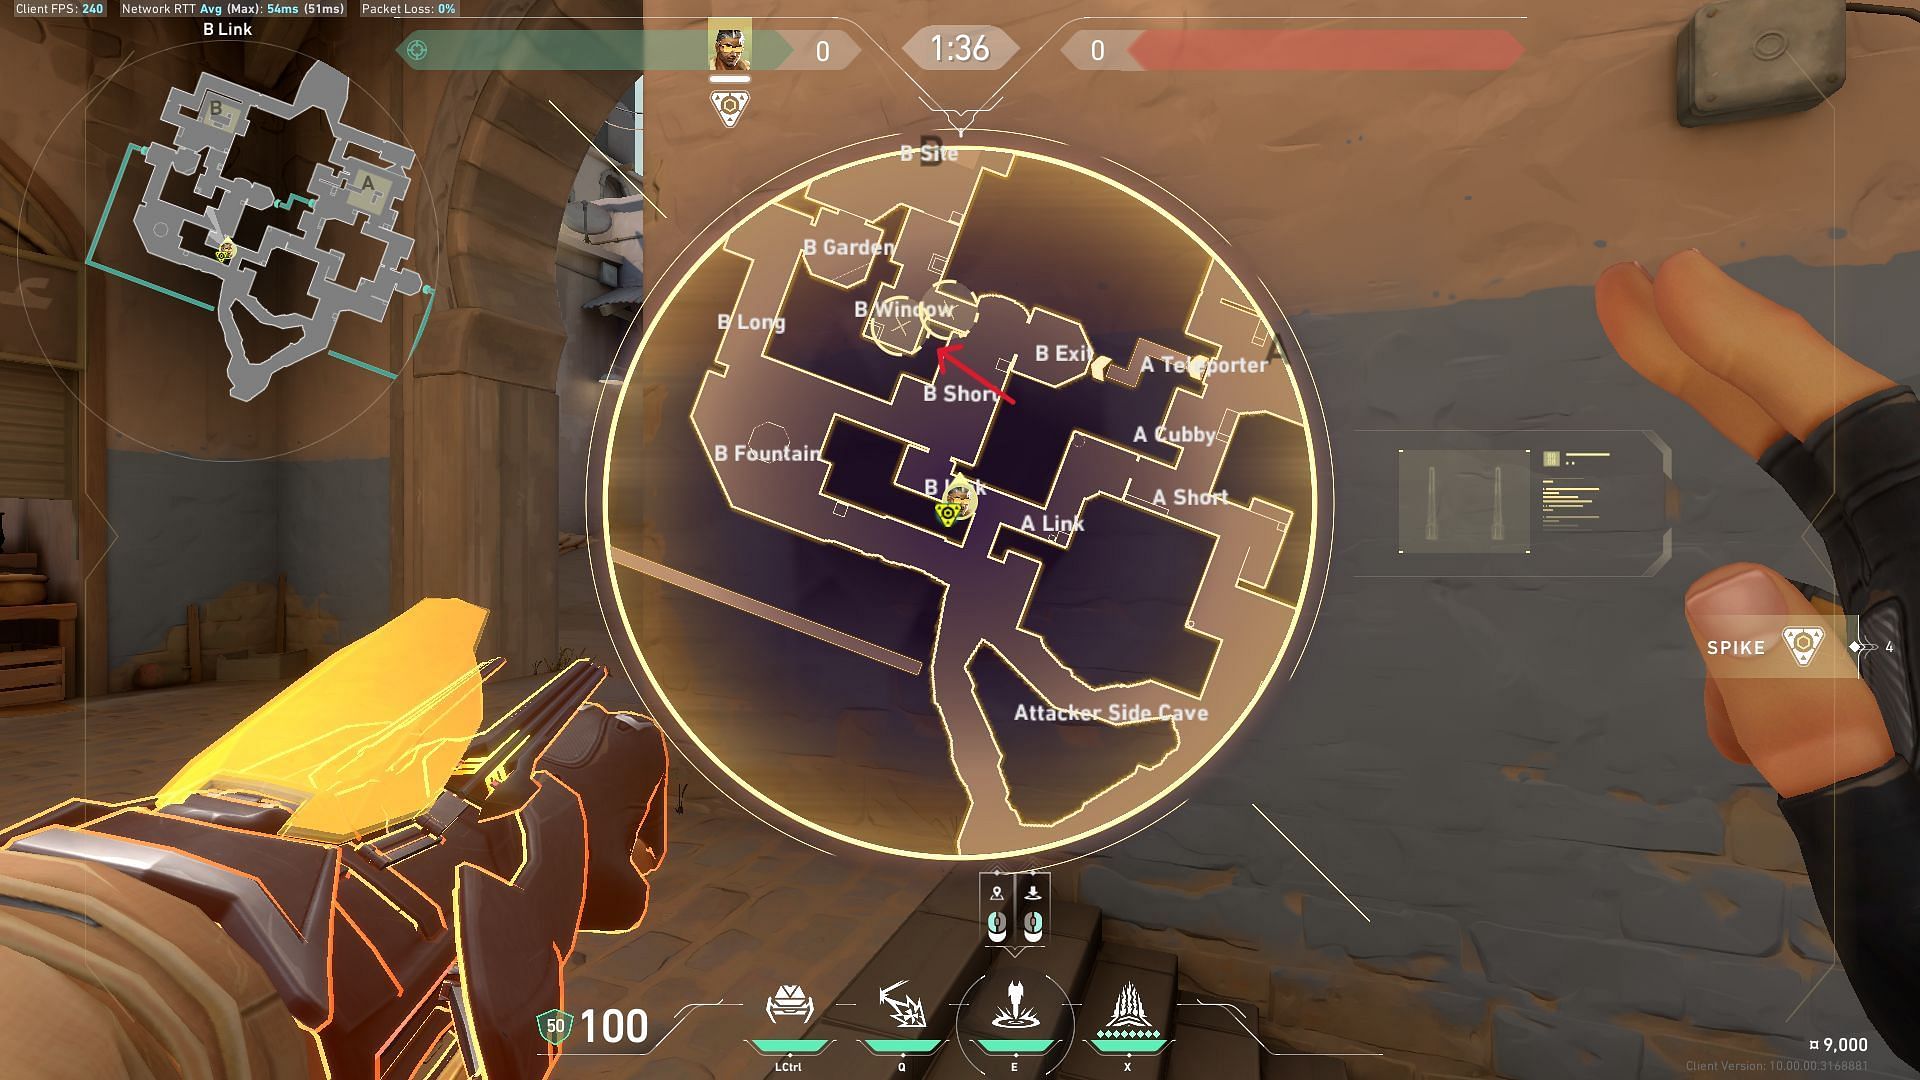
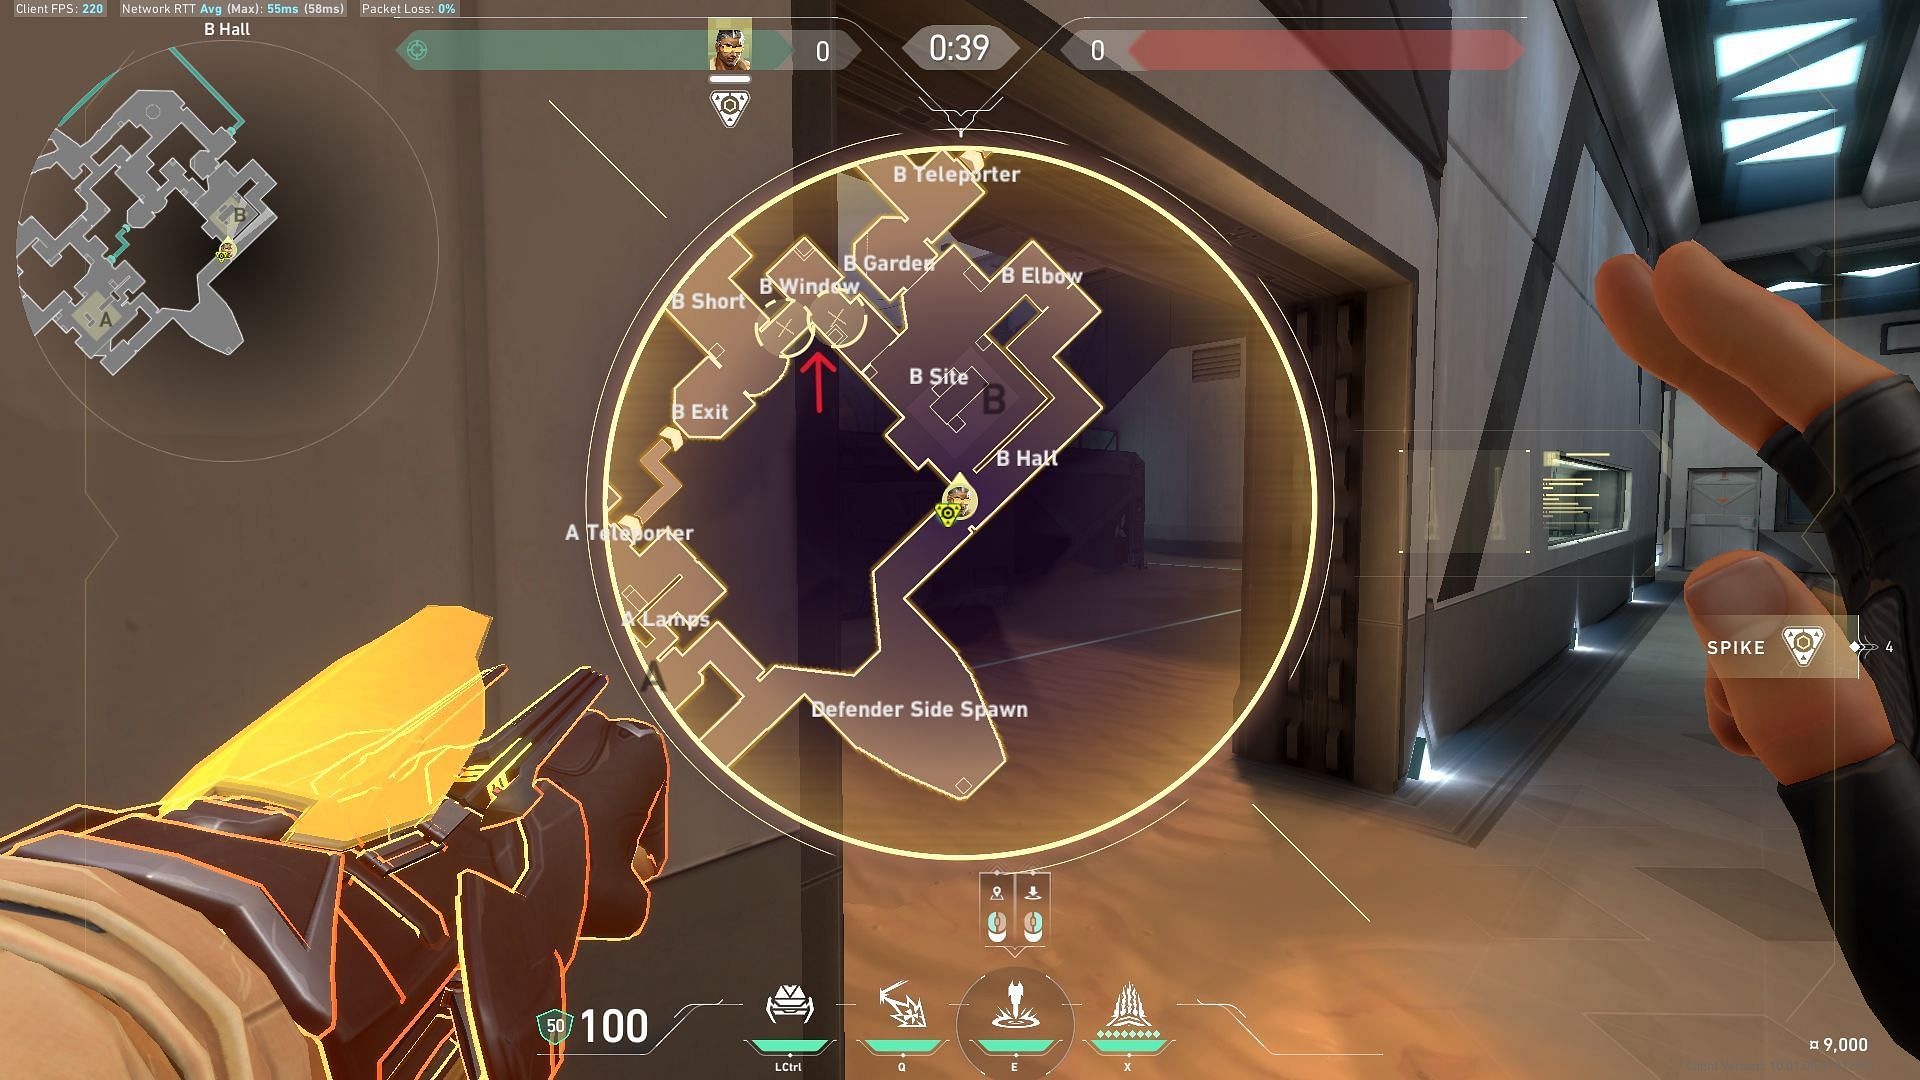
Attacking B-site option 1
Deploy Special Delivery from B-Link to concuss enemies at B-Hookah.
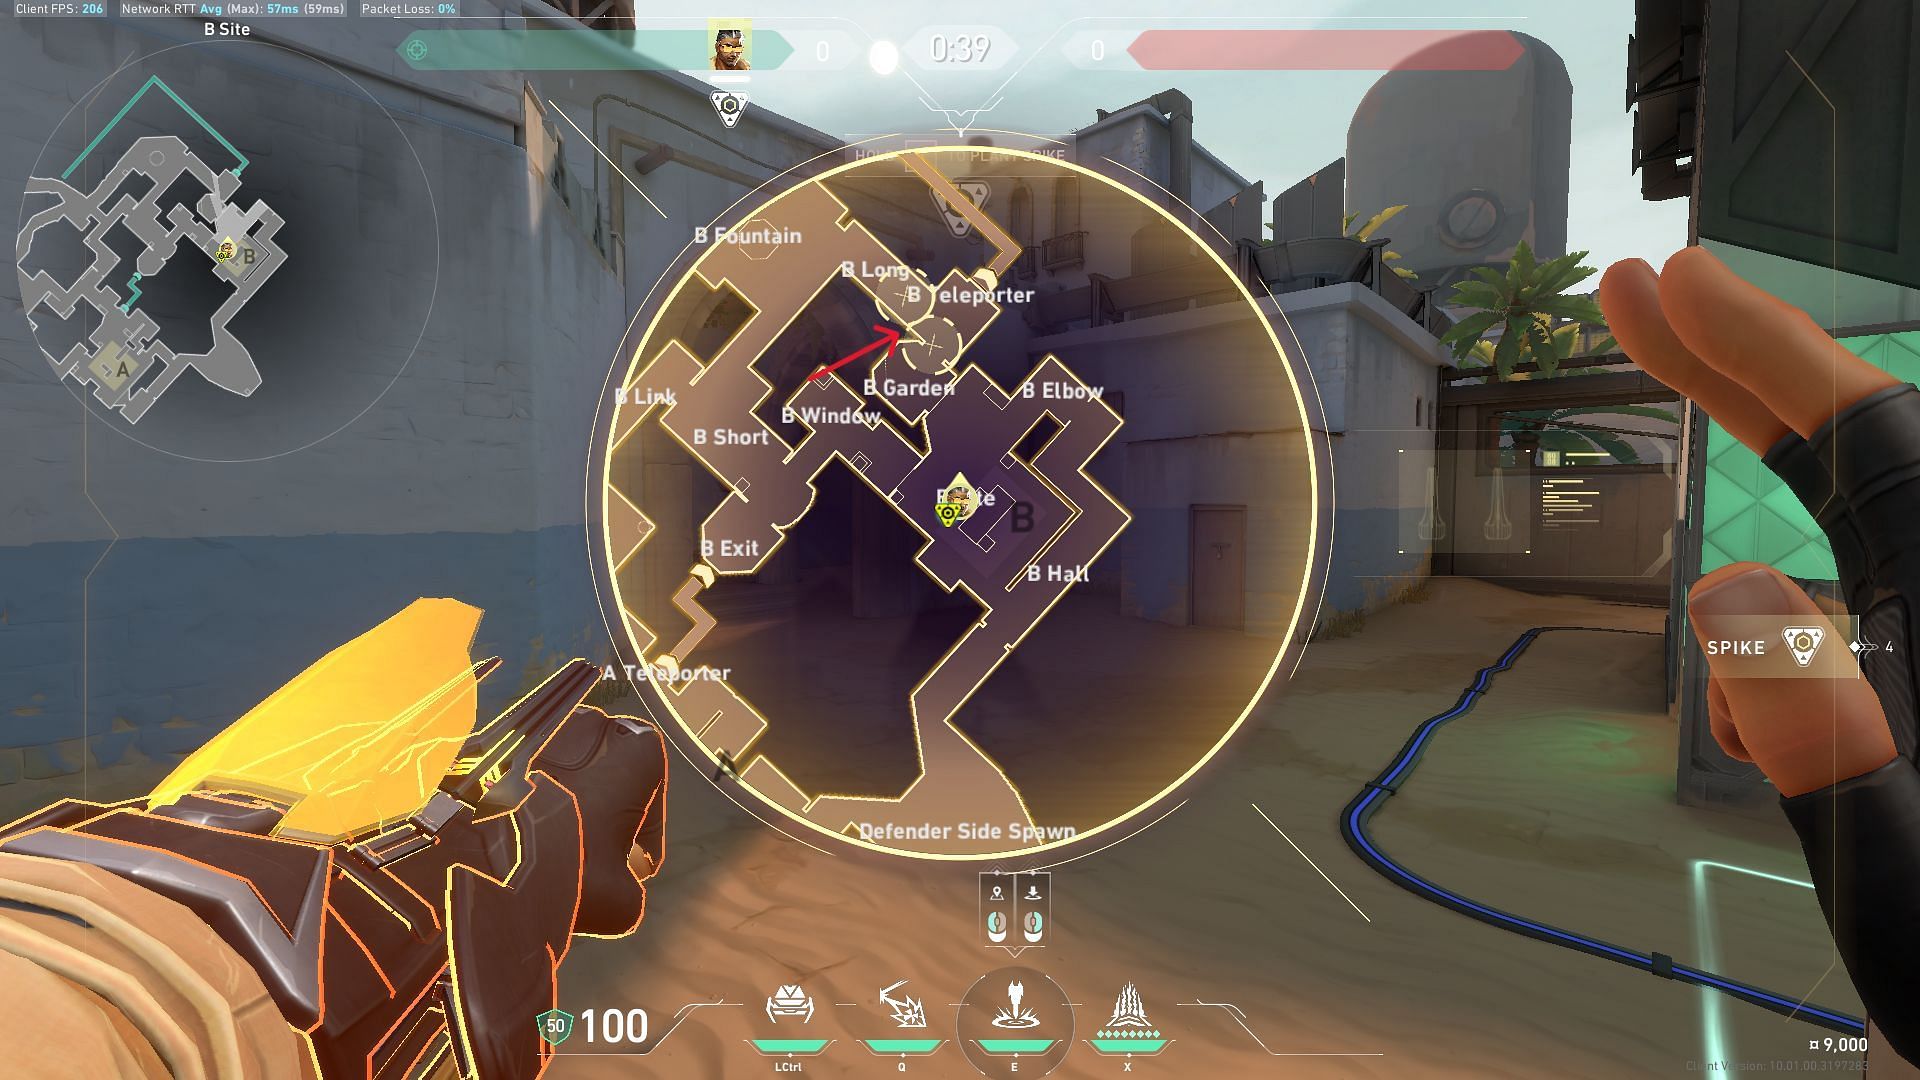
Attacking B site option 2
Use the Special Delivery grenade to concuss opponents holding the B-Garden or the B-Teleport area.
Also read: Valorant Tejo Haven guide
Defending A-site option 1
Use the Special Delivery ability to concuss enemies pushing from A-Short.
Defending A-site option 2
Deploy Special Delivery from A-Site to concuss enemies pushing from A-Bath.
Valorant Tejo Bind guide: How to use the Guided Salvo
Tejo can equip an AR targeting map that is comparable to Brimstone's Pad by using the Guided Salvo ability. Players can choose two locations from that map to launch missiles, which independently go to their intended targets and explode when they get there.
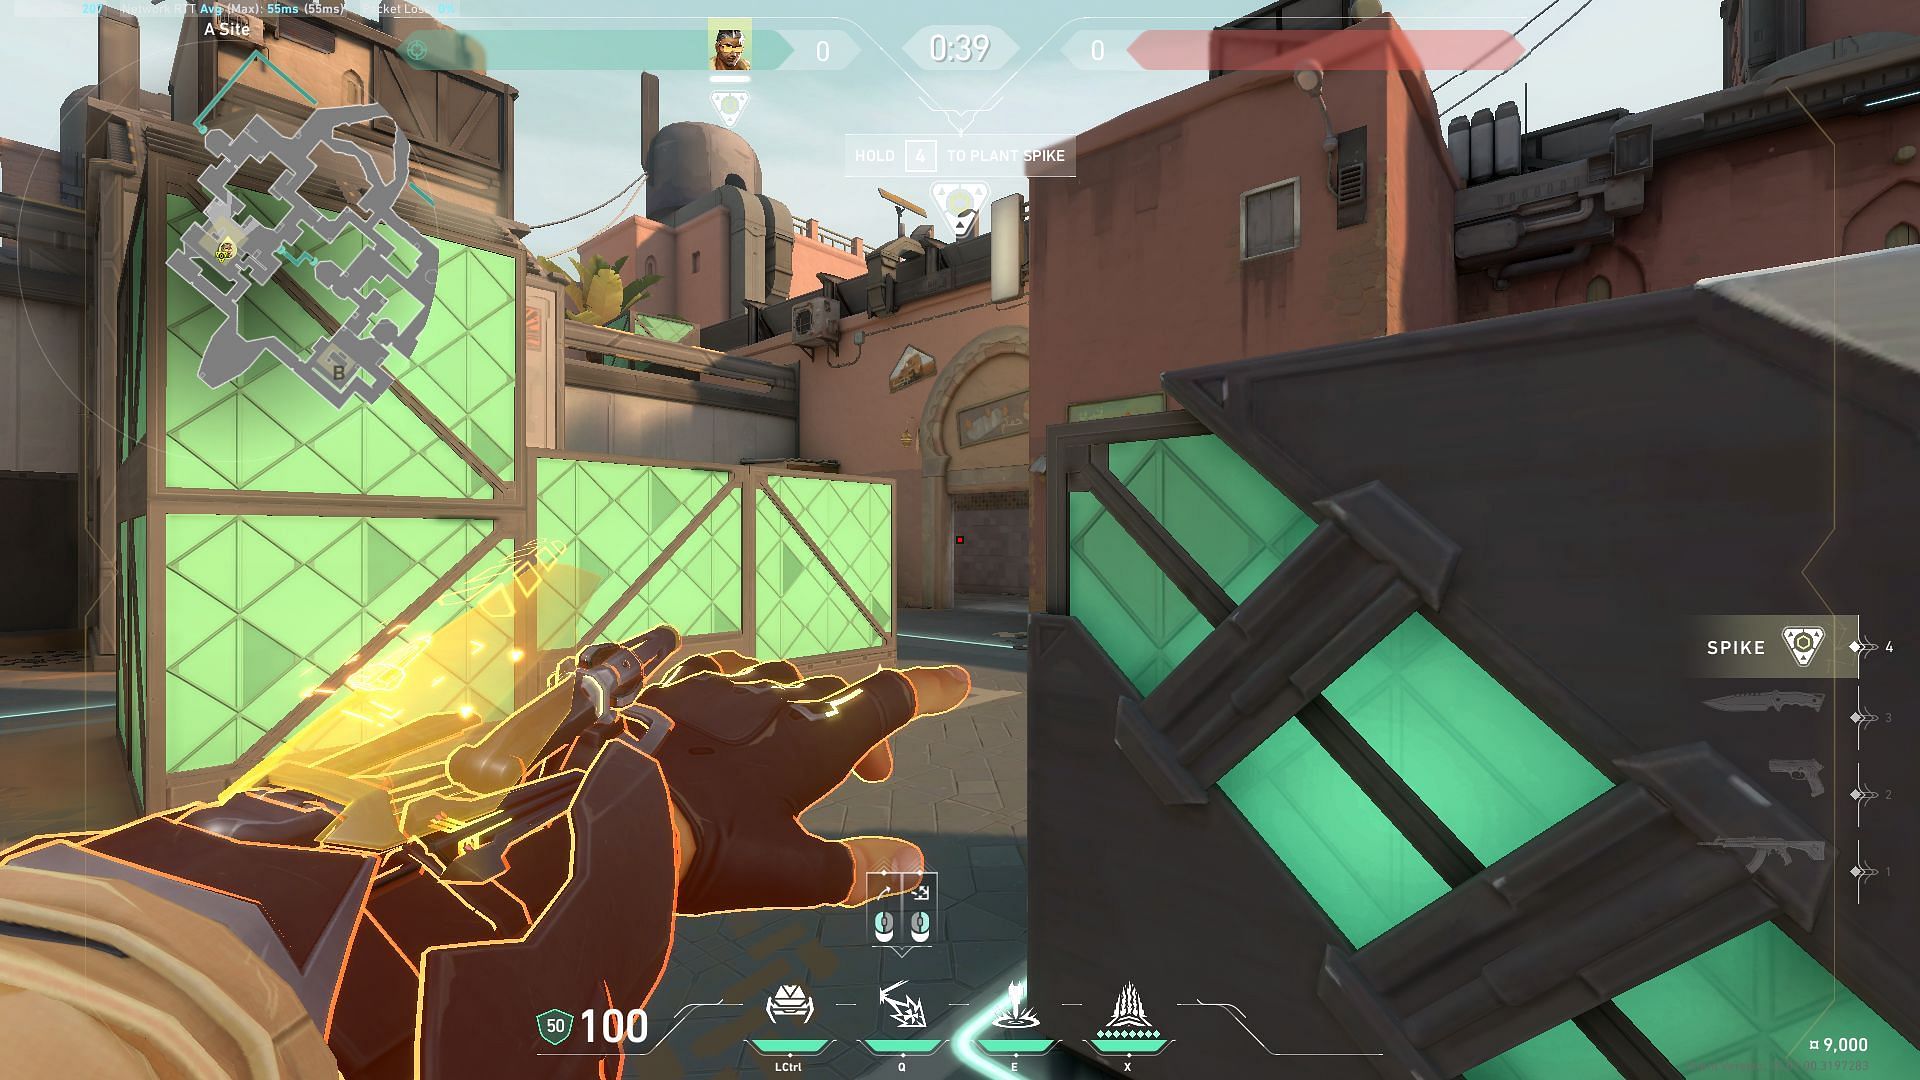
Attacking A site option 1
Launch the Guided Salvo missiles in the indicated locations to clear out enemies on A-Lamps and the brown box at A-Site.
Attacking A site option 2
Use the Guided Salvo Missiles to disrupt enemies' positioning on A-Tower and the truck at A-Site.
Attacking B site option 1
Launch Tejo’s Guided Salvo Missiles to throw off enemies taking point at B-Hookah.
Attacking B site option 2
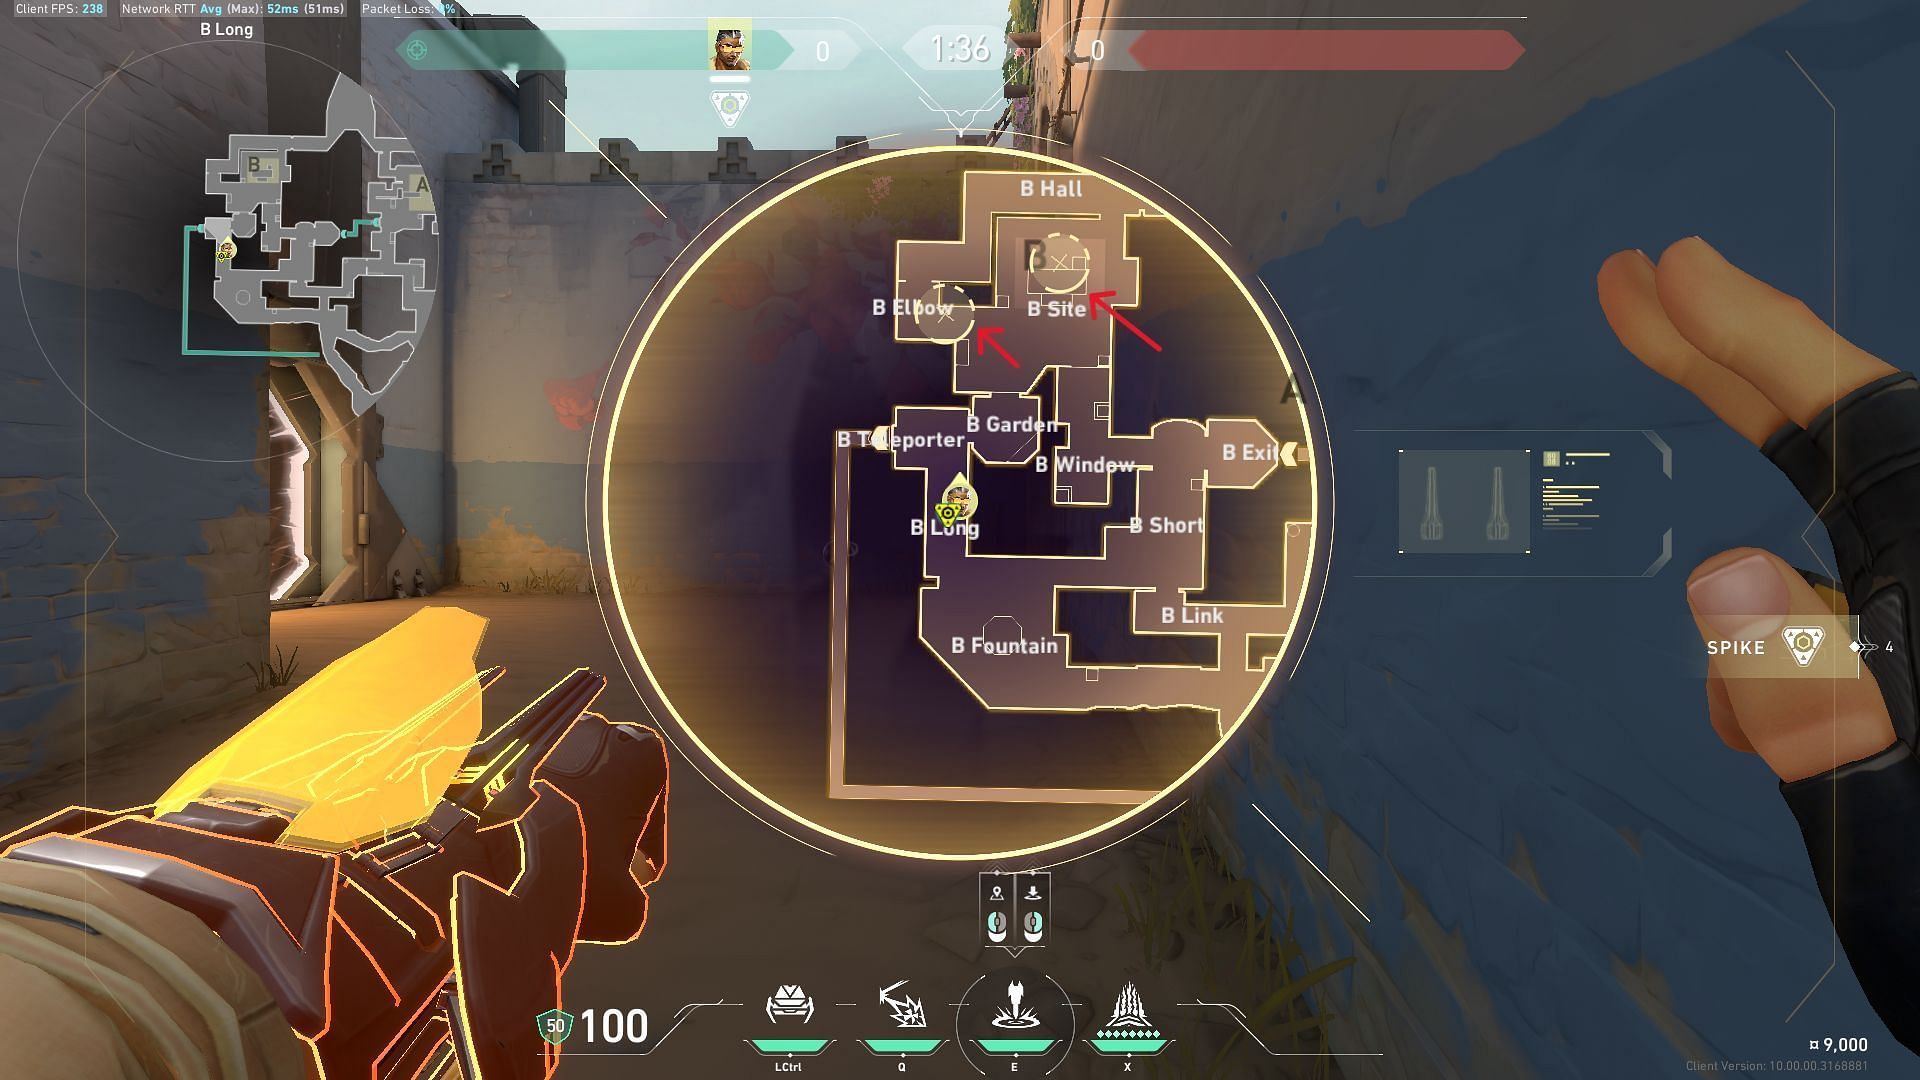
Launching Guided Salvo missiles on the B-Elbow and B-Site will destroy any Cypher or KillJoy traps set in those areas or force the opponents to move from their holding positions.
Also read: Valorant Tejo Fracture guide
Defending A site option 1
In order to hinder the opponents' execution to take control of A-Site, launch the Guided Salvo Missiles on A-Cubby and A-Short. You can also launch a combo attack by coordinating with Breach’s Fault Line ability simultaneously.
Defending A site option 2
Launch the Guided Salvo missiles on A-Bath to disrupt enemy push from that area.
Defending B site option 1
Launching missiles at B-Window and B-Hookah will disrupt enemies moving from B-Link. This will slow down their movement, giving your team enough time to execute a flank attack.
Defending B site option 2
Launching missiles on the target locations as indicated in the picture will throw off aggressive players from their execution. You can also combine it with your teammate having flashing abilities.
Valorant Tejo Bind guide: How to use the Armageddon Ultimate
Tejo's Ultimate ability Armageddon equips a tactical strike targeting a certain portion of the map. A further push of the fire button releases a wave of explosives along the strike route after the target region has been chosen by hitting the fire button.
Attacking A-site for post plant
Launch the Armageddon Ultimate by choosing the path that covers the spike to disrupt enemies trying to defuse it.
Attacking B-site for post plant
Use the Armageddon Ultimate ability to cover the area in which the spike is planted at B-site to inflict heavy damage upon enemies attempting to retake the site or to defuse the spike.
Defending A-Site
Launching the Armageddon Ultimate as soon as the enemy team attempts to plant the spike at A-Site will disrupt their execution and throw them off their positions.
Defending B-Site

Launch Tejo’s Armageddon Ultimate ability as soon as the enemy attempts to plant the spike as the explosion path will inflict heavy damage upon them.
Stay tuned to Sportskeeda for more Valorant updates.

Are you stuck on today's Wordle? Our Wordle Solver will help you find the answer.