

'%20x='0'%20y='0'%20height='100%25'%20width='100%25'%20%0A%20%20%20%20%20%20%20%20%20%20xlink%3Ahref='data:image/jpg;base64,/9j/2wBDAAYEBQYFBAYGBQYHBwYIChAKCgkJChQODwwQFxQYGBcUFhYaHSUfGhsjHBYWICwgIyYnKSopGR8tMC0oMCUoKSj/2wBDAQcHBwoIChMKChMoGhYaKCgoKCgoKCgoKCgoKCgoKCgoKCgoKCgoKCgoKCgoKCgoKCgoKCgoKCgoKCgoKCgoKCj/wgARCAAGAAoDASIAAhEBAxEB/8QAFQABAQAAAAAAAAAAAAAAAAAAAAb/xAAVAQEBAAAAAAAAAAAAAAAAAAADBP/aAAwDAQACEAMQAAAAj5geP//EACIQAAIABAYDAAAAAAAAAAAAAAECAAMEBgUREiEiIzJy0f/aAAgBAQABPwCjvKsk4GmlESWAOpRxfYeUNc9SSSUXP2f7H//EABcRAAMBAAAAAAAAAAAAAAAAAAECEQD/2gAIAQIBAT8ADMBLv//EABgRAAIDAAAAAAAAAAAAAAAAAAMRAAES/9oACAEDAQE/ALCNvM//2Q=='%3E%3C/image%3E%3C/svg%3E)
Our Valorant Tejo Pearl guide aims to provide players with the best tips and lineups they can use in-game. Tejo is a strong Initiator choice for the Pearl map in Valorant. Its classic two-site, three-lane layout complements his utility kit, allowing him to both gather intel and deal damage effectively. To make the most of his potential on this map, understanding his abilities and how to use them strategically is essential for securing wins.
This article covers in-depth strategies for playing Tejo effectively on the Pearl map in Valorant.
Valorant Tejo Pearl guide: How to use Stealth Drone
Tejo deploys a Stealth Drone that he can control to navigate in the game. This drone is ideal for scouting corners of a particular site, detecting enemies, and gathering intel on opponent positions. It fires a single pulse that suppresses as well as reveals enemies within its range.
Looking for Crossword hints & solutions? Check out latest NYT Mini Crossword Answers, LA Times Crossword Answers, and Atlantic Crossword Answers
To avoid being vulnerable to attacks while piloting the drone, make sure to launch it from a safe location.
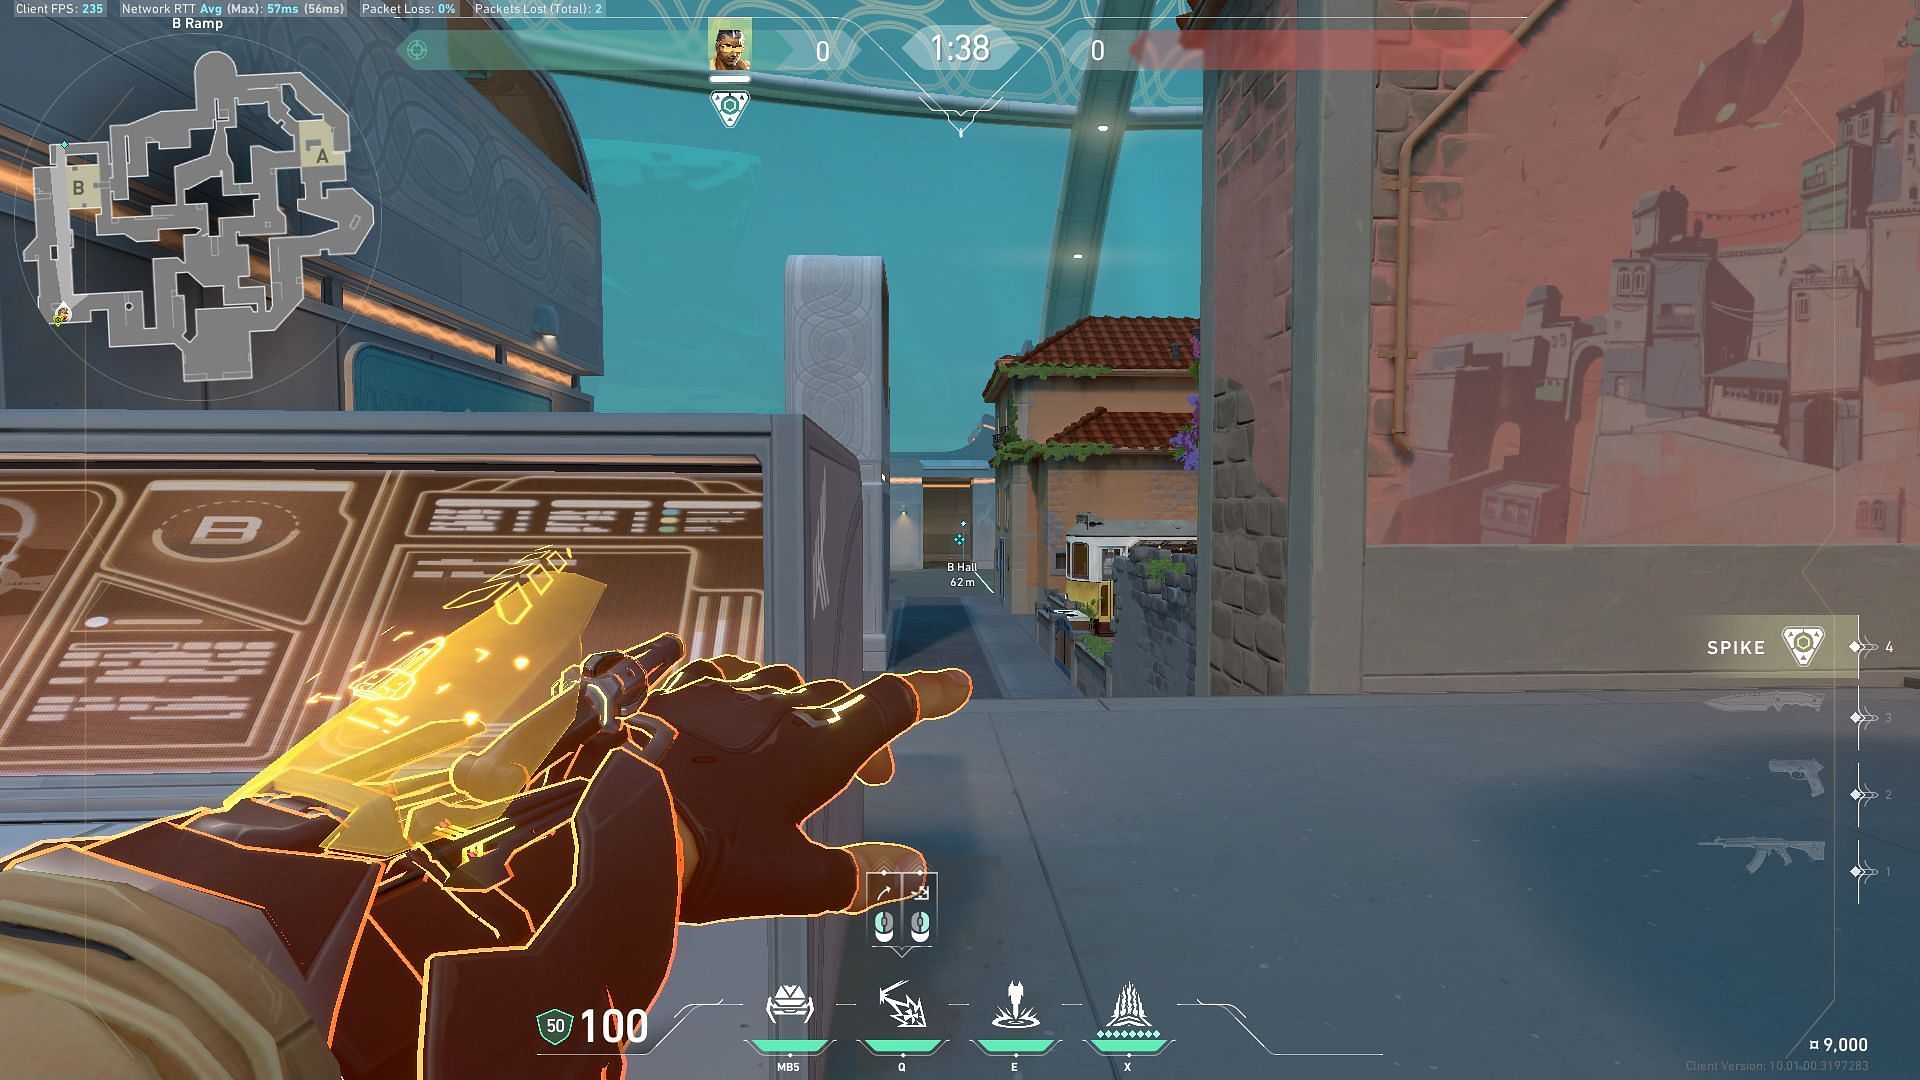
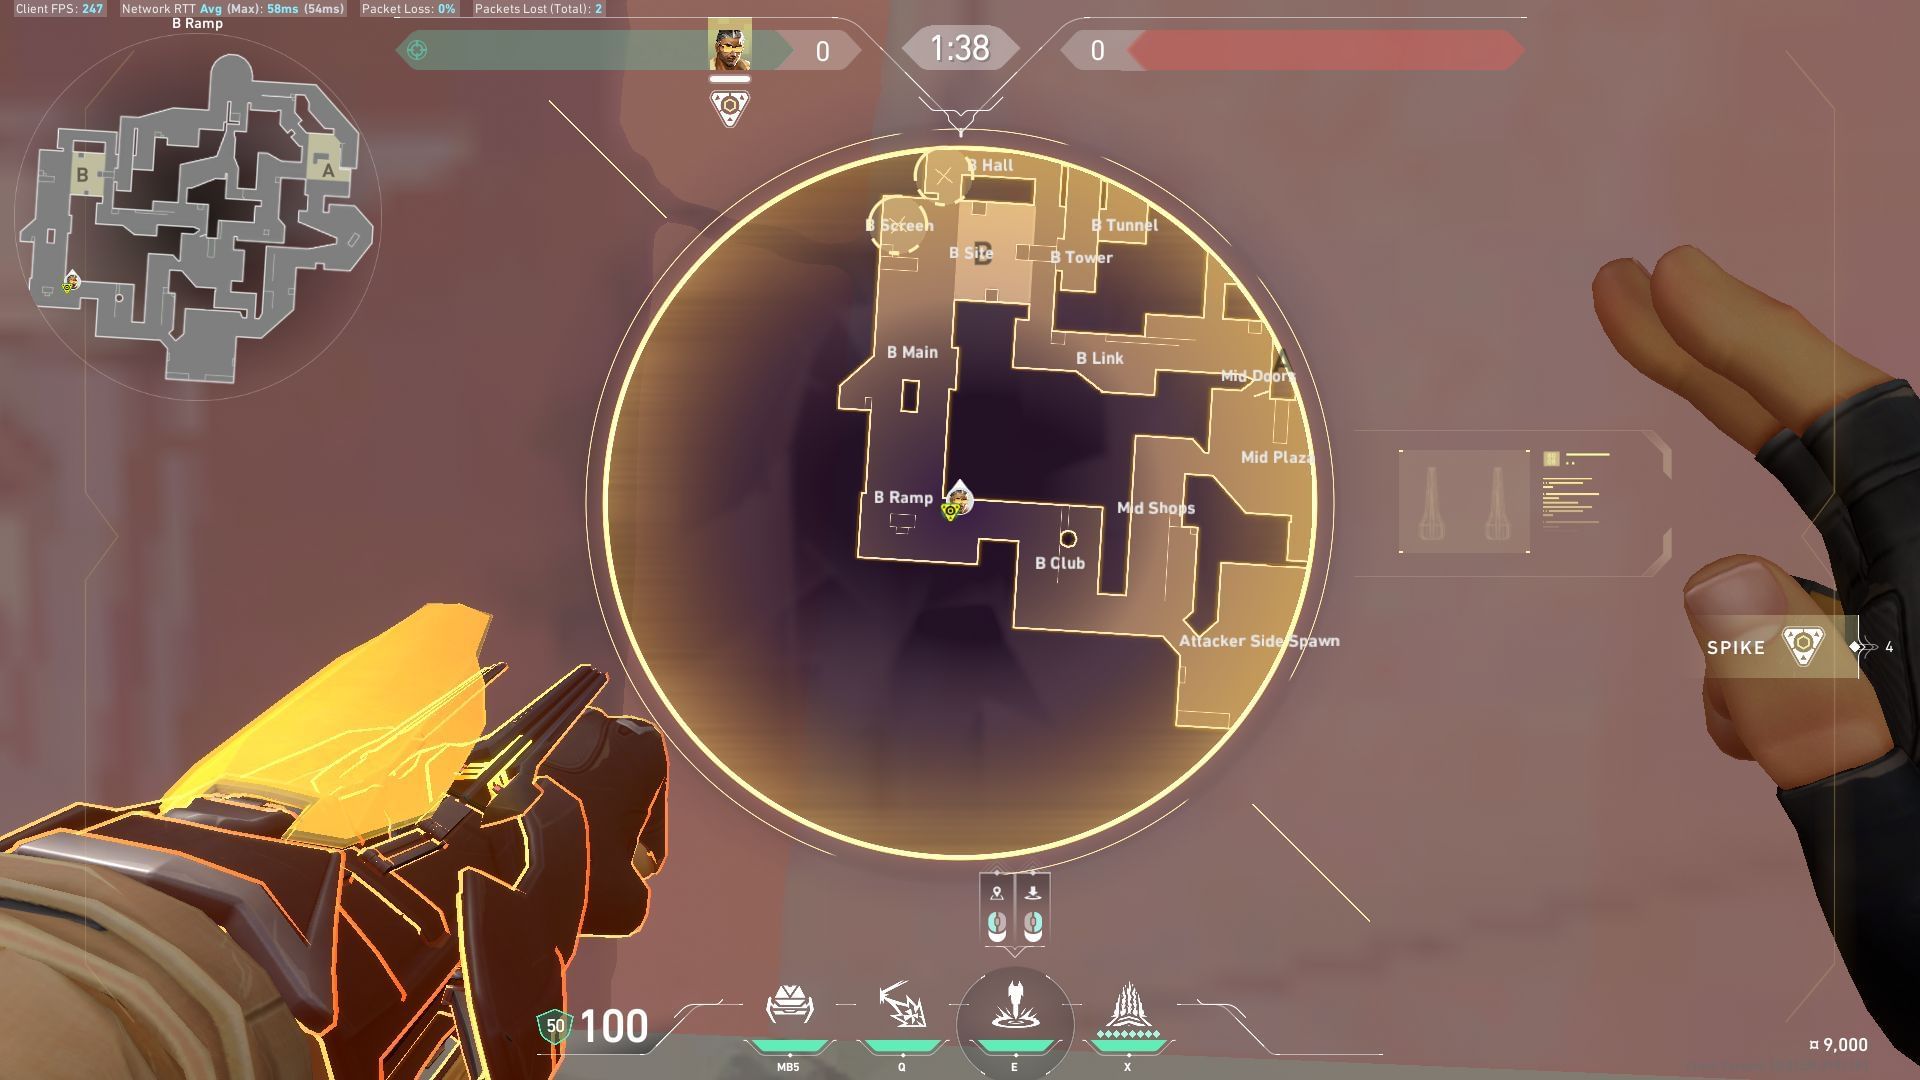
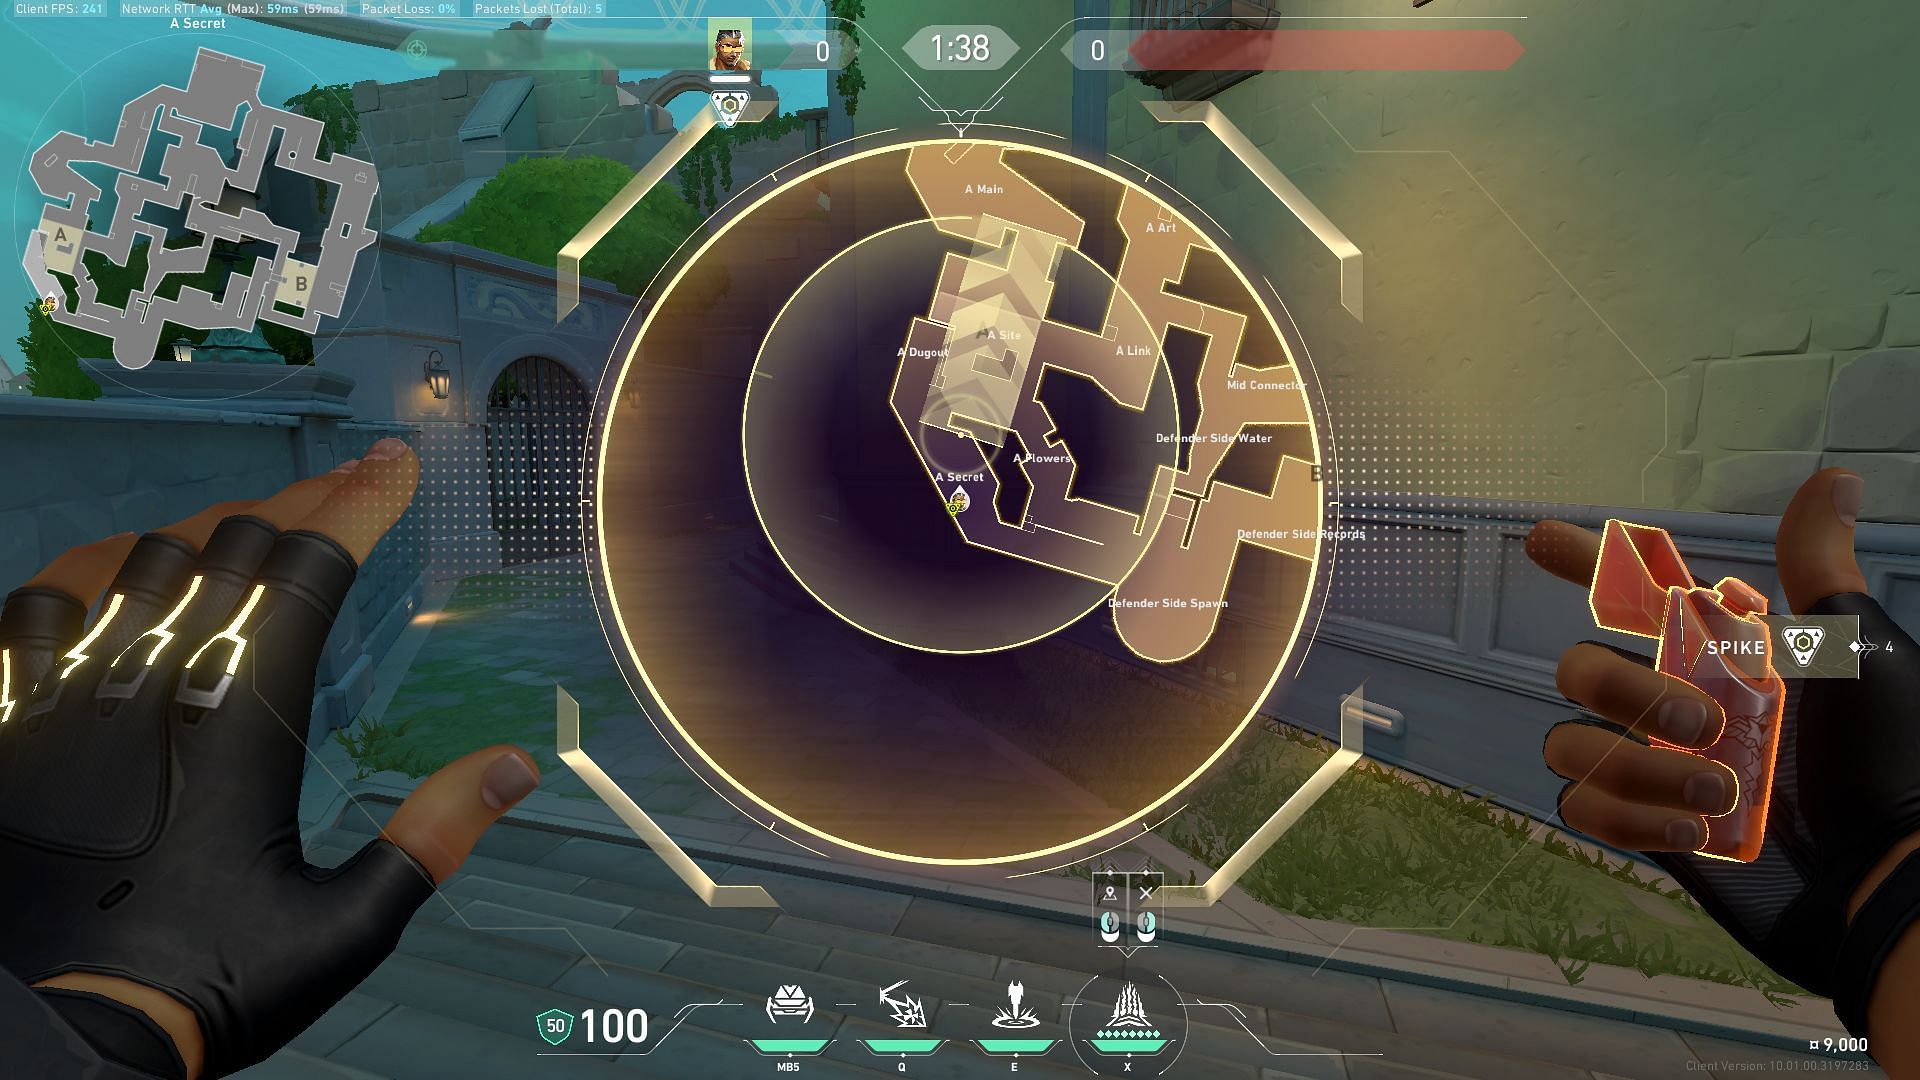
Stealth Drone Attacking route
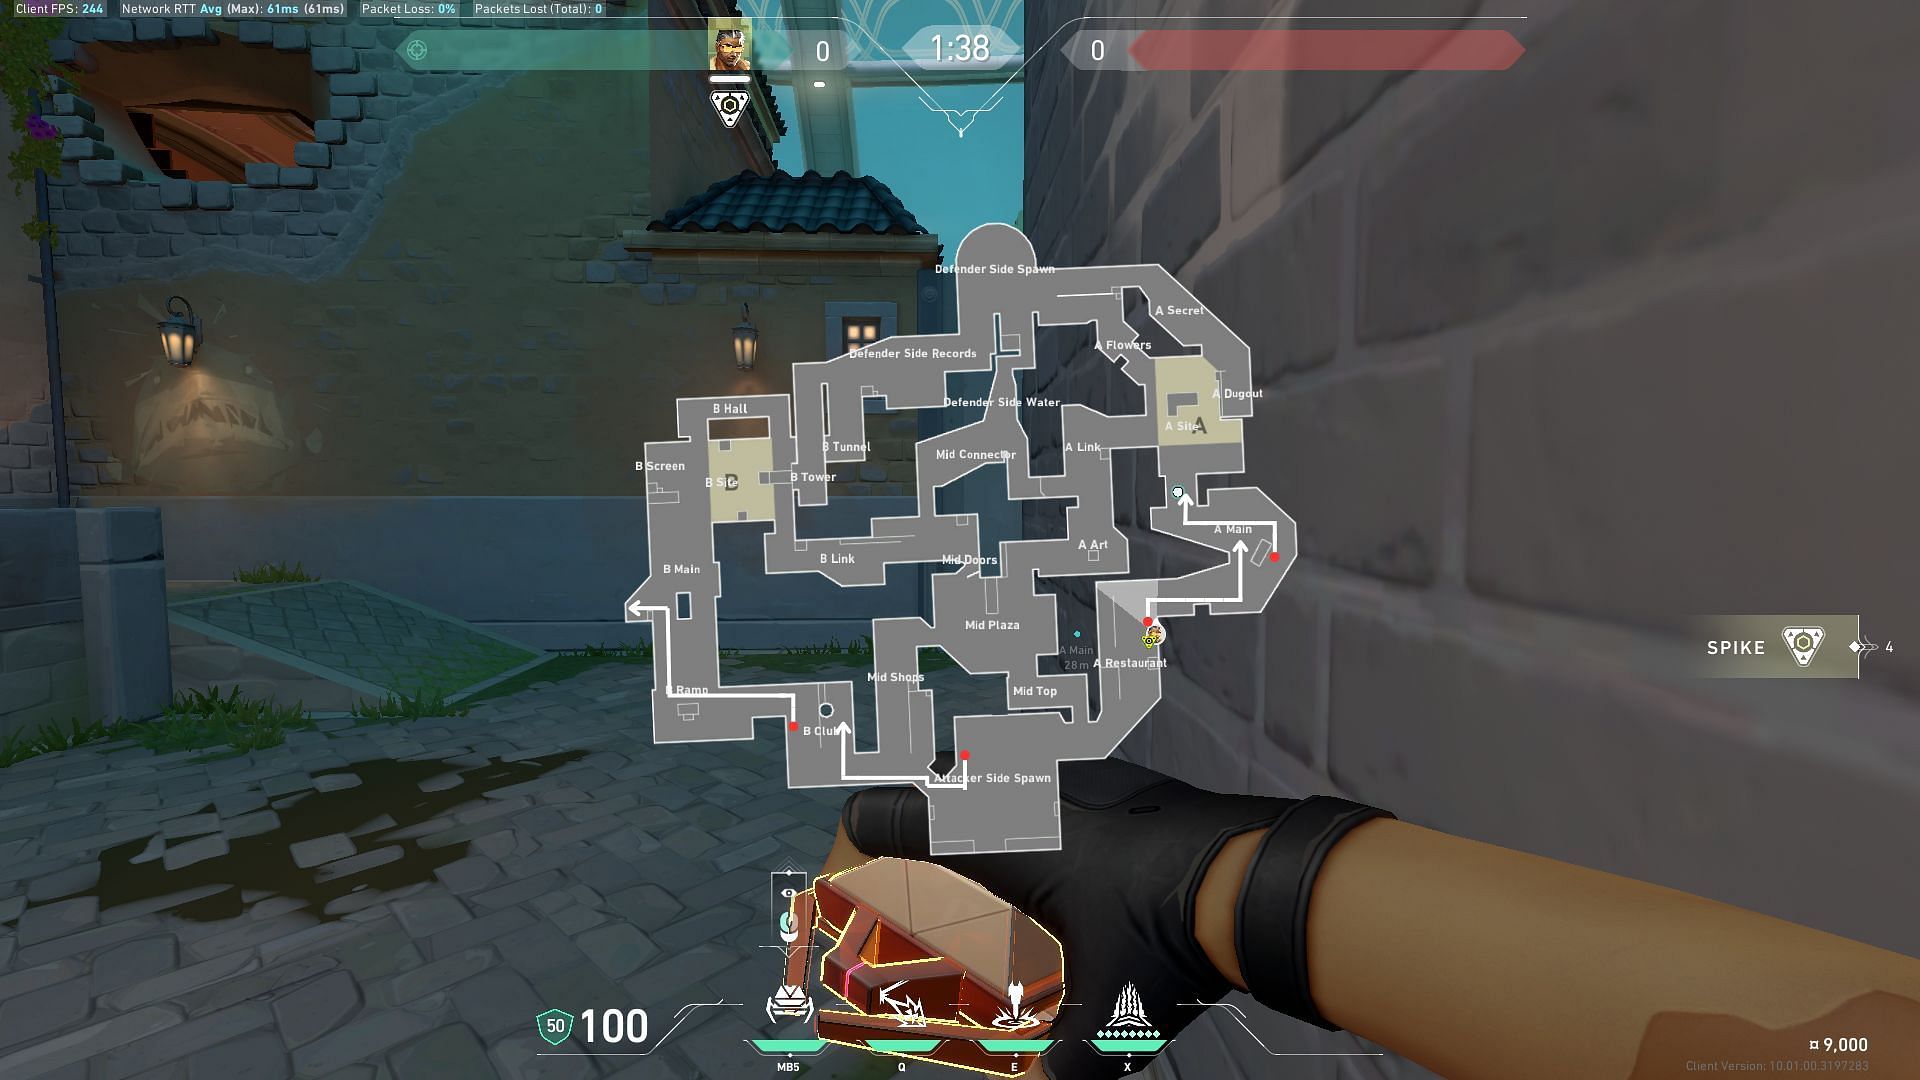
Deploy Tejo's Stealth Drone toward the locations marked on the image to detect and suppress enemies.
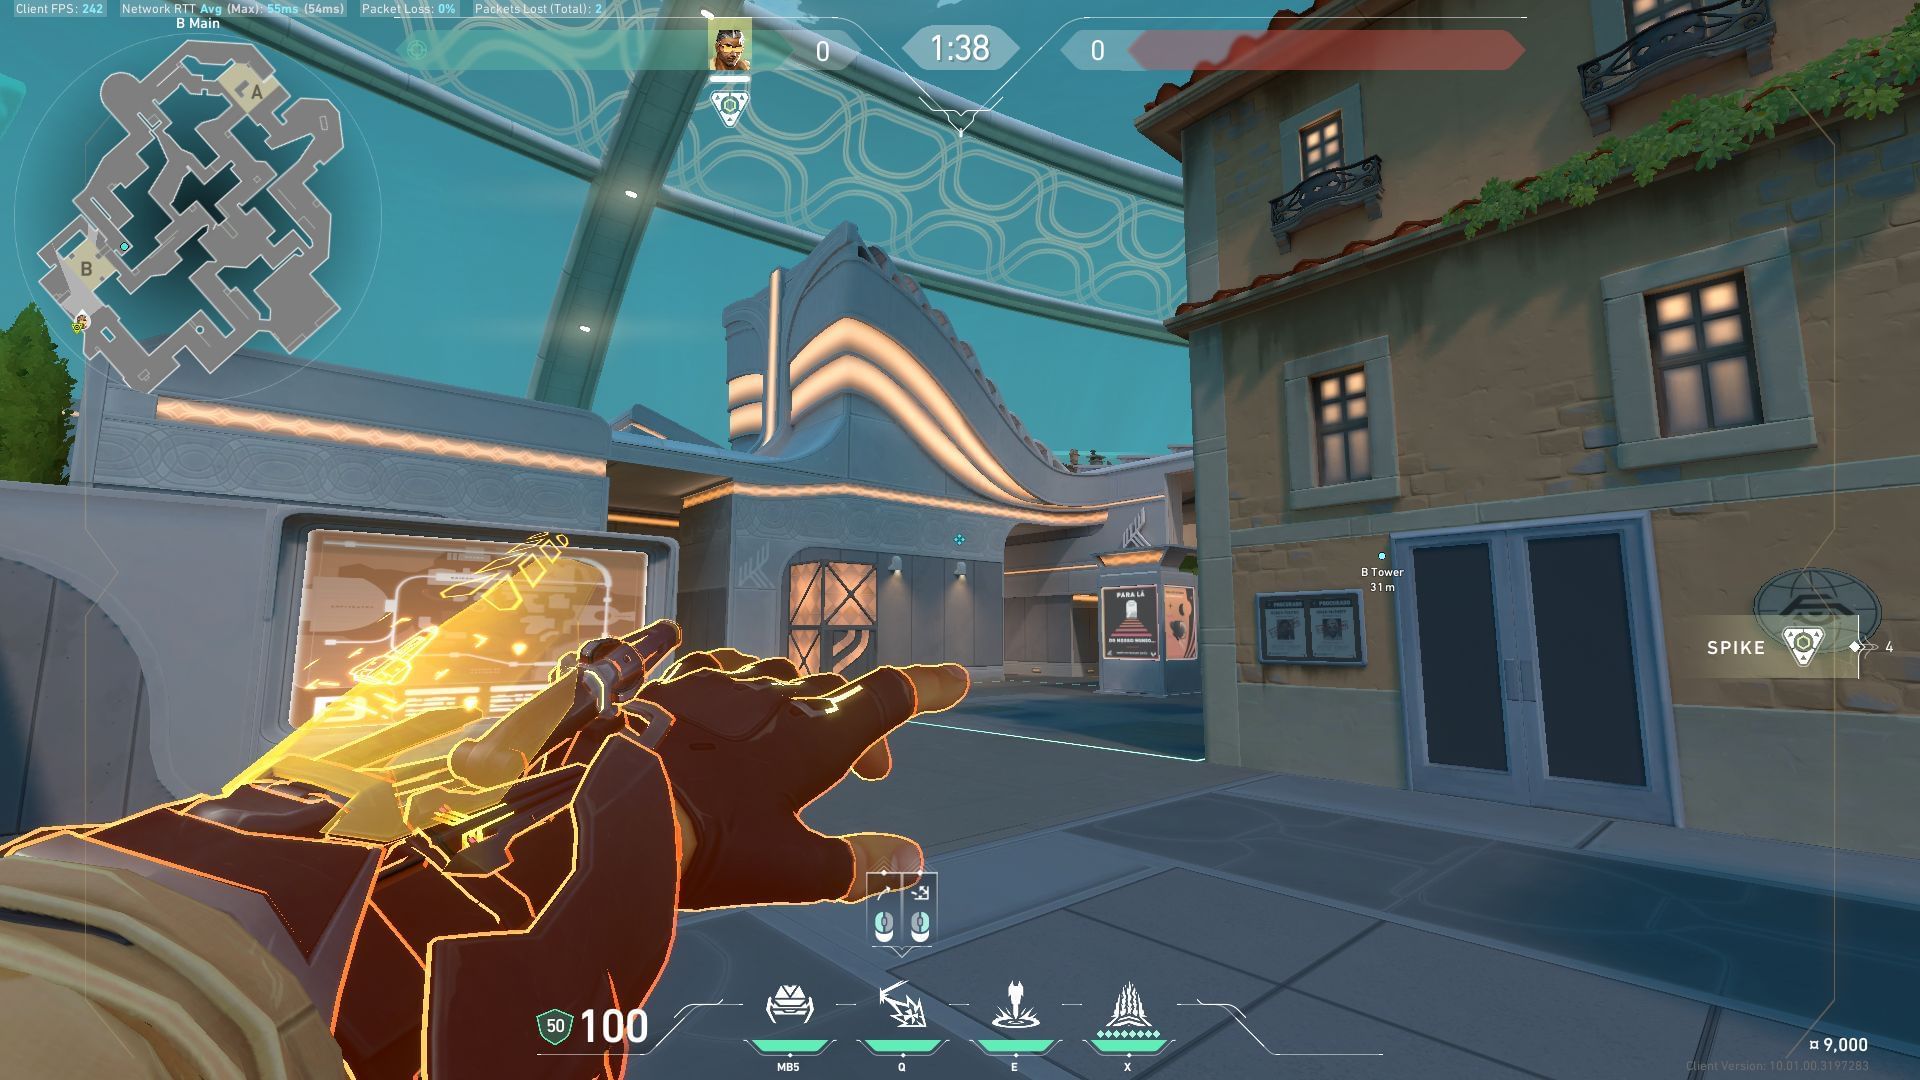
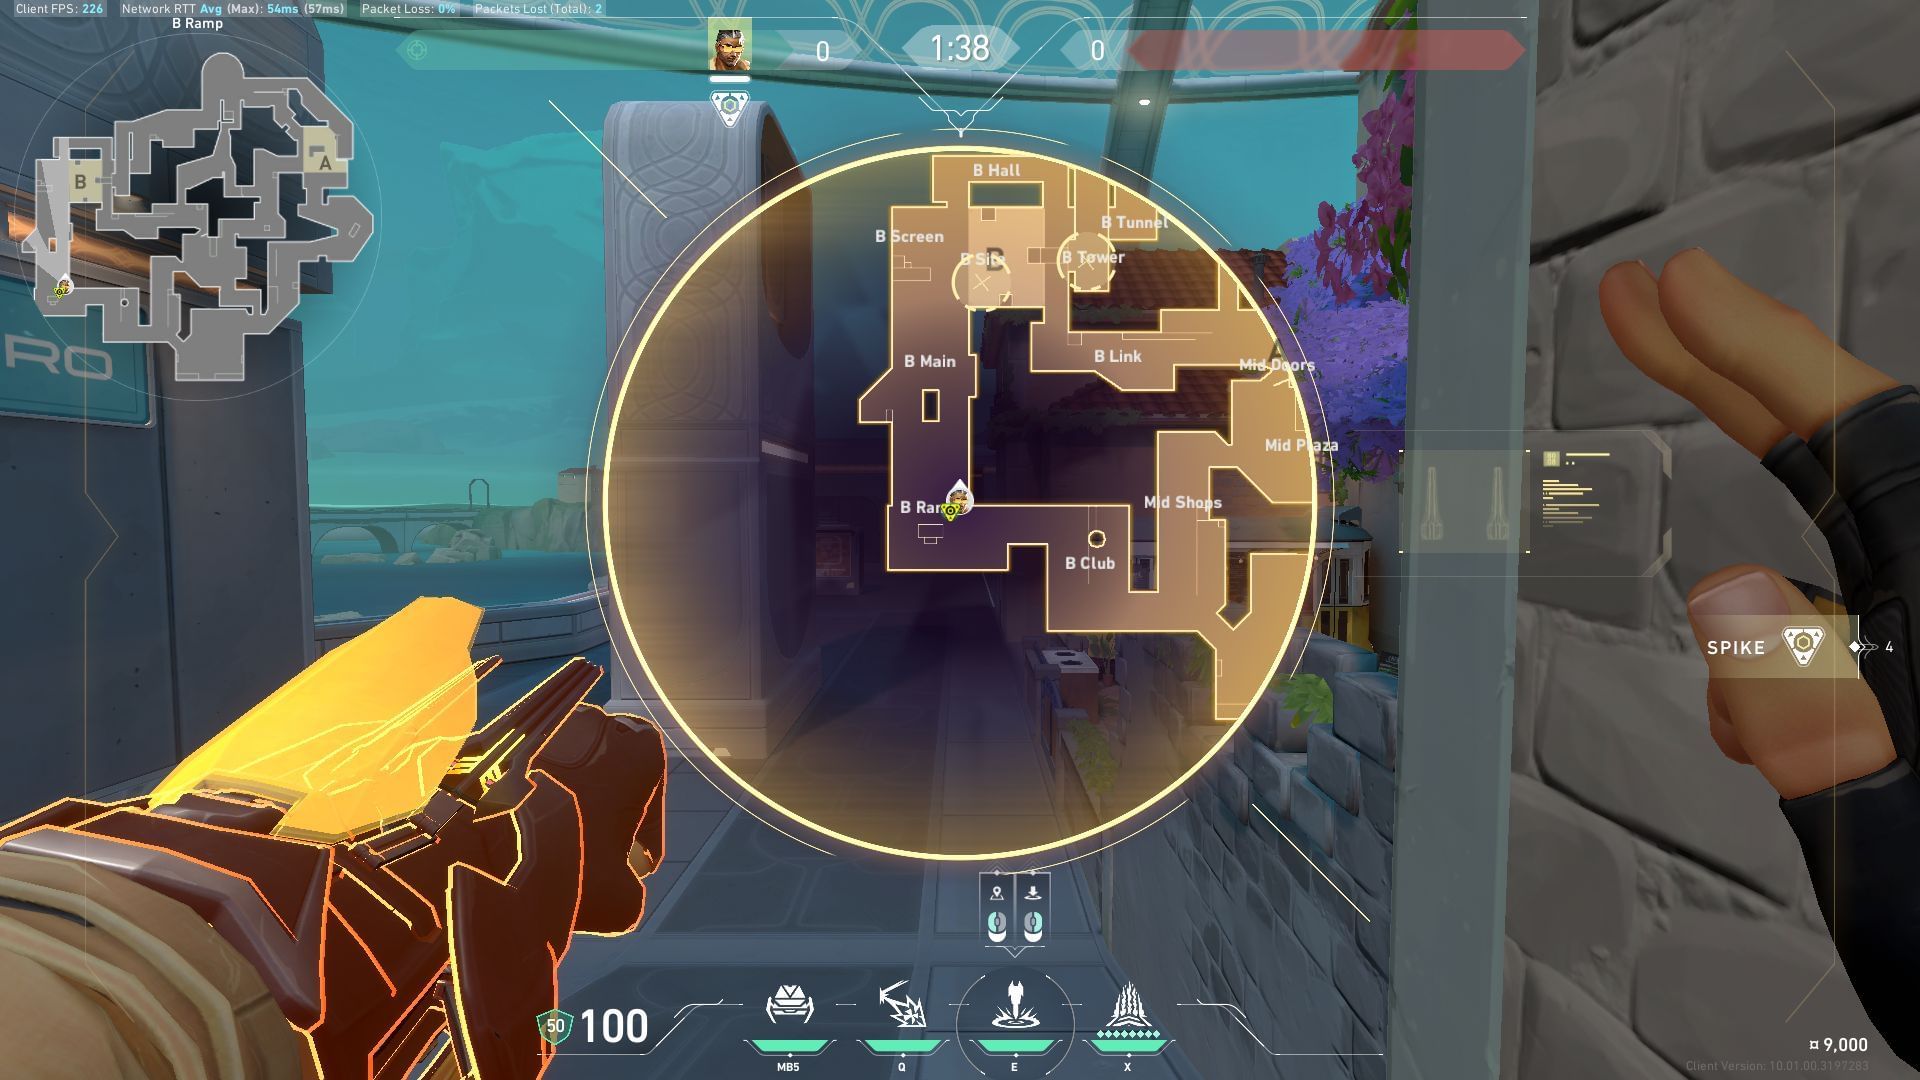
Stealth Drone Defending route
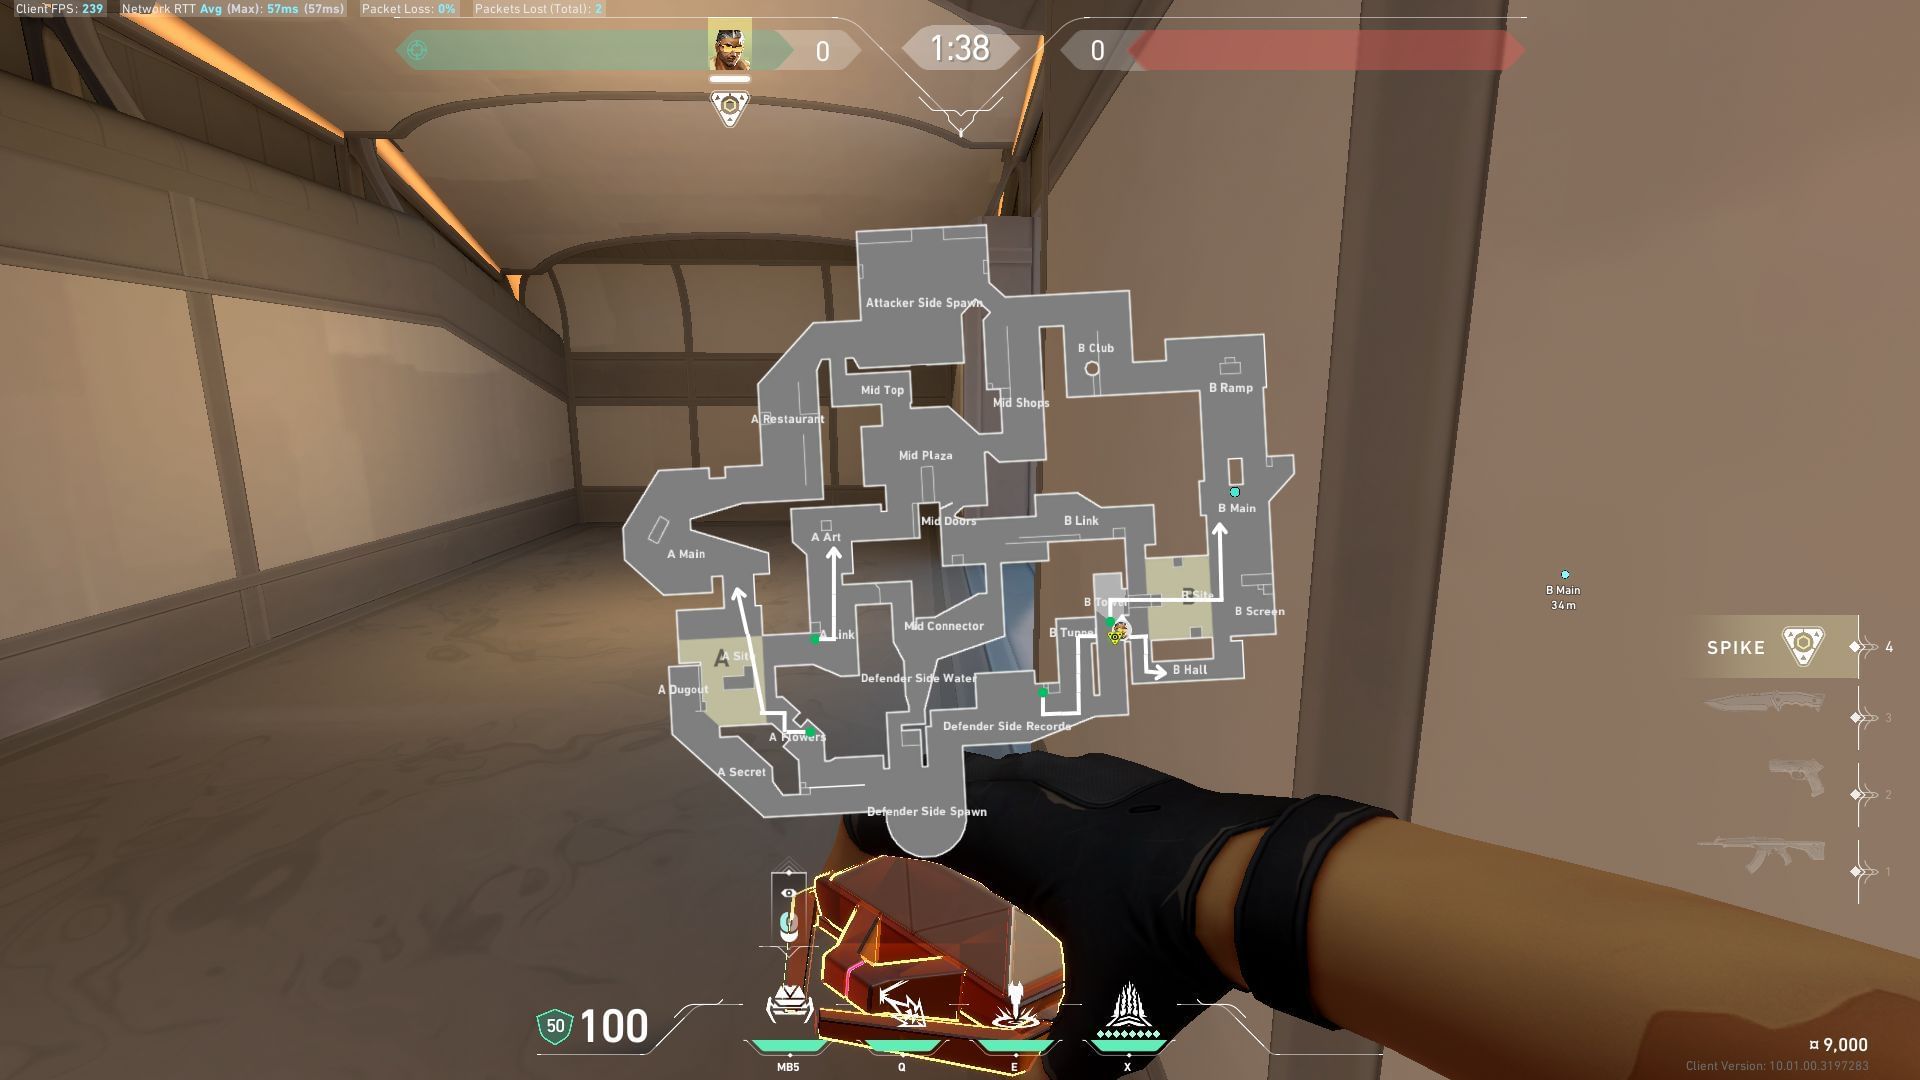
Deploy the Stealth Drone towards the marked locations as shown in the image to suppress and detect attacking enemies approaching a specific site.
Also read: Valorant Tejo: All abilities and Agent gear.
Valorant Tejo Pearl guide: How to use Special Delivery
Tejo’s Special Delivery is a sticky concussion grenade useful for concussing enemies in sight or hiding in tricky corners in Valorant’s Pearl map. By pressing ALT FIRE, you can allow the grenade to bounce off a surface and hit the targeted area.
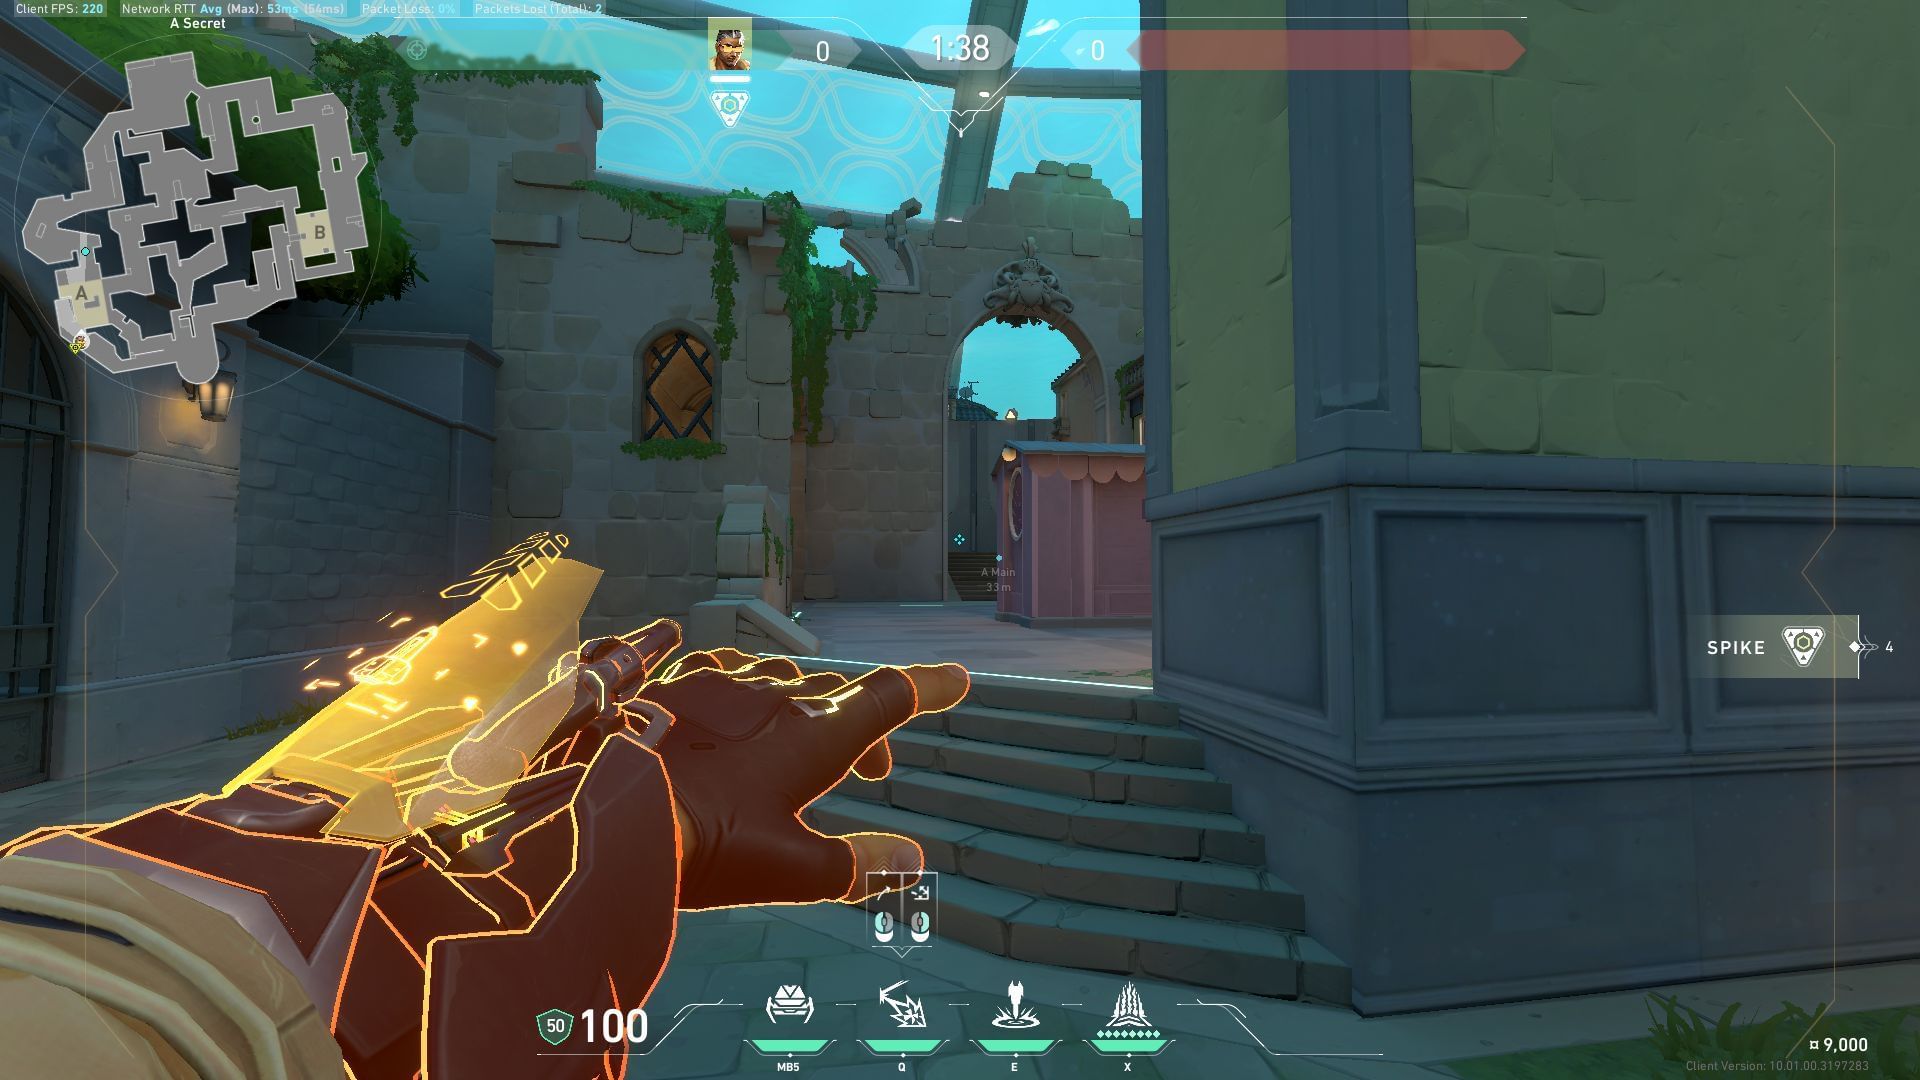
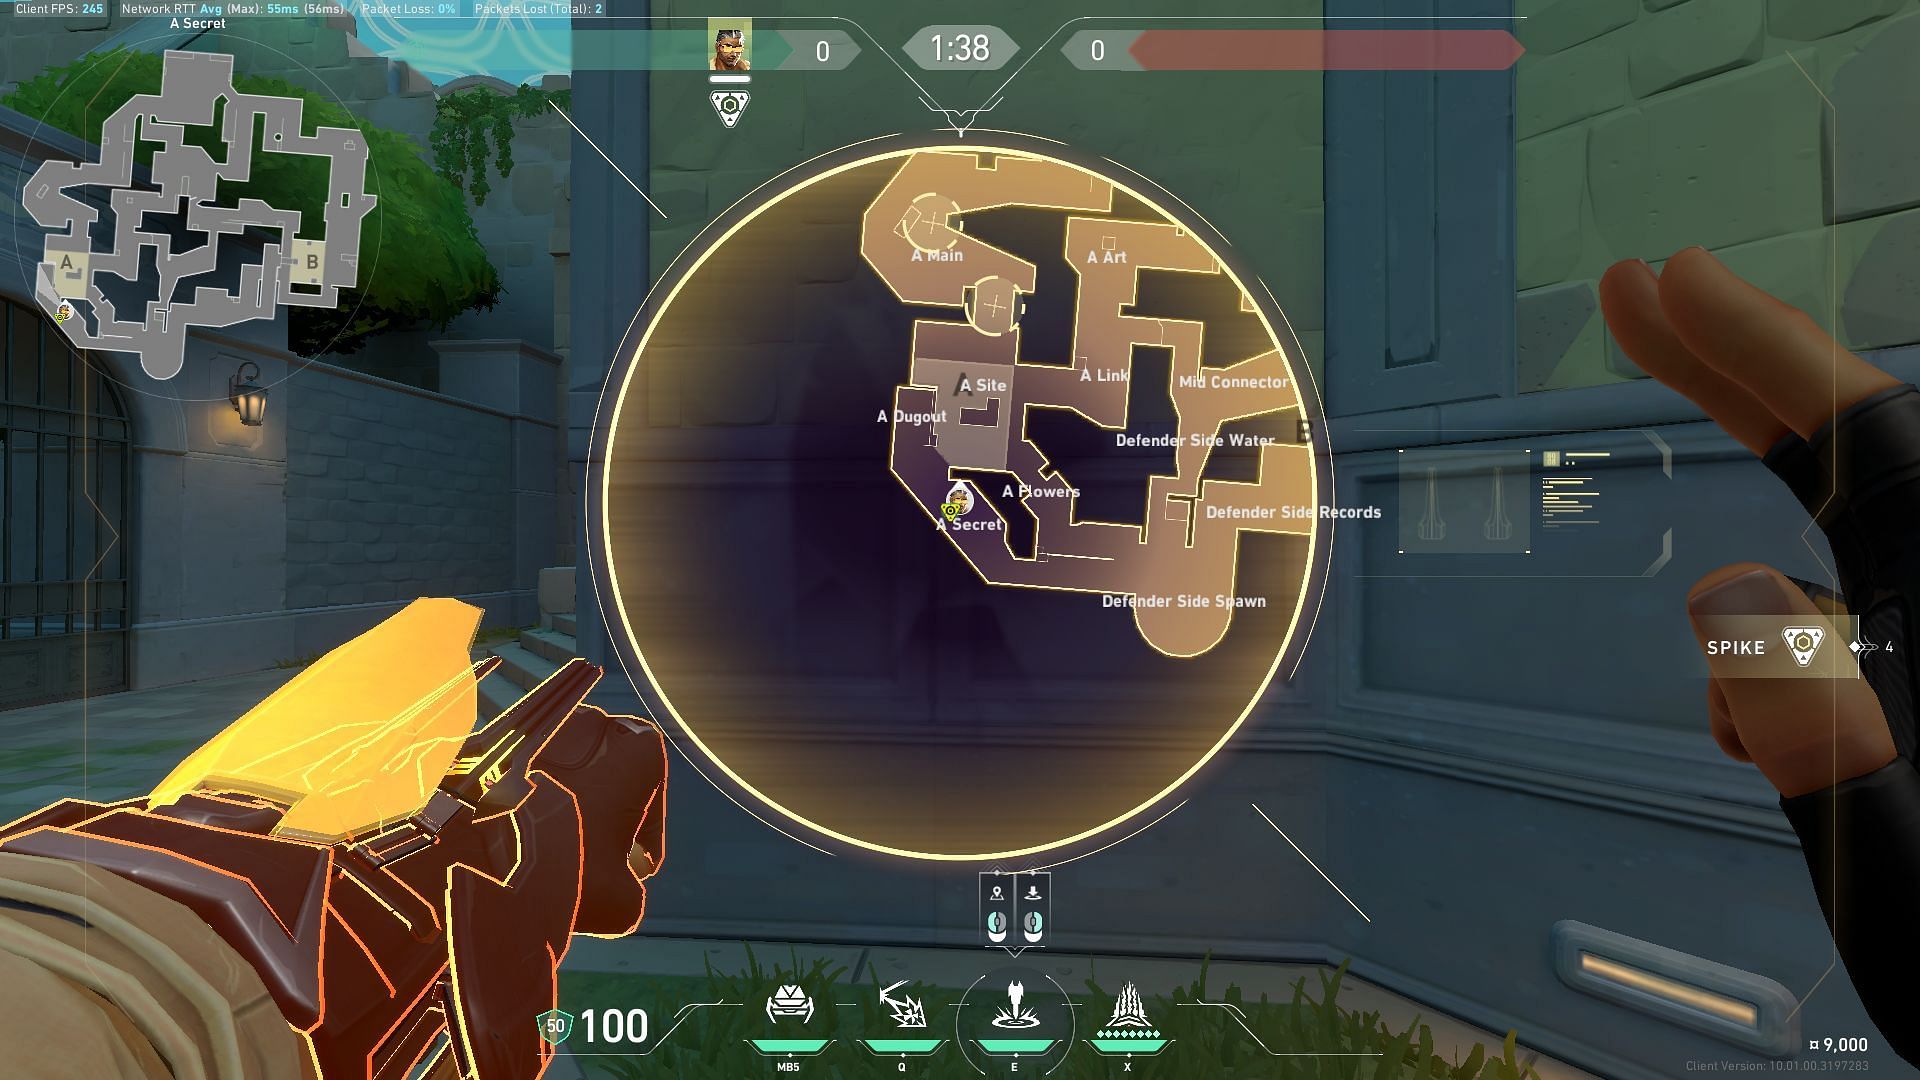
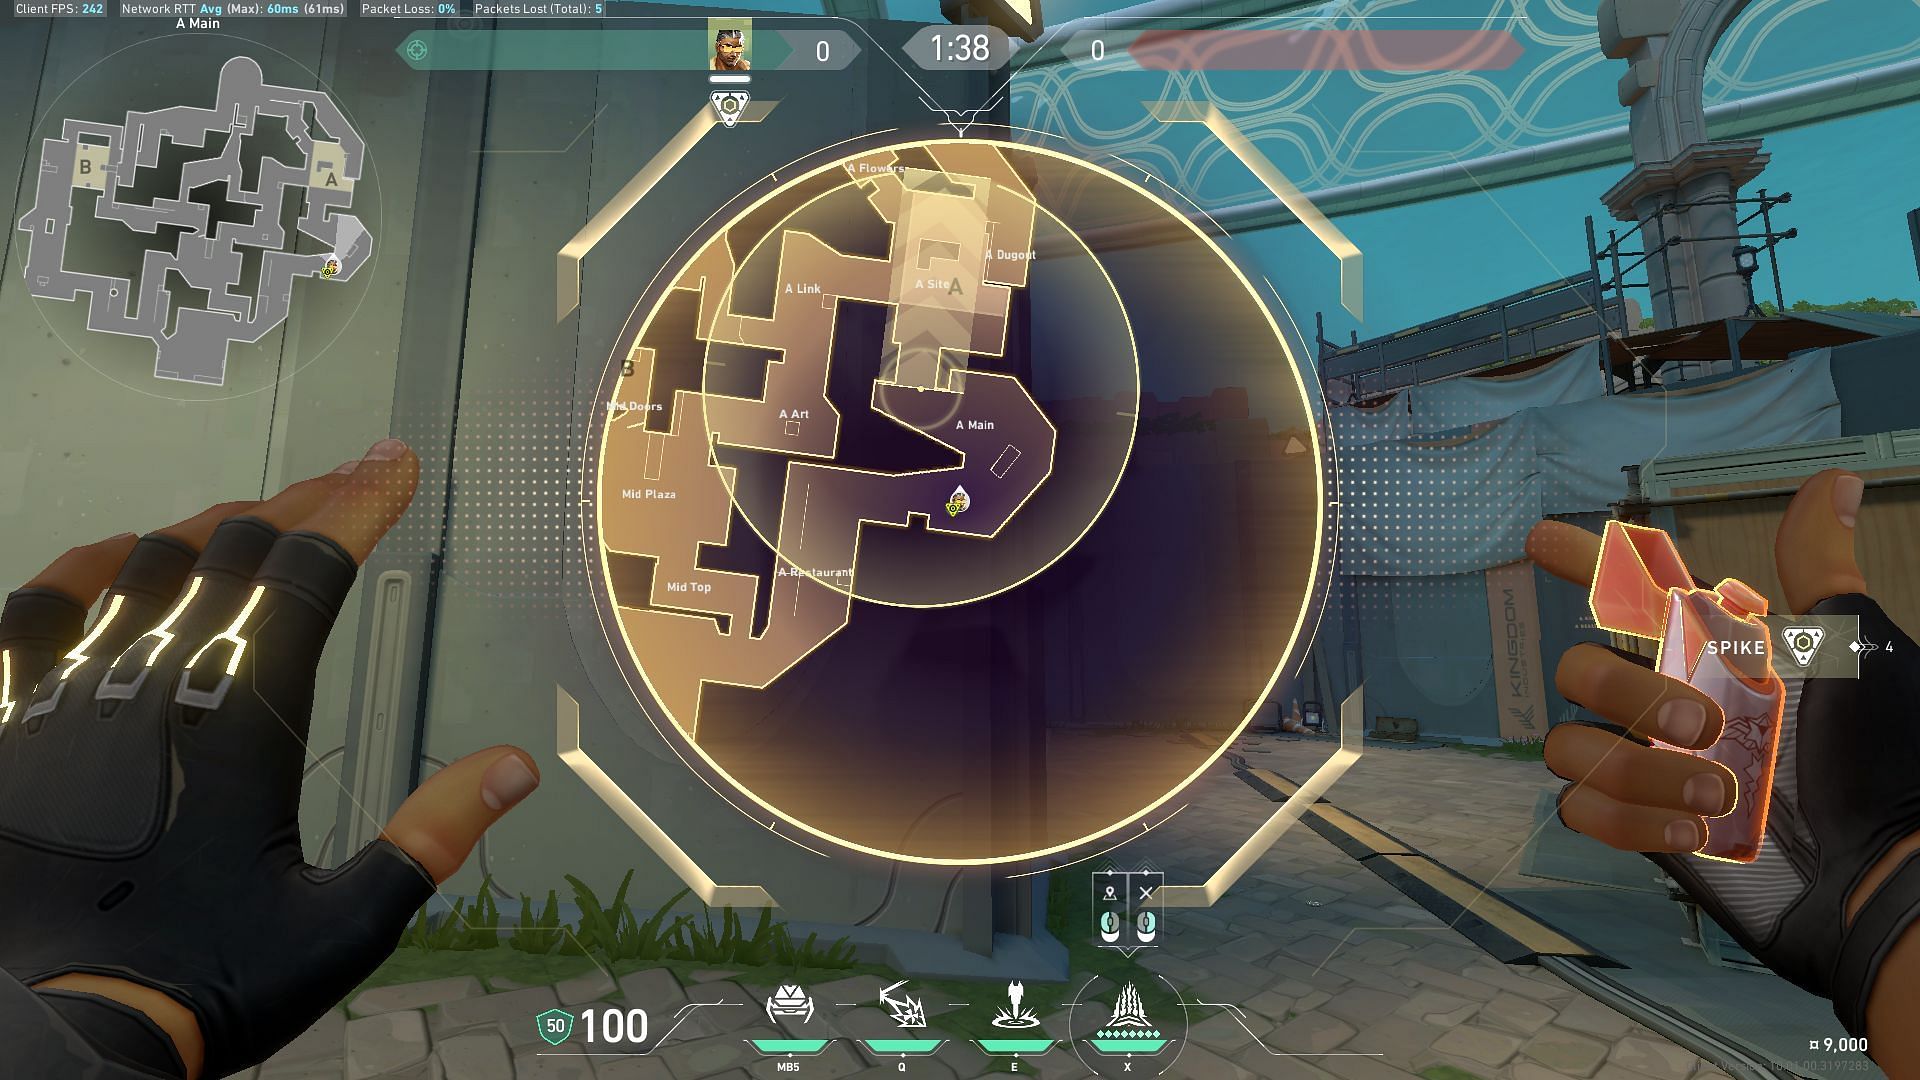
Attacking A-site option 1
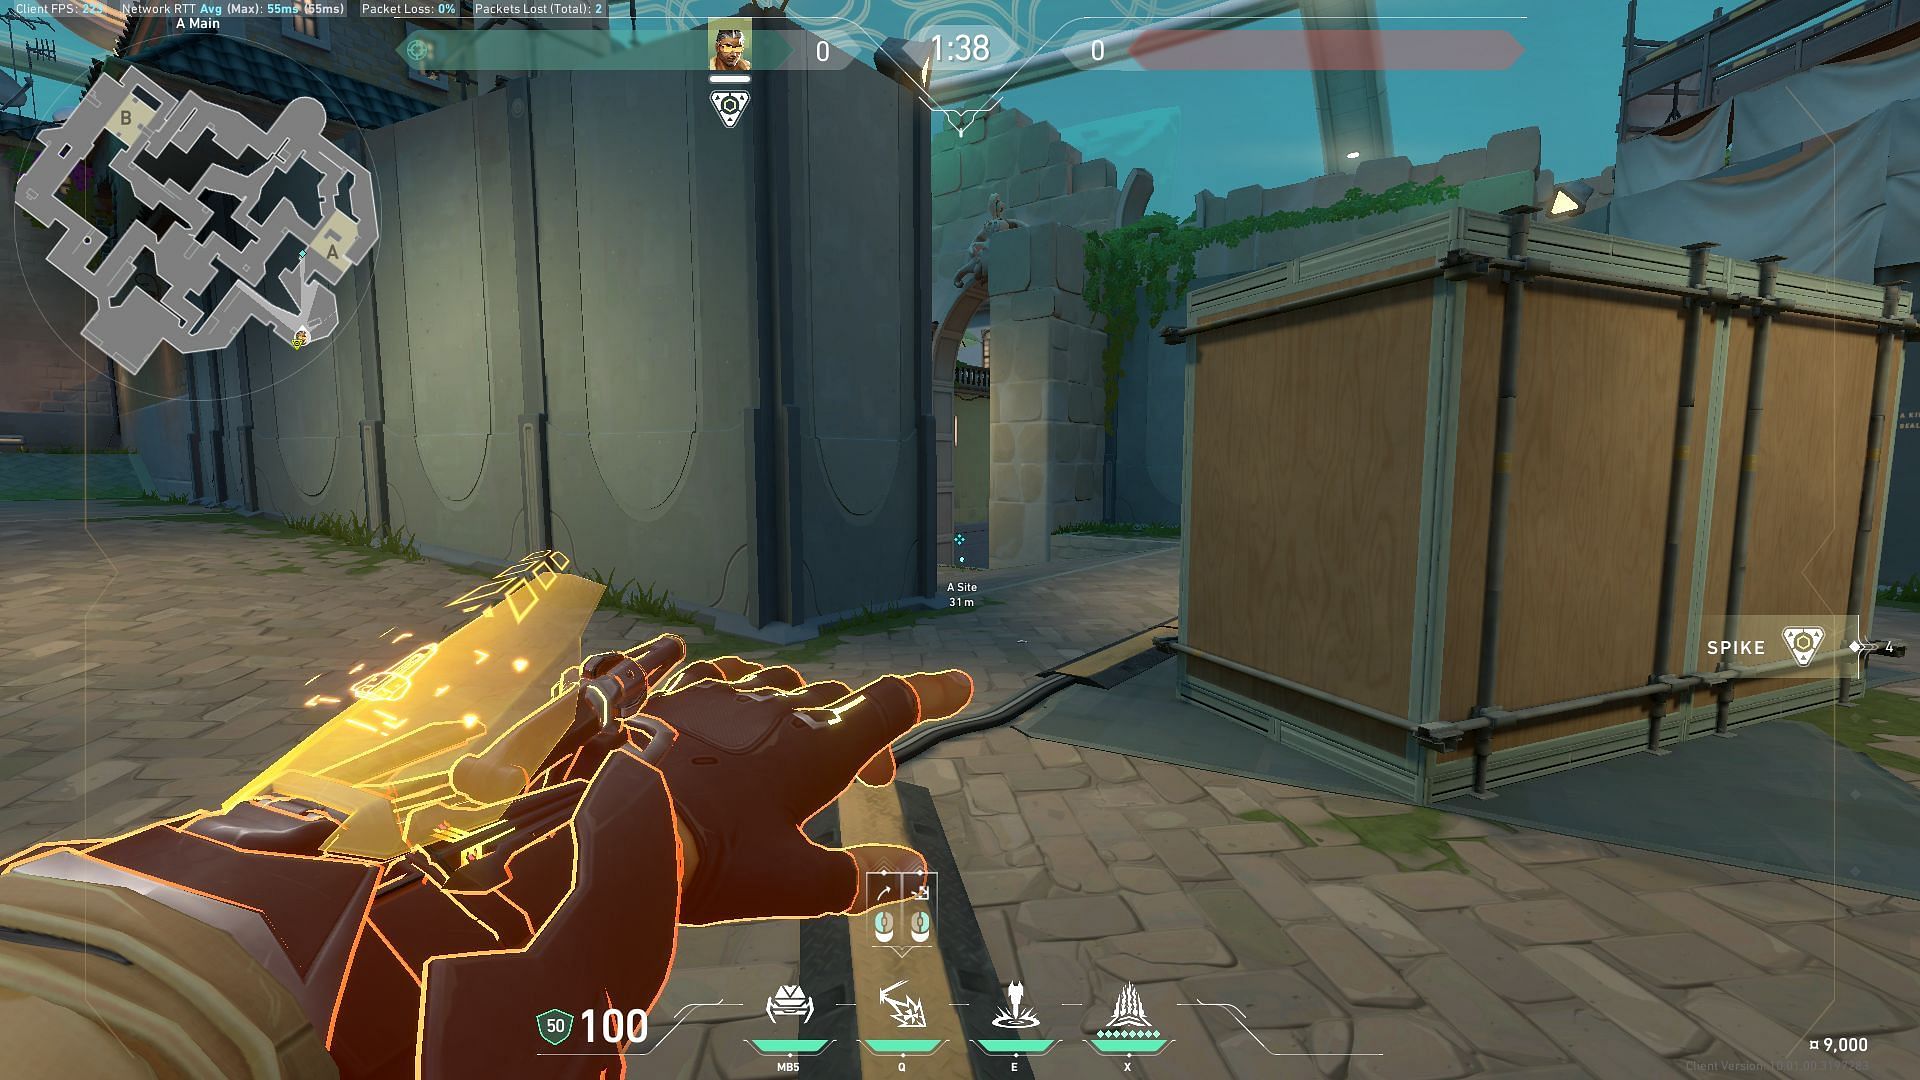
Deploy the Special Delivery grenade on A-Main to concuss enemies within that area.
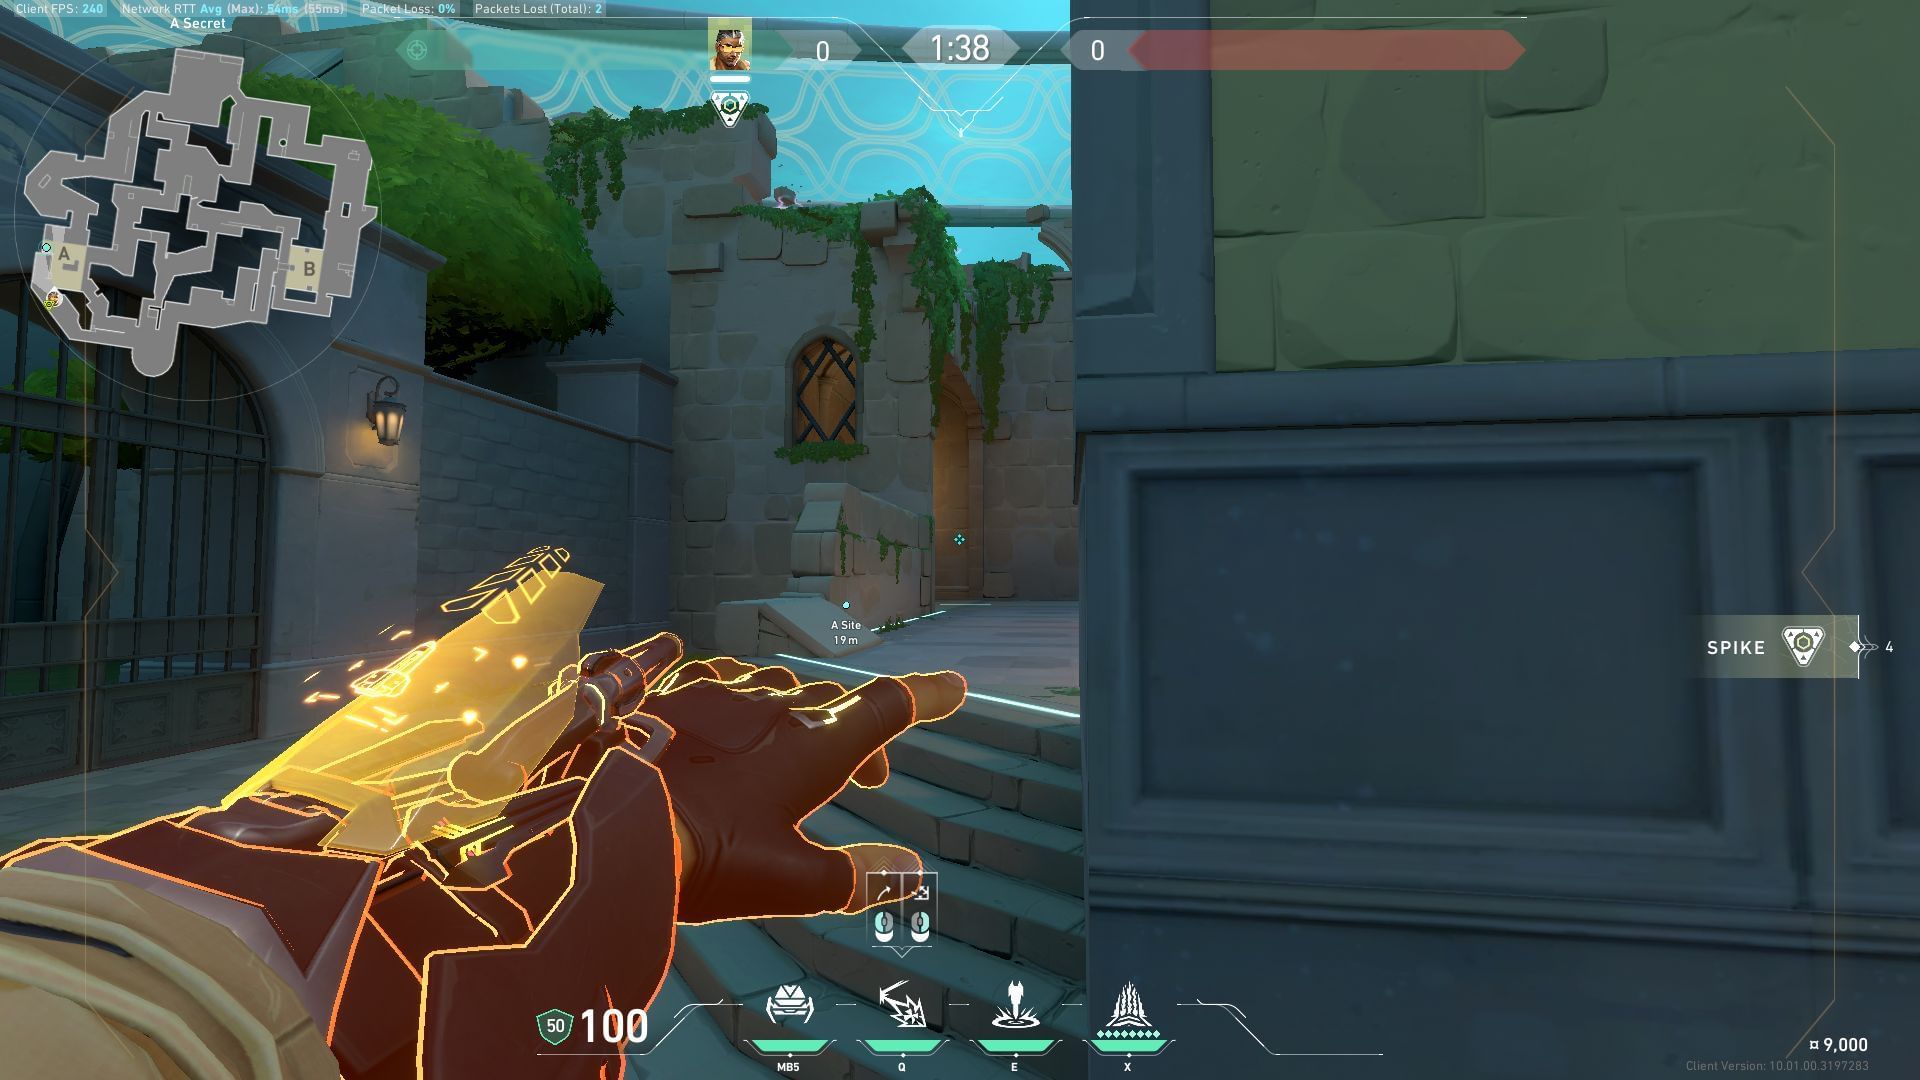
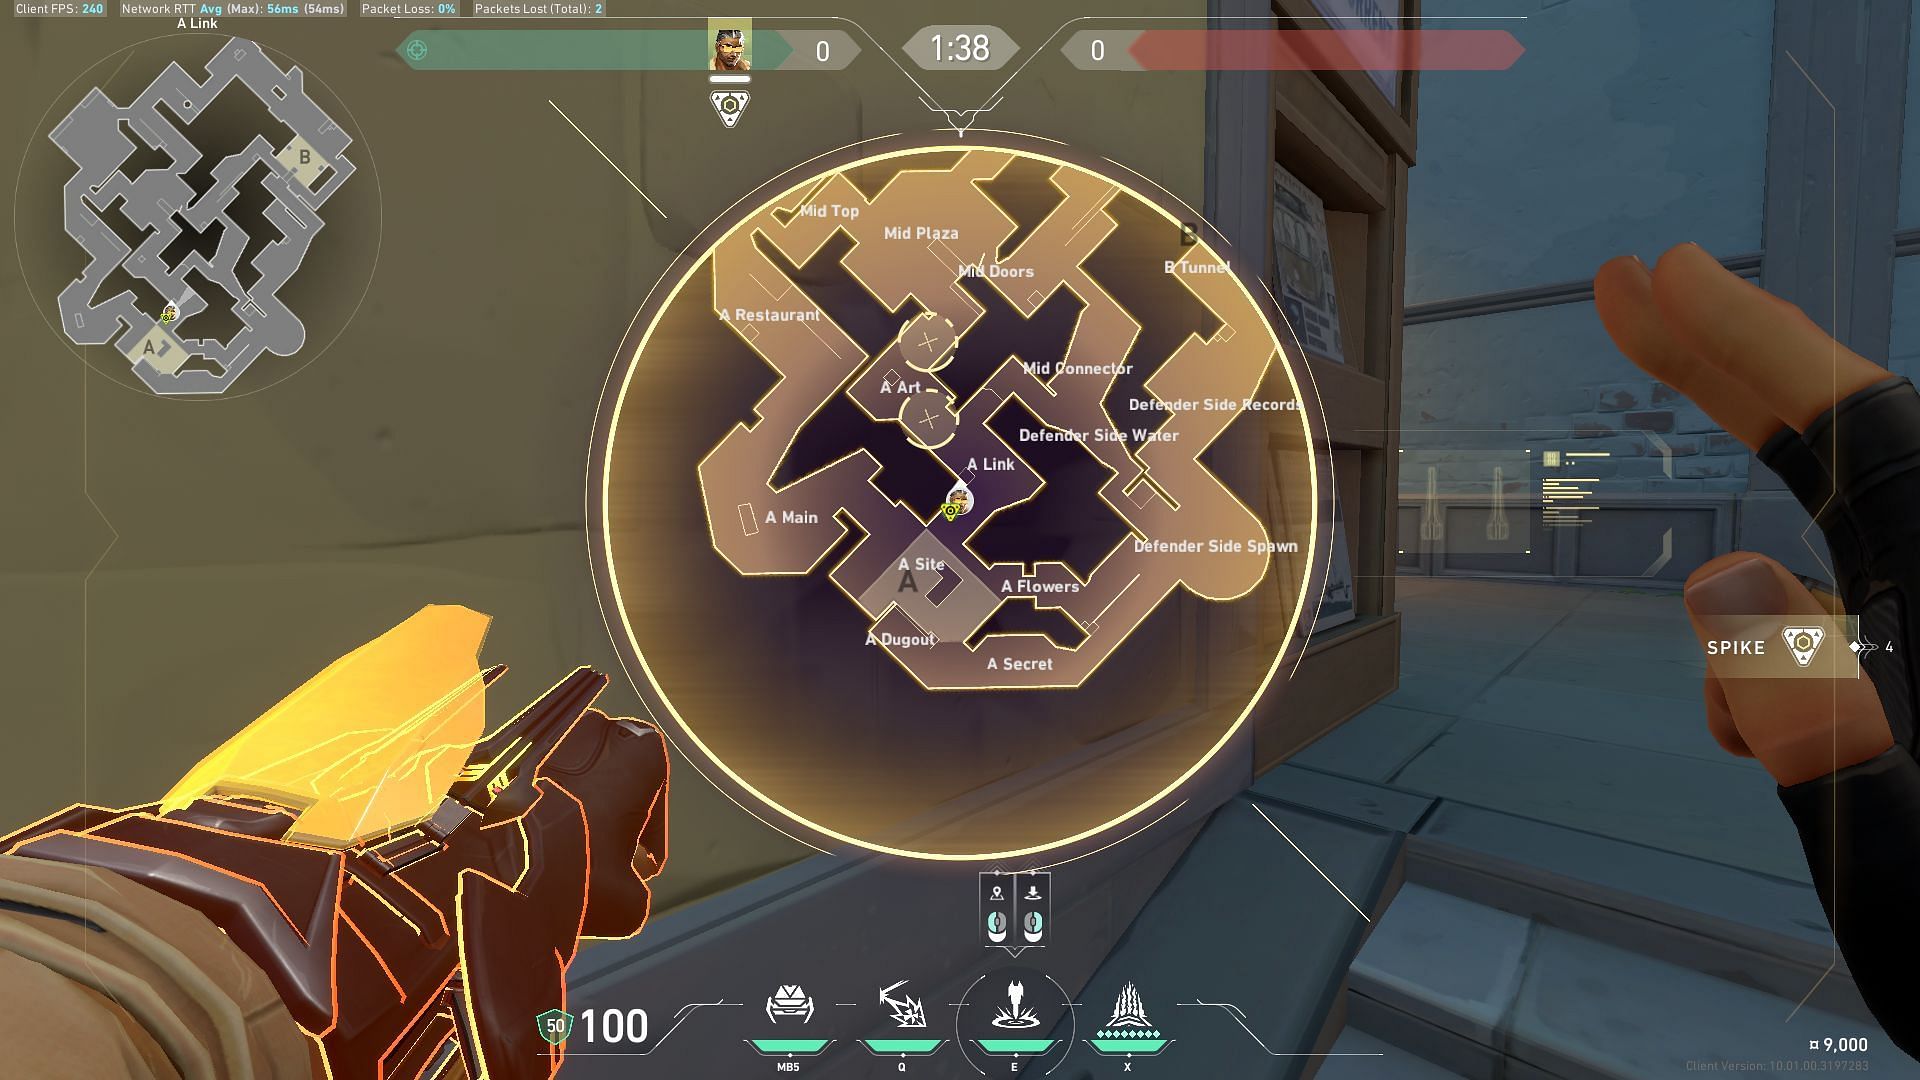
Attacking A-site option 2
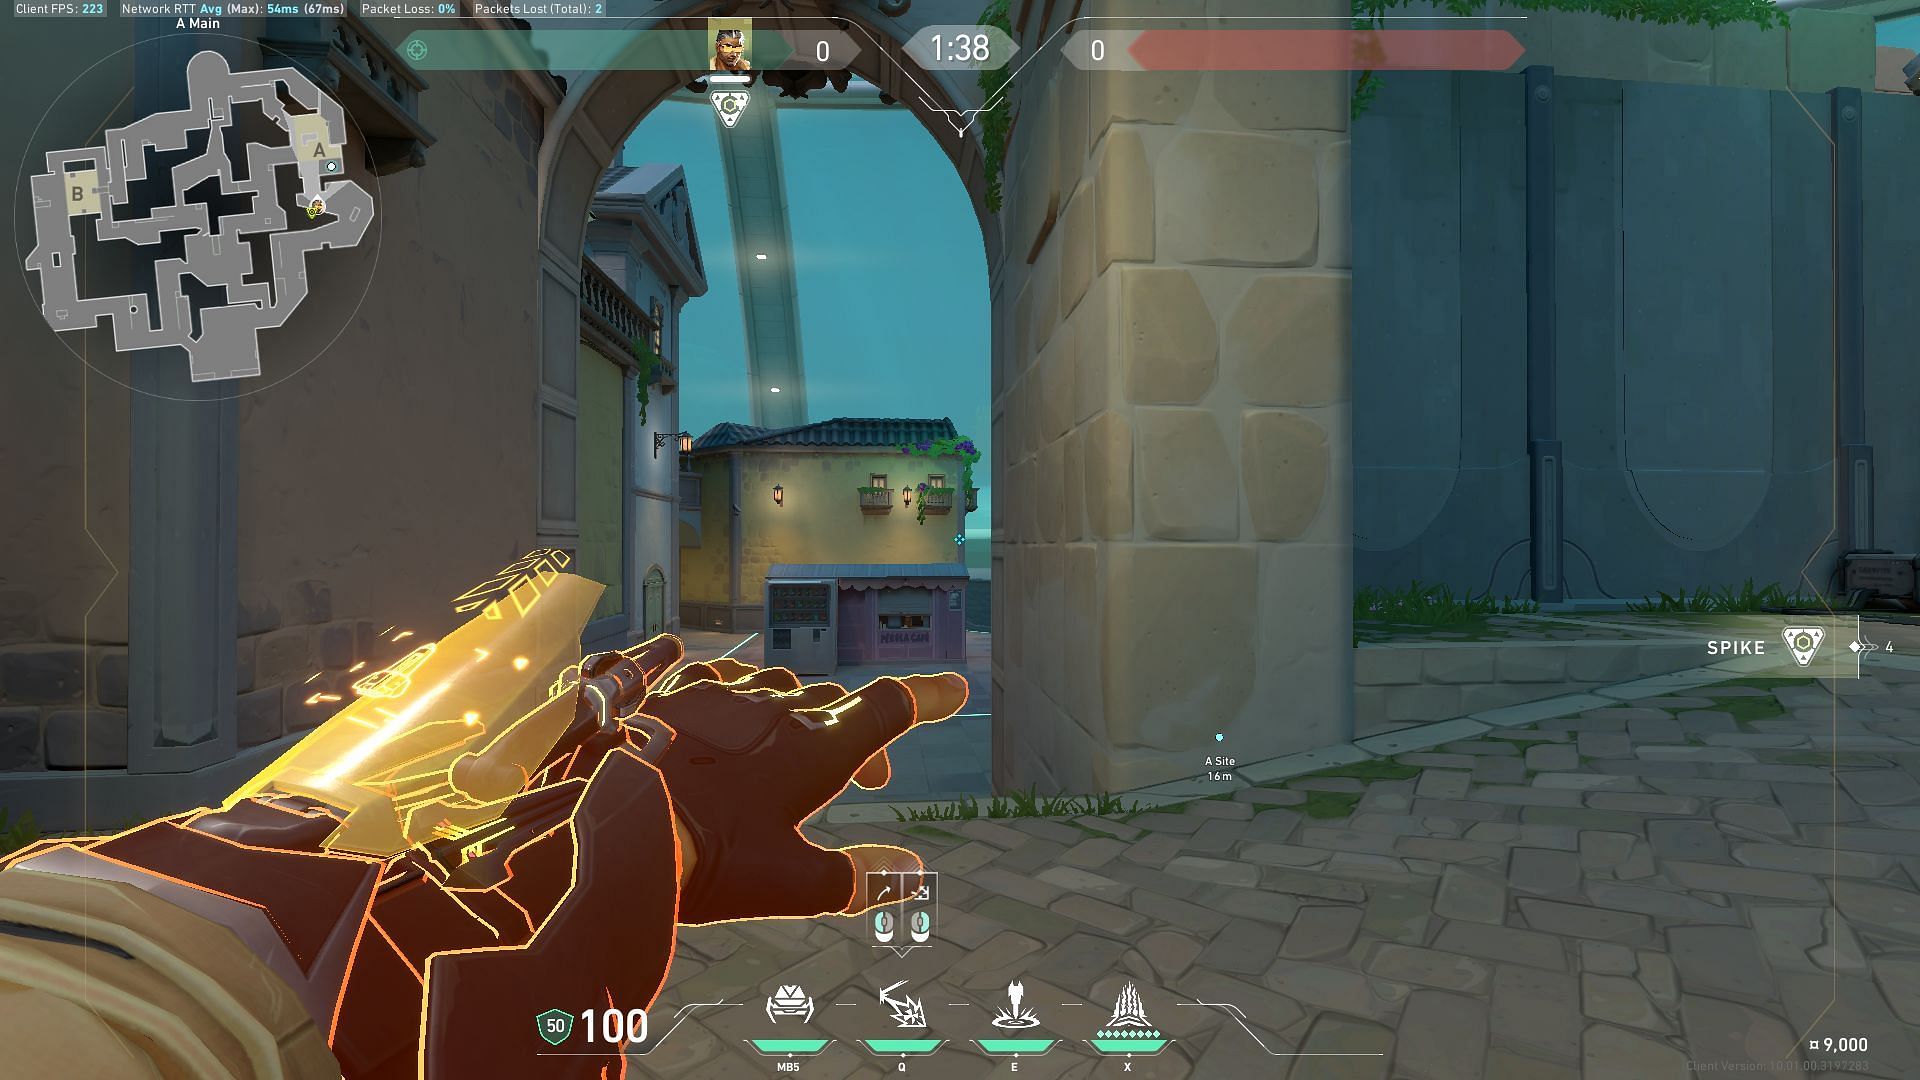
Right-click to launch the Special Delivery grenade toward the wall at the A-Site to let it bounce off and land at the right corner of the A-Site entry.
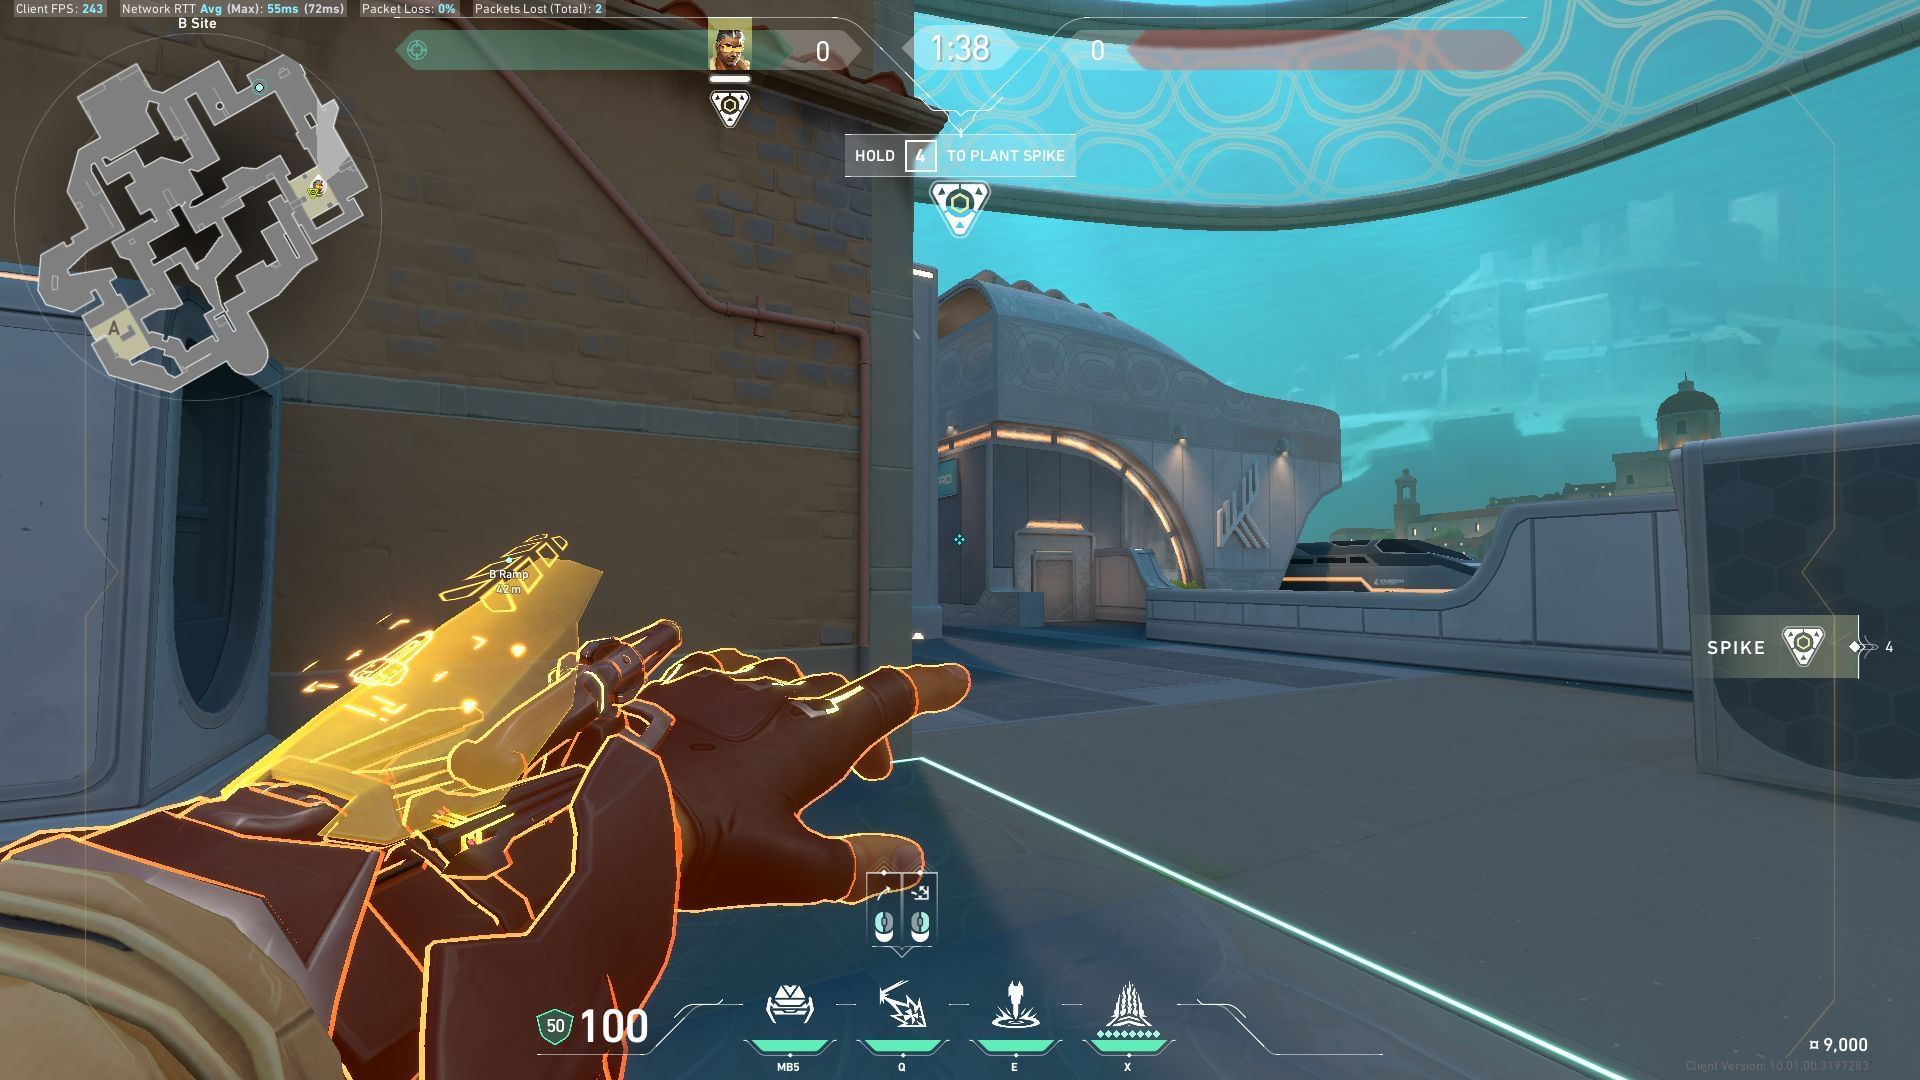
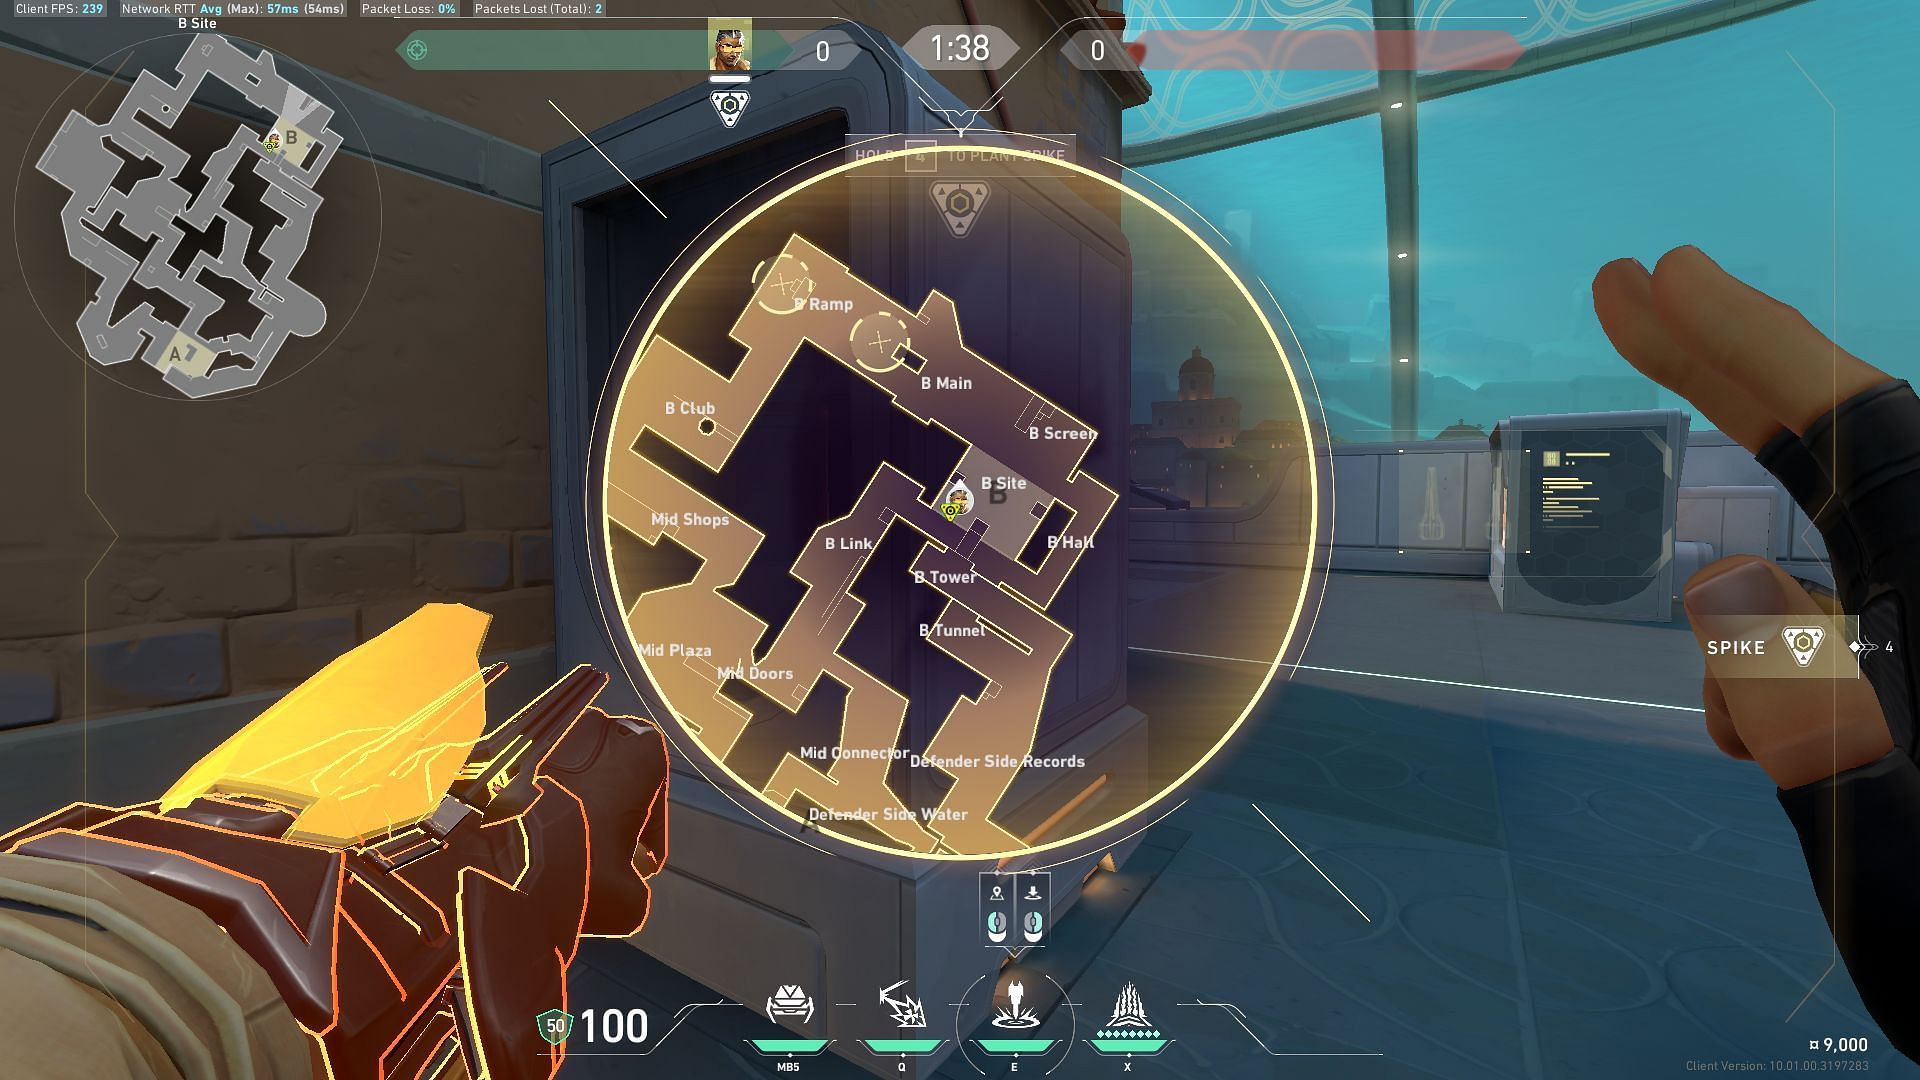
Attacking B-site option 1
Launch the Special Delivery grenade on B-Hall to concuss enemies holding a position within the blast radius.
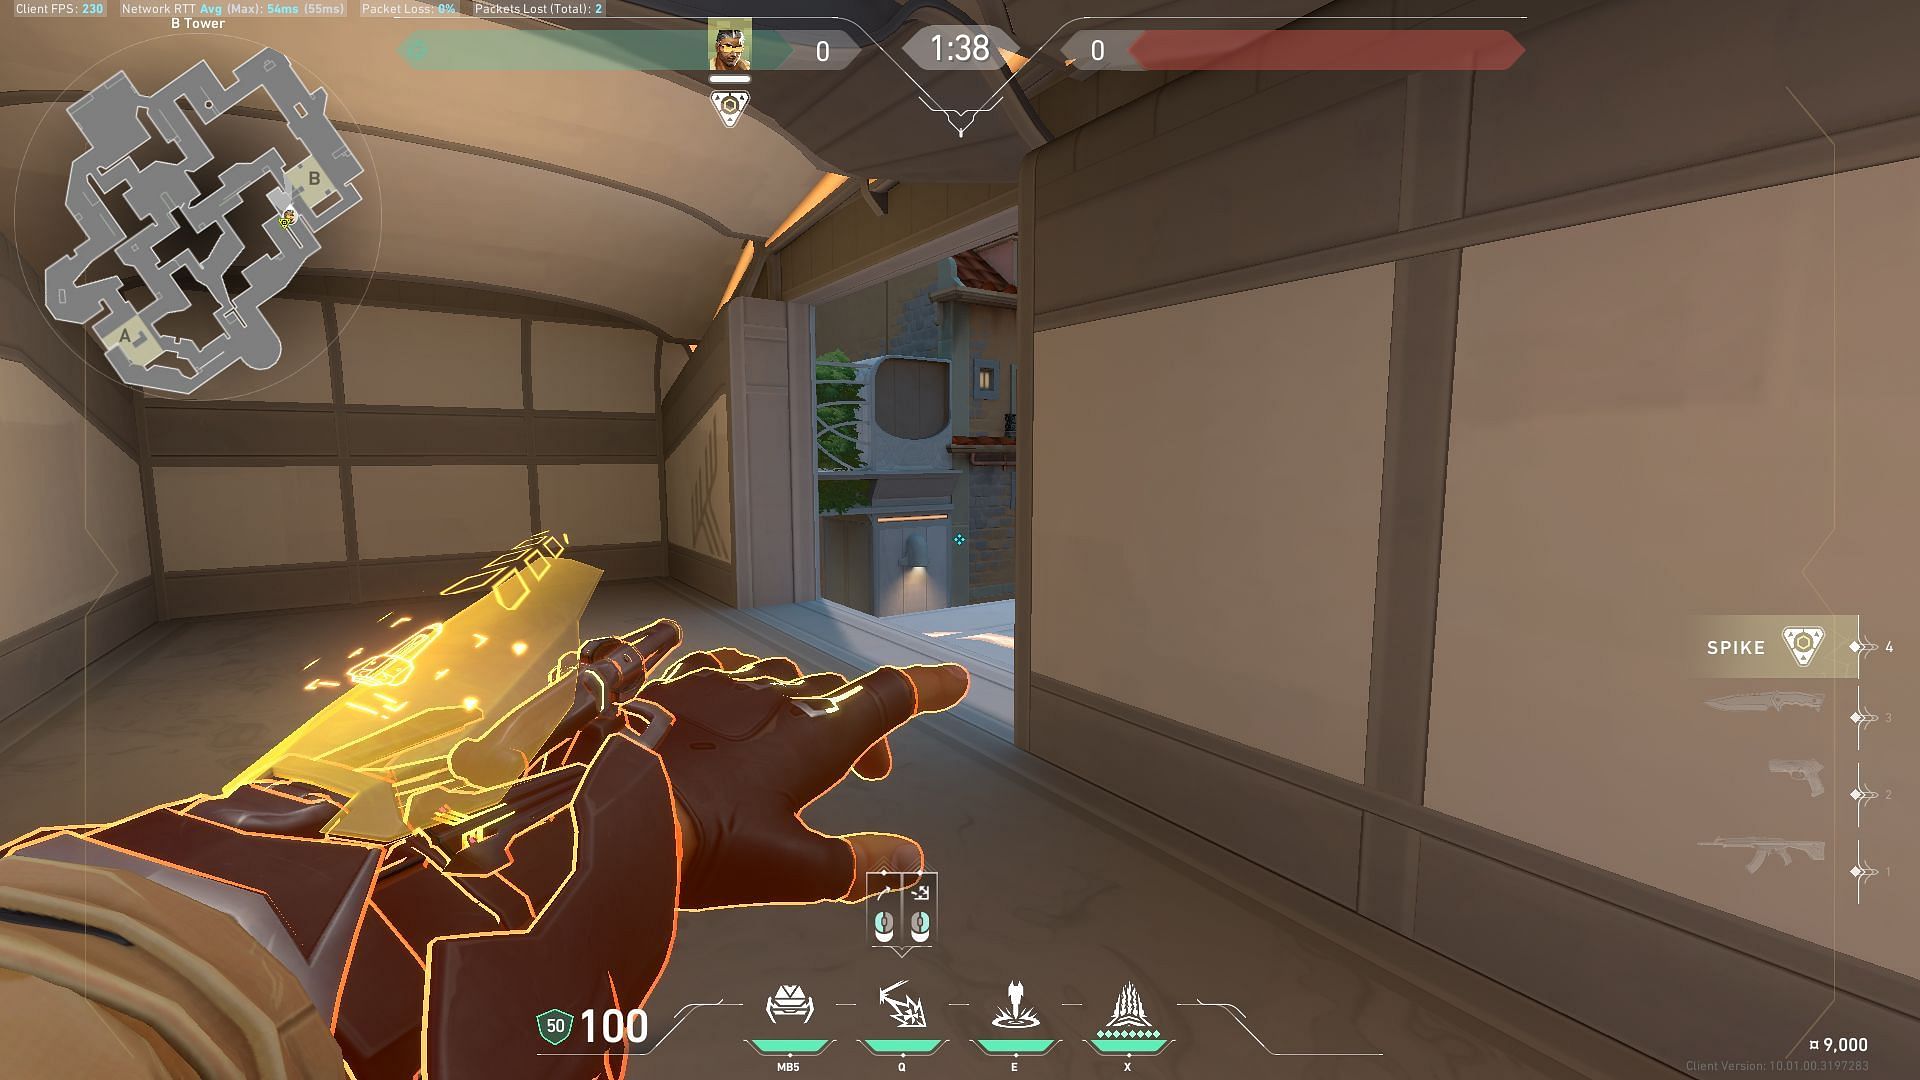
Attacking B-site option 2
Right-click to launch the Special Delivery grenade towards the wall at B-Site and let it bounce off the wall and land at B-Tower.
Defending A-site option 1
Launch the Special Delivery grenade toward the A-Main site entry in order to concuss enemies approaching the A-Site.
Defending A-site option 2
Right-click to launch the Special Delivery grenade to let it bounce off the wall towards A-Main and land at the hiding spot near A-Dugout.
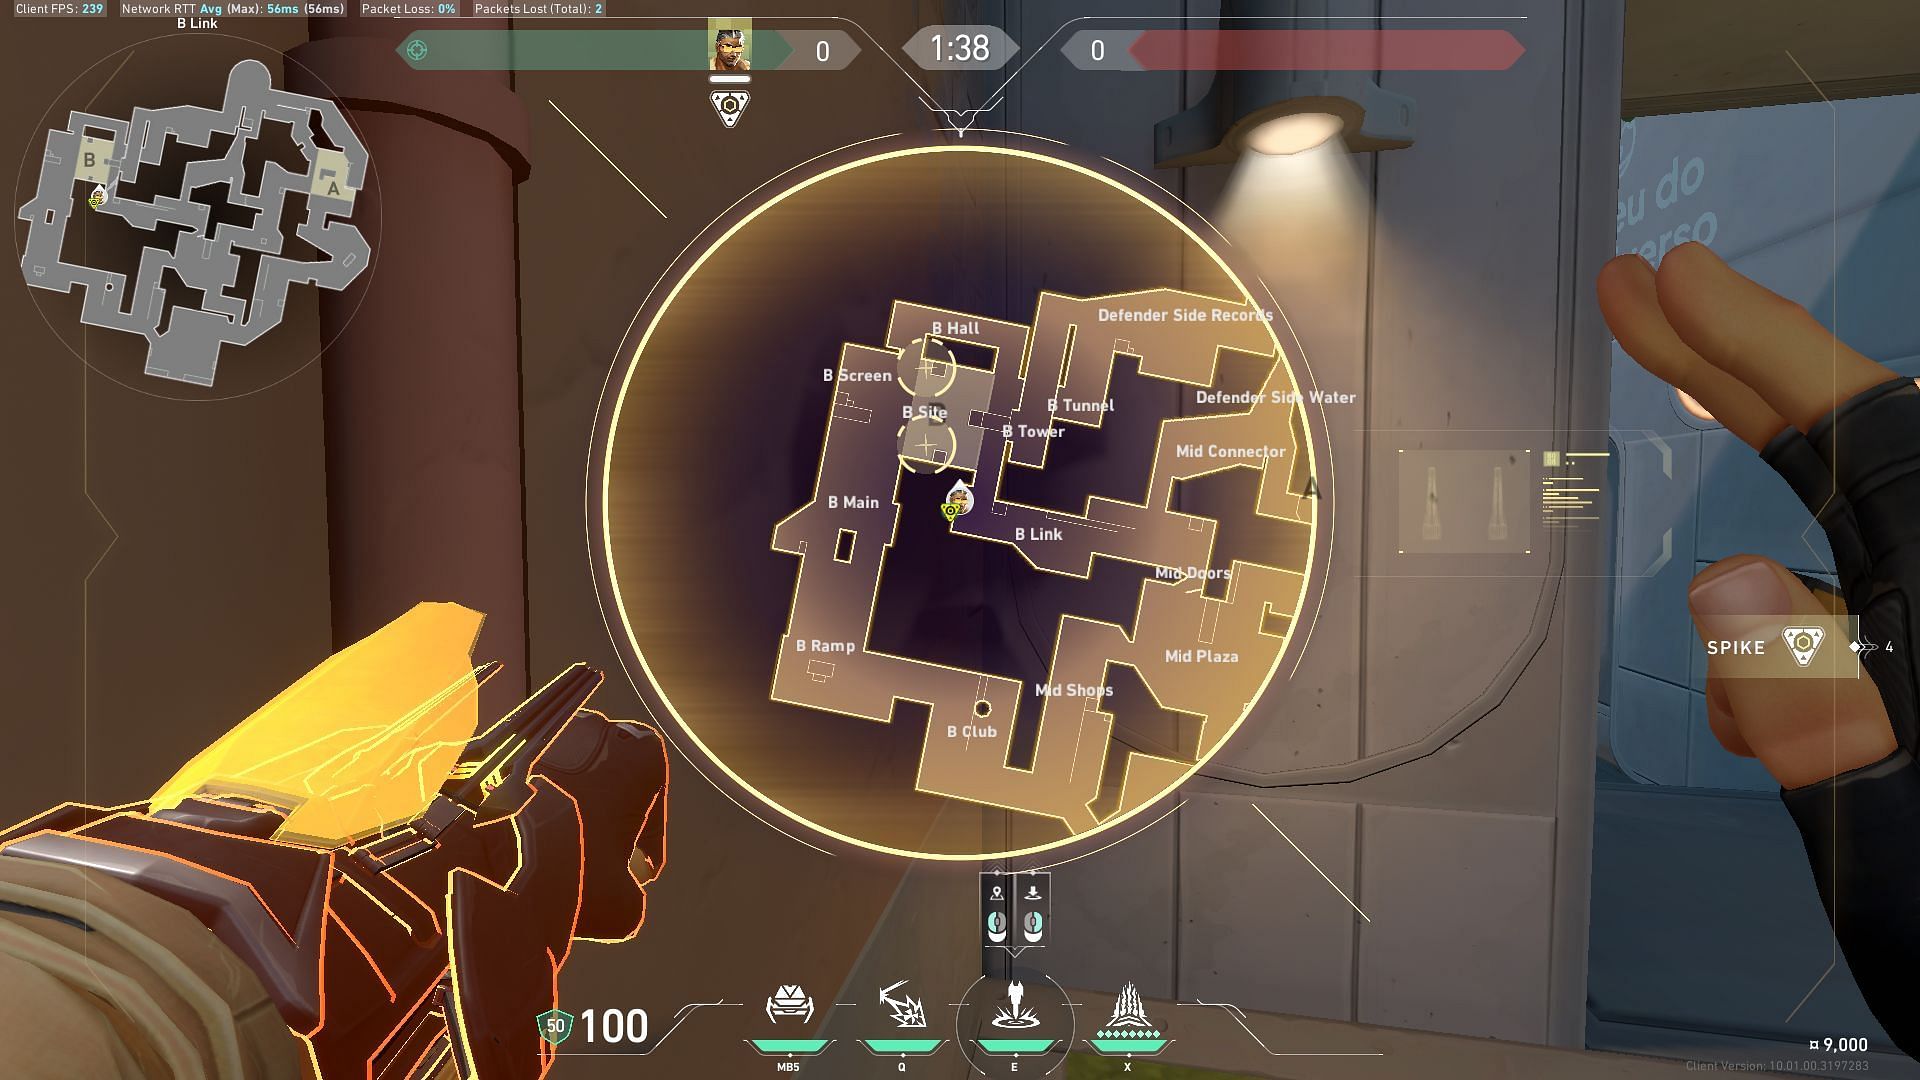
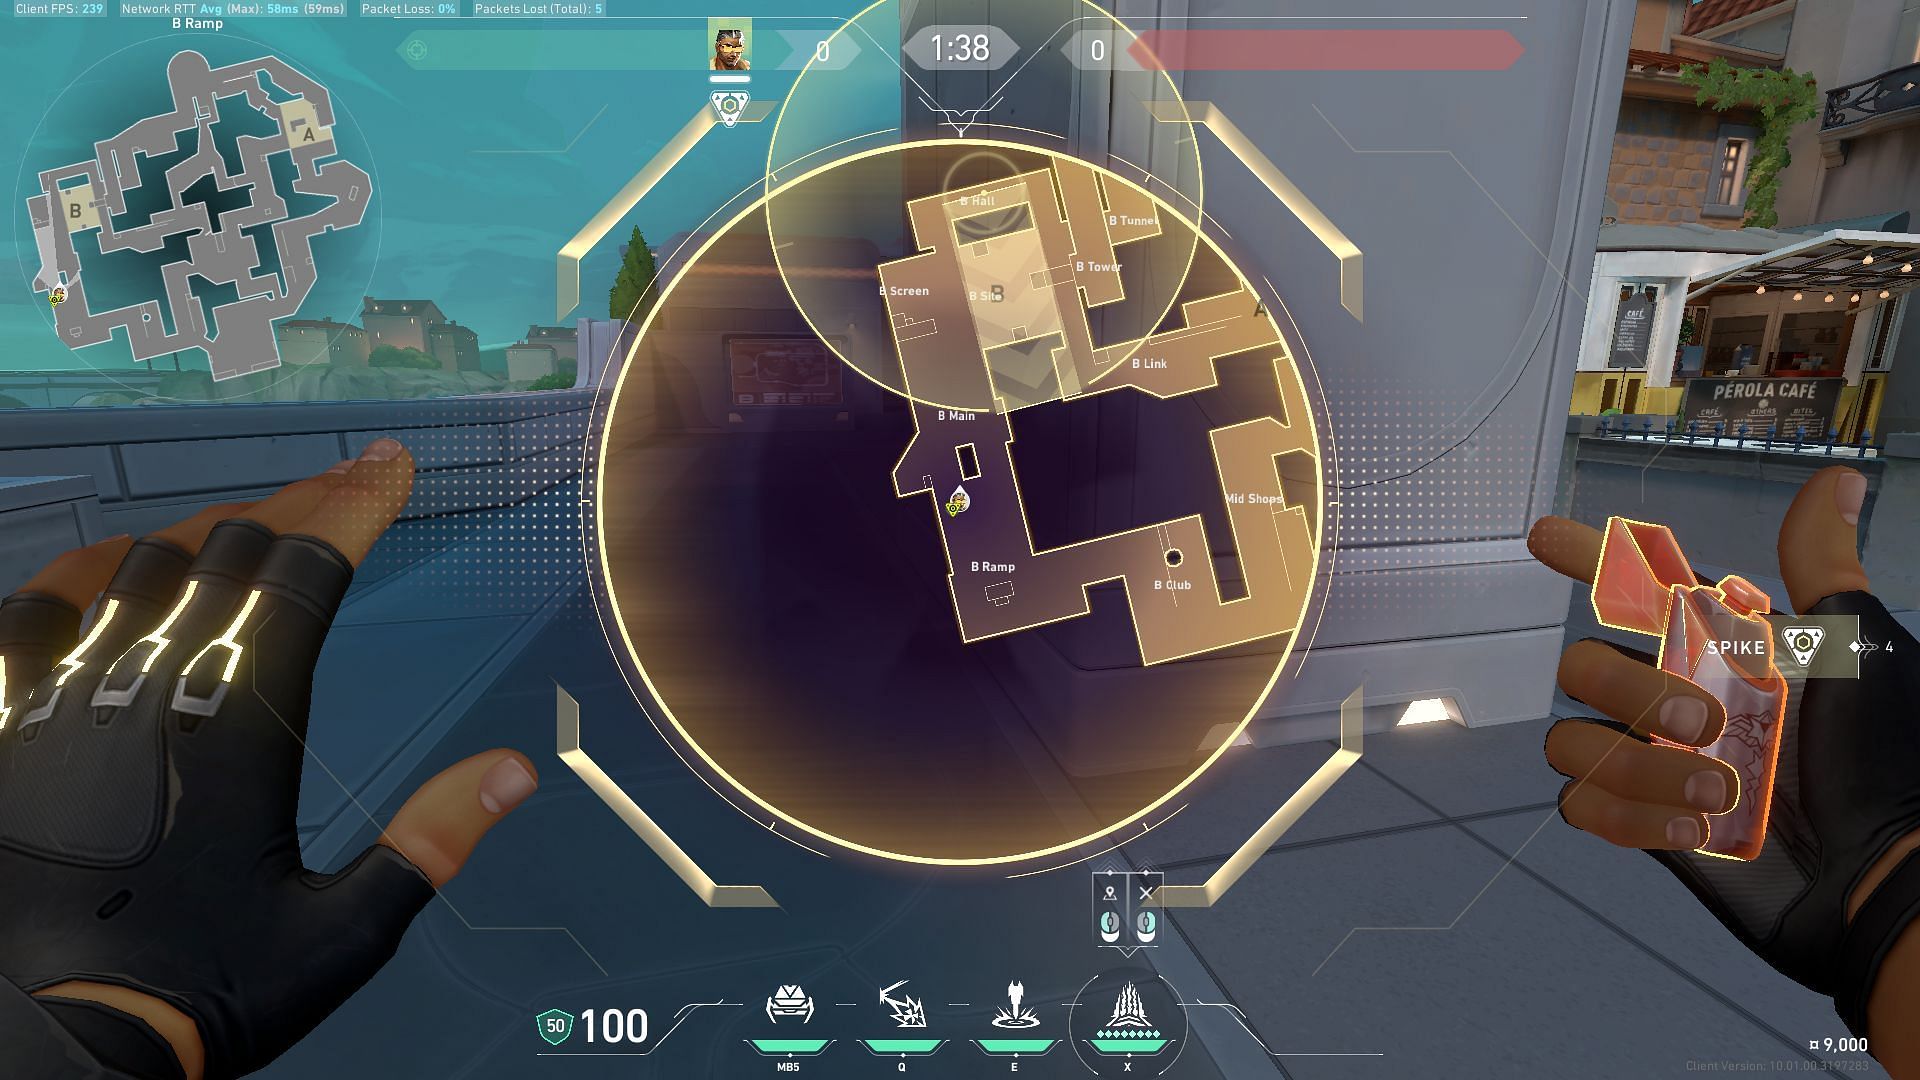
Defending B-site option 1
Right-click to launch the Special Delivery grenade to bounce it off the wall and land on B-Ramp.
Defending B-site option 2
Right-click to launch the Special Delivery grenade from B-Tower to let it land on the default plant spot in B-Site.
Also read: Valorant: Complete Tejo Lotus guide.
Valorant Tejo Pearl guide: How to use Guided Salvo
Tejo’s unique Guided Salvo ability allows him to target two locations on the map and deploy automatic missiles that detonate with multiple explosive pulses. This effectively clears out enemies hiding in tricky spots or forces them out of position. Additionally, Guided Salvo is great for breaking enemy trap setups.
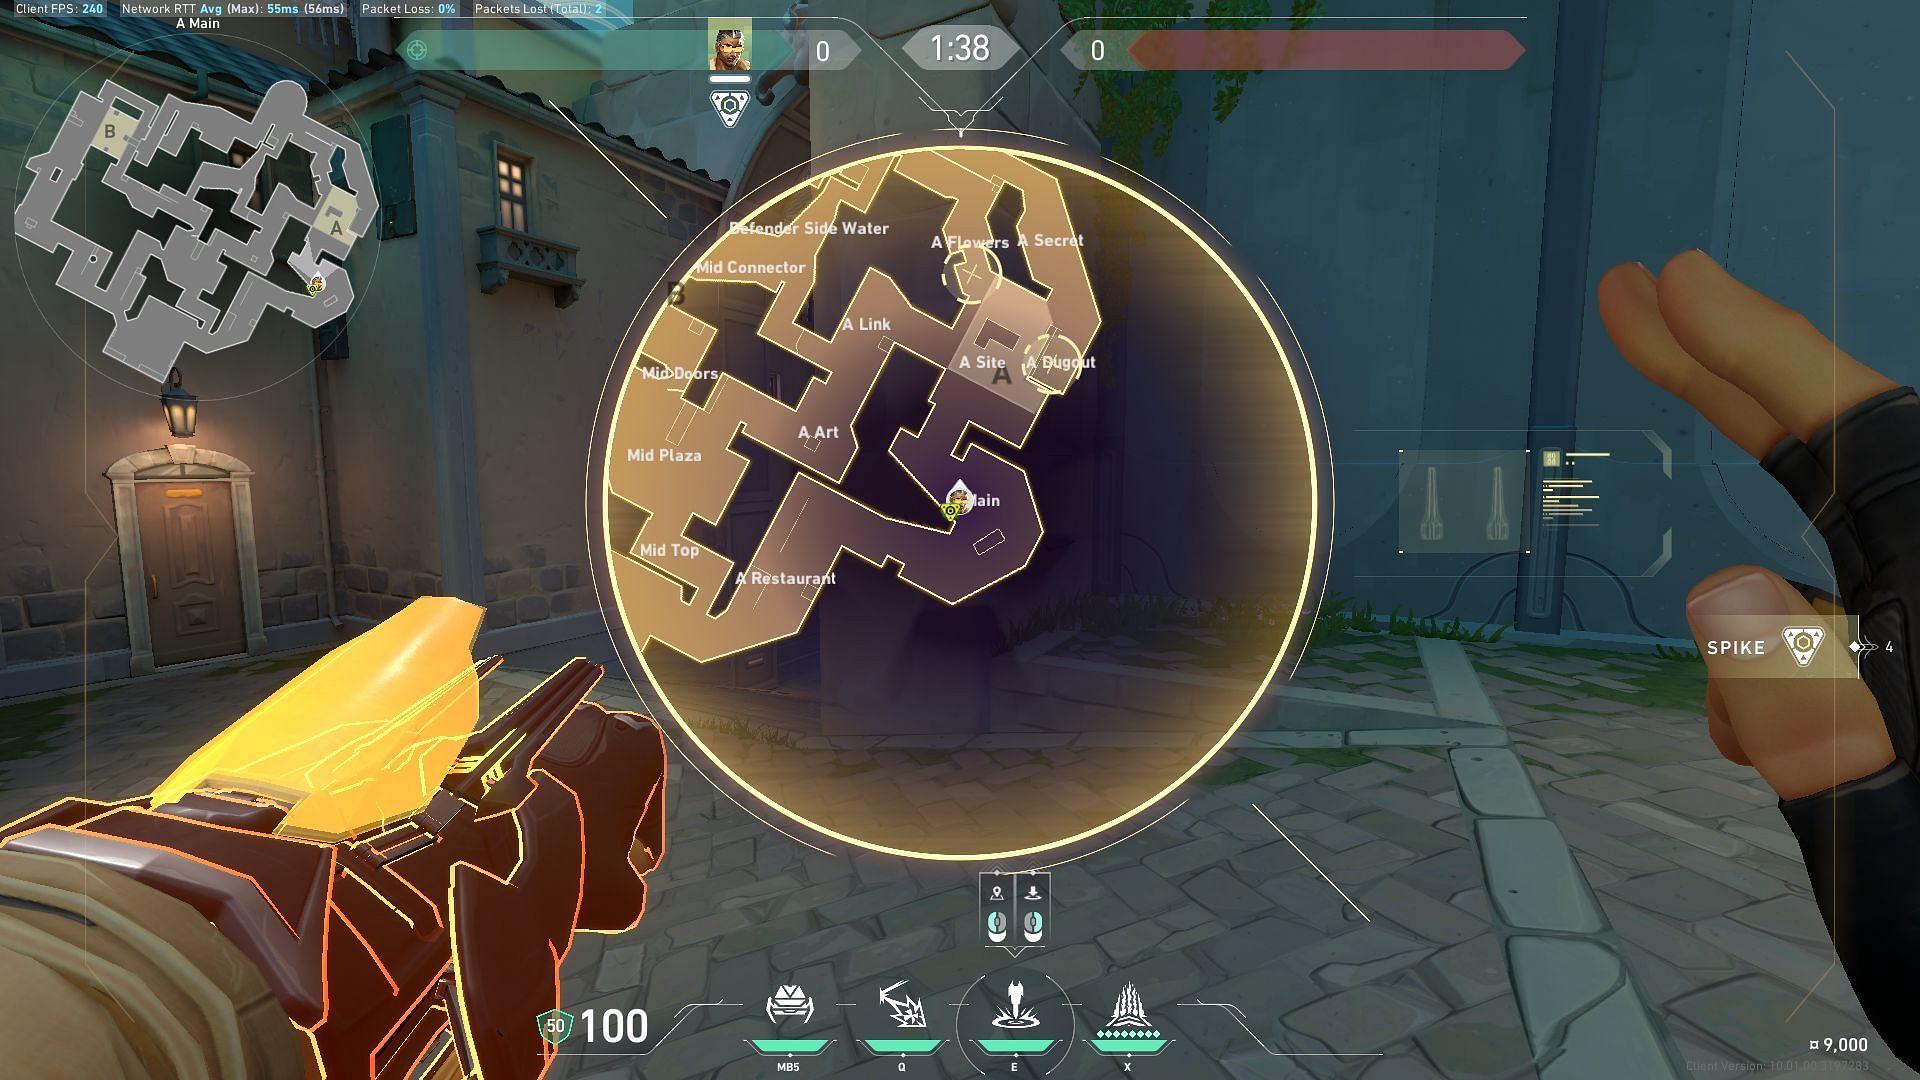
Attacking A-site option 1: A-Main and A-Link.
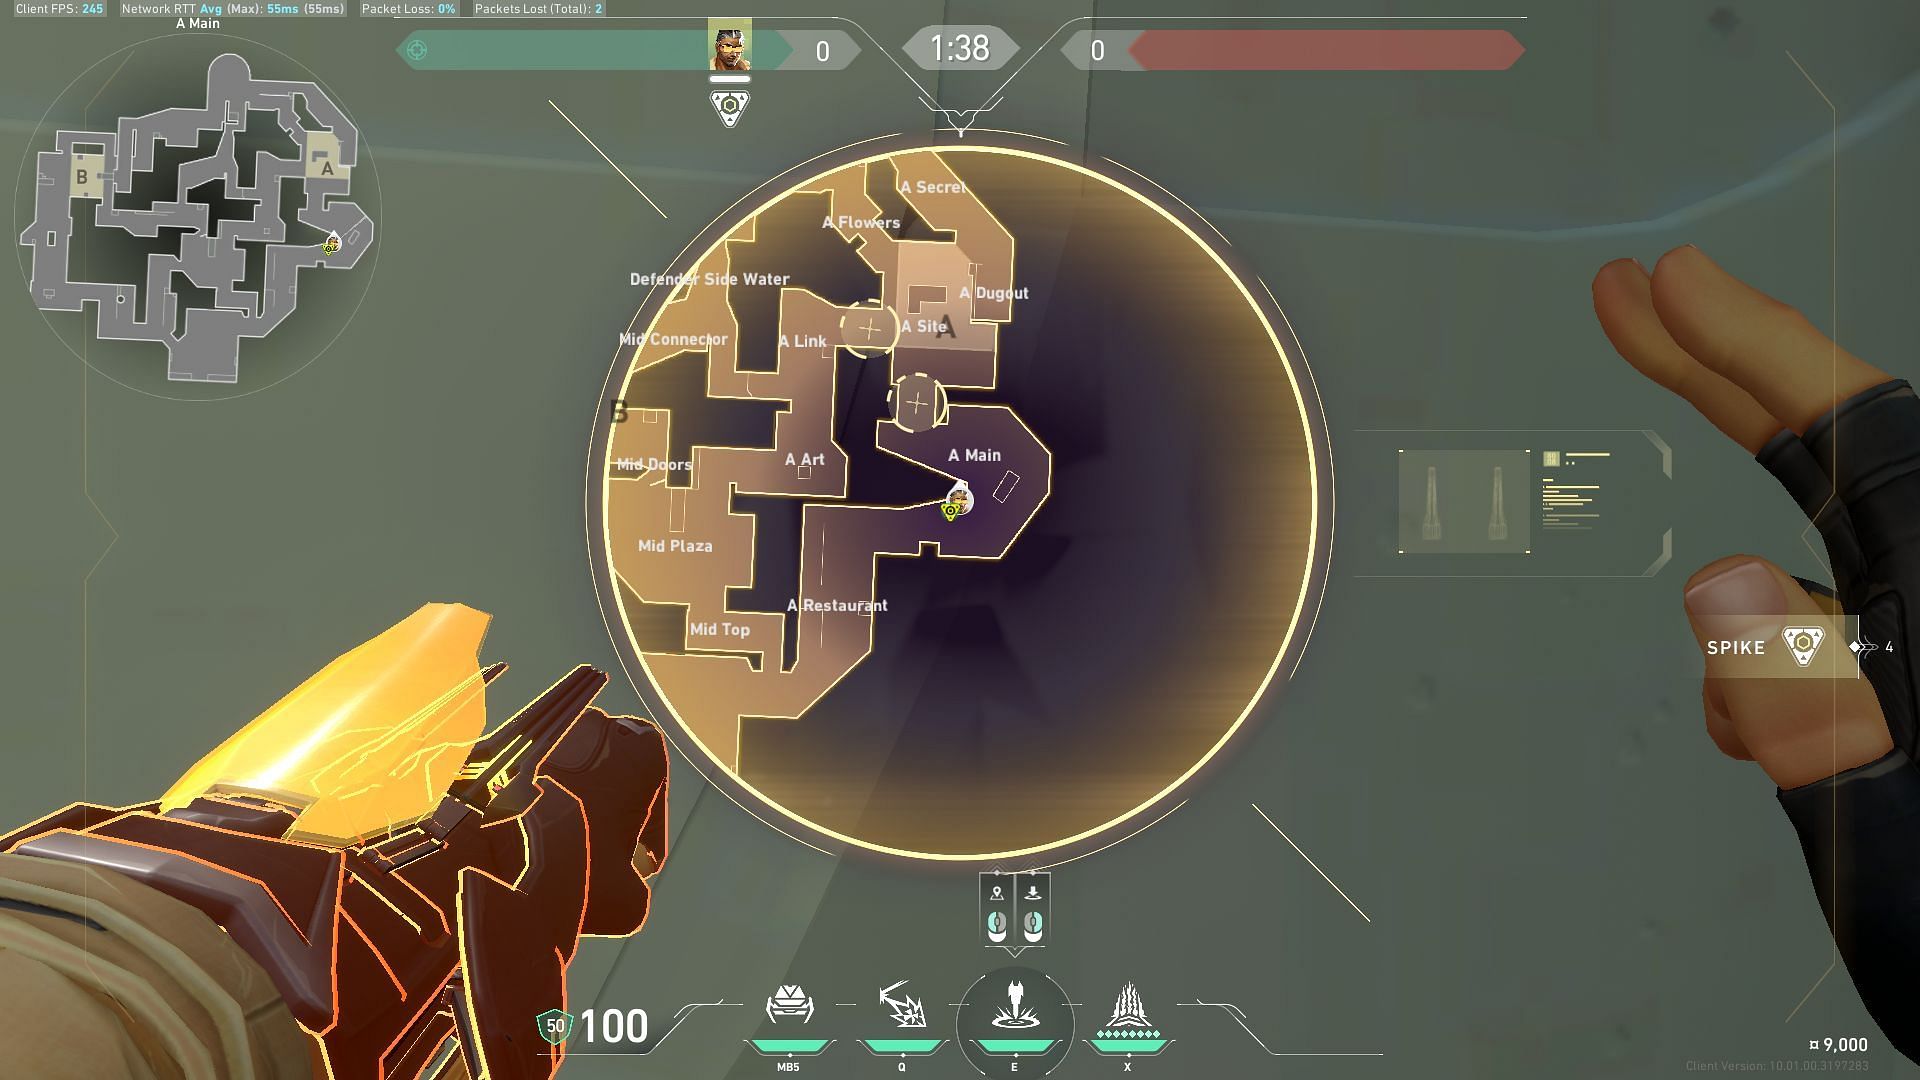
Attacking A-site option 2: A-Dugout and A-Flowers
Attacking B-site option 1: B-Screen and B-Hall
Attacking B-site option 2: B-Site and B-Tower
Defending A-site option 1: A-Main and A-Site entry
Defending A-site option 2: A-Art
Defending B-site option 1: B-Main and B-Ramp
Defending B-site option 2: B-Default plant sites
Valorant Tejo Pearl guide: How to use Armageddon
Tejo’s Armageddon Ultimate delivers a powerful tactical strike on a specific area on the map. Pressing FIRE allows you to mark the starting point, followed by another press to define the endpoint, triggering a series of explosions along the chosen path. This ability proves invaluable in both attack and defense scenarios, inflicting substantial damage on enemies.
For maximum impact, pair it with Breach’s Ultimate to limit enemy movement, making them easier to eliminate.
Also read: Valorant: Complete Tejo Fracture guide
Attacking A-site
Activate Tejo's Armageddon Ultimate during post-plant situations to deal heavy damage on enemies attempting to defuse the Spike.
Attacking B-site
Launch the Armageddon Ultimate on enemies attempting to defuse the spike during post-plant scenarios in B-Site.
Defending A-site
Activate the Armageddon Ultimate to prevent enemies from planting the Spike or entering the A-Site.
Defending B-site

Launch the Armageddon Ultimate on B-Site to prevent enemies from planting the spike.
Also read: How to master Tejo.
This was everything you needed to know about our Valorant Tejo Pearl guide. Read more about Valorant on Sportskeeda.

Are you stuck on today's Wordle? Our Wordle Solver will help you find the answer.