Wuthering Waves has a way of thrusting players into scouting new regions on the map in the form of exploration missions. One such mission is the Hidden Dangers in Peaceful Life quest, which takes Rover on a journey across the Tiger’s Maw Mine, located south of Jinzhou City. Although it is a time-consuming endeavor, you are likely to come across some great NPC and Resonance Beacons, something that is otherwise easy to overlook.
Here is a guide detailing the steps to complete the Hidden Dangers in Peaceful Life quest. You will also find the location and requirements to initiate this mission.
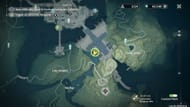
Wuthering Waves Hidden Dangers in Peaceful Life quest location

Looking for Crossword hints & solutions? Check out latest NYT Mini Crossword Answers, LA Times Crossword Answers, and Atlantic Crossword Answers
The Hidden Dangers in Peaceful Life exploration quest is accessible after completing The "We Promise, We Deliver" mission. It is unlocked once you hit Union Level 15 in Wuthering Waves and can be initiated by talking to Xiayou, an NPC from Jinzhou City.
To find her, teleport to the Resonance Beacon near the Souvenir Shop. Drop down to the ground floor and head towards the Ministry of Development under The Grand Library. If you have the quest selected, Xiayou will be highlighted with a green marker.
How to complete Hidden Dangers in Peaceful Life quest in Wuthering Waves
Talking to Xiayou marks the beginning of the Hidden Dangers in Peaceful Life quest in Wuthering Waves, which will navigate you to the Resonance Beacon inside Tiger’s Maw Mine. Keep following the green marker, as it leads to a group of NPCs. From there, follow these steps to complete the missions.
Investigate clues near the transport

Head south to inquire about the three clues that appear on the screen, marked with a yellow hue. After completing the investigation, return to Huayu and interact with him to get the next objective. Use the elevator to get to the base of the mine.
Install the external mobile power source
Talk to the NPCs near the shack and help them install the external mobile power source. Your goal here is to carry the Induction Cells and place them inside the marked sockets. The Levitator feature will help you transport them to both mobile power sources.

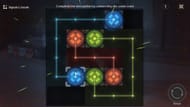
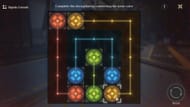
Once the batteries are in place, turn off the switch nearby and head to the location of Huaxi. Talk to the little kid and take the elevator to the middle floor. Interact with the researcher to move on to the next step, which requires you to activate a console. Simply match the colors as shown in the image above to complete the decryption.
Verify through the external Terminal

In the final step, solve the next Signals Console and take the elevator to the upper floor. Head to the intersection area marked on the map and let the cutscene roll out before you report back to the Ministry of Development.
Follow Sportskeeda’s Wuthering Waves hub for more information and updates.
Are you stuck on today's Wordle? Our Wordle Solver will help you find the answer.
