

'%20x='0'%20y='0'%20height='100%25'%20width='100%25'%20%0A%20%20%20%20%20%20%20%20%20%20xlink%3Ahref='data:image/jpg;base64,/9j/2wBDAAYEBQYFBAYGBQYHBwYIChAKCgkJChQODwwQFxQYGBcUFhYaHSUfGhsjHBYWICwgIyYnKSopGR8tMC0oMCUoKSj/2wBDAQcHBwoIChMKChMoGhYaKCgoKCgoKCgoKCgoKCgoKCgoKCgoKCgoKCgoKCgoKCgoKCgoKCgoKCgoKCgoKCgoKCj/wgARCAAGAAoDASIAAhEBAxEB/8QAFgABAQEAAAAAAAAAAAAAAAAAAAQG/8QAFAEBAAAAAAAAAAAAAAAAAAAABP/aAAwDAQACEAMQAAAAmxQ0n//EAB8QAAICAQUBAQAAAAAAAAAAAAIDAQQFAAYHERIhQf/aAAgBAQABPwDP8mw/dGMppVZARa2TdPXrolSMfNVuT8emupVrb4vsAECxsNEfZfpdedf/xAAXEQEAAwAAAAAAAAAAAAAAAAACAAMy/9oACAECAQE/AFYjmf/EABYRAQEBAAAAAAAAAAAAAAAAABEAMf/aAAgBAwEBPwAdv//Z'%3E%3C/image%3E%3C/svg%3E)
Repair all lighthouses is a quest objective in Wuthering Waves, triggering a quest titled Lost History. As the name suggests, you must find five lighthouses in Huanglong and repair them. Unfortunately, the quest navigation doesn't mark the locations of these lighthouses, so some might not know where to start. This article will showcase the locations of each lighthouse and explain how to repair them.
Repairing them will also give you several Supply Chests. Furthermore, you will receive a new Trophy and a Premium Supply Chest for completing the Lost History Side Quest in Wuthering Waves.
How to repair all lighthouses in Wuthering Waves: Locations and guide
Lighthouse #1
Looking for Crossword hints & solutions? Check out latest NYT Mini Crossword Answers, LA Times Crossword Answers, and Atlantic Crossword Answers
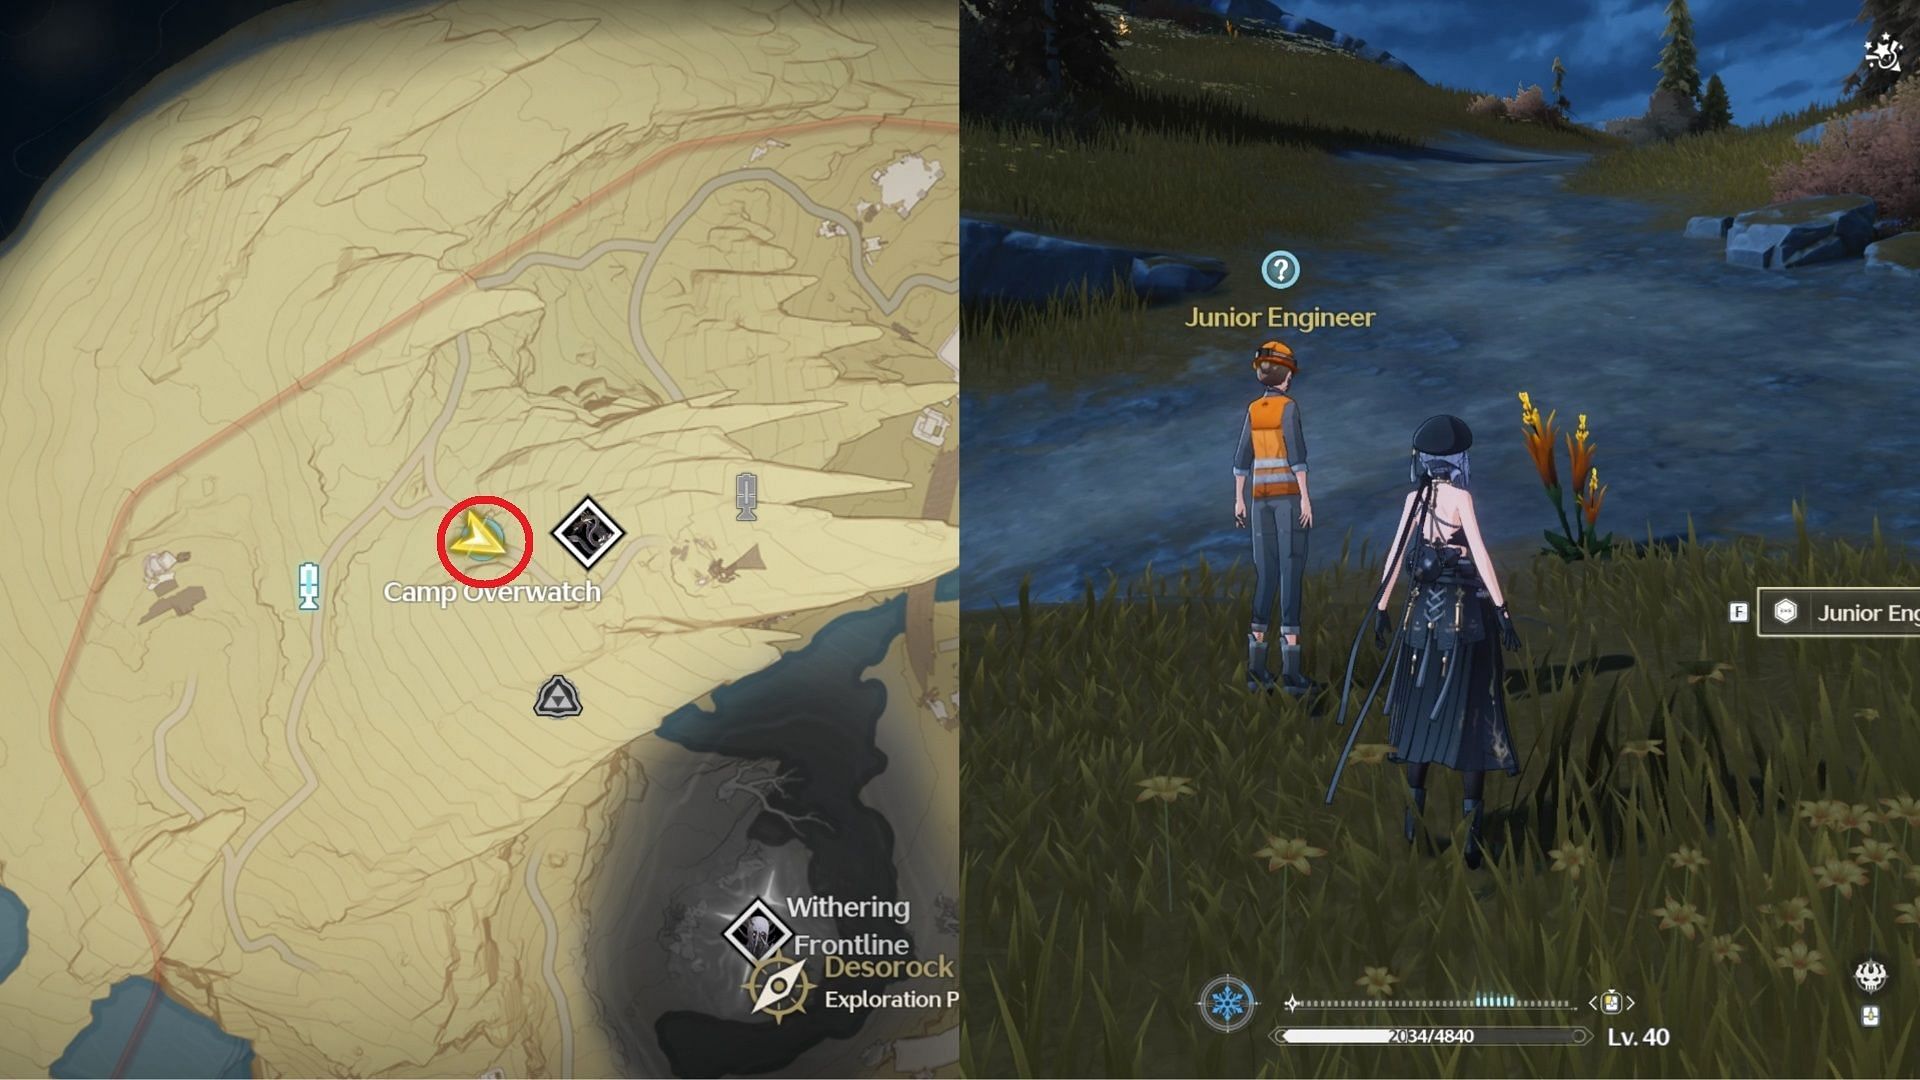
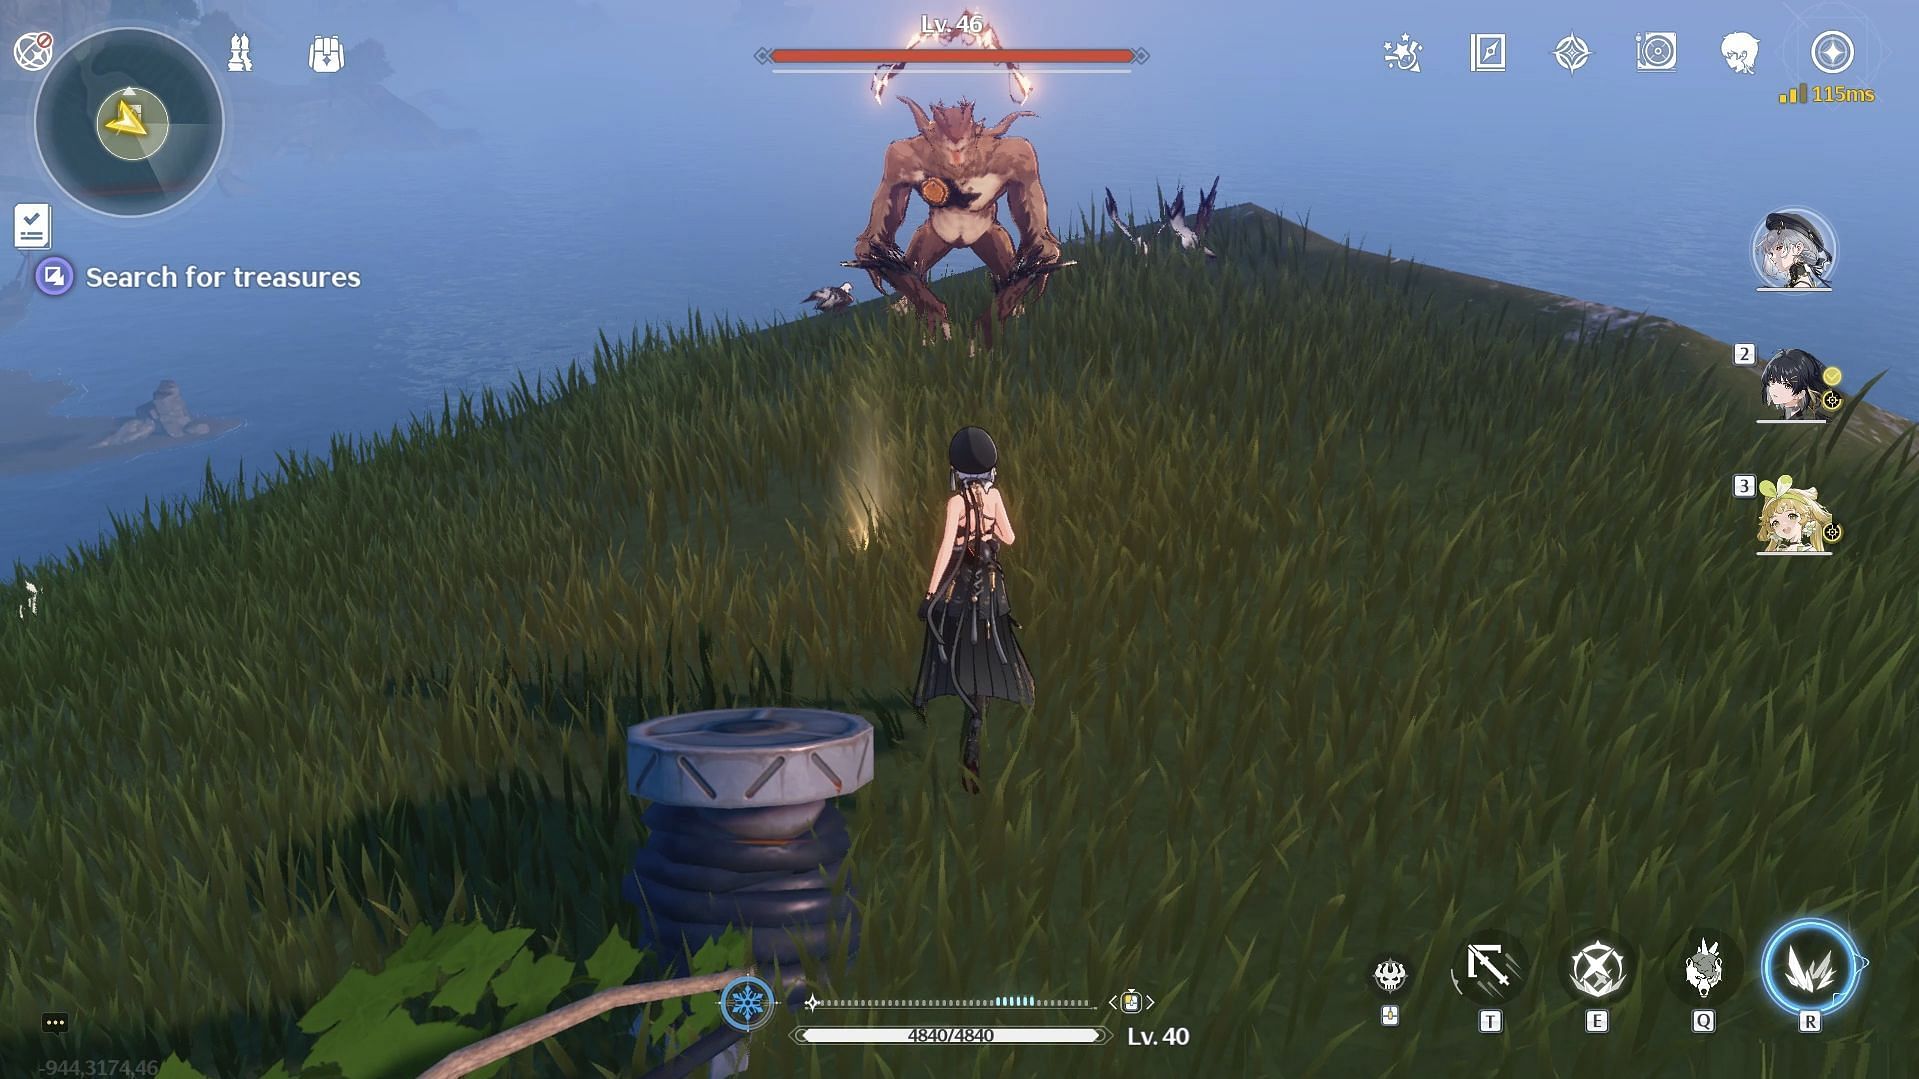
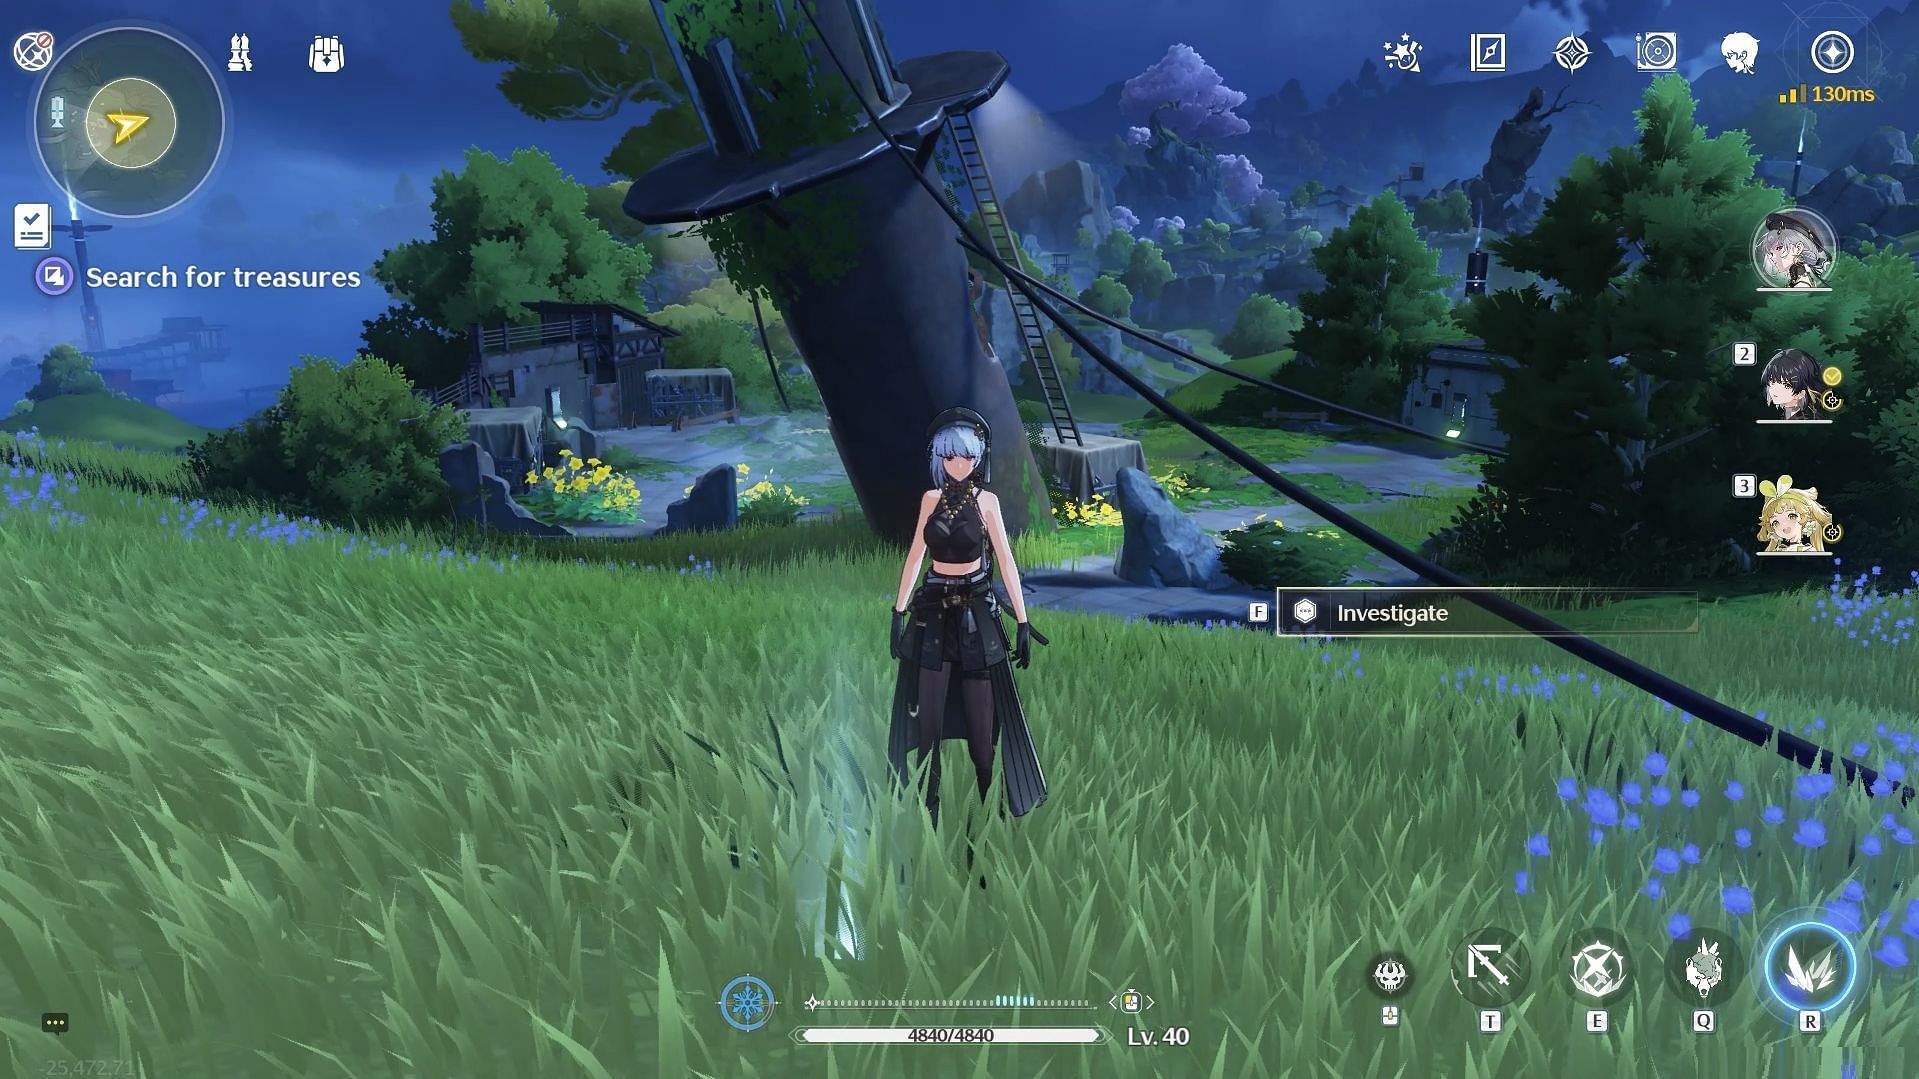
Start by teleporting to Camp Overwatch in Desrock Highland and head northeast to find a Junior Engineer in the middle of nowhere. Interact with her and follow her to the lighthouse. You will face several enemies on the way, so carry a good party.
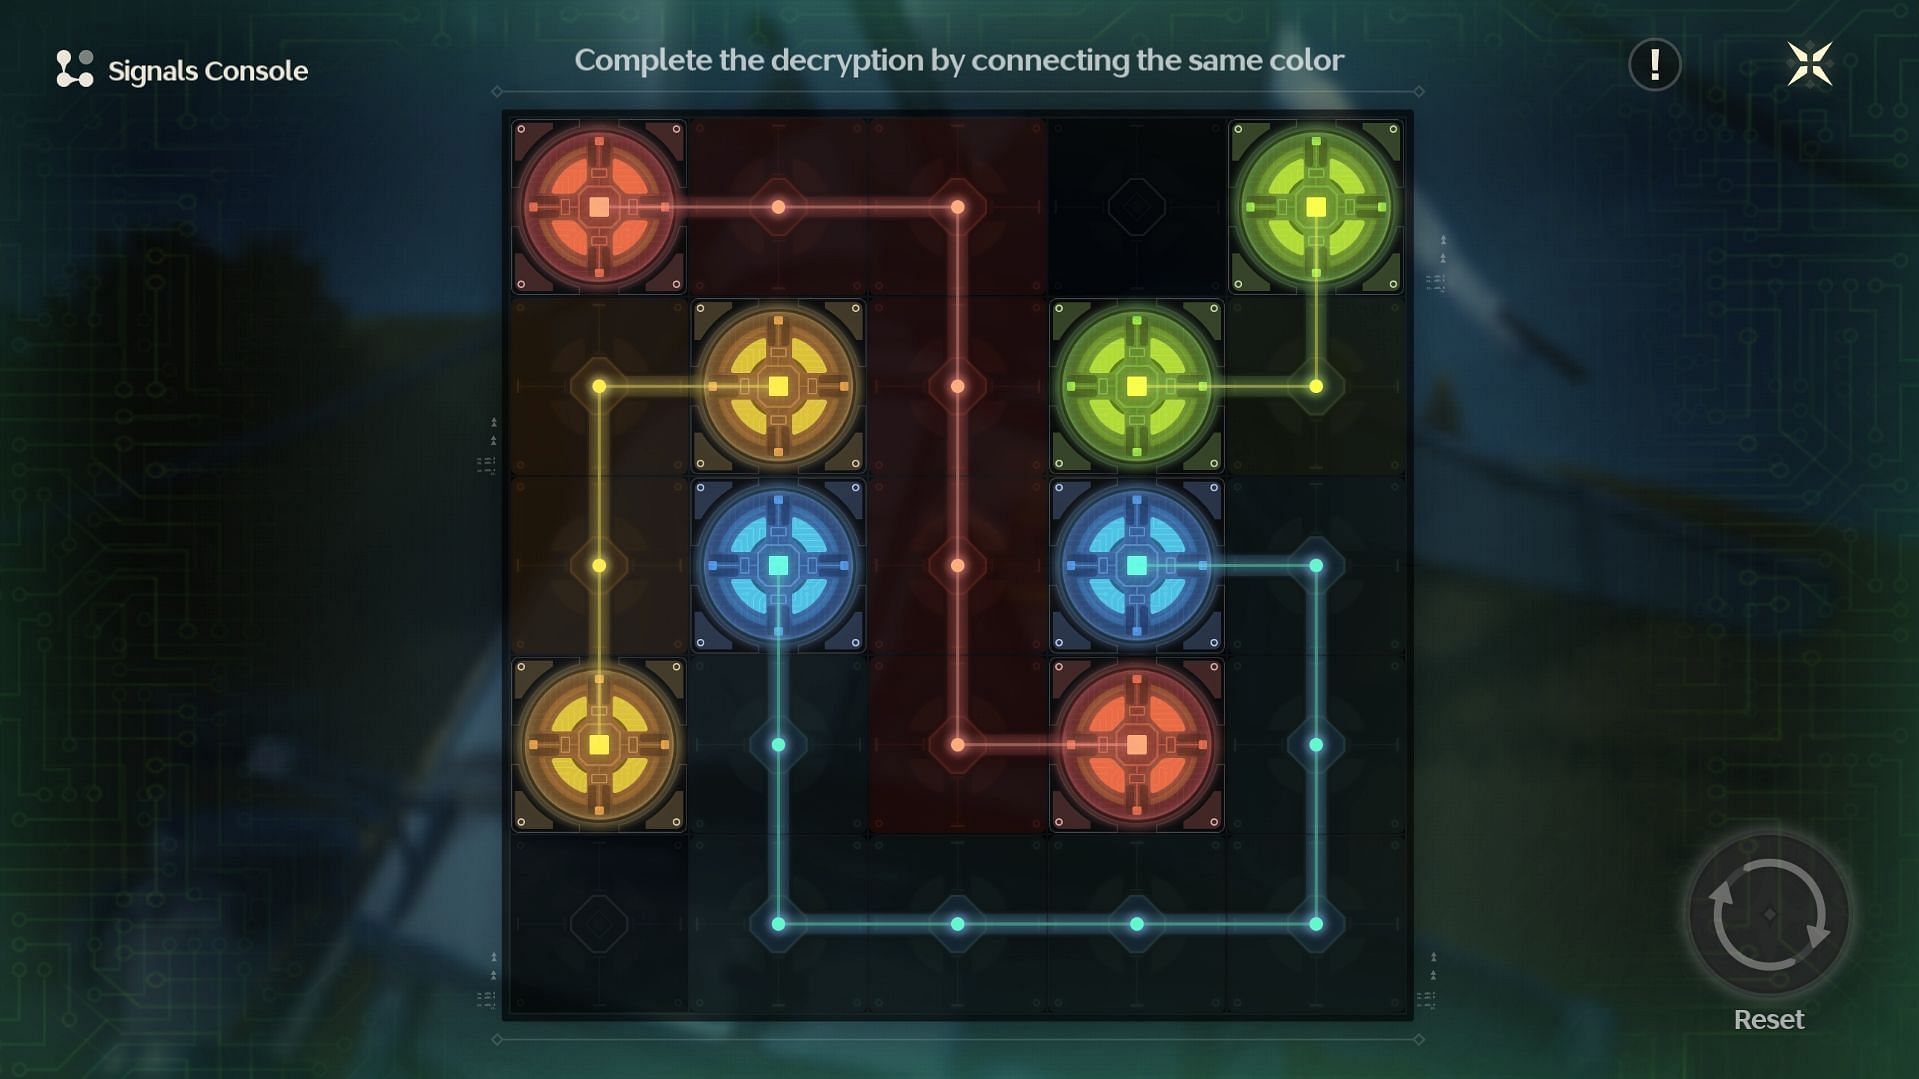
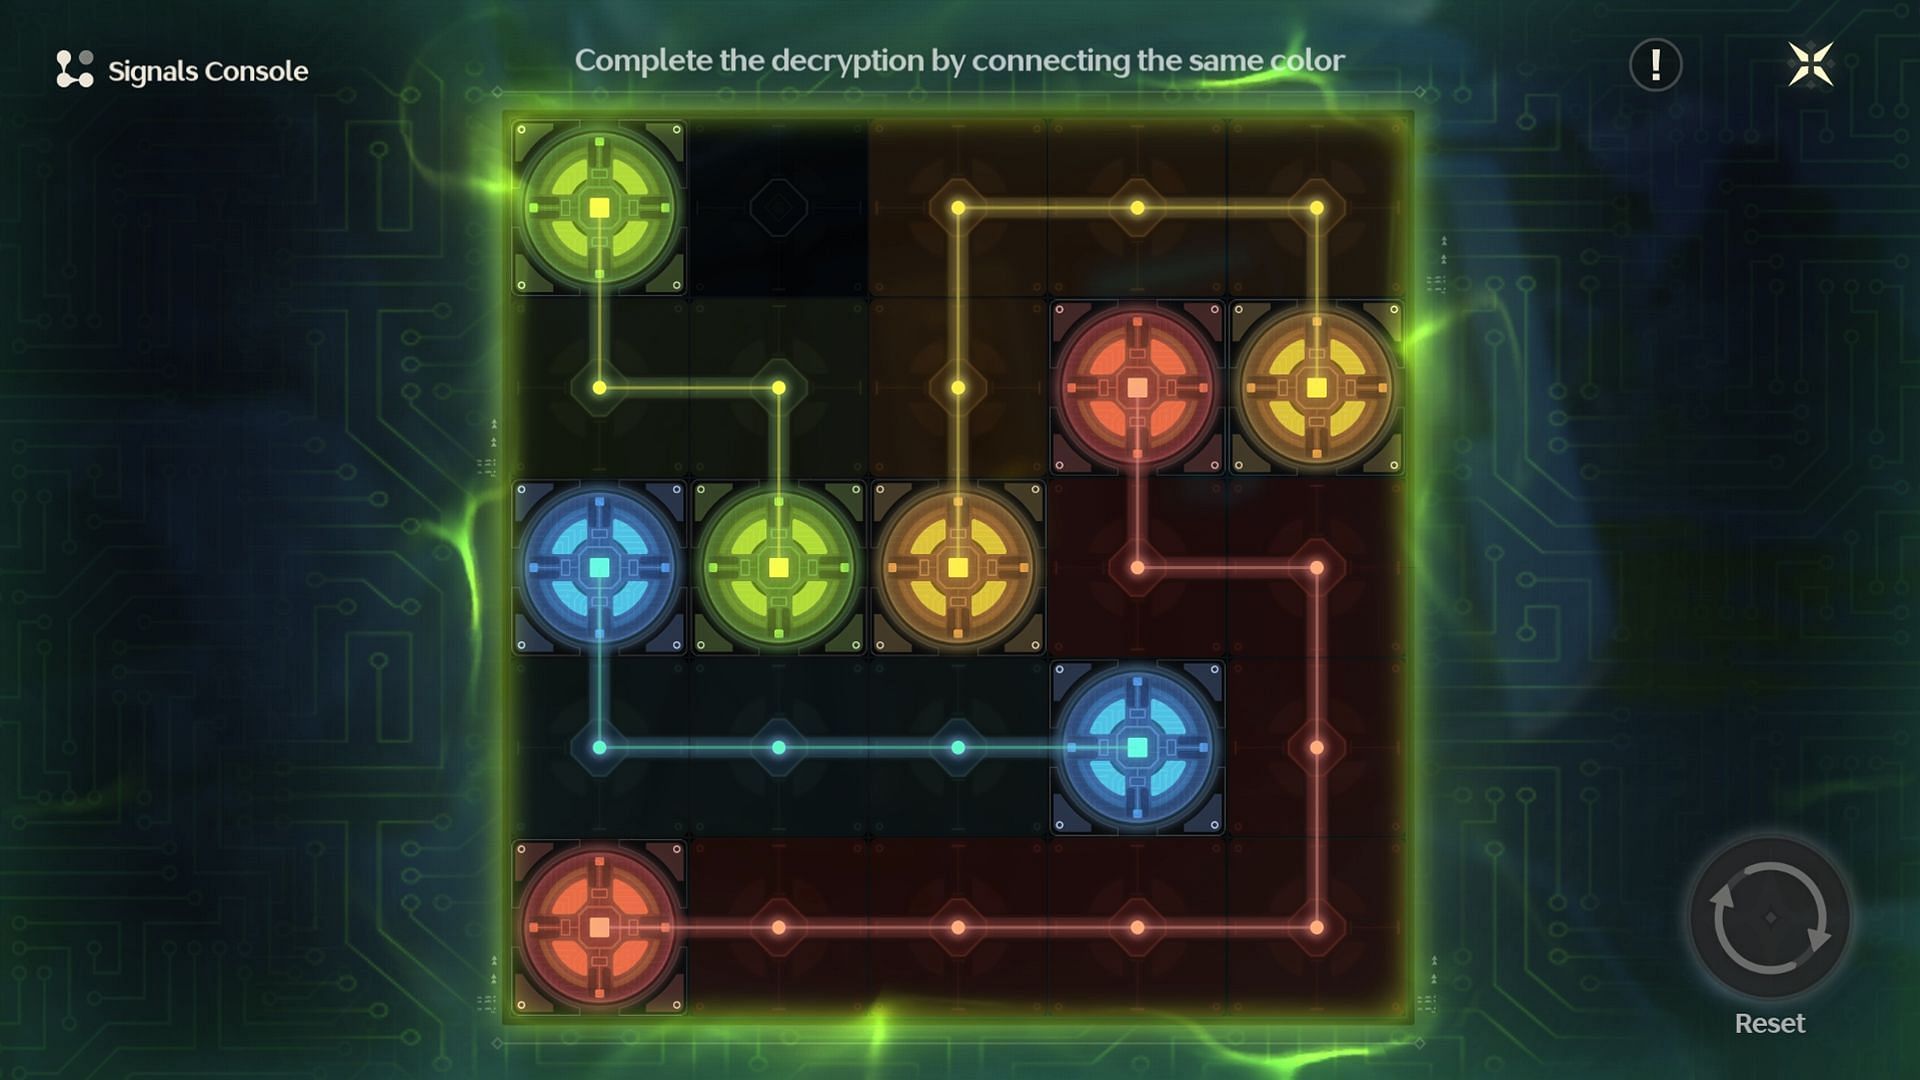
Once you've reached the next location, talk to the Junior Engineer before hacking the lighthouse. Solve the Signals Console puzzle by connecting the same colors.
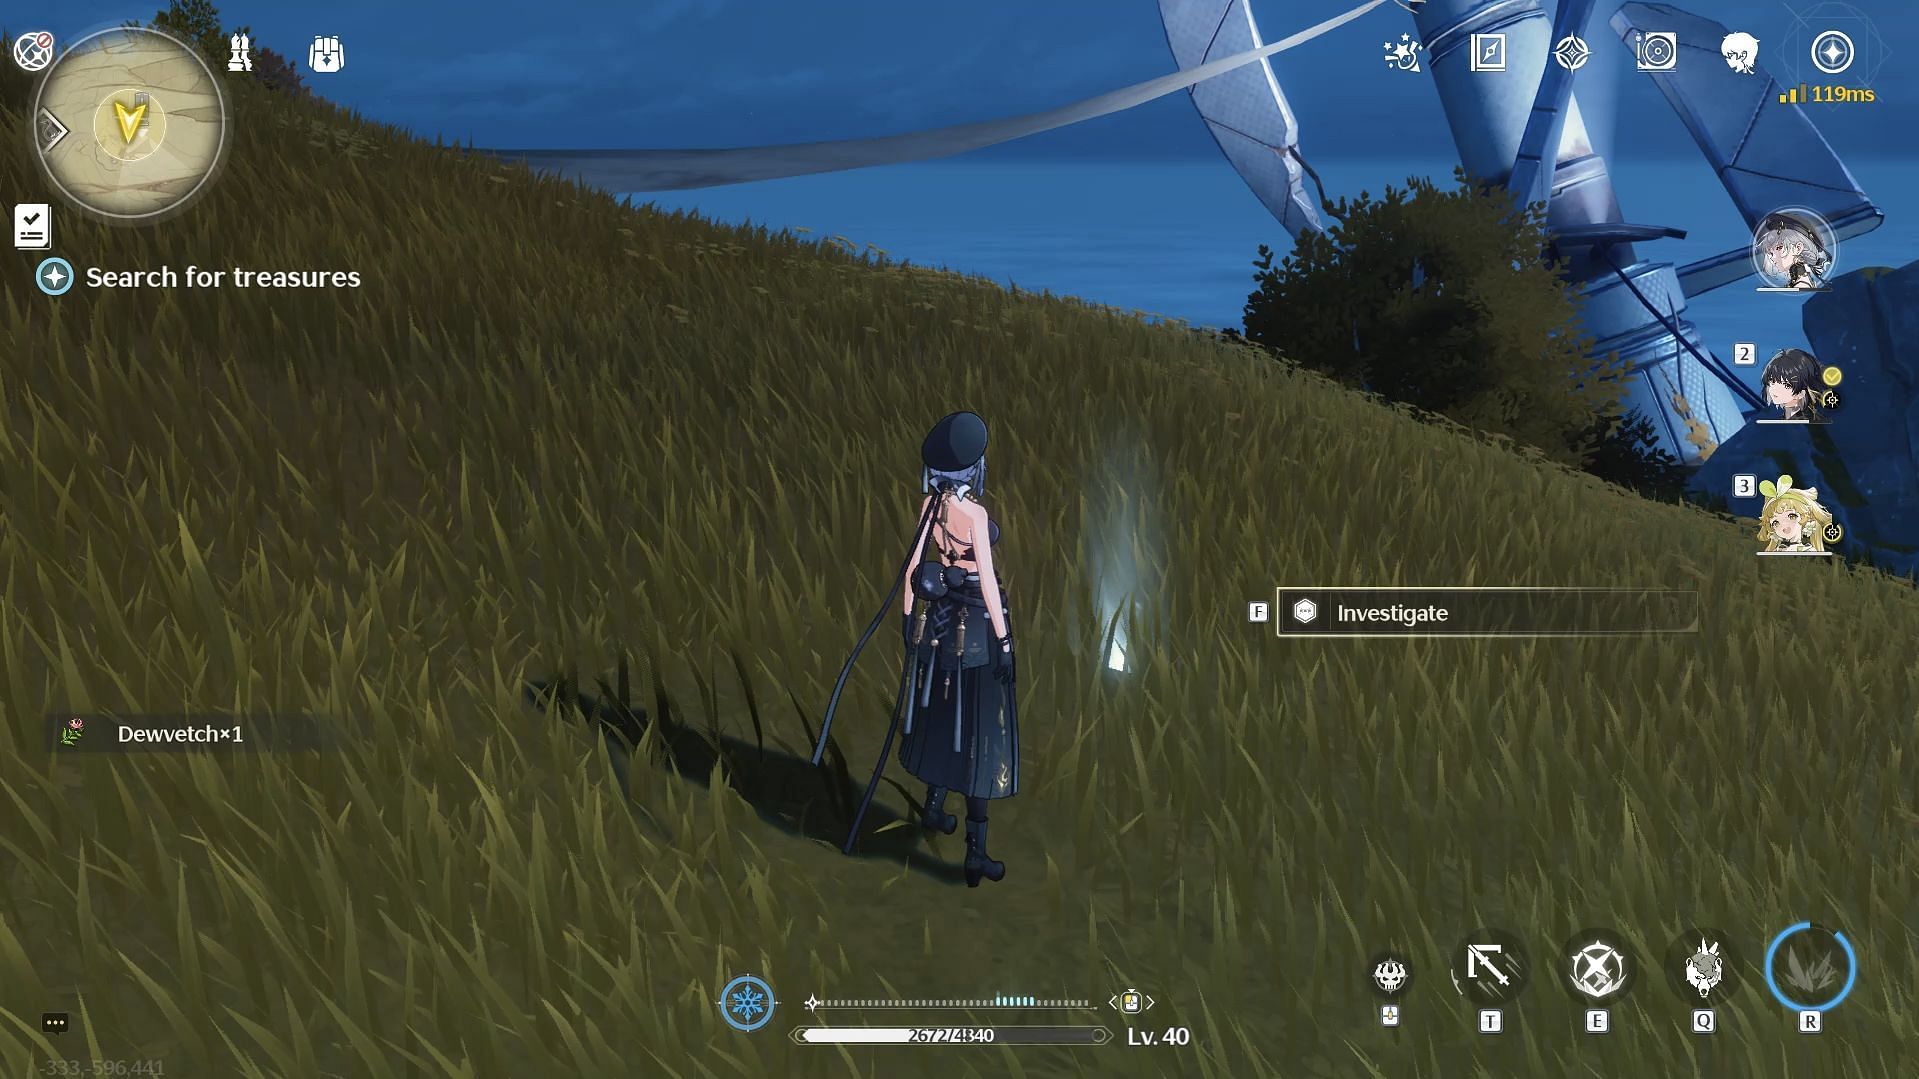
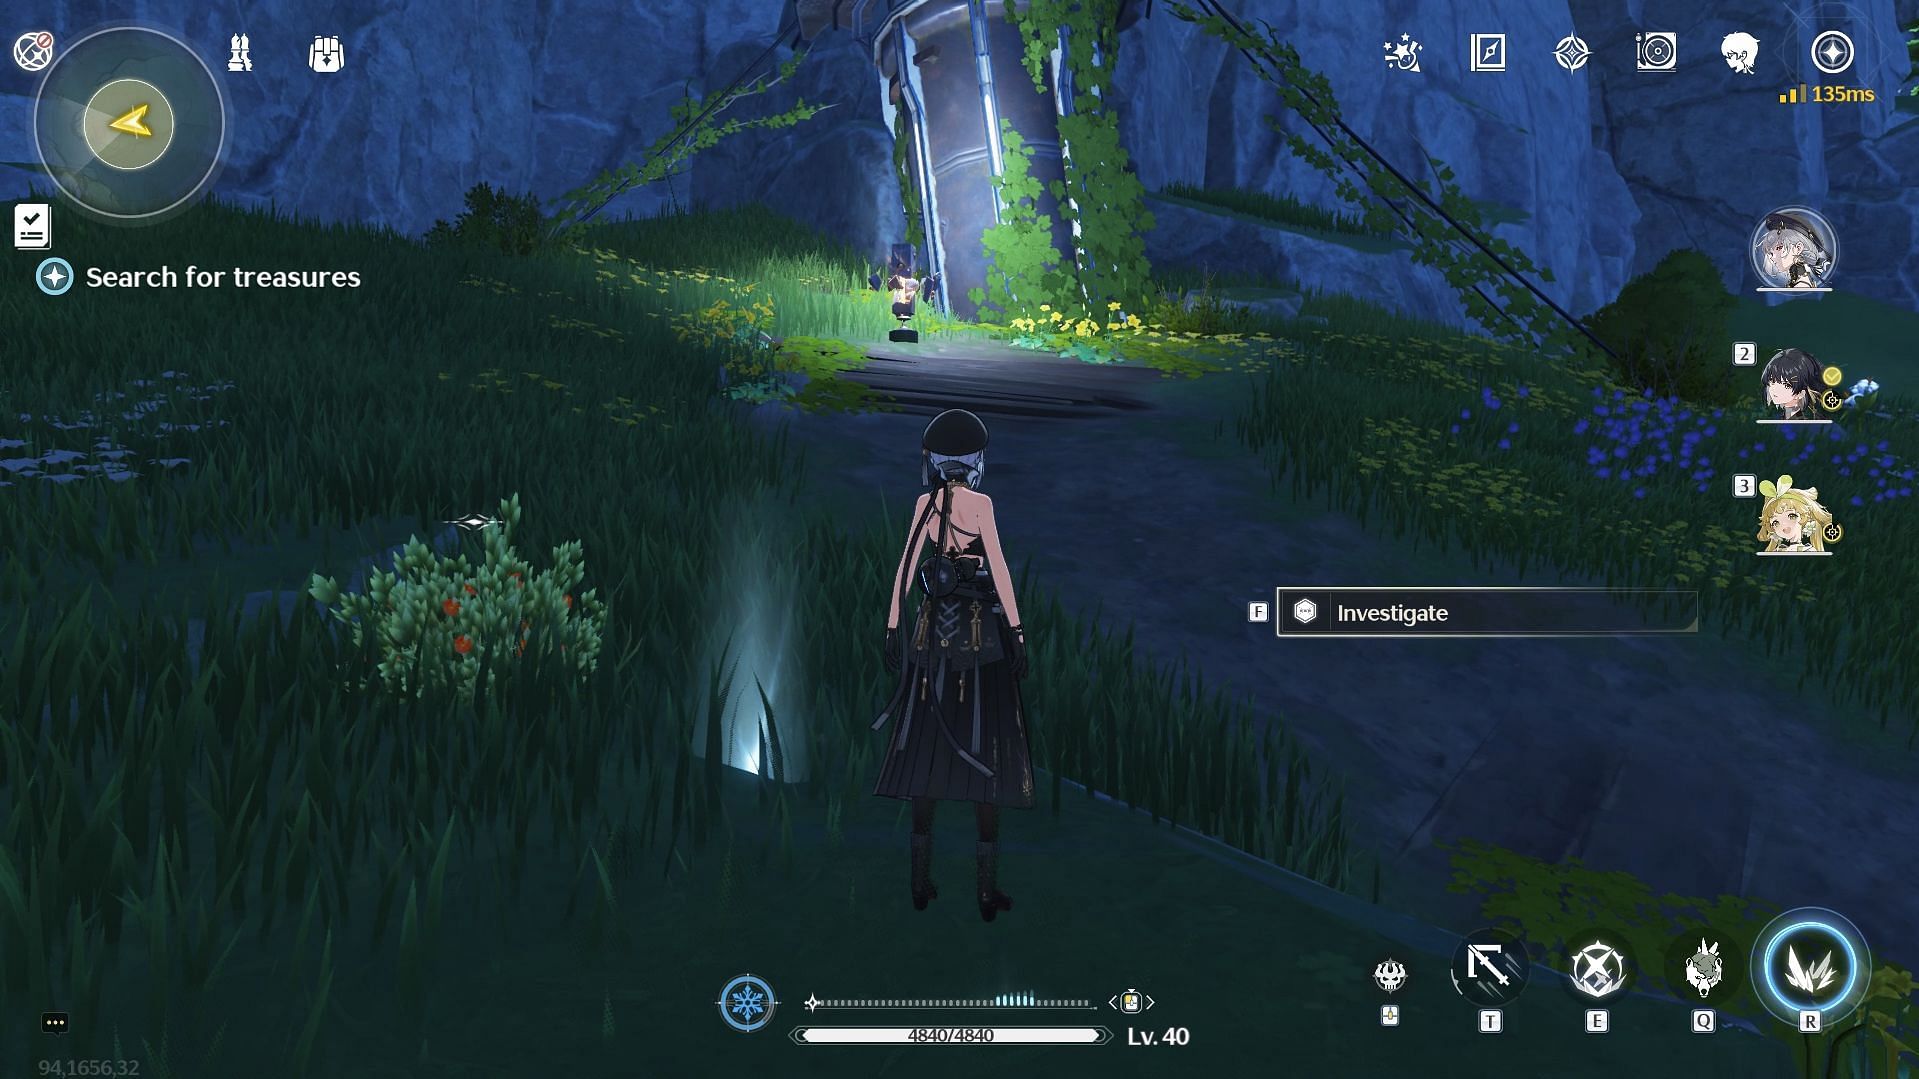
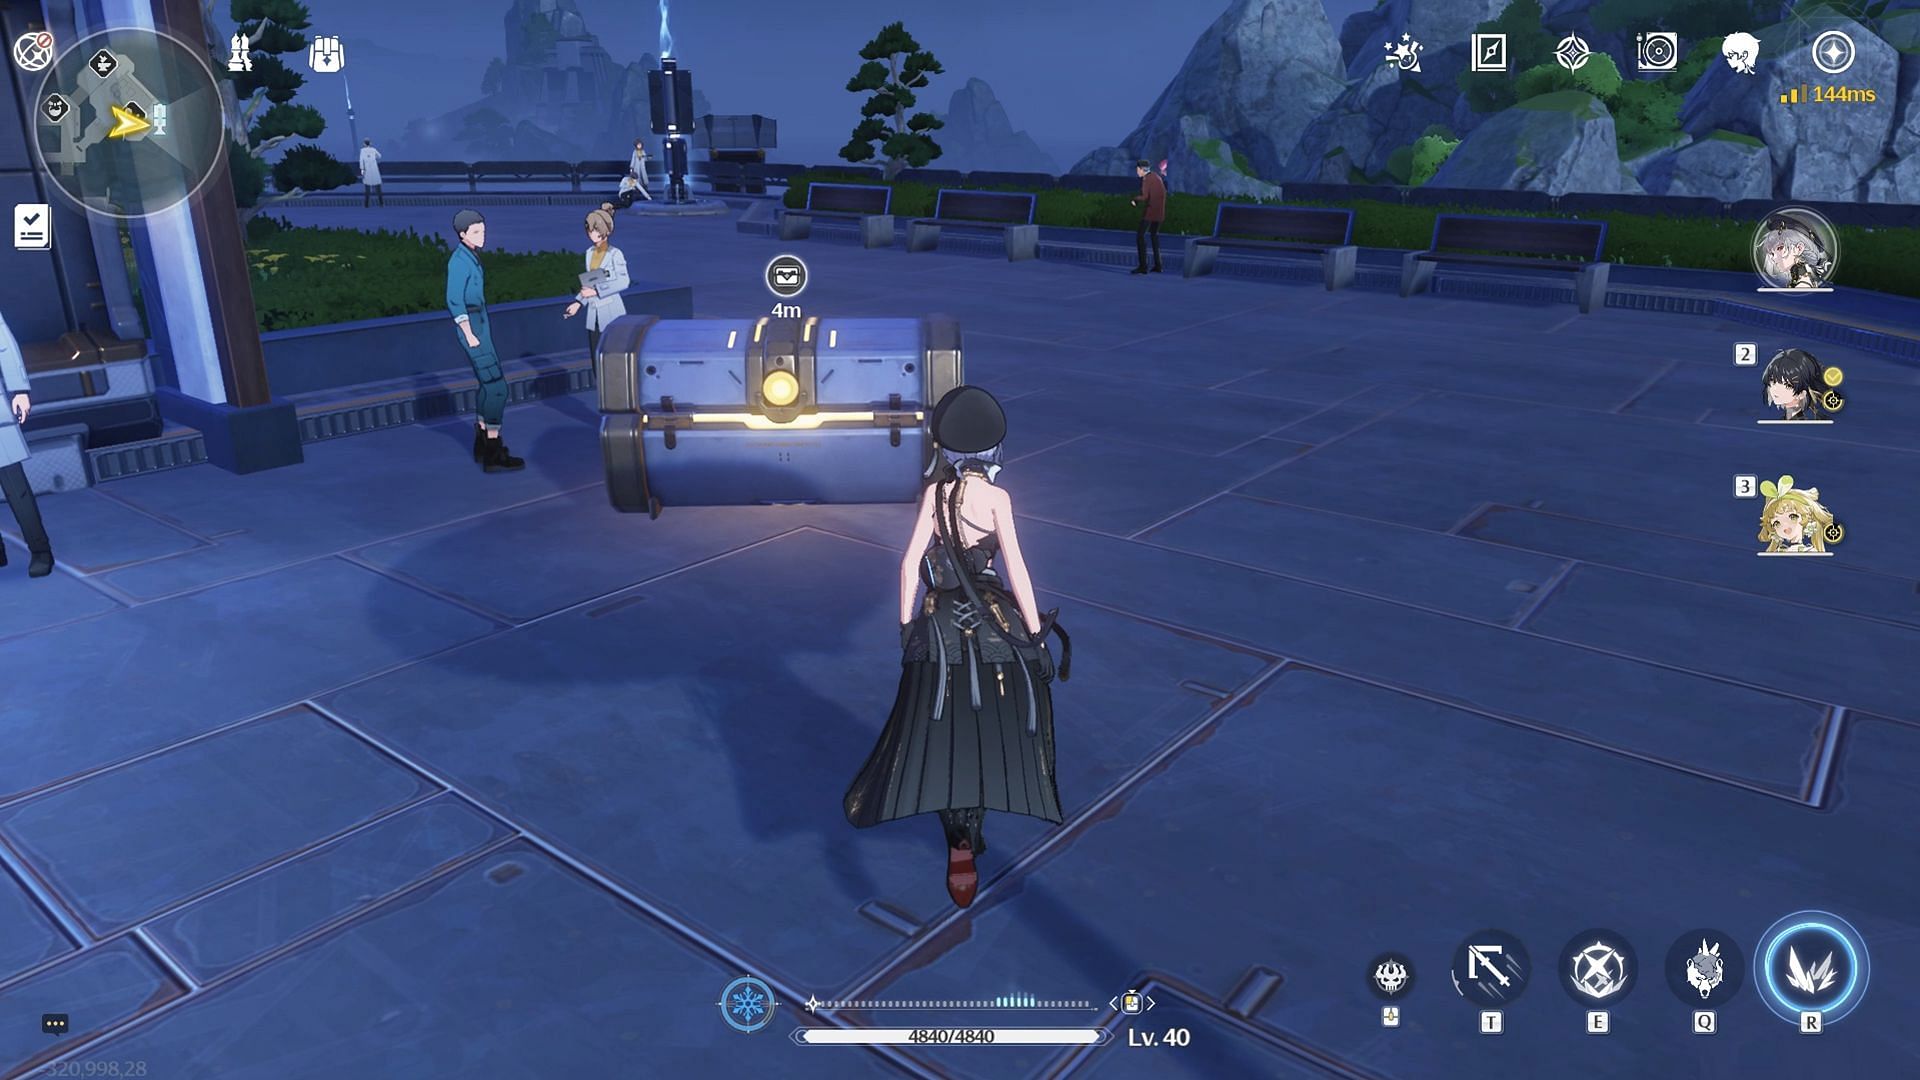
After repairing the lighthouse, head toward the cliff and investigate the shining spot. This will spawn a Standard Supply Chest, worth 10 Astrites. Collect it to trigger the Lost History quest in Wuthering Waves.
Also read: Wuthering Waves quest list
Lost History
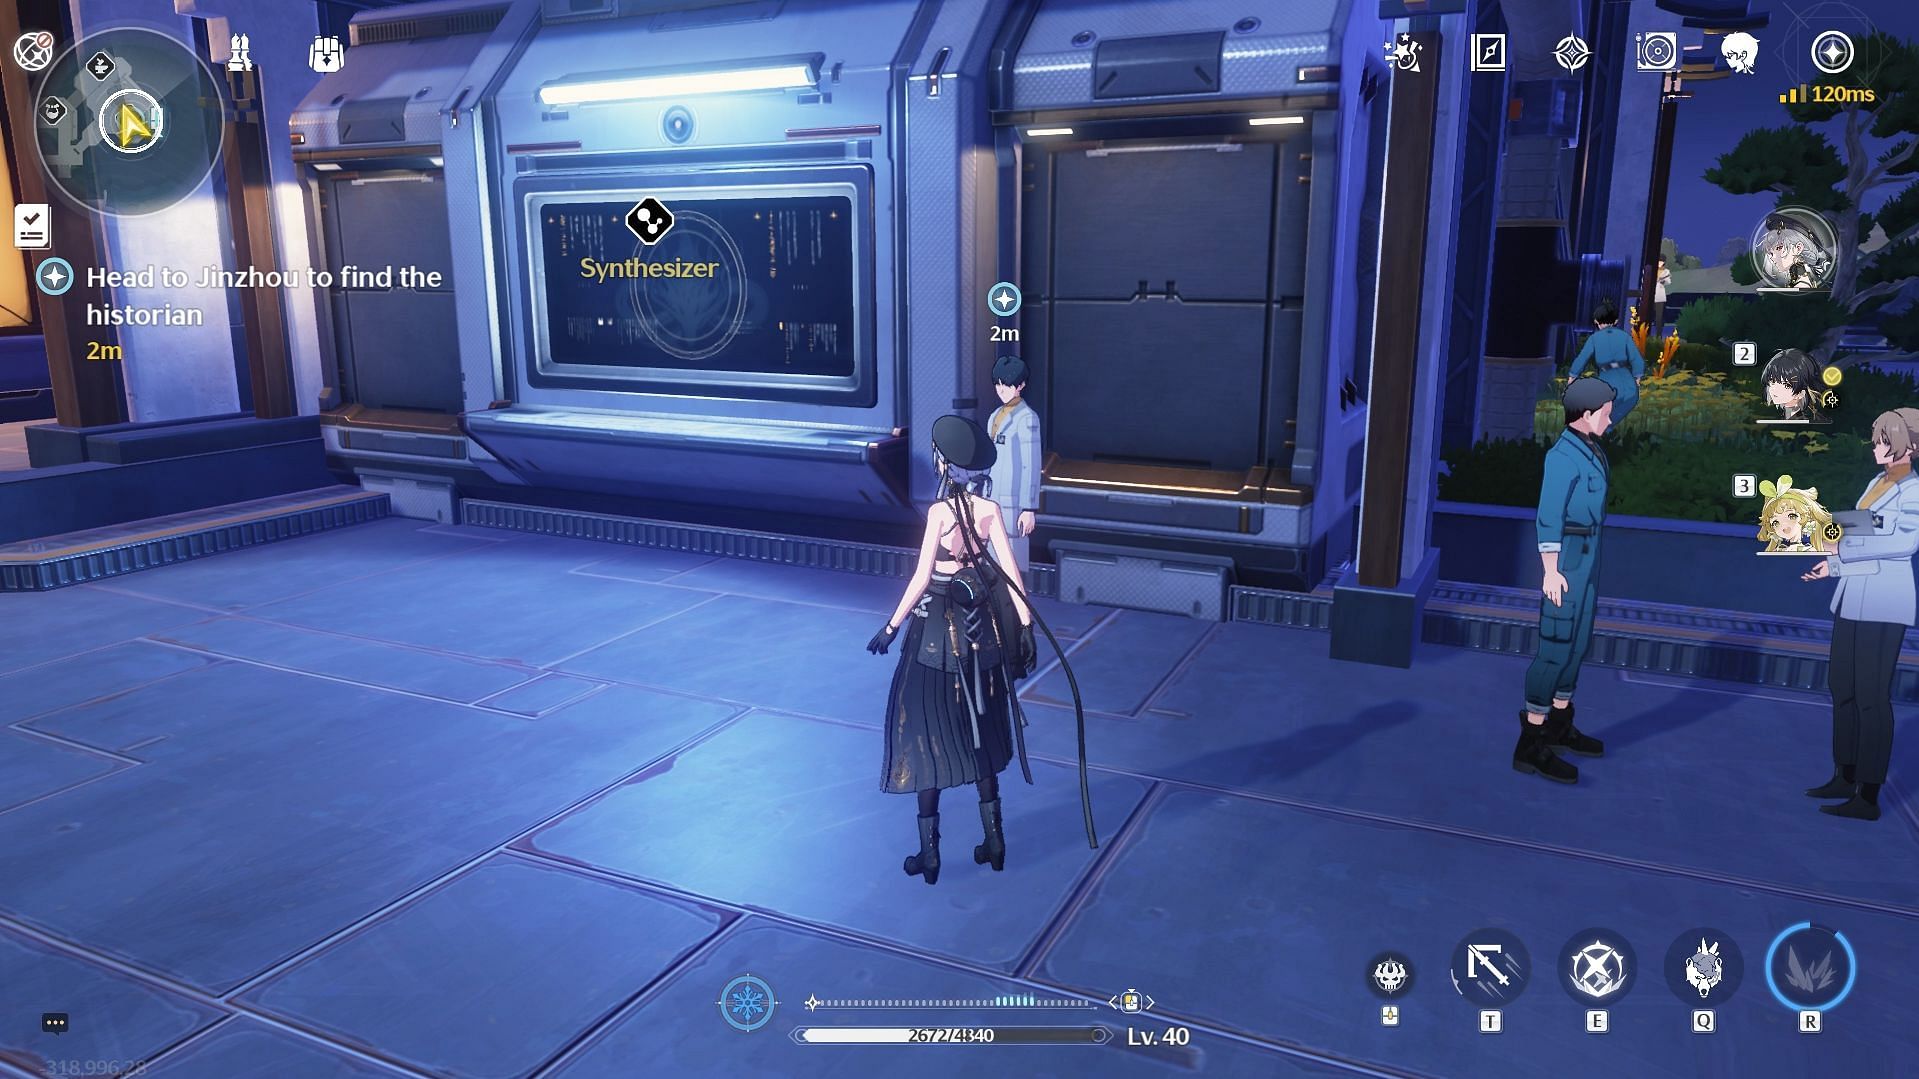
Teleport to the Resonance Beacon near the Synthesizer in the main Jinzhou city and meet the historian.
Lighthouse #2
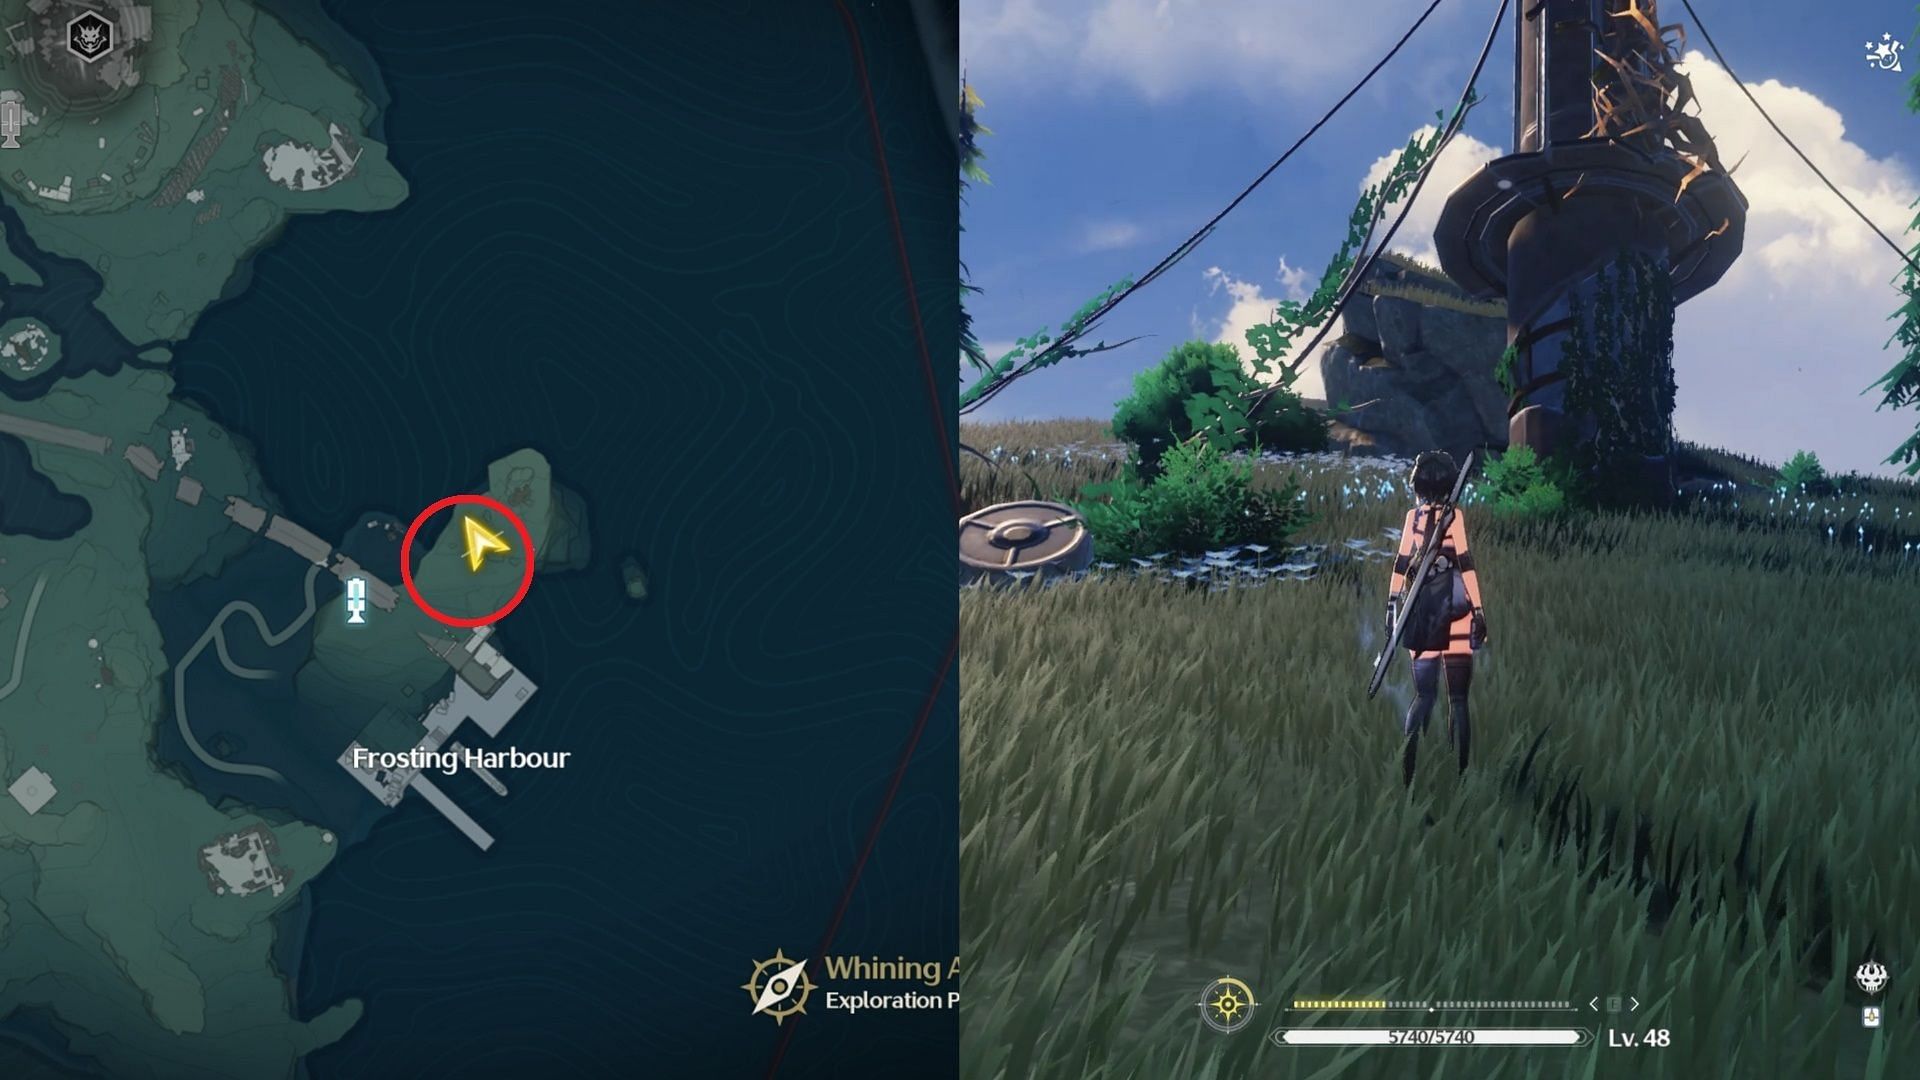
Teleport to the Frosting Harbour and head toward the cliff. Defeat the enemies before picking up the Explosive Charge and throwing it at the thorns covering the lighthouse. Next, climb the lighthouse and hack it.
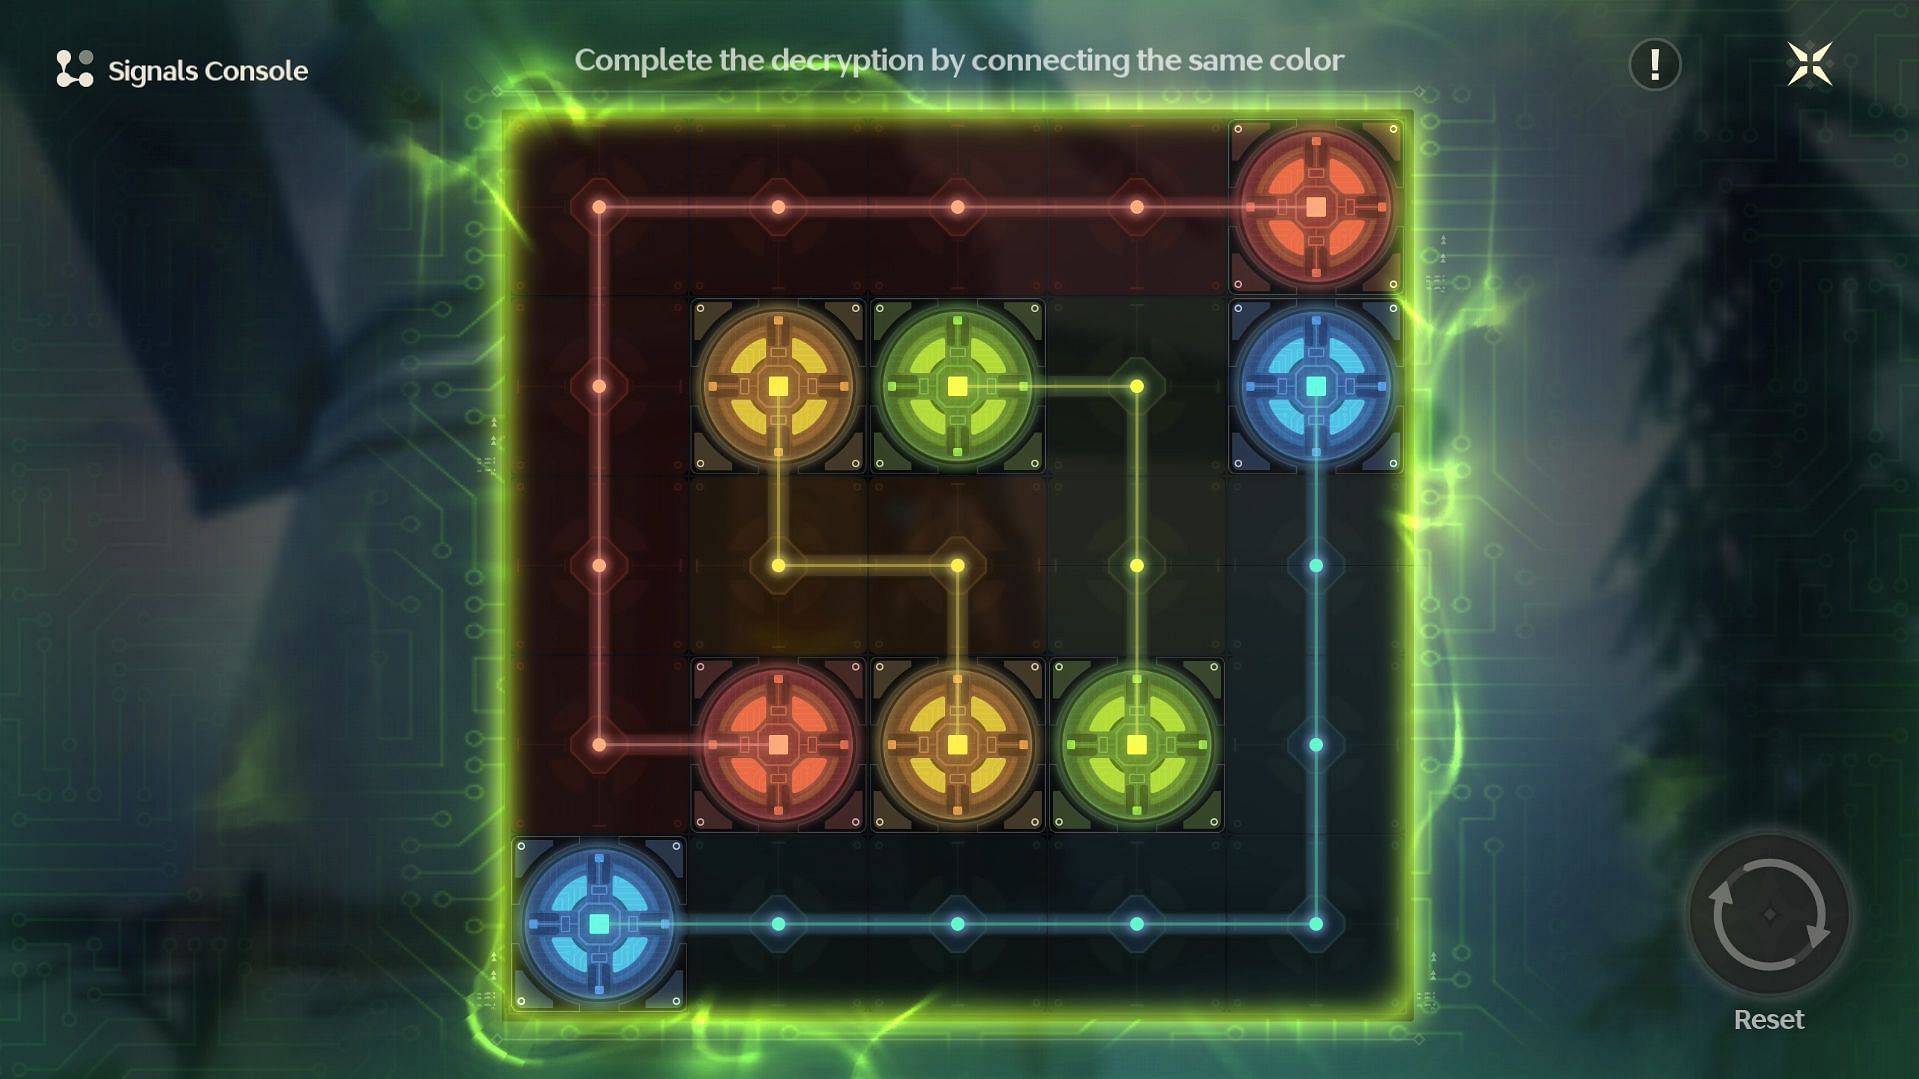
Solve the Signals Console puzzle by connecting the matching colors to repair the lighthouse.
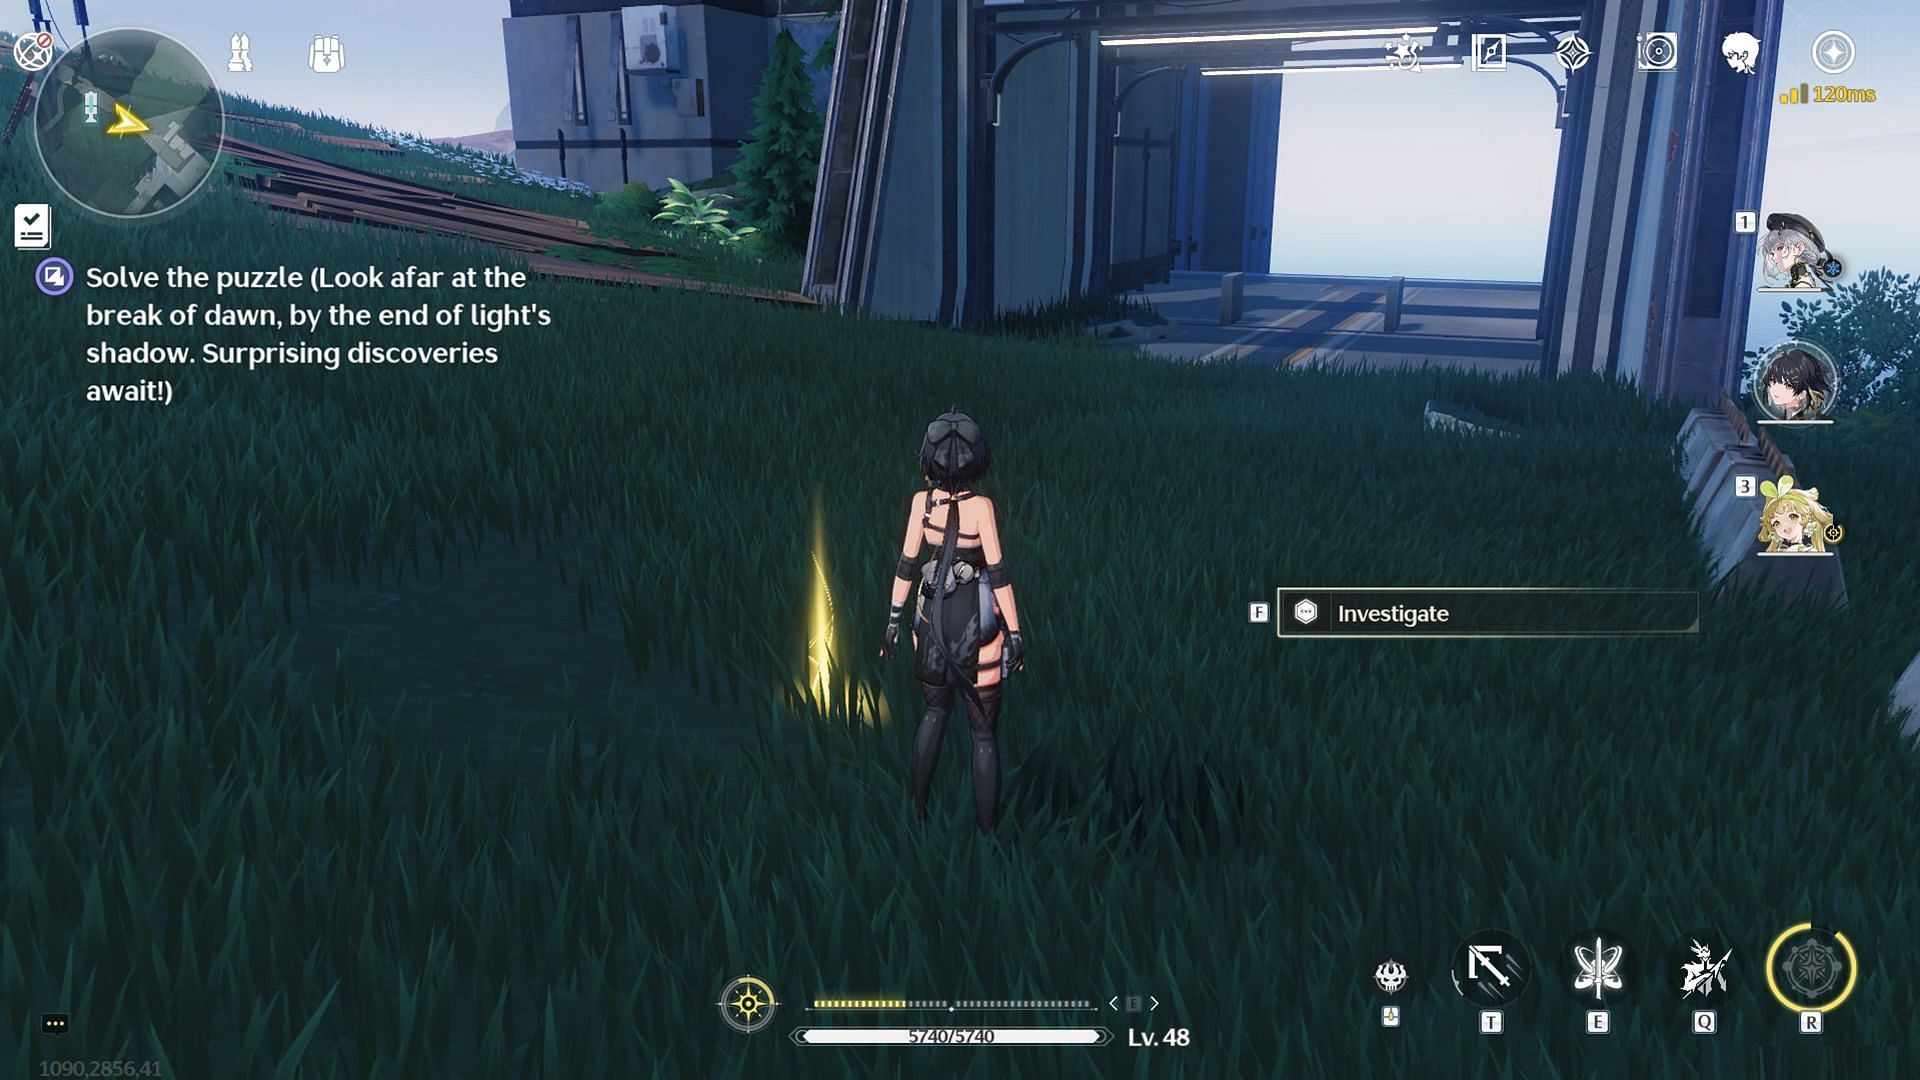
Lastly, teleport back to the Resonance Beacon in the Frosting Harbor and head east to find a yellow pillar of light. Investigate to get a Standard Supply Chest, worth 10 Astrite in Wuthering Waves.
Also read: Wuthering Waves Journal of Jinzhou Vol.1 quest guide
Lighthouse #3
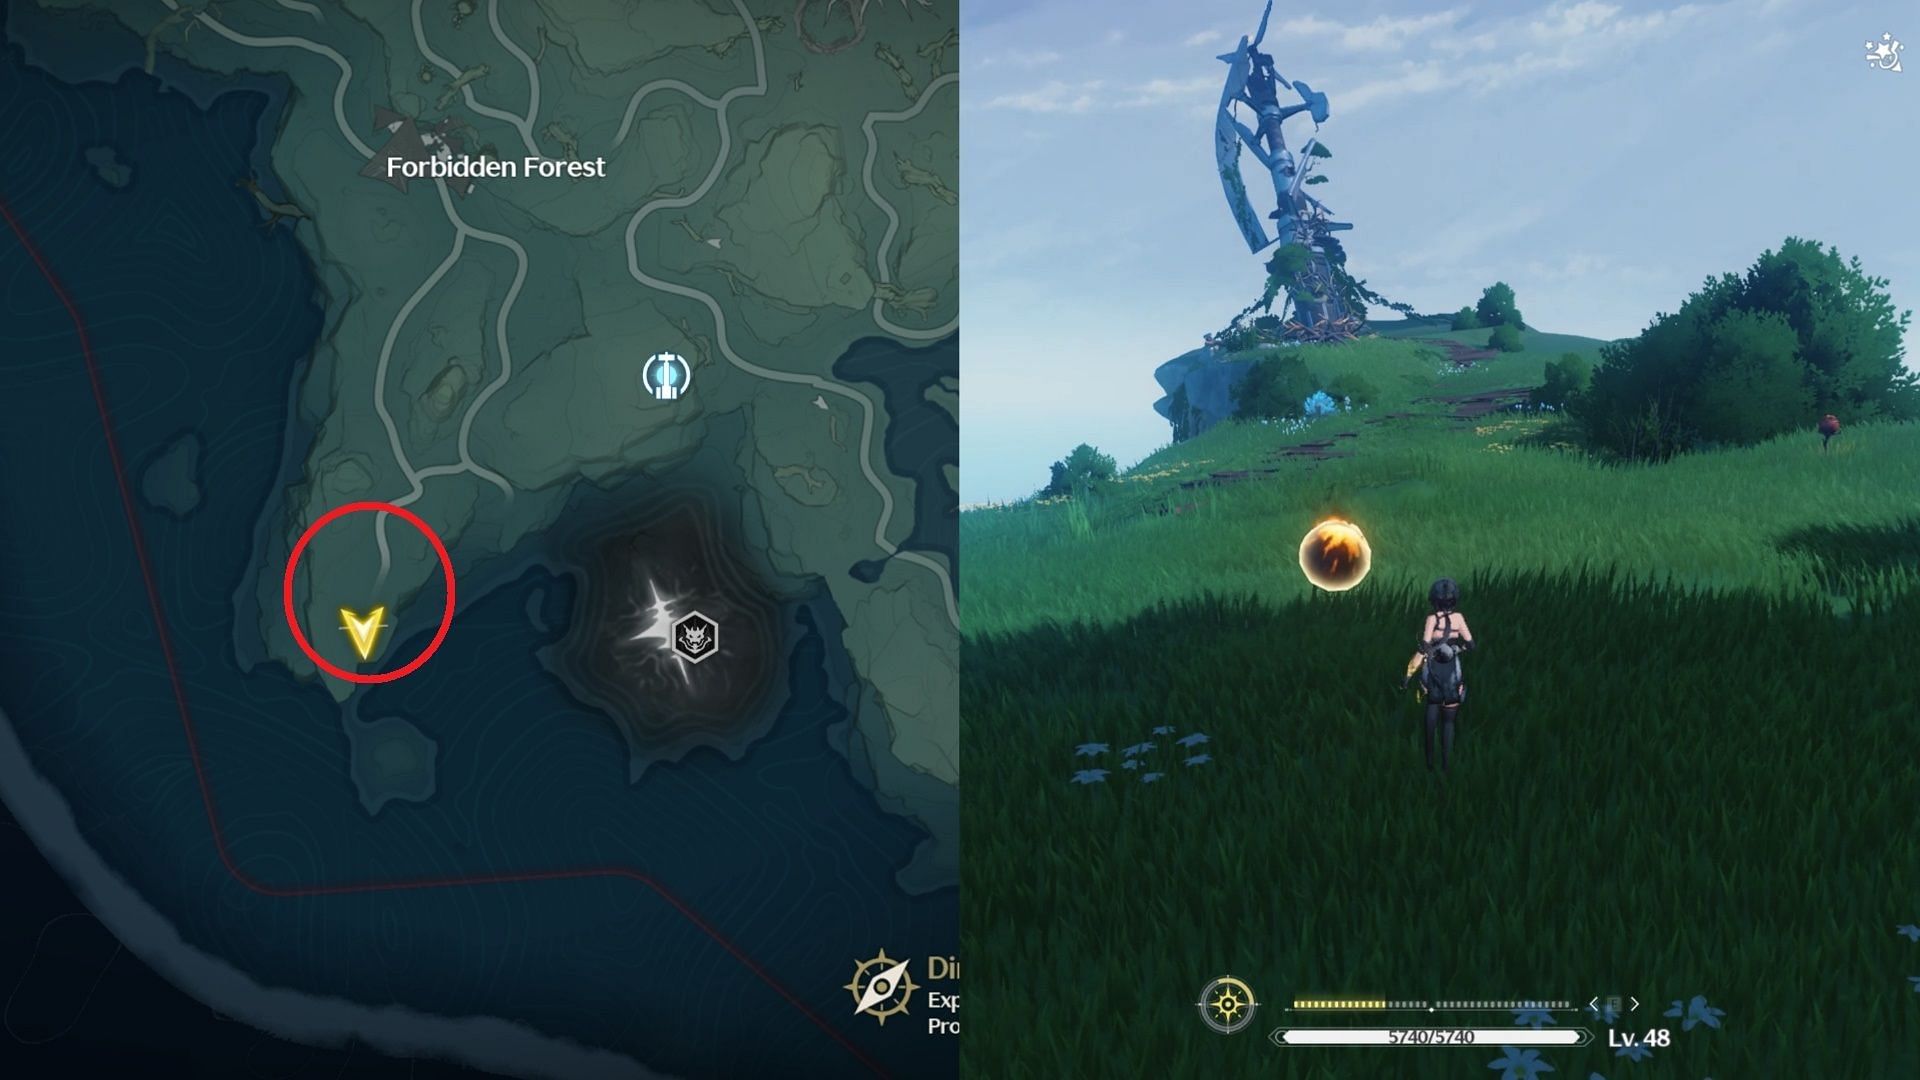
The third lighthouse is located south of the Forbidden Forest. Start by teleporting to the nearby Resonance Nexus and head southwest toward the cliff. To repair the lighthouse, burn down all the thorns with Explosive Charge. Note that the Explosive Charge will despawn if you move too far from its original location, and you'll have to restart everything.
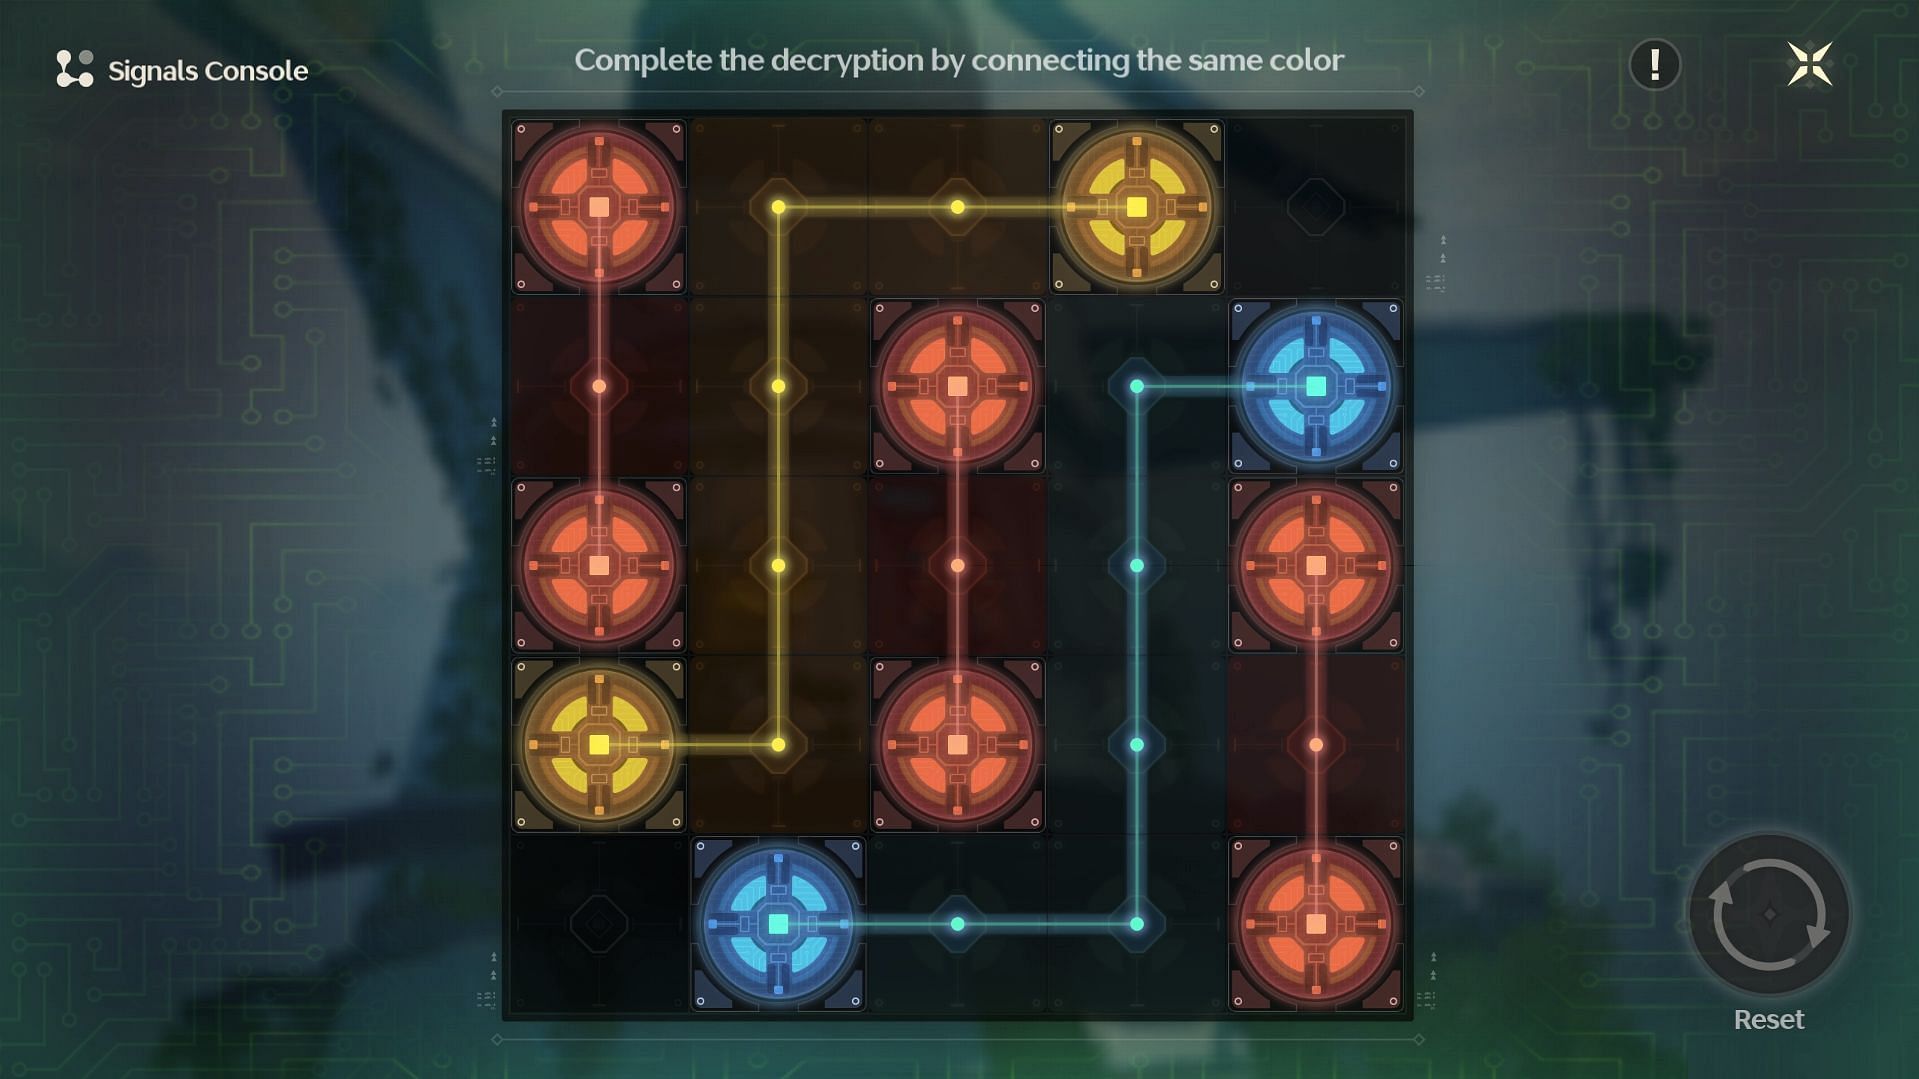
Once you've burned down all the thorns, climb the lighthouse and repair it by solving the Signals Console puzzle.
Next, go to the cliff's edge to interact with the pillar of light and collect the Standard Supply Chest. On a related note, you can find a Sonance Casket at the top of the lighthouse.
Lighthouse #4
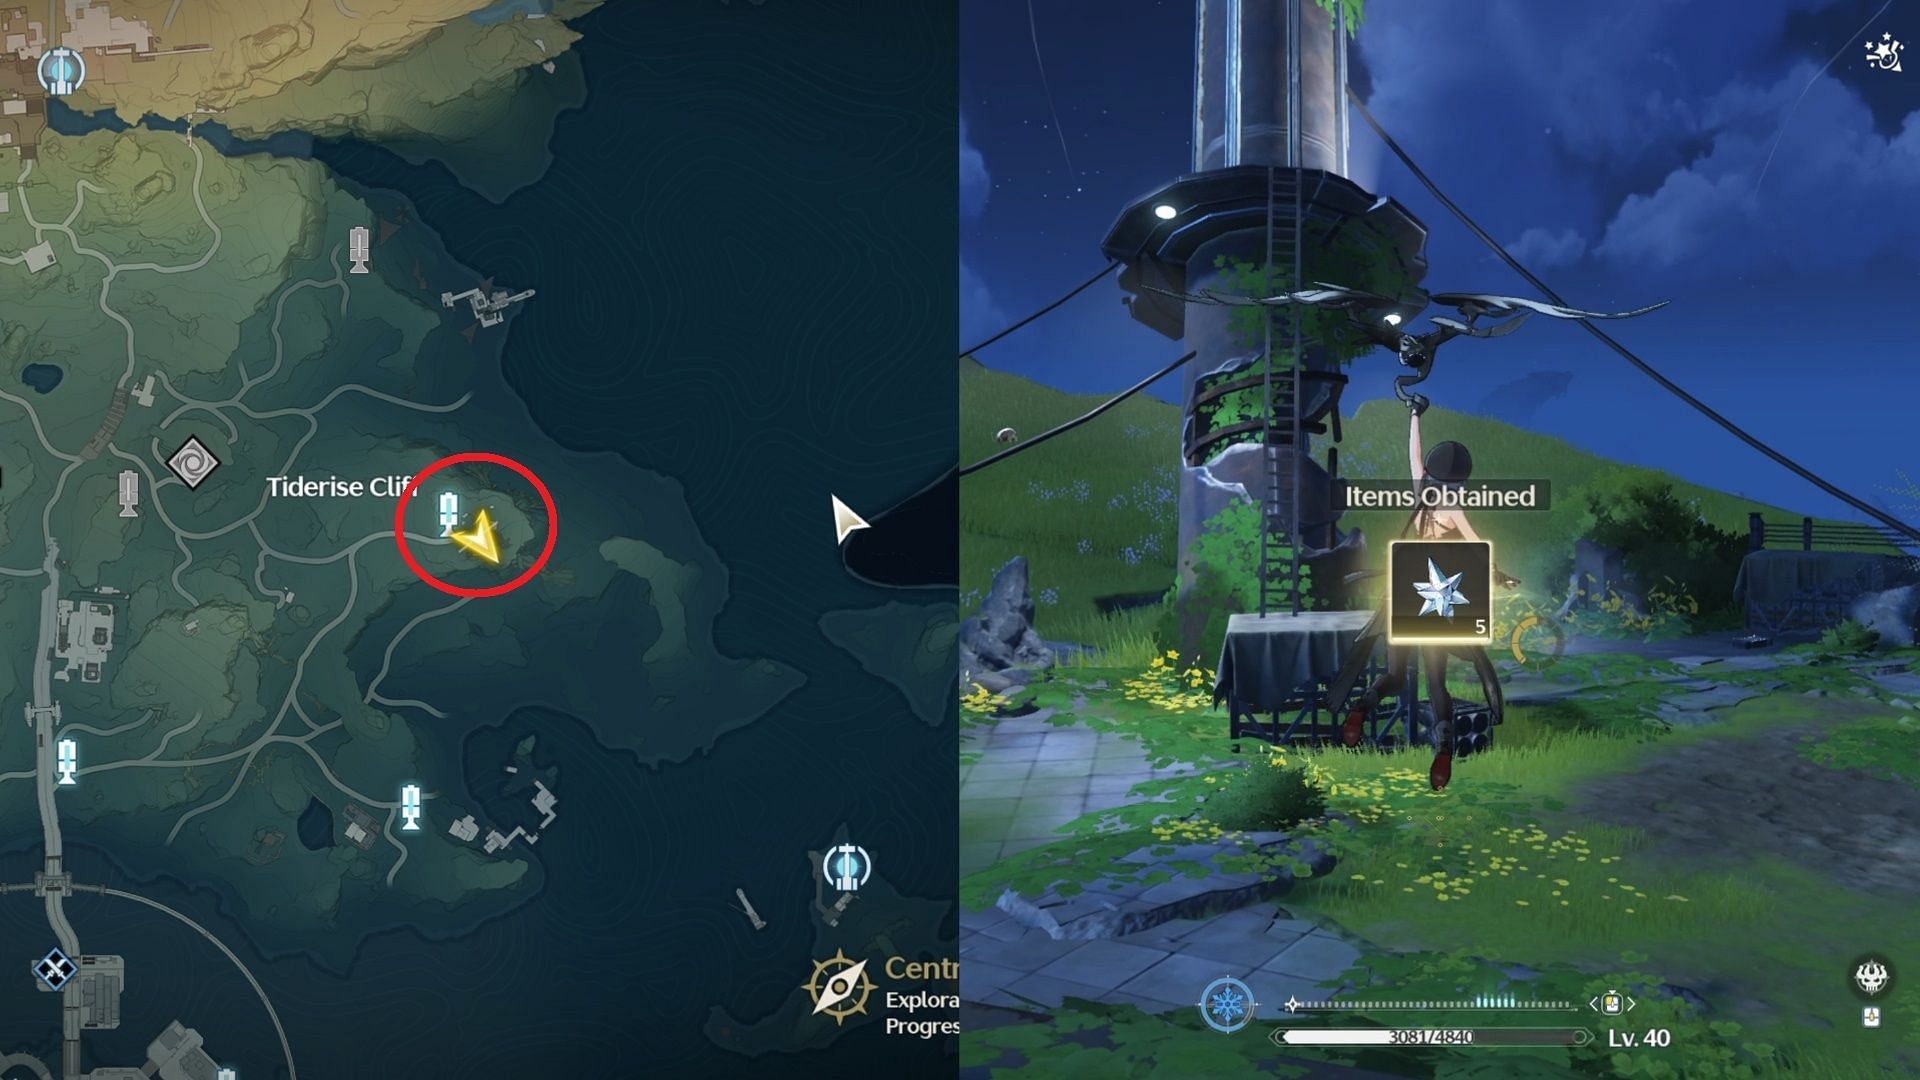
The fourth lighthouse is located on the Tiderise Cliff. Use the Resonance Beacon to get here.
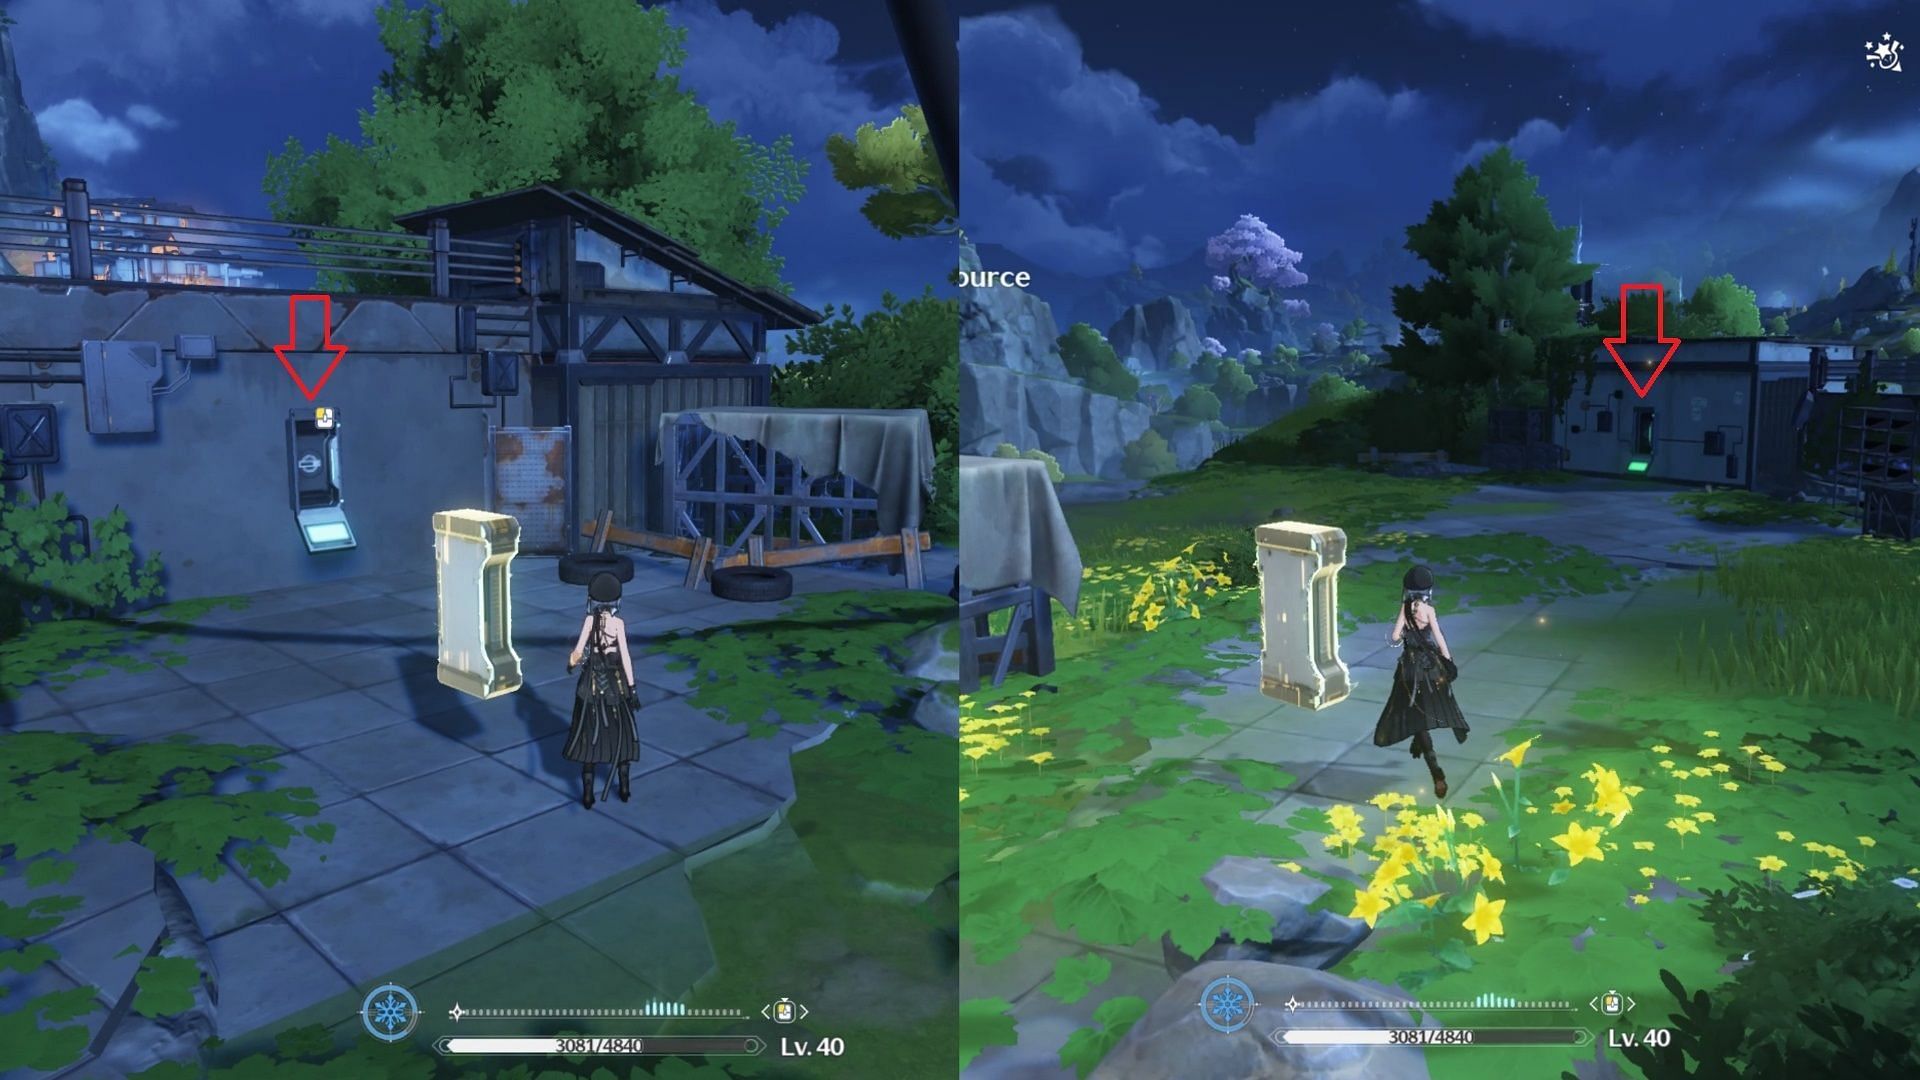
Restore the lighthouse's power by putting both Induction Cells into the Cell Sockets. The first cell is located on the right side of the lighthouse and the other is on the left (east).
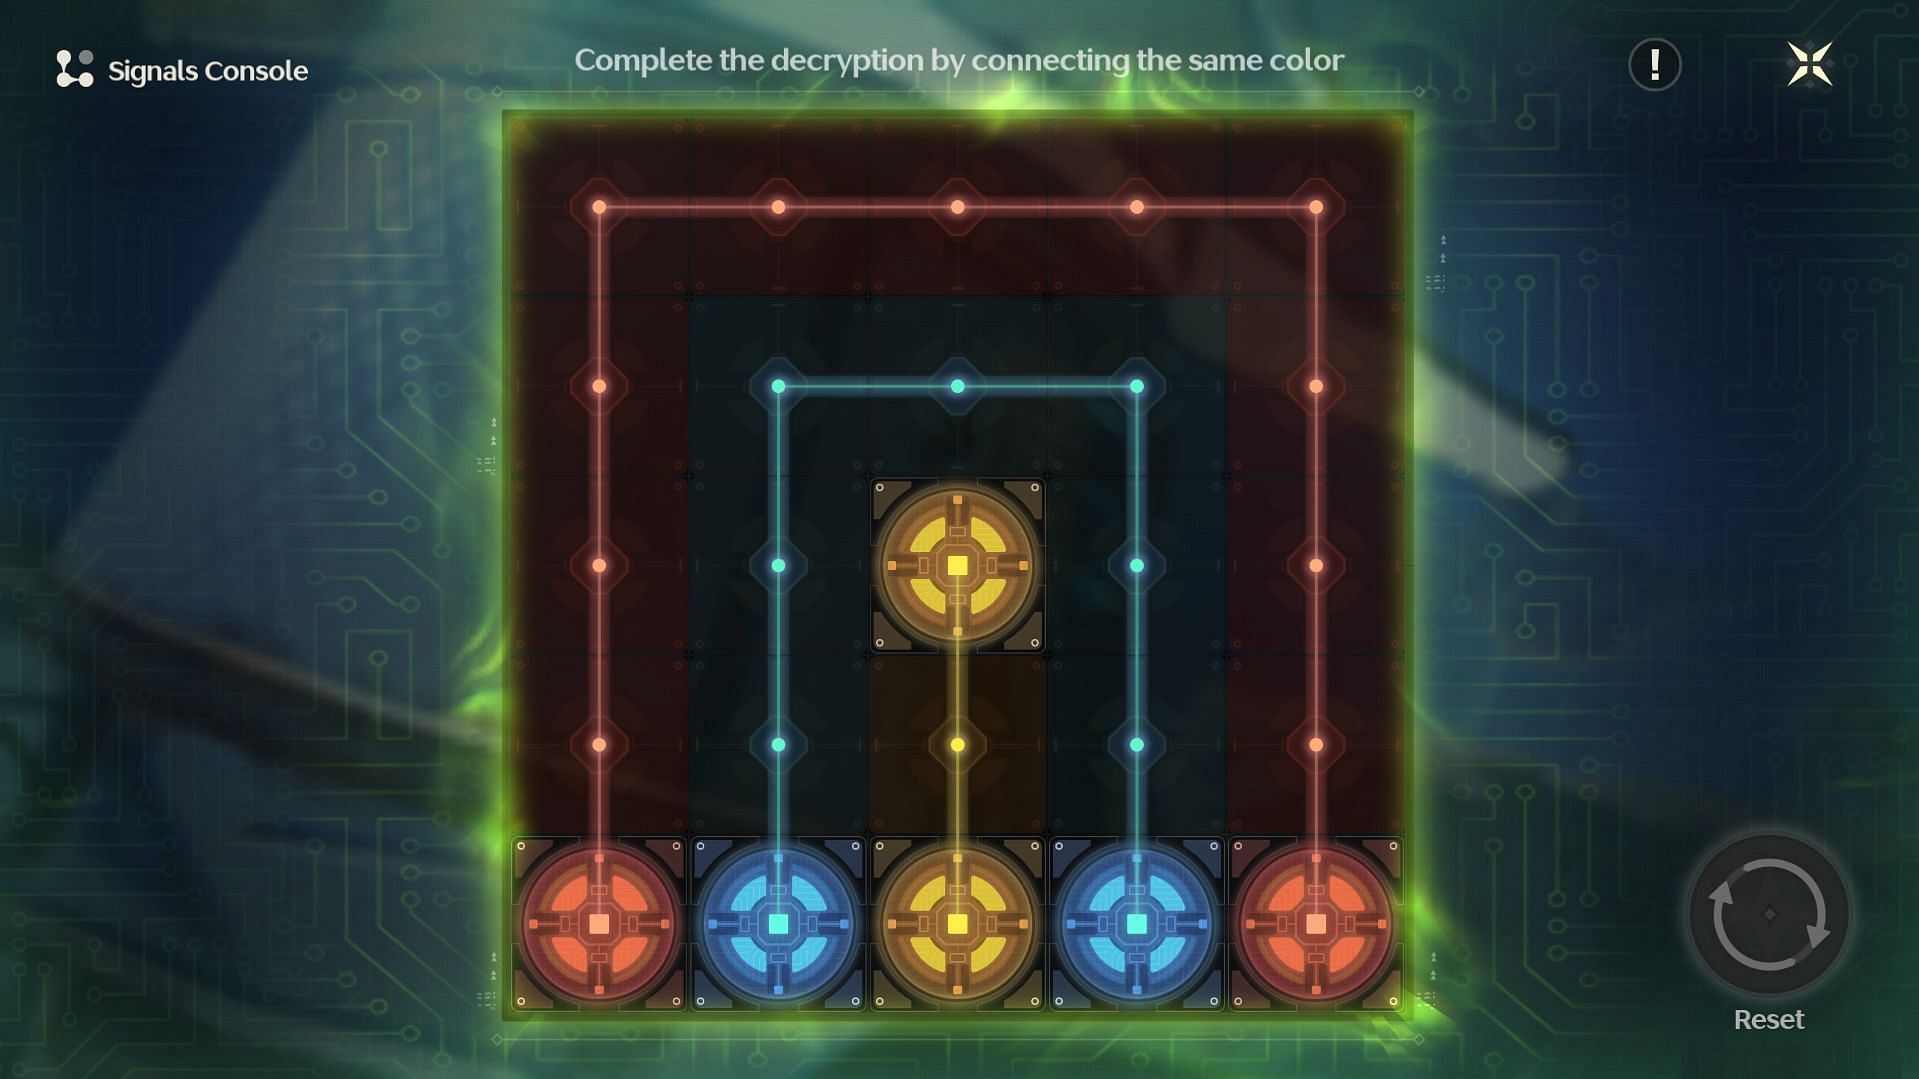
Once the lighthouse is activated, hack it and connect all the matching colors.
Finally, get off the lighthouse and collect the Standard Supply Chest. This will unlock a new quest in your quest tab titled Repair the lighthouse at the Nameless Bay.
Also read: Wood-textured Shard use in Wuthering Waves
Lighthouse #5
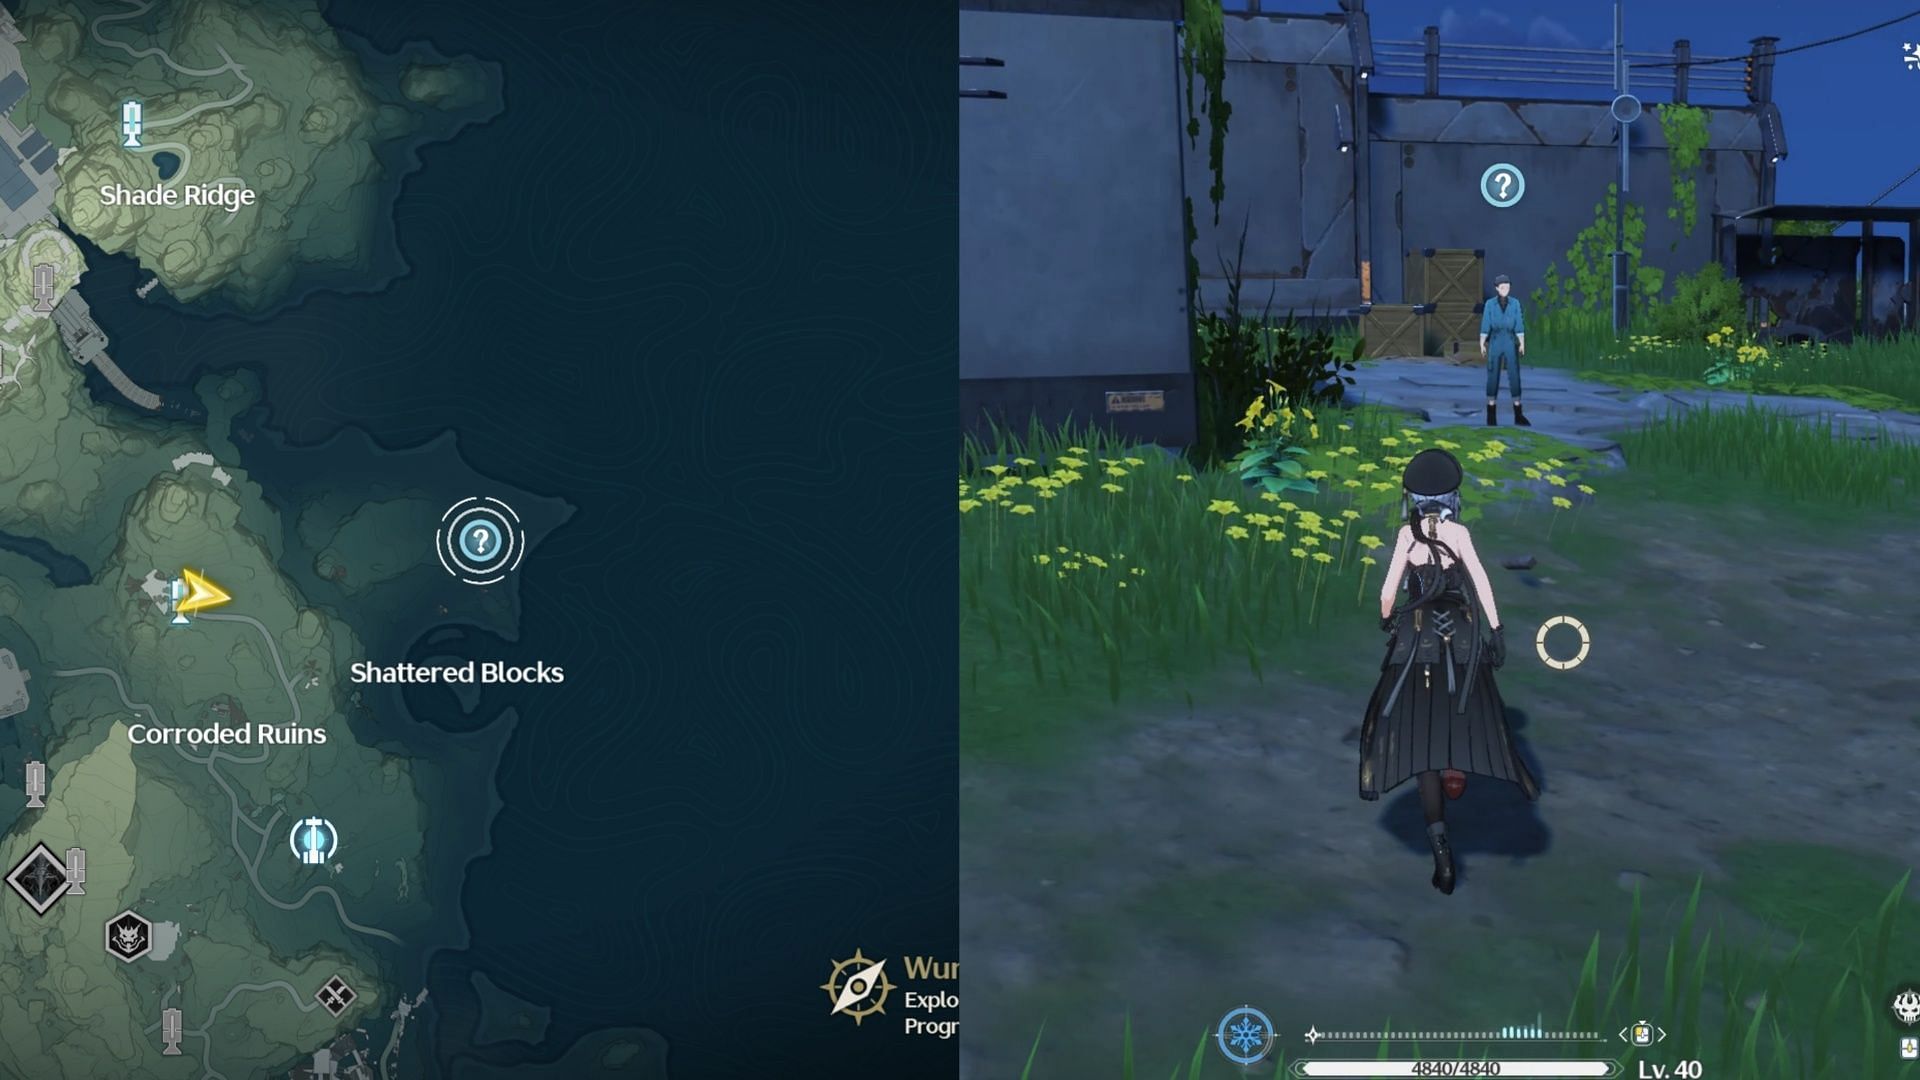
The last lighthouse is located in Nameless Bay, north of Shattered Blocks. Follow the quest navigation and talk to the NPC before putting the Induction Cell to its socket. This will launch a pulse circuit.
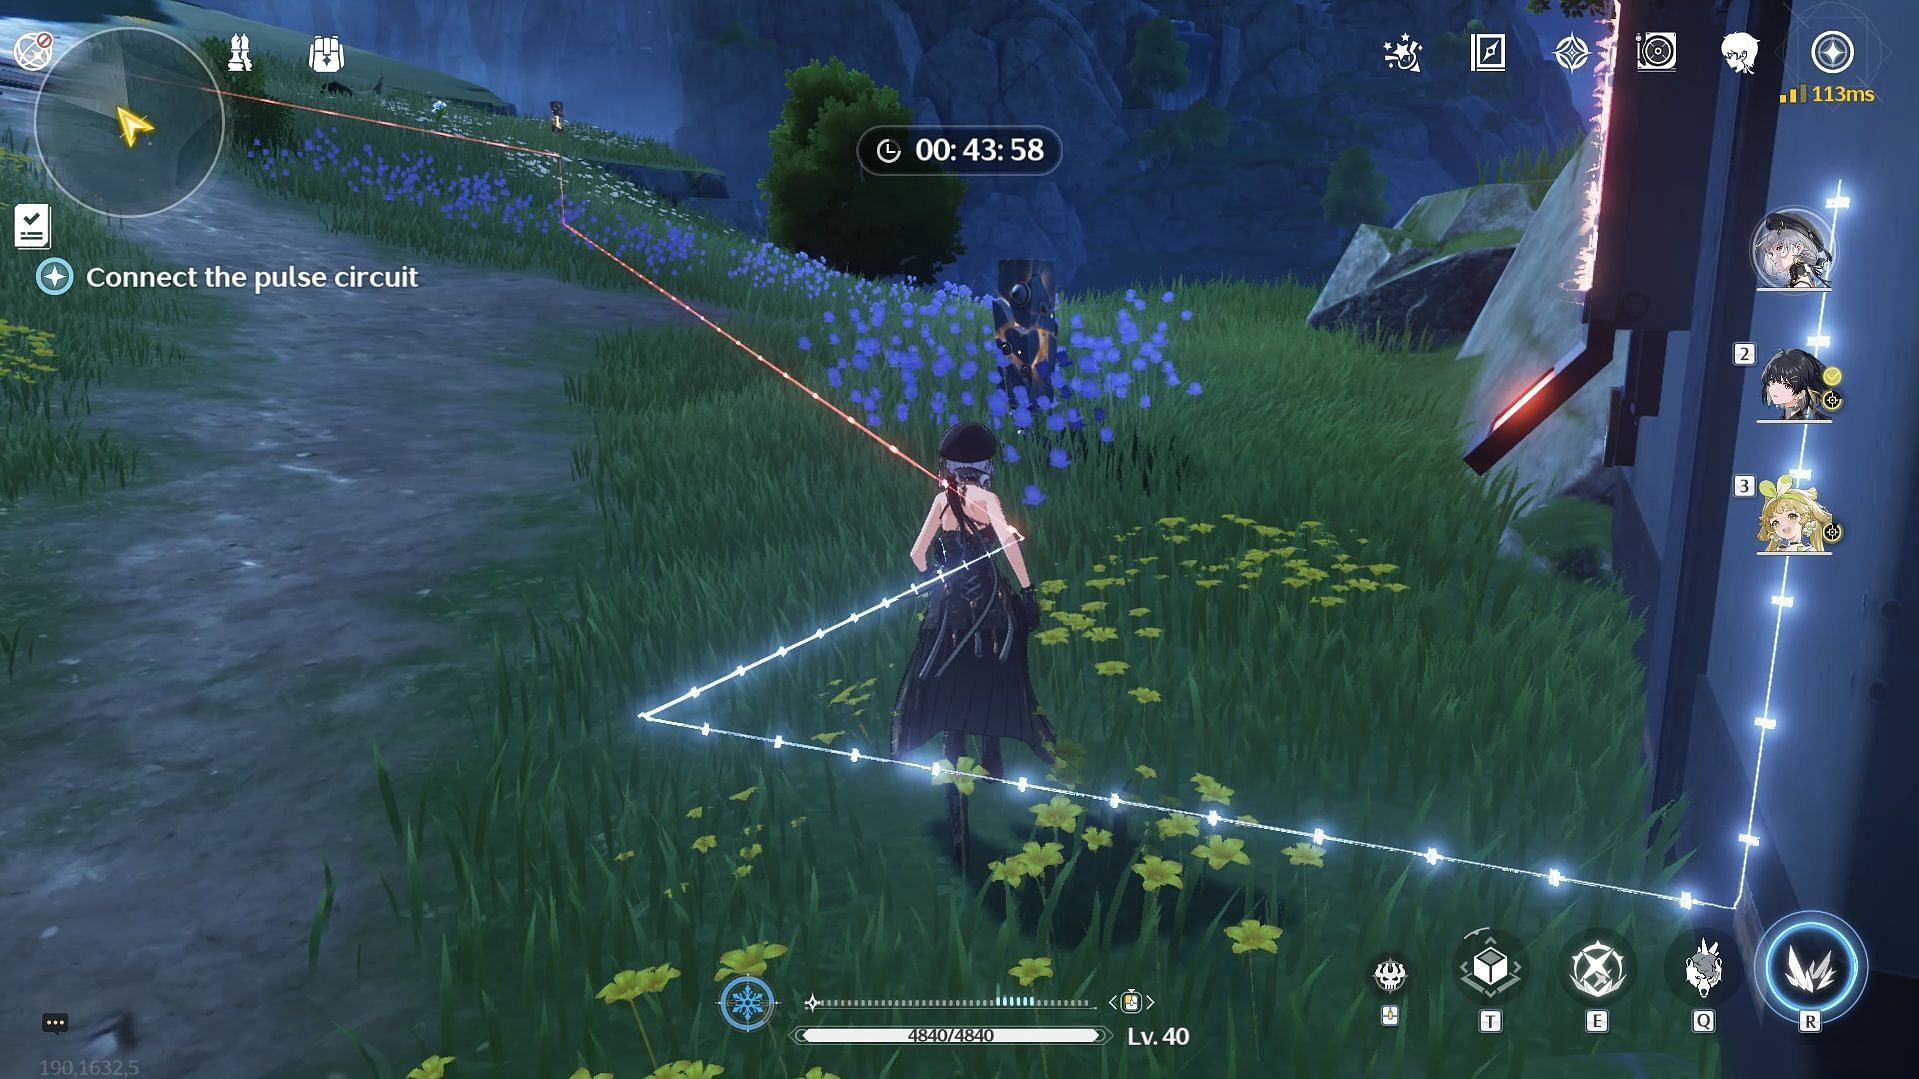
Hit all the Training Dummies to connect the pulse circuit within the time limit to restore the lighthouse's power.
Next, hack the lighthouse and solve the Signals Console.
Finally, investigate the pillar of light and collect the Standard Supply Chest, worth 10 Astrite rewards in Wuthering Waves. This will complete the Repair the lighthouse at the Nameless Bay quest, and you will receive a call from the historian.
Head to Jinzhou and find the historian
Return to Jinzhou and find the historian near the Synthesizer. Interact with him to conclude the quest. This will unlock a trophy called May the Beacons Guide Us, worth five Astrite, and spawn a Premium Supply Chest, worth 40 Astrites.
Follow Sportskeeda for more Wuthering Waves guides and updates.

Are you stuck on today's Wordle? Our Wordle Solver will help you find the answer.