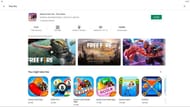
Free Fire has established itself as one of the best battle royale games on the mobile platform. The title has witnessed incredible growth in the last few years and boasts a massive player base across the world.
Free Fire has become so popular that many players even want to enjoy the fast-paced battle royale title on their PCs. Luckily for them, they can do so using an Android emulator.
This article provides players with a step-by-step guide to play Free Fire on PC using Bluestacks.
Also Read: Romeo Gamer's Free Fire ID, K/D ratio, and stats in February 2021
Playing Free Fire on PC using Bluestacks.

BlueStacks is one of the oldest and most widely used Android emulators on the market. Here are some of its key features:
- Pre-set game controls with ease of customization.
- Shooting Mode.
- Ability to record gameplay with a single key.
- Real-time translation.
- High definition graphics and high FPS.
- Multiple utility features, including disk clean-up and screenshot.
Players can follow the steps given below to play Free Fire on PC using BlueStacks:
Step 1: Players first have to download and install the BlueStacks emulator from the official website. They can click here to visit the website.

Step 2: Once the emulator is installed, they have to log in to their Google account.

Step 3: Next, players have to open Google Play Store and search for Free Fire using the search bar.

Step 4: They can then press the ‘Install’ button.

Step 5: After the installation is complete, players can log in to their Free Fire account and enjoy playing the fast-paced battle royale title on their PC.
Apart from BlueStacks, there are numerous other emulators like MEmu Play and Nox Player that players can use to play Garena Free Fire on their PC.
Note: This article is for beginners. While these steps may seem obvious, several new players often search for these tips and tricks.
Read: Amitbhai (Desi Gamers) vs Sooneeta: Who has better Free Fire stats in February 2021?
Check out the latest Free Fire MAX redeem codes here.
