Every gamer who aspires to make their PC faster knows that Windows is, by default, one of the most optimized operating systems for the PC space, but it is not perfect. Regardless of your specifications - low end or high end - you can optimize your gaming PC to give you better performance.
If your gaming experience has been hampered by constant stutters and frame rate drops while gaming, make a note of the following PC optimization steps and make sure to implement them the next time you sit down to play your favorite game.
Please note that the suggested settings are intended to improve gaming performance as a general starting point. Every game has a specific affinity for certain optimizations. Once you implement the suggested optimizations, we recommend that you look into specific optimizations for your game.
Optimizations needed to make your PC faster
Creating a restore point for safety
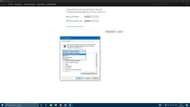
Before you move on to optimizing your PC, we recommend that you create a restore point. It will give you the option to revert the system back to the pre-change state in case certain settings do not work out positively. To create a restore point, follow these steps:
- Search “Create a restore point” in the search box - select it.
- “System Protection” - Select your C Drive - “Configure” - Enable “Turn on system protection” - Select maximum usage to 5% - Apply - Ok.
- Go back “System Protection” tab - “Create” - Name the restore point as you please - “Create.”
You have now successfully created a restore point and can move on to the actual optimizations.
1) Change Windows' power plan

Power Plan is a Windows setting that regulates power consumption and performance. Changing it to High performance gives priority to maximum performance at the basic cost of additional power consumption.
This setting is not worthwhile for the average user, but for gamers, it is highly recommended. To change the power plan to High Performance, follow these steps:
- Open Start Menu and search for Power Plan.
- Select the option “Choose a power plan” - Select “High performance” option.
2) Clear temporary Windows files

Temporary files, as the name suggests, are files that Windows temporarily creates either to build up a cache so the PC can load things or to safeguard old system files incase of future need.
Normally they are deleted autonomously, but sometimes they can be left hanging for too long. They take up space and slow down your system. Thankfully, you can clear these files yourself. To do so, follow these steps:
- Press “Windows” + “R” while on your desktop - Type “temp” next to open - Click on “Ok.”
- Select all files by pressing “Ctrl” + “A” - Delete them by pressing “Shift” + “Delete” - Click on “Yes.”
- Go to desktop - Press “Windows” + “R” - Type “%temp%” - Press “Ok.”
- Select all the files in the folder and delete like in the previous part.
- Go to desktop again - Open Run as done in the previous step - Type “prefetch” - “Ok.”
- Select and delete all files in the folder.
3) Stop apps from running in the background

Certain windows applications keep running in the background while you play games. They utilize unnecessary resources from your PC and this takes a toll on your game's performance.
You can stop these apps from running in the background by going through the following steps:
- Search for “Background Applications” in the start menu - Select it.
- Put the “Let apps run in background” option “Off.”
4) Set Windows' visuals for best performance

This optimization is based on setting up Windows' appearances and animations for the best performance. Do note that this optimization makes the general operating system navigation and animation look bad. However, if you simply want to prioritize getting high frame rates in-game, this will help out.
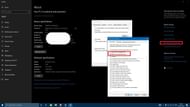
- Open File Explorer - Right Click on “This PC” - Select “Properties” - “Advanced system settings.”
- A new tab will open, click on “Advanced.”
- Select the “Settings” option below performance - Click on “Adjust for best performance.”
5) Turn on Game Mode

Game Mode is a one-step solution from Microsoft to prioritize Windows for gaming. It has immensely benefited games like Forza Horizon 5.
Turning on Game Mode automatically tweaks the system to make maximum use of system resources for gaming. The feature works variably, for certain systems it will heavily improve performance and decrease stutters. However, it can also reduce performance for certain specifications. It is recommended to test it out and see if it works for you.
To turn on the Game Mode, you need to proceed with the following:
- Search for Settings in the start menu and open it.
- Once inside of windows settings, choose “Gaming” - Select “Game Mode” appearing in the left side.
- Turn “Game Mode” - “On.”
By following these steps, your PC will become much faster for a while. While the improvement might not be very discernible in day-to-day tasks, a difference in gaming will definitely become noticeable.
