'%20x='0'%20y='0'%20height='100%25'%20width='100%25'%20%0A%20%20%20%20%20%20%20%20%20%20xlink%3Ahref='data:image/jpg;base64,/9j/2wBDAAYEBQYFBAYGBQYHBwYIChAKCgkJChQODwwQFxQYGBcUFhYaHSUfGhsjHBYWICwgIyYnKSopGR8tMC0oMCUoKSj/2wBDAQcHBwoIChMKChMoGhYaKCgoKCgoKCgoKCgoKCgoKCgoKCgoKCgoKCgoKCgoKCgoKCgoKCgoKCgoKCgoKCgoKCj/wgARCAAGAAoDASIAAhEBAxEB/8QAFgABAQEAAAAAAAAAAAAAAAAAAAYH/8QAFAEBAAAAAAAAAAAAAAAAAAAAAP/aAAwDAQACEAMQAAAA0iiD/8QAIRAAAQQCAAcAAAAAAAAAAAAAAgEDBQYABBESExQVQ1P/2gAIAQEAAT8AYq0tozFUZe3WOo2/PgpAZ+/mIMoUFY0o1dQ5VCPxutxXuXfkOf/EABQRAQAAAAAAAAAAAAAAAAAAAAD/2gAIAQIBAT8Af//EABQRAQAAAAAAAAAAAAAAAAAAAAD/2gAIAQMBAT8Af//Z'%3E%3C/image%3E%3C/svg%3E)
Checking for the graphics card on Windows 11 is not as easy as going to the Settings page and finding the GPU name there. While the CPU name, RAM capacity, and other details are available on the settings page, the graphics card finds no mention there. Fortunately, there are other ways to check for the GPU name.
In this article, we will look at all the ways you can check your graphics card on Windows 11.
How to check the graphics card name in Windows 11
1) Check the graphics card using Task Manager
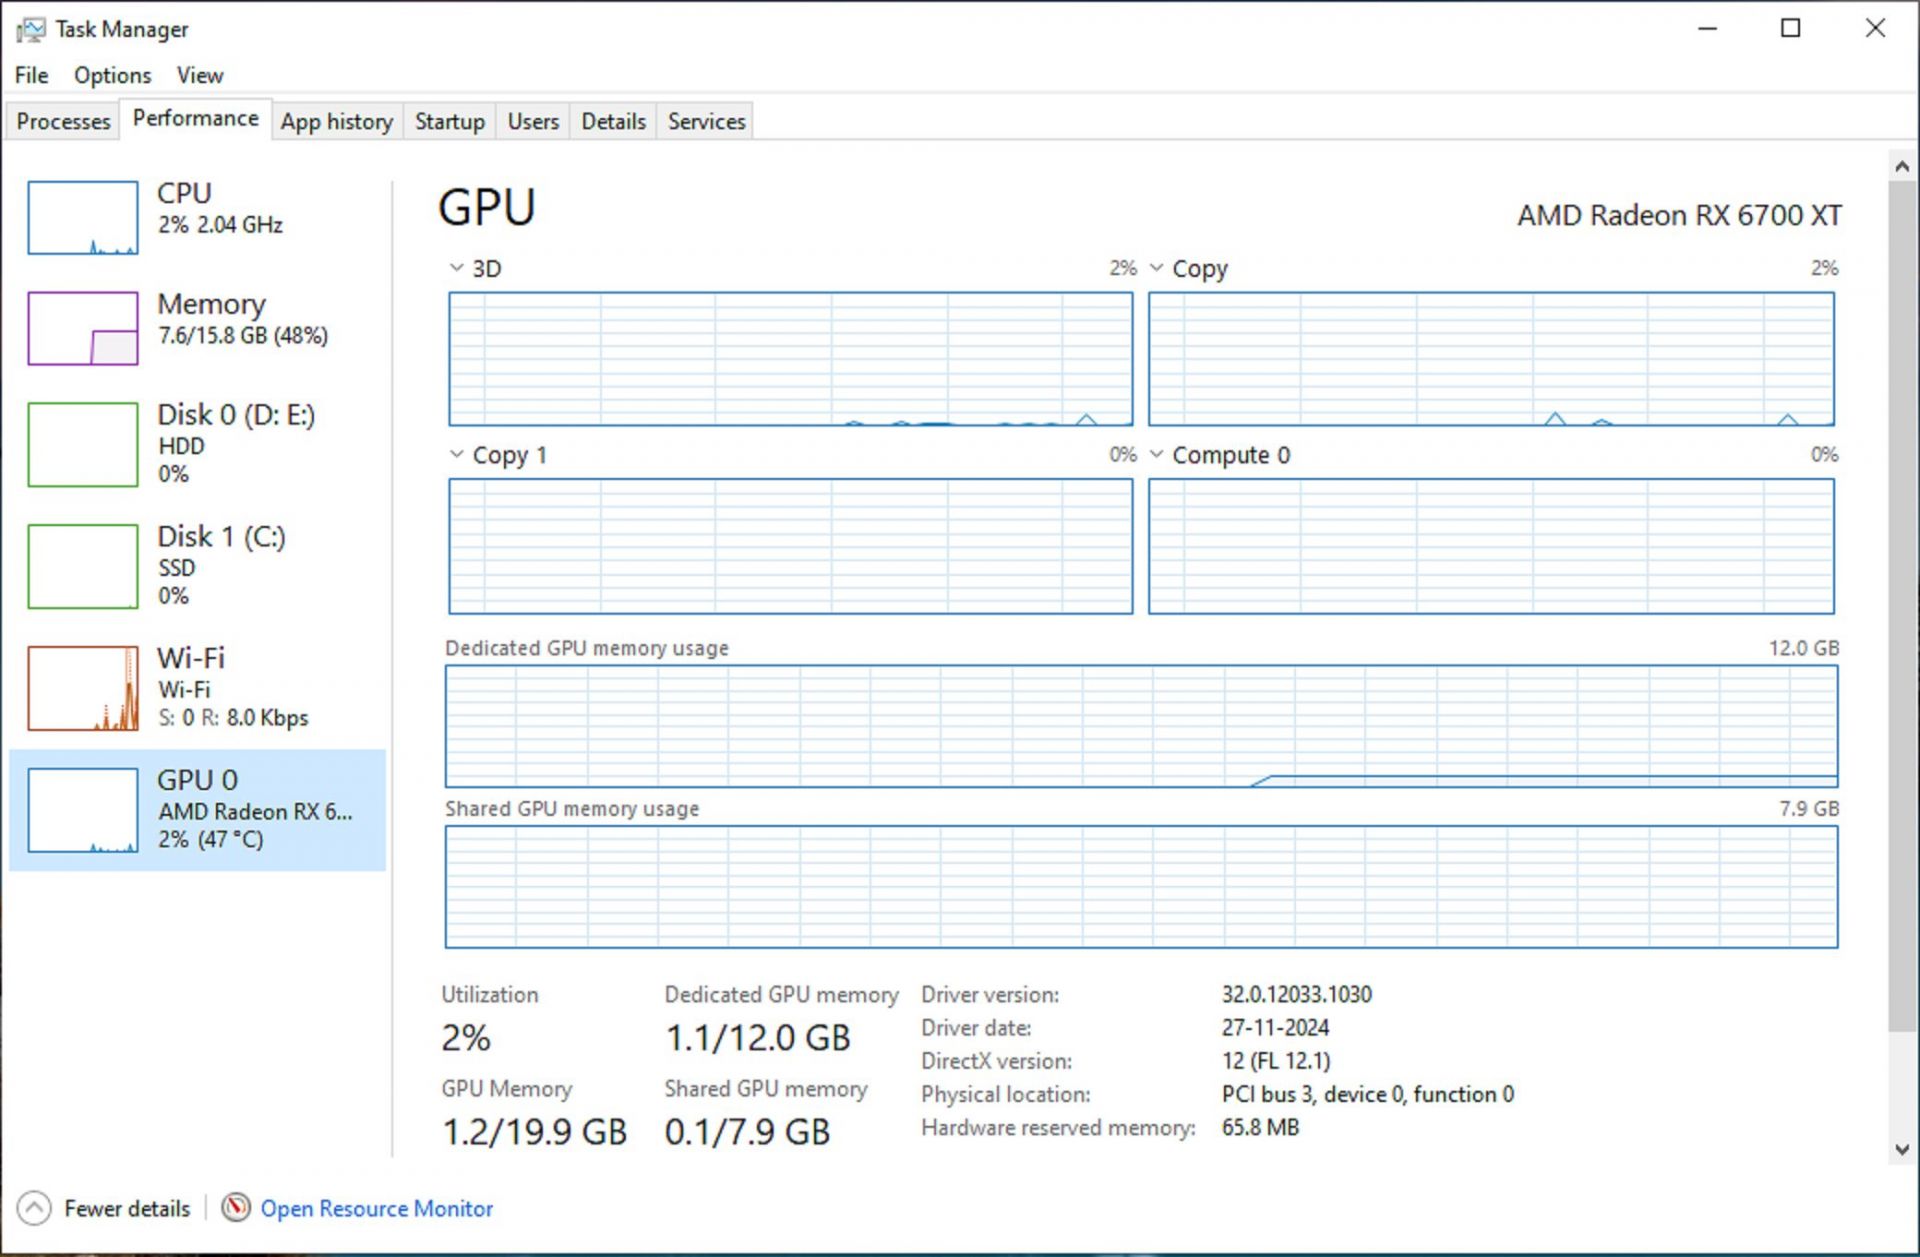
The Task Manager displays all the major hardware components and how they are utilized by your PC. Using the Task Manager, we can easily view your PC's graphics card.
Follow these steps to do so:
- Right-click on the Taskbar at the bottom and select the option Task Manager.
- Once the Task Manager opens, click on the Performance tab at the top.
- Your GPU will be listed at the bottom of the left pane.
- If you have multiple graphics cards (integrated and dedicated), then they will appear as GPU 0 and GPU 1. Click on any one of the entries to reveal the graphics card name.
2) Find the GPU name from Settings
Check the graphics card name using these steps:
- Launch the Settings app and click on System on the left pane.
- Next, click Display on the main screen.
- Scroll down and click on Advanced display settings.
- Your graphics card will be listed below Display Information.
Also read: How to roll back NVIDIA drivers
3) Check the graphics card using Device Manager
Here are the steps to check your GPU:
- Right-click on the Start Menu and select Device Manager.
- Next, check for the Display adapters entry in the list and double-click it to reveal your graphics card name.
4) Launch the DXdiag software to check the GPU
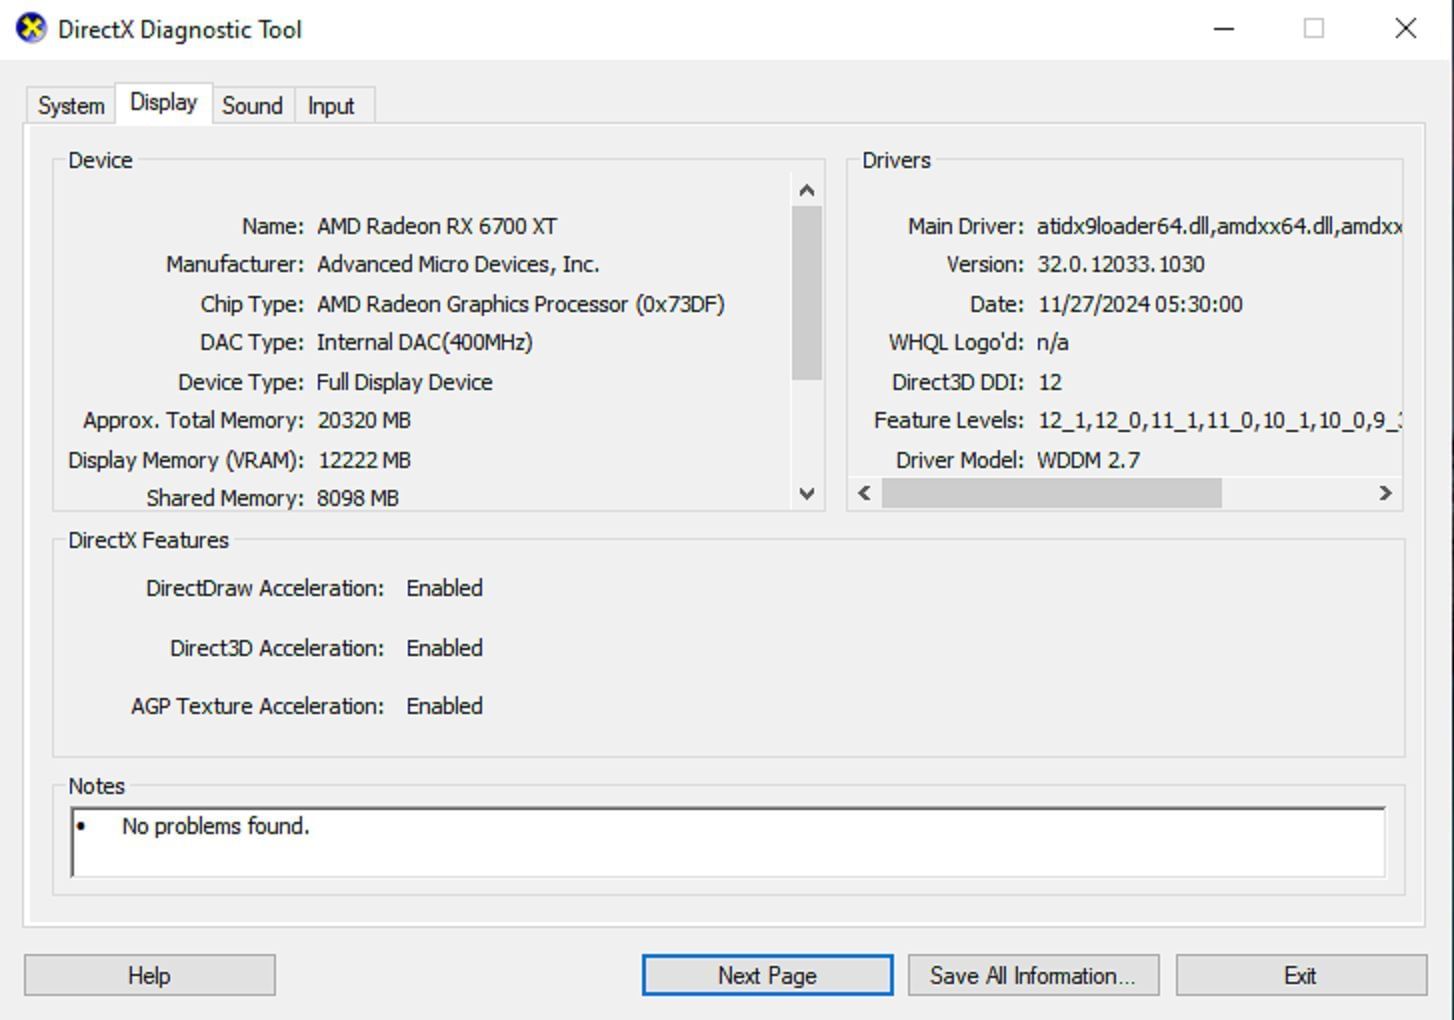
Follow these steps to check the GPU on Windows 11:
- Press the Windows + S keyboard shortcut and type dxdiag, which is a DirectX diagnostic tool.
- Launch the app and click on the Display tab at the top.
- It will show the details of your graphics card.
5) Check for graphics cards using a third-party app
You can also download a third-party tool like CPU-Z to check the graphics card. Simply download and launch CPU-Z, and it will show all the system information, including the graphics card name.
Also read: DirectX Raytracing 1.2 announced with huge visual and performance enhancements