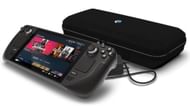
Valve's Steam Deck comes with SteamOS pre-installed, which is a Linux-based OS designed to provide the best handheld gaming experience. However, the majority of games are usually not designed for SteamOS or any other Linux OS. They are designed for Windows OS and often don't run well on Linux. Online multiplayer titles with custom anti-cheat programs may even refuse to run at all.
That's why many players want to install Windows to get the best game compatibility. On top of that, most titles run on Windows OS natively, which often leads to better performance and experience.
This article provides step-by-step instructions on how to install Windows on Steam Deck.
Note: The Windows installation process will wipe all data on the flash drive and Steam Deck itself. Backup all data before proceeding with the installation process.
Installing Windows on Steam Deck
Installing Windows 10/11 on Steam Deck is not as complicated as it sounds. Below, you can find proper instructions on installing Windows on Steam Deck, including all the drivers. We have divided the process into four categories to make it easier for you to follow. Let's begin with the prerequisites.
Prerequisites

Having a few prerequisites that must be ready to use will make the Windows installation process a lot smoother. Here is everything you will need:
- Windows-based PC.
- Latest Windows 10/11 ISO.
- A Flash Drive with at least 8GB capacity.
- A USB-C Dock. (Not necessary with a USB-C powered flash drive)
- Rufus, which is a software tool.
- A Windows license key.
Preparing the bootable media drive

Once you have the prerequisites at your fingertips, we can begin with the second process, which involves preparing a bootable media drive. This will be required for the Windows installation process later. This process must be done on a Windows-based PC.
Here's how to prepare the bootable media drive:
- Insert a Flash Drive with at least 8 GB capacity into the USB port of a Windows-based PC.
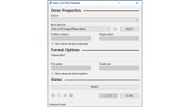
- Launch the Rufus application. You can download Rufus here if it hasn't been downloaded yet.
- Select the USB drive in Rufus if it hasn't been automatically selected.
- Click on the Select button next to boot selection in Rufus.
- A new window will appear, where you must choose the Windows 10/11 ISO. You can download Windows 11 ISO here if it hasn't been downloaded yet.
- Next, click on the Start button to begin preparing the bootable Windows flash drive. Ensure all the data in the drive is backed up to avoid data loss. The process will take a few minutes. You will get a message when it's ready.
You can start updating the Steam Deck firmware while the bootable drive is prepared.
Updating Steam Deck firmware
Updating the firmware of the Steam Deck is necessary to ensure everything works after installing Windows. Follow these steps to update Steam Deck firmware:
- Launch the Settings app.
- Tap on System.
- Next, tap on System Update Channel and choose the beta channel.
- Check for updates and update the firmware to version 3.6.9 or higher. The Steam Deck may restart several times during the installation process.
Windows installation process

With the up-to-date firmware and bootable drive ready, we can begin installing Windows on Steam Deck. Follow these steps to begin the installation of Windows in Steam Deck:
Note: Make sure your Steam Deck is fully charged before proceeding further. Also, any data on the Steam Deck that is not backed up will be lost in the installation process.
- Shut down the Steam Deck completely.
- Connect the bootable USB flash drive to the Steam Deck using the USB-C Dock. A Dock is not needed if you have a USB-C flash drive.
- Hold the Volume Down button and press the Power button for a few seconds. The BIOS screen should appear on the screen.
- Select Boot Manager using the D-pad on your Steam Deck and press the A button.
- Choose the EFI USB device using the D-pad once and press the A button again.
- Wait for the Windows Setup process to end.
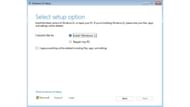
- Choose the language and click on Install Now.
- The setup will ask for a license key. Click on "I don't have a product key." We will use the Windows key later.
- Delete all the partitions you see on the screen and create a new partition using the New button.
- Once the partition is created, click on the Next button. The setup process will begin installing Windows onto the Steam Deck. The device will restart several times during this process.
- Once the installation is over, you will be presented with a device setup screen that includes adding a name, privacy settings, and more. Complete the process according to your preference.
With this done, Windows will be successfully installed on your Steam Deck. However, it isn't quite ready to use since the drivers are missing.
Driver installation process

Windows will not work correctly and games will refuse to run without the drivers. The drivers are available on Steam's website. You must download them on a Windows PC and transfer them to the Steam Deck with the help of a flash drive.
The drivers are different for the two models. Below, you can find the driver installation process for both.
Steam Deck OLED
Here's the installation process for each Steam Deck OLED driver:
- APU driver: Click on the driver name to download it. Once the download is done, you can install it using the setup.exe.
- SD Card reader driver: Download and install it using the setup.exe.
- Wi-Fi driver: Download the driver. Right-click on qcwlan64.inf file and select Install to begin the Wi-Fi driver installation.
- Bluetooth: Right-click on qcbtuart.inf file and choose Install to begin driver installation of Bluetooth. Without the firmware version 3.6.9 or higher, Bluetooth will not work.
- Audio driver 1: Click on the driver name to download it. Right-click on cs35l41.inf file and select Install to begin the first audio driver installation.
- Audio driver 2: Click on the driver name to begin the download. Right-click on the NAU88L21.inf file and choose Install to begin the second audio driver installation.
Steam Deck LCD
Here's the installation process for each Steam Deck LCD driver:
- APU driver: Download and install it using the setup.exe.
- Wi-Fi driver: Click on the driver name to begin download. You can install it using the install.bat.
- Bluetooth: Download the driver. Click on installdriver.cmd file to begin Bluetooth driver installation.
- SD Card reader driver: Download and install it using the setup.exe.
- Audio driver 1: Right-click on cs35l41.inf file and choose Install to begin driver installation of audio driver 1.
- Audio driver 2: Download the driver. Right-click on the NAU88L21.inf file and select Install to begin the audio driver 2 installation.
If you carefully follow all the steps, the process should be moderately easy. With Windows OS, you don't have to worry about game compatibility or getting a low framerate, but it has its own issues, such as the battery life not being up to mark compared to SteamOS.
