
'%20x='0'%20y='0'%20height='100%25'%20width='100%25'%20%0A%20%20%20%20%20%20%20%20%20%20xlink%3Ahref='data:image/jpg;base64,/9j/2wBDAAYEBQYFBAYGBQYHBwYIChAKCgkJChQODwwQFxQYGBcUFhYaHSUfGhsjHBYWICwgIyYnKSopGR8tMC0oMCUoKSj/2wBDAQcHBwoIChMKChMoGhYaKCgoKCgoKCgoKCgoKCgoKCgoKCgoKCgoKCgoKCgoKCgoKCgoKCgoKCgoKCgoKCgoKCj/wgARCAAGAAoDASIAAhEBAxEB/8QAFQABAQAAAAAAAAAAAAAAAAAAAAT/xAAVAQEBAAAAAAAAAAAAAAAAAAACBP/aAAwDAQACEAMQAAAAsgJh/8QAIhAAAQMDAwUAAAAAAAAAAAAAAgMEBQASEwERIQYHFSKR/9oACAEBAAE/ABdSU5OtAg5mSYRyj0EHQ5bCT4HhIR9bflO+4ANHSzbzXVZ4TJO7OGm+1f/EABkRAAIDAQAAAAAAAAAAAAAAAAIDAAEEEv/aAAgBAgEBPwDU41DXE//EABYRAAMAAAAAAAAAAAAAAAAAAAACIf/aAAgBAwEBPwBof//Z'%3E%3C/image%3E%3C/svg%3E)
Connecting dual monitors with MacBook depends on your Mac machine and macOS version. Whether you want more screen real estate, work on multiple applications simultaneously, or a more immersive experience, whether for work or leisure, using a multi-monitor setup can enhance productivity, comfort, and efficiency.
Apart from just connecting, Apple lets users make some adjustments to get a more satisfactory experience. Here's how you can do that.
Note: Part of this article is based on the author's opinion.
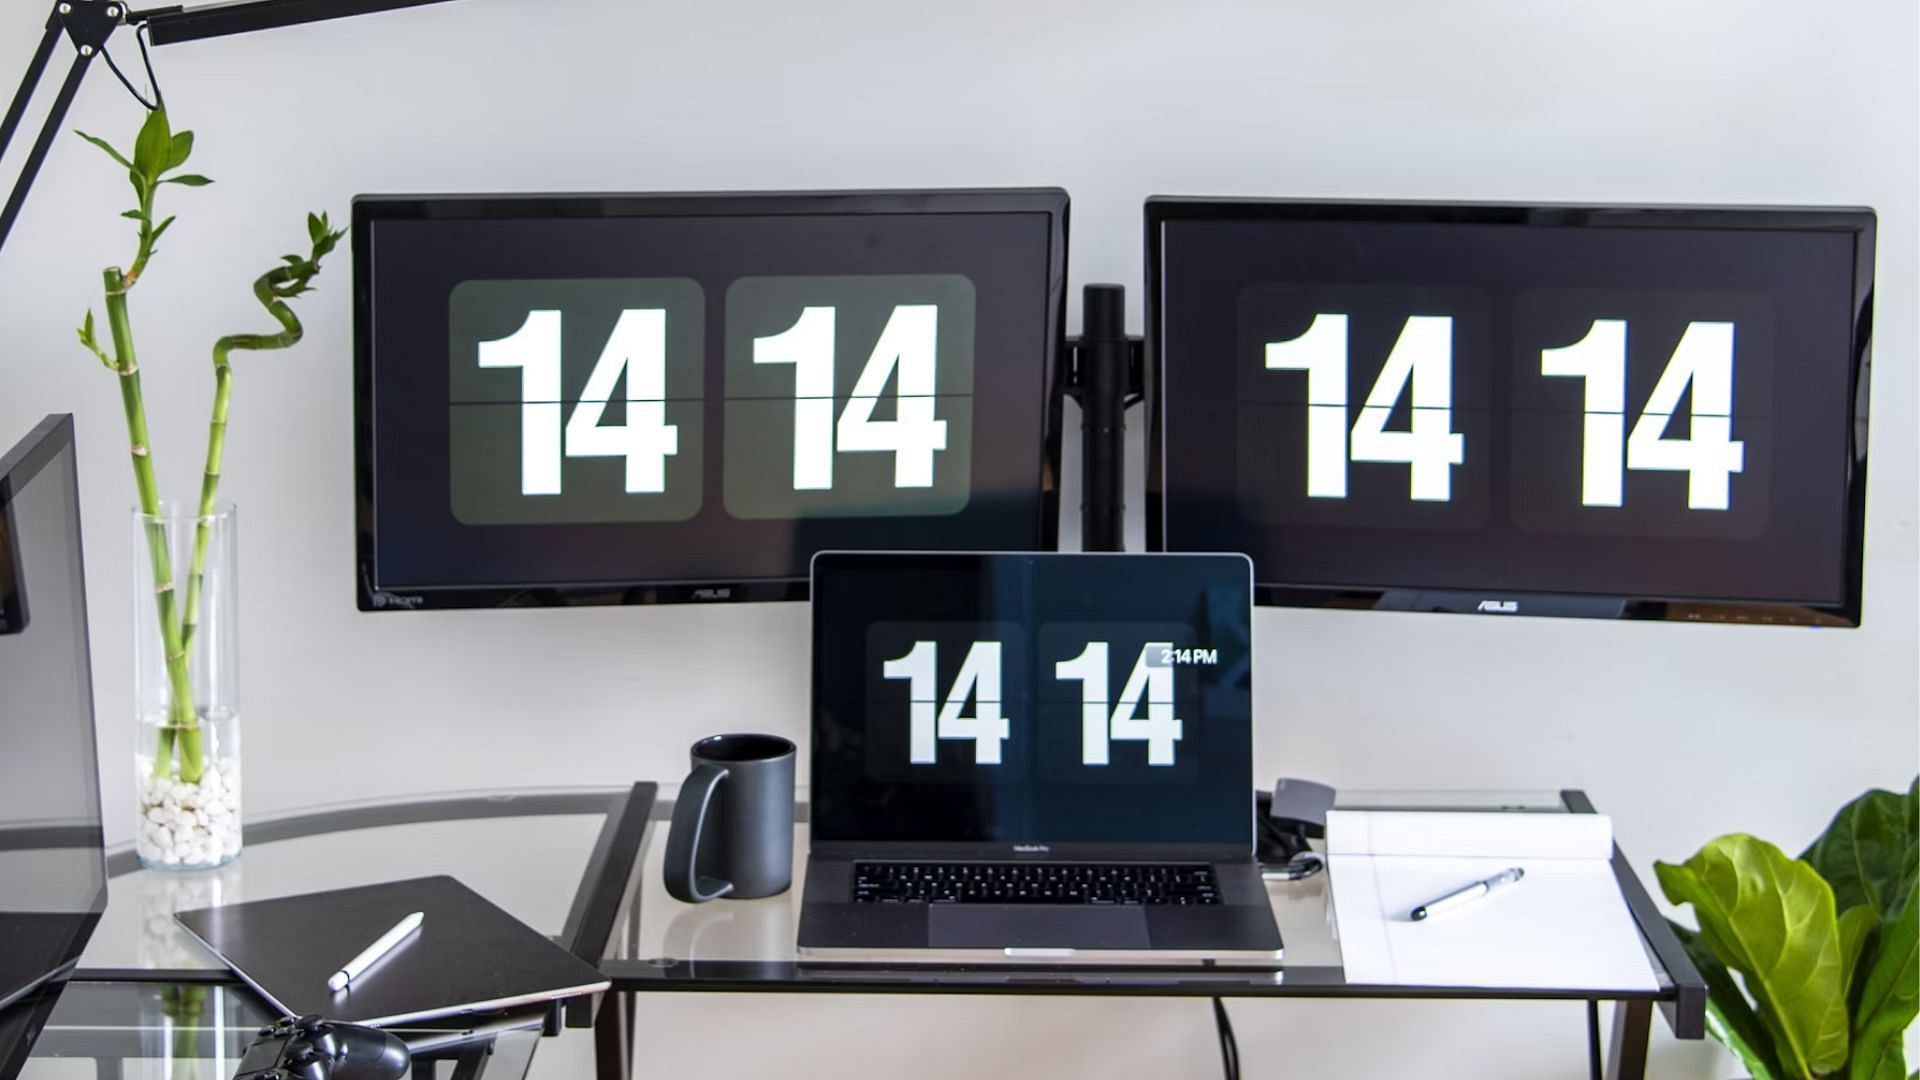
Setting up dual monitors with MacBook
Here’s how to set up dual monitors on a Mac:
Step 1: Check video ports
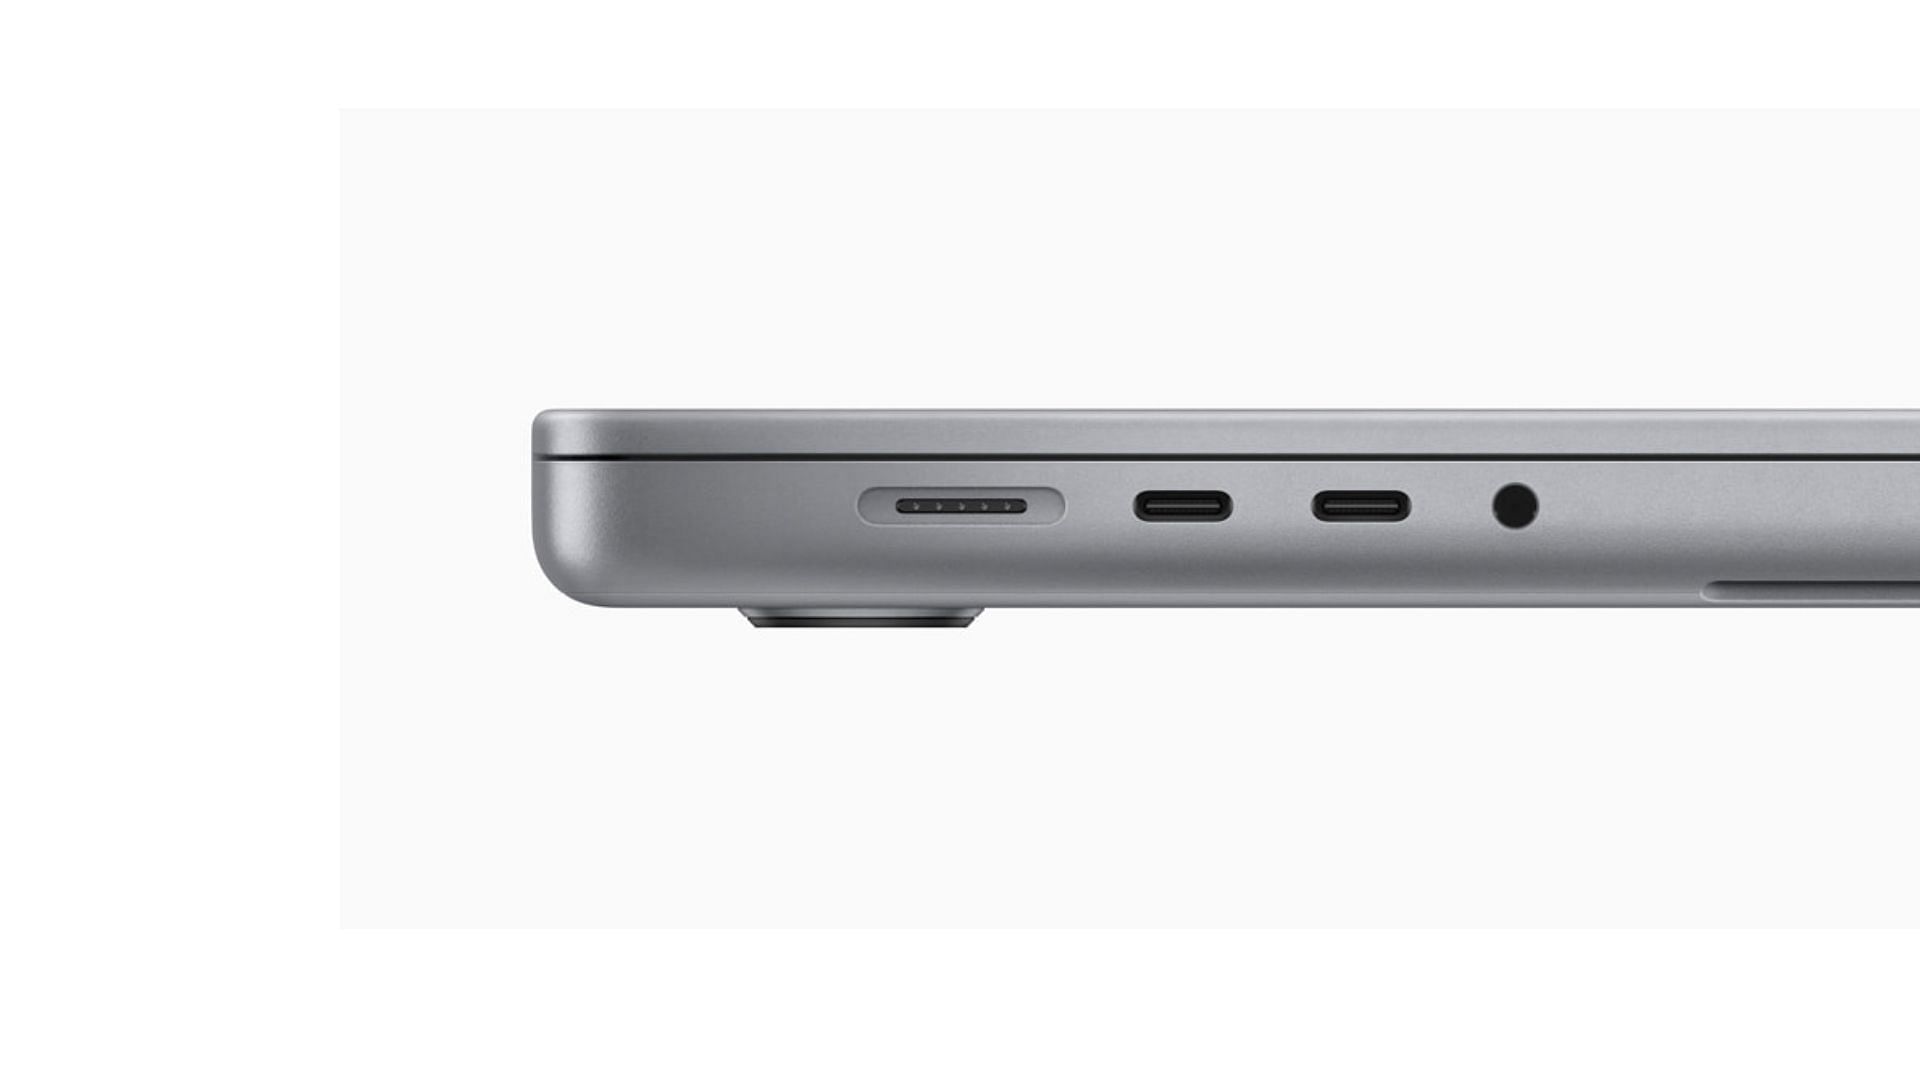
Mac machines come with different video ports, and checking the type of video ports your device has is crucial. Only then will you know the kind of external display and how many of them you can connect to your device.
Check the image given below, to understand more.
Step 2: Check compatibility
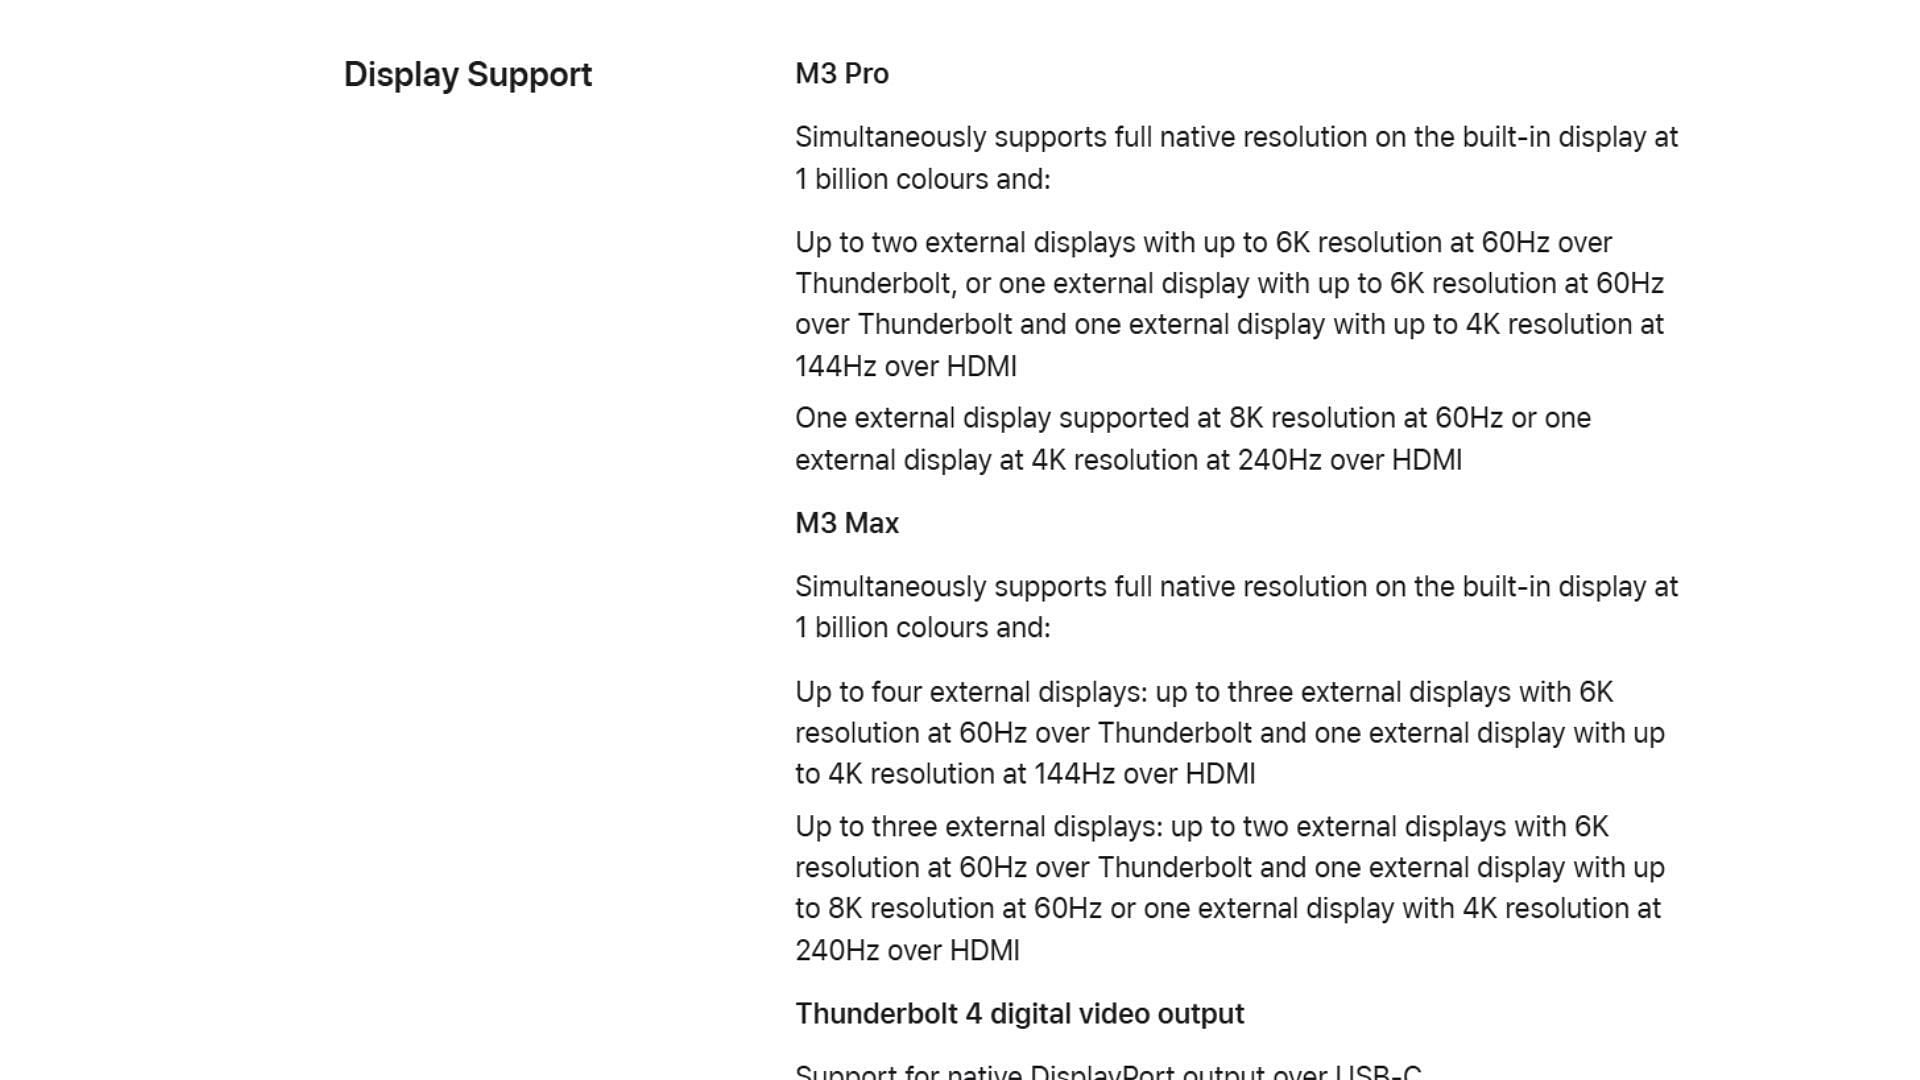
Next, check whether your Mac supports the display you want to connect by going to the Apple Menu. Select System Settings (or System Preferences) and head to Help from the menu bar. Select <your device> Specifications. Look for Display Support (or Video Support). Click on that, and now you can read the complete details about the display that your device supports.
Check the same information on the Apple support website as well.
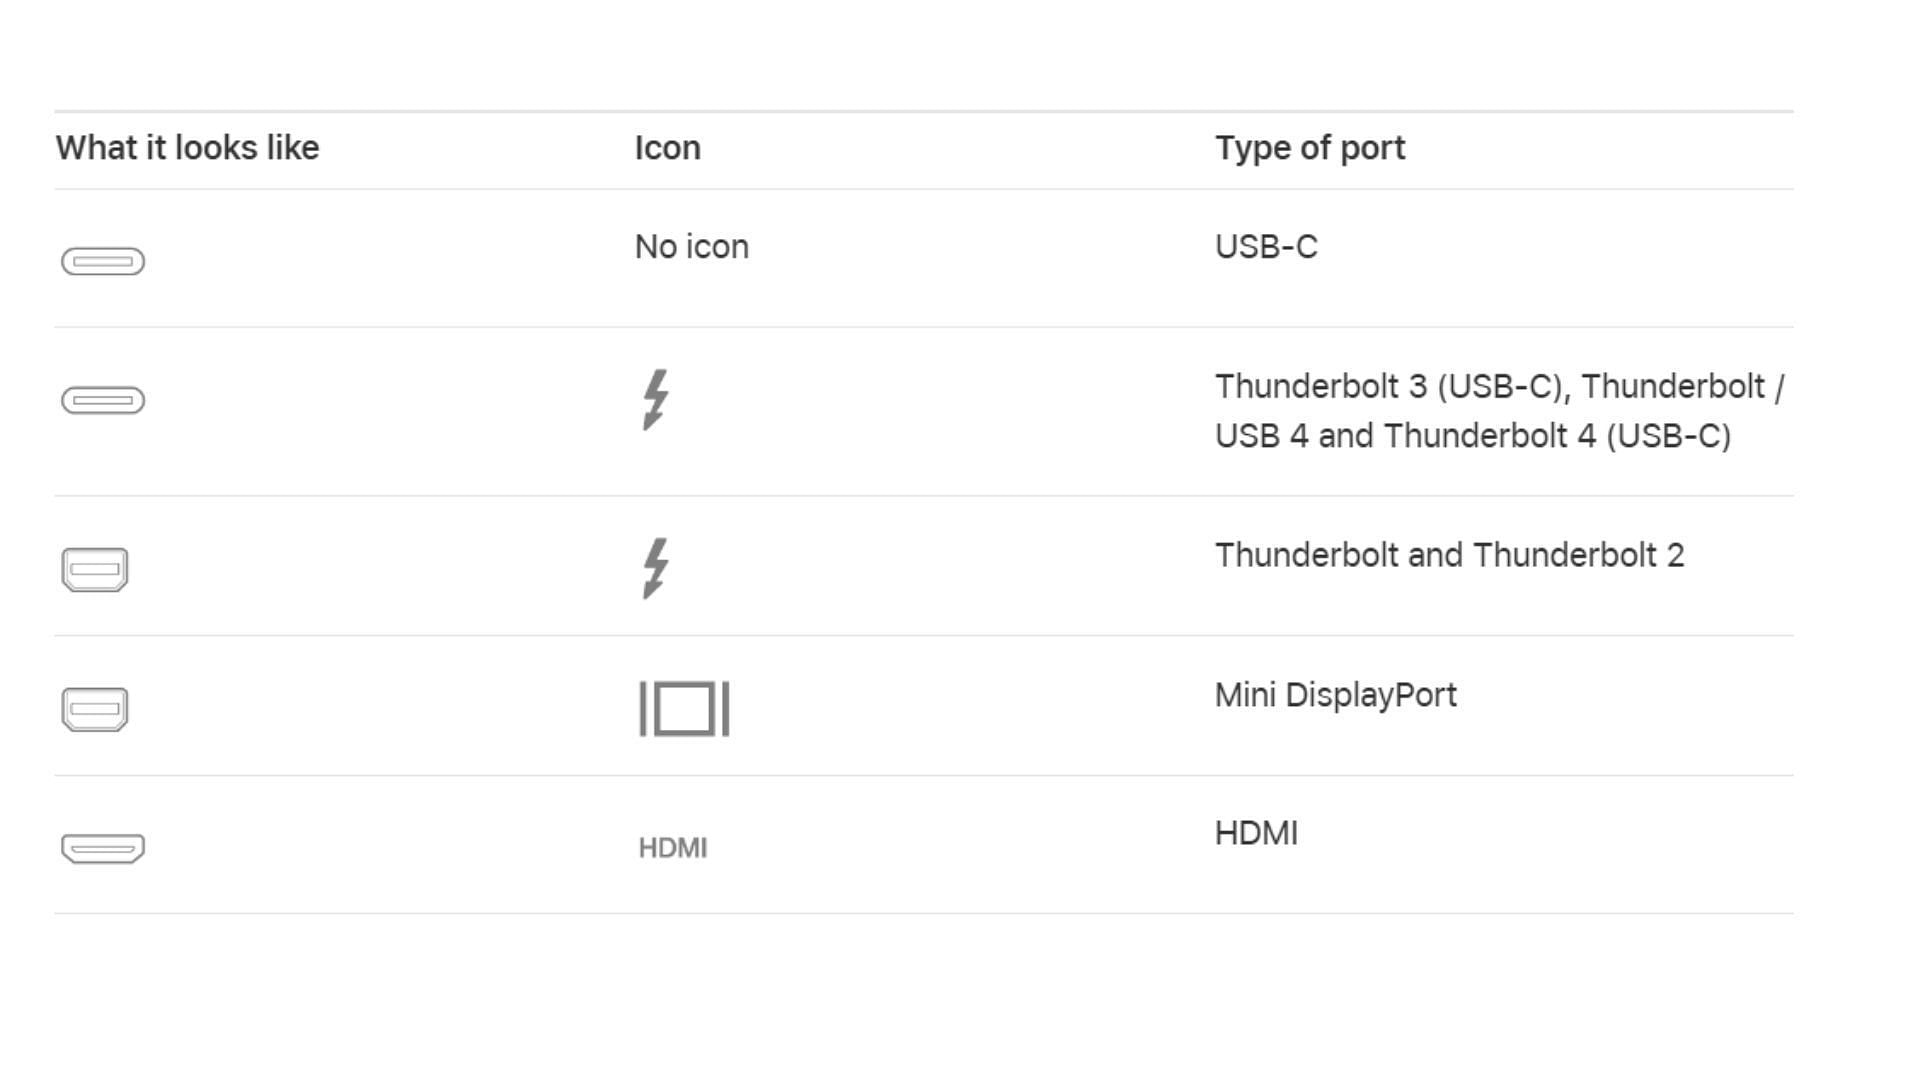
Ports also impact the number of displays you can connect. Below, you can check different port details.
- Mac with Apple M1 Chip: Supports single external display. If you have a Mac Mini (M1), connect additional displays via HDMI port.
- Mac with Mini DisplayPort: Supports up to two displays.
- Mac with Thunderbolt or Thunderbolt 2: Supports up to two displays. If your device has two ports, connect one display to each. Otherwise, you can connect one display to another (with Thunderbolt) and then connect it to your machine.
- Mac with Thunderbolt 3 (USB-C): Supports single display to each port. If you connect multiple Thunderbolt devices, the screen must be the last device in the chain. This ensures the video signal can be properly transmitted.
- Mac with Thunderbolt 4 (USB-C) and HDMI: Support up to eight external displays, based on the Mac model you have.
M2 and older MacBook Airs don't support dual external monitors.
Step 3: Connecting dual monitors with MacBook
Link your displays to your Mac using the specified video ports, cables, and any necessary adapters. Turn your device on, and most likely, it will automatically detect and activate the external monitor(s).
Note that you will need an adapter to get it running on the M3 MacBook Air.
Step 4: Adjusting the settings
Once your displays are connected, adjust their settings by selecting the Apple Menu and System Settings (or System Preferences).
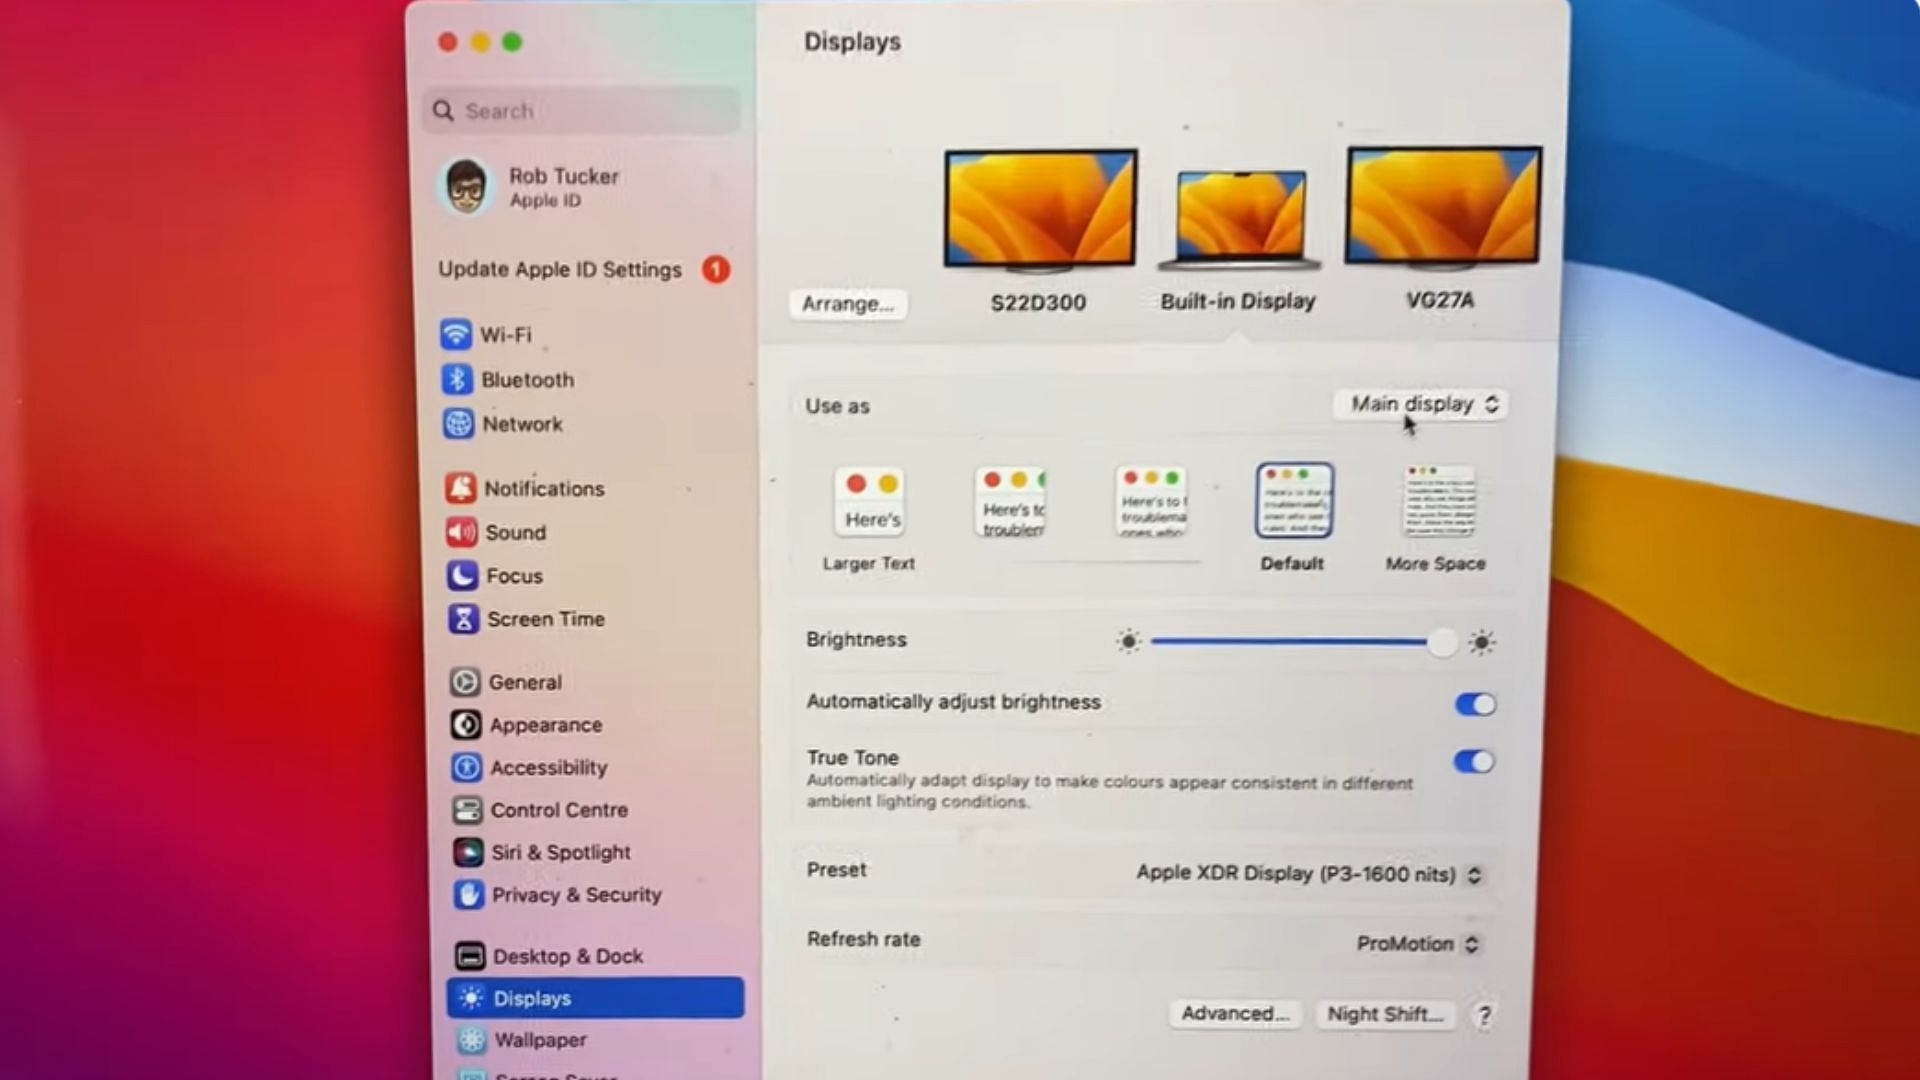
Next, click on Display. You will now be on the display’s settings window. Here, adjust the resolution, brightness, and color profile. Choose which display to use as primary and secondary based on your preferences.
Best power adapters to connect dual monitors with MacBook M3
1) EZQuest USB-C Multimedia 8-Port Hub
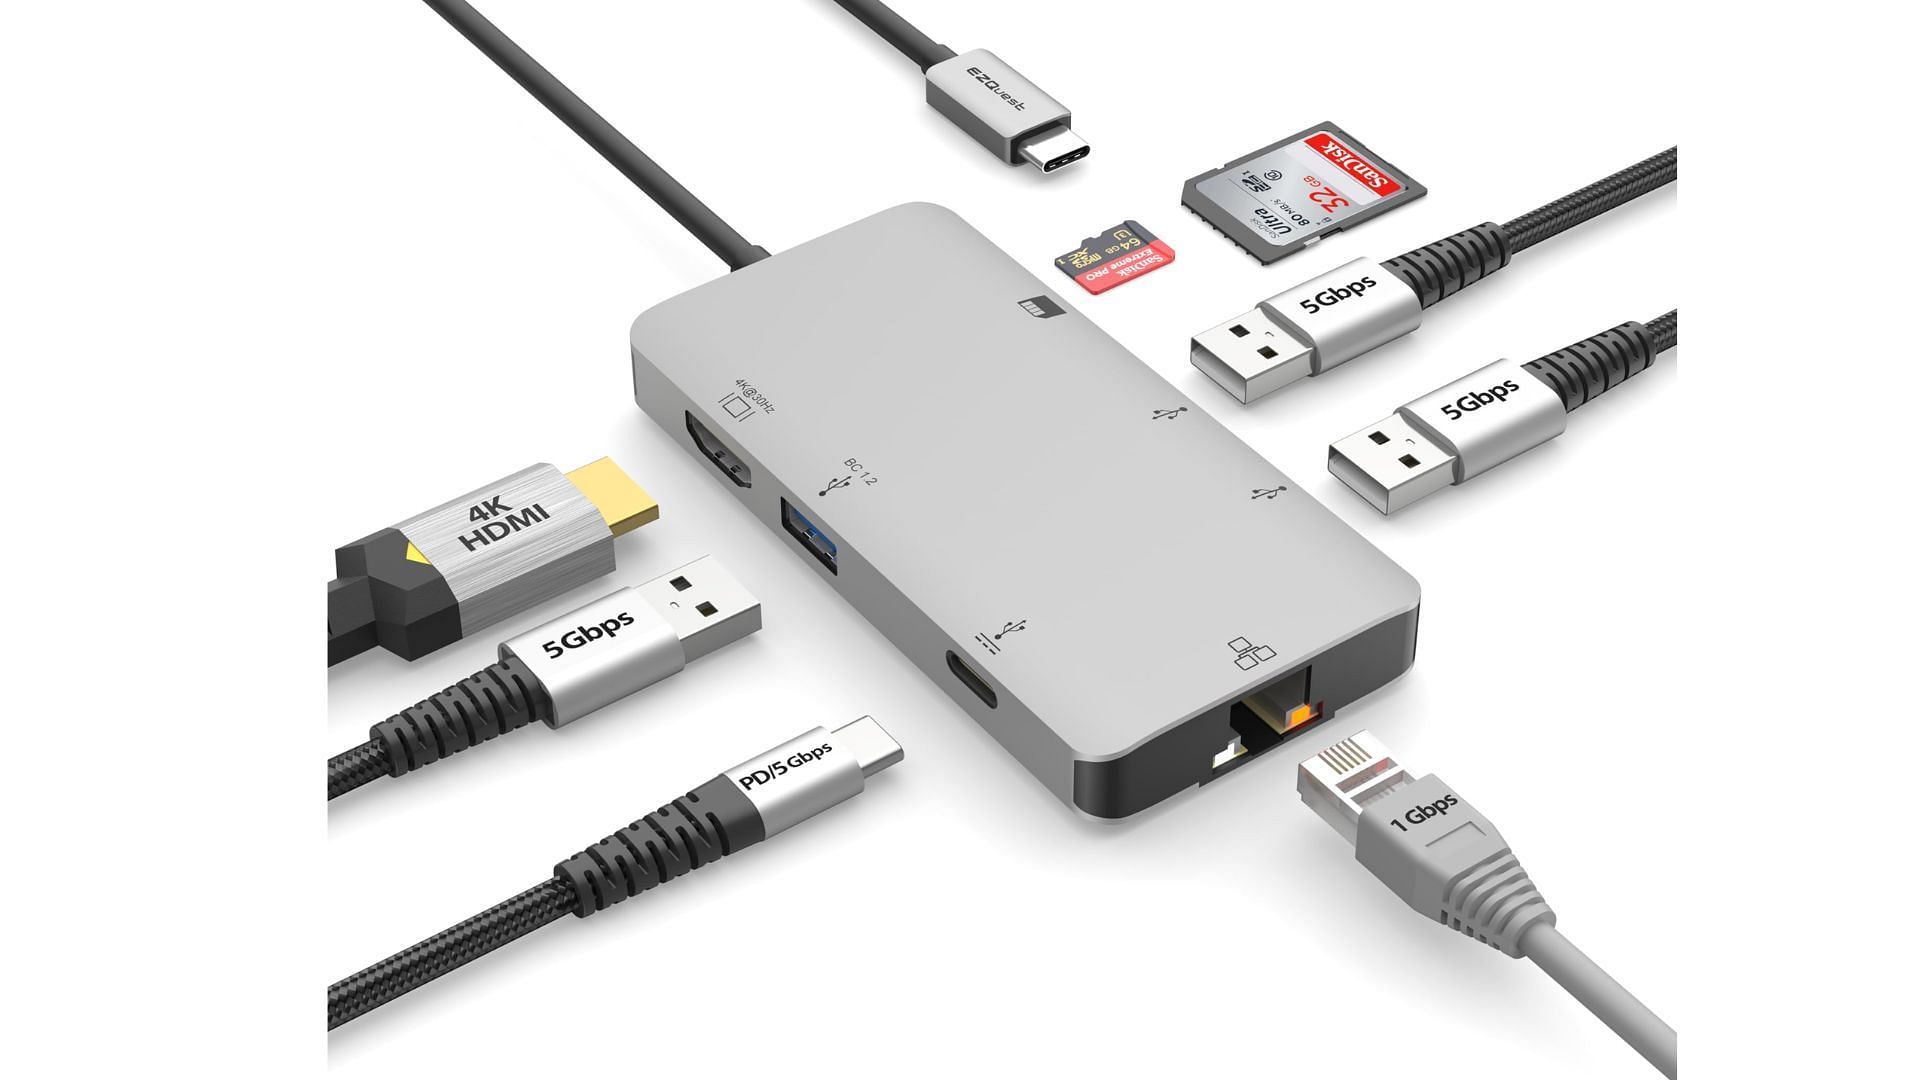
It is one of the best USB-C hubs that provides all the essential ports. You get an HDMI that supports resolutions up to 4K at 30Hz. The USB-C pass-through provides 100 watts for power delivery, with 15 watts dedicated to powering the hub.
Handy labels are printed on top, making it easy to identify each port. You can get it for around $49. Thanks to its aluminum body, it is highly durable.
2) Anker 555 8-in-1 USB-C Hub
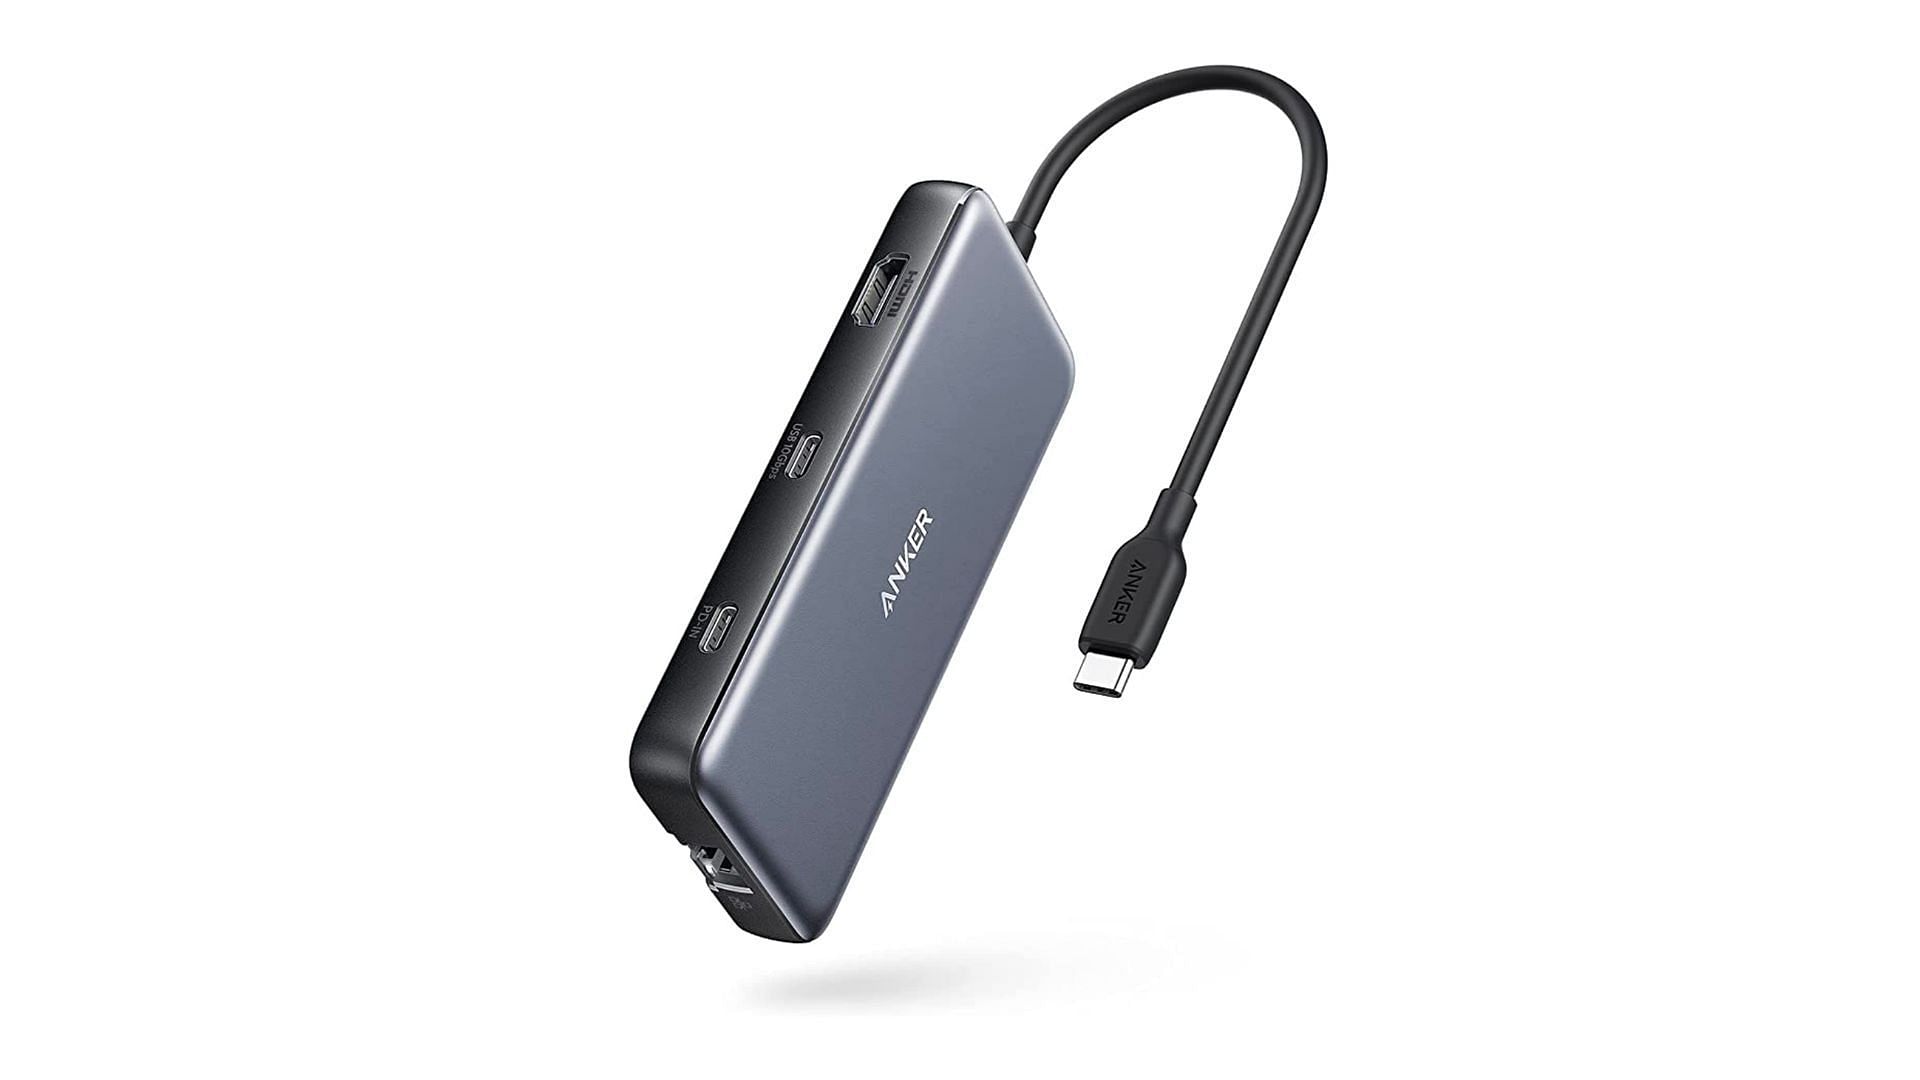
Next, we have the Anker 555 8-in-1 USB-C Hub. You get USB-A ports, an HDMI port, a USB-C port, and Ethernet. In my opinion, it strikes a good balance of ports and price. It is available at $49. That said, there's a 5Gbps USB-C connection for data and a second USB-C port for power input rated up to 85 watts.
The stand-out part about this hub is that its HDMI port is capable of a 60Hz refresh rate, making it a highly recommended adapter to connect dual monitors with MacBook Air M3.
3) Monoprice 5-in-1 USB-C Hub
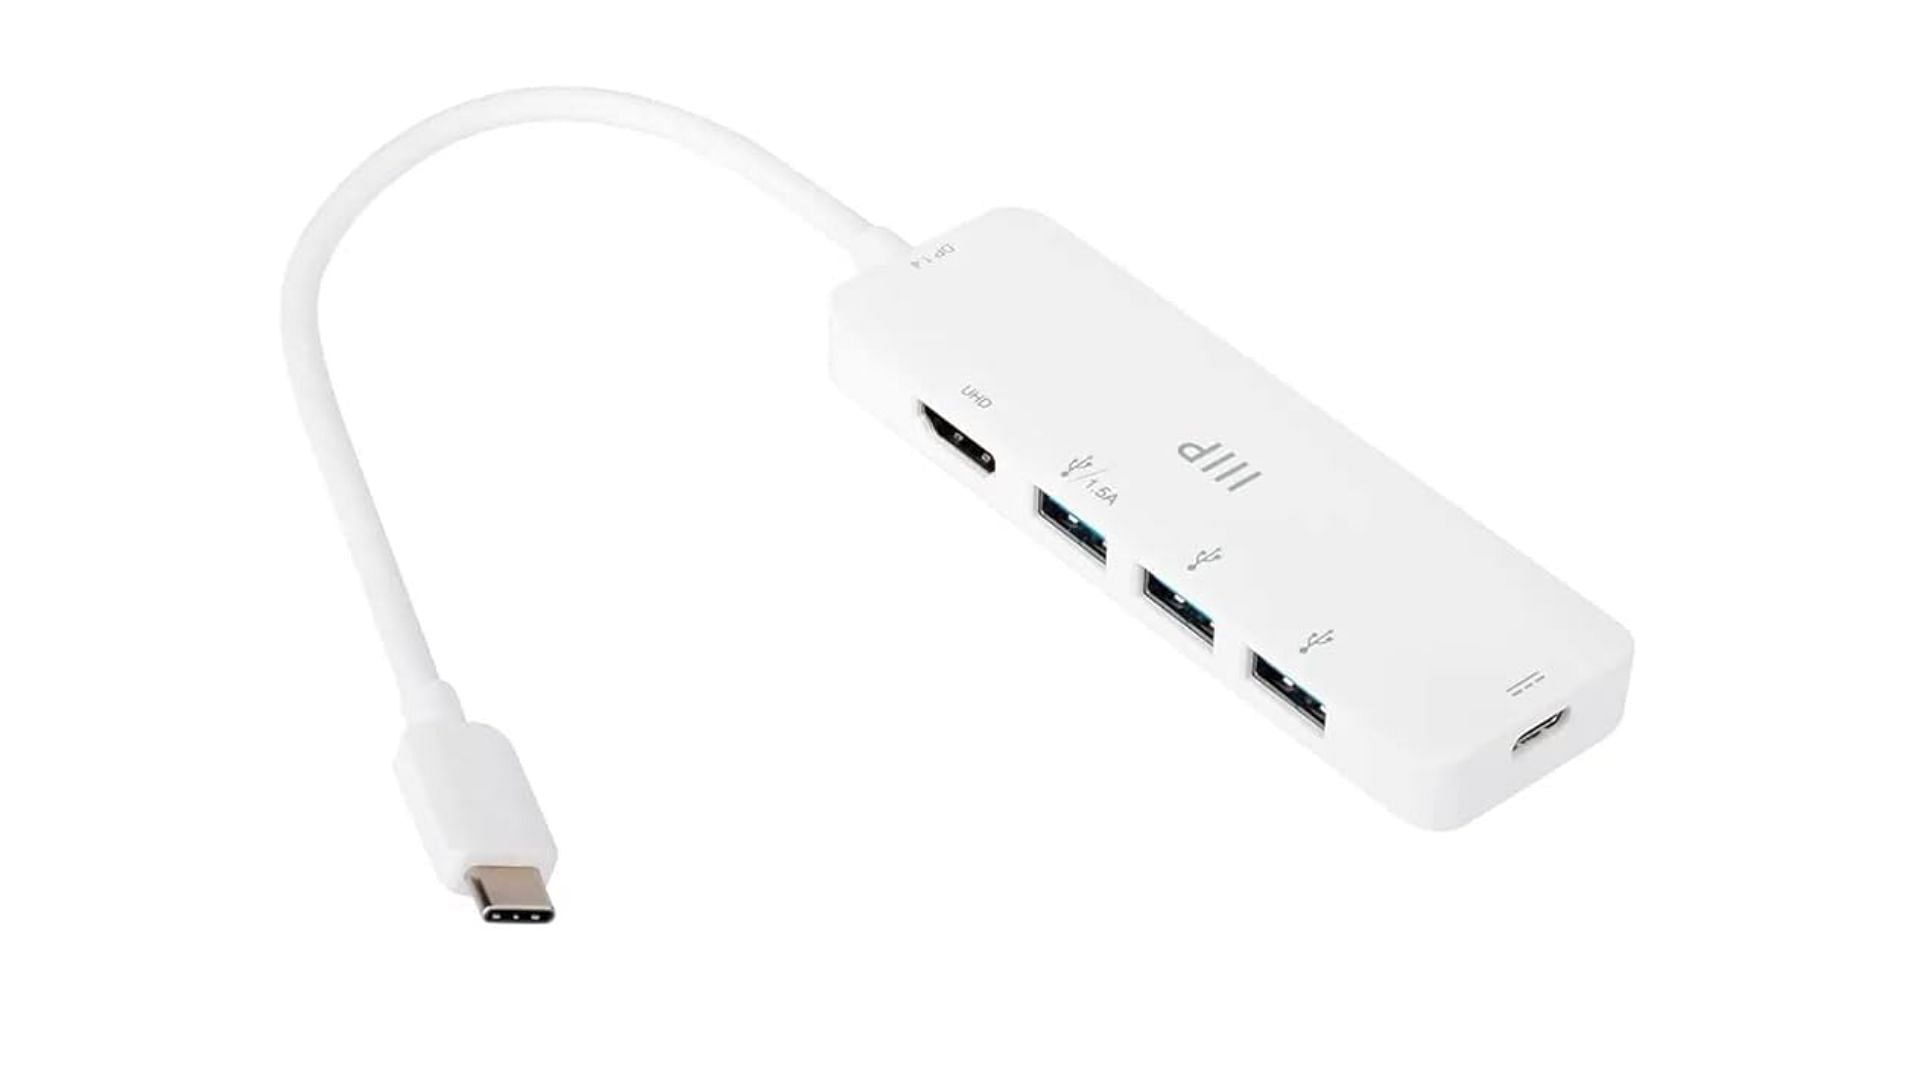
If you want something with a lower price tag, consider the Monoprice 5-in-1 USB-C Hub. With a price tag of just $22, you get 3 USB-A 3.0, 1 USB-C PD, and 1 HDMI that supports 4K at 30Hz. I think that is more than enough to get the work done.
Unlike other options, the build is plastic. But it feels premium and is durable. It can also be used to charge your laptop when connected.
That’s all the information that you might need to use dual monitors with MacBooks.
Check other guides:
- How to reset your Apple ID password
- How to back up Steam Deck SSD?
- How to restore your Mac from a backup?
