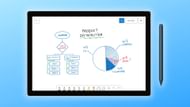
Windows 11 introduced the Microsoft Whiteboard back in September 2021. This app can be extremely useful for brainstorming ideas, taking meeting notes, or drawing roadmaps. The possibilities are endless and depend on the creativity of the users.
However, the Microsoft Whiteboard app is not a Windows 11 exclusive. Mac users can download and use this powerful software via the App Store.
The newly introduced software leaves users guessing how to use it. The Microsoft Whiteboard comes with dozens of features that allow the creation of beautiful designs. However, beginners can get confused with this software.
A beginner's guide to Microsoft Whiteboard

The Microsoft Whiteboard comes pre-installed on Windows 11 devices. Users on Apple devices will have to pick the app via the App Store. Users on an Android device can download the app via the Google Play Store.

Once the app has been downloaded and installed, start it up by following these steps:
- Press the Windows key + S at the same time. This will open up Search for you.
- Now, type in Whiteboard.
- Open the app by pressing the Enter key.

Once the app has loaded, users will be greeted with an interface similar to the one above. Upon starting it up for the first time, recent projects will not be shown. Click on the New Whiteboard option to continue.

Once the blank whiteboard is loaded, many users may be surprised to see an empty UI. Microsoft has done an incredible job of keeping the focus on the content being created with this app.
The status bar at the top has the following buttons:
- Home button
- Undo button
- Redo button
- Whiteboard switching button
Users can utilize all of these buttons to navigate around the app easily.
The ribbon icon in the upper left corner contains options allowing users to create. The available tools are listed below.
- Select tool: The Select tool can be used to select any part of the drawing.
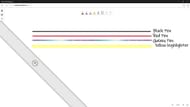
- Inking tool: The Pen tool can be used to attach a hand-drawn doodle.
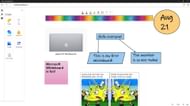
- Create tool: The Create tool can be used to attach text boxes, figures, emojis, etc.
The ribbon in the bottom right corner allows users to zoom in and out of the whiteboard. Users can also choose to view all of the content at once using the Fit to Screen tool.
More about the Inking tool

The inking tool can be accessed via the keyboard shortcut Alt + W. Users can use this tool to create doodles on the whiteboard by following these steps.
- Select the Inking tool by clicking on it or pressing Alt + W on the keyboard.
- Use the various types of pens to create a doodle.
More about the Create tool

The Create tool will help users organize and computerize their Whiteboard. It has the following tools:
- Notes: This tool can be used to add small snippets of text to the whiteboard.
- Text: The text tool can be used to add text bodies throughout the canvas.
- Shapes: The shapes tool can be used to highlight text, add pointers, and represent the flow.
- Reactions: The reactions tool can be used to add highlighters, highlight important points, and tasks.
- Images: The Images tool can be used to insert any image from the device into the canvas.
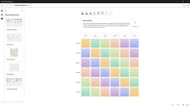
- Templates: Microsoft Whiteboard has several in-built templates to choose from. These templates will help users speed up their design process.
- Documents: The Documents tool can be used to insert any page from any document into the canvas.

The Whiteboard app comes with a plethora of tools, designs, and templates to allow users to create stunning designs for presentations, classes, or simply brainstorm ideas.
Conclusion
Overall, the Whiteboard app is fairly easy to use. Microsoft has made the app available on several platforms. This will help users develop creative designs on all their devices and even on the go.
