
'%20x='0'%20y='0'%20height='100%25'%20width='100%25'%20%0A%20%20%20%20%20%20%20%20%20%20xlink%3Ahref='data:image/jpg;base64,/9j/4AAQSkZJRgABAQAAAQABAAD/2wCEAAMDAwMDAwQEBAQFBQUFBQcHBgYHBwsICQgJCAsRCwwLCwwLEQ8SDw4PEg8bFRMTFRsfGhkaHyYiIiYwLTA+PlQBAwMDAwMDBAQEBAUFBQUFBwcGBgcHCwgJCAkICxELDAsLDAsRDxIPDg8SDxsVExMVGx8aGRofJiIiJjAtMD4+VP/AABEIAAUACgMBIgACEQEDEQH/xABdAAEBAQAAAAAAAAAAAAAAAAAABQgQAAICAQQDAAAAAAAAAAAAAAECAwQABRESMQYTIQEBAAAAAAAAAAAAAAAAAAAABhEBAQEBAAMAAAAAAAAAAAAAARECAAMEEv/aAAwDAQACEQMRAD8AwJ4lrGn0UsxW9IrX1sCLf2nYqEbkeJA+E9E5Fuy0prliSGkkETzOyQhiRGpO4UE9gYxiIZ4cIFVrDjGq+zsdamcgH0wLe//Z'%3E%3C/image%3E%3C/svg%3E)
The Snip & Sketch is by far the most accessible and easy-to-use capture tool for Windows users. While there are many available that can help one obtain screenshots and edit them on the go, this offering allows one to use more editing options for even the simplest of tasks.
The in-built Windows Snipping tool is one of the most commonly used widgets. While the program allows one to capture an area of the screen on the go, the software is very much limited to today's standards. Consumers usually look for a capture widget with more tools to work around with.
This article will provide a brief guide to readers who are looking to pick up the snipping widget in Windows.
Steps to install the Snip & Sketch tool on Windows and use it
For users who haven't used the program before, here's how one can access Snip & Sketch in Windows 10 and 11:
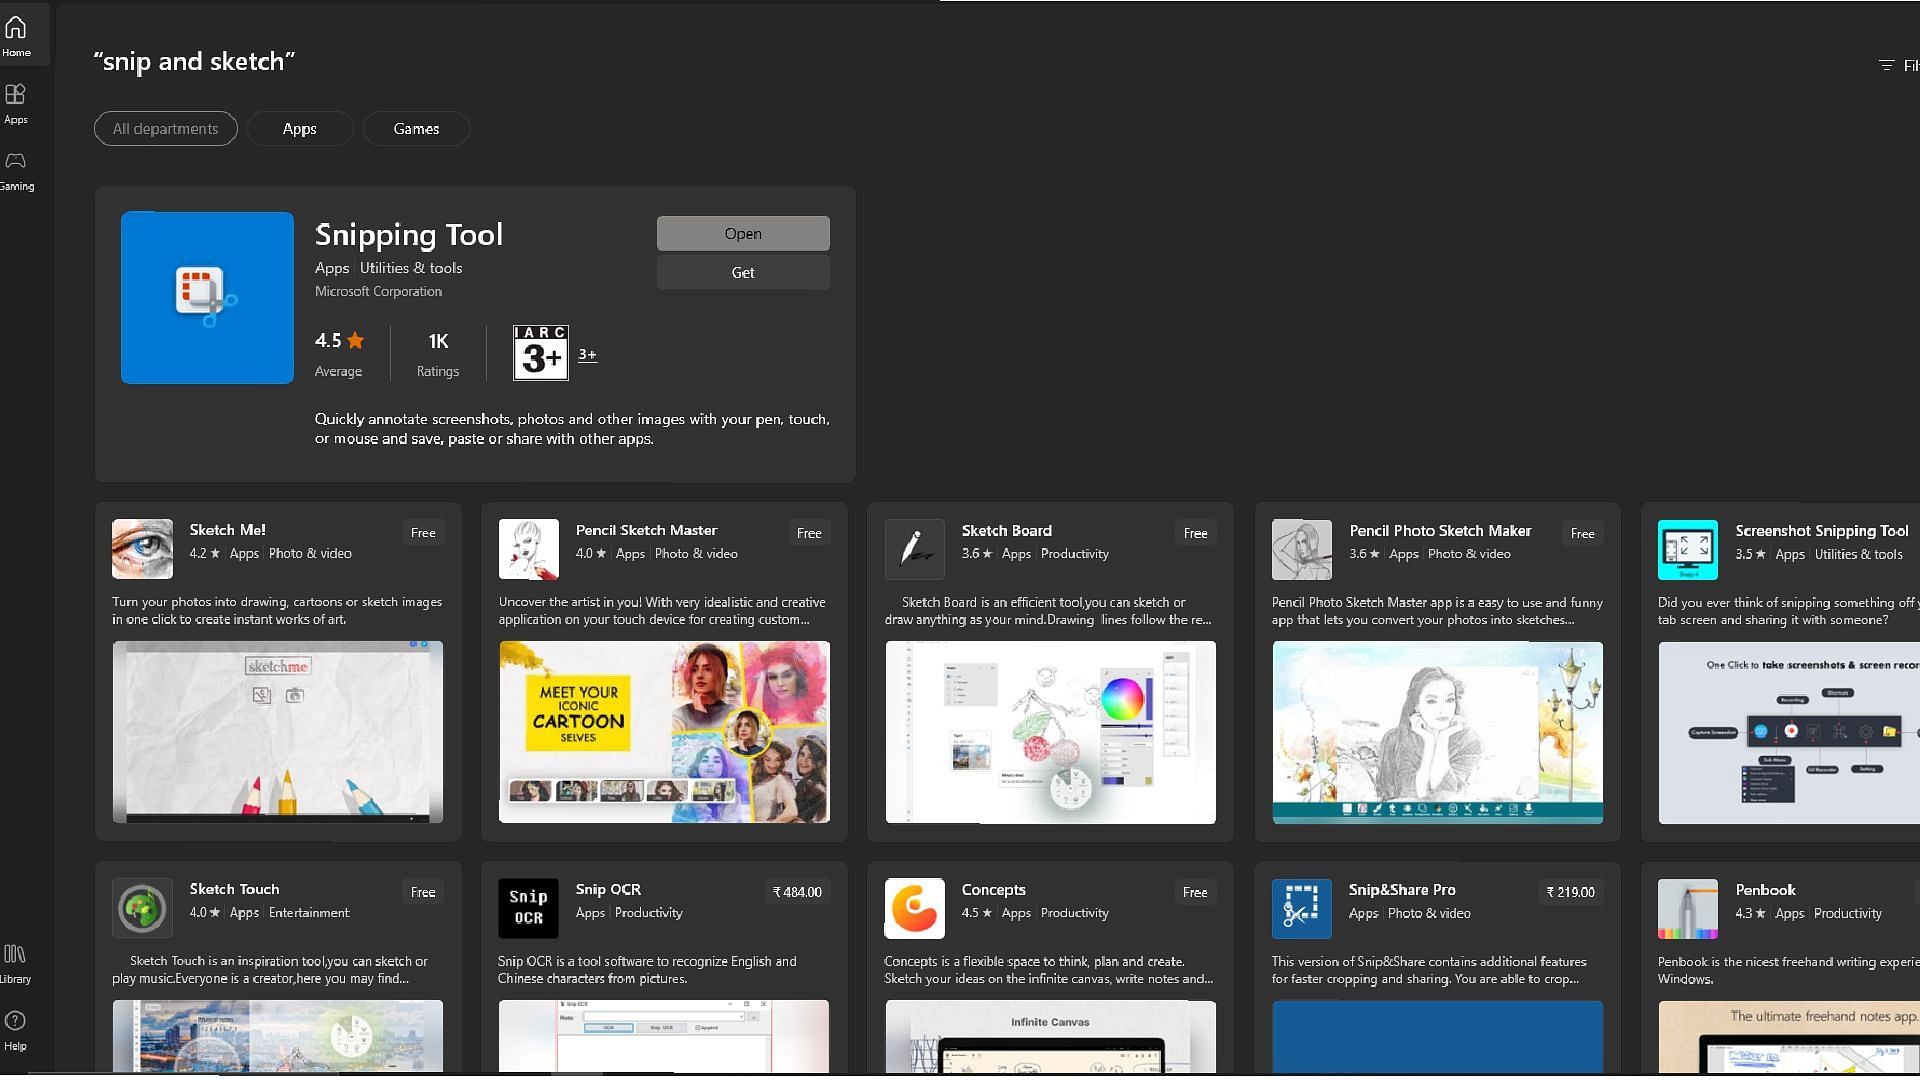
- Navigate to the Windows search bar and type Microsoft Store.
- Open it and look for the "Snip & Sketch" tool.
- Click on the Install option. (It should be pre-loaded on your system if the OS was installed prior to 2018)
- Open the program from the Microsoft Store and pin it to the Taskbar for more accessibility.
The program is particularly easy-to-use once installed, and should be already present in most systems.
Taking screenshots and other uses of the Snip & Sketch tool in Windows
Users have more freedom to customize their capture area with this tool. Compared to the regular Snipping Tool that comes attached with all Windows devices, the Snip & Sketch delivers three extra options to the users. Readers will be happy to learn that these features are just a few clicks away.
Here's how you can utilize all the snip options:
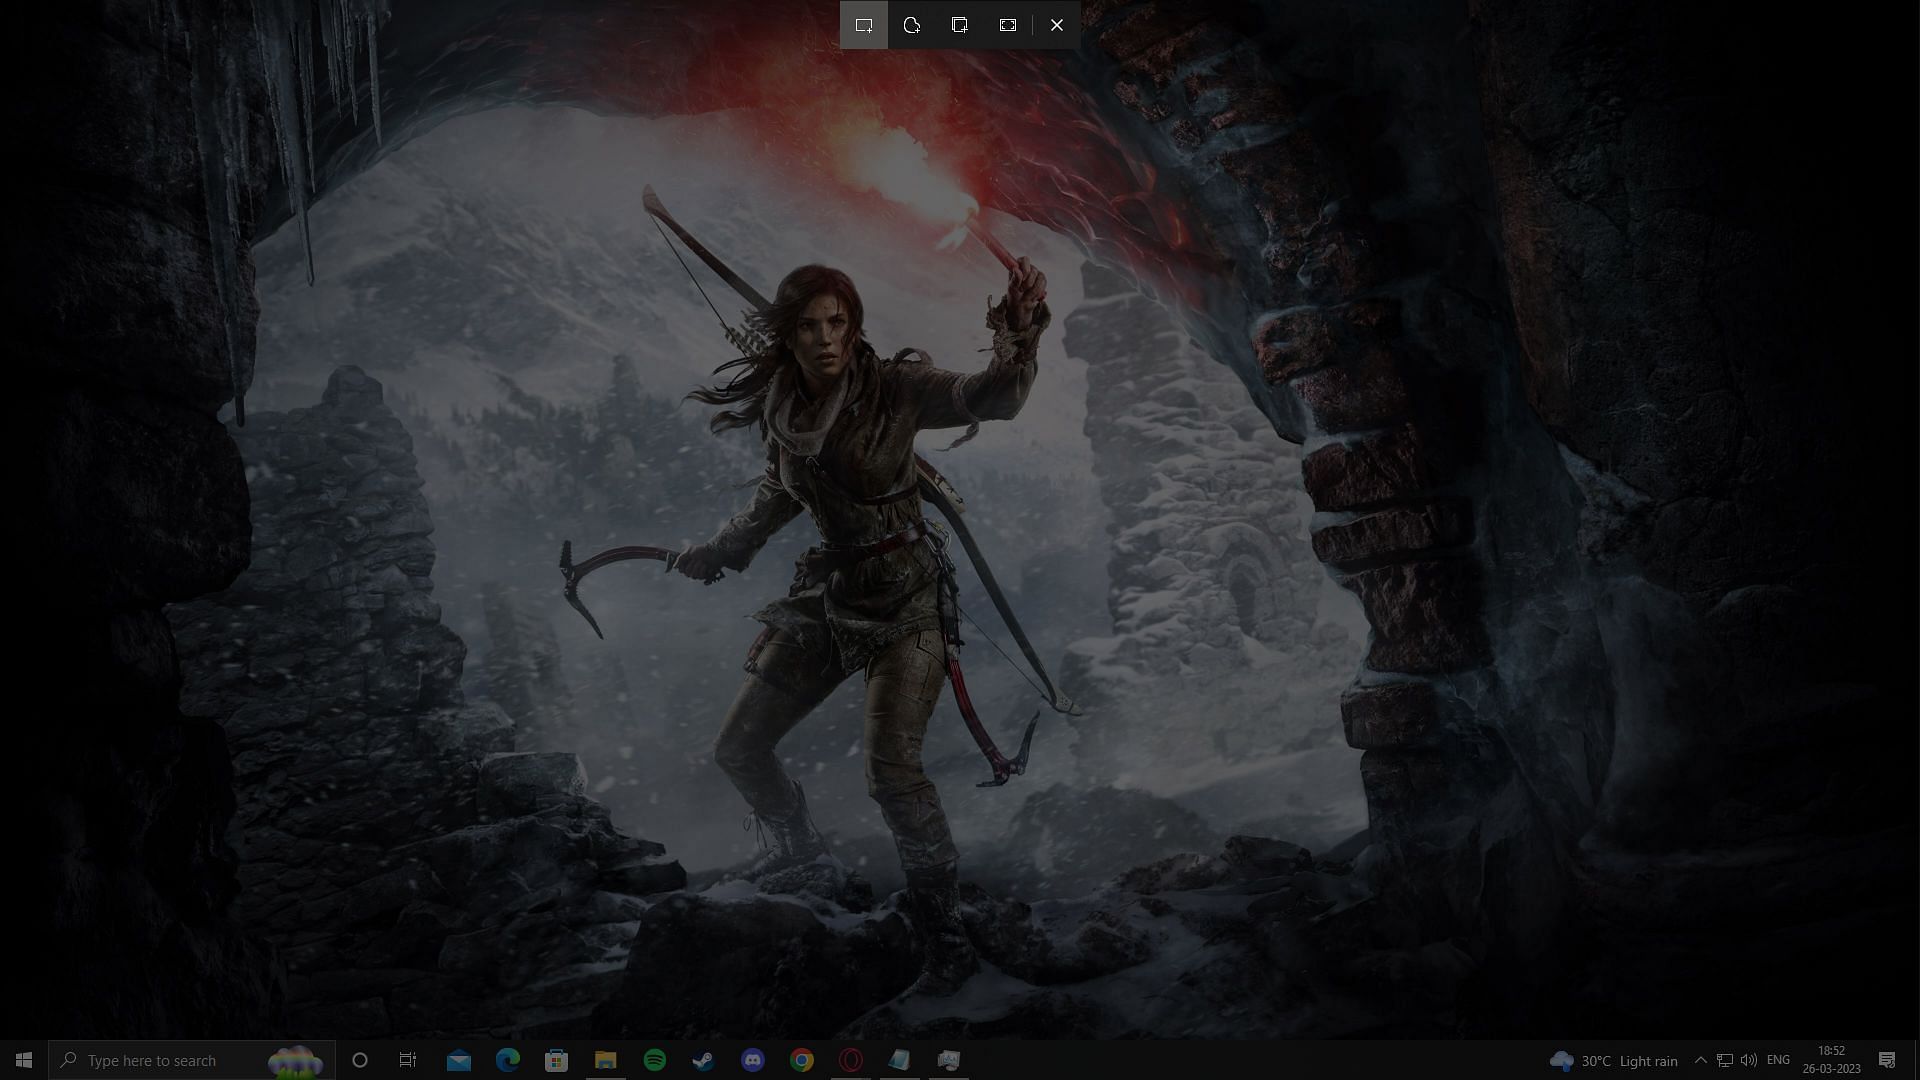
- Press Windows+Shift+S keys together on your keyboard to launch the tool. The widget should appear as shown in the above image, overlaid on your pre-running applications.
- Once the widget appears, you can select any of the four needed options from the top of your screen. These include rectangular, freeform, window snip, and fullscreen snip options.
- The rectangular and freeform allows you to pick an area from the screen and customize it according your preference.
- The window snip allows you to snip from a specific application window.
- Lastly, the fullscreen will take a screenshot of the entire window alongside all the open applications.
Once you have taken a snip of your liking, you can access it from the notifications tab on the bottom right of the window.
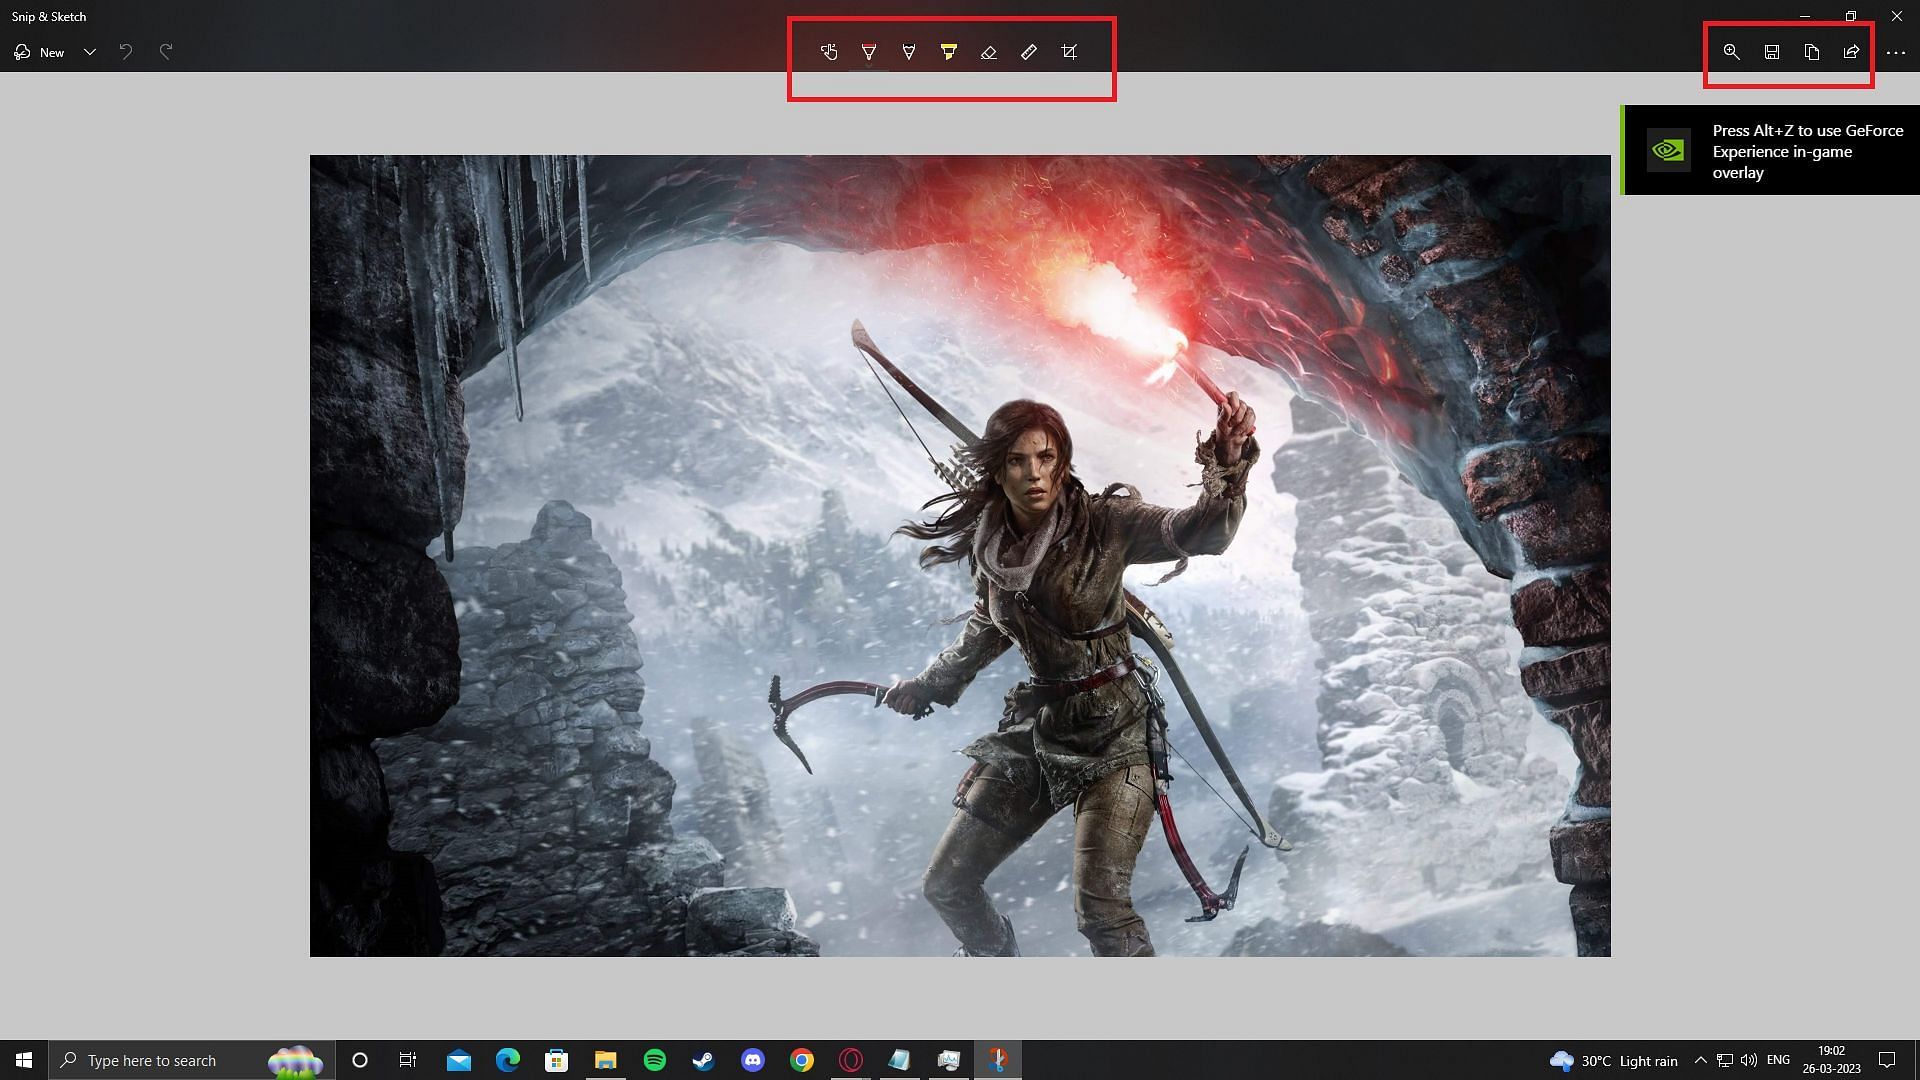
Once you have opened the snipped file on the software, you can access the highlight, pencil, eraser, touch writing, and ruler & protractor tools highlighted on the top of the screen to edit the image according to preference.
Once done, you will be able to export or share the image using the options given in the top-right corner of the screen.