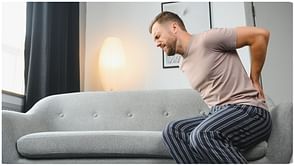
Lower back pain has been positioned as the single leading cause of disability worldwide in the 2010 Global Burden of Disease Study. With the current workplace environment and the reduction seen in the total time spent on conditioning the body, the number of people suffering from lower back pain has only increased exponentially.
![]()
The back plays a quintessential role in most of the daily activities, and it is imperative that you take good care of this vital region. You could prevent lower back altogether by maintaining a proper posture and having a healthy diet. However, if you could not stop it before the onset, you could try these effective lower back stretches for pain relief, which tone the target muscles with unrivalled precision.
Let us not wait any longer and look closer at the five best lower back stretches that you could do to have immediate and effective relief.
Note: If the back pain persists or shows no sign of improvement, it is recommended that you visit a doctor.
11 Proven Lower Back Exercises to Relieve Lower Back Pain: Step-by-Step Guide
#1 Bird Dog
The Bird Dog is one of the best exercises for lower back pain.This exercise very effective exercise in targeting the core muscles along with stabilisingthe spine and lower back. Along with that, the Bird Dog targets the shoulders, hips and aids in postural control.
Beginners, experienced trainers and people in recovery can perform the Bird Dog due to its simple motion.
Instructions:
Step 1: Position yourself such that the body is resting on the arms and the knees. Ensure a straight torso and stiff arms while performing this exercise.
Step 2: With stable back and abs, move your left arm forward while stretching the right leg backwards. Move the limbs until they are almost parallel to the floor. Do not allow for any unnecessary movement in the torso while performing this motion.
Step 3: Hold for a moment and return to the initial position.
Repeat the same motion with the other arm and leg. Perform this exercise for the recommended number of times.
Important Tips: Along with the regular bird dog, you could perform this exercise on a flat bench or by using a medicine ball. This offers variable resistance and ultimately leads to better stabilisation.
#2 Pelvic Tilt
Want to perform lower back exercises at home with a focus on the pelvic area? Try the pelvic tilt as shares the high efficiency and supreme effectiveness seen in the Brid Dog.
The pelvic tilt is a wonderful exercise in stabilising the lower back and the abdomen region. The range of motion in this exercise is quite limited, which makes it an easy exercise for people of diverse skill levels and different age groups.
Instructions:
Step 1: Lie on the floor in a supine position with bent knees. The whole foot should be resting on the floor while the arms could be placed on the sides or on the abdomen.
Step 2: Slowly move the pelvis towards the ceiling while restricting the movement in all other parts of the body.
Step 3: Hold for a moment and return to the initial position.
Repeat the exercise for the recommended number of times.
Important Tip: The pelvic tilt could also be performed while standing for better customizability. Focus on a smooth motion over short speed bursts while performing this exercise.
#3 Knees to Chest
The knees to chest exercise not only targets the lower back but also targets the hips, glutes and the hamstrings. In addition, this exercise is very effective in improving the overall flexibility of the body.
Instructions:
Step 1: Lie on the floor in a supine position with bent knees.
Step 2: Slowly move both the knees or a single knee towards the chest and interlock it with your hands. While pulling the legs, ensure that you do not overstrain your back and the neck muscles. Improper form here could put a lot of stress on the lower back region.
Step 3: Hold for a moment and return to the initial position.
If you are lifting the single knee, perform the same motion on the other side to complete one rep. Perform the exercise for the recommended number of repetitions.
Important Tip: Double knees to chestor single knee to the chest are both effective exercises to help lower back pain. However, exercise caution while performing these exercises as an improper form or irregular motion could lead to a further aggravation of the injury.
#4 Glute Bridge
When it comes to stretching exercises for lower back, the glute bridge is right up at the top. The glute bridge aids in lowering back pain and targets the glutes for a stronger back. In addition, this exercise is ideal for strengthening the core and improving the overall posture of the body.
Instructions:
Step 1: Lie on the floor in a supine position with bent knees. The arms should be on the sides with the feet positioned flat on the floor.
Step 2: Carefully lift your knees, hips and the shoulders off the floor until they form a straight line.
Step 3: Hold this position for two seconds and return to the initial position.
Repeat the exercise for the recommended number of times.
Important Tip: Ensure a smooth motion while performing this exercise. Hyperextending the back muscles is a real possibility without proper form, and this could lead to a serious injury.
#5 Side Plank
The side plank wraps up our list of lower back muscles exercises. It is a very simple exercise that effectively targets the obliques and thereby, aids in relieving lower back pain. Moreover, this exercise tones the muscles in the abdomen.
Instructions:
Step 1: Lie on the side with the legs stacked on each other and fully extended.
Step 2: Using the lower arm and elbow, slowly raise the body while holding the abs and obliques in a tight position. Ensure that the body forms a straight line from the head to the toes. Take care that you do not let the rib cage sag towards the ground.
Step 3: Hold this position for a moment and return to the initial position.
Perform the same motion on the other side. Repeat the exercise for the recommended number of times.
Important Tip: Multiple variations of the side plank could be performed including the side plank rotation for variable resistance and improved customisability.
#6 Hip Raise
Instructions:
Step 1: Lie down on the floor. Keep your back straight on the floor. Extend your legs forward and keep your hand to your side.
Step 2: Bend your knee so as to ensure that your feet are flat on the ground.
Step 3: Now, engage your glutes and raise your hips till they form a straight line alignment, from your shoulder all the way to your knees.
Important Tip: Pause for 6 seconds and return to the starting position. Do 2 sets of 10 each and take a 10-second break between both sets.
#7 Crunches
Yes! This exercise can help you with your lower back issue. Not only that, you can work on your abs at the same time. What can be better?
Instructions:
Step 1: Lie down on your back. Make sure that your back is flat on the floor.
Step 2: Bend your knees so that your feet are on the ground. Now, keep your hand behind your head. Engage your core and pull your shoulder off the ground.
Hold for 2 seconds and return. Do 1 set of 10 reps and increase gradually.
Important Tip: Do not use your elbow’s strength for this movement as you might end up hurting your neck. Do not come all the way up. You need to be partially off the ground.
#8 Back Extensions
Instructions:
Step 1: Lie on your stomach and keep your hand under your shoulder.
Step 2: Push your body with your hands and lift your shoulder off the ground. Try and bring your elbow under your shoulder and hold for 10 seconds.
Important Tip: Do this exercise 8-10 times. Do not raise your hips off the ground when you push up.
#9 Prone Cobra
Instructions:
Step 1: Lie on the floor with your face towards the ground. Your legs must be kept straight and your hands should be next to your side.
Step 2: Now engage your glutes and core to raise your head, chest, arm, and legs off the ground, as much as possible.
Important Tip: In this process, circle your hand so that your thumb points towards the ceiling. Hold this position for 30 seconds and relax. Do this exercise 6 times.
#10 Bottom Heel Touch
Instructions:
Step 1: Kneel on the ground so that your knees and arms are on the floor. Your knee needs to be under your hips. Keep your back straight.
Step 2: Slowly take your hips towards your heels, not moving your hand at all.
Important Tip: Hold this position for 10 seconds and return. Do this exercise 5 times. This is a mild stretching exercise but is extremely effective for your lower back pain.
#11 Twist
Instructions:
Step 1: Stand up keeping your back straight. Do not slouch. Put your hand forward and your legs apart. Put your palm on each other.
Step 2: Slowly twist to your left, such that your feet stay on the floor.
Step 3: Lift your heel a little and bend your knee to facilitate the movement. Move your head in the same direction. Stay for a second and return to the initial position.
Repeat the same exercise for the other side as well. Do this exercise 10 times on each side.
Important Tip: Do not go too fast. Take your time and do this exercise slowly.

