- How to make a Minecraft sugar cane farm
- 1) Place the mud
- 2) Create the water reservoir
- 3) Plant sugar cane
- 4) Cover the reservoir
- 5) Place Pistons on the blocks
- 6) Place blocks behind the pistons
- 7) Place Observers on the Pistons
- 8) Connect the Observers
- 9) Build walls
- 10) Make a hole
- 11) Place a line of dirt
- 12) Place chests
- 13) Connect droppers to chests
- 14) Place a glass barricade
A Minecraft sugar cane farm allows you to mine tons of sugar cane without having to look for it or wait for the crop to respawn. It has a wide range of applications in the game: from crafting sugar for cakes and spells to making paper for books, banners, and maps.
That said, here's how you can make an easy and reliable Minecraft sugar cane farm.
How to make a Minecraft sugar cane farm
Chart New Territories with the ultimate Minecraft Seed Generator!
A Minecraft sugar cane farm can be crafted easily and needs basic resources to sustain itself and continue farming the crop. Before you begin, these are the materials you will require:
- Sugar cane
- 1 chest
- 5 Hopper
- 5 Mud
- 33 stone bricks
- 1 Water
- 5 Observer
- Redstone dust
- Glass
Once these resources and items are collected, follow these steps to craft the Minecraft sugar cane farm:
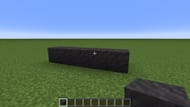
1) Place the mud

Begin by placing five mud blocks on the ground. This will be the base where your crops will grow and your Minecraft sugar cane farm will sustain. You can easily make mud using dirt and water.
2) Create the water reservoir
Create the water reservoir that will supply and sustain your sugar cane farm. Place the stone bricks in the same way as shown above and pour water inside the area to create the reservoir. You can collect water with a bucket.
3) Plant sugar cane

Next, plant five sugar cane on the mud blocks you placed on the hopper. These are starter crops that will keep getting renewed and grow over time. You can find sugar cane while exploring swamps or water-based areas in your world.
4) Cover the reservoir

You must now place five stone bricks to cover the top of the water reservoir and build a wall. This is essential to the building of the Minecraft sugar cane farm and ensures optimal delivery.
Also read: 5 best features and changes in Minecraft snapshot 24w44a
5) Place pistons on the blocks

Place five pistons on the stone bricks you just built. These pistons will automate the harvesting process and are an essential part of your Minecraft sugar cane farm. Make sure they face the sugar cane so that it can push and harvest the crop.
6) Place blocks behind the pistons

Place blocks behind each of the pistons you just placed. This will help with the next part of the build and easily automate your Minecraft sugar cane farm.
7) Place observers on the pistons

In Minecraft, observers are blocks that act based on changes in situations or environments. Make sure to place the five observers on the pistons with their faces pointing toward the sugar cane crop you planted.
8) Connect the observers

Proceed to connect the observers you placed with redstone dust. Place redstone dust on the additional blocks you built behind the pistons to connect them and make them work in unison.
Also read: New AI generates real-time Minecraft gameplay, but it's not as impressive as it seems
9) Build walls
Now, build walls on either side of the Minecraft sugar cane farm you are building. This ensures that sugar cane does not escape the farm and fall off on the side where it may be consumed by other mobs. Place the blocks in the format shown above.
10) Make a hole

You must then make a hole to create the catchment area and automate the Minecraft sugar cane farm. You will need to dig a hole two blocks deep and seven blocks wide to have enough space for the miner.
11) Place a line of dirt

Your next step is to place a line of dirt blocks just in front of the floating mud block above. These dirt blocks will be used to place the chests that will collect the crops from your farm.
12) Place chests

Place chests on the blocks of dirt. Make sure they are facing you when you place them since their position needs to be perfect for the farm automation to work.
13) Connect droppers to chests
Connect droppers to the chest while making sure they are attached to the mud blocks you placed. Remember to crouch and place the dropper while pointing at the chest to complete this step.
14) Place a glass barricade
Place a glass barricade in front of the sugar cane and cover it to prevent the crop from falling out or getting damaged. This also enhances the visual appearance of your Minecraft sugar cane farm.
By following the aforementioned steps, you can build and complete your Minecraft sugar cane farm. Make sure to regularly empty your chest so that you can keep collecting the crop without fail. You can modify this farm to increase the length of mud blocks. However, make sure to put proportionate amounts of chests. You can also place one chest and connect the other droppers to that chest if you wish to.
Also read: How to use shaders in Minecraft 1.21.3
Check out our other latest Minecraft articles:
- New Minecraft snapshot 24w44a brings eyeblossom and resin to Java Edition
- Minecraft Beyond Earth mod: Features, installation guide, and more
- Minecraft releases quick 1.21.3 update to fix issue related to salmon
- How to use shaders in Minecraft 1.21.3
Uncover new worlds with our Minecraft Seed Generator!

