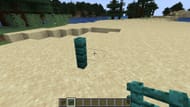
Diagonal fences in Minecraft are something that players wish they could have in their worlds as they embark on their building journey. Mojang has introduced tons of building items to satisfy the creativity of the players but sometimes they wish to have more. This is when the extensive modding community in Minecraft comes as the savior, adding mods for everything, including diagonal fences in-game.
Here's everything you need to know to add diagonal fences in Minecraft using mods.
How to add diagonal fences in Minecraft using mods

Chart New Territories with the ultimate Minecraft Seed Generator!
You can add diagonal fences in Minecraft using the Diagonal Fences mod by Fuzs, a popular modder and editor. This mod can be installed using a mod loader. For this guide, we will use Curseforge and Curseforge mod loader — a natively popular loader with access to a vast repository of customization options for Minecraft.
Here's how you can download and install the Diagonal Fences, one of the best mods in Minecraft:
- Head over to Curseforge and download the launcher.
- Once downloaded and logged in, search for the Diagonal Fences mod by Fasz. Alternatively, you can click this link to the directory page.
- If you want to manually install the mod, click the download button and place the zip file in the mods folder by following the instructions. However, it is recommended to use the Curseforge loader.
- Click the orange install button which will redirect you to the Curseforge app.
- You will be prompted to create a new instance. Additionally, you can also choose an existing instance but it is recommended to go with a fresh installation since it avoids conflicts with existing mods, shaders, or packs. Name your instance and create it.
- After creating the profile, you will be redirected to the installed instance. Click the orange play button on the right to launch Minecraft with the Diagonal Fences mod successfully installed.
If you are installing the mod manually, here is a list of additional mods and assets that you must add to the instance before running this mod:
Also read: Minecraft Creaking and Pale Garden now available in Bedrock beta and preview
How to place diagonal fences in Minecraft
You can easily place diagonal fences in Minecraft after installing the diagonal fences mod. Simply craft a fence, place it in a diagonal or angled way you wish to, and connect it with the other end to create a fence. You can craft endless lengths of fences in all directions with the help of this nifty mod.
Here is a step-by-step guide to place diagonal fences in Minecraft:

Place one end of the fence on the ground in any orientation you wish to. This mod allows you to build diagonal fences in Minecraft from any direction.

Place a second fence pole at any angle you wish, diagonally to the first pole. Make sure that the second pole is not vertically aligned and there is some angular distance between the two poles.

Keep connecting the remaining poles in the angles and directions you desire to place diagonal fences in Minecraft. You can craft endless extensions to the fences as per your requirements.

This mod essentially allows you to place fences in whichever orientation you wish, including vertical alignment. This mod opens a door to the vast and creative minds of the active Minecraft community, known for building projects like the popular Pokemon-inspired mega build.
Also read: How to find Pale Garden in Minecraft
Check out other latest Minecraft articles:
- "Bro really invented Malevolent Shrine": community stunned after player creates powerful Insta-Kill Auto Turret
- Creaking mob brings the Weeping Angels mod to life in the official game
- Bundles of Bravery drop gets its first pre-release
- Can you play Snapshots on Minecraft Bedrock?
Uncover new worlds with our Minecraft Seed Generator!
