If you want to convert Minecraft Bedrock world to Java and enjoy the host of mods, shaders, and texture packs, you're in luck. You can now easily transfer worlds created in Bedrock and play them with ease on Java edition with a few steps. This means you will not need to abandon your beloved world and start over again.
Here's how you can convert Minecraft Bedrock world to Java.
This is how you can convert Minecraft Bedrock world to Java
Chart New Territories with the ultimate Minecraft Seed Generator!
You can easily convert Minecraft Bedrock world to Java using the Chunker application. Chunker is a world conversion software made by Hive Games under an exclusive license to Minecraft that allows you to convert existing Bedrock worlds to Java and vice versa and offers a suite of customization options.
Before you begin, prepare and download your world:
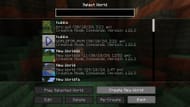
Open Minecraft and select Play. Head to the list of worlds and click the edit icon next to the world you wish to convert. Scroll down and you will find the Export World tab. Select it and click the green button to save the world in your preferred location as shown above.
After generating and saving your world file, here's how you can convert a Bedrock world to Java:
1) Open Chunker

Download and run Chunker. Once done, run the application. The Chunker app offers you the choice between uploading the directory of the saves file which converts all of your saves into the necessary format or choosing a specific ZIP file or .mcworld file to convert. For this guide, we will choose the Bedrock world you saved earlier
2) Upload the archive

Open the folder where you saved the Bedrock save file. Drag and drop the .mcworld file into the area and wait for it to be uploaded. Once done, you must press the Start button to proceed with the conversion
3) Choose the version you wish to convert to

Next, you must choose the version to which you wish to convert Minecraft Bedrock world to Java. It is recommended to choose the same version across both editions to ensure maximum compatibility and retention of world data.
4) Customize conversion (optional)

Next, you must scroll down to the bottom of the list where you will be given two choices — Advanced Options and Convert. If you wish to proceed with the conversion without any modifications, you can choose to convert directly.
But if you wish to make modifications to your world such as modifying the difficulty setting, game mode, or spawn coordinates, you can use the Advanced Options tab to make those changes accordingly and then choose convert.
5) Save the file

Once you have converted the file from Bedrock to Java you must now save it. Choose the green Save button name your ZIP folder and save it anywhere you want to.
Additionally, if you are not satisfied with the chosen options, you can restart the process and make your changes. Once done, you have successfully generated a world file compatible with the Java edition. Now, you must implement the save file in Minecraft Java edition.
Also read: All Minecraft Halloween Easter eggs and how to find them
How to run converted Bedrock world in Minecraft Java edition
Once you have completed all the steps to convert Minecraft Bedrock world to Java, it is now time to successfully implement and run the world. Here's how you can do so:
1) Unzip the converted ZIP file

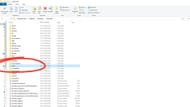
Your first task is to unzip the converted ZIP and place all its contents into a new folder. Name the folder according to the world name you wish and keep it somewhere accessible.
2) Locate the saves folder of Minecraft

The next step is to locate the .minecraft folder where your saves are located. You can simply do that by heading over to the Minecraft launcher. Select Java Edition and head to the installations tab.
Hover over the instance where you wish to run the converted file and click the folder icon that appears next to the green Play button. This will open the folder where your instance and its assets are stored.
Also read: 5 best Minecraft spooky shader packs to play in Halloween
3) Place the unzipped folder in the saves directory

Now, place the folder you created into the saves directory of the instance where you wish to run the converted world. Drag and drop the folder into the directory and close the folder
4) Run the converted world in Java Edition

Open the instance of Minecraft where you copied the files and choose Singleplayer. Once you log in, you should see the name of the file you created under the name of the original final that was saved in the Bedrock edition.
Simply choose the world and launch it to successfully finish converting your Bedrock edition to Java edition. Thus, you can easily convert Minecraft Bedrock world to Java edition and vice versa to ensure maximum compatibility and ease of access.
Also read: All Minecraft Halloween Easter eggs and how to find them
Check out our other latest Minecraft articles:
- How to raid an Ancient City in Minecraft
- 5 best Minecraft spooky shader packs to play in Halloween
- Minecraft releases quick 1.21.3 update to fix issue related to salmon
- How to use shaders in Minecraft 1.21.3
Uncover new worlds with our Minecraft Seed Generator!
