Released over a decade ago, Minecraft is a popular survival sandbox game where players must gather food and kill monsters to survive. Once the player has got the basics down, they can move on to exploring the world and gathering items to bring their creative builds to life.
Most Minecrafters would likely agree that the game is at its most enjoyable when played with friends on multiplayer servers. While there are a vast number of servers available for players to explore, most focus on offering unique minigames and activities rather than providing a traditional Minecraft survival world experience or the level of privacy that many players seek. Luckily, paying for a server isn't necessary as, there are services like Aternos, which offer free Minecraft servers.
Minecraft aternos server guide
Even owning a basic Minecraft server from a renowned hosting website can cost anywhere from $5 to $40, which may not seem worth it to some players. However, with the help of Aternos, players can create a Minecraft server that works fine for completely free.
Chart New Territories with the ultimate Minecraft Seed Generator!
The best thing about the Aternos servers is that they offer many features that other hosting sites would charge extra for, such as mods and modpacks.
Creating an Aternos account
Before learning how to set up an Aternos Minecraft server, let’s learn how to set up an Aternos account first:

Step 1: Open the official website from here. Sign up to create an Aternos account by clicking on the blue Sign up button.

Step 2: On the sign up page, you'll have to enter a unique username and agree to the terms of service. You must then click on the Next button.

Step 3: The next step in creating a secure account is to generate a strong password. While you do have the option to skip entering an email address, it's highly recommended that you provide an email address for account recovery purposes. You must then click on the sign up button to complete the process.
Creating an Aternos server
Now that your Aternos account has been created, you can move on to setting up the Aternos server:
Step 1: While on the homepage, click on the Create a server button.

Step 2: You must type out a name for the server as well as a custom text that will be displayed under it in-game. Once you're done, click on the Create button.
A brand new server has now been created, which you can enter using the address displayed on the Aternos home screen. With the help of the Options menu, you can select basic world settings, such as the game mode and difficulty. It can be found on the left side of the home screen of the Aternos webpage.

Interestingly, you can change the version of the server from the home screen as well. Once everything has been set up, you can start the server by clicking on the Start button on the home screen. This may take a few minutes, and you'll be notified once the server has started.
How to join a Minecraft server
Joining a Minecraft server is about as easy as setting one up. Here are some simple steps that you can follow to begin your multiplayer survival journey on a server:
Step 1: Launch the same version of Minecraft for which the server was created.
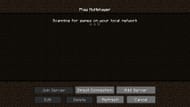
Step 2: You must select the Multiplayer option.

Step 3: Click on the Add Server button.

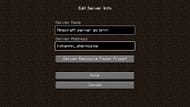
Step 4: Search for the name of the server and the server address.

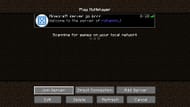
Step 5: Simply select the server on the multiplayer screen and click on Join Server.
By following these simple steps, you can enter any server in the game.
Uncover new worlds with our Minecraft Seed Generator!

