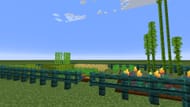
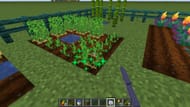
Growing crops in Minecraft is a fundamental gameplay mechanic that can help you in your adventures and keep you sustained. The game allows you to plant and grow a host of crops that can be used to cook food or craft other objects. You can build endless farms to amass a vast amount of resources, making it one of the best ways to progress in-game.
Here's everything you need to know about growing crops in Minecraft.
What are crops in Minecraft?

Chart New Territories with the ultimate Minecraft Seed Generator!
Crops in Minecraft are essentially cultivated plants or agricultural produce that can planted or harvested. These include items such as grains, fruits, vegetables, and more. The game offers a vast variety of crops to grow, and the produce has multiple uses.
Here are all the crops that you can grow in Minecraft:
- Wheat
- Beetroot
- Carrot
- Potato
- Melon
- Pumpkin
- Torchflower
- Pitcher
- Bamboo
- Cocoa
- Sugar Cane
- Sweet Berries
- Cactus
- Mushrooms
- Kelp
- Sea Pickle
- Nether Wart
- Chorus Fruit
- Fungus
- Glow Berries
How to grow crops in Minecraft
Growing crops in Minecraft is easy as all you need do is collect the required seed/plant/crop, prepare the farm ground, sow the seeds, and water it.
Here's how you can grow crops in Minecraft.
1) Obtaining seed/crop

The first step to growing crops in Minecraft is obtaining the seed or plant you wish to farm. While some crops like wheat and sugarcane can be found easily, others like carrot, beetroot, and potatoes will require a bit of exploration.
Some crops such as wheat and melon can be planted only as seeds while others like carrots and potatoes can be planted as they are. You only need one of each because you can grow the first batch and multiply from there quite easily.
Also read: Minecraft creaking mob guide: Location, loot, uses, and more
2) Sowing the crop
Next, you must prepare the ground and sow the seeds using a hoe. It is an agricultural tool that tills the ground and turns it into farmland — a plot suitable for farming and growing crops. Use the hoe to till the ground and turn it into farmland ready for planting.
The ideal crop farm is placed in a 9x9 grid or two rows of 9 blocks each. Make sure to place a block or line of water in the middle of this area to provide a permanent source of water. Water is crucial for the growth and sustenance of your crops,
Once you have created a farmland and placed a source of water, you must now plant the seeds. Make sure to check the kind of soil that is required for your crop — most crops will grow on farmland but some crops like sugar cane grow on sand while kelp will exclusively grow underwater. Additionally, you will require a light level of 9 or higher to make sure the crops keep growing.
3) Protecting the crops

One of the most important steps after building and placing your farm is to ensure it is protected from wandering mobs and animals who can easily trample it and destroy the crops in Minecraft.
You can easily build a fence with a gate around your farmland to protect unwanted intruders from damaging your crops in Minecraft. As an added bonus, fences also make your farm look visually pleasing.
Also read: 10 best Minecraft Pale Garden seeds
4) Boosting crop growth

Although crops in Minecraft do not need any attention once sown, you can use certain methods to make them grow quickly. One of the best ways to grow your crops in Minecraft is by using bone meal. Different crops require different amounts of bone meal before they are ready for harvesting. You can also farm this item and apply it to the crops to help them grow.
Additionally, you can place torches near your crops to ensure they receive a steady source of light even at night to speed up the growth process. This is a great way to boost crop growth since they cannot grow at night and the torch provides a light source of 9 or higher that helps them grow.
5) Harvesting crop
Once your crops are ready, you must harvest them. You can do so by interacting with them or attacking them with your bare hand. While crops like carrots and wheat can be harvested immediately, others like melon and sugar cane might take a while.
Alternatively, you can automate the process to make harvesting more seamless and time-effective.
Also read: Easy Minecraft sugar cane farm tutorial for beginners
Check out our other latest Minecraft articles:
- New Minecraft snapshot 24w44a brings eyeblossom and resin to Java Edition
- Minecraft Beyond Earth mod: Features, installation guide, and more
- Minecraft releases quick 1.21.3 update to fix issue related to salmon
- How to use shaders in Minecraft 1.21.3
Uncover new worlds with our Minecraft Seed Generator!

