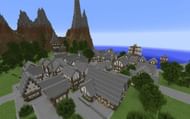
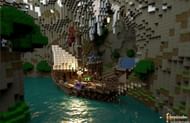
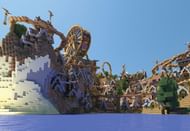
Premade maps that have been created by the community are one of the easiest ways to have fun, exciting gameplay that isn't just the regular Vanilla Minecraft experience.
There are thousands of maps built by some of the most amazing players and builders, and there is something for every player. These maps span pretty much every genre, too, including horror, adventure, sci-fi, medieval, and so much more.
Whether players are looking for an individual, one-off experience, or a map to play through with friends, there is something for everyone to enjoy. Downloading these maps, however, does take a little bit of time.
Downloading Minecraft maps isn't difficult at all, and if players have done it once, they can do so many times.
Chart New Territories with the ultimate Minecraft Seed Generator!
How to download and install Minecraft Java Edition maps
Downloading

The first step to installing one of these fantastic Minecraft adventure maps is to find the one that the player wishes to pursue.
There are a bunch of them, and there are so many great websites where players can access them.
One website that is popular amongst map users is minecraftmaps.com.
Once the player has found the map they wish to install, they can download it to their computer. From there, they can proceed to the next step: installing it into their game drive.
Installation Overview

Installation of Minecraft maps is fairly straightforward, regardless of the type of computer the player is using. However, the process does differ slightly depending on whether the player uses a Mac or a Windows computer.
Both ways are relatively easy for anyone to understand and execute. Here are detailed guides to complete this process on both devices.
Installing Minecraft maps

Extract the World
Once players have downloaded their chosen Minecraft map, they must extract the world from the file.
World files usually come in either .zip or .rar formats. The former can be extracted immediately by the player, whereas .rar files cannot be extracted without external programs. To do so correctly, players have to extract it and check for two folders: a 'region' folder and a 'level.dat' folder.
These folders may not appear on the first page but, instead, within a folder entitled 'your_save.' Once those two folders are located, players must extract them to their desktop.
If they find the folders within a 'your_save' folder, gamers can extract them onto their desktops.

Import it into Minecraft
The players have to relocate the 'region' and 'level.dat' folders into their .minecraft folder, found by opening the search bar and using this command:
%APPDATA%\.minecraft
This will bring players to the .minecraft folder. From there, they may proceed into the 'saves' folder and paste in this new file. This 'saves' folder also contains the data of every other world they have ever created in Minecraft.
Once pasted, they can check the folder to ensure that this specific folder (shown above) is present in their 'saves' file folder.

Launch the game
Once all of this gets completed, players can launch their game and proceed to check out the new world they just downloaded. It should be present in their world list.
Uncover new worlds with our Minecraft Seed Generator!

