Minecraft requires its players to collect various in-game resources, some of which help progress their projects, while others help keep the player safe and alive. The game has numerous structures that provide items in unique ways. However, no other structure in the Overworld is as rewarding as Minecraft villages, primarily because of the villager mobs found there.
Villagers make this common structure highly profitable, as these mobs can be turned into different types of traders who provide valuable items for cheap. In this article, we guide players on how to find villages in the Minecraft 1.21 update.
Minecraft guide to finding villages in the tricky trials Update
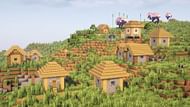
Chart New Territories with the ultimate Minecraft Seed Generator!
Following the launch of the new Minecraft 1.21 update, many new players have joined the game, intrigued by the update features. To progress quickly in the game, many players prefer living in villages in the early phase and start trading there as quickly as possible.
Finding villages may seem tricky to new Minecrafters since the game does not have a map to lead them to the closest village. Luckily, this structure is very common, and most players encounter their first village within their first or second in-game day of wandering around and exploring.
However, in case the player gets unlucky with village spawns, they can follow these simple tips to increase their chances of coming across a village:
Explore biomes with unobstructed views
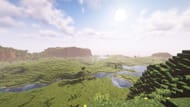
Players should explore the plains, savanna, or desert biomes featuring mostly flat terrain, which will allow them to spot structures from afar. Out of all the biomes in the game, the plains biome has proven to be the best for finding structures.
Turn up the render distance
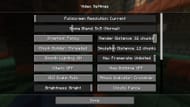
Increasing the render distance allows you to see further than the game allows by default. This tip is very helpful for locating not only villages but other structures in other biomes as well.
Some players with older systems may experience lower framerates upon using this tactic, but the tradeoff is worth it. Moreover, they can always turn down the render distance once the desired structure has been located. Players can find this setting in the video settings section in both Java and Bedrock Editions.
Lower the FOV
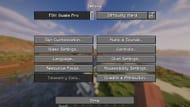
Setting the Field of View (FOV) to a higher number is a great way to increase peripheral vision, allowing players to perceive a wider area. This adjustment helps players see more with each frame and spot structures quickly, with practically no negative effects on the game's performance. The FOV setting can be found in the options menu, and is accessible from both the pause menu and the main menu.
Use online seed maps
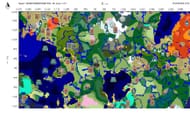
Although some may consider this cheating, using seed maps is the most efficient way of locating any structure. By entering their world seed, they can access an online map that reveals all in-game structures, along with many other features.
The maps also provide the coordinates for the structures, making it easier to navigate. Java Edition players can check their coordinates by pressing F3 to enable the debug screen. Bedrock players need to navigate to the world game settings and enable the "Show Coordinates" option there.
Uncover new worlds with our Minecraft Seed Generator!

