
'%20x='0'%20y='0'%20height='100%25'%20width='100%25'%20%0A%20%20%20%20%20%20%20%20%20%20xlink%3Ahref='data:image/jpg;base64,/9j/4AAQSkZJRgABAQAAAQABAAD/2wCEAAMDAwMDAwQEBAQFBQUFBQcHBgYHBwsICQgJCAsRCwwLCwwLEQ8SDw4PEg8bFRMTFRsfGhkaHyYiIiYwLTA+PlQBAwMDAwMDBAQEBAUFBQUFBwcGBgcHCwgJCAkICxELDAsLDAsRDxIPDg8SDxsVExMVGx8aGRofJiIiJjAtMD4+VP/AABEIAAUACgMBIgACEQEDEQH/xABkAAEBAAAAAAAAAAAAAAAAAAAABhAAAQQBAwUAAAAAAAAAAAAAAgEDBBEAEhMhBQYHMkEBAQEAAAAAAAAAAAAAAAAAAAIGEQAABgIDAQAAAAAAAAAAAAABAgMEERIABSJCcbH/2gAMAwEAAhEDEQA/AJKb5A7xmRdoOoBGI7FXGWAEvSr5usnW3YyNgjwSHXEFNbm/Wovpciq84xkW93G0emAXLpRYSzFxtHk4daQiaBqFAnPqFfmf/9k='%3E%3C/image%3E%3C/svg%3E)
Since Minecraft has been out for a really long time and has a very active player base, the community has created a ton of mods for it. Using mods is a great way to try new things and enjoy the survival gamemode in a different way.
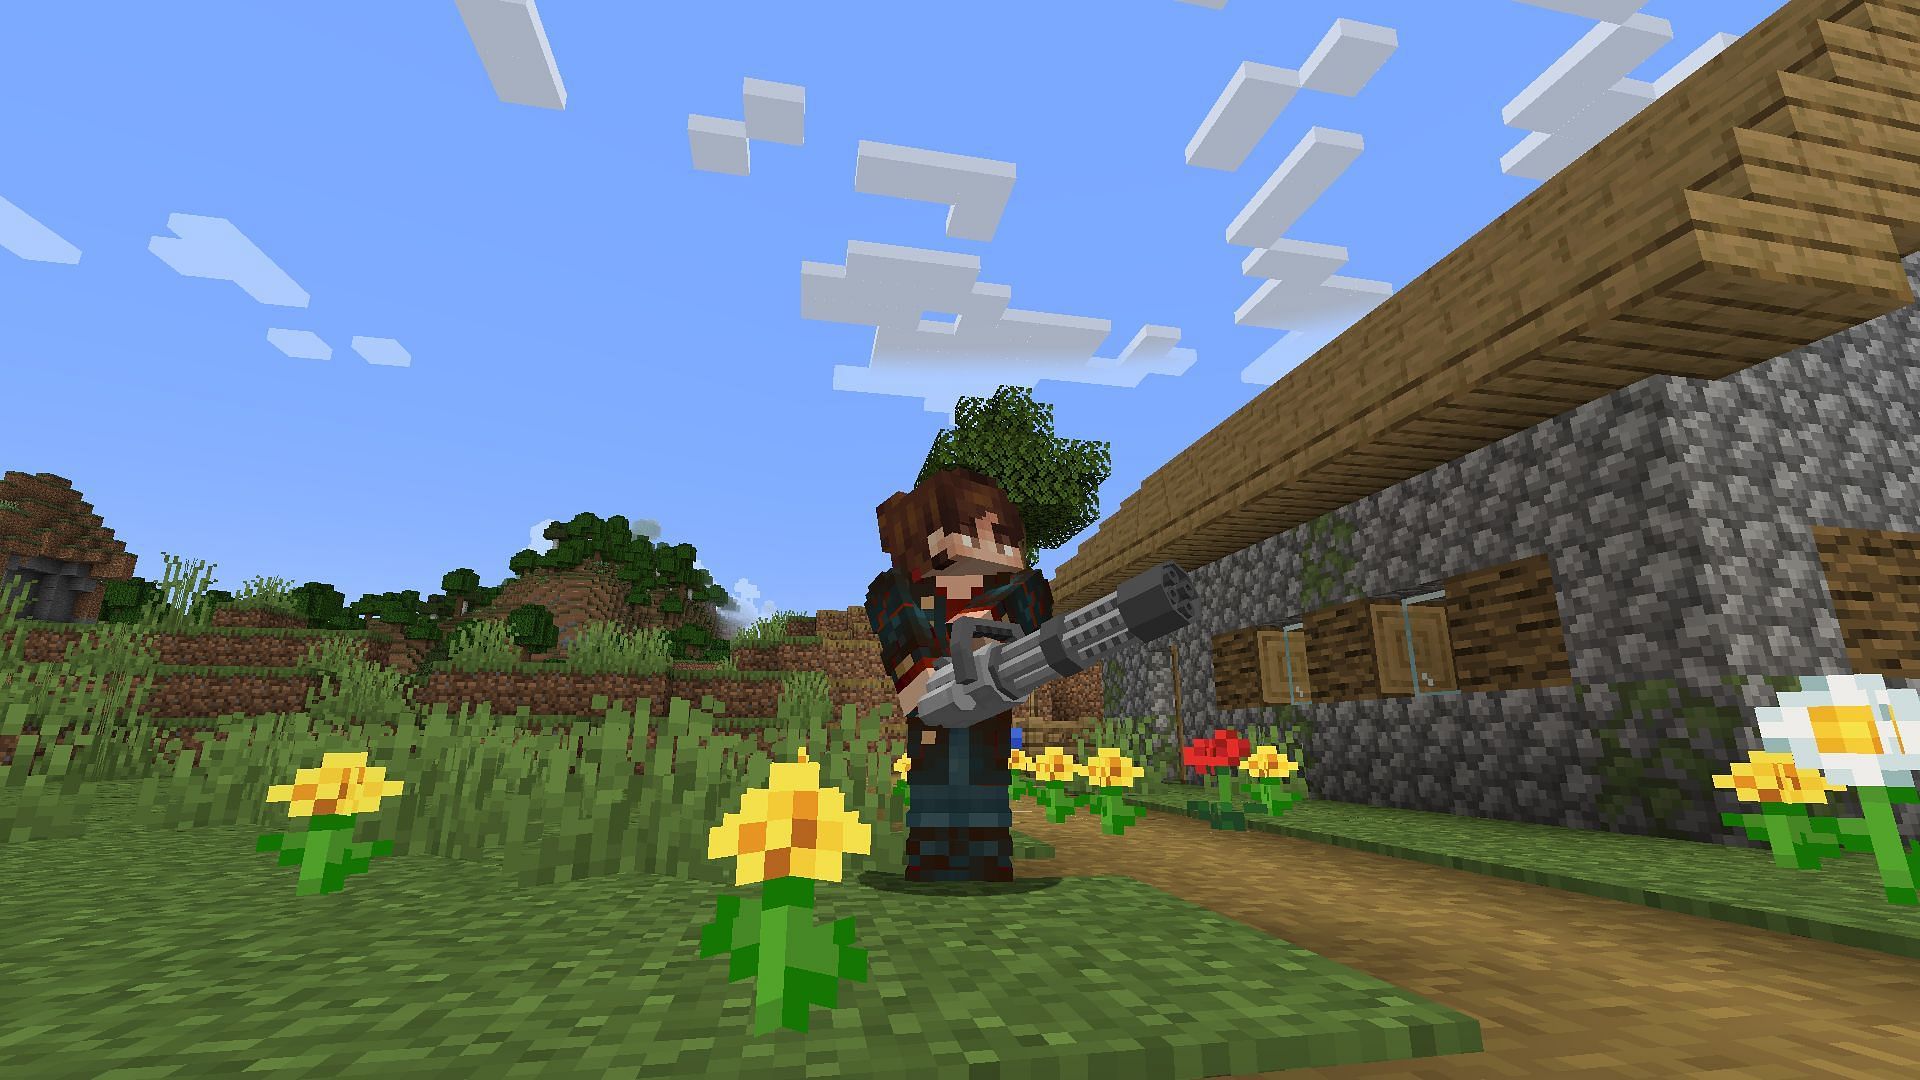
The game requires players to fight hostile mobs from time to time, and they can use a variety of weapons to do so. However, vanilla Minecraft only has traditional weapons, such as swords and axes.
With the help of mods, players can add functional guns to Minecraft to make slaying mobs more fun. One of the best weapon mods available for Java Edition is MrCrayfish's gun mod, which can be played on version 1.19.2 and a few older versions.

Chart New Territories with the ultimate Minecraft Seed Generator!
Adding guns in Minecraft using MrCrayfish's gun mod
The mod adds a handful of weapons, such as bazookas and shotguns. To install MrCrayfish's gun mod, Java Edition players need to follow these steps:
Step 1: Download the mod from the official website.
According to the website, those using version 1.16 or below will need to have the Obfuscate library installed, and those using version 1.18 or above will need the Framework library.
Step 2: Download the Forge installer. You need to ensure that the downloaded Forge, Obfuscate, and MrCrayfish's gun mod are for the same version of Minecraft.
Step 3: Open the Forge installer using the JAVA (TM) Platform SE binary. You have to install Java to open the installer if your system does not already have it.
Step 4: Check if the mentioned directory of Minecraft is correct or not. Then select the Install client option and press Ok.
Step 5: Once the installation is over, open the official Minecraft launcher. In versions, select the Forge installation, and open the game. You need to open the game to allow the launcher to download the other required files.
Step 6: Close the game and move the MrCrayfish's gun mod and the Obfuscate mod to the mods folder inside the game's application data folder. This folder can be located by pressing WIN+R and typing "%appdata%/.minecraft".
After following the steps above, the new Forge installation of the game will have MrCrayfish's gun mod. Select that installation and launch it from the official launcher to play it.
Features of MrCrayfish's gun mod
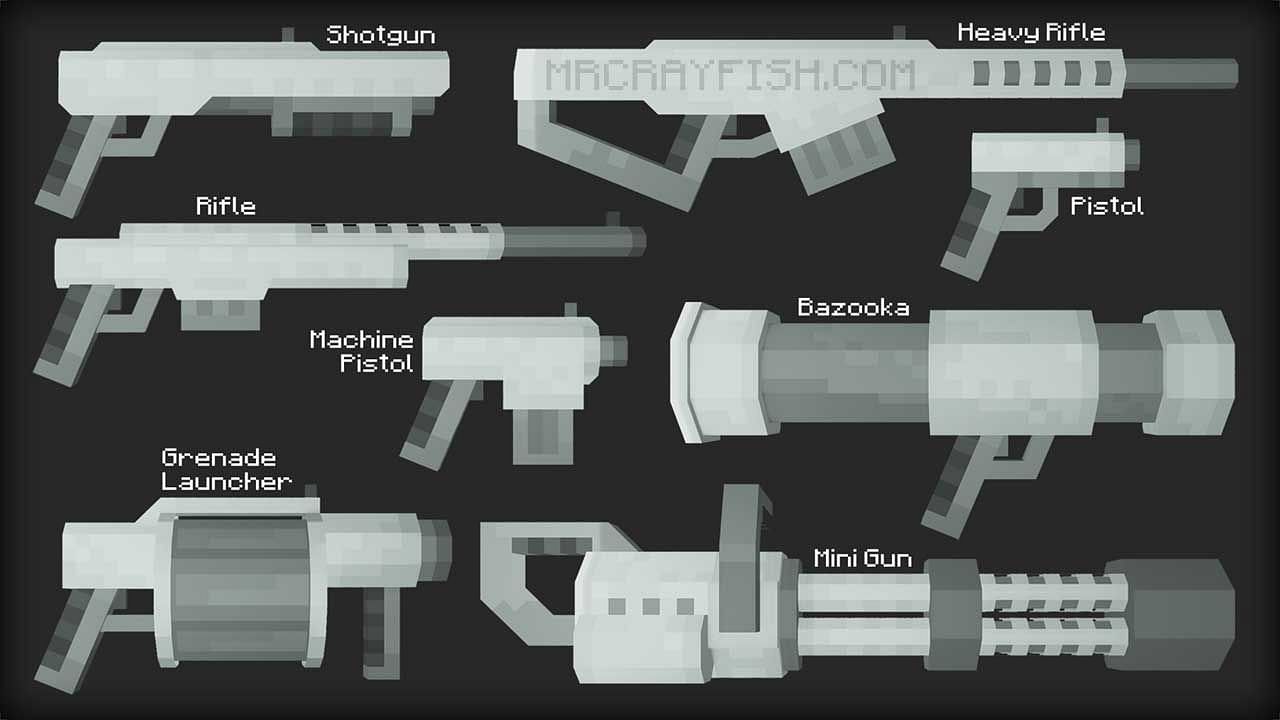
MrCrayfish's gun mod has nine weapons, including a pistol, shotgun, and minigun. This mod offers not only guns but a few attachments to go with those weapons. Players can put a silencer on their weapon to make it quieter or add a grip to reduce the recoil.
To get started, you will need to craft a workbench on the crafting table. Once you have a workbench, you can craft weapons, attachments, and ammunition on it. Iron ingots are one of this mod's primary crafting ingredients for weapons and other items.
The mod also has a few enchantments for the weapon that can help improve the guns. There is a custom shelf on top of which you can place a backpack. As you may have guessed, the backpack is a storage block with nine slots that works similarly to chests.
Survival players can also reload guns in this mod, and there is a reload animation as well. However, they can only reload if there is ammunition in their inventory.

Uncover new worlds with our Minecraft Seed Generator!