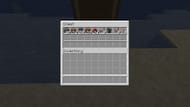
There are a lot of different items in Minecraft. This is an issue that's only getting worse as more updates come out. Take 1.21, the latest major update, for example, which introduced a huge array of copper and tuff blocks, wind charges, breeze rods, ominous bottles, four new potions, four new arrows, banner patterns, pottery sherds, armor trims, and music discs.
With so many items in the game, it's easy for players to spend insane amounts of time sorting storage areas to keep things easy to find. Thankfully, though, there's a simple redstone contraption that can be built to automatically sort items.
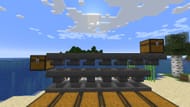
The process for making one of these simple item sorters for 1.21 can be found below.
Chart New Territories with the ultimate Minecraft Seed Generator!
How to make a basic item sorter in Minecraft 1.21
Materials

Item sorters are perfect examples of mid-game Minecraft redstone builds. They aren't exactly cheap, requiring plentiful redstone resources and hoppers, as well as chests. However, they are still relatively cheap, at least at their simplest, meaning that they can be made before killing the ender dragon or setting up other large-scale farms.
That being said, a Minecraft iron farm is highly recommended for anyone wanting to make an item sorter. This is because they consume a considerable amount of iron, especially as more and more rows are added in.
1) Place down chests

The first thing you'll want to do when making a basic Minecraft loot sorter is put down chests. Each double chest will eventually correspond to a different item, making this design quite easy to expand down the line.
2) Add hoppers

The next thing you'll want to do is go along one side of the chests and add a Minecraft hopper facing each one. This will feed the filtered items into their correct storage spots down the line.
3) Start the redstone

To start the sorter's redstone, leave a one-block gap behind these hoppers and make a row of solid blocks as long as the chest chain. Place redstone torches on these blocks, facing towards the bottom row of hoppers from the last step.
Then, move to the other side of this row of blocks and add repeaters facing them. Place a second row of blocks behind these repeaters, and a ceiling of blocks above the redstone torches all the way back to above the repeaters.
4) Finish the redstone

To finish up the redstone, place a row of Minecraft comparators next to the upper hoppers, facing away from them. Then, add an extra layer of hoppers facing into these comparators.
Finally, add redstone dust, covering the tops of the rest of the blocks placed in the previous step.
5) Add the input and output chests

Next, you'll want to add the chests to input items to the sorter, as well as catch any items that failed to sort. Place a temporary block on the very leftmost hopper. Then, place a chest next to the temporary block. This chest will act as the output for the sorter.
Break the temporary block and add a final row of hoppers, all facing this output chest. Add one more hopper to this row, and place a chest on top of this extra one. This will be the item sorter's input chest.
6) Add in the filters

The skeleton of the item sorter is done. Next, you'll need to prepare and add the filter blocks. Take some dirt blocks and rename them with an anvil. The name doesn't matter, though some variation of "Filler" or "Filter" is recommended to help identify the purpose of the blocks later on.
To actually add the filters to the item sorter, place a single renamed block in four of the five open slots on each hopper in front of a comparator. The comparators should light up as you do this.
7) Add in items

Next, place exactly 41 of any item you want to sort into the final spot of each of these hoppers.
If you're sorting an item that stacks in 16s instead of 64s, such as Minecraft ender pearls, place in 10 of the item. This will cause any items that enter the row of hoppers above the comparators to be passed along unless they match this single stack of items, filtering out anything that doesn't match.
8) Finishing touches

While optional, it's highly recommended to add in signs or item frames to indicate what kind of item is being stored in each chest. This will help keep your Minecraft storage room much more organized.
Less time spent hunting for items means more time spent playing the game. That's the entire point of an item sorter, after all; to speed up organizing and finding items.
Uncover new worlds with our Minecraft Seed Generator!

