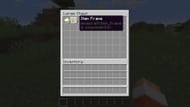
Map walls in Minecraft are a fun way to share your adventures and enhance your builds. By transforming ordinary game maps into decorations, you can showcase the places you've explored and help guide players through the game world. Making these map walls can take time, and require exploration and knowledge of the game map, but it's an easier job than you might think, especially if you have the means to travel quickly.
To create a Minecraft map wall, you'll need a few resources, but they are quite easy to obtain. After collecting them, simply explore the game world and document multiple areas on a collection of maps. Then, place them on wall-mounted item frames and piece them together.
How to make a simple wall map in Minecraft
Required Resources for a Minecraft Map Wall

Chart New Territories with the ultimate Minecraft Seed Generator!
Before diving into the creation of your map wall, gather the essentials: empty maps or empty locator maps (for Bedrock Edition). To craft empty maps, you'll need eight pieces of paper and one compass. Empty locator maps in Bedrock Edition can be constructed via a cartography table by combining a piece of paper and a compass in its interface.
Empty maps can also be looted from shipwreck, stronghold, and village loot chests and traded for with novice cartographer villagers for the price of seven emeralds. A small map wall can require as few as four empty maps, but for this example, we'll use nine empty maps for a wider distribution. Additionally, you'll need several item frames to match your number of empty maps/empty locator maps.
You can obtain item frames primarily by crafting them by combining eight sticks and a piece of leather on a crafting table or trading for them with expert cartographer villagers for the cost of seven emeralds. Although item frames can be found on end ship structures holding elytra, that's a bit of an unnecessary journey to collect them.
Building the Map Wall in Minecraft

With your empty maps and item frames in your possession, find a wall of your choosing and place the item frames close together (for example, a nine-map wall is typically assorted in a 3x3 manner). From here, your objective is to fill your empty maps/locator maps before placing them on the wall. While this sounds simple, you'll need to pay close attention to your Minecraft maps as you fill them in.
Below, you can find the steps to help fill out your empty maps so that they cohesively band together on the map wall in Minecraft:
- Take one of your empty maps and navigate to the area you'd like to map out and serve as the center of your Minecraft map wall. Use the empty map to fill it in, and it will now show your approximate surroundings as well as mark your location.
- Take a look at your filled map. Notice that it has four edges where the map will stop tracking your location. You'll want to make your way to each of these four edges in each cardinal direction (north, south, east, and west) until the map no longer tracks you. The map's cursor for tracking your location should turn from an arrow into a circle.
- Each time you reach the edge of your original map in a new direction, pull out an empty map and use it, then travel around the area the newly-created map shows until it's filled in. By now you should have five filled maps total, and all that's left is to fill the remaining four (in a nine-map configuration) that represent the diagonals.
- Return to the location where you started mapping in Step 1, and head to the corners of your original Minecraft map to find the diagonal locations. Like in Step 2, you'll want to travel to the corner of the original map four times and then use your remaining empty maps, and fill them in for each corner.
- With all of your maps filled, return to the wall of your choosing, take the map you created in Step 1, and place it in the center item frame. Next, place the remaining filled maps in the other item frames so that the maps combine to create a cohesive larger image. Keep in mind that you may need to occasionally use the maps on the item frames to rotate them in case they're misaligned when they're placed.
That's all there is to it. Remember you can easily expand a map wall in Minecraft by traveling to new areas in the game world's seed and filling additional empty maps. As long as you have more item frames, you can continue placing maps (or even zoomed maps if you don't mind filling them out) to your heart's content.
Minecraft's maps keep track of the terrain in a grid-like format similar to how the game handles its loaded chunks. You can use this to your advantage and create a grid and mark which areas you've traveled to and have created maps for so you can visualize your map wall if you choose to expand it.
Uncover new worlds with our Minecraft Seed Generator!

