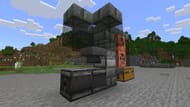
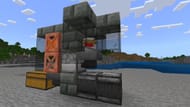
Food is one of the most important resources when it comes to survival in Minecraft. It's required to keep the hunger bar filled up, which is needed for sprinting, healing, and, on harder difficulties, avoiding lethal starvation damage. This means that setting up a renewable source of food is one of the most vital things to do early on in any new world.
Thankfully, automatic chicken cookers are both easy and cheap to set up. This article details everything you need to know about building one of these handy chicken farms.
How to make an automatic chicken cooker in Minecraft Bedrock
Materials

Chart New Territories with the ultimate Minecraft Seed Generator!
The materials needed for this farm are, as mentioned previously, quite cheap. The most expensive parts of the farm are the two observers, two hoppers, and the lava bucket. This makes the farm perfect for making in the first few days of a new survival world.
1) Create the collection system

The collection system in this Minecraft farm acts as its base, so the first thing you need to do is add it in. Place down a double chest, and then add a hopper facing into one of the shorter sides.
2) Add a dispenser

The next thing you'll want to do is place down a dispenser on top of a solid block, facing the Minecraft hopper you just put down. This will eject eggs that hatch into baby chickens, which will be killed and cooked by lava placed later on.
3) Create the kill box

Start building the kill box by placing down two temporary blocks on top of the hopper. Add two glass blocks along these temporary blocks, above the double chest. Then, place down and close two trapdoors on each side of the two temporary blocks, for four Minecraft trapdoors in total.
Once this is done, break the temporary blocks. Place a slab on top of the hopper and a solid block on top of the dispenser. Add a slab on top of this final block, and place lava in between the trapdoors. Add two final slabs to seal the lava off, making the farm safer.
4) Create an observer clock

The only redstone needed for this farm is incredibly simple. Place a Minecraft observer so that its redstone output faces the block beneath the dispenser. Then, place a second observer facing the first. This will create a simple redstone clock that will spit out any eggs that enter the dispenser.
5) Create the chicken box

Place a hopper above the first observer, leading into the dispenser. This will take the eggs produced by the upper level of chickens and move them into the dispenser.
Next, place a temporary block above the hopper and glass on each open side of it. Similarly to the glass used in the kill chamber, this will let you see into the farm to make sure things are working correctly. Finally, add slabs on top of this glass to spawnproof it.
6) Add chickens

The final step before the chicken farm is fully functional is to add the chickens. Bring at least two of them to the upper level and start breeding them with wheat seeds. As more chickens populate the upper level, the speed at which eggs will enter the lower area will increase. That directly equates to more and faster Minecraft food and feather production.
Uncover new worlds with our Minecraft Seed Generator!

