Kelp in Minecraft might not seem useful at first, but it's a fantastic early-game fuel resource that can also be eaten in its dried form or formed into kelp blocks for building purposes. Moreover, smelting kelp is a popular way to gain early XP levels. When it comes to farms that you can build early in a new game world, a kelp farm can be highly beneficial in a few different ways.
While there are several different kelp farm designs in Minecraft, including in Bedrock Edition specifically, the wide range of options can leave players at a loss of which to build. Every player is free to find the farm that suits them best, but one design in Bedrock Edition should allow you to collect plenty of kelp and do so automatically.
Making a simple automated kelp farm in Minecraft Bedrock
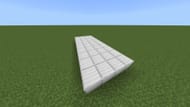
Chart New Territories with the ultimate Minecraft Seed Generator!
This kelp farm design has been made popular by multiple Minecraft Bedrock YouTubers, including the building and crafting savant JC Playz. All things considered, it's quite easy to assemble once players have the needed resources.
Ahead of building this kelp farm, you will want to collect or craft the following materials:
- At least six glass blocks
- Two chests
- Two hoppers and two hopper minecarts
- Two ordinary rails
- 16 pistons and 16 observers
- 16 redstone dust
- 16 pieces of kelp
- A stack of slabs
- Three to four stacks of ordinary building blocks of the player's choice
- One or more water buckets to fill the farm, the more the merrier
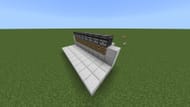
Once you have your resources in hand, you can construct your kelp farm in Minecraft Bedrock with these steps:
- Begin by placing building blocks and creating a platform that is 10 blocks long and four blocks wide.
- On top of both long sides of the platform, place a row of 10 blocks.
- Place eight pistons across the rows of blocks you placed in Step 2. Ensure that the pistons are facing toward the inside of the platform, and then place two building blocks on each side of the pistons.
- Place observers on top of each piston block and ensure that the "faces" of the observers are also pointing inward like the pistons.
- Place a row of blocks behind the pistons and cover the top of each block with redstone dust.
- Use your building blocks again and place a block on each side of the observer rows. Then, place a row of blocks on top of the observers. It should appear as though the pistons and observers are part of a wall.
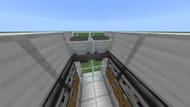
At this point, you should have a platform with two walls with observers and pistons inlaid in them. Next up, you can continue the build with these steps:
- Connect the two "walls" of blocks at the back of the platform by using additional building blocks. On the opposite side, place four glass blocks in a square shape.
- Place a double chest so that it hovers one block in front of and one block above the glass you placed.
- On top of the glass blocks and behind the double chest, place two hoppers connected to the chest.
- Place two glass blocks on top of the double chest, then two building blocks on top of the hoppers.
- On top of the building blocks placed in the previous steps, place two rails and two hopper minecarts on top of them. Make sure that these minecarts don't move off of their rails.
- Break the blocks that the rails are sitting on. The minecarts should fall and land on top of the hoppers.
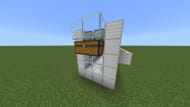
Next up, it's time to fill the farm with water and create the delivery system. This can be achieved with just a few slabs and a few buckets of water.
You can finish up the build with these steps:
- Using your water buckets, place a water flow while aiming at each observer block's "face". Continue doing so on each side of the build until the flows come together and create still water.
- Place slabs above the observers until you've completely covered the water you just placed. Don't worry, the water won't go anywhere, and it'll be important again in a moment.
- With all the slabs placed, head to the back of the build and place two water bucket flows against the back wall. This should cause the water to flow toward the hopper minecarts. You can now break the slabs and the water flow up top will remain the same.
- Lastly, dive down into the water and place your kelp across the floor of the build.
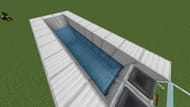
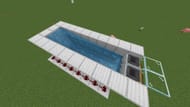
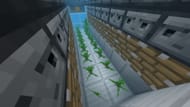
If you have followed the steps above, you should notice that as the kelp grows inside the farm, the observers will trigger when they reach maximum height. This causes the pistons to break the kelp without destroying the roots, allowing the broken kelp to float to the top of the farm and funnel into the chest via the hoppers and hopper minecarts.
Uncover new worlds with our Minecraft Seed Generator!

