One of the most interesting changes introduced with Minecraft 1.21, also known as Tricky Trials, relates to bad omen. The effect is no longer automatically applied when defeating a raid captain. These mobs now drop ominous bottles, which, when consumed, implement the effect. This makes ominous bottles invaluable items if you want to do any raid farming in this version of the game.
Thankfully, farming these ominous bottles is quite easy and can be done from almost the start of the game. Everything you need to know about making a starter ominous bottle farm for Tricky Trials can be found detailed down below.
How to make a simple Minecraft 1.21 ominous bottle farm
Materials

Chart New Territories with the ultimate Minecraft Seed Generator!
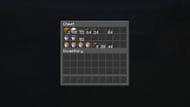
This farm isn't very expensive. The most expensive parts of the material list include the 20 hoppers needed and the large number of Minecraft trapdoors and nether gates. Thankfully, much of the foundation of this farm can be recycled from a pillager outpost.
1) Clear a pillager outpost

The first step when making an ominous bottle farm is to find a pillager outpost. These are one of the few structures in the game that can reliably spawn pillagers and raid captains, and the layout of the towers can be recycled for the structure of the Minecraft farm.
These structures can spawn in a multitude of biomes, making it hard to locate one reliably. Thankfully, third-party Minecraft seed mapping tools can simplify the process of finding these structures.
After finding one, you'll need to strip away all of the minor surrounding structures and landscape until everything is nice and uniformly flat.
2) Light up the floors

The next step is to light up every floor of the pillager outpost. This will stop pillagers from spawning while you work. Make sure to also light up the roof of the Minecraft structure.
3) Break the walls

Next, you must break all of the walls of the pillager outpost's first and second levels. Leave the floors of these levels, as they are important for a future part of the farm's construction.
4) Slab the center and make the spawn platform

Once you've torn the walls down, place a slab in the exact center of the ground floor of the outpost. Count out and mark 22 blocks from each side, and either flatten out or fill in the needed area, depending on the terrain your Minecraft seed generates.
5) Make the pillager wall

Next, you'll want to count out nine blocks from each side of the center slab and place down a wall. Connect these walls in a large square. This will stop future pillagers from reaching the inside of the farm and force them instead into the kill chambers.
6) Create the collection systems

Establish a double chest under the wall so that five Minecraft hoppers can be placed leading into it on the other side. Then use trapdoors to create a small lip around these hoppers. Make sure to leave a one-block gap along the sides of the hoppers and a two-block gap on the front. This will allow for water to be placed later to lead mobs into the kill chamber. Complete this process for each wall.
7) Place Nether gates

Place down three Minecraft Nether gates in the middle of the three center hoppers, and then three more on top of the wall behind them. Place three temporary blocks on top of the original gates, and then use these blocks to add gates on each side other than the top.
Place one more temporary block in the middle of the three other temporary blocks. Use this to build out three slabs to the left and right. Replace the temporary block in the middle of the slabs with another slab, creating a roof of sorts. You'll once again need to complete this process for each wall.
8) Finish the kill chambers

The next step is to break the first three temporary blocks and place a lava source block in the center of the gates before opening them all. This will allow pillagers to walk through the gates, right into the lava located over the hoppers. Finish the kill chambers by placing water in the corners of the trapdoors. This will create a stream that helps push mobs into the lava.
As with the last two steps, you'll need to do this for each wall.
9) Add iron golems

This farm design uses trapped iron golems to draw spawning pillagers into the lava traps. Return to the second layer of the farm and build an iron golem in between four walls so that it's trapped in the center of the platform.
After this, return to the first floor of the farm and place walls around the center slab. Then build another iron golem at this location. These two golems should be more than enough to draw the hostile Minecraft mobs in without incurring any damage in return.
10) Make an AFK room

Finally, you're going to want to build an AFK room to sit in while the farm runs. The best way to do this is to build up 104 blocks from the top of the pillager outpost and then make a small room. Make sure to either bring a bed or add a roof so that Minecraft phantoms can't attack you.
Uncover new worlds with our Minecraft Seed Generator!

