
'%20x='0'%20y='0'%20height='100%25'%20width='100%25'%20%0A%20%20%20%20%20%20%20%20%20%20xlink%3Ahref='data:image/jpg;base64,/9j/2wBDAAYEBQYFBAYGBQYHBwYIChAKCgkJChQODwwQFxQYGBcUFhYaHSUfGhsjHBYWICwgIyYnKSopGR8tMC0oMCUoKSj/2wBDAQcHBwoIChMKChMoGhYaKCgoKCgoKCgoKCgoKCgoKCgoKCgoKCgoKCgoKCgoKCgoKCgoKCgoKCgoKCgoKCgoKCj/wgARCAAGAAoDASIAAhEBAxEB/8QAFQABAQAAAAAAAAAAAAAAAAAAAAX/xAAUAQEAAAAAAAAAAAAAAAAAAAAF/9oADAMBAAIQAxAAAACLNB0f/8QAIRAAAgIBAgcAAAAAAAAAAAAAAQIDBAUAERITITJBkdL/2gAIAQEAAT8AuU8rnYp8PG1NJalk3Gcs6rIxXhJ6ee31pMBnY0VGGLJUbE86X51//8QAFxEAAwEAAAAAAAAAAAAAAAAAAAECA//aAAgBAgEBPwDOUf/EABcRAAMBAAAAAAAAAAAAAAAAAAABAhL/2gAIAQMBAT8AinlH/9k='%3E%3C/image%3E%3C/svg%3E)
Vanilla Minecraft works on a basic rendering engine and extremely pixellated textures on blocks. This makes the game's graphics look quite dated compared to other popular games. Over the years, however, its bustling community has come up with all kinds of texture packs, shaders, and mods to exponentially improve the game's graphics.
In recent times, improving Minecraft's overall graphics while retaining the vanilla look can be easily done by using one mod, shader, and resource pack. Here is a short guide on how to make Minecraft look and feel modern with just one shader and texture pack.
Note: Many other shaders and resource packs can drastically improve Minecraft's graphics.

Chart New Territories with the ultimate Minecraft Seed Generator!
Steps to transform Minecraft graphics using one mod, shader, and texture pack
1) Install Sodium and Iris Shaders mods
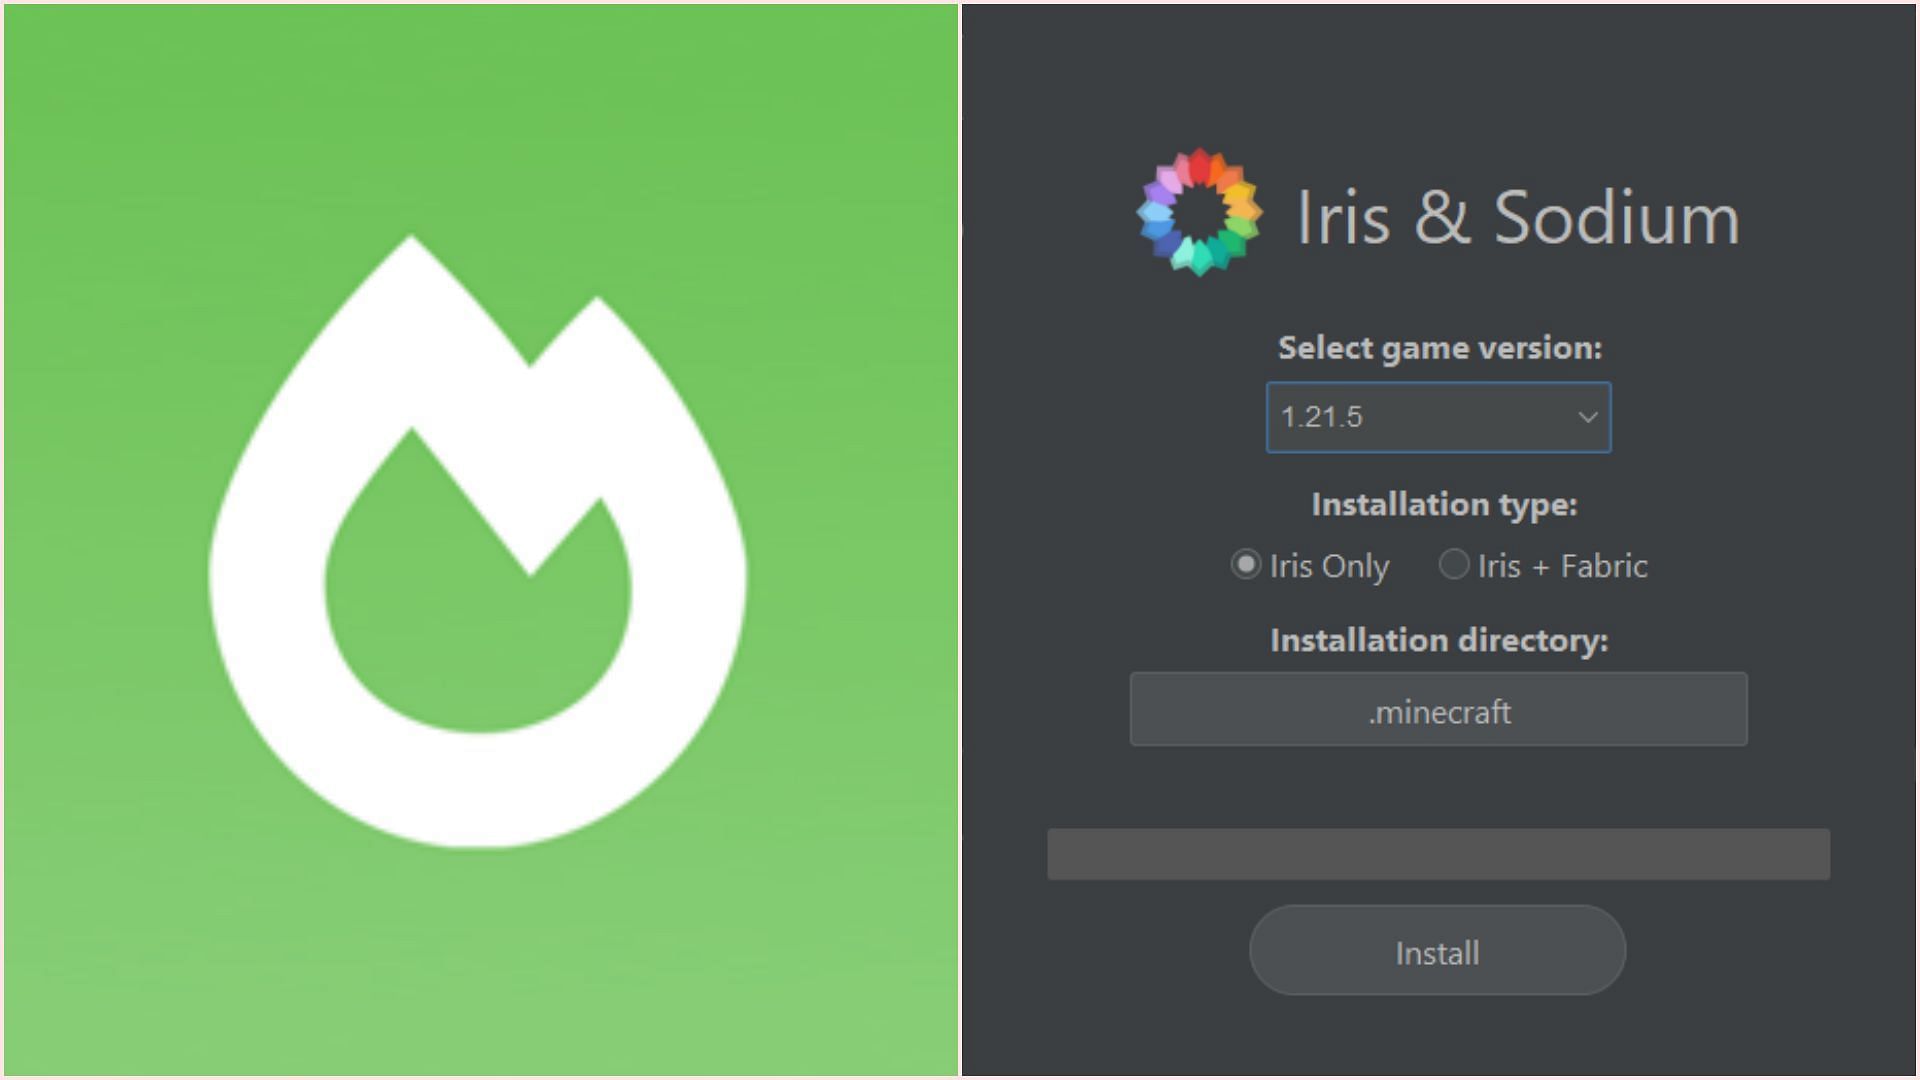
First, you need to download and install Iris Shaders and Sodium mods. These mods will help the game run much smoother when you enable shaders. The Iris Shaders installer can be downloaded from its official website.
Once it is downloaded, you can open the installer and simply install it for the latest version they support, which currently is 1.21.5. Select "Iris Only" to install both Iris and Sodium together. Once the installation is complete, you can close the installer.
After the mods are installed, you need to open Minecraft's official launcher, find the modded game version, and open the game once. This will create a new version folder in which you can later place the shader and resource packs.
2) Install Complementary Reimagined Shaders
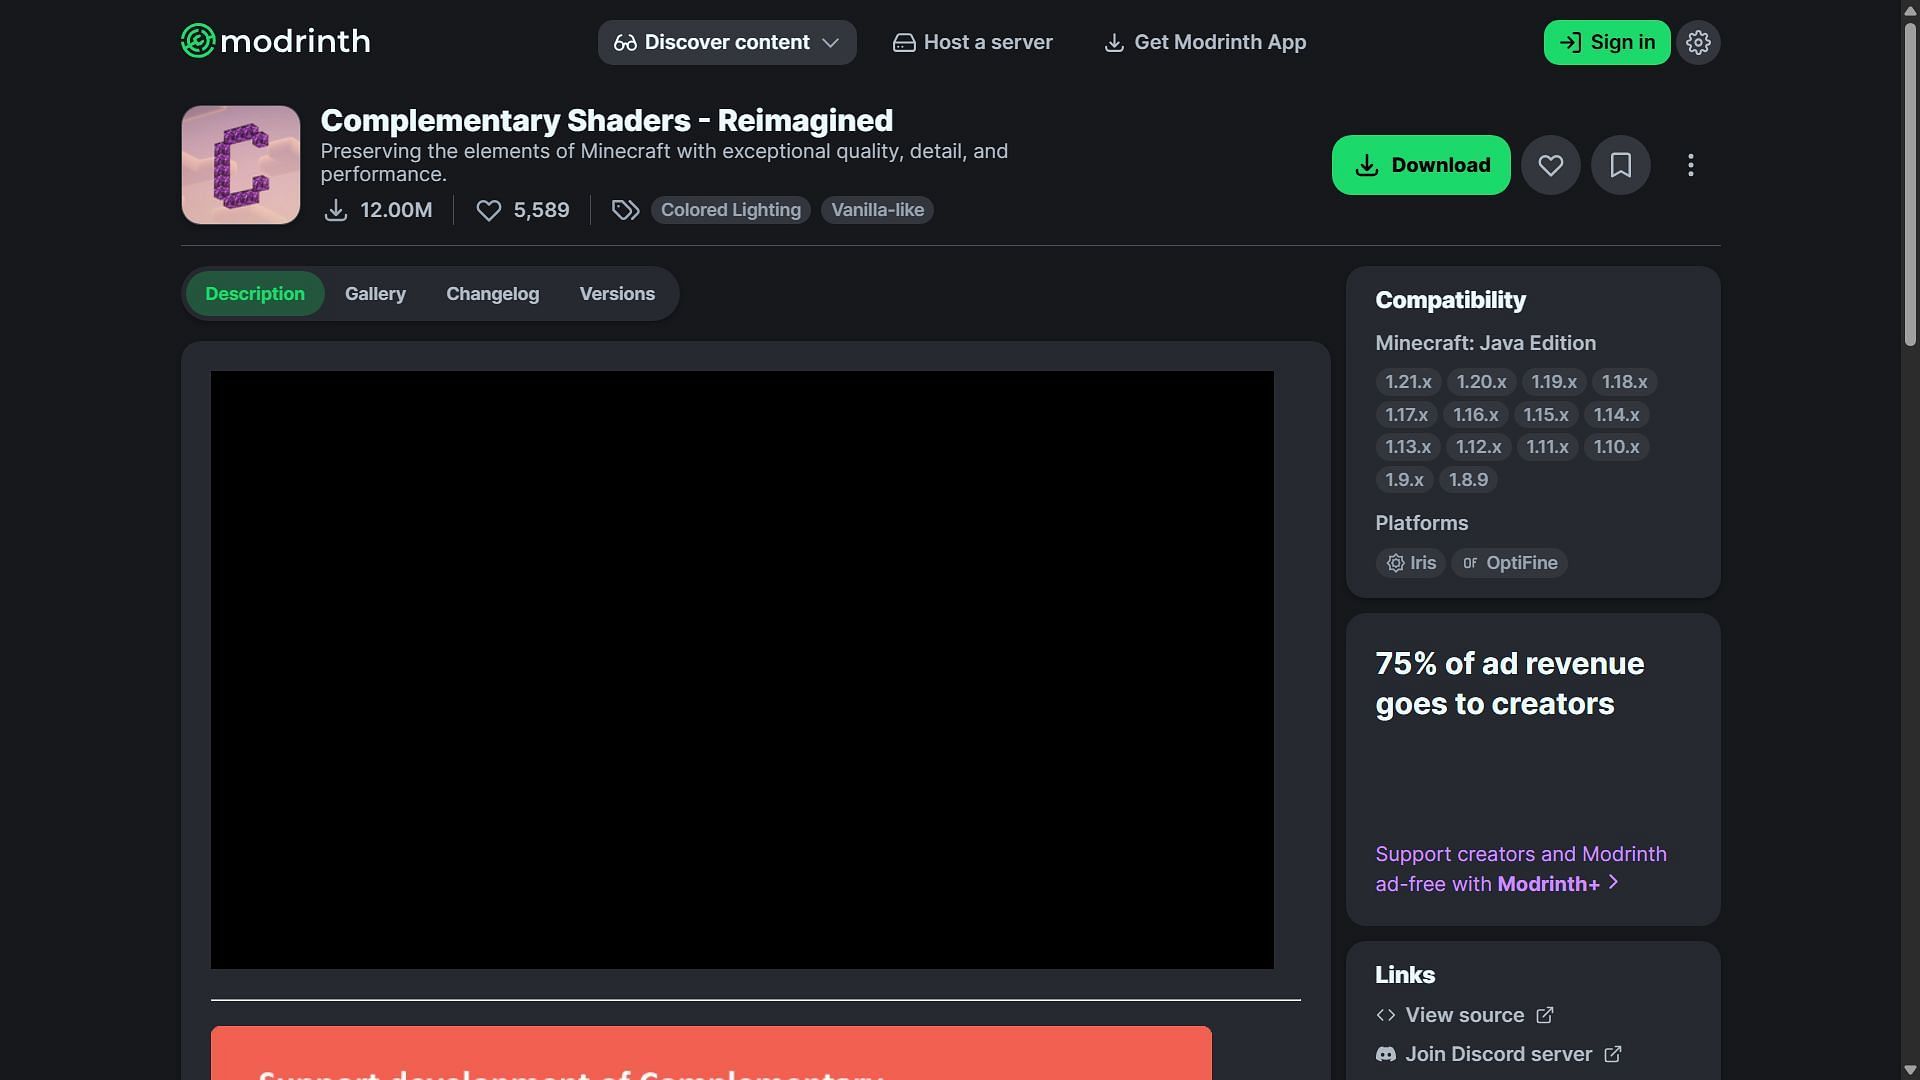
To download Complementary Shaders Reimagined, you can head to the following website and download it from Modrinth. The latest version will support 1.21 version and above. The shader pack will be downloaded as a .zip file, which does not need to be opened.
The zip file needs to be copied and pasted directly to Minecraft's game directory. The path of the folder where it should be installed will be: C:\Users\admin\AppData\Roaming\.minecraft\shaderpacks.
3) Install Pixlli Resource pack
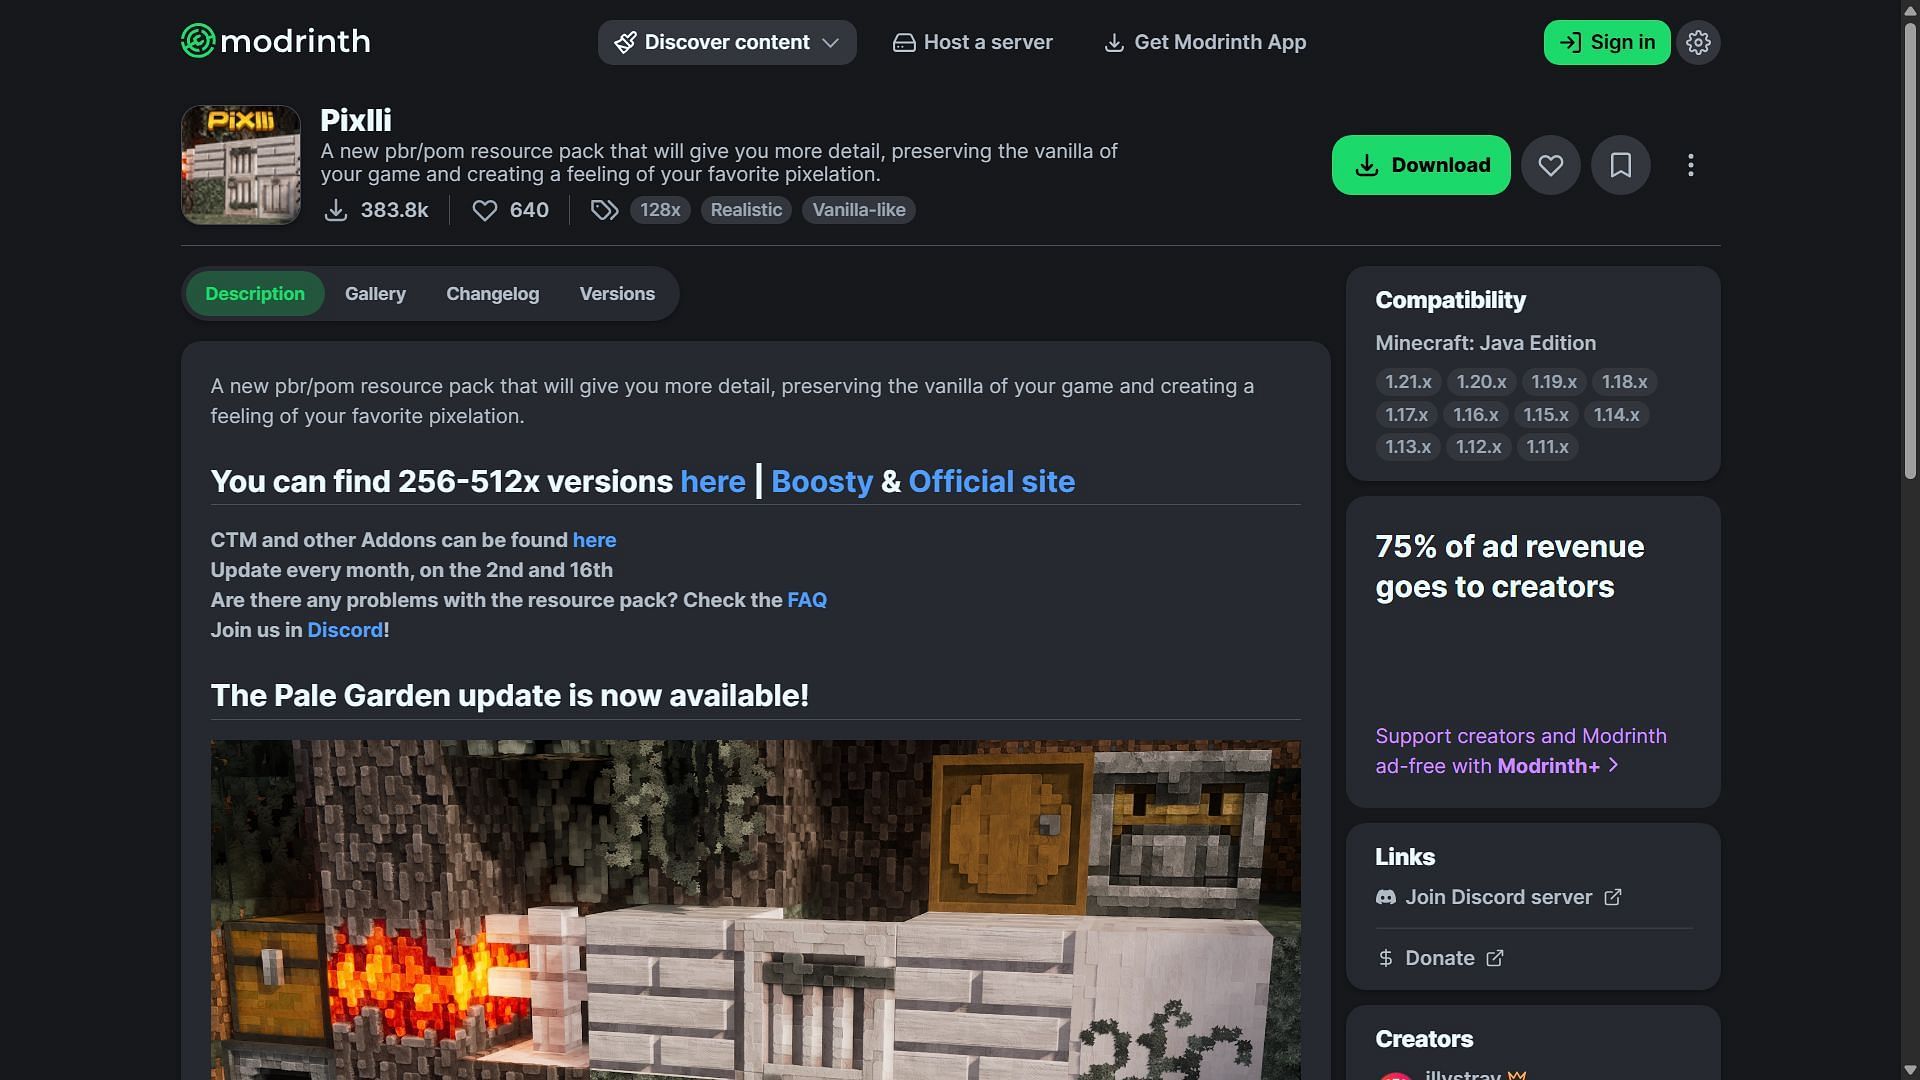
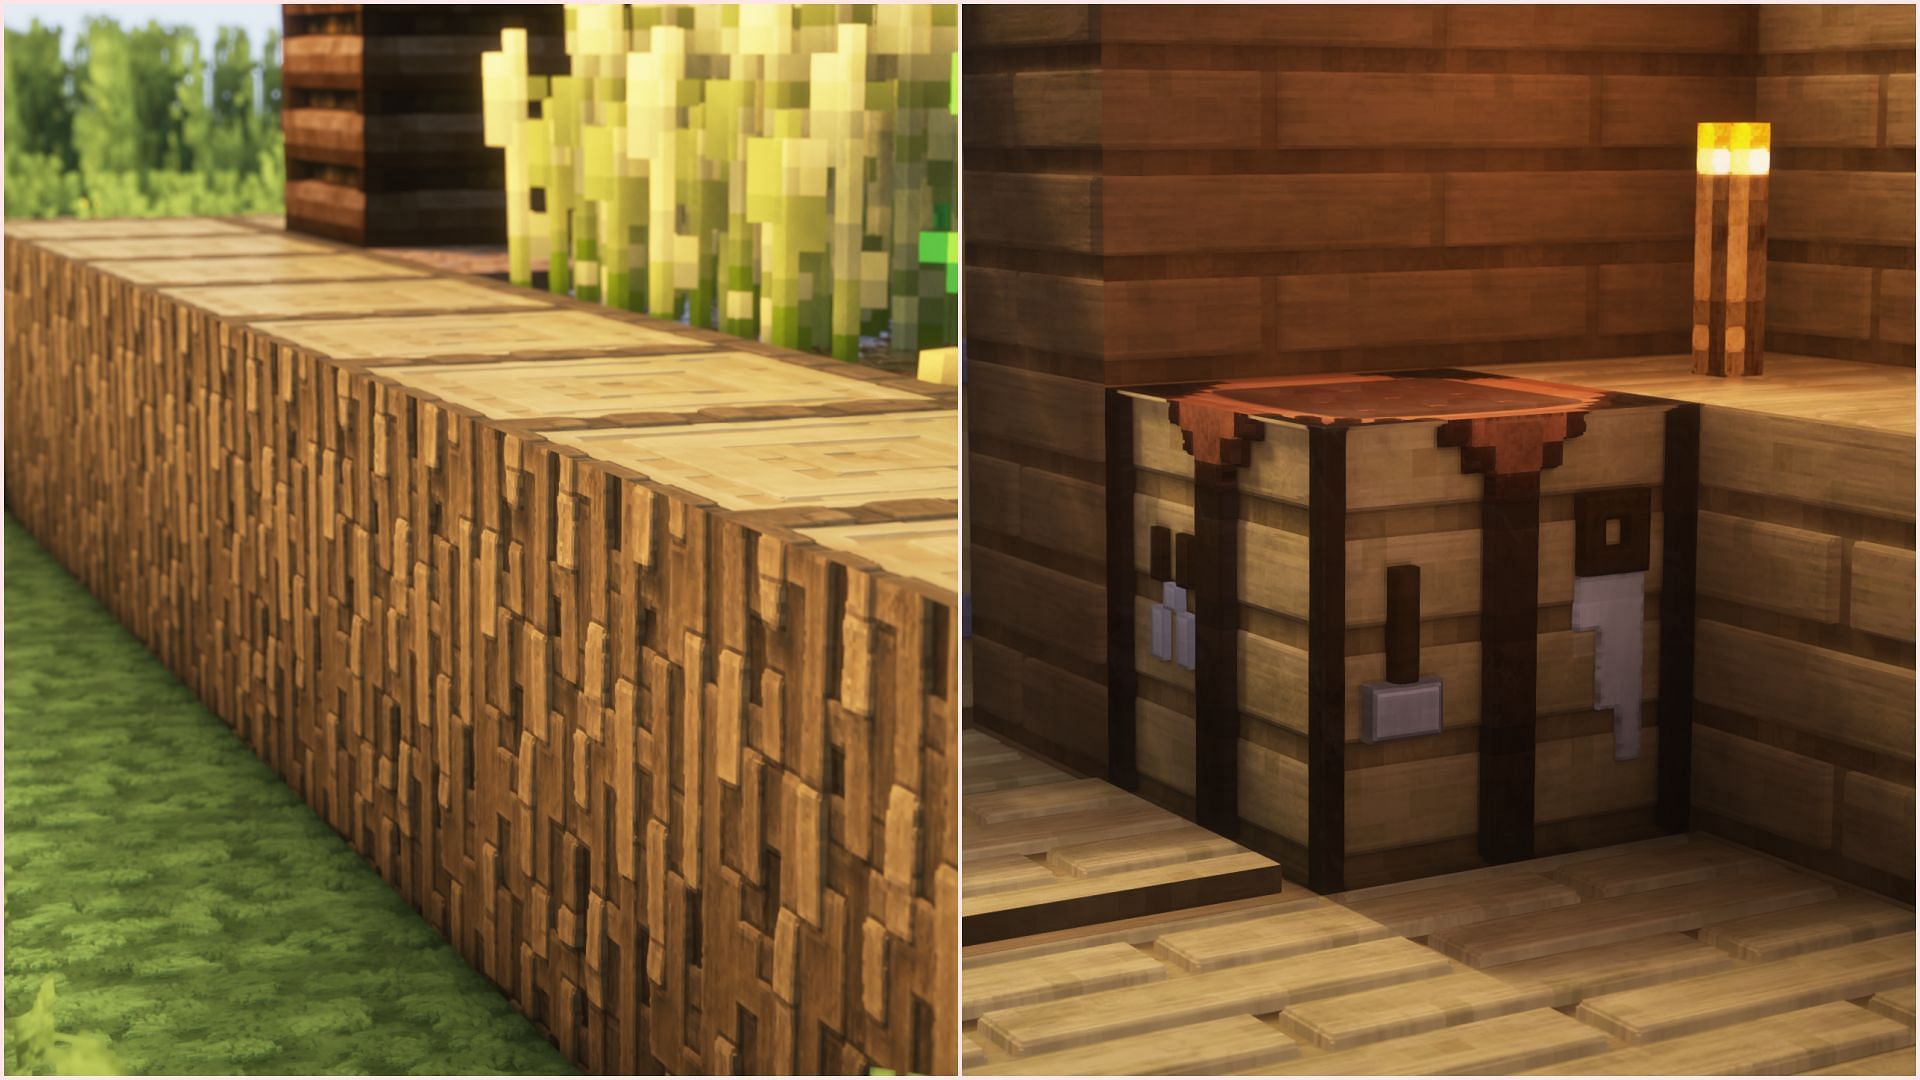
After the shader pack, you need to download the Pixlli resource pack, which is a texture pack with high-resolution textures of every block in the game. It is worth noting that the resource pack does not change mob textures.
To find the Pixlli resource pack, head to this Modrinth page. Download the resource pack for the latest version 1.21.5. The file will be large since it contains new textures for every block.
Once it is downloaded, it should be placed in Minecraft's game directory as well. The path to the exact folder should be: C:\Users\admin\AppData\Roaming\.minecraft\resourcepacks.
4) Activate the resource pack and configure the shaders for the final result
Once all the mods, shader packs, and resource packs are installed and placed correctly, you can open Minecraft and start tweaking some settings.
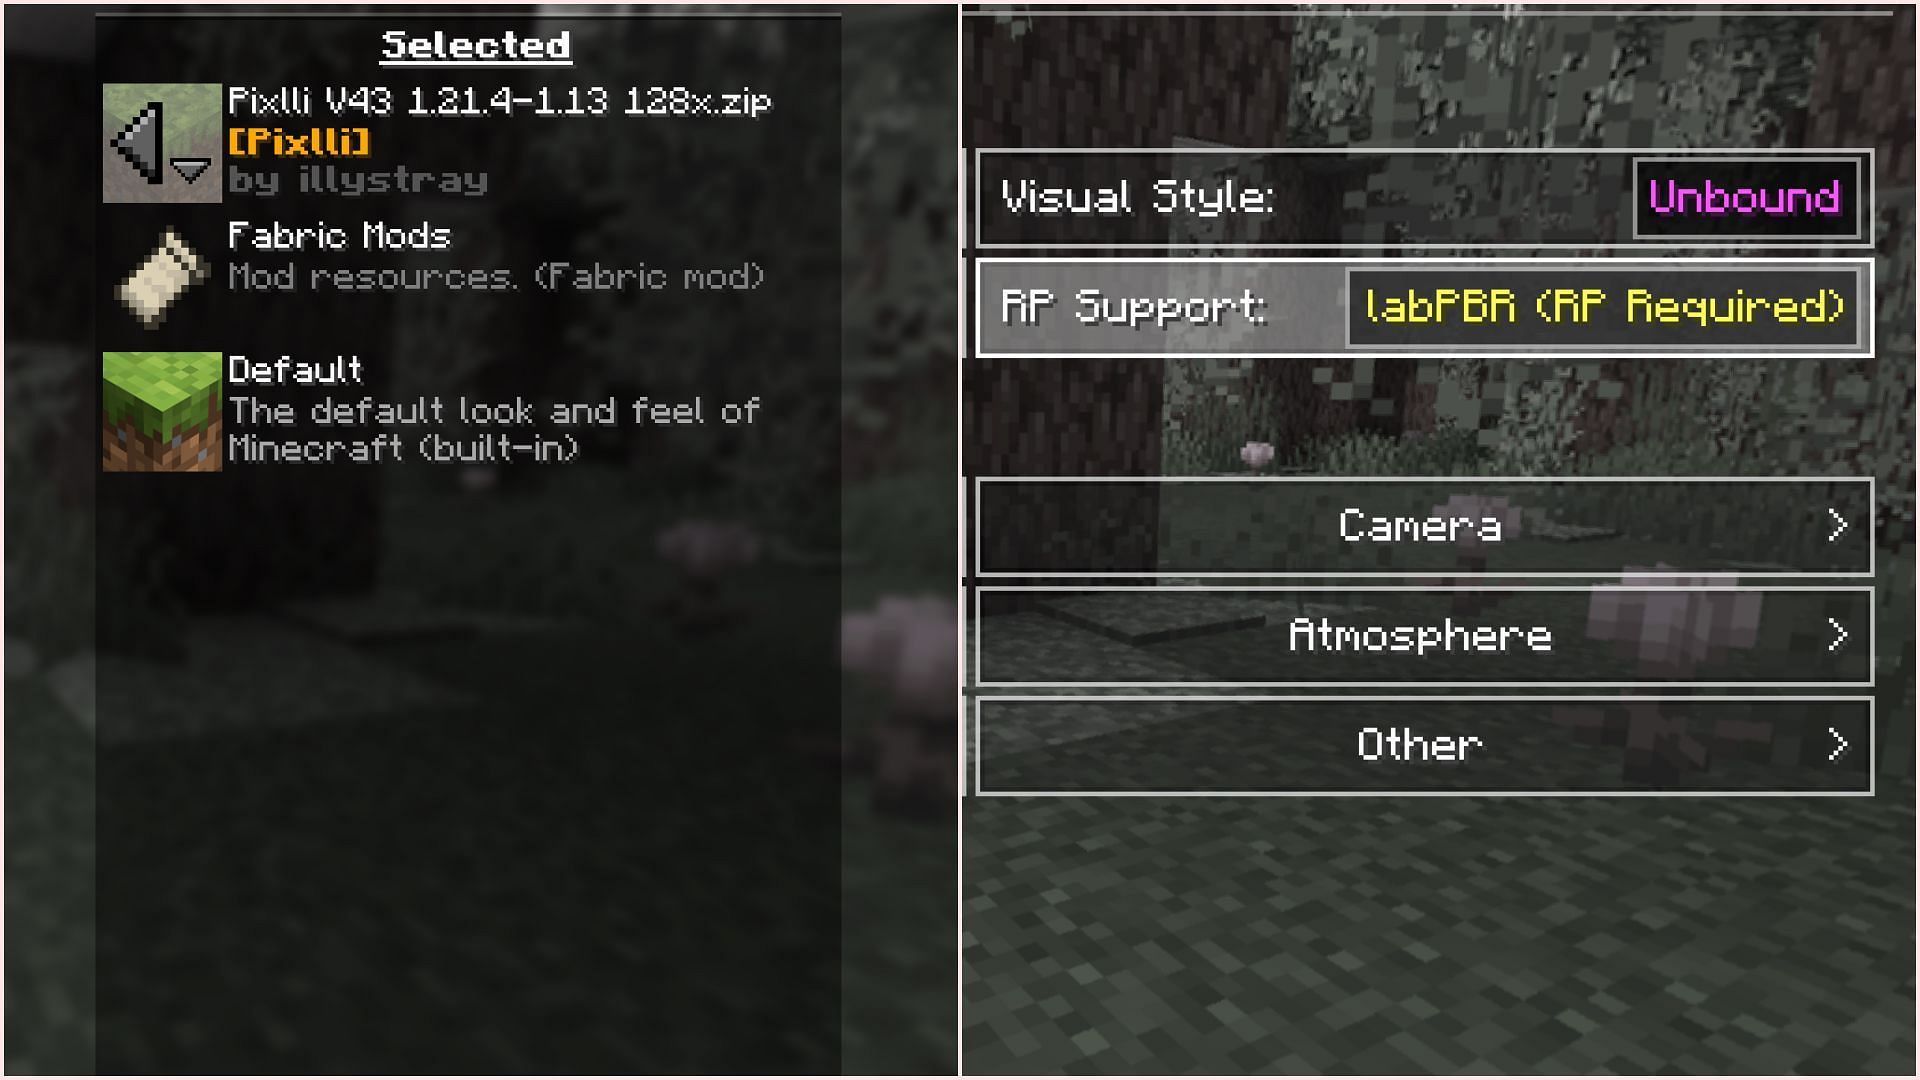
First, head to the resource pack settings, find the Pixlli 128x resource pack, and activate it. This can be done by hovering over the pack shown in the list on the left side, and hitting the arrow to shift it to the right list.
Then, you need to head to the video settings, find the shader packs tab, and enable Complementary Shaders. After enabling it, head to its settings. This is where you can tweak every single detailed setting of the shader pack.
You can change the shader preset to your desired setting and get a balance between quality and performance. The only major change you need to make is to change RP Support to labPBR.
This will allow the resource pack to work correctly and show 3D details on each block texture.
You will now have the enhanced graphics from the shader pack and highly detailed textures from the resource pack.
Check out our latest Minecraft articles:
- 5 cutest Minecraft resource packs
- Minecraft Distant Horizons guide: How to install, features, and best settings
- Minecraft player finds nether fortress in overworld due to rare generation glitch

Uncover new worlds with our Minecraft Seed Generator!