The Origins mod might be one of the best-known standalone mods for modern Minecraft. For those unfamiliar with the mod, it allows for players to select a custom origin when joining a new world for the first time. Each of these origins completely change the feel of the game. For example, some origins give players a permanent elytra or extra inventory space.
With such game-changing abilities and functions available in the mod, it is a must-try for many players. Here's how players can install the mod, check what mod loaders they need and verify that the mod is working properly.
Chart New Territories with the ultimate Minecraft Seed Generator!
How to install the Origins mod using CurseForge for Minecraft 1.19
1) Install the CurseForge application and open it

If the player already has CurseForge installed, they can skip this step. Those without CurseForge should navigate to the CurseForge website, head to the download section featured on the website, and download the installer. Then they must follow the prompts to install CurseForge and connect it to Minecraft.
Once CurseForge has been installed and properly associated with Minecraft, players can begin modding their game.
2) Create a Custom Profile

The first thing players will want to do is hit the “Create Custom Profile” button near the top middle of the screen. This will open the Create Profile dialogue box, which is explained in further detail in the next step.
3) Profile Settings

Players will want to name their profile something memorable or use the version of the game they are modding if they plan on only having one profile per game version. Then, players will want to ensure the game version is set to the right one. CurseForge will default to the newest available version of the game.
Finally, players must select which of the game’s two mod loaders they want to use: Forge or Fabric. The Origins mod exists for both mod loaders, so this choice will only matter for other mods the player wants to use.
4) Add mods to the profile

Once the player’s custom profile is completed, they will need to access it. Players will now be presented with their profile information and an empty list of mods. This list needs to be populated with the mods the player wants to use. In this case, it is the Origins mod.
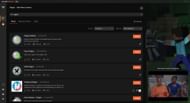
Players will want to click the “Add More Content” button and then use the search bar near the top of the screen to search for “Origins.” The top result of this search should either be the Forge or Fabric version of the Origins mod, depending on the mod loader the player selected when creating their custom profile.
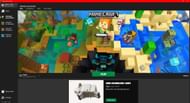
Players will want to hit the “Download” button to download the mod to their profile. Once this is done, players can either add additional mods or return to the profile page and hit the “Play” button to launch the game with the mods installed.
5) Testing the mod

Once in the launcher, players will want to launch the game. Assuming the game does not crash on launch, which will happen if the mod’s dependencies are not installed, players should then hit the “Singleplayer” button and make a new world.
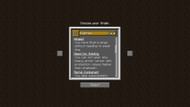
When loading into a new world for the first time, players should be prompted to select their origin of choice. If this selection prompt does not appear, the mod is not working, and players should try to reinstall it or check the version of the mod loader their custom profile is using.
Uncover new worlds with our Minecraft Seed Generator!

